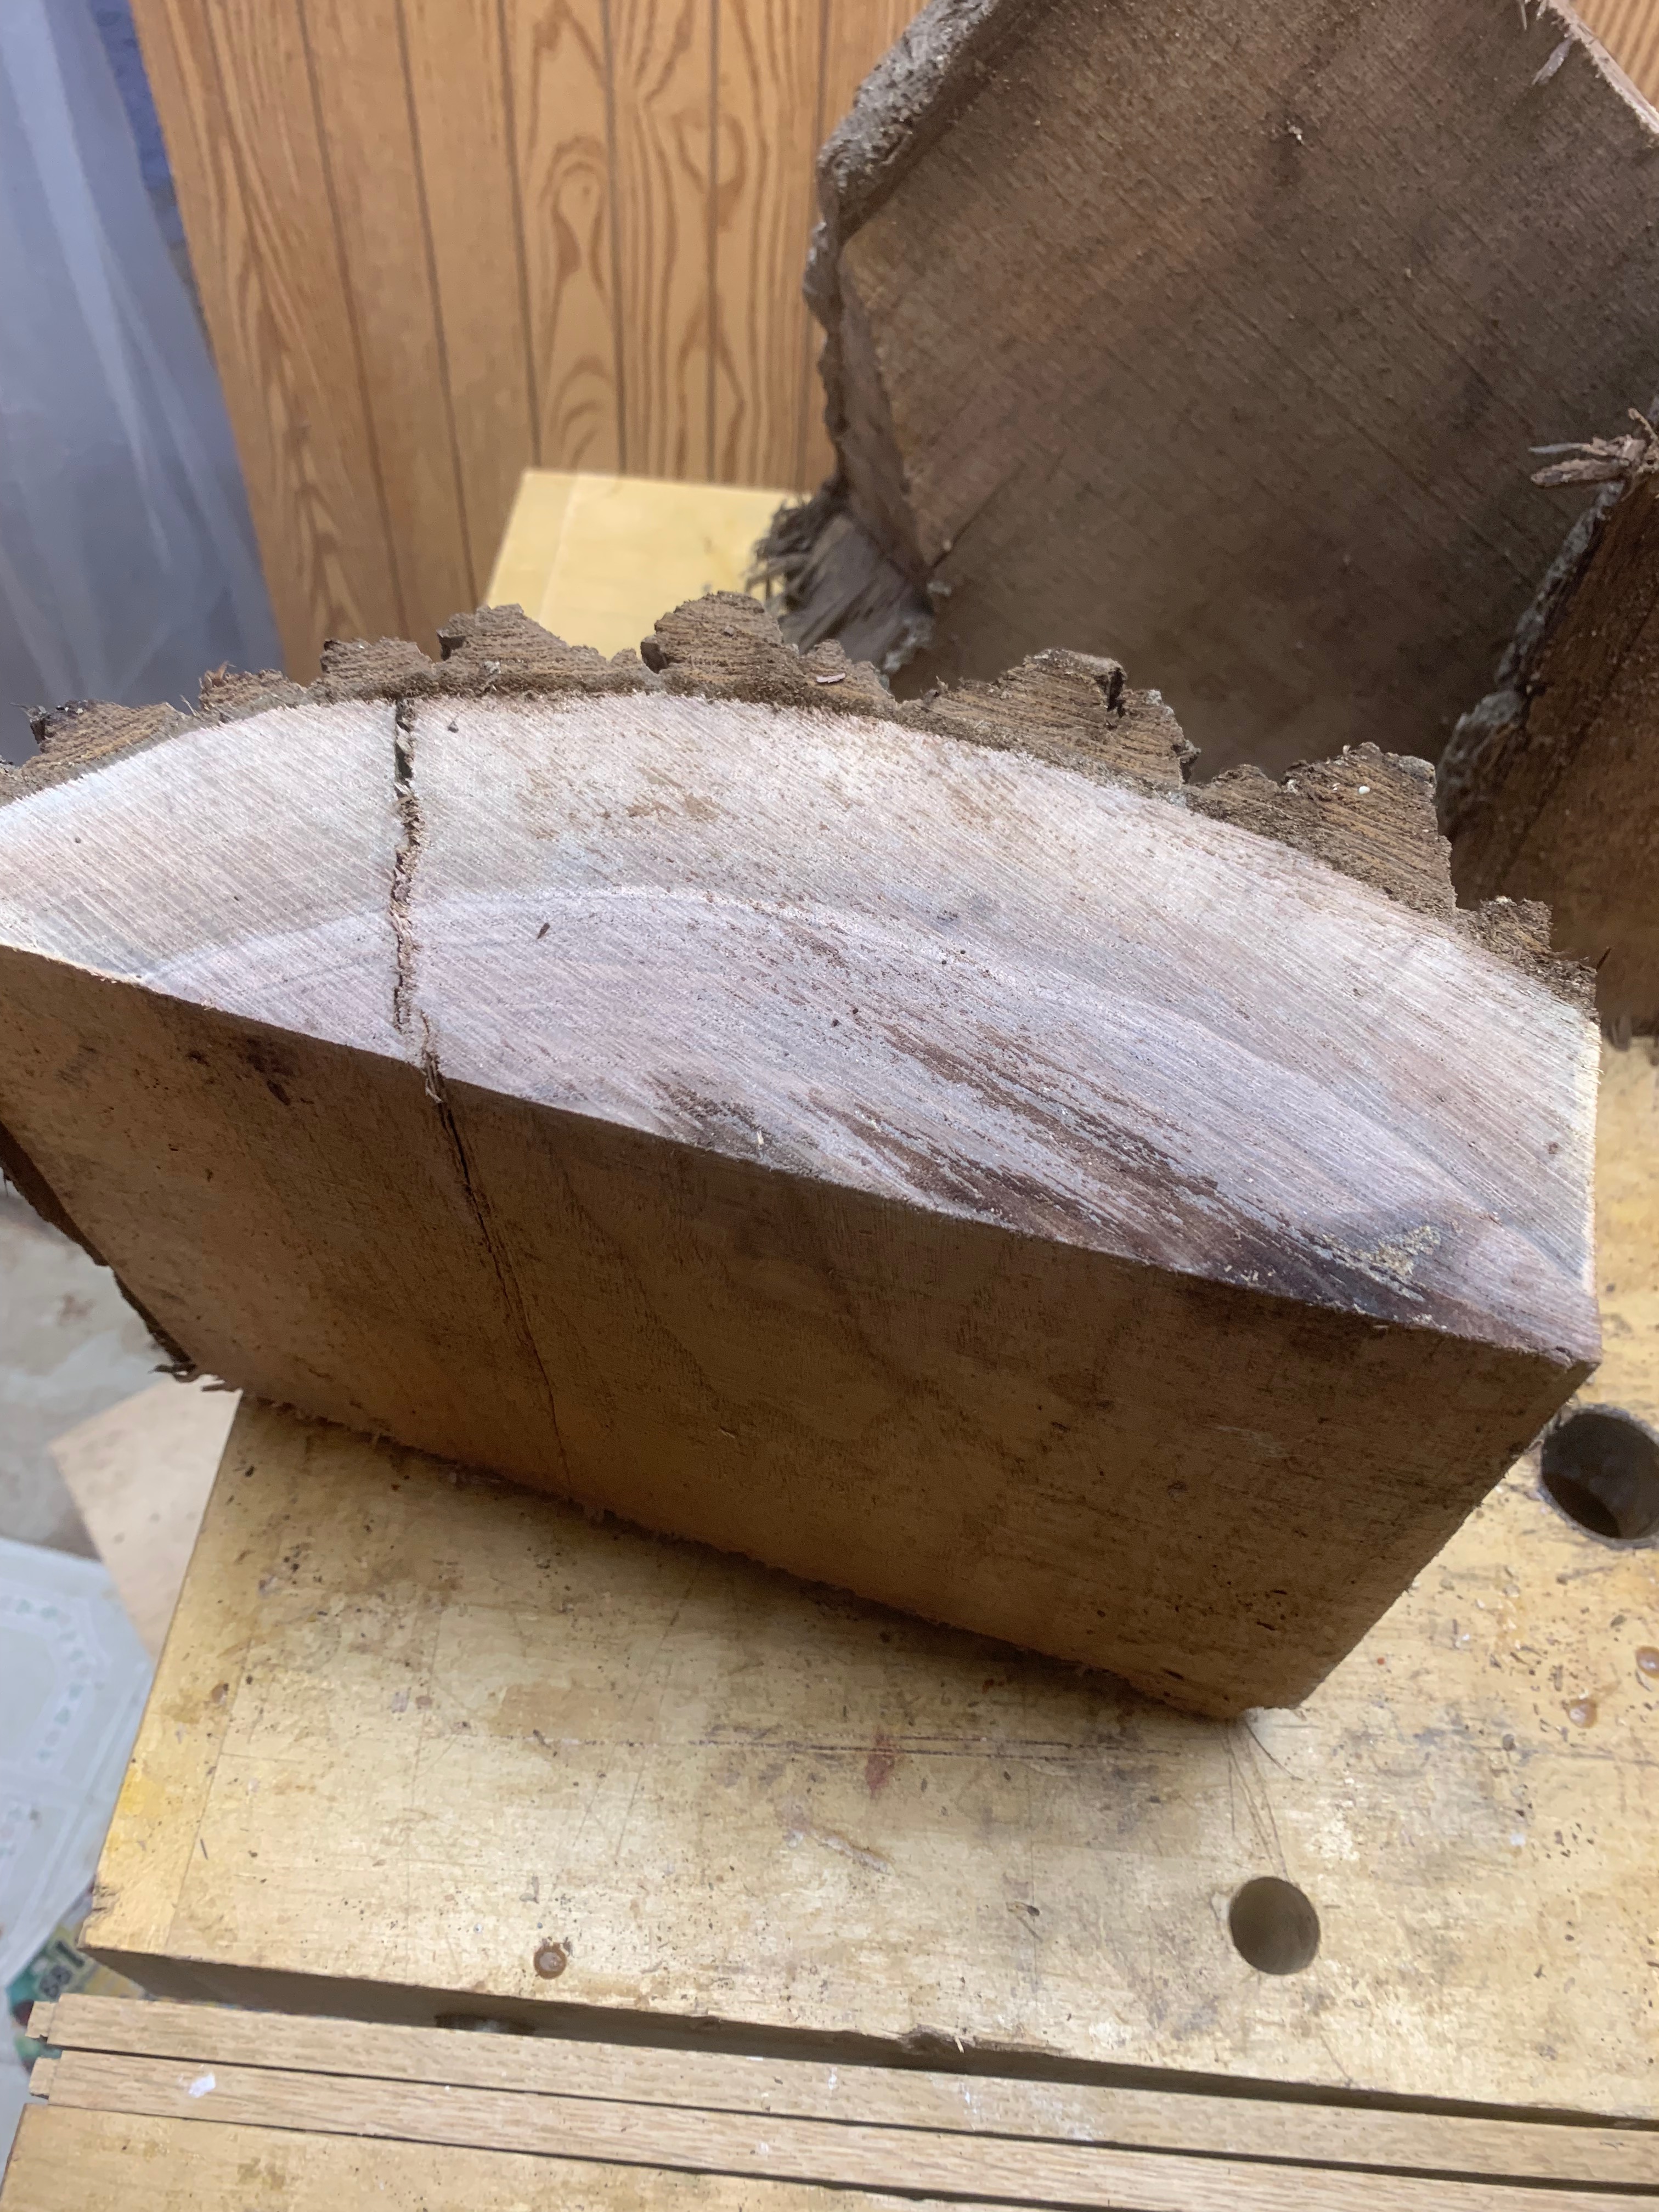
Slab wood cut from a walnut log during the process of milling it into boards.
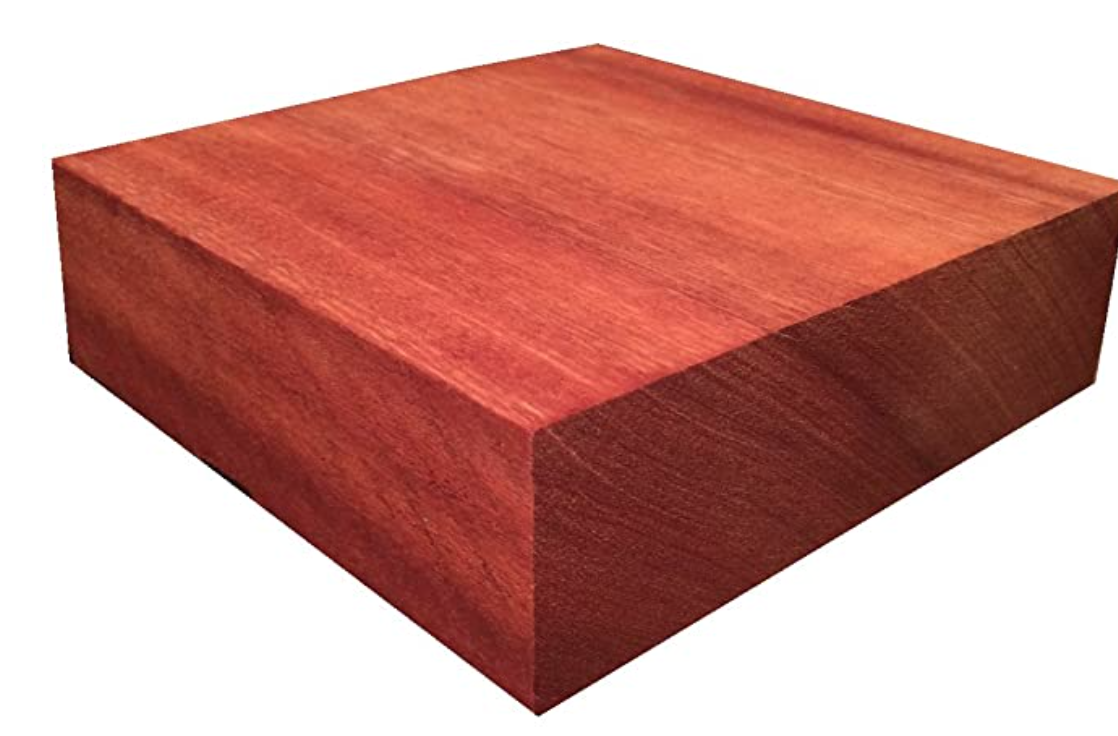
Once you start woodturning you rather quickly find out that if you buy wood from commercial sources to feed your woodturning addiction that the cost for wood from those sources is really expensive. A standardized woodturning blank from commercial sources generally is about 6″ to 8″ square, and about 2″ to 3″ thick. Cost of a typical blank can run from $10 or so at the low end up to $75 or even more depending on the species of wood. And as the size gets larger, the price goes up dramatically.
But there is a lot of free wood out there if you can be bothered to go look for it. Like that piece in the photo up there.
Now I have to admit that I completely forgot had this stuff laying around until MrsGF and I found these slabs laying around in the garage when we were cleaning it out this fall. A friend of a friend had cut down some black walnut trees on his property years ago and had them milled into lumber by a portable sawmill. When cutting logs into lumber you end up with these slabs where the bark was sliced off and generally there isn’t much you can do with them except turn them into mulch or firewood. But this was black walnut, which is ridiculously expensive, really nice, and some of the slabs were thick enough in places that I thought I could use them for something so I snagged some of them and stuck them in the garage and immediately forgot about them for something like six years until we stumbled across them a month or so ago.
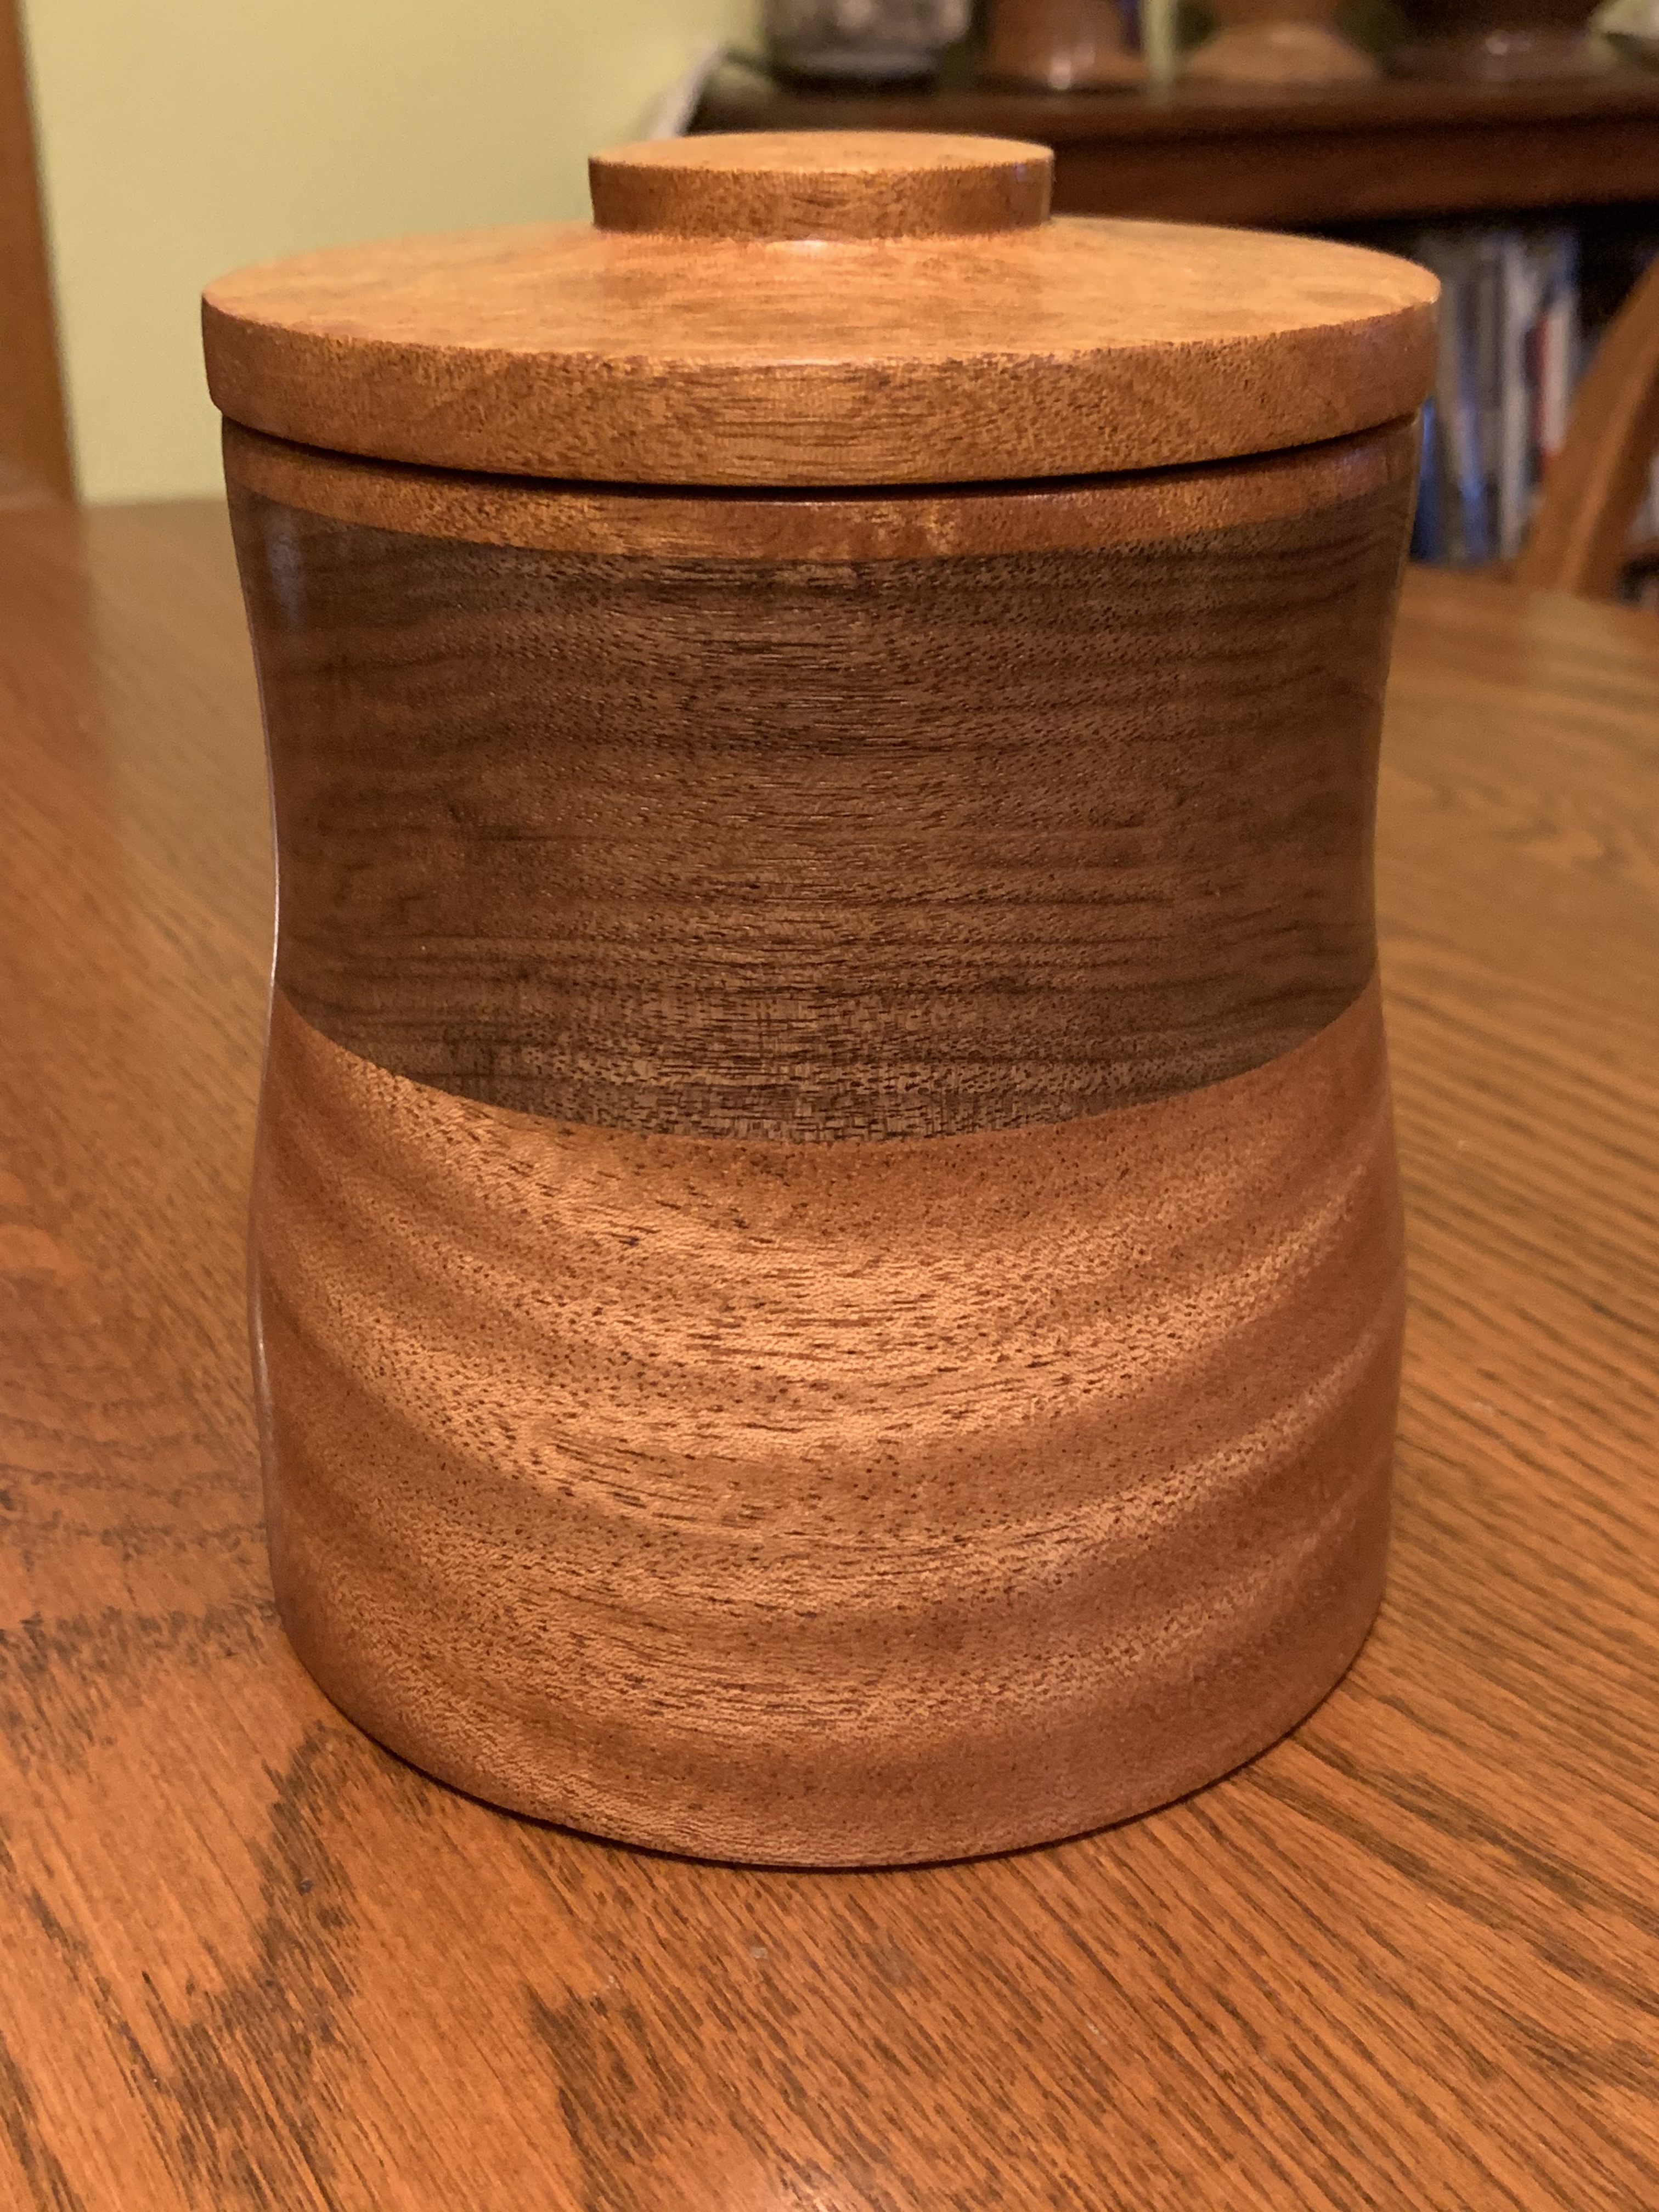
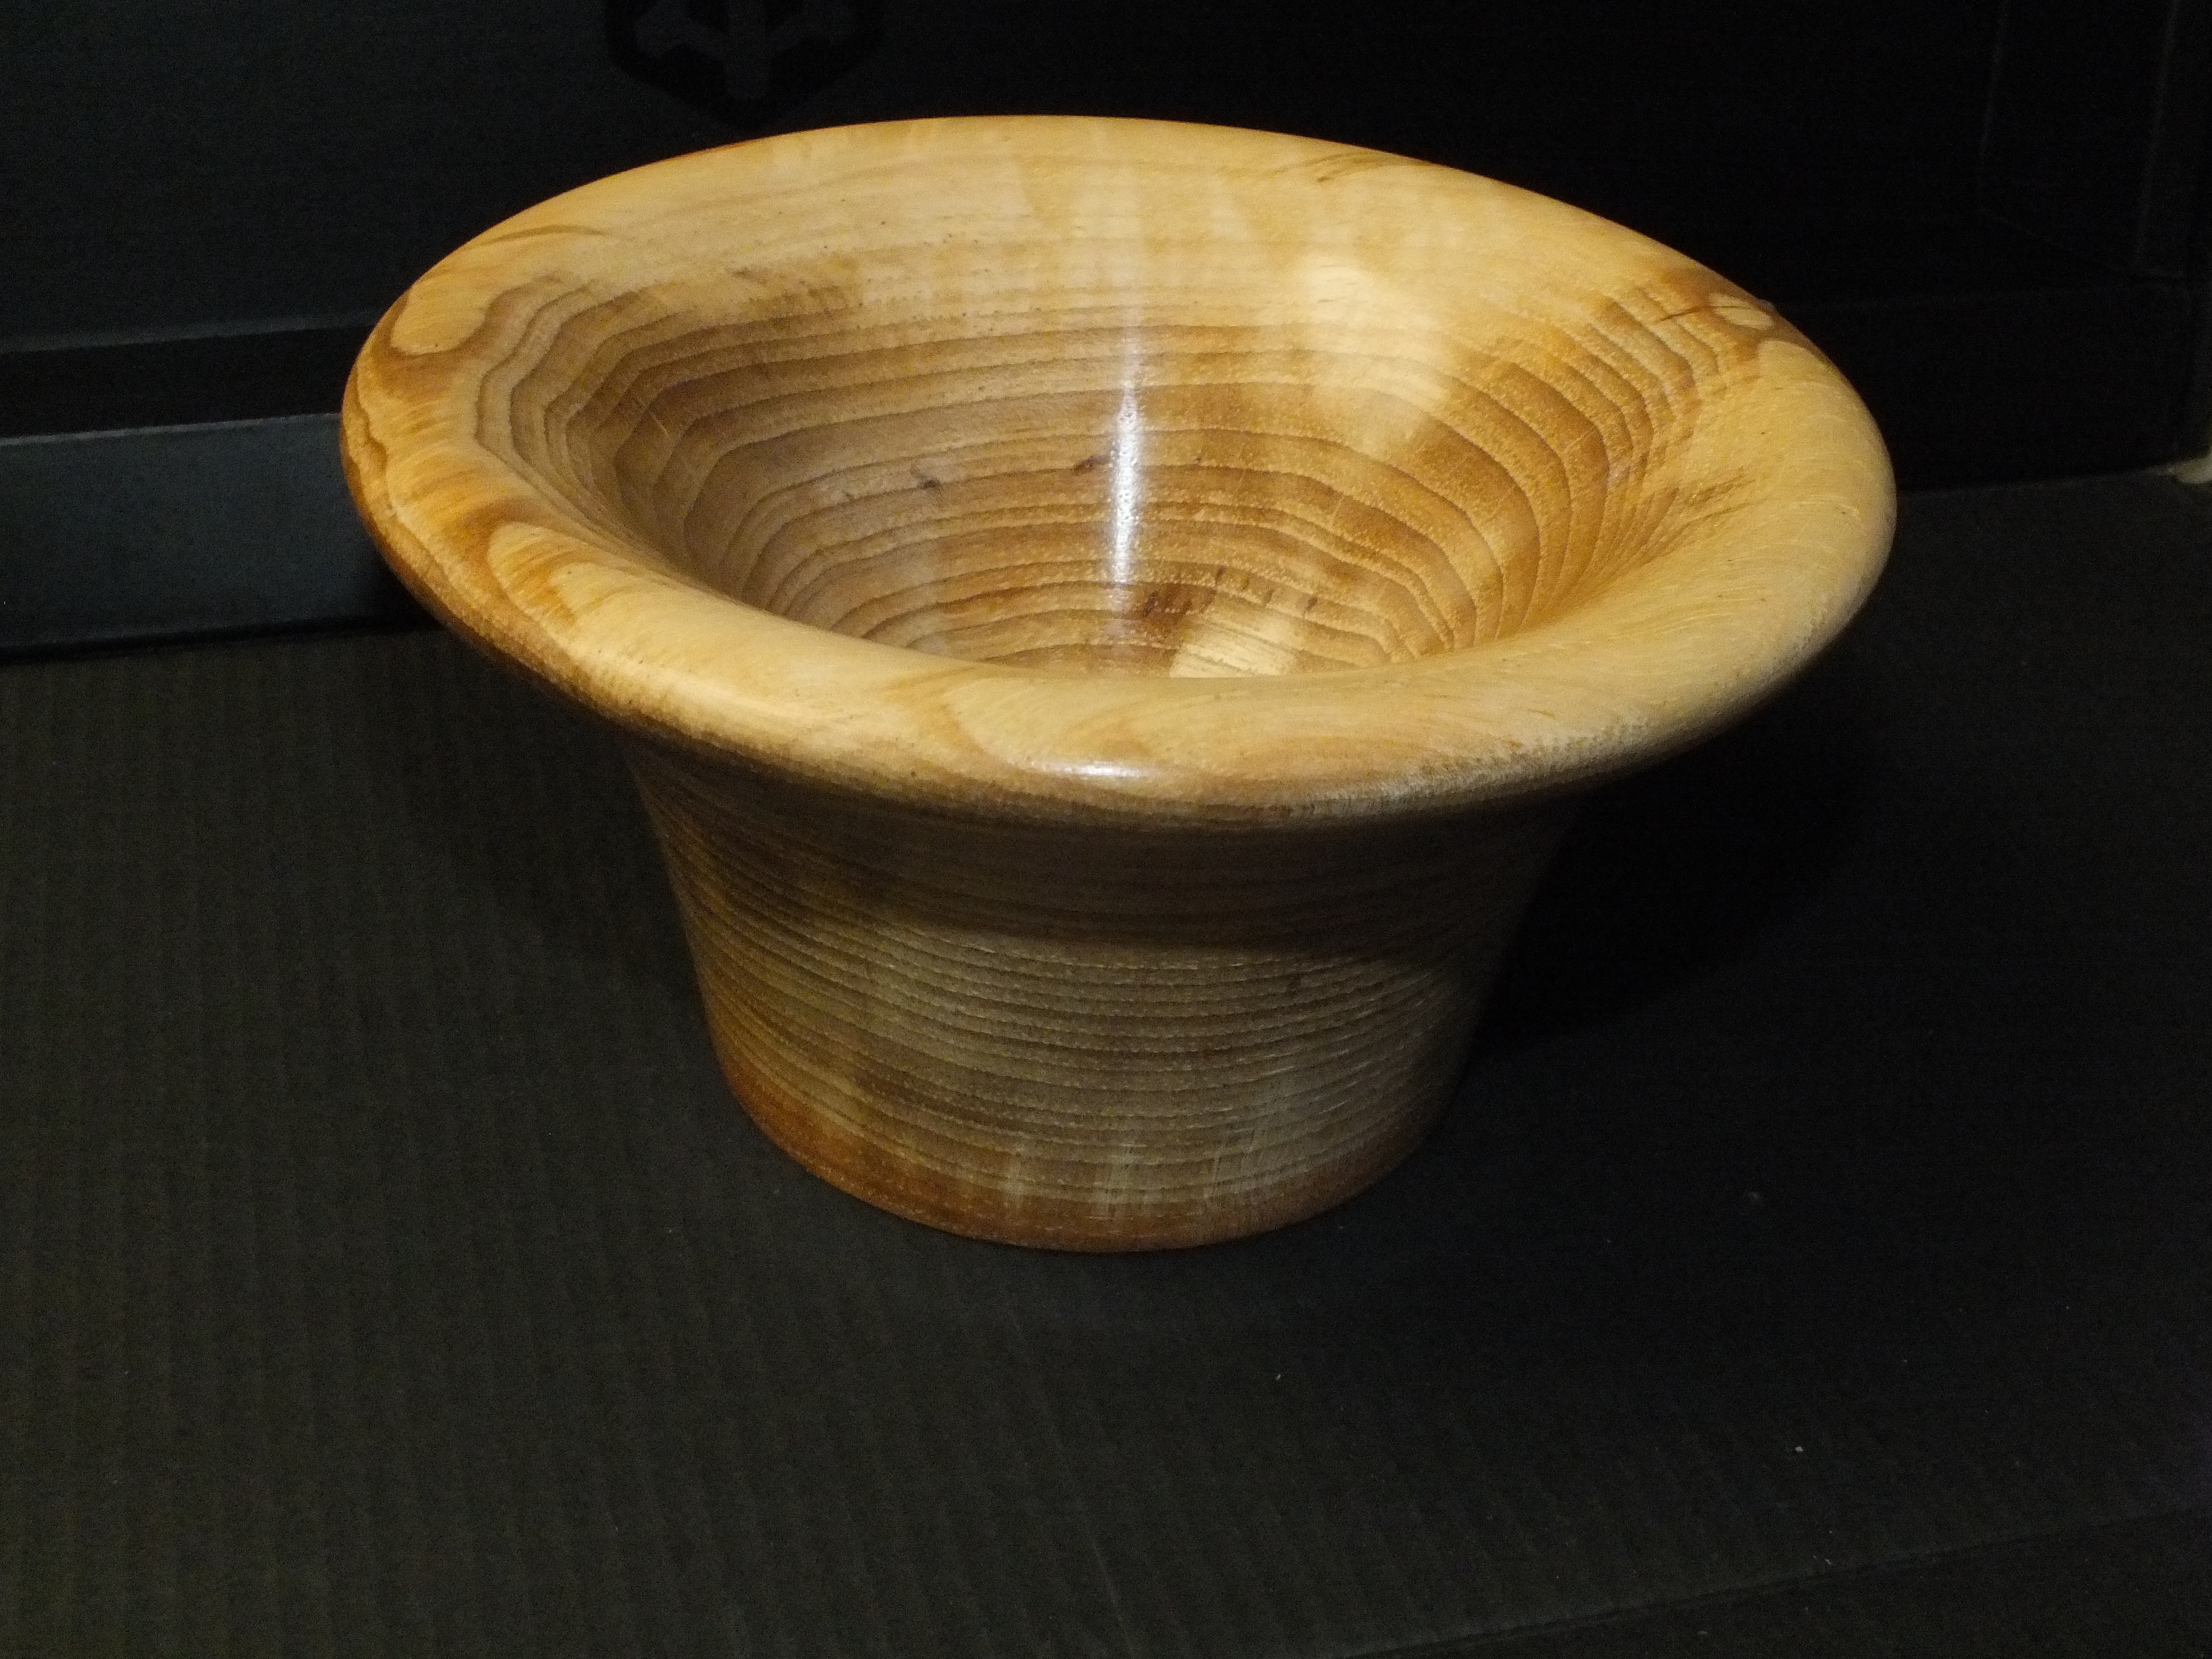
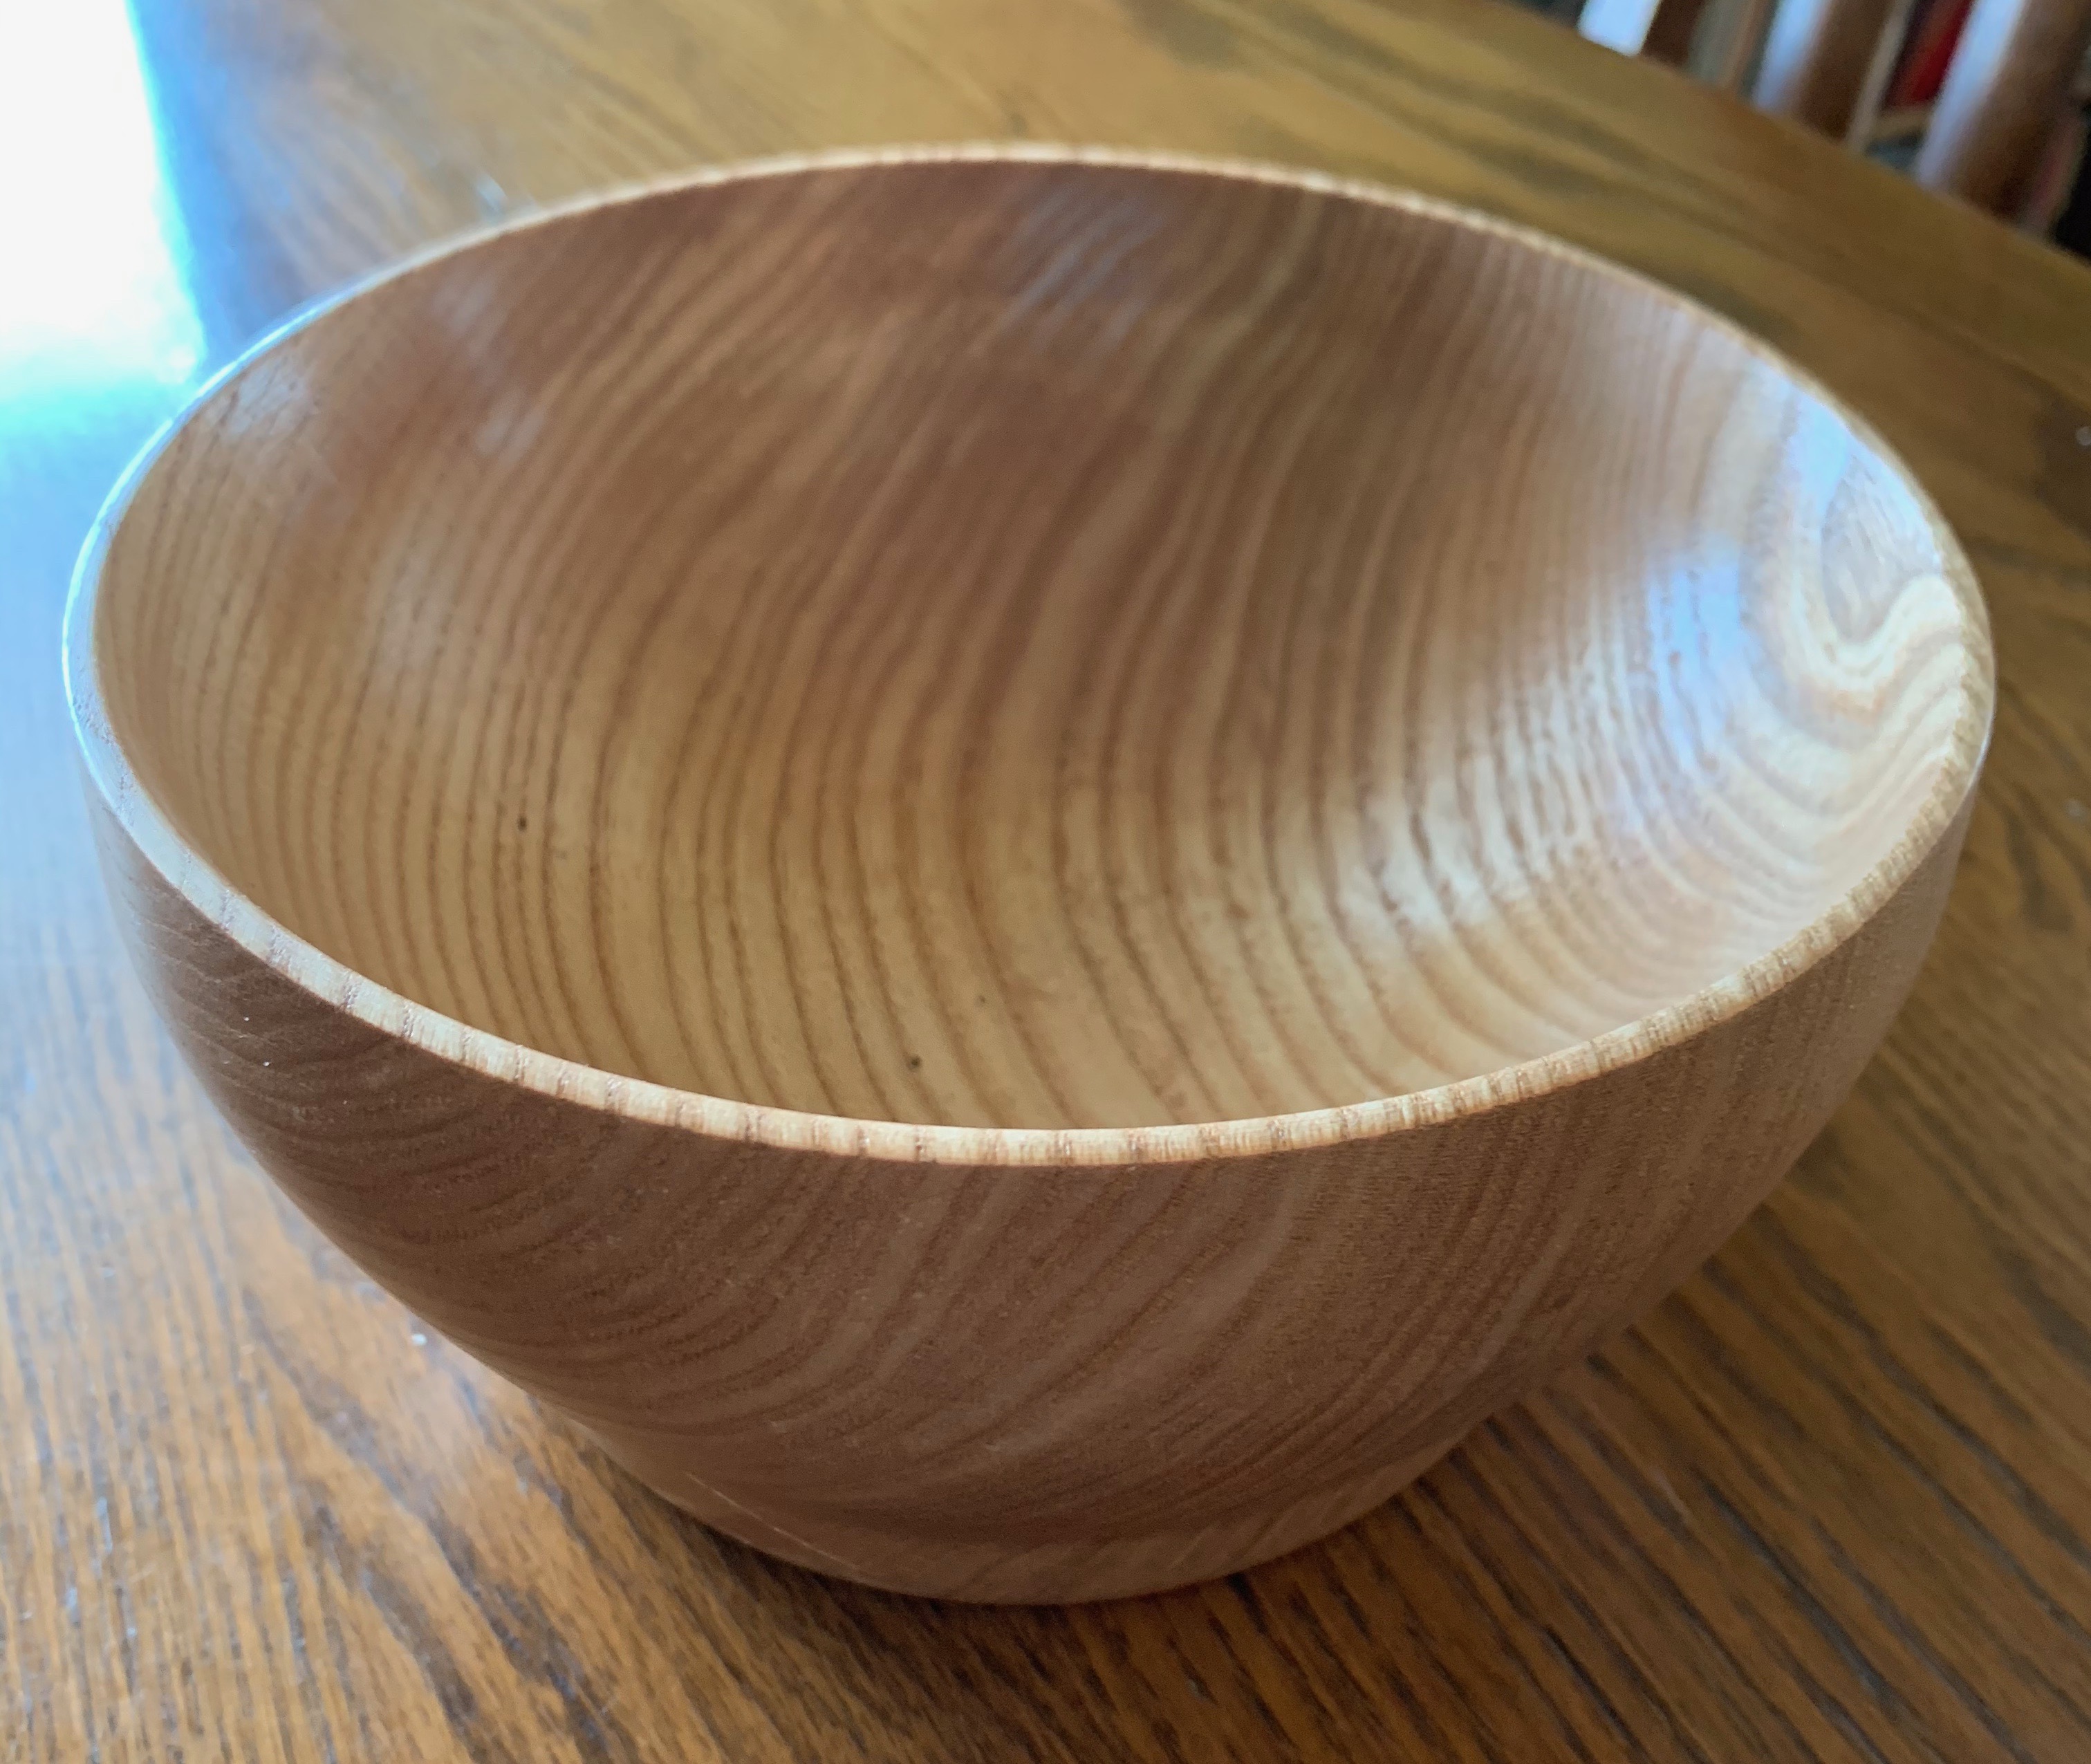
We now have the time and ambition to finally get around to doing something with this stuff. At least one of the slabs is thick enough, wide enough and long enough to perhaps turn into a garden bench. But a lot of it didn’t look too promising until I thought hey, can I make bowls out of some of this stuff. So I cut it up into manageable sizes with the chainsaw, carried some of it down into the shop and started to experiment with the stuff and the first experiment turned out looking like this.
That, by the way, is a Sjobergs workbench. I definitely do not recommend them. But I bought into the hype and despite the insane cost bought one of the things and almost immediately started regretting it. It isn’t that well made, is ridiculously light weight, the materials aren’t that good, there is pretty much nothing about that bench that justifies the price.
Not bad for a piece of free wood, I thought.
If you look around you can find free wood just about everywhere. On any given day I can drive around the towns around here and find people trimming or cutting down trees, and most of that wood is going to end up either being chipped for mulch or composted. Most people won’t mind at all if you ask nicely to take a few bits of it.
Wood shows up all the time at my town’s compost site from people who’ve cut down or trimmed trees. They are only supposed to be dropping off easily chipped brush down there, but a lot of people can’t seem to be able to read the signs and we regularly end up with large branches and even tree trunks being dumped down there. You might have seen me down there with my little battery chain saw whacking off bits and pieces that might be useful, along with the locals who burn wood for heat.
And don’t forget Craig’s List! Start scrolling through the “Free” section of the listings and you’ll find dozens of people just begging someone, anyone, to come get the remains of trees they had to cut down.
If you do get your hands on some of this free wood, some caution is called for, however. There can be some issues with this stuff you need to be aware of.
The first is infestations of bugs. You never know what might be living in that wood. I would never store free wood inside the house or even in the garage unless I was sure it was free from things like carpenter ants, beetles, etc. Anything questionable ends up being burned in the fireplace out in the backyard while MrsGF and I sit around it with a beverage or two.
Rot is something you’ll have to deal with too. Now there are ways you can deal with rotted wood so you can still get something useful out of it by soaking it in types of epoxy resin and preservatives and all that. Frankly, don’t bother. Yes, you can do it but it isn’t worth the effort in my opinion. You need things like a vacuum tank, special wood preservatives and other equipment… Ain’t worth it. Chuck it into the firepit and move on to a solid piece of wood.
Nails, screws, wire and other nasties buried in the wood is also something you need to watch out for. People have this nasty habit of attaching things to living trees. They nail ornaments to them, screw signs to them, hang birdhouses to them, etc. and leave the hardware in the wood. Hitting a nail, screw or other bit of metal embedded in a piece of wood with a saw or gouge is not fun. It isn’t easy to find the stuff either because the tree can grow around the object and completely enclose it. Always inspect any piece of wood carefully before you start sawing it up or putting it on the lathe. Metal detectors specifically designed to find nails and the like in wood have come down in price quite dramatically in the last couple of decades. It might not be a bad idea to pick one up.
If you don’t mind glueing up your own blanks from bits and pieces of boards (You can get some really nice looking turning blanks from odds and ends glued together.) there is a lot of free stuff like that out there. Again, check Craig’s List free section and other sources like that. You’ll find odds and ends of lumber people had left over from remodeling and construction projects and things like that. Even some old furniture made from solid wood will end up sitting out on the curb that can be disassembled and used to glue up something useful.
Pallets – the damned things are everywhere, and nobody seems to want them. Should you consider old pallets as a source for turning wood? Personally I wouldn’t use them for a variety of reasons. The wood is generally very thin, rough cut so it would have to be planed before it could be glued up into a blank. They’re a pain in the ass to take apart and get all the nails and staples out of. Tearing apart a pallet to try to get wood to glue up into a turning blank seems like an awful lot of work for very little reward. And, frankly, you don’t know where the hell that thing has been and what it has been exposed to. For all you know that pallet had some toxic chemicals spilled all over it before it ended up in the “free wood” bin or out on the curb where you found it.
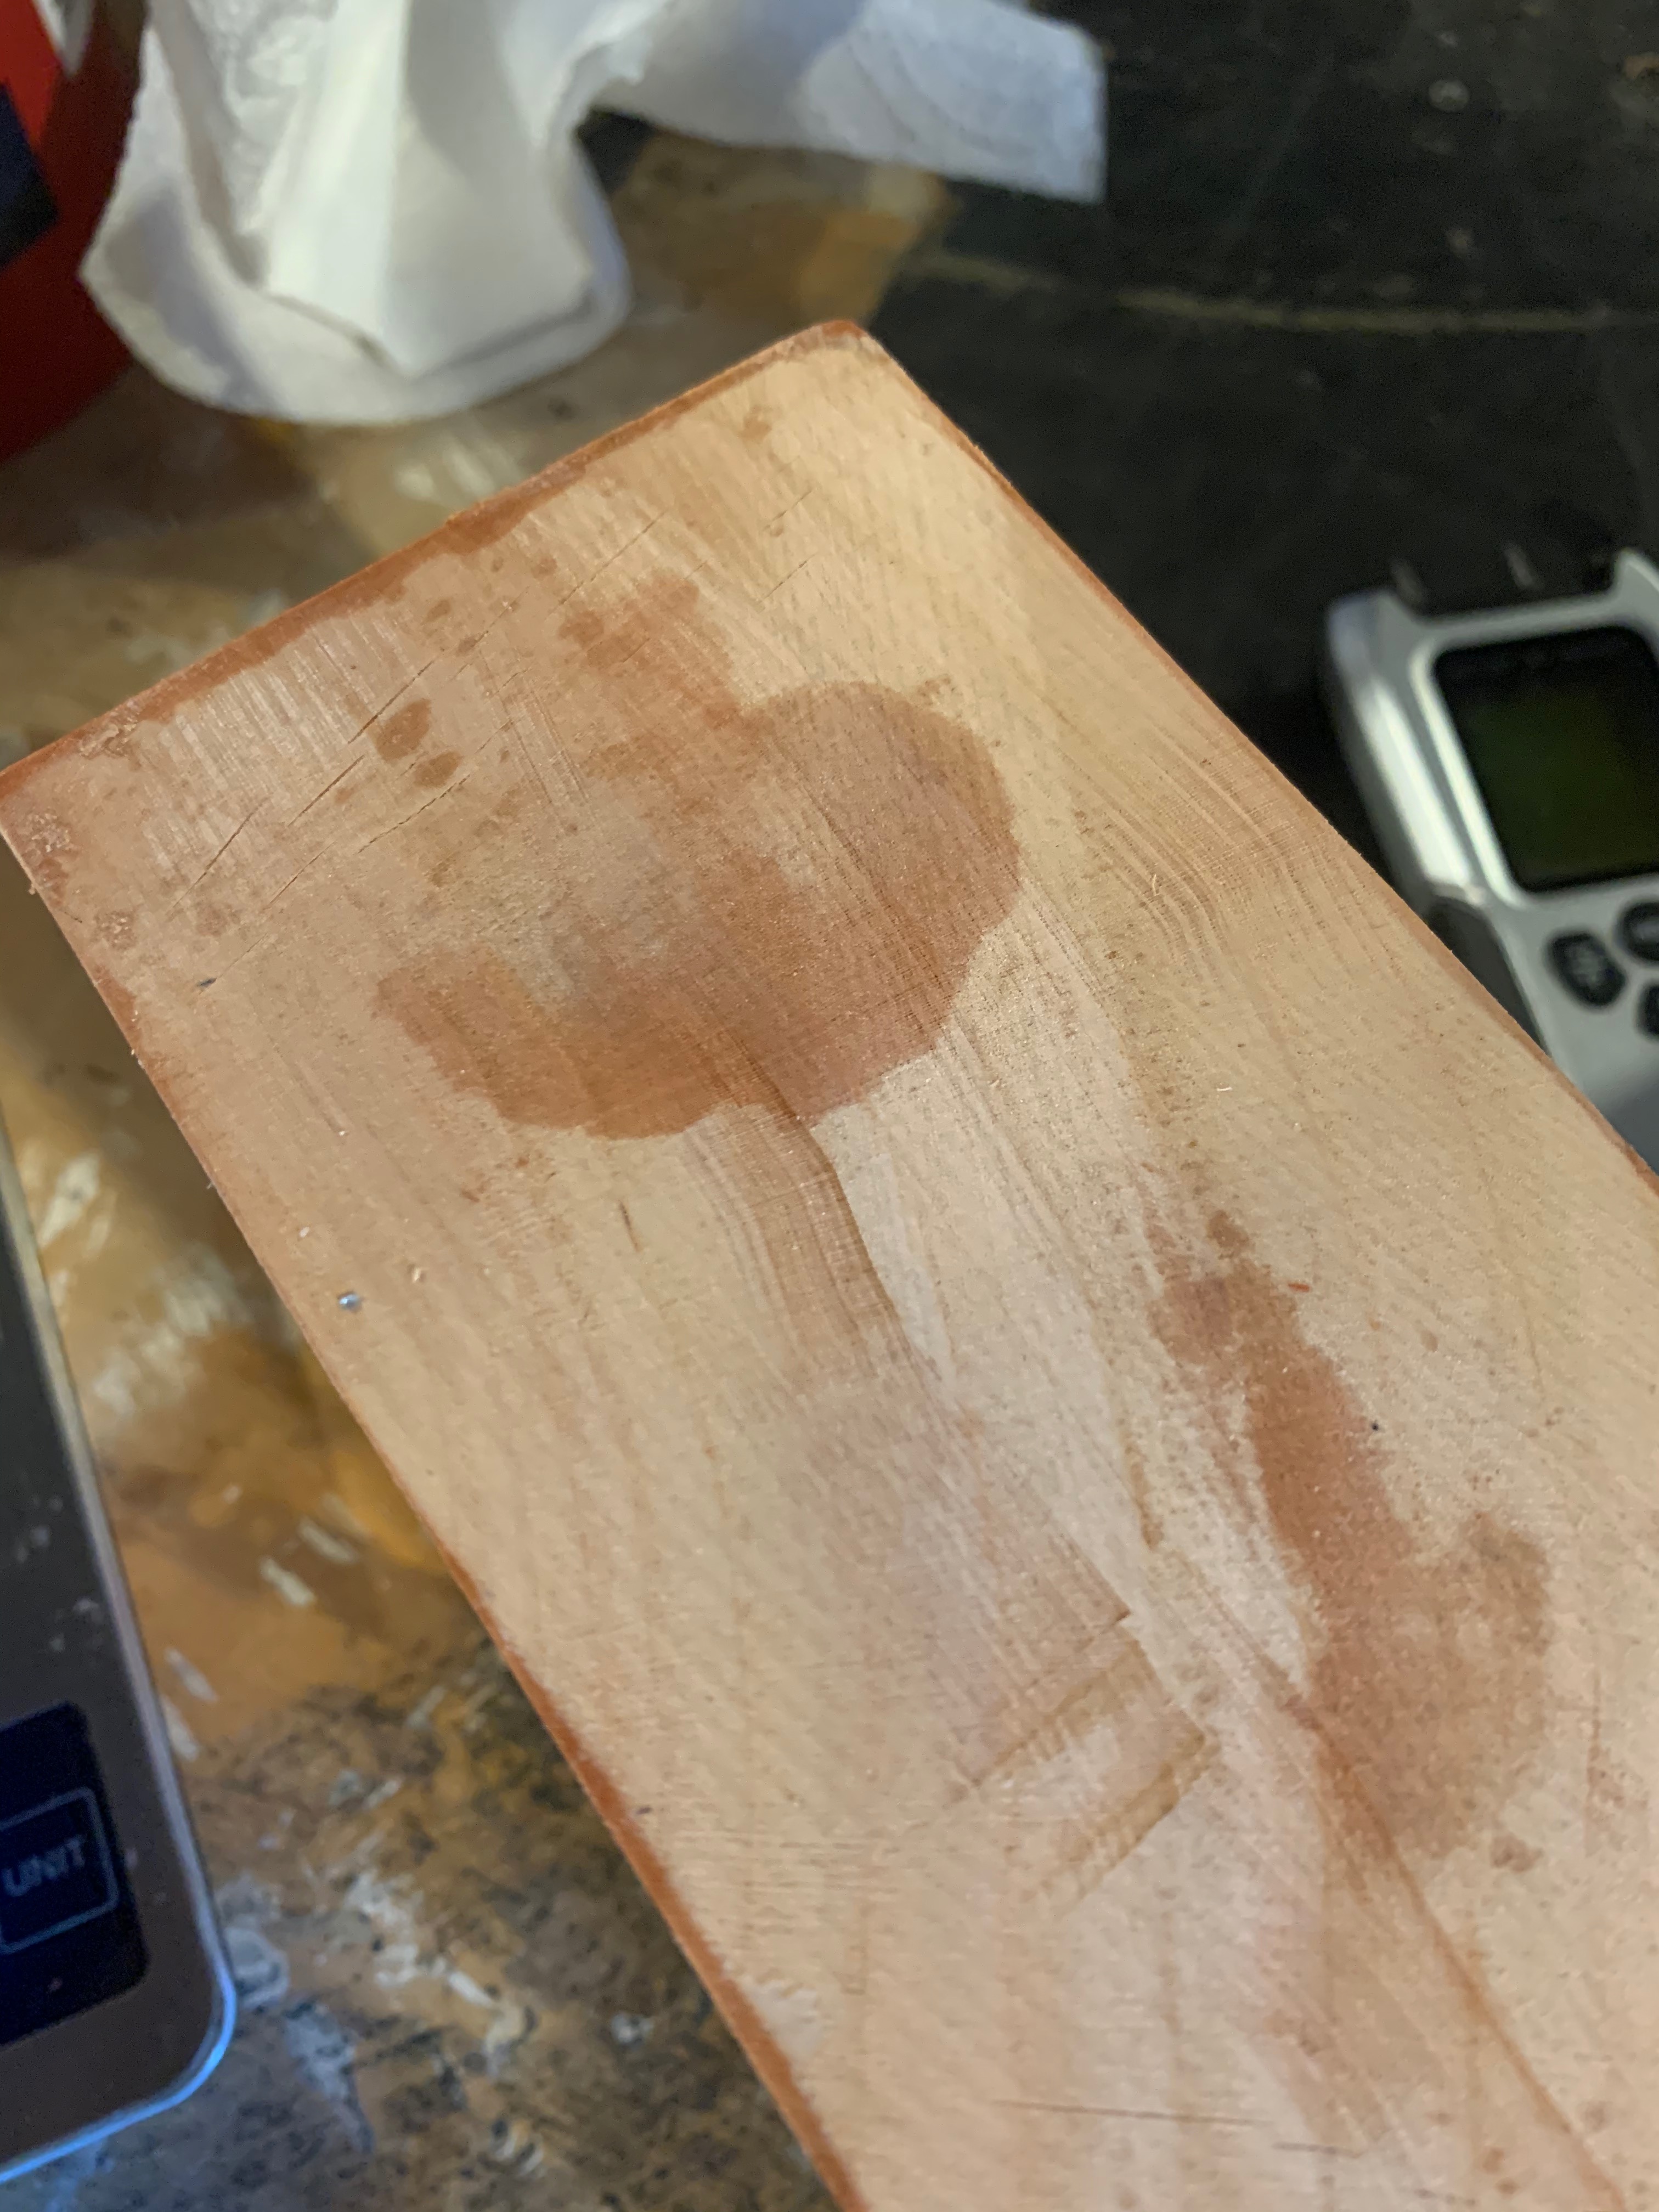
The last issue you need to deal with is the fact that a lot of this stuff is cut directly from living trees that were just cut down, so it is very, very wet and you need to be able to deal with that. Now I know a lot of turners who like working with wet wood and have developed ways of dealing with it, and if you’re one of those, that’s fantastic. But if you’re like me and you prefer to work with wood that is already dried, you need to be prepared to store this stuff for a long, long time before it’s going to be dried down to a usable moisture level, or you need to be able to dry it yourself. The walnut slabs I’m working with right now sat in a dry environment (my garage) for about 5 or 6 years so they’re down to about 10% – 15% moisture which I consider to be reasonably low enough for me to work with them without a lot of issues. But a lot of this stuff is going to be dripping wet when you get it. So you’re going to need to either store it in a protected area for a considerable amount of time for it to dry naturally, or you’re going to have to dry it yourself. There are plans out there on the internet for making your own drying boxes to accelerate the process and some of them even work reasonably well.
What’s Coming Up
Oh, oh… He’s got something cooking in the pot. Now we’re in trouble.
I’m working on the 2nd part of the intro to resin thing I’ve been doing. Yes, really I am. I haven’t forgotten about it. The project that I’ve been cooking up to accompany the 2nd part is curing in the pressure pot even as I write this and should be coming out tomorrow. I’ve got videos and everything for this one.
Well, I hope I’ll have videos. I’m still not sure if I’m using that dopey camera right. Anyway that will be coming up sometime in the next couple of weeks if all goes well.
I got in a new parting tool from a company called Woodpeckers that I’m waiting to try out. I’ve tried a variety of different parting tools since I got into this and I haven’t really liked any of them very much. The cheap carbide ones that seem to be made by the millions by some outfit in China and sold under a variety of different brand names not only don’t work very well and wear out quickly, they are just -just nasty all the way around. The one I use most often is an old fashioned steel one from Sorby which works but needs to be sharpened a lot.
Oh, and Happy Cat! I almost forgot about her… Let’s see I got that video somewhere…
I’ve been doing this lathe thing for a while now and I get occasional questions about wood turning and especially about working with resin. So I thought some people might find it useful if I put together some of the things I’ve learned over the last couple of years.
I am not an expert on this stuff, but I’ve learned a lot about working with resin since I started this, especially about why things go wrong. I wish I’d run into an article like this when I first started out. It would have prevented a lot of problems, saved me a lot of money and kept me from wasting a lot of time.
This first part is going to be mostly stuff about chemistry, curing, bubbles, mixing and stuff that a lot of you probably know already and is going to be as boring as watching paint dry, but be patient because I’m aiming this at newcomers who may not know any of this stuff. Things will get more interesting in the second part when I actually make something, and I’ll cover that step by step from the initial design process to the finished product. I’m going to make it in “real time”, so to speak, writing up every step, along with photos and, hopefully, videos, as I actually do the work.
If you have any questions please feel free to ask in the comment section or at old.grouchyfarmer@gmail.com
What The Heck Is This Stuff Anyway?
The resin I’m talking about is a liquid plastic that comes in two parts, the resin itself and a hardener or catalyst which is mixed with it. After they are mixed together it is poured into a mold of some type and over a period of time a chemical reaction takes place which causes the liquid to turn into a solid material.
There is a huge variety of various powders, liquid dyes and other coloring material made specifically for use with resin so you can get just about any kind of look you need.
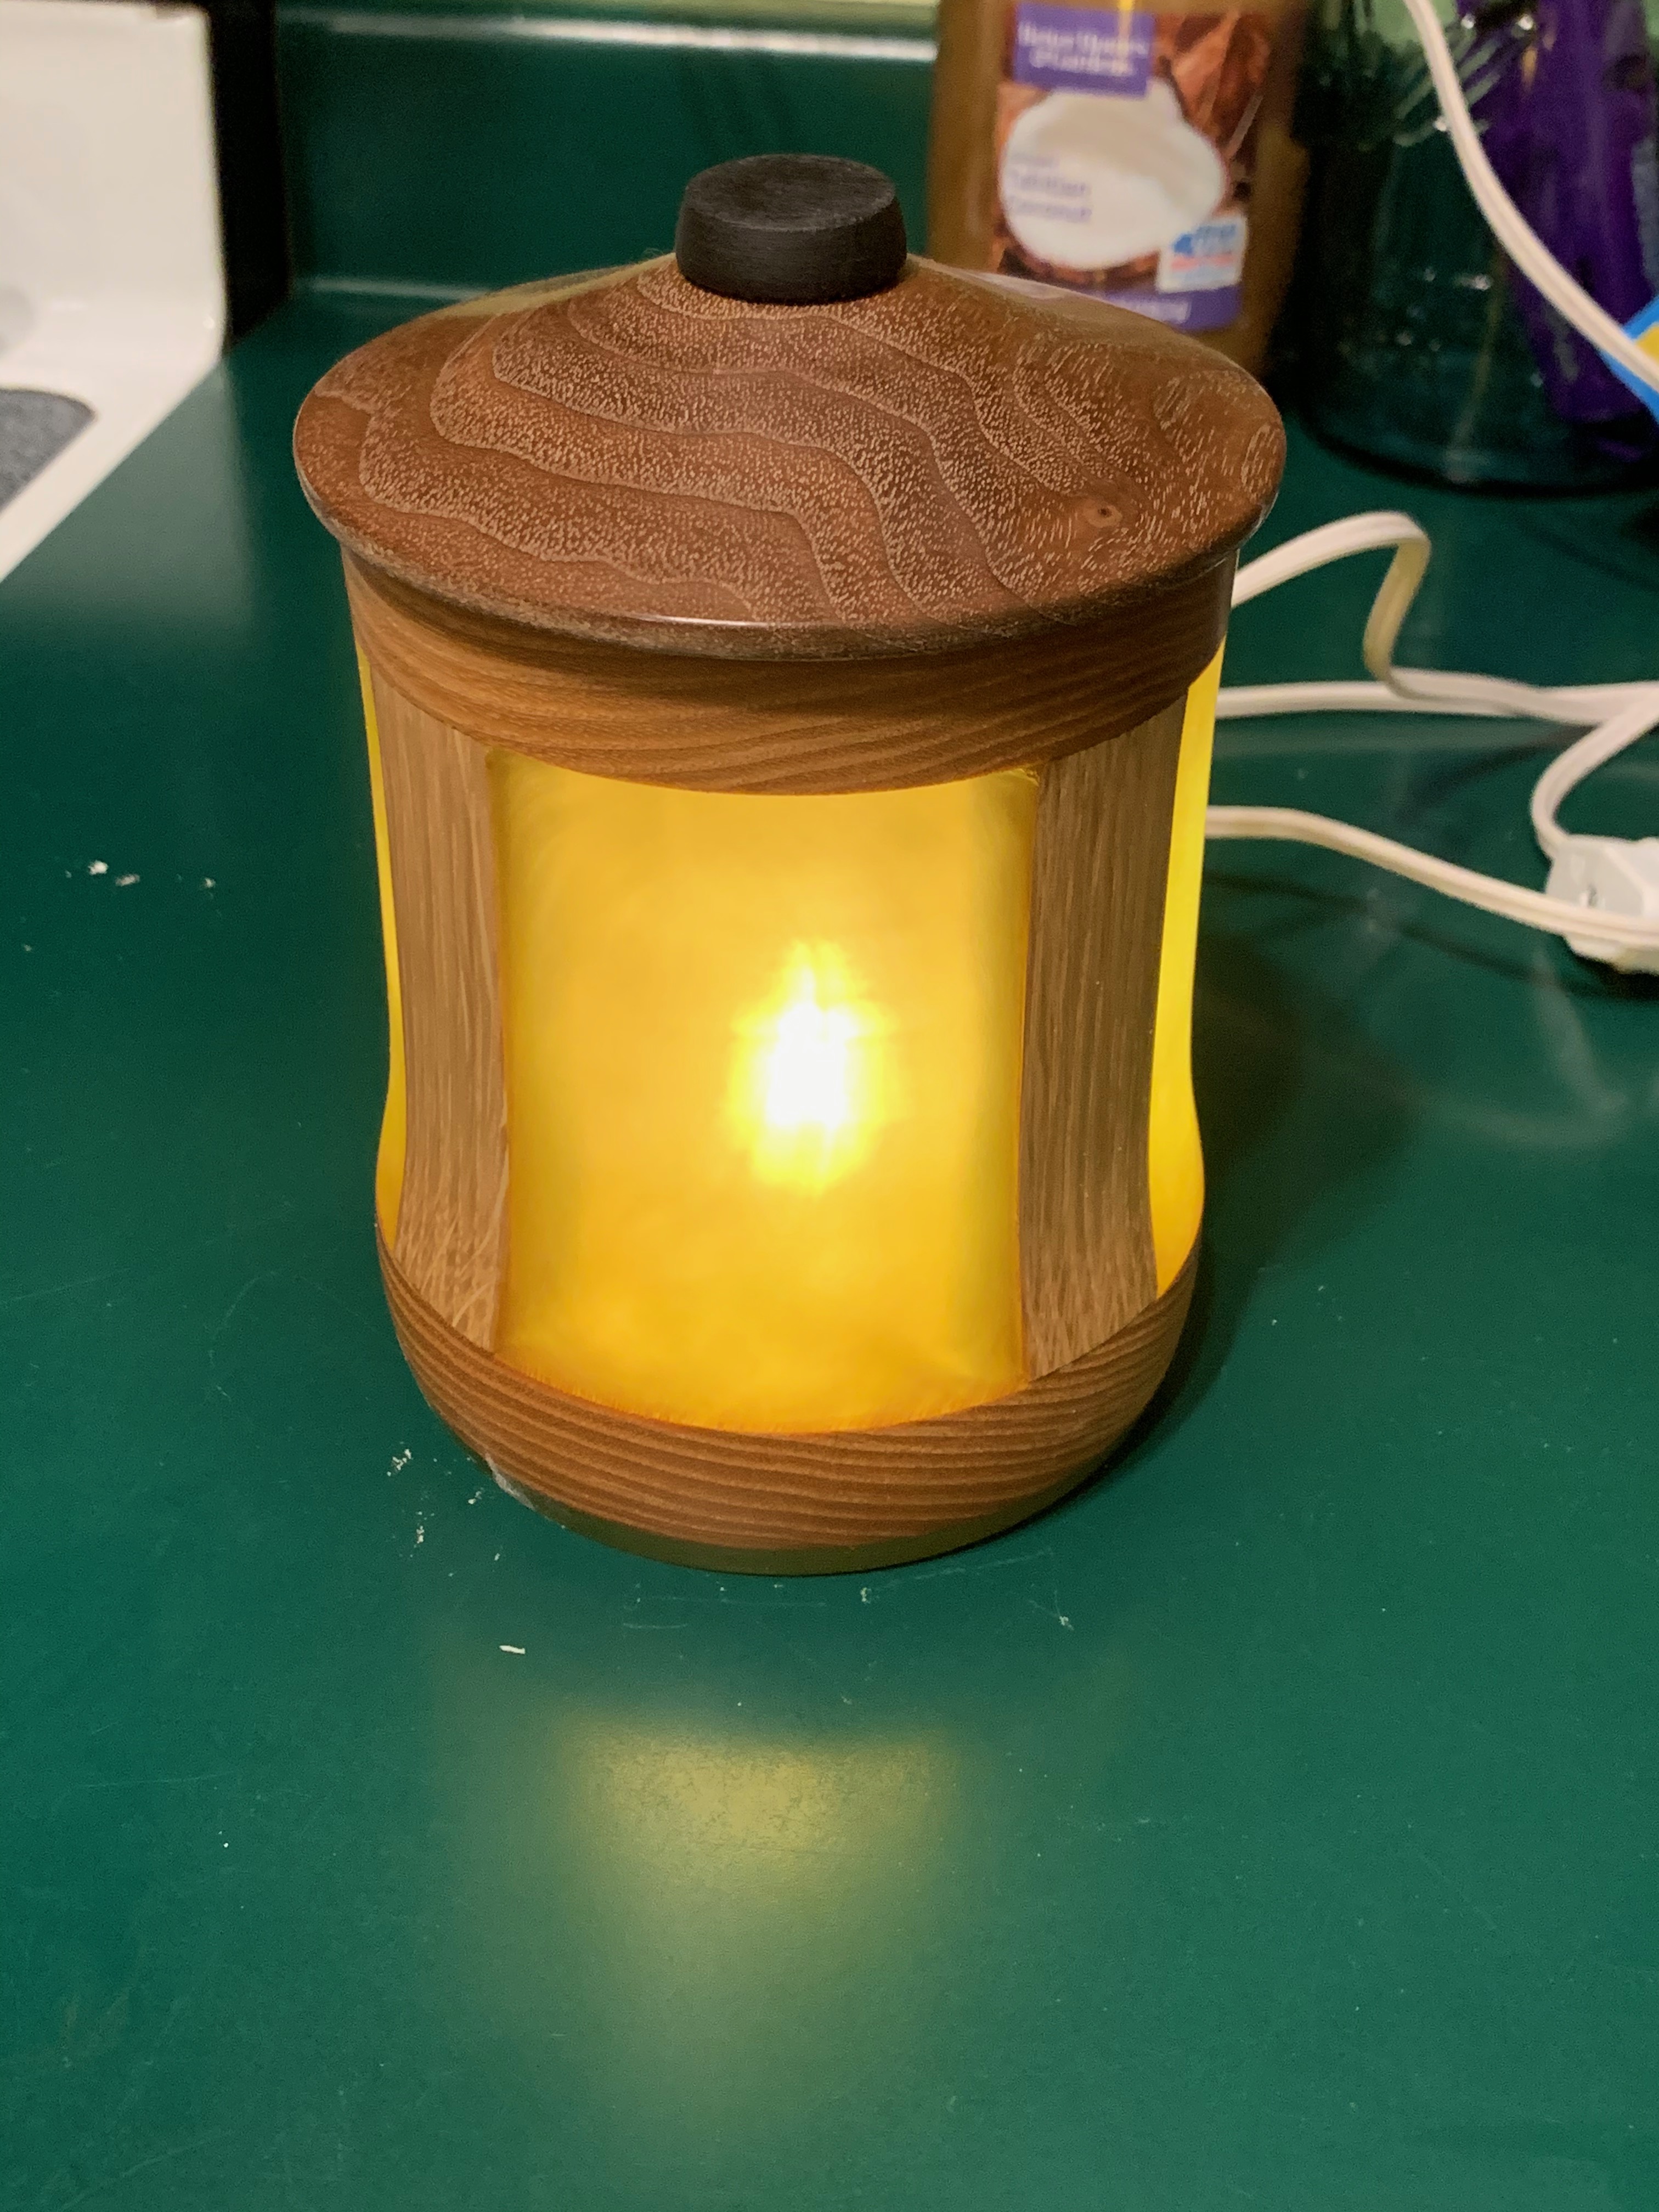
Once cured it is generally crystal clear, but you can add dyes, coloring agents, glitter, iridescent powders and other things to enhance its appearance. That tea light in the lead photo has emerald and gold iridescent powders mixed into it.
One of the neat things about this stuff is that with these resins you can cut and shape it with standard woodworking tools once it is cured. You can use your steel or carbide gouges, skews and other turning tools, as well as normal sandpaper. Although if you want a really high polish and high gloss finish you’re going to need use much finer sandpapers and polishing agents in the final finishing than you would with wood. But I’ll come to that later.
Time To Get Out Your Wallet
Let’s get this out of the way right off the bat. This stuff ain’t cheap. Which is why I don’t do resin projects as often as I’d like to. The material I use most often, Naked Fusion Deep Pour, is currently selling for about $160 for a one and a half gallon kit (1 gal resin, 1/2 gal hardener). That works out to about $0.83 per ounce. Other brands and types get even more expensive and can cost you as much as $1.50 per ounce.
Eighty three cents per ounce doesn’t sound like much, but projects can use up a lot of material. That little tea light in the lead photo at the top of the page isn’t very big, but there is probably about $20 worth of resin in it. I’ve done a lot of projects that used 40 – 60 ounces so I can have a lot of money sunk into a project in just resin before I even get it on the lathe. For me this is a hobby and I can afford to splurge once in a while. But if you’re planning on selling your projects or you’re on a tight budget you really need to keep costs under control. So remember quality resin is a bit expensive and a single project can use a lot of the stuff.
What to Buy? It’s All In The Chemistry
There is a bewildering variety of different resins out there from a large number of different companies and they all have different uses and different characteristics. If you buy the wrong one for your application you’re going to have a real mess on your hands. First you need to consider:
Depth of Pour
Depth of pour is one of the most important characteristics of the resin you buy. We’re concerned with the volume and overall thickness of the object being made. Resins are generally classified as thin pour and deep pour varieties. To make things more interesting the definition of what those two terms means seems to vary wildly. Always read the instructions carefully before you buy a product because what the manufacturer means by the terms “thin” and “deep” may not be what you think they mean.
Thin pour resins are designed for very thin applications, generally under an inch thick, sometimes even less. A lot of these are intended for use only as coatings on table or bar tops, or for trinkets like key fobs and small ornaments.
Deep pour resins are intended for larger objects. Almost all of the projects I do have a resin volume that is greater than 2 inches deep and wide, and a lot of them are much larger than that, so that’s what I use and probably what you’ll want as well unless you want to make small ornaments or pens.
What happens if you use the wrong type of resin? You can have a real mess on your hands. You can end up with resin that won’t cure properly, will only partly cure, be too brittle to work with, or even end up with a runaway exothermic reaction that will generate so much heat that it’ll melt your mold. So always make sure the resin you’re using is suitable for your application. Always read the instructions carefully before you buy a product.
Viscosity
Another thing you may want to consider is the resin’s viscosity, or how thick it is when it is poured. Viscosity also varies widely, ranging from rather thin, like warm table syrup, to very thick and more like the consistency of cold molasses.
There are two reasons why viscosity is important here. The first is when it comes to releasing bubbles. Generally the thinner the resin, the more easily bubbles can float to the surface. (I’ll talk about bubbles specifically a bit later.)
Holy cow that’s ugly.
The second reason is that I embed pieces of wood in the resin when I pour it, and sometimes those have complex shapes. A thinner resin is going to flow into all of the little nooks and crannies more easily preventing voids that can cause problems later. That ugly little object over there on the right was one of the first experiments I did with resin. I basically just chucked a bunch of wood scraps into a mold and filled it with resin. This one didn’t turn out too bad because I used a rather thin resin here. I did one (since consigned to the fireplace in the backyard) where I used a very thick resin and I ended up with a lot of voids because it couldn’t flow into all of the small spaces and because I didn’t provide a way for air to escape from those voids.
Cure Time
This is the amount of time it takes for the resin to turn into a solid after it is mixed with the catalyst. This can vary wildly depending on the chemistry the manufacturer uses. (Other things like ambient temperature and the volume of resin used can have an effect on the cure time as well but the most important is the chemistry of the product.)
Some products cure so quickly that the moment you get it mixed up you have to rush to get it poured into your mold and into your pressure tank (if you use one) before it begins to harden. Others can take literally days to fully cure. Which one you use is entirely up to you. Some people are impatient and want results right now. They’re going to prefer the fast curing types.
Personally I prefer the slower curing ones. The Naked Fusion resin I use can take 36 – 48 hours to fully cure. Why would I want to put up with that? First of all I’m in no hurry. I generally have a lot of other stuff going on so I’m not exactly sitting around watching the clock. The second reason I like the longer curing variety is that I believe the longer the material remains liquid the better the chance any bubbles in it will be released. Thirdly I don’t have to rush to get it mixed up, add colorings, and get it into the mold and then into the pressure tank.
Temperatures
All resins have recommended temperature ranges for storage and curing included with the instructions. Please pay attention to those because they are important. Most resins are pretty liberal when it comes to storage temperatures. As long as you store the unmixed resin in an environment that you are comfortable in, it’s probably going to be just fine. But I do have a specialty product that has to be stored above 55 F. If it gets colder than that it can start to crystalize.
Ambient temperature during the curing process is important as well. The temperature can affect how quickly or slowly the resin cures after it is mixed. Once again generally if you are in an environment where you are physically comfortable, it isn’t going to be much of an issue, but pay attention to the manufacturer’s instructions and try to adhere to the recommended temperature ranges.
Safety
Always, always read the instructions and safety warnings carefully when you work with resins. Some of these products are seriously nasty. Follow the manufacturer’s safety instructions to the letter. Some give off toxic fumes, especially during the mixing and curing process. Some can potentially generate a lot of heat during the curing process. The thing I am always concerned with when working with any kind of chemicals is the production of potentially dangerous gasses that can cause neurological damage, lung damage, etc. Some of these products may require the use of special respirators and venting and should never, ever be used inside of a home. Some are relatively benign. Before you buy any resin read the safety data carefully and make sure you understand the potential dangers and that you can deal with those dangers before you buy the product.
The stuff I work with, Naked Fusion, is one of the more benign ones. It gives off no VOCs and emits virtually no fumes. But even so I still take precautions. I always wear nitrile gloves and always wear a full face shield to protect against splashes when I’m mixing and pouring the stuff.
Dealing With Bubbles
There are times you want bubbles, like in a nice glass of beer. But you do not want bubbles in your finished resin project, especially in a project like a tealight or lamp where light shining through the resin is going to make defects glaringly obvious. I’m not concerned about bubbles on the surface the way someone making a river table would be. For most of us bubbles on the surface aren’t going to be a problem because the surface layer is going to be cut or sanded off anyway when the object is shaped on the lathe. The problem we have is bubbles embedded in the body of the resin project itself.
Liquids like water release bubbles very easily and quickly. Resin, however, is much thicker, and its specific gravity may be such that bubbles are not buoyant enough to float to the surface.
The most commonly used method to eliminate or at least dramatically reduce the amount of visible bubbles in a resin project is to put it in a pressure tank and put it under pressure and leave it there until the resin is cured.
Sidenote: Some people recommend using a vacuum tank. I do not. Putting it in a vacuum tank can cause foaming as air is drawn out of the wood that is embedded in the resin. In theory that foam comes to the top, but in actual practice it often doesn’t. So a vacuum tank can actually increase the amount of bubbles you get. Also when in a low pressure environment bubbles actually get bigger and more noticeable. Being in a vacuum tank doesn’t necessarily mean the bubbles will rise to the surface, either. That is going to depend more on the viscosity and specific gravity of the resin. From the research I’ve done putting your project in a vacuum tank can actually make bubble problems worse, not better.
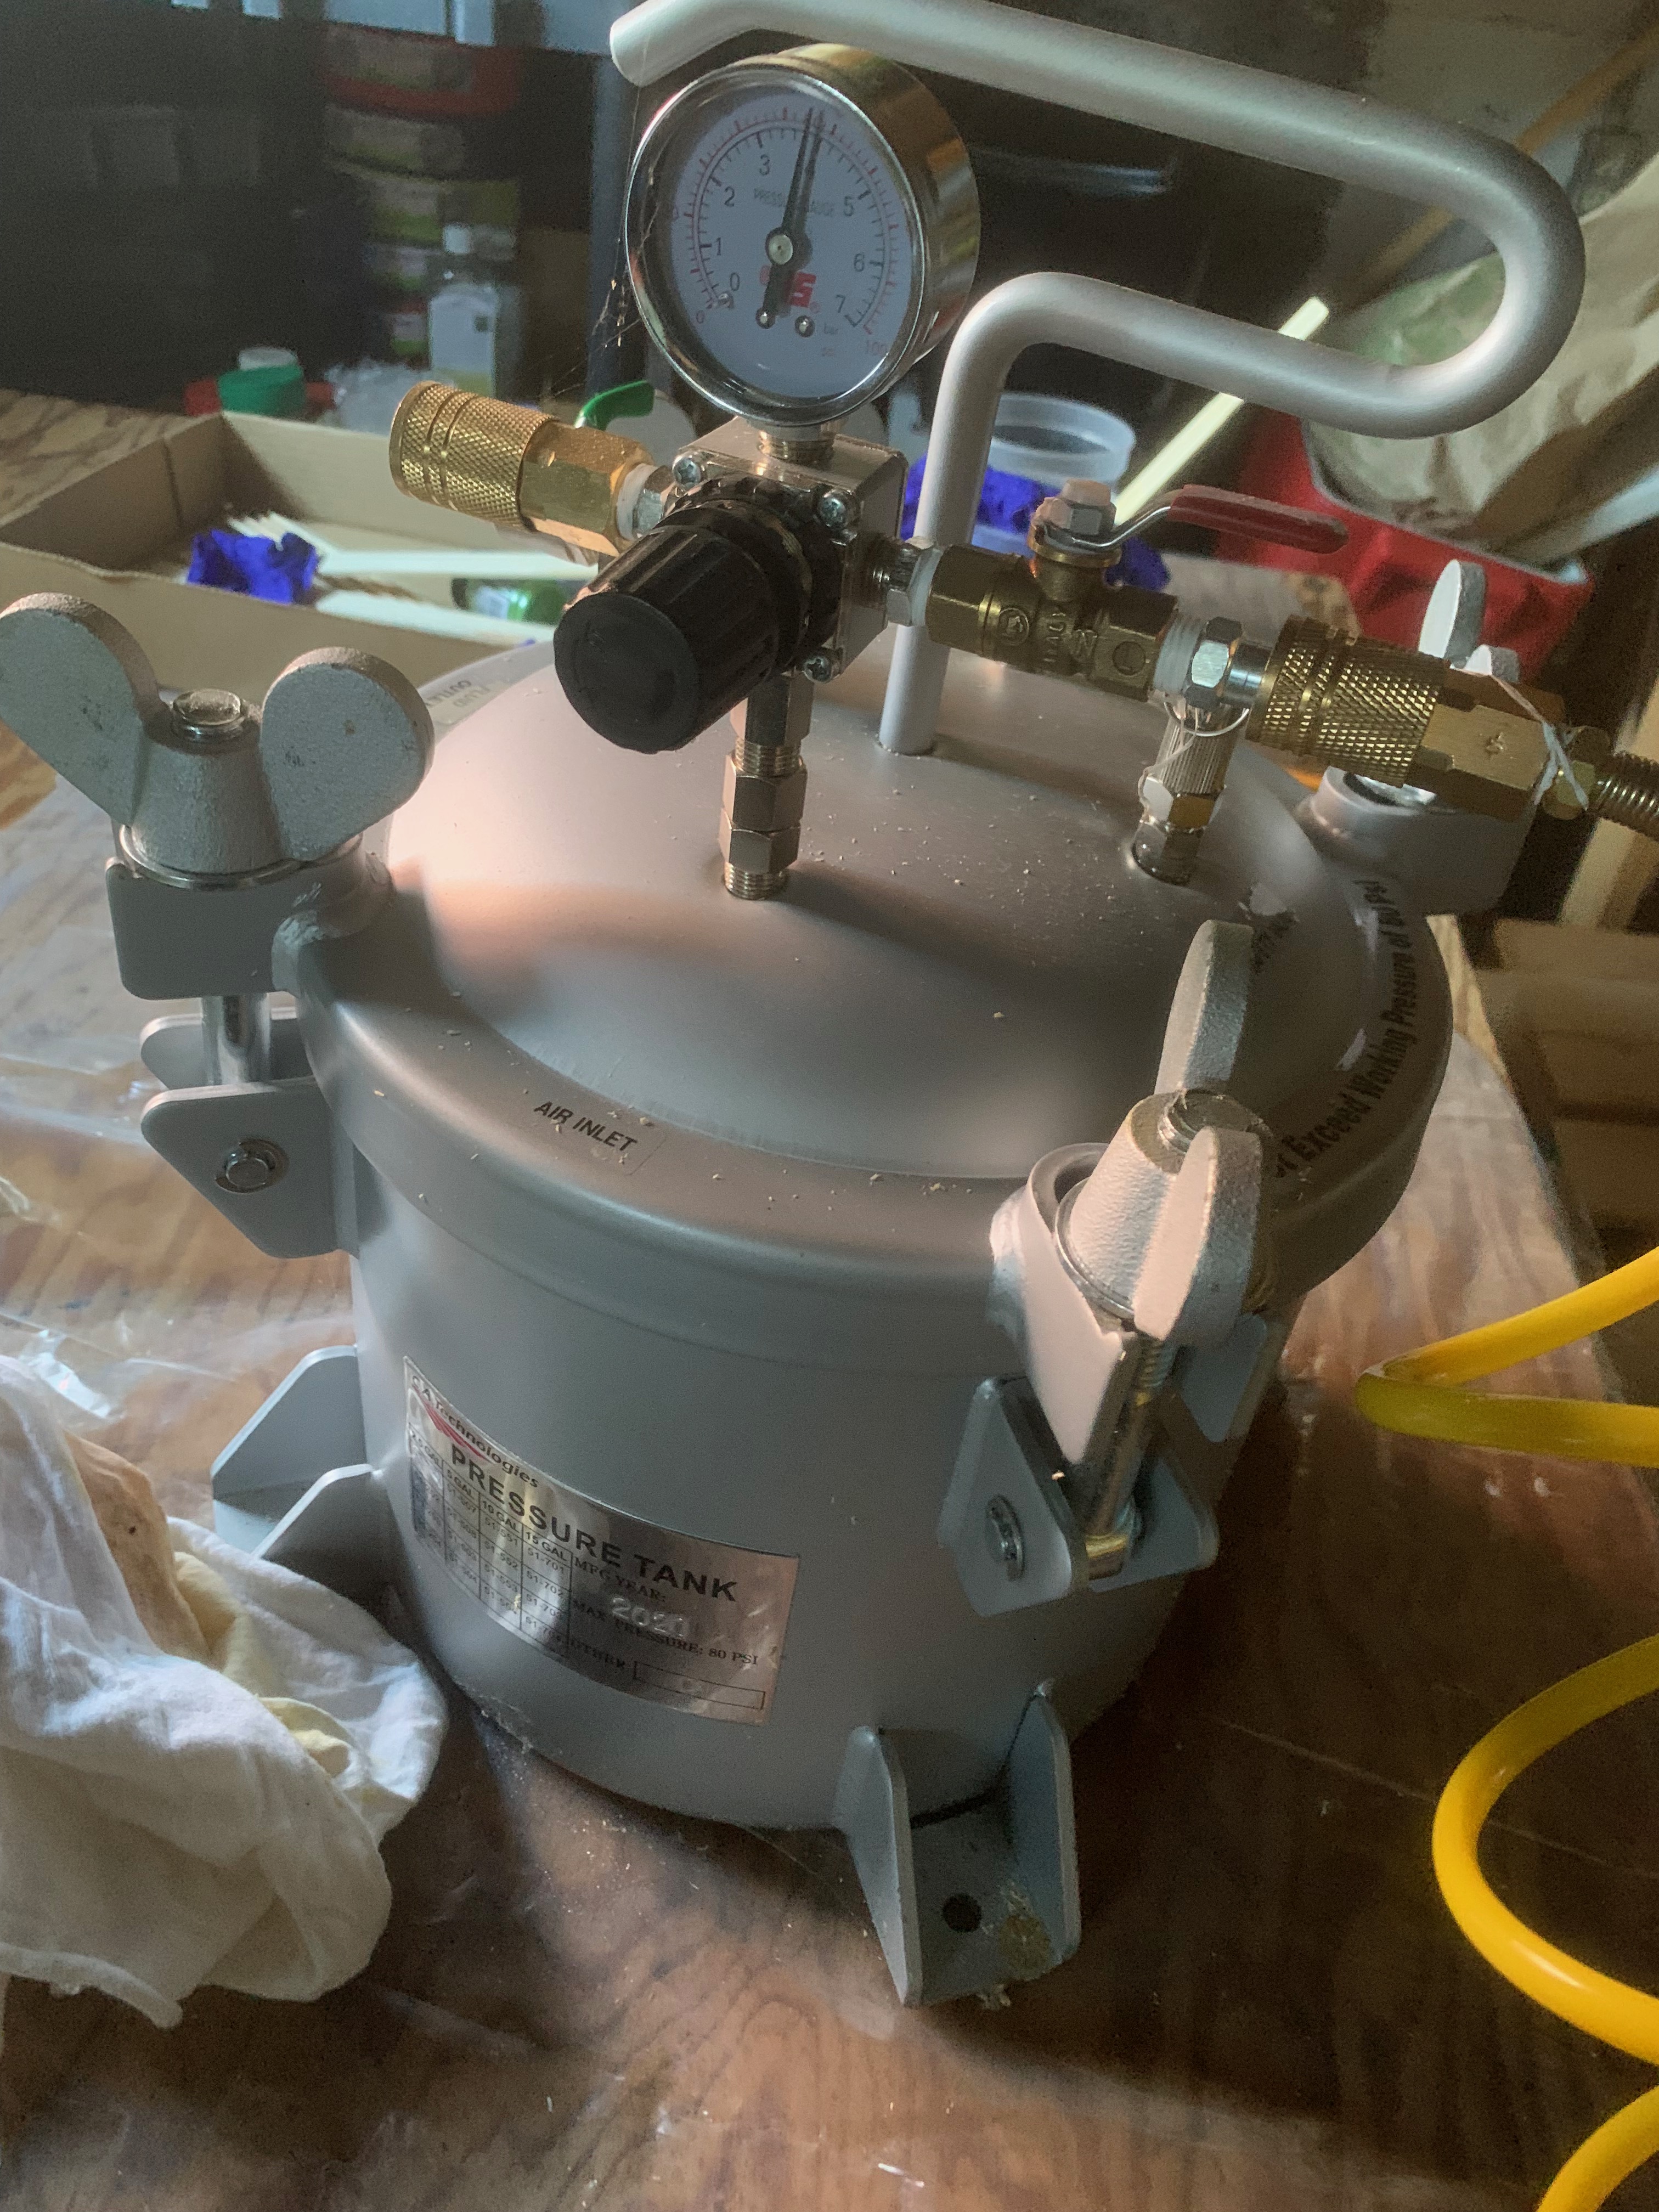
So let’s talk about pressure tanks. We find pressure tanks useful because putting a resin casting under pressure while the resin is still liquid will cause the bubbles to shrink dramatically in size, and even seem to disappear entirely.
That’s my pressure tank up there. It’s from CA Technologies, is extremely well made and works quite well. But it ain’t cheap. That tank up there currently retails for about $500. There are cheaper models on the market but be cautious with the ultra cheap tanks. Some of them can be dangerous.
The usual procedure is that after you’ve poured the resin into the mold, you put the mold in your pressure tank and use an air compressor to pump it up to about 40 – 50 PSI, and then leave it under pressure until the resin has hardened.
Now you can buy pressure tanks that are designed specifically for this kind of thing, specially certified by safety organizations and all that stuff. But they are very expensive, often a lot more money than most of us would like to spend for something like this. So what most woodturners use aren’t actual pressure tanks but pressurized paint pots used for spray painting that were never intended to be used for this purpose. But they are very attractive because some of them are pretty cheap.
You can get one of these paint pots from everybody’s favorite purveyor of cheap knock off tools, Harbor Freight, as well as from some other vendors, for about $100. They won’t work as-is, they have to be modified. But the modifications aren’t difficult to do and the parts needed are easy to find and cheap. So a lot of people who work with resin use these cheap pots because the alternative is spending several hundred dollars on a piece of equipment they might only need only occasionally.
Now there are probably thousands of these cheap pots in use out there, and almost no one has issues with them. But (you knew there was a “but” coming, didn’t you?) I have seen enough reports of these cheap pots failing, sometimes catastrophically, that they scare the hell out of me. Just run some searches on Google about Harbor Freight paint pot failure and you’ll see what I mean So if you do use one of these cheap modified paint pots as a pressure tank, be very, very careful. Always keep the pressure well under the manufacturer’s maximum PSI rating. Always secure the lid properly, etc.
Enough of that, though. Let’s get on with this and move on to…
Molds
A mold is a simple thing, basically just a container to hold the liquid resin and whatever you might be embedding in it until it solidifies. I mostly use disposable plastic paint mixing containers like the one in the photo over there on the right that I buy in bulk. (Remember that tea light in the very first photo? That’s it before it was machined on the lathe.) They’re cheap, available in a wide variety of sizes, and are printed with a variety of different markings to make it easier to measure out resin quantities.
But people also use just about anything as a mold. Food containers like cottage cheese containers and similar items work well after they’ve been thoroughly cleaned. I’ve used “Cool Whip” frozen topping containers and things like that with good results. If you’re doing a large project those 5 quart plastic ice cream pails work well. There’s no need to use mold release or anything like that because if it doesn’t come out of the mold, well, the mold didn’t cost you anything in the first place so just cut it apart or even chuck the whole thing on the lathe and peel it off with a gouge.
You can make your own molds rather easily for special purposes using silicone caulk or hot glue, and sheets of plastic. Just about anything that will hold a liquid can be used as a mold. But always remember that you have to be able to get your project out of that mold, so avoid using things like glass and metal.
One word of advice: If you’re using a pressure tank, line it with a small sheet of plastic just in case your mold leaks or overflows. Trying to clean hardened resin out of one of those things is a pain in the neck. The better ones are lined with Teflon but even so it can still be hard to clean them out if there’s an accidental spill.
Mixing
Resin has to be mixed with a hardener or catalyst. You need to follow the manufacturer’s instructions exactly. If you get the proportions wrong, bad things will happen. So always read the instructions carefully and follow them exactly. A lot of resins are mixed by volume, like Naked Fusion, the stuff I use. I mix two parts resin with one part hardener. But the exact amounts may vary depending on the resin you’re using. I have one brand/type of resin that mixes at a 1:1 ratio. Supposedly some of the resins out there tell you to measure quantities by weight, not volume. That seems a bit odd to me, but whatever the manufacturer tells you to do, do it.
At some point you are probably going to want to mix some kind of coloring agent in with the resin. Again, follow the manufacturer’s instructions, if any. Sometimes the maker will not have specific instructions for mixing in coloring agents. What I do with Naked Fusion is mix the coloring, dye or whatever in with the resin, and then mix in the hardener. That’s worked quite well for me. But if your product has specific instructions, follow them.
The hardener needs to be thoroughly incorporated into the resin. If it isn’t you can get pockets of uncured resin in your project or other problems can crop up. Again, follow the manufacturer’s instructions for mixing the product. A lot of guys use those paint mixers that chuck into an electric drill. If you’re mixing up a large quantity those things can be useful. Especially if you’re working with a resin that cures rapidly. You want to mix it as fast as possible and get it into the mold before it starts to set up. But also be aware of the fact that using a power mixer like that can incorporate bubbles into the resin, which you do not want.
I use good old fashioned disposable paint stirring sticks. The resin I use cures slowly so I’m not in a rush. I’ve had good results this way. The sticks are cheap. I get ’em for about $20 for 200 of them off Amazon.
Sidenote: Those disposable paint mixing sticks also make great markers for gardening. They’re big enough that I can write on them with a Sharpie to label stuff out in the gardens.
Dyes and Coloring Materials
As I said before most resins are crystal clear when fully cured and you can turn out some really, really beautiful stuff using nothing but clear resin. This is especially true if you’re trying to emphasize the object you have embedded in the resin. But a lot of us are looking to make things that are colorful and eye catching so we resort to using various coloring agents and iridescent powders.
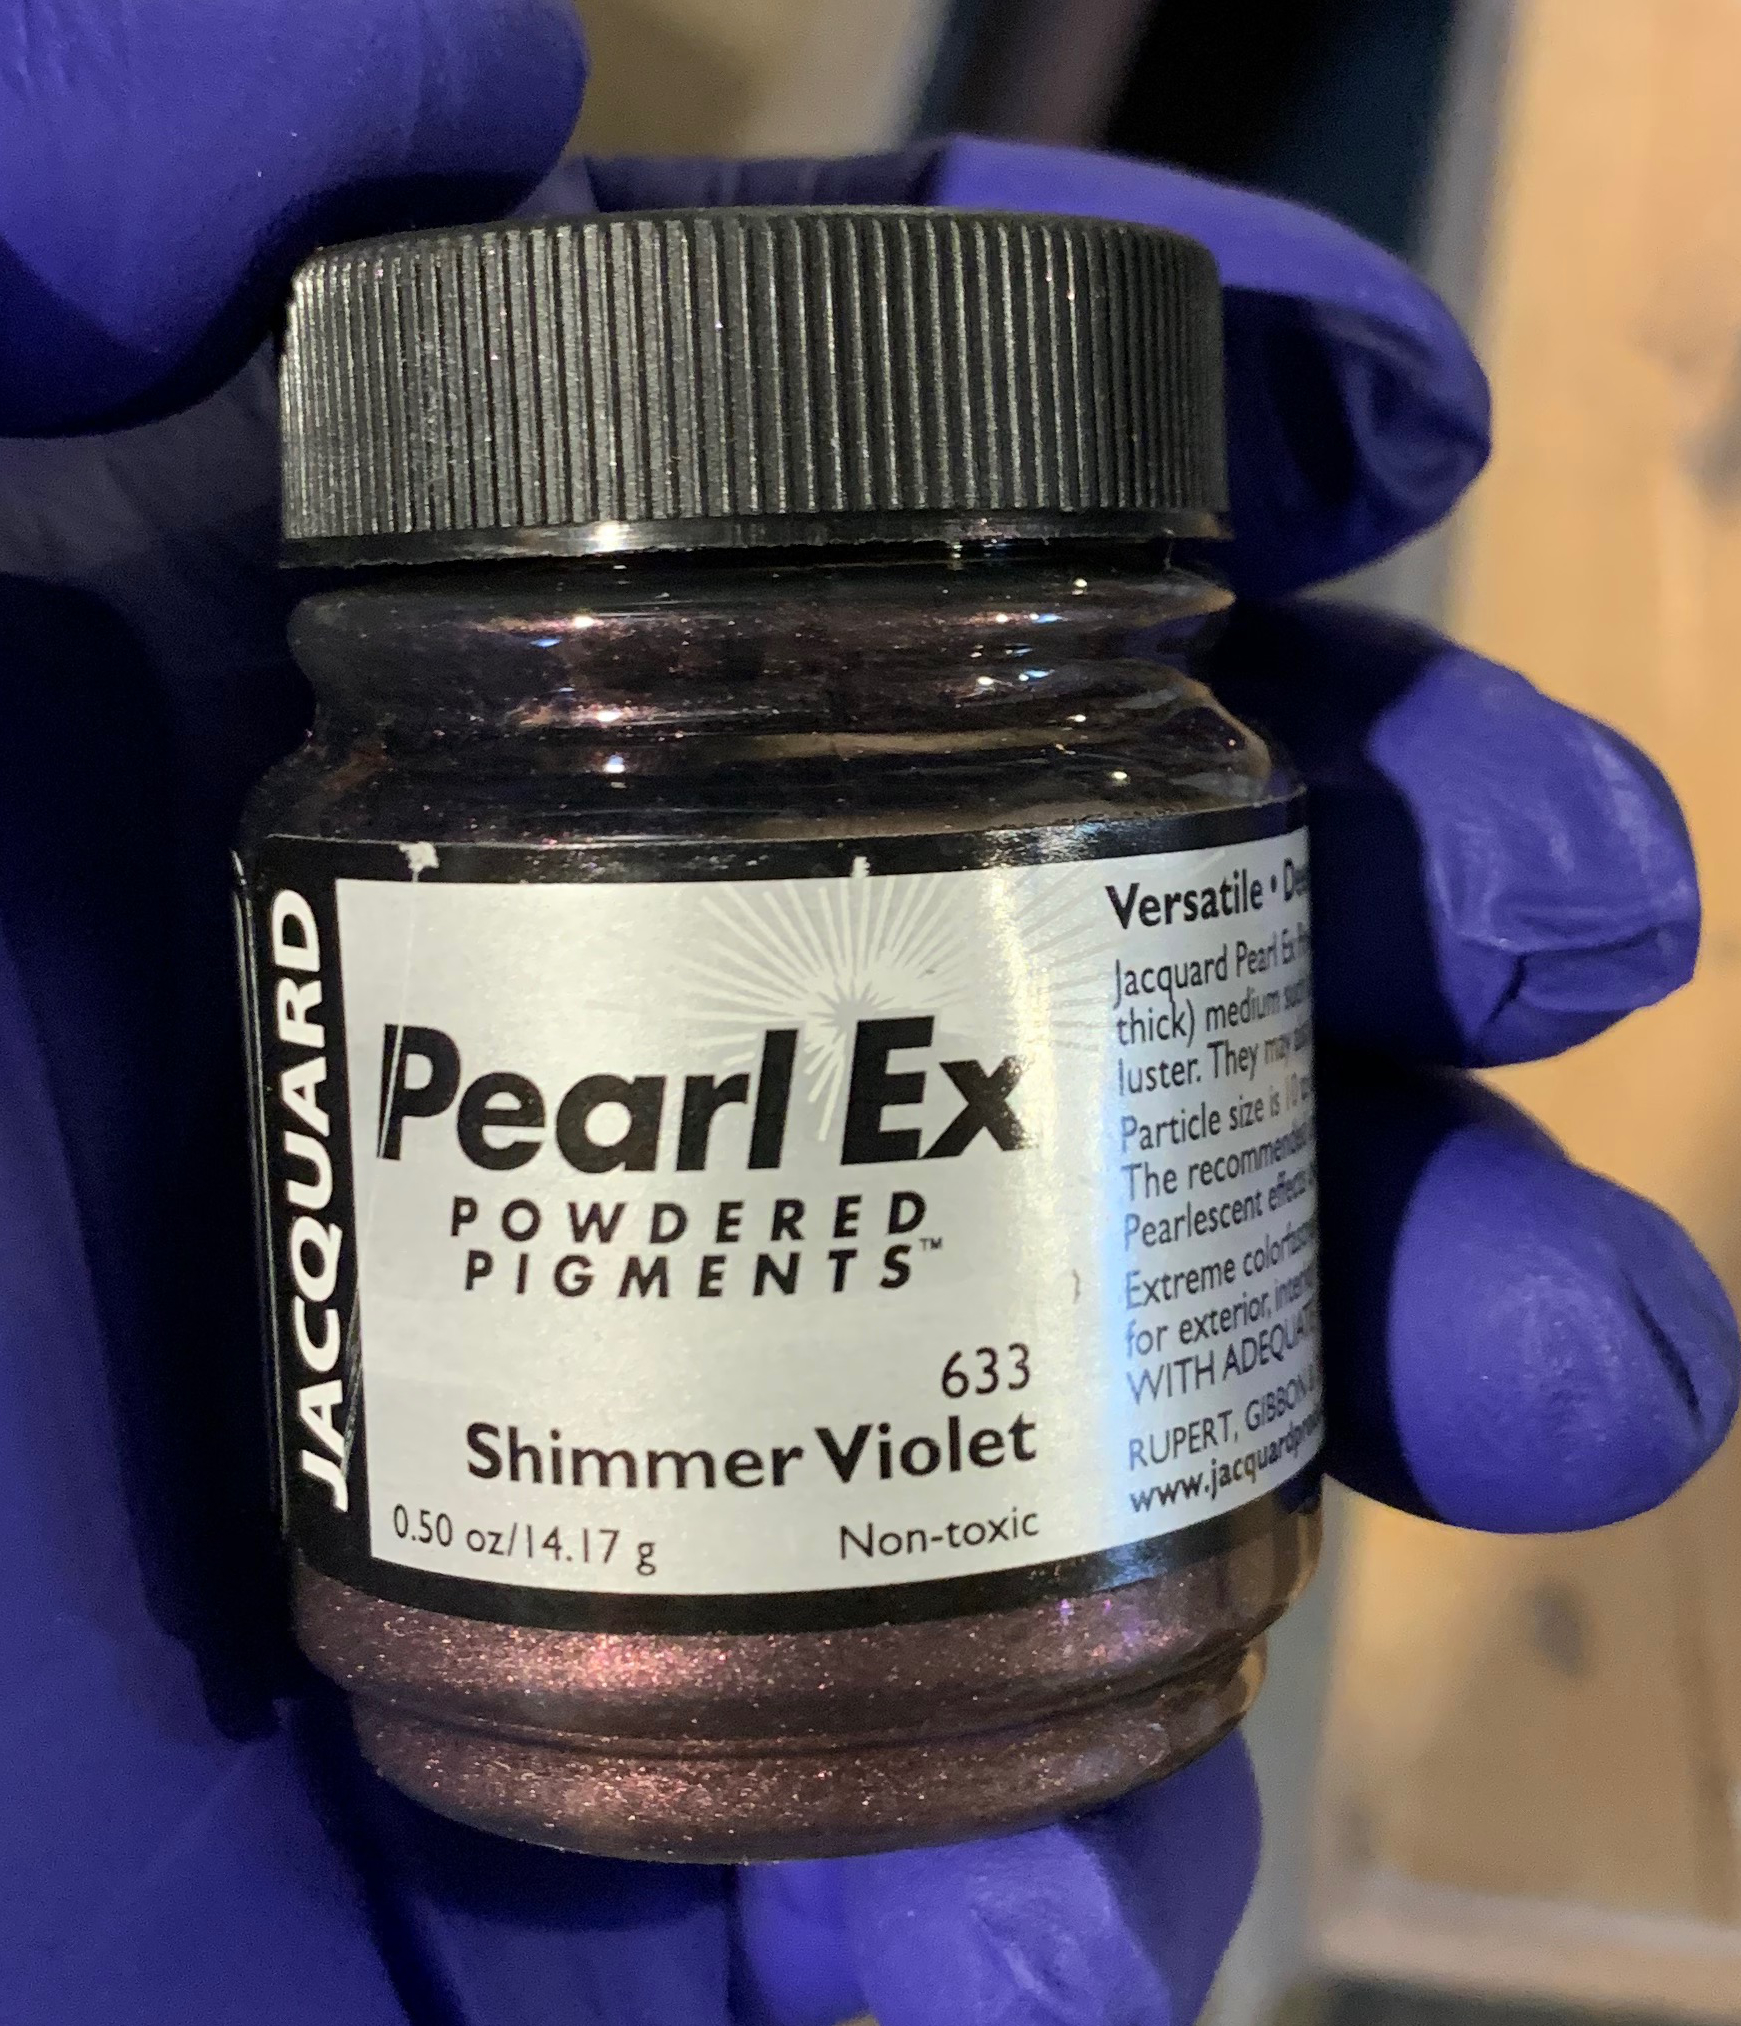
Personally I stick with additives that are specifically designed to be mixed into resin. There are a huge number of dyes, coloring powders, iridescent materials, glitter and I don’t know what all else made specifically for use in resin. Basically you can get just about any kind of look you want. Most of them aren’t super expensive, and you don’t need a lot of the stuff. Over there on the right is a remarkably bad photo of a decorative lamp I made. (It looked much, much better in real life. Seriously.) That resin had two different Pearl Ex powdered pigments in it, emerald green and gold. And despite how it looks in that picture it turned out quite nice.
I’ve seen people use all kinds of weird stuff to try to achieve various colors and special effects with resin. They’ve used things like various types of ground spices, inks, you name it. I saw one guy try ground up Cheetos. Seriously. Yeah, it didn’t work very good.
My advice is to stick with additives that are specifically designed to work with resin.
Working With The Stuff
Once you have your resin project cured, you can work with it as if it were a piece of wood. Sort of. Kinda. I’ll be going into that in more detail in the second part of this when I actually make a resin project and have you follow along.
First of all, safety.
Yes, here I go again with the safety warnings, but you only have one set of lungs, one face, one pair of eyes. Wearing respirators, face shields and other protective gear is inconvenient, yes, but it’s better than losing an eye, suffering from face lacerations, or ending up with lung disease. I put up a video of me working on the lathe recently and you can see dust and wood chips flying up and bouncing off my face shield. That face shield I’m wearing costs less than $30 and not only has it kept dust and chips out of my eyes, it’s kept me out of the ER a couple of times now when things have gone very, very wrong. The first thing I do when I even so much as walk into my shop is put on my respirator and that shield.
Attaching It To A Lathe
You can attach a resin object to a lathe just about any way you want, but one word of advice about the use of faceplates. You don’twant to run screws into just the resin itself. Resin doesn’t have the strength and resilience that wood has, and it can be brittle. If you attach the faceplate with the screws anchored only into the resin, the vibration of the lathe can cause the resin holding the screws in place to disintegrate. So avoid using screws driven into just resin. When I use a faceplate I either have wood embedded in the resin itself as part of the project that the screws can bite into, or a sacrificial wood disk embedded in the resin that I can later cut off during the machining process.
It is going to be a mess. A serious mess
Resin is plastic. It might be soft enough to cut with wood working tools, but that is where the similarities end. You aren’t going to end up with nice shavings. You are going to have long strings of half melted plastic coming off your tool that will stick to everything.
See what I mean? And that up there isn’t even all that bad. I took those photos when I’d just started rounding off a project. The really serious mess didn’t start until after I took those pictures.
The stuff will get everywhere, on your tools, on you, on your clothes, all over your shop, it will wind around your lathe…
Wear a hat. Seriously. Trying to get that stuff out of your hair is not fun. I also wear a high necked woodturner’s smock that fits tight around my neck to keep the stuff from going down inside of my clothes. You’re probably going to have to stop frequently to clean the stuff off of your face shield so you can see and off your lathe. The long strings will get twisted around your project so you’ll have to stop to clean that off.
Tools
You don’t need any special tools to work with resin. Just about all your normal woodturning tools, whether steel or carbide, will work with resin. Just be careful until you get used to the different ‘feel’ of working with the stuff. Your tools need to be sharp to avoid chipping.
Resin can also be brittle. Be cautious when you work with the stuff. Do not be overly aggressive. Make only light, shallow cuts at least until you get a feel for how the stuff behaves. Different resins have different machining characteristics. Some are more brittle and chip easily, others are more malleable.
Sanding
Sanding resin is a pain in the ass. Remember we’re working with plastic here, not wood. Plastic melts at relatively low temperatures and sanding causes a lot of friction which generates heat. If you try to sand resin as aggressively as you’d sand wood you’re going to end up with the plastic melting and clogging up your sandpaper. Keep the lathe speed down and don’t try to rush things.
And wear a N95 rated respirator and use some kind of dust collection and air filtration system. You do not want to inhale the dust from this stuff!
I’ve seen guys resort to wet sanding in order to avoid problems with the plastic clogging up their abrasives. That will work of course, but dear lord it’s a mess. I used to do auto body work a long, long time ago and I wet sanded a lot of cars and it is something I would rather avoid. If you use a light touch, relatively low lathe speed and are relatively cautious, you should be able to avoid having to resort to wet sanding. But if you need to get into the higher grits like up beyond 600 grit sandpaper, you might have to. If you do try wet sanding, get that cheap plastic sheeting painters use for drop clothes and cover everything within about 10 feet of your lathe, including your lathe itself. Wear a rain coat, face shield, etc. It gets seriously messy sometimes. You’ll be amazed at how far a spinning object can fling water droplets.
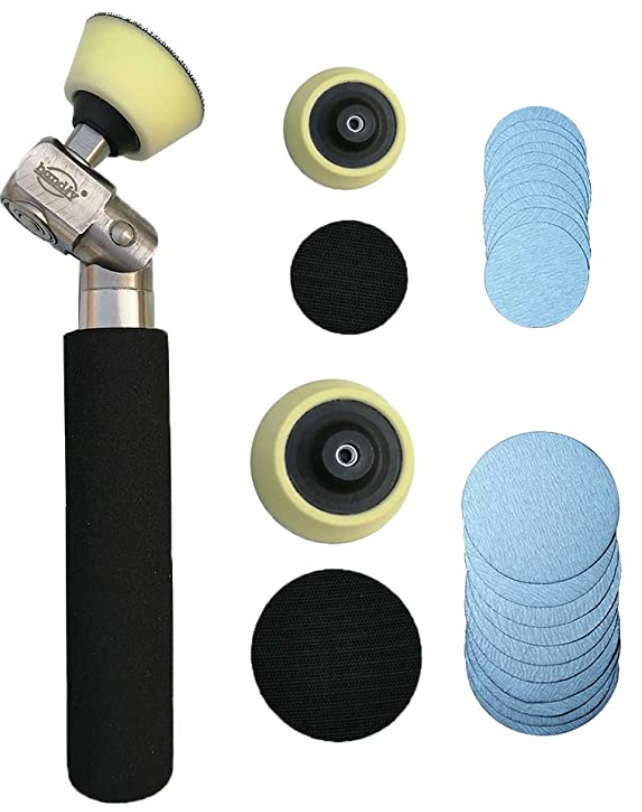
You might want to consider getting a tool like the one over there on the right. That’s a hand held bowl sander with a variety of different padded heads. 2 or 3 inch sanding discs attach by velcro to the head. The pad is attached to a free spinning bearing. I’ve got one of those and I’ve found it well worth the $50 it cost me. When held against an object spinning on the lathe, the head of the tool holding the sandpaper also spins around. You get an effect similar to a powered orbital sander which makes marks left by the sanding process less noticeable.
Sanding is a tedious process. The first step is to use a relatively coarse abrasive to remove any tool marks left from the initial shaping. After that first step, what you’re trying to remove aren’t took marks, but scratches left from the previous sanding. So if I sand with 80 grit first, sanding with 120 removes the marks left by the 80 grit. Then sanding with 220 removes the scratches left by the 120. Sanding with 400 removes the marks from the 220… You get the idea. Sanding is always going to leave scratches. Always. The idea is to end up using a grit that is so fine that the scratches are invisible to the human eye and to us it appears to be completely smooth.
Now with wood I almost never sand beyond 4o0 or 600 grit. With resin I generally take it to even higher grits. That’s when you might be tempted to try wet sanding because otherwise that fine sandpaper clogs up fast.
I’ve used this variety with good results on both wood and resin projects. But there are dozens on the market that work just as well.
If I want a really smooth, high gloss surface, the last thing I’ll do is use a sanding paste. This is a very, very fine abrasive suspended in a carrier of some sort similar to the texture of car polish. Well, basically that’s what it is. When I was doing autobody work the last step we did was use polishes that were actually extremely fine abrasives suspended in a paste like carrier, along with a random orbital buffer to apply it.
I do the same with lathe projects. I’ve been using Pita’s for a while now with good results but there are a lot of others that work just as well. I just rub it in with a bit of paper towel, and then buff it up with a clean, lint free rag.
Finishes
You’re going to want to put some kind of final finish on to bring the project up to a high gloss and to protect any exposed wood. I’ve used straight carnauba wax, but that gets a bit tricky for me at least. I have to be very, very careful or it gets kind of ‘streaky’ looking on resin. I’ve had good results with good old home made “OB shine juice” made with shellac, linseed oil and alcohol. Personally I’d avoid lacquer because lacquer thinner can react badly with some types of plastic.
Before you put on a final finish, though, you should apply some kind of sealer to any exposed wood. Unsealed wood can absorb whatever finish apply over time and cause splotching and dull spots.
Embedding Stuff in Resin
I stick bits of wood into resin to make stuff, and that’s probably what you want to do also or you wouldn’t be reading this. You can embed anything in resin, of course, but I’m going to stick with wood because wood and resin seem to get along with each other pretty well.
I haven’t had any problems with any of the various species of wood that I’ve embedded in resin. At least none that I’ve noticed. But all of the projects I’ve done so far have used wood that is already on the dry side, at 10% moisture or less according to my meter. I don’t know what would happen if you took a piece of wet wood straight off a tree and encased it in resin. If you want to try that you’re on your own.
(I get these weird ideas I’d like to experiment with. Like embedding a Big Mac in resin just to see what would happen to it over time.)
If you go scrounging around YouTube you’ll find people embedding all kinds of weird sh*t in resin and chucking it up on a lathe, including golf balls, roofing nails (seriously, roofing nails), various bits of food, and just about anything else they had laying around, with varying degrees of success and quite a few utterly spectacular failures and quite a few personal injuries. If you wish to continue this tradition of insanity feel free to do so, but you’re on your own there.
Dealing With Failure
Dear lord this one was ugly! The end result was so offensive that it sort of ‘accidentally’ got knocked into the “to burn” box in the shop
Stuff goes wrong. It just does. Things are going to go bad and you’re going to end up with a project that is an utter failure or, as occasionally happens to me, so ugly you sneak it out into the firepit in the backyard in the middle of the night before anyone else can see it. That’s what happened to the project over there on the left. Dear lord, the color that thing turned out to be… (Shudder) That was supposed to be a lamp but just about everything was just – just nasty when it was done.
Sometimes things just don’t work. You figure out what went wrong, correct the problems and move on. I’m a pretty good furniture maker and my house has tables, chairs, bookcases, etc. that I cranked out myself and turned out pretty darn nice. But what people don’t see is all of the mistakes, screwups, disasters and other things that happened while I was in the process of acquiring the knowledge and skills I needed. Same is true with woodturning. Things are going to go wrong.
Don’t be afraid to challenge yourself. If you don’t stretch yourself, if you don’t experiment, if you don’t try to acquire new skills, well life would be pretty darn dull, wouldn’t it? Don’t be afraid to screw up. We all do it. That’s how we learn and grow.
And if you do screw up spectacularly, well, bring the remains over to my place and we’ll consign it to the firepit in the backyard and have a coffee or a beer and I’ll tell you about all of the massive screwups I’ve had.
Let’s Wrap This Up
I’ve been babbling along here far too long already so let’s finish this part up. I hope this has been helpful. Feel free to ask questions and I’ll do my best to answer them.
They say that the best way to learn how to do something is to actually do it. So that’s what I’m going to do in the next part of this. I’m going to make a decorative lamp from resin and wood. I’ll cover the whole process from the initial design phase right through to the finished product.
I’m not sure exactly when I’ll get that posted here because I don’t even have a basic design in mind yet. Anyway, stay tuned…
The late summer is always a busy time for us because it seems that all of the vegetables we’ve been nursing along since early spring all come ripe at the same time and all have to be dealt with right now. We probably have enough wax beans and green beans to last us two years, and enough various tomato sauces to last us almost that long. On one Saturday alone MrsGF and I processed more than 40 pounds of tomatoes to turn them into tomato soup. Plus we did salsa, chili sauce and spaghetti sauce. And that was from just three plants.
Food made with our home grown vegetables always seems to taste better. We don’t buy any canned tomato products any more because the flavors of the grocery store stuff seems flat, insipid and often just plain nasty when compared to what we make ourselves. And often way, way too salty and way too sweet.
But the beans have been done for weeks now. We probably could have gotten another couple of weeks of production out of them but we were so sick of beans we just pulled them out. Tomatoes are pretty much at an end now as well. But the peppers are still going strong and will probably keep going until we get frost. We put in a variety of sweet bell and banana type peppers. We thought we’d have enough to make pickled peppers, but almost all of them have been going into various sauces.
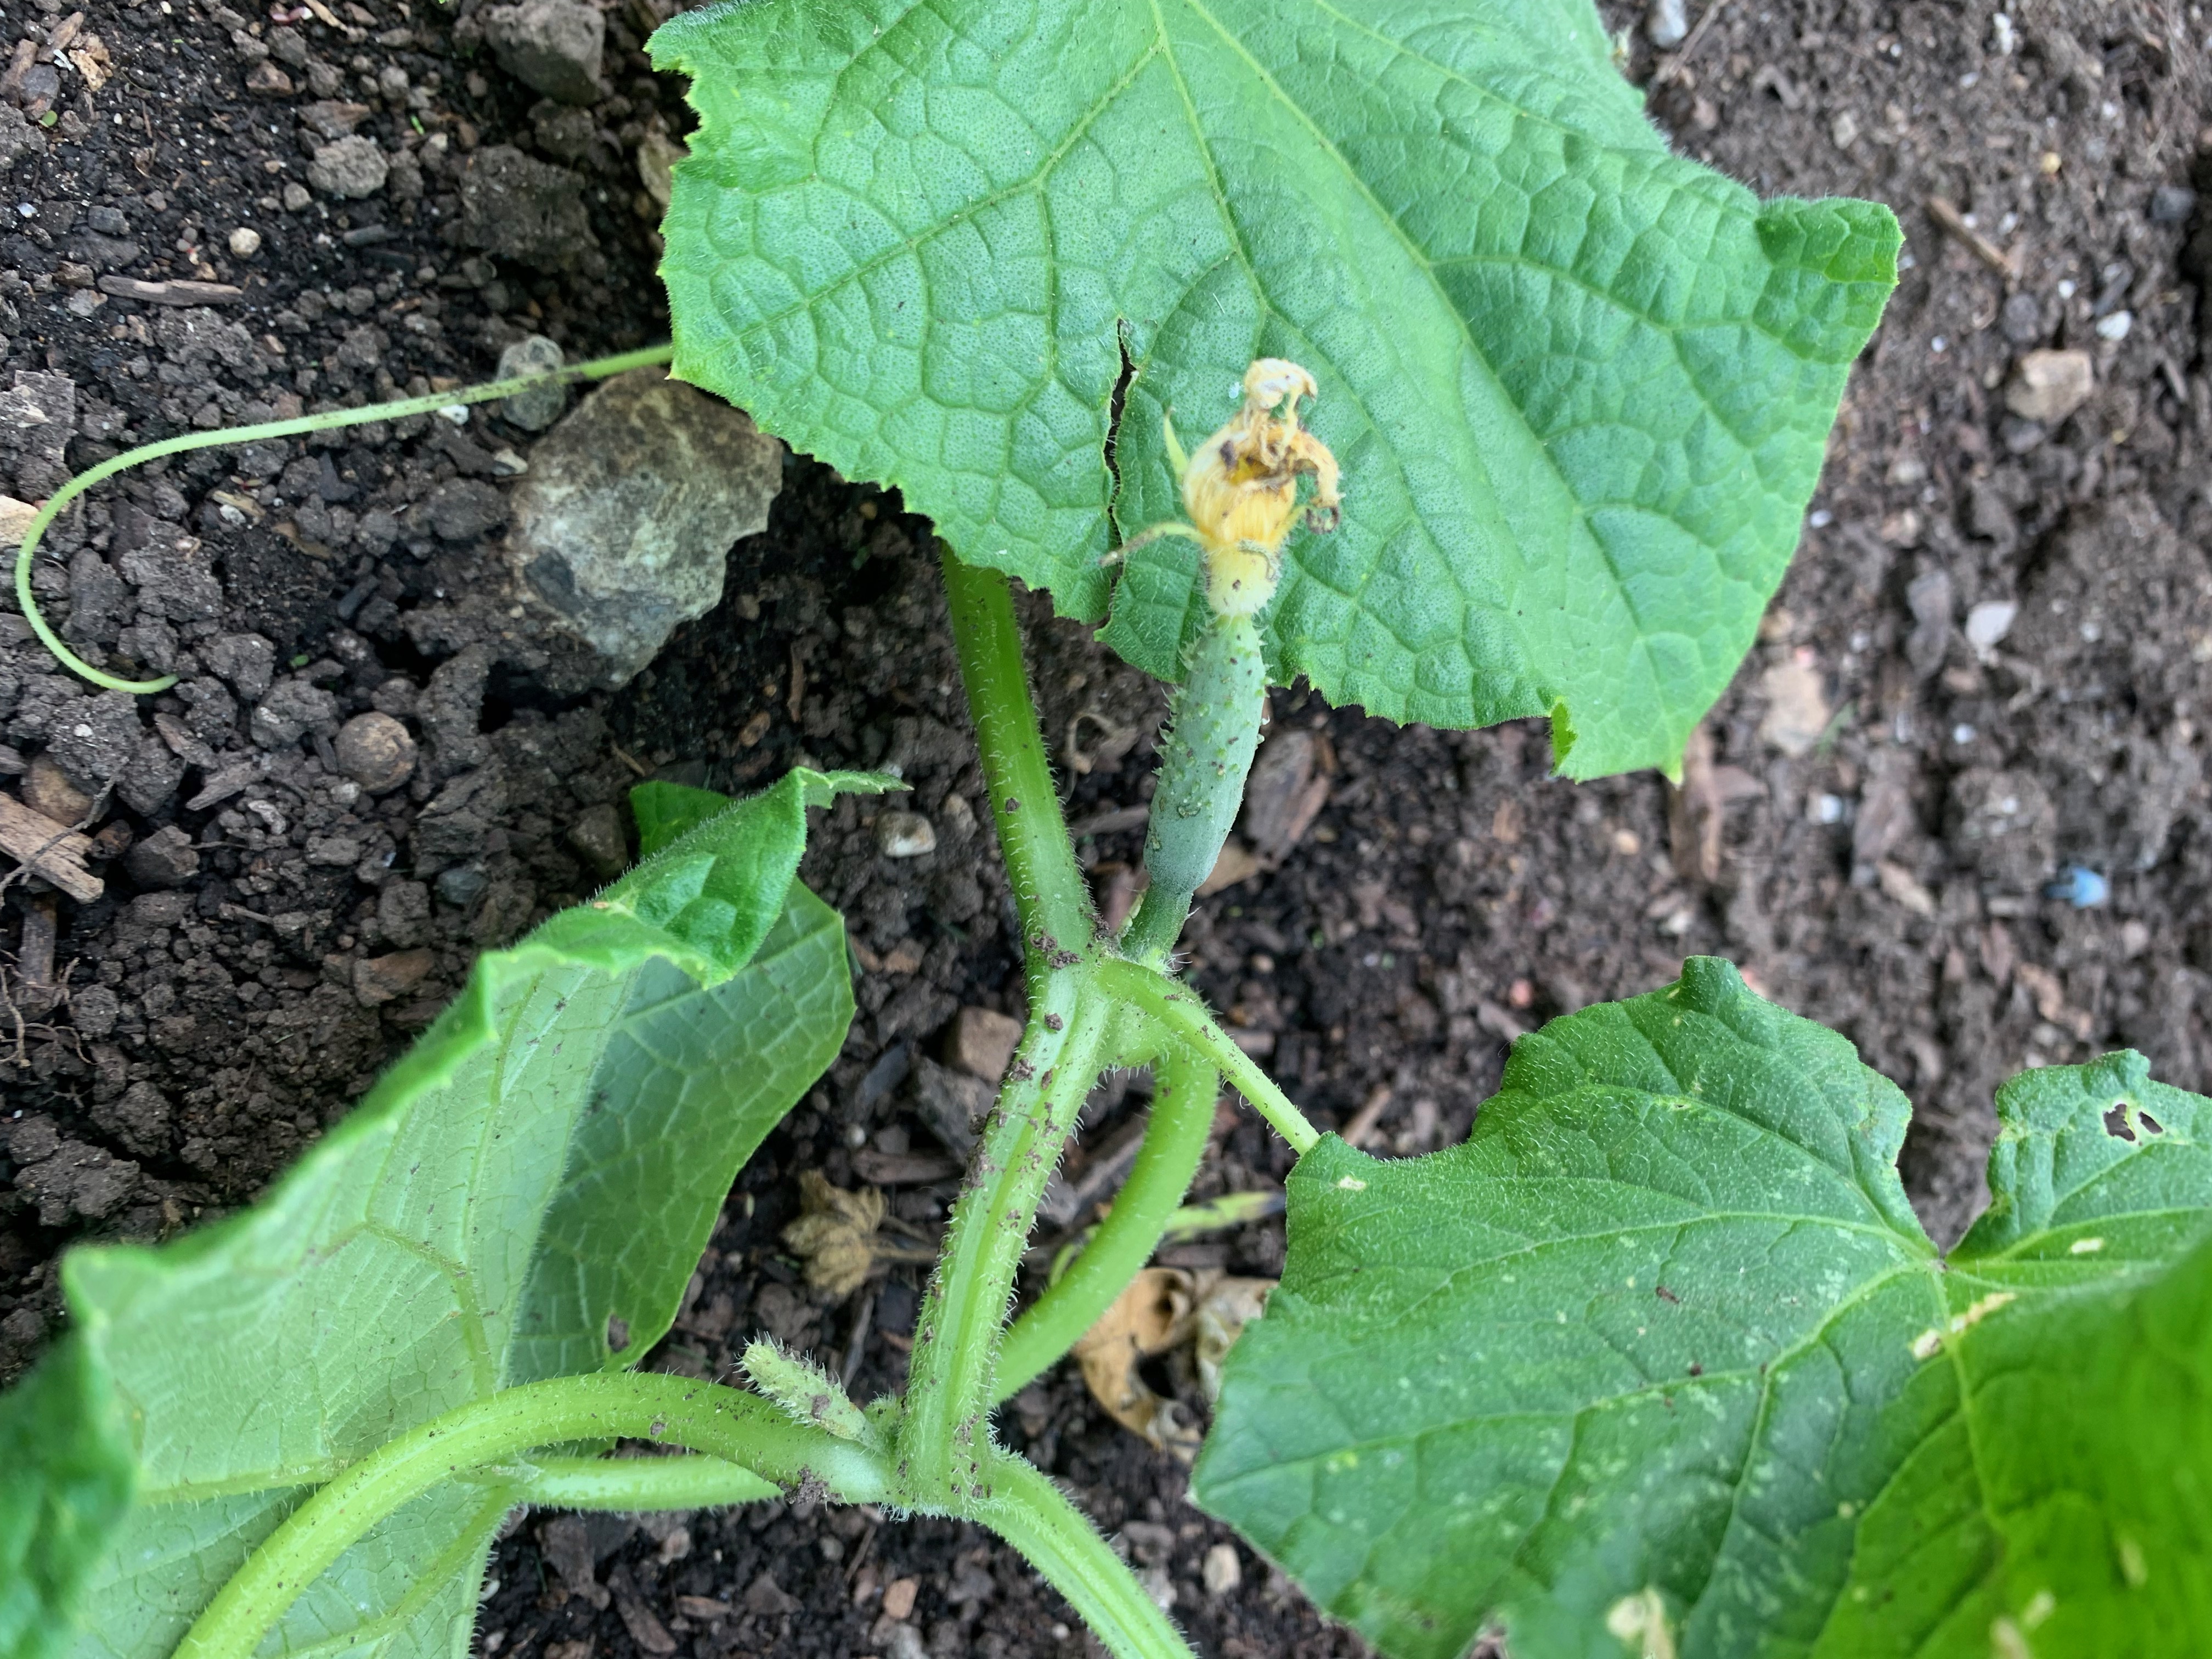
We were only going to put in 3 cucumber plants because I’m the only one who likes to eat them fresh. But somehow we ended up with 6 plants and they went a bit goofy on us and took over the whole garden behind the garage. MrsGF made four different kinds of pickles plus some relish, enough to last us more than a year, and now we’re giving the things away. They’ve started to slow down but they’re still blossoming. I hate to pull out and compost plants that are still healthy and producing but I’m thinking of just pulling them out this week and being done with them.
It’s hard to see in the photo but there are also a half dozen tomato and pepper “volunteer” plants hidden in that mess of cukes somewhere and now those are bearing fruit.
MrsGF and I both love squash but our attempts to grow the stuff haven’t been all that successful. Last year we had powdery mildew that pretty much wiped them out. This year, though, wow… We planted in a more sunny location, worked in hundreds of pounds of compost before we planted, made sure they were well watered during the drought, and it paid off beautifully. The plants are starting to come to the end of their lifetime now, and we’re seeing dozens of massive butternut squash under the leaves. And I mean massive squash. Some of these things are a foot and a half long, and they all look absolutely beautiful.
We picked one yesterday and we’re going to make that one this week and see what it tastes like. Hopefully they’ll taste as good as they look. We’ll probably end up cutting them up into cubes, roasting them and freezing them for use later.
All the sunflowers got knocked down when we had a storm roll through here, but the other flowers and decorative plants made it through the summer fairly well. We’ve had no shortage of flowers out in the gardens this year.
It was a struggle to keep some of this stuff alive during the drought. We were careful to keep the vegetable gardens well watered but we occasionally neglected the ornamental plants. Still most managed to survive and even grow reasonably well until the rains finally came in August.
We have three roses out there in the gardens now and all of them came through the drought and even looked pretty good. We had something, we aren’t sure what, trying to eat the climbing rose, and MrsGF finally resorted to dusting it with something and that seemed to take of that problem. She only had to treat it once.
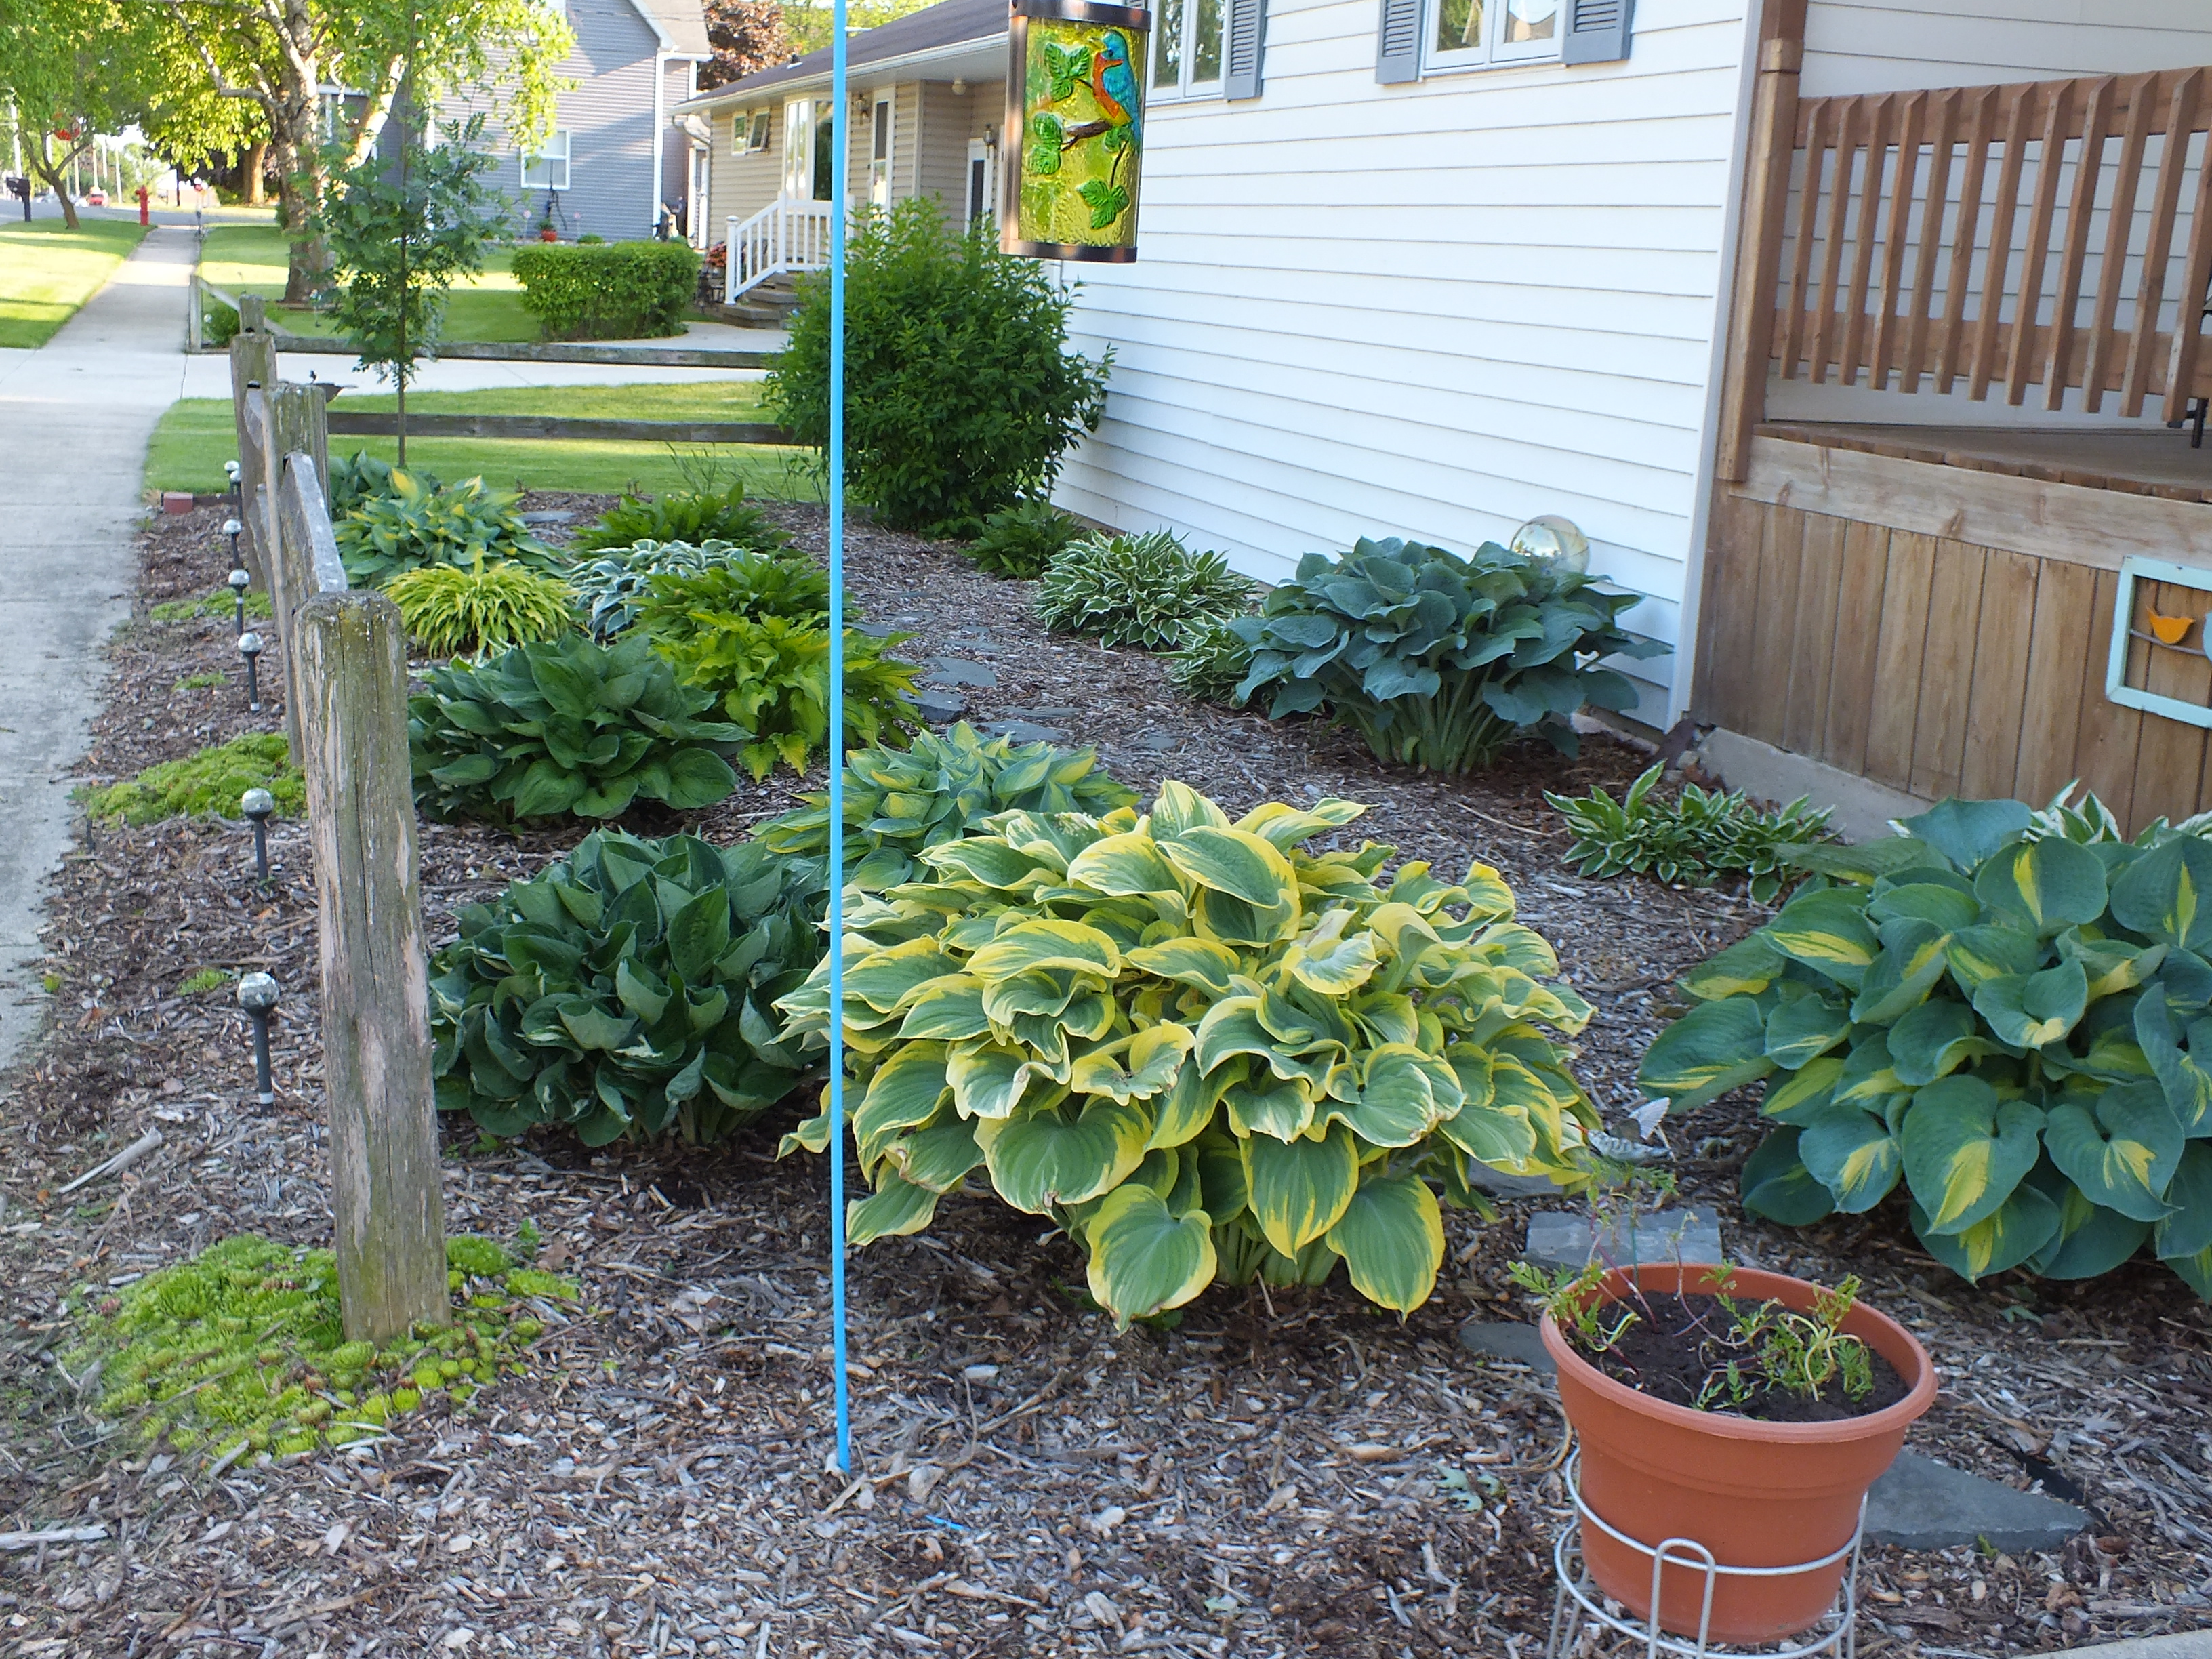
The hot, dry weather was not kind to the hostas out front, though. Some of those poor guys are looking pretty rough.
This poor guy looks pretty rough but it will survive just fine.
The giant large leafed varieties did a lot better than the more traditional looking narrow leafed types. The variegated varieties seem to have fared worse than the solid colored ones. This time of year the hostas start to look pretty rough anyway. They’ve all flowered now and are going to seed so there is no need for them to keep putting energy into the foliage, I suppose. They’re getting ready to go dormant for winter anyway.
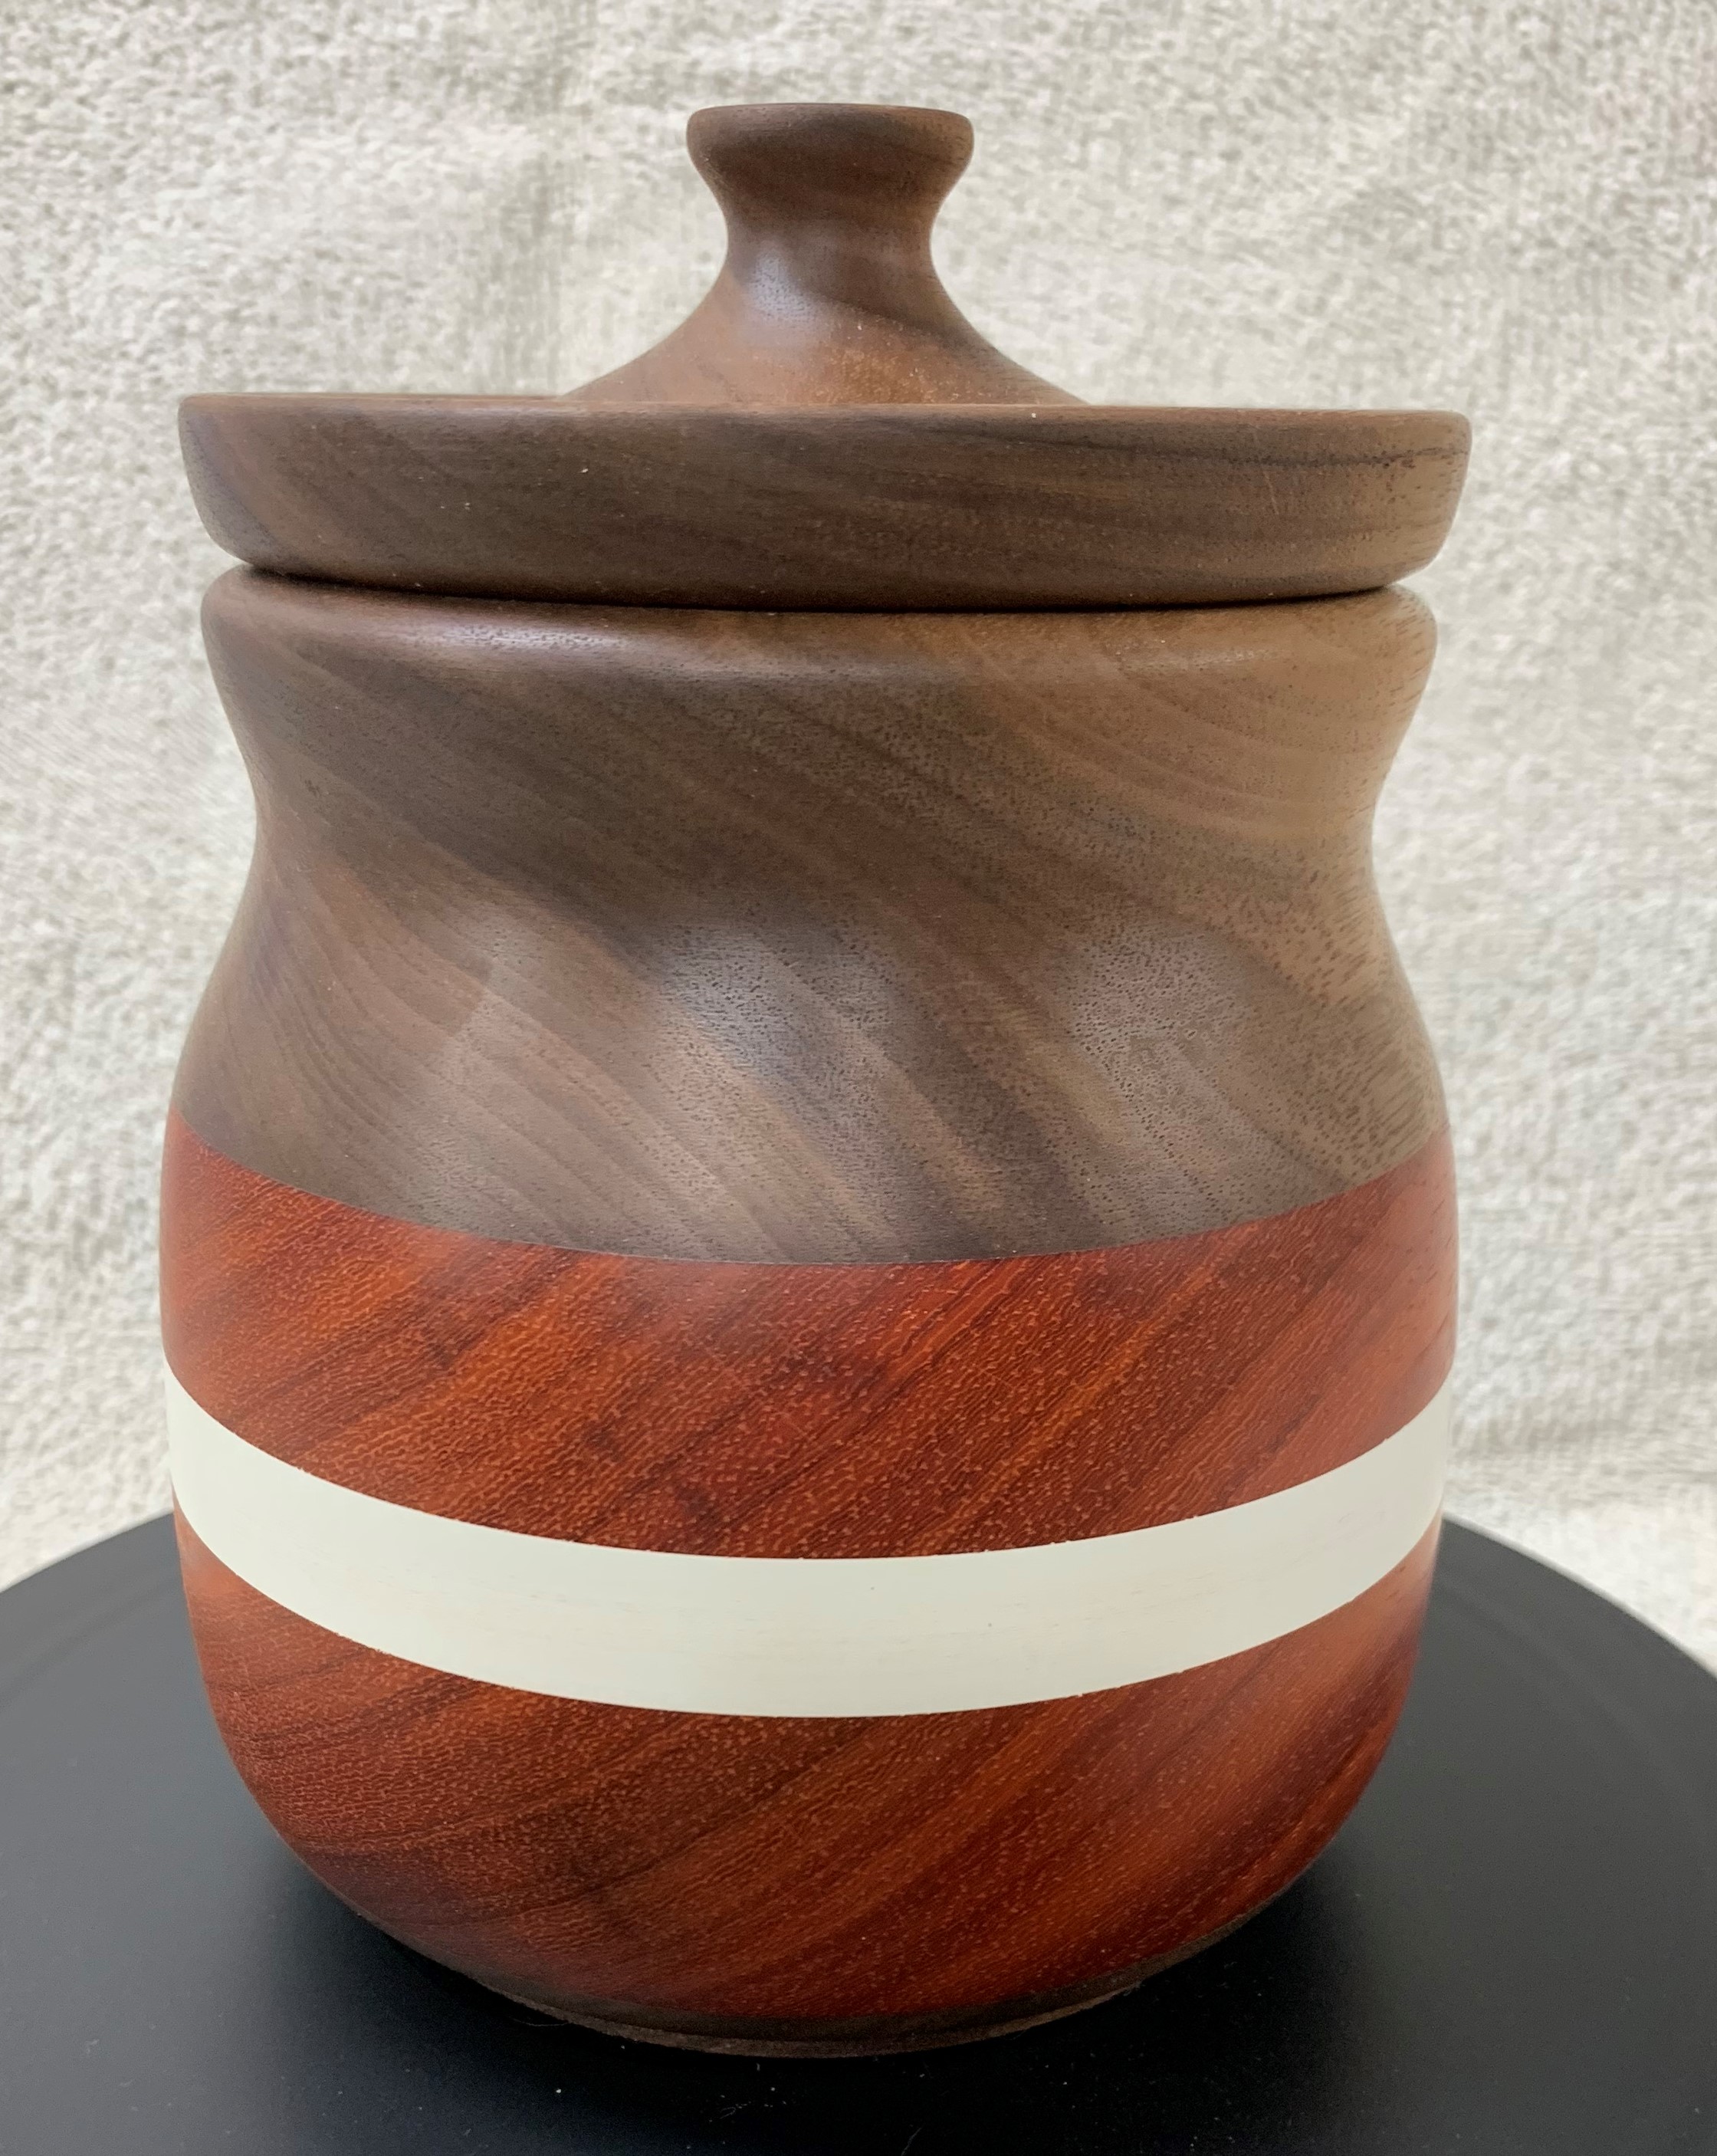
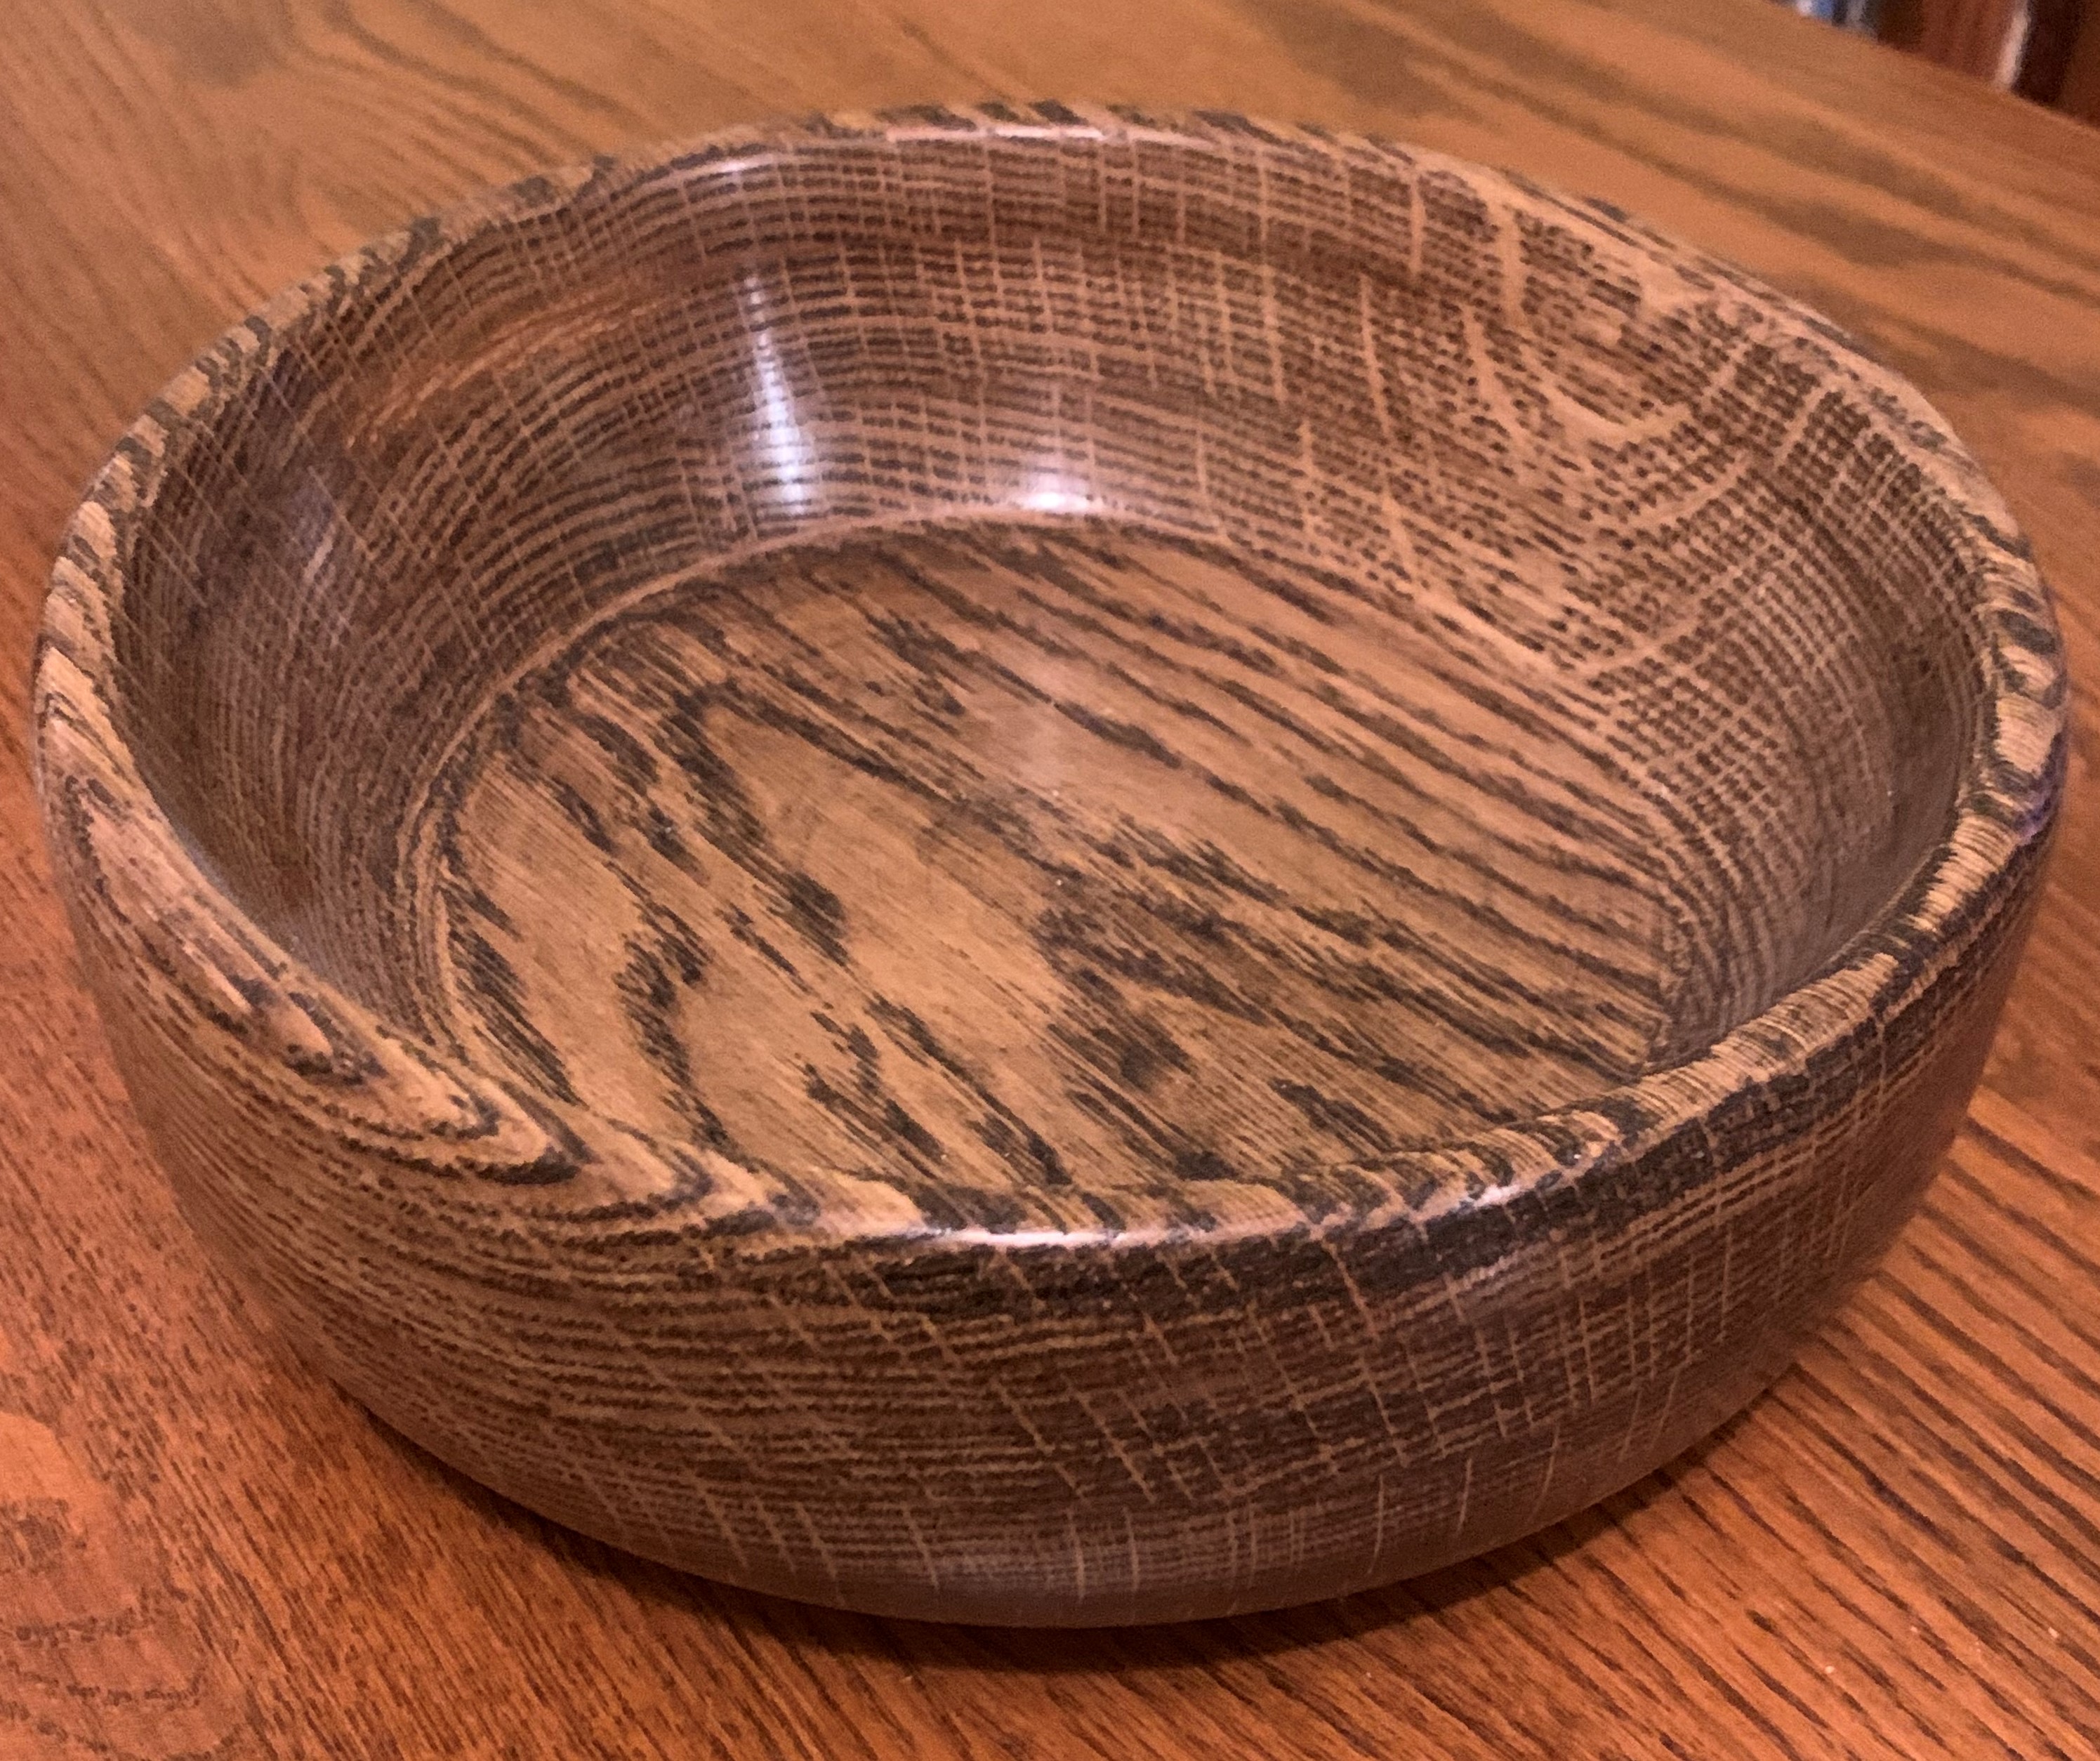
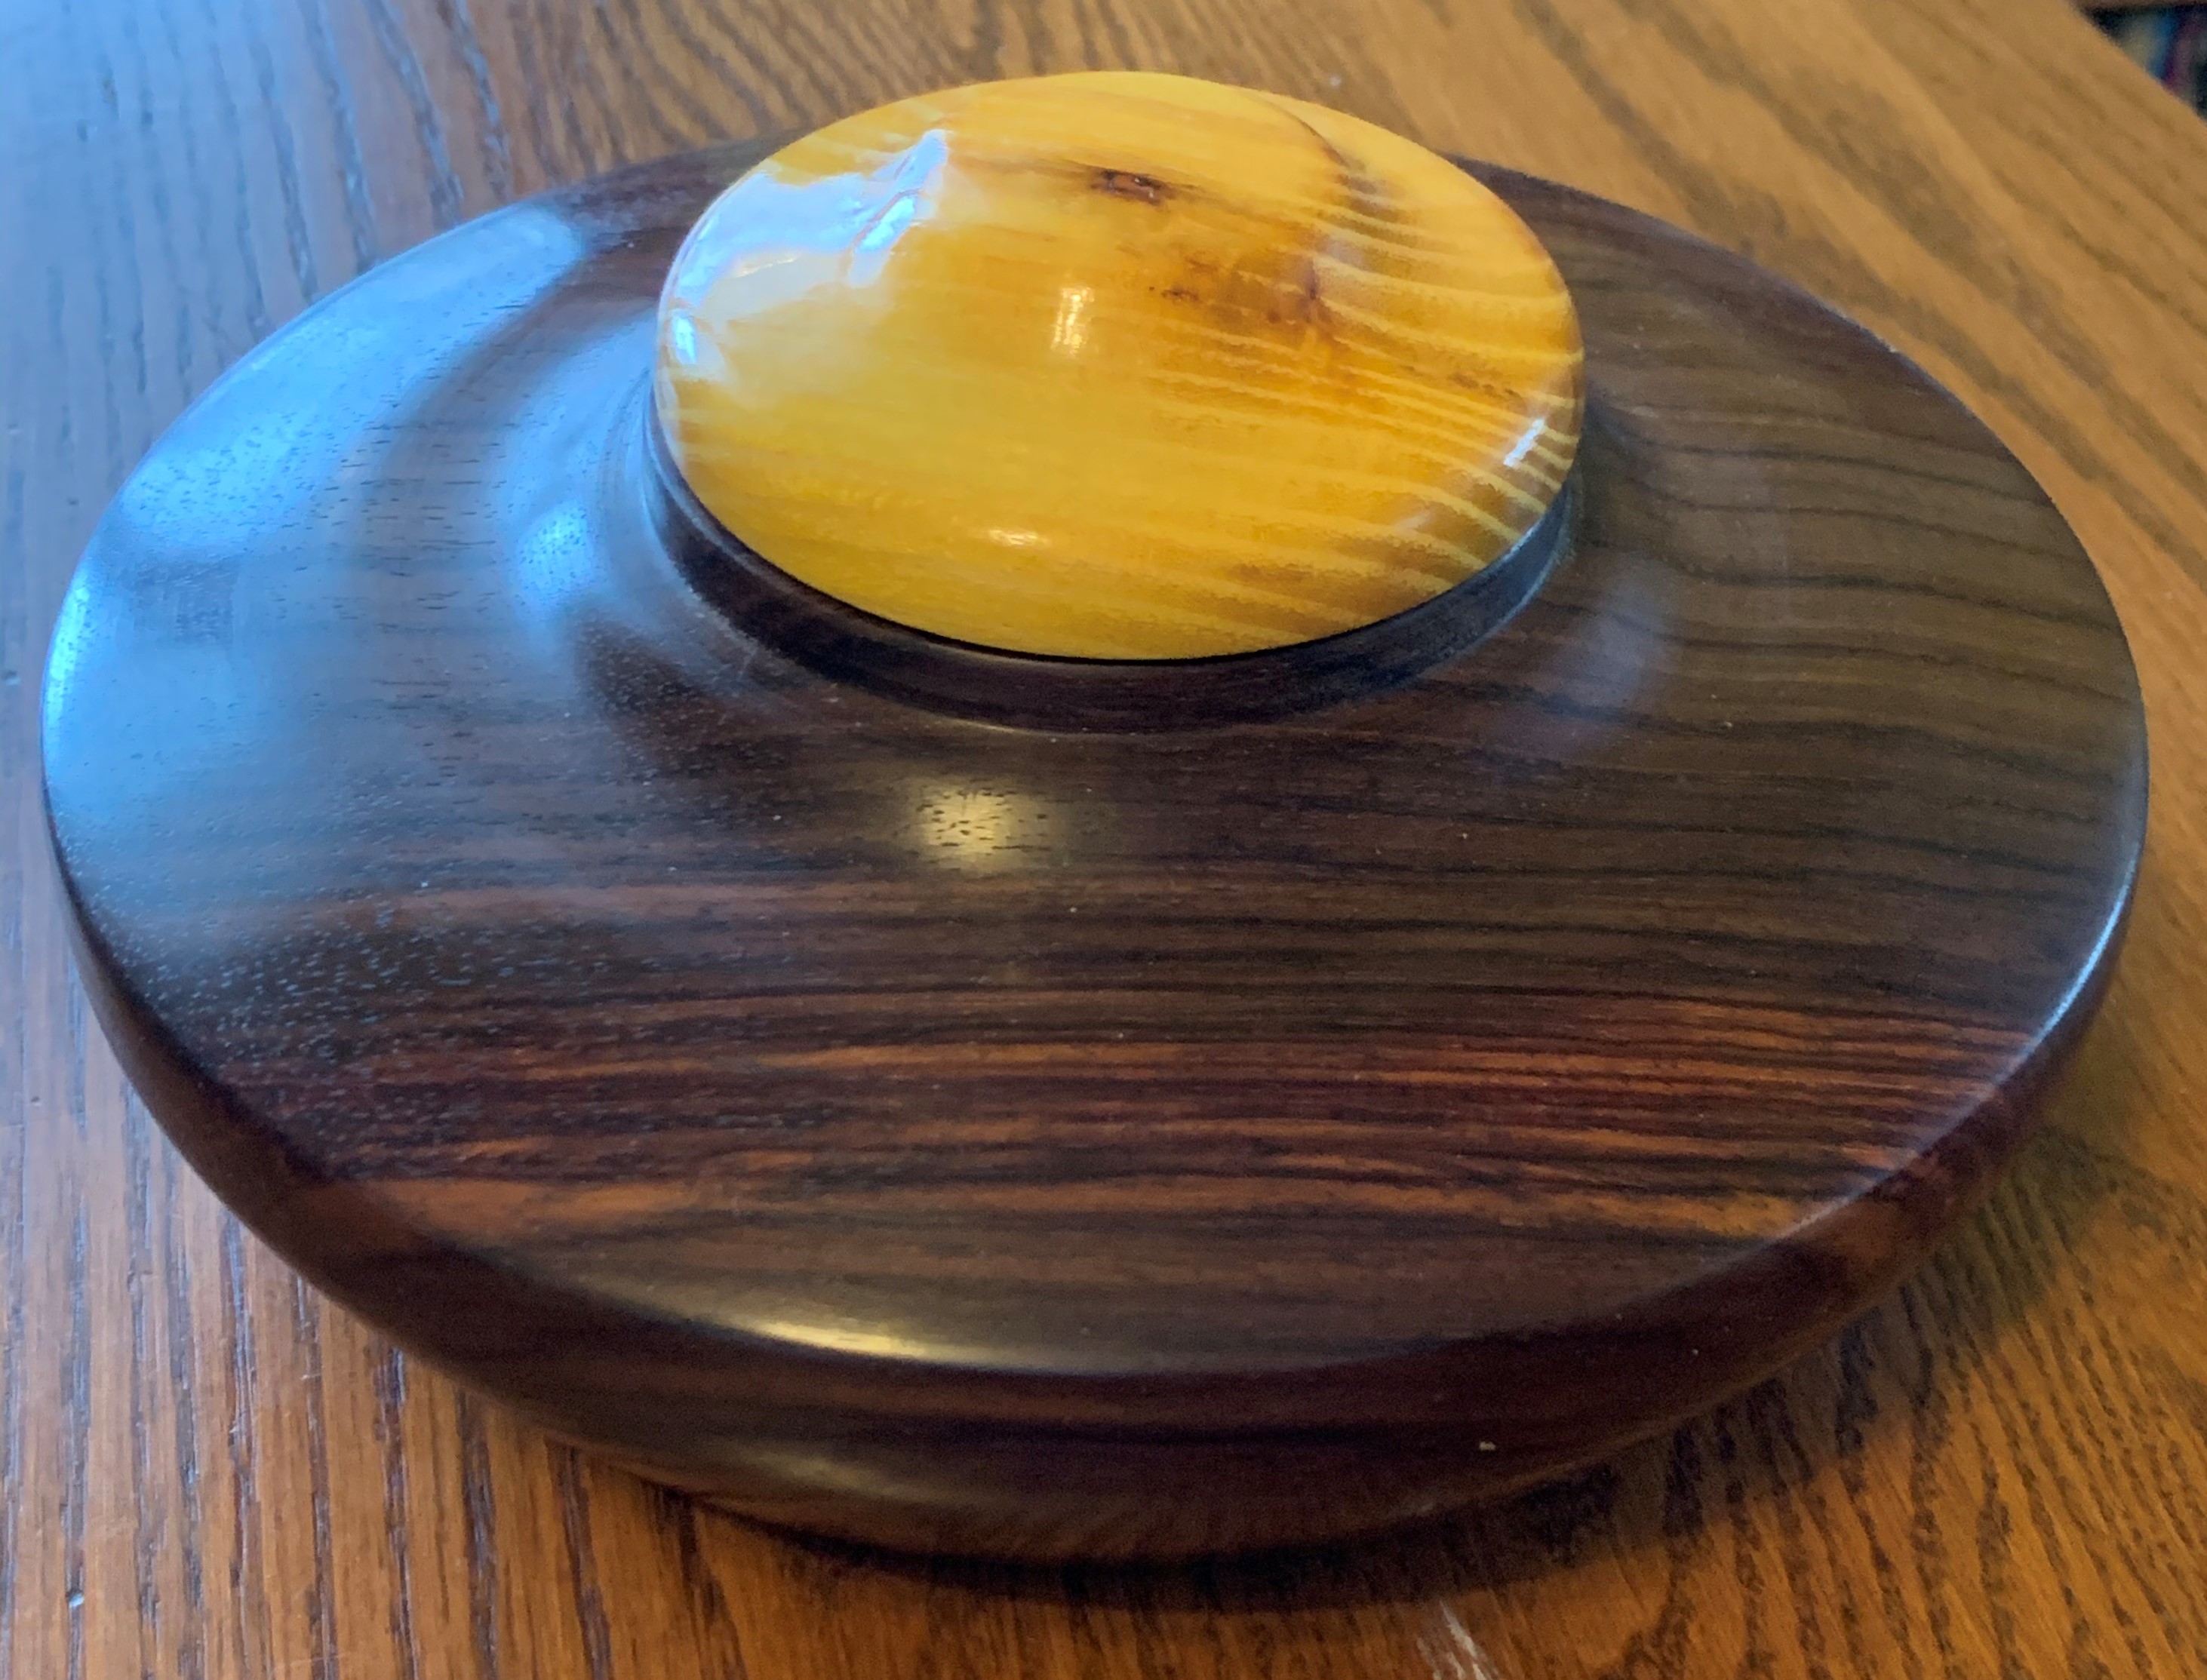
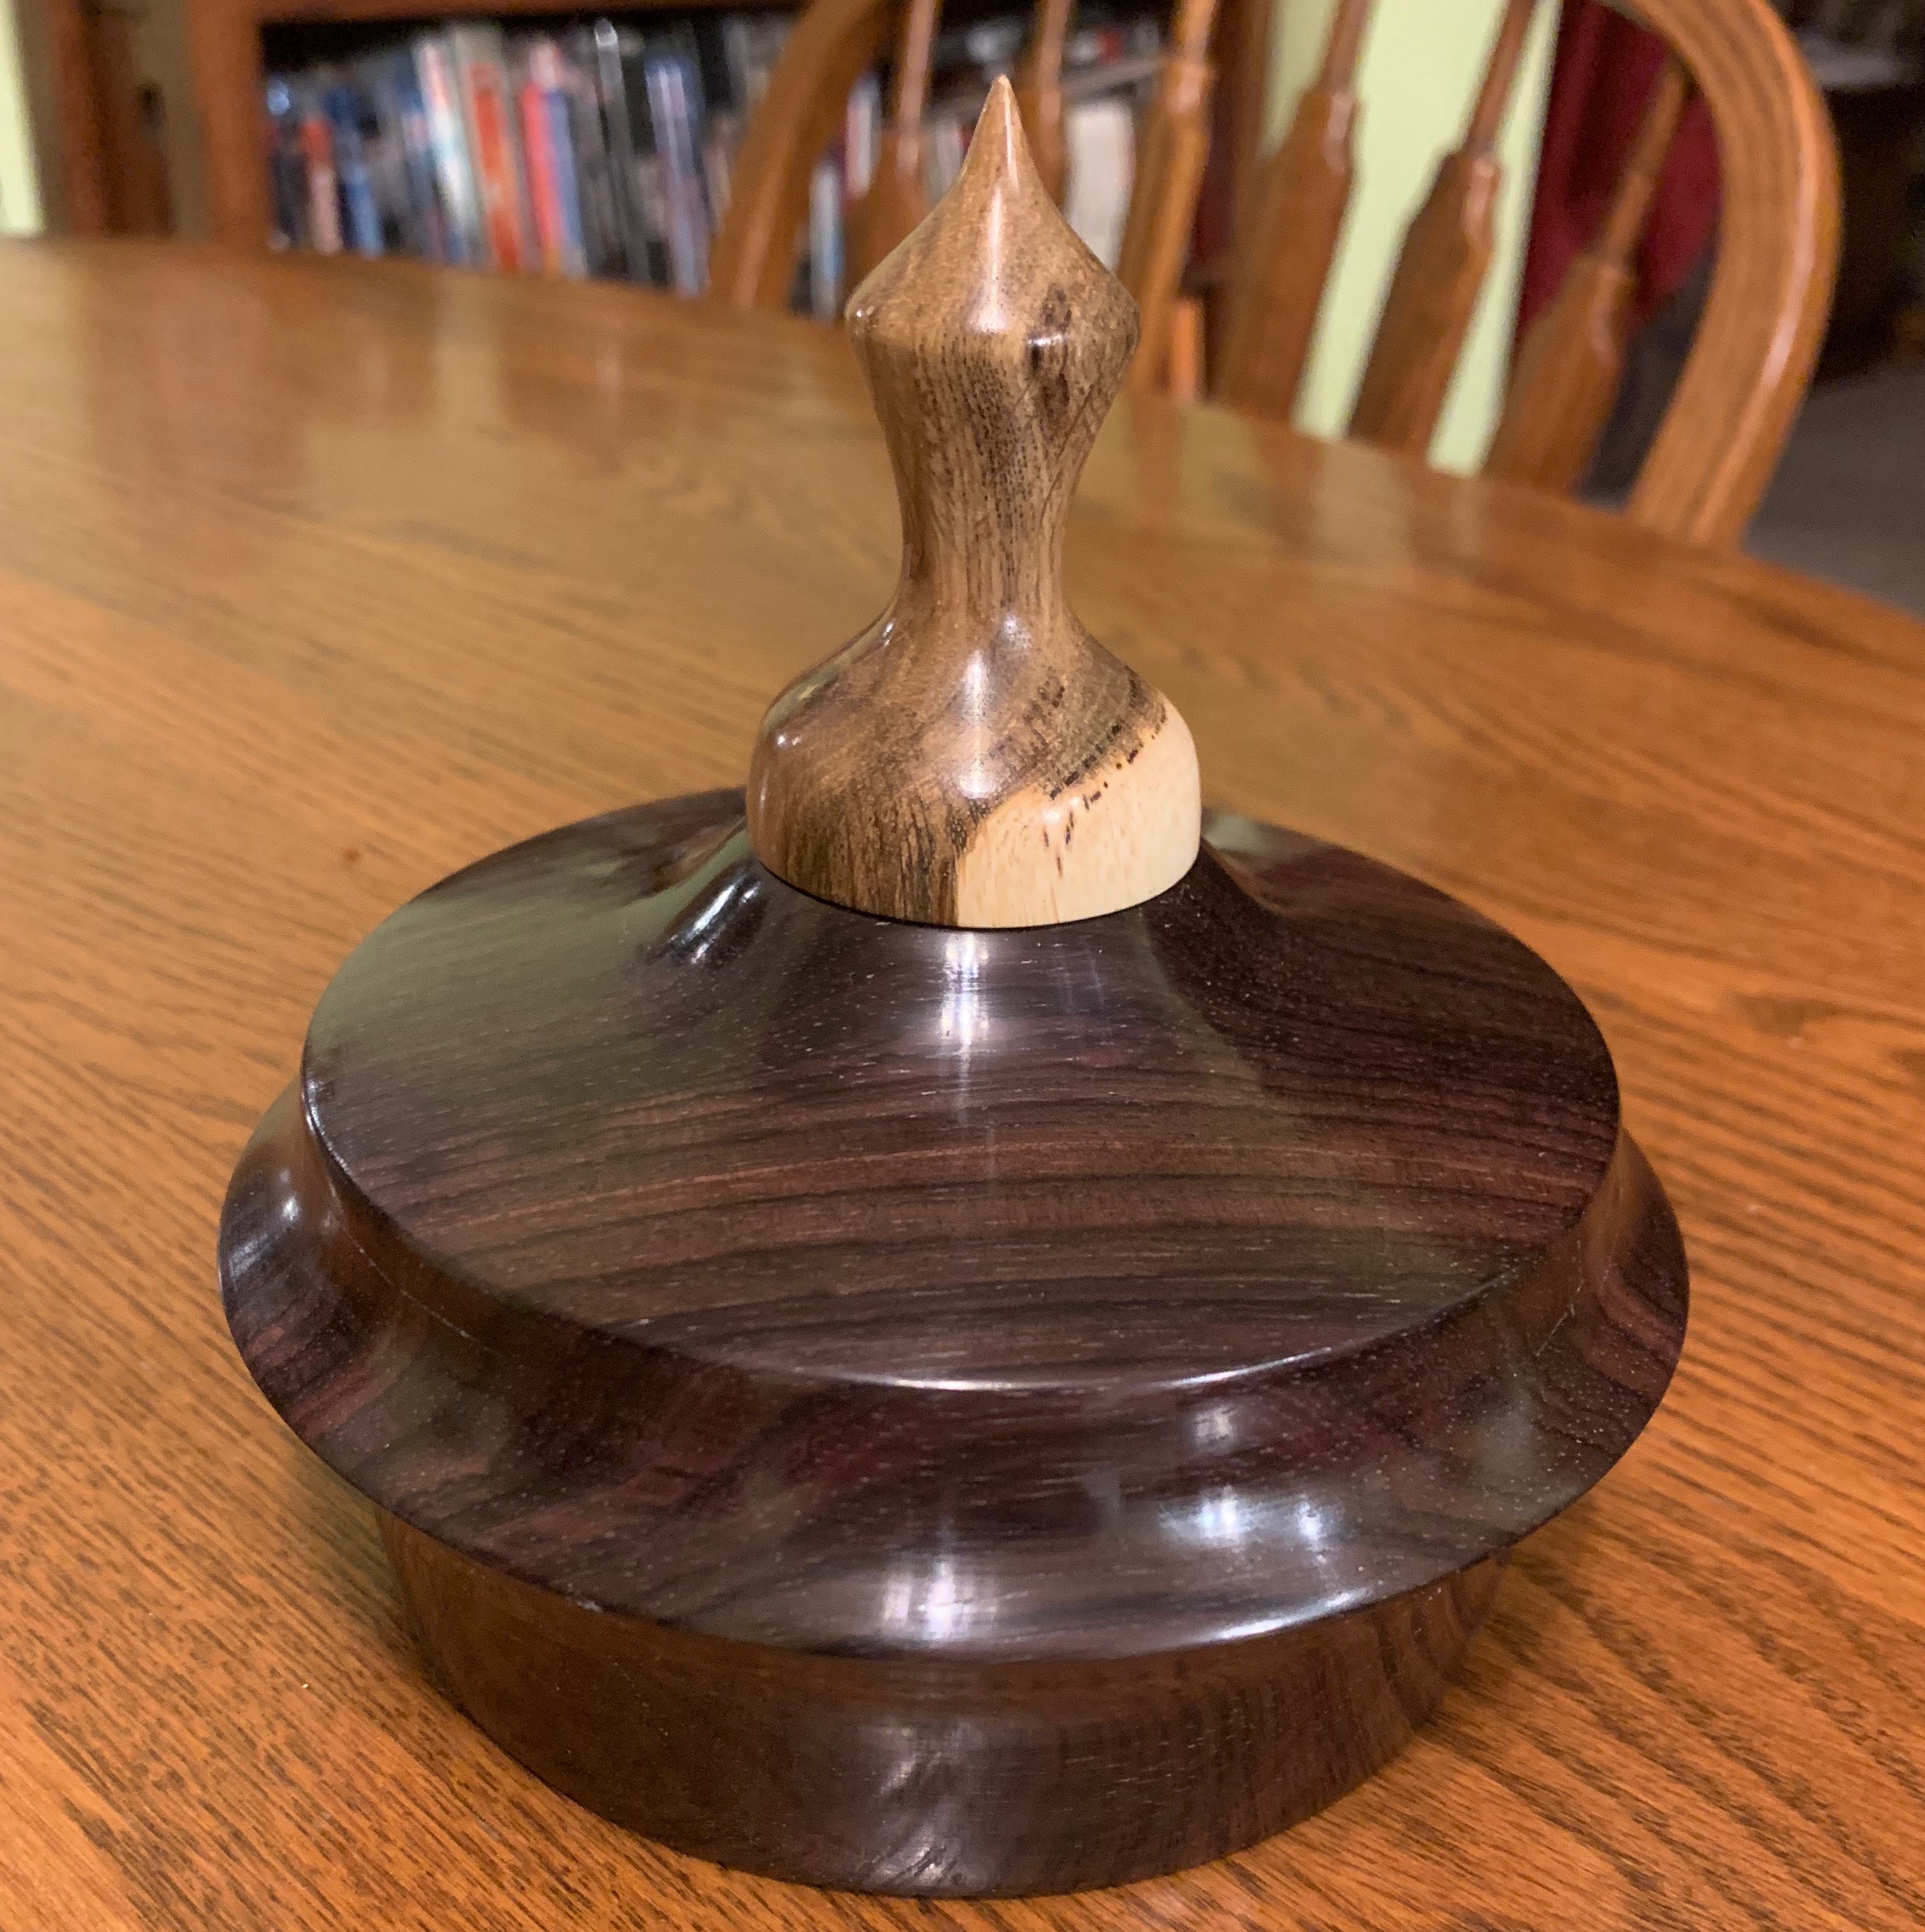
With all of the gardening and harvest stuff going on I haven’t had a lot of time to putter in the woodshop. I haven’t done any wood turning since I produced these two bowls down below…
I love the grain on padauk, and it’s wonderful stuff to work with. It’s not cheap but I think the results are worth the expense.More padauk. Once it’s finished this stuff almost glows.this is MrsGF’s favorite. This little one was made from wood salvaged from the old pear tree in the backyard.
I do have some projects in mind, though. I picked up this piece of wood down below at a shop a few weeks ago. Paid way too much for it but I loved the grain and color. I still don’t know what I’m going to do with it.
I’m also trying to adjust to a new computer. I have three main computers, an iMac, a very old Macbook that I use mostly for email and reading the news, and my primary computer, a “gaming” computer my son built for me which I use for just about everything else, including amateur radio, photo and video editing and video streaming and other stuff. The gaming computer was taken out during a severe thunderstorm a few days ago. I think the power supply got fried. I’d been having problems with it for some time and knew it was going to have to be replaced, so I already had a replacement ready to go for a couple of months. Still, it’s a hell of a lot of work to have to try to redo that whole system.
The new one is a fairly high end MSI 17″ gaming laptop which works great for things like video and photo editing and pretty much everything. But I still need to install all my amateur radio software, hook up all the radio gear to it, etc.
But it also gives me a chance to tear everything down and rearrange everything to make things more convenient and less chaotic.
We’ve been getting rain! The drought finally seems to be over. We’ve received several inches of rain over the last week and will be getting more today. Things were getting bad, and not just for home gardeners like me. We’ve had enough rain now that the plants have completely turned around and things are actually starting to look lush out there. The tomatoes have tripled in size and in full blossom. We even have some baby tomatoes on them already. The squash are growing so fast you can almost see the vines getting longer. We have baby cucumbers developing. The raspberries are probably going to be ripe in a week or so. Wow, it’s amazing what a bit of rain can do.
Baby cucumberThe color on the lilies has been almost breathtaking this year.The warm, damp weather has really jump started the tomatoes. They look beautiful this year.The raspberries are so loaded with fruit this year MrsGF had to put posts with string to rest the canes on because the weight of the fruit was bending them in half and snapping off the canes. I’ve never seen that happen before.
Anyway, as you can see the gardens here have been doing very, very well of late. Yes, we were watering everything carefully during the drought and keeping an eye on soil moisture and all of that, but for whatever reason artificial irrigation never seems to give the same results as natural rainfall, at least not for me. Even though I was sure the plants were getting adequate water, once it started raining everything just started going crazy.
Possible Logo
I’m going to (well, maybe) start selling some of my wood stuff. I got an account with Etsy now, but haven’t gotten around to actually putting anything up for sale over there, and I’m thinking of putting up a separate set of pages here to showcase a few things for sale. Don’t worry, none of that will appear here in the blog except for a link to the sales site. I’m not going to spam you or anything like that.
But I needed to come up with a name for this for Etsy, and a logo or something to mark the bowls. Most of my bowls have a 2 1/8 inch mortise (basically a shallow hole) in the bottom. This is how I attach them to the lathe with a four jaw chuck. I like using a mortise rather than a tenon because unlike a protruding tenon which has to be removed, I can leave the mortise in place. That means that if something goes wrong with the finish or something else happens, I can easily reattach the piece to the lathe to rework it or refinish it. And as for the remaining hole, I thought why not use it for a logo? I got these thin, 2″ wooden disks which work really well with the laser engraver, so I came up with a name and logo that looks pretty good when burned into the disk.
One of the experiment logo tests
Then just glue the disk into the mortise on the bottom of the bowl. I’m not sure if this is going to be the final version, but so far I’m fairly satisfied with it.
Hollowing Tool
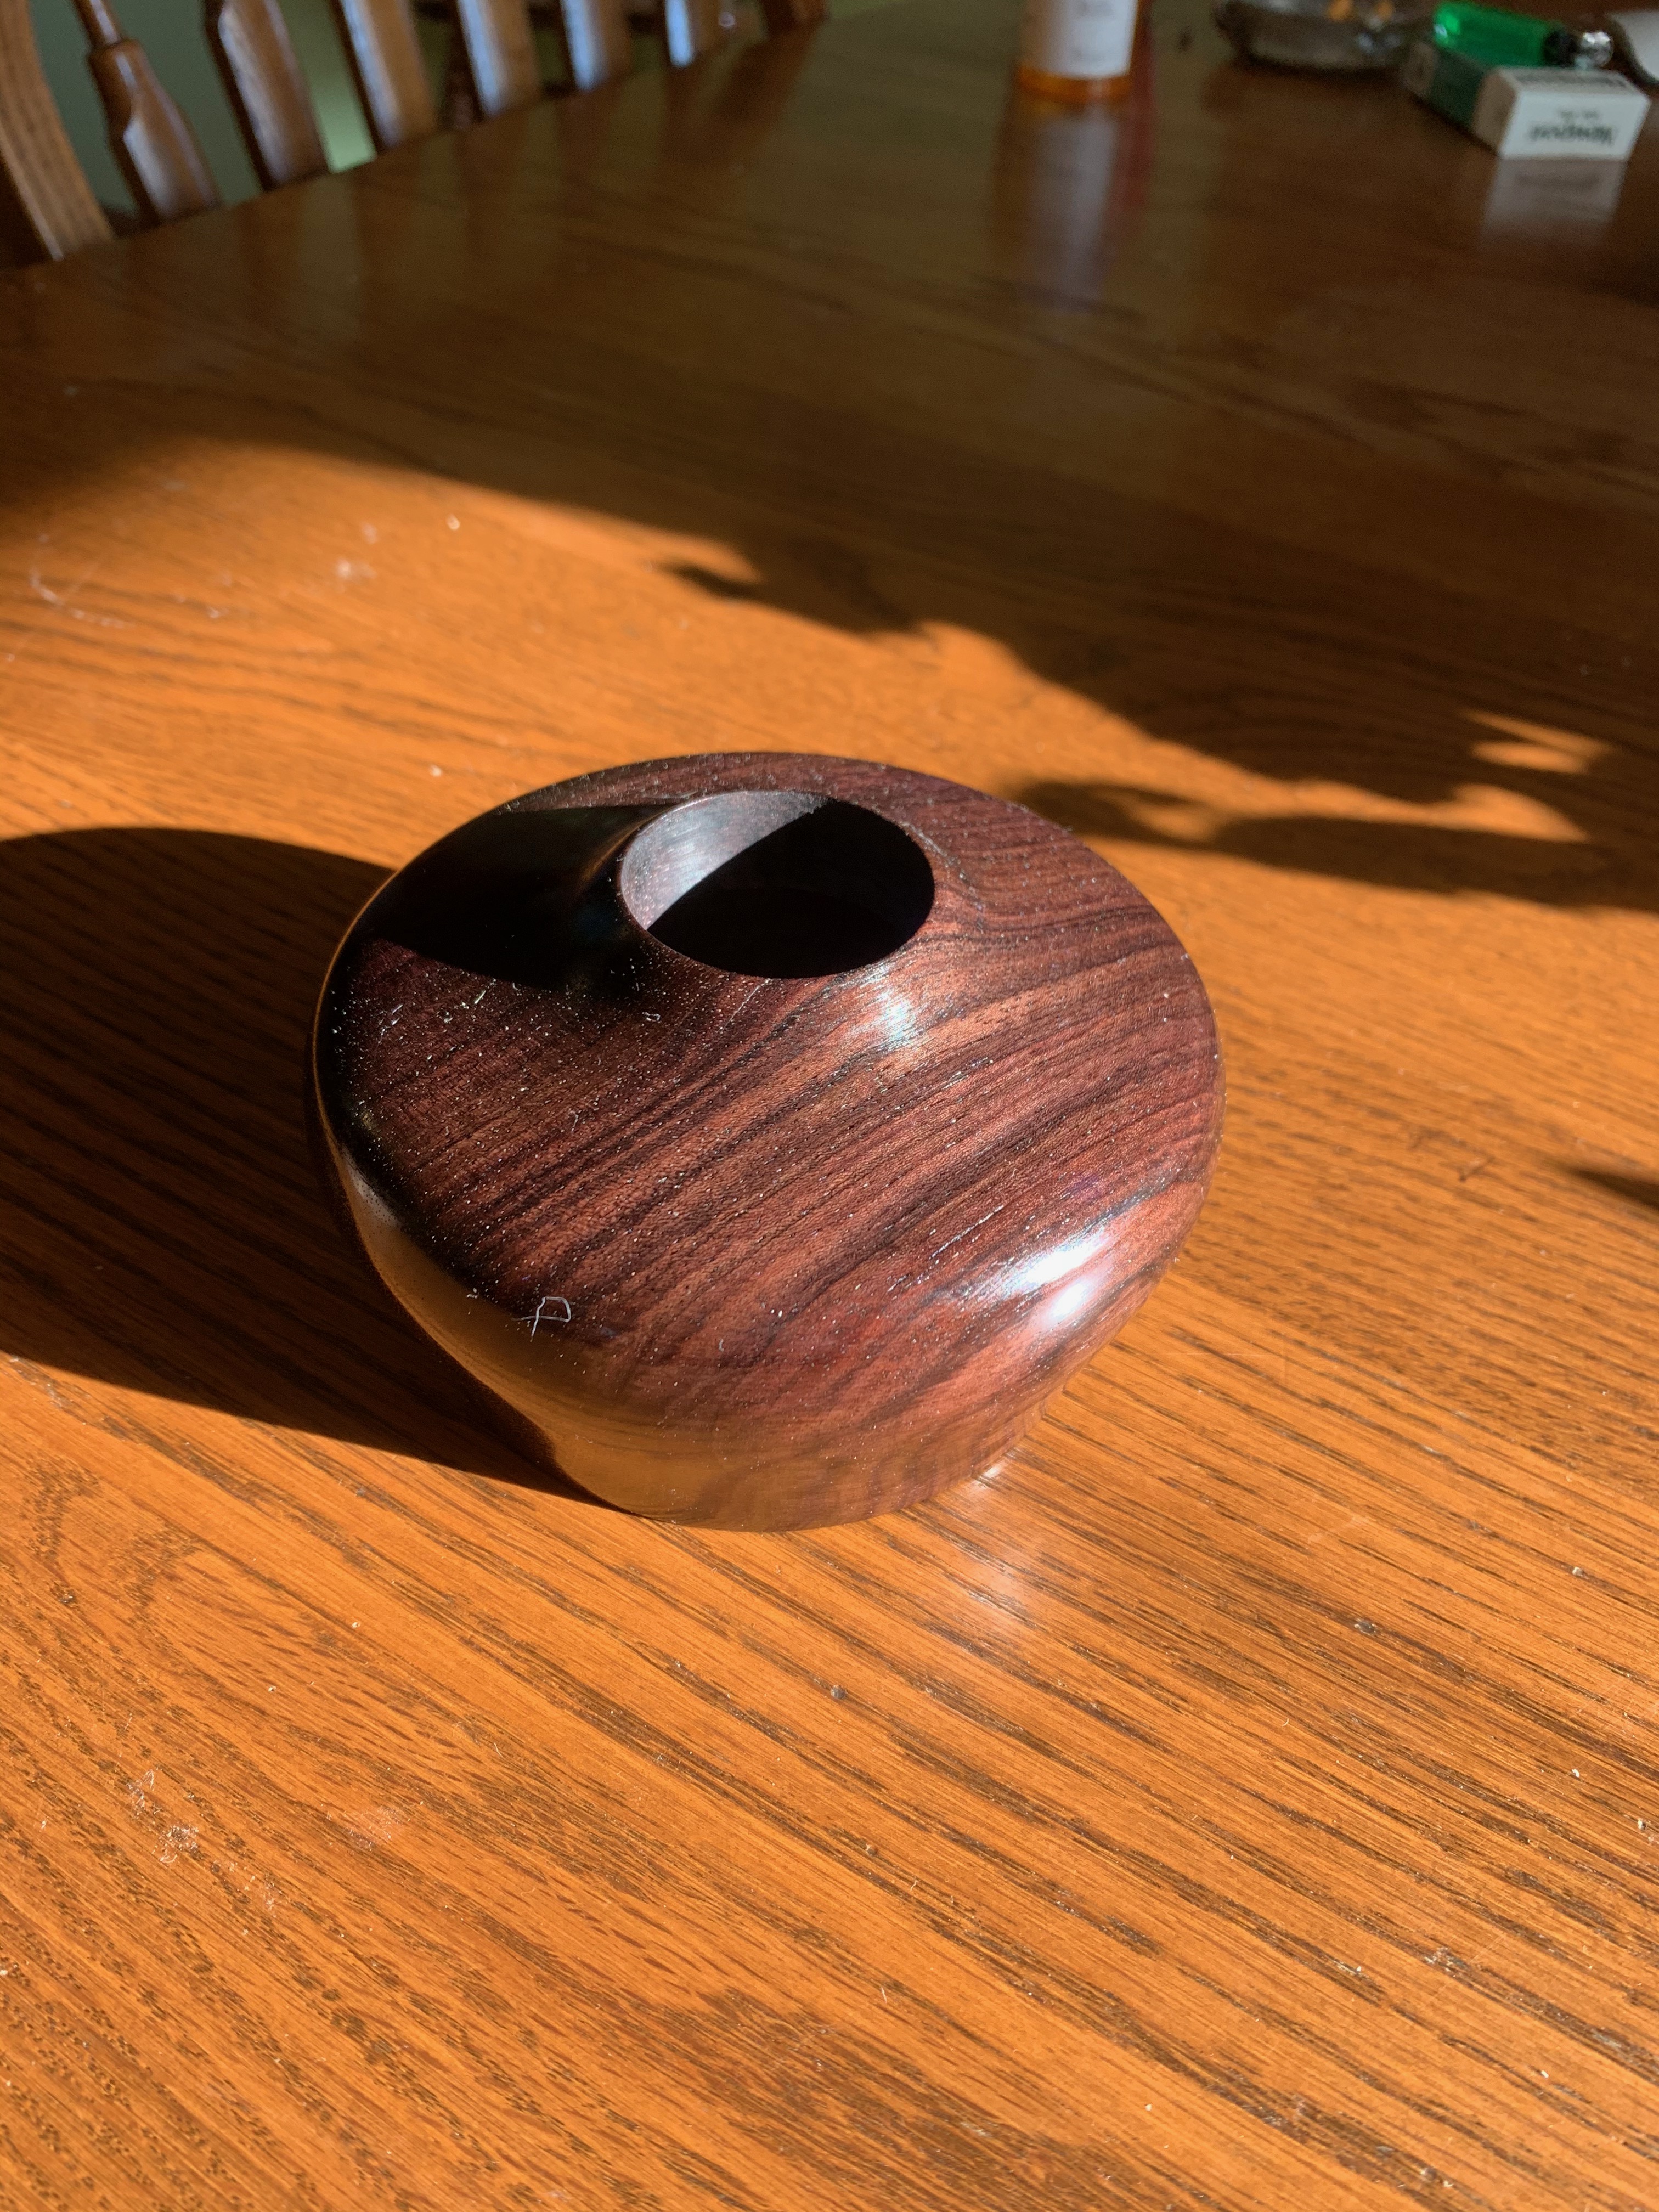
One of the issues I’ve run into with wood turning is dealing with objects that aren’t actual bowls, but instead are what are generally called “hollow form vessels”, things like, well, this one down below here.
This thing is supposed to be hollow, and it is. Sort of. Kinda. But not much. I ran a 2″ hole into it with a forstner bit and then fiddled around with the tools I had to try to hollow it out, but it’s a damned poor job because trying to reach in there to hollow it out without damaging the small opening and without hurting myself is a pain in the neck, even with special tools. I have tools that claim they are for hollowing out forms like this, and for whatever reason they just don’t work well for me. I see guys on YouTube doing this stuff effortlessly. How the heck do they do that? I’ve tried using their techniques and tools and what I’ve ended up with is dangerous catches, broken bowls, broken tools, and a real mess.
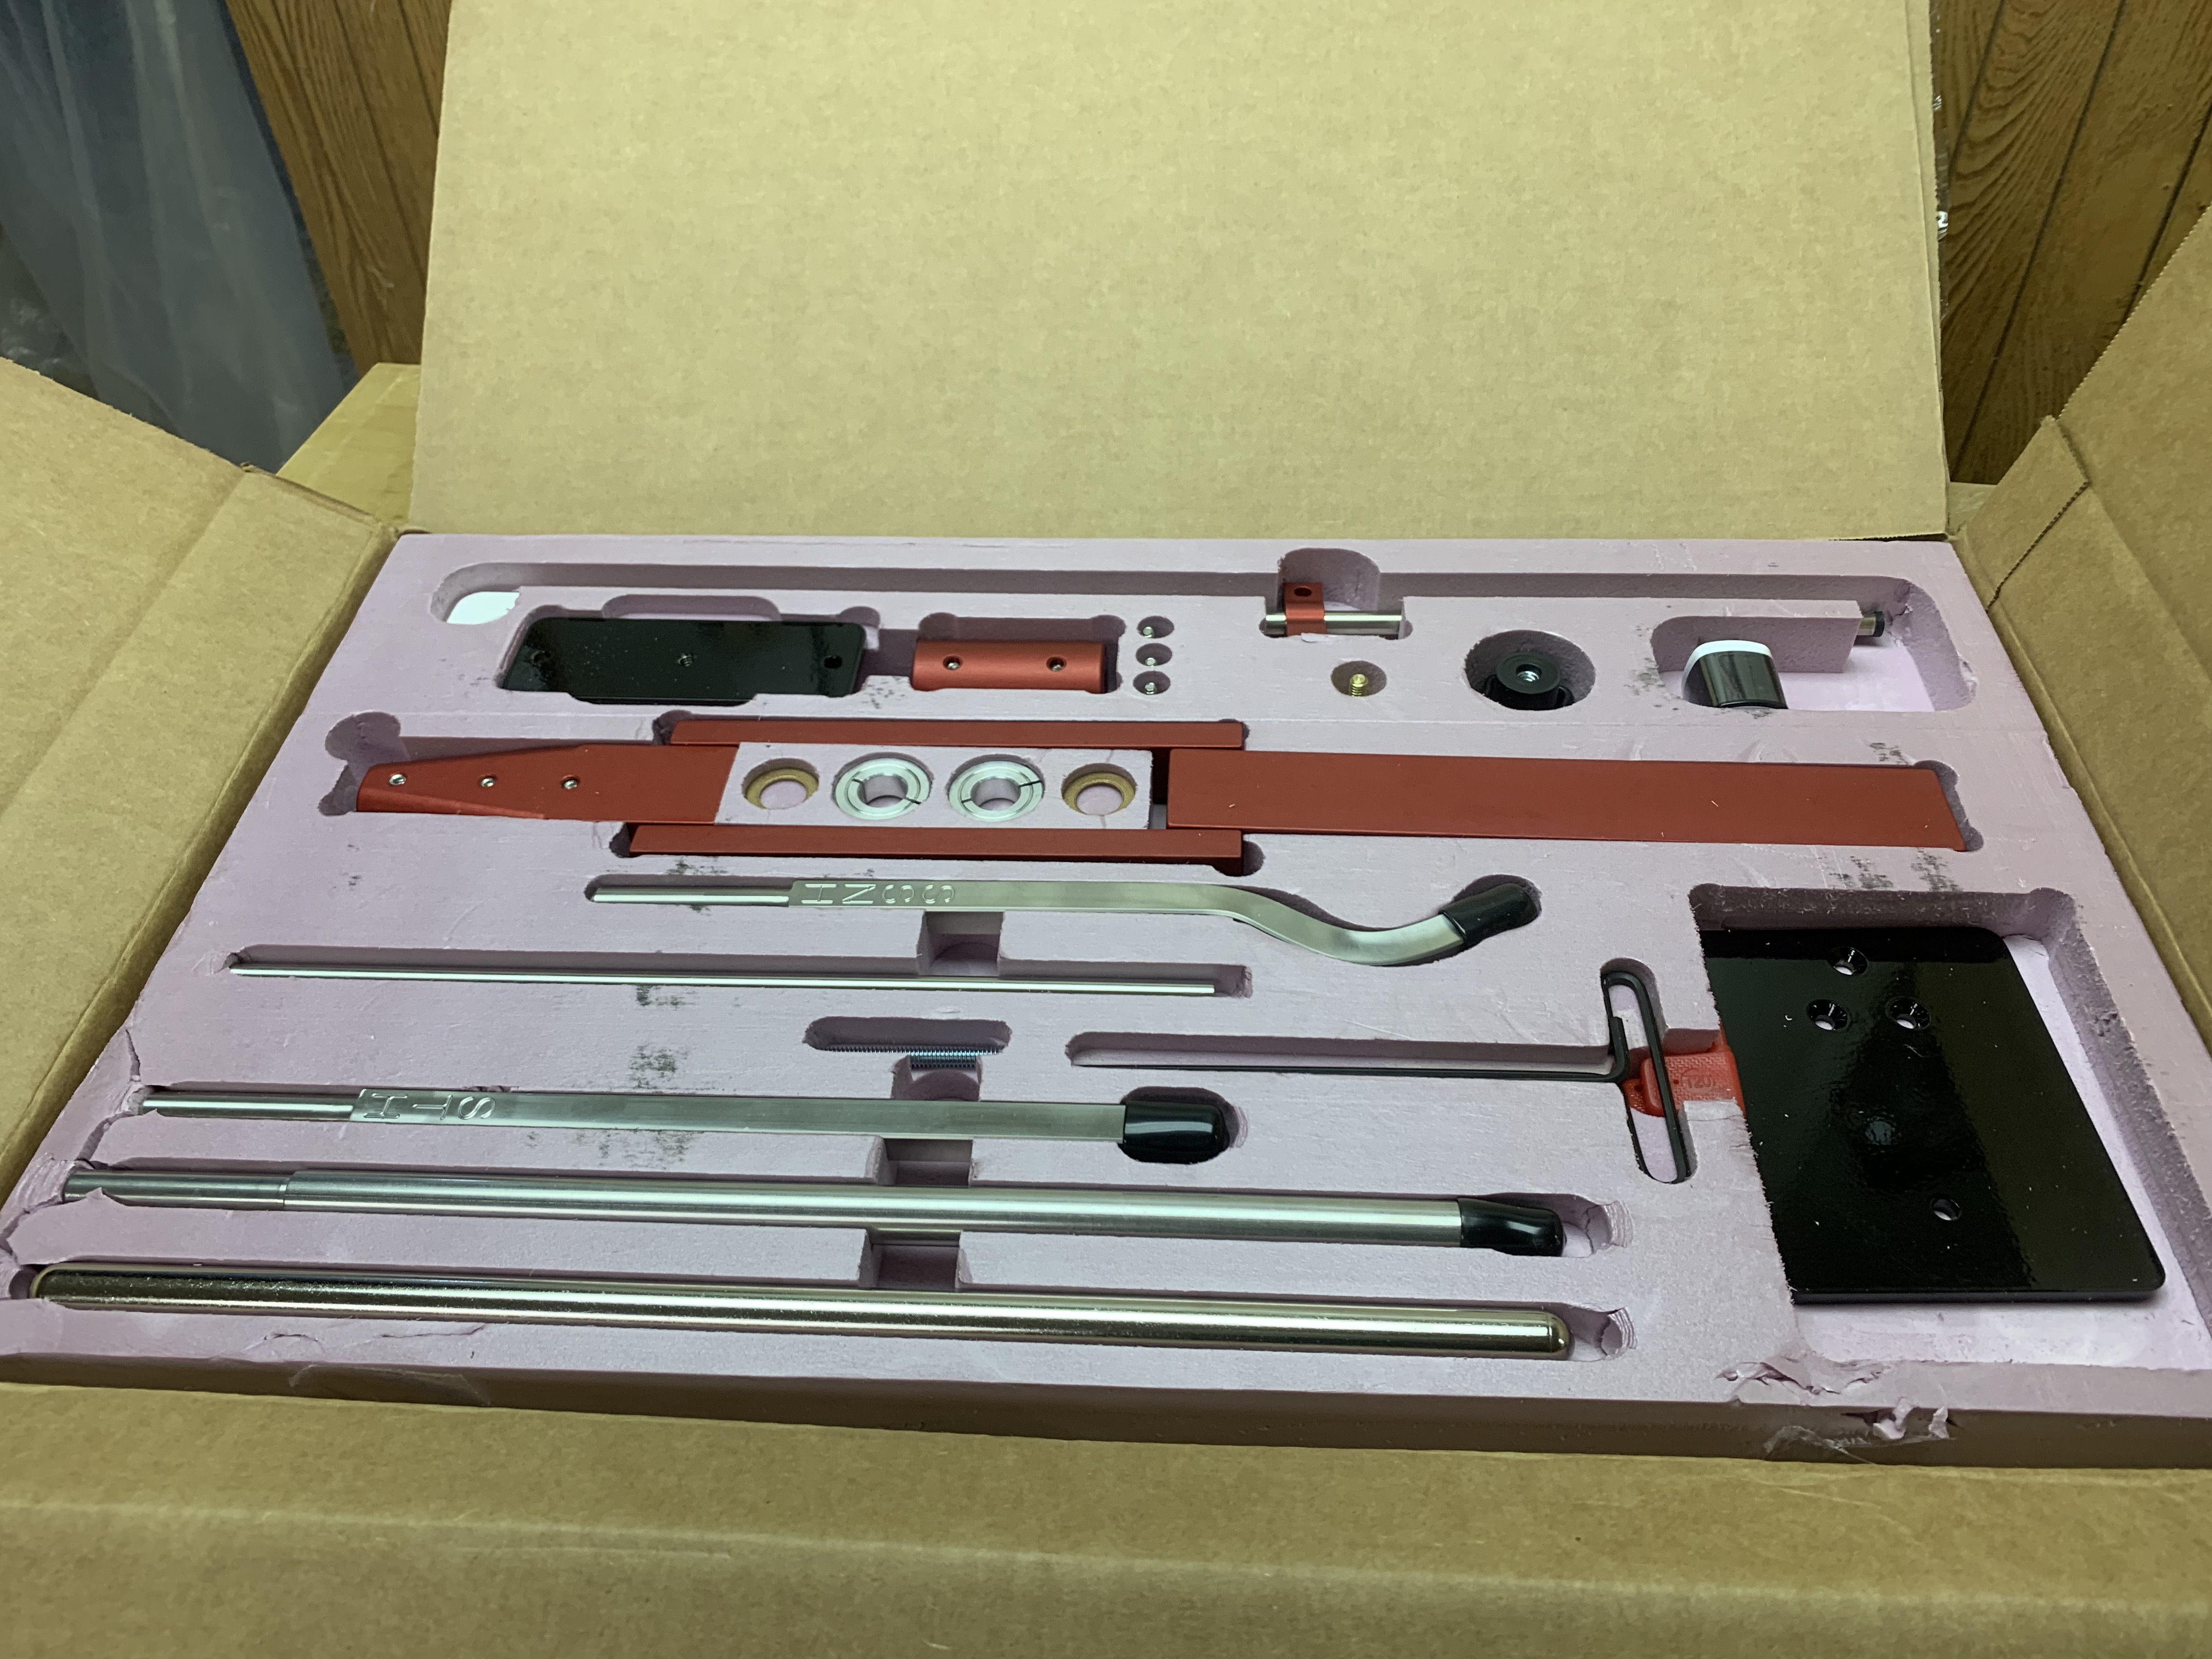
So I spent way more money than I wanted to for this:
This is the “Simple Hollowing System” from Harrison Specialties. Harrison markets a line of lathe tools under the “Simple Woodturning” brand. I have some of their carbide tools and they are very, very good indeed. This system is supposed to make it relatively easy to hollow out even something like the bowl in that photo up there. This version comes with just about everything you need, including the system itself, the tools, cutters and even a laser guide system to prevent you from accidentally cutting through the side of a bowl as it is being hollowed out.
As you can see I haven’t even had a chance to set it up yet because it’s been so busy here, but hopefully I’ll be able to give it a try in the next week or two and I’ll talk about it then. I also want to cover the laser engraver in some detail as well in the future. So keep an eye out for both of those coming up.
Car Stuff
Let’s see, what else… Oh, almost forgot. I sold the Corvette. It was a very, very nice car, it was huge fun, but, well, even I had to admit that it wasn’t exactly practical. Basically it was a vehicle that I could only use about 5 months of the year, was a two seater, had very little cargo space. Oh, and did I mention that new tires for that thing were $500? Each. Yeah, it was over $2,000 to put a set of four tires on it because it ran high tech, high speed, run flat racing tires.
I bought, heaven help me, a Buick. Yeah, a Buick. It’s an Envision Avenir which is, according to Buick, at least, “the highest expression of Buick luxury” available. Here’s a photo swiped from Buick’s website because I’m too lazy to go out to the garage and take a picture of mine at the moment.
And I really, really like it. Well, of course I do or I wouldn’t have bought it. Duh.
The list of options on this thing runs two full pages of small type. Emergency braking systems (which I tested the first day I had it. Neighbor’s dog ran in front of the car when I drove into my driveway and the car stopped itself before I could even get my foot off the gas pedal. Wow), lane divergence warnings and even steering. Apparently if you wander outside your lane on the freeway the thing will actually steer itself back into the center of the lane you’re in. Automatic headlights, automatic cruise control that slows down or speeds up itself to match traffic, a 360 degree camera system along with radar systems to assist with parking. I won’t go into the whole list because it’s a bit ridiculous, really. Bumper to bumper warranty that covers everything, and I mean everything. With the package I got even the interior fabrics are covered. Tears, burns, stains, paint chips… All covered. Sheesh…
This thing is very, very nice. I absolutely love it.
And there’s another reason I went with it. It’s four wheel drive with good ground clearance. The roads here in Wisconsin are utterly horrible and getting worse every day. We have one of the worst maintained highway systems in the country. The roads around here are so bad you’re risking doing serious damage to your car if it doesn’t have enough ground clearance to get through the pot holes, cracks, gravel patches and other garbage we have to contend with. The Buick can deal with that a lot better than the Vette.
Why are our roads so bad? Go talk to our state legislature if you want the answer to that one. They can find billions to pay for building new freeways down around Milwaukee that no one wants, but they can’t find the money to maintain the highways, roads and bridges we already have. Those multi billion dollar freeway expansion projects are done by huge corporations that funnel enormous amounts of money into the campaign funds and PACs of our dear legislators down there in Madison. Meanwhile most road maintenance is done by local governments and small contractors who don’t have any influence at all with the legislature.
Let’s see, what else… I’m hoping to actually go fishing this year. Maybe. Every year I get my Conservation Patron license. That is an all inclusive license offered in Wisconsin that covers just about everything you can legally fish or hunt for in the state. At first glance it seems expensive, but when you consider that it includes almost everything, it is actually cheaper and more convenient than trying to get individual licenses. So I get the license every year and generally end up doing, well, nothing, because I don’t have the time. Spring turkey season came and went this year before I even remembered I had a spring turkey permit. Sigh… I think I went fishing exactly twice last year, and once so far this year.
I don’t deal with leisure time very well, I’m afraid. Heck, I’m retired for pete’s sake. I don’t need to constantly be doing something practical. But every time I start planning to go fishing there’s this little voice in the back of my head that’s saying things like “you know you really should be weeding the gardens, not wasting your time with this”, or “you should be spending your time finishing that jewelry box you started last week not sitting along a river waiting to catch a fish and wasting your time.”
I’m not going to miss this tree too much. It’s been shedding limbs every time we get a 20 mph wind for years now.
The only big old tree we have left on the property is going to have to come down. I’m sad about that but it has to go because it’s rotting out from the top down where two of the major branches of the canopy come together. If we don’t take it down soon it will come down itself and quite possibly do some serious damage. So that will be coming down probably in August. That’s going to mean some big changes in the gardens around here. That tree is massive and it shades out a huge area which always meant what we could grow back there was seriously restricted because of the shade.
Right now I’m thinking of putting in another decorative feature like this one:
MrsGF looked at me like I was nuts when I first proposed it, but then she thought about it for a moment and said sure, why not. Neither of us want to end up with just a big area of nothing but grass back there. So we’ll see. Putting in that feature up there with the retaining wall blocks and all that was a hell of a lot of work and it wasn’t exactly cheap. I think I have about a thousand bucks sunk into that one garden when the costs of the retaining wall blocks, rock, plants and everything else is added up.
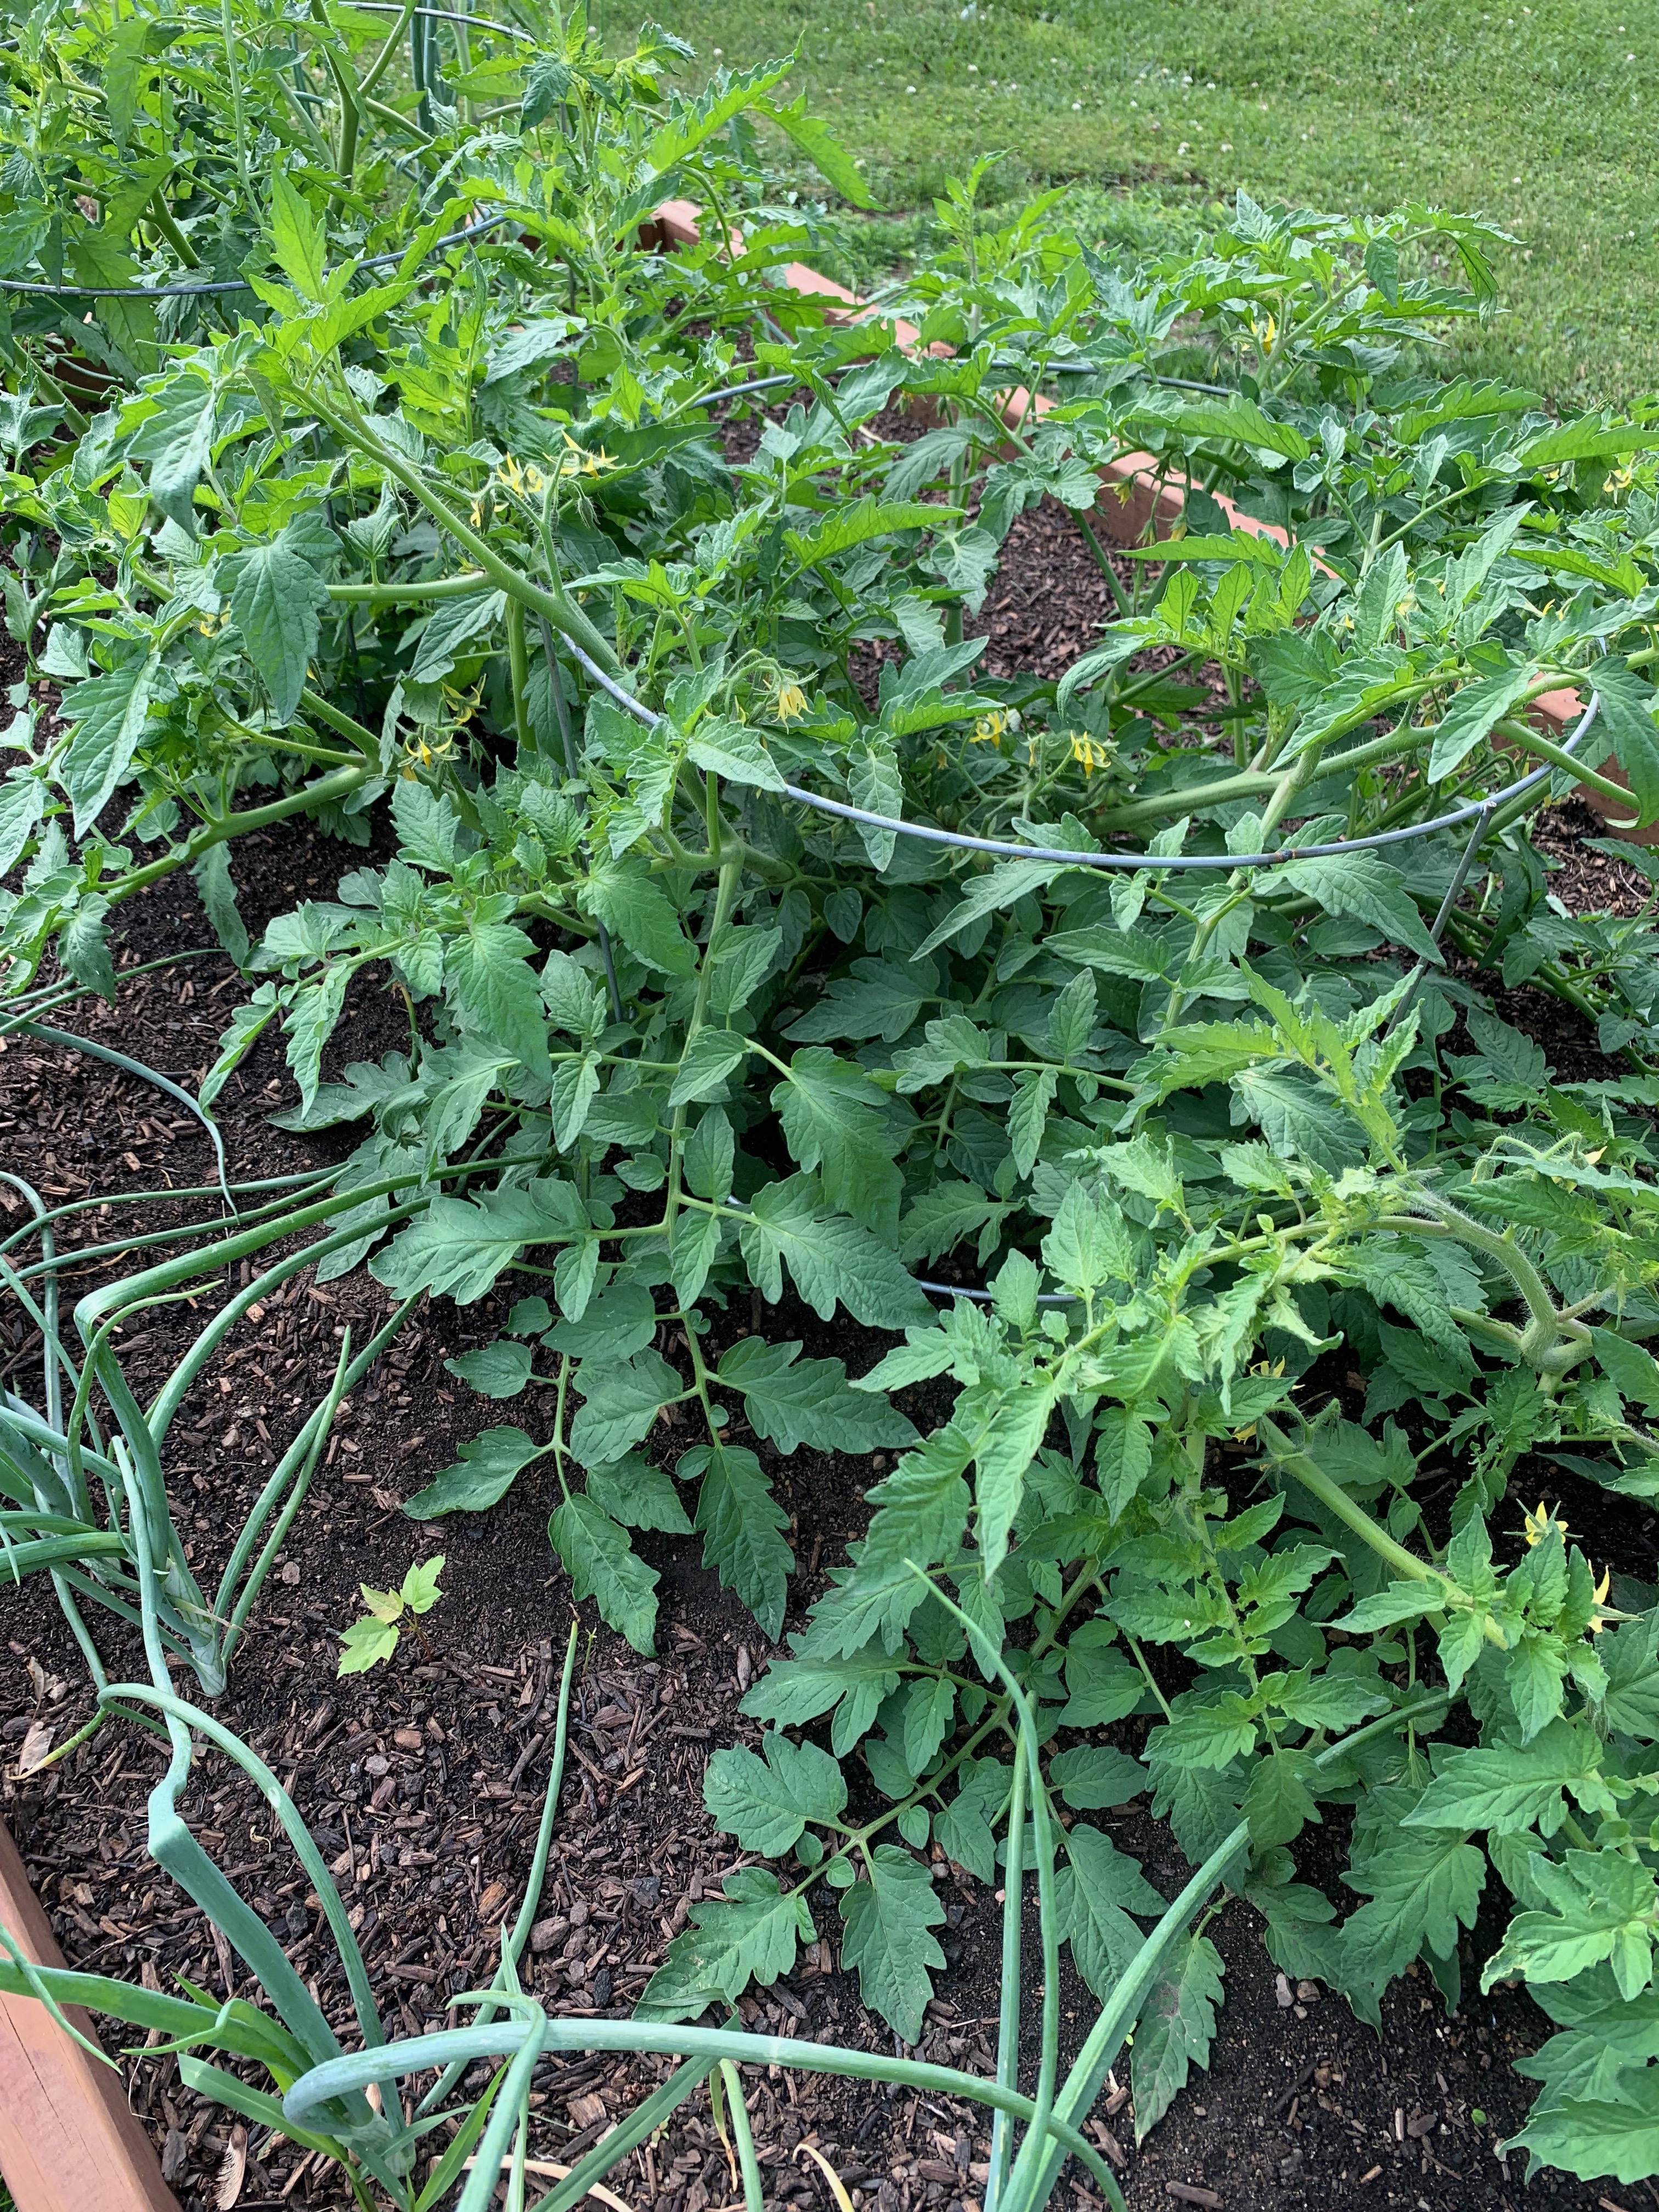
The two new raised vegetable beds are doing quite well. One of these days we’re going to get around to building a brick/stone wall around these to make them more decorative looking, but that’s in the future. We have three tomatoes in one, surrounded by onions, and pole beans and more onions in the other.
I highly recommend raised beds for vegetables. They work really well, are easy to keep weed free, easy to tend the soil, the height tends to discourage animals from getting into them. The biggest drawback is that they dry out rather fast and they need to be watered almost every day. Especially this spring because we haven’t had a decent rain in, well, a month or more, I think. It has been an exceptionally dry spring here.
The other two raised beds are doing well also. One has a variety of pepper plants in it. You can see that the plants have #10 cans with the bottoms cut out surrounding them. Those will be coming off this week yet. The cans are a great way to give the plants protection when they’re first transplanted into the garden. The other bed is all beets with more onions planted around the outside. We really, really like beets. We like ’em roasted, sliced, pickled, etc. They freeze pretty well also so we figure we’ll have enough to hold us through the winter with all of these.
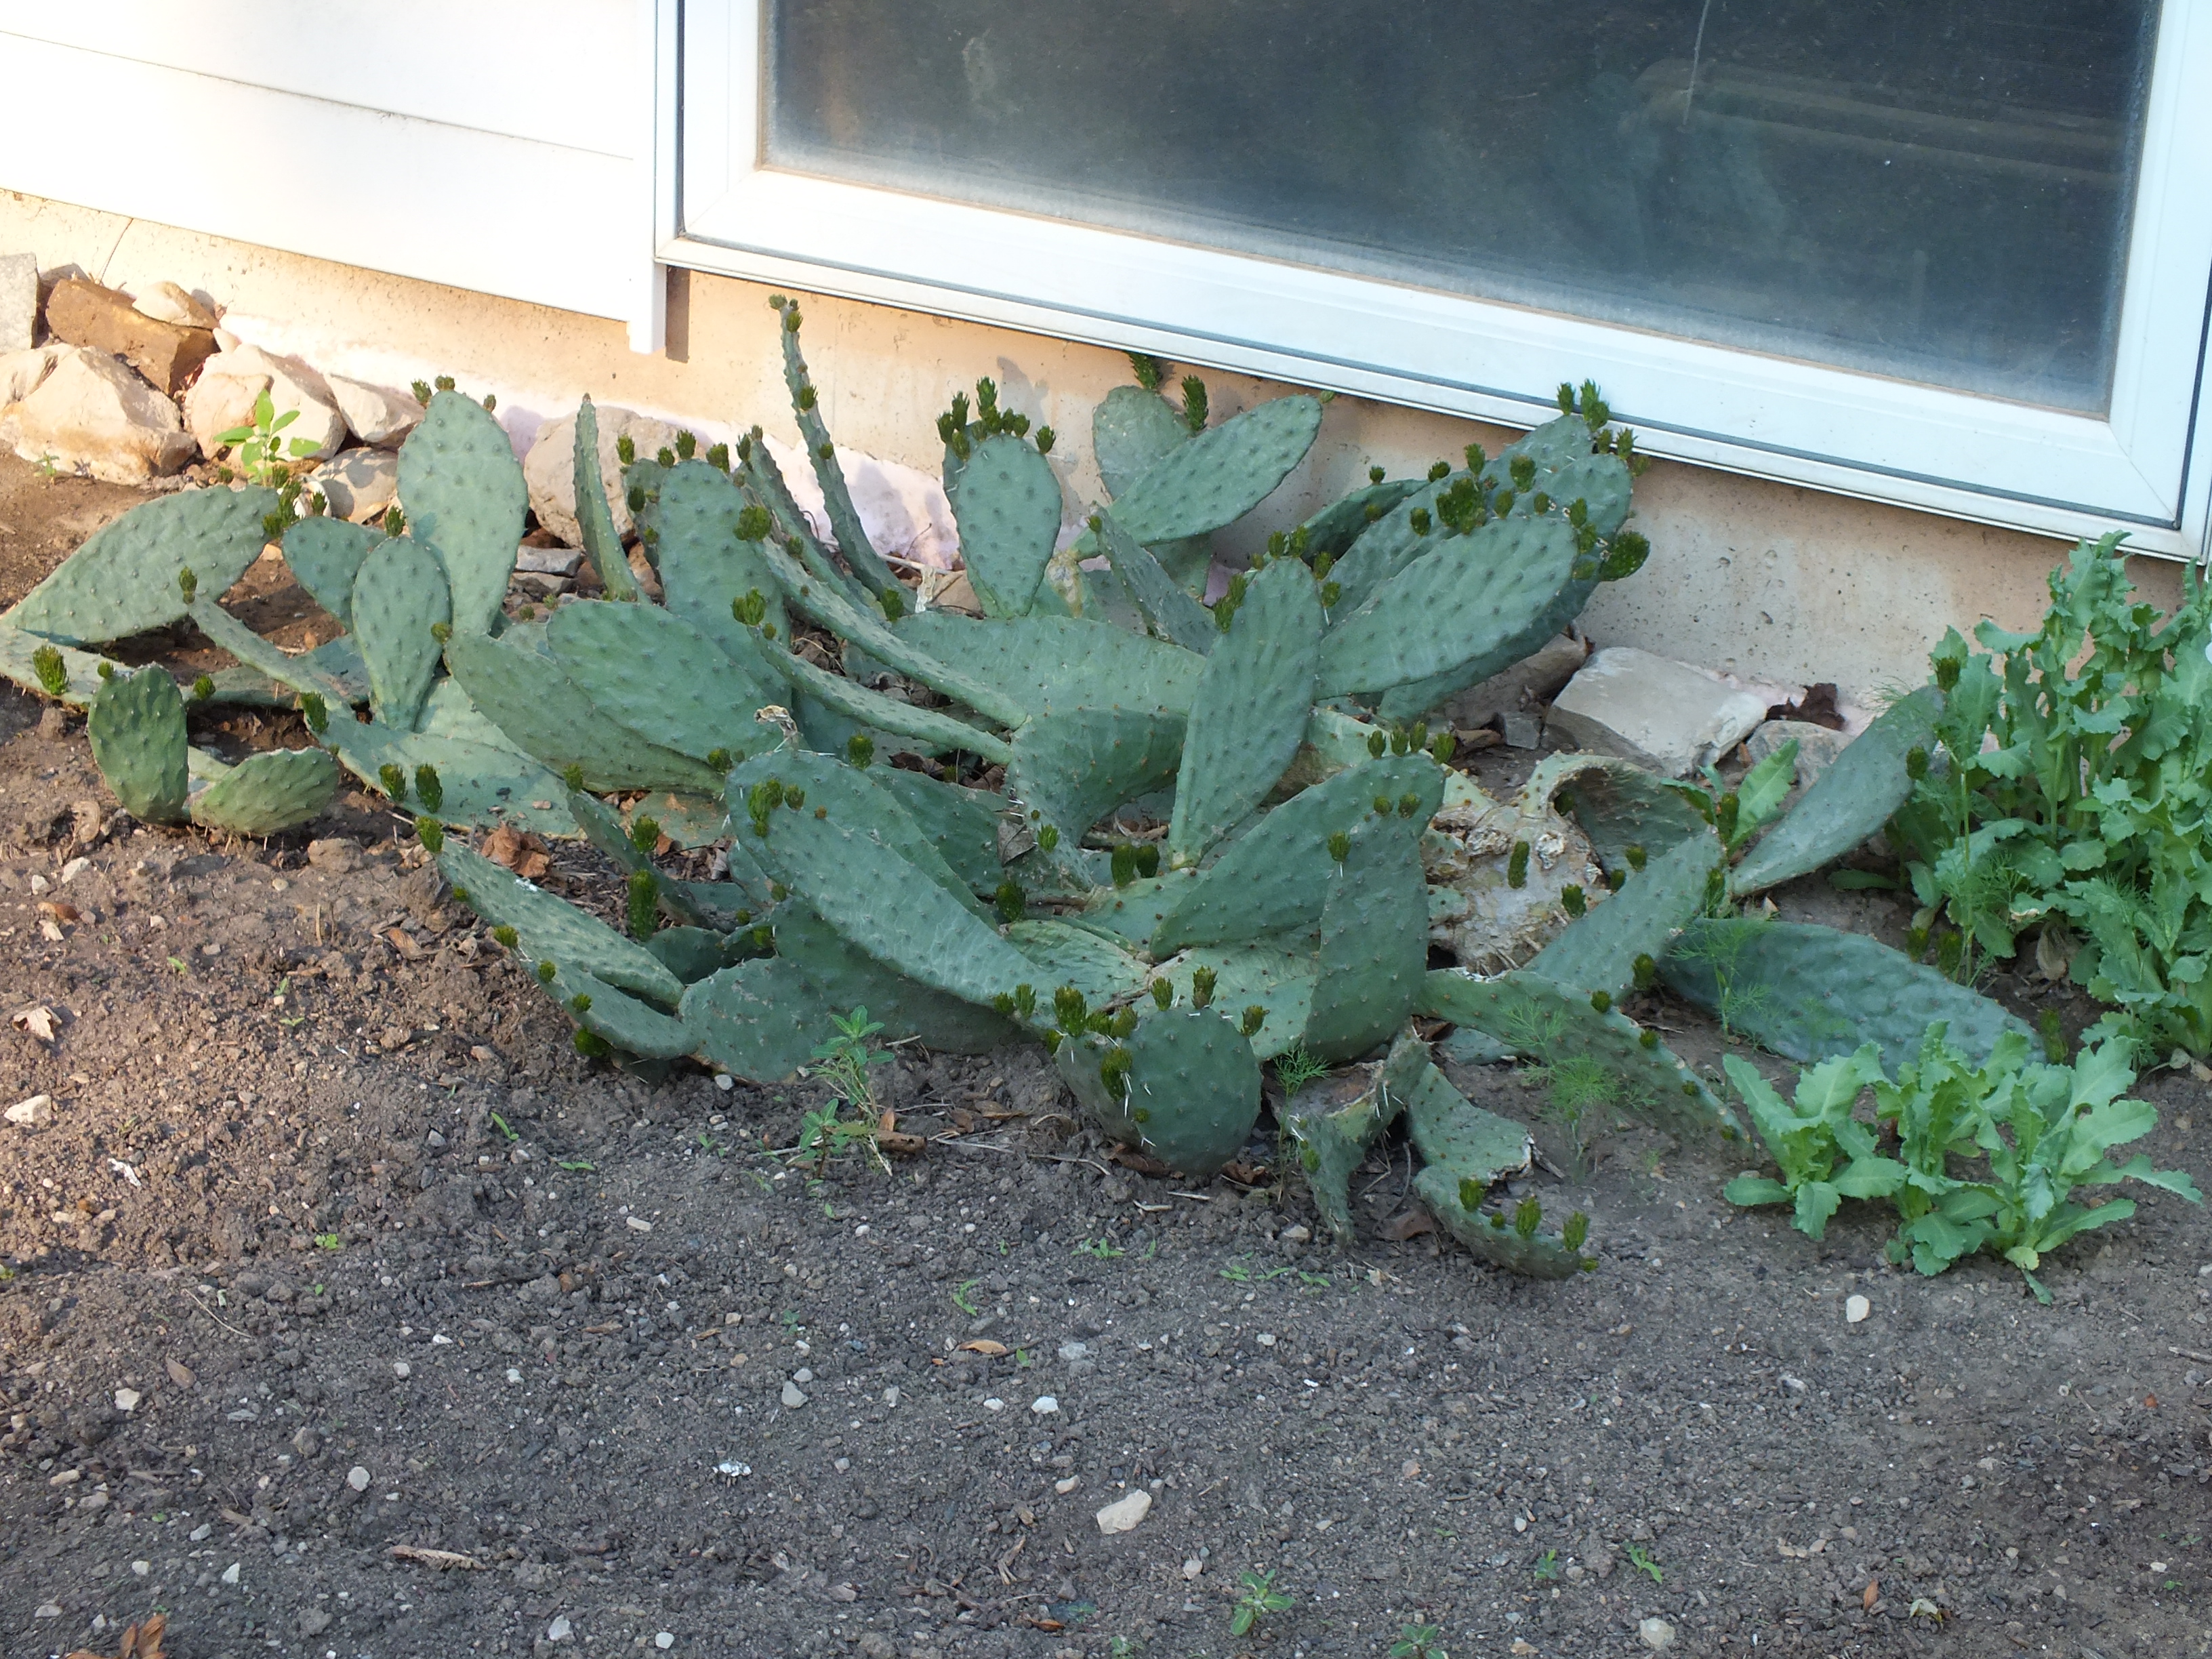
Mr. Spiny, our pet cactus is still doing fantastic along the foundation wall. It’s hard to tell in this photo but there are three other cactus off to the left, started from pads we took off Mr. Spiny and stuck in the ground. The soil right along that wall is absolutely horrible and normally almost nothing will grow there. The cactus seem to love it, though. Makes a great conversation piece because people can’t believe that a cactus will thrive here in Wisconsin for some reason, even though Wisconsin does have some native cactus, including this one. There are some other types that are hardy here as well. You don’t need to live in the southwest to have cactus in your gardens.
If you want to grow your own, go for it. I will warn you that in early spring they will look absolutely horrible and you’ll think it’s dead. At least this one does. It’ll be laying flat on the ground, the pads looking all brownish and nasty. It isn’t, though. Once the weather gets a bit better the pads begin to turn green again and start filling out again.
The hosta garden in the front of the house came through the winter quite well and is looking pretty good. They still haven’t reached full size yet but will be getting there pretty soon at the rate they’re growing.
And then the flowers – holy cow have we got flowers this year!
Other Stuff
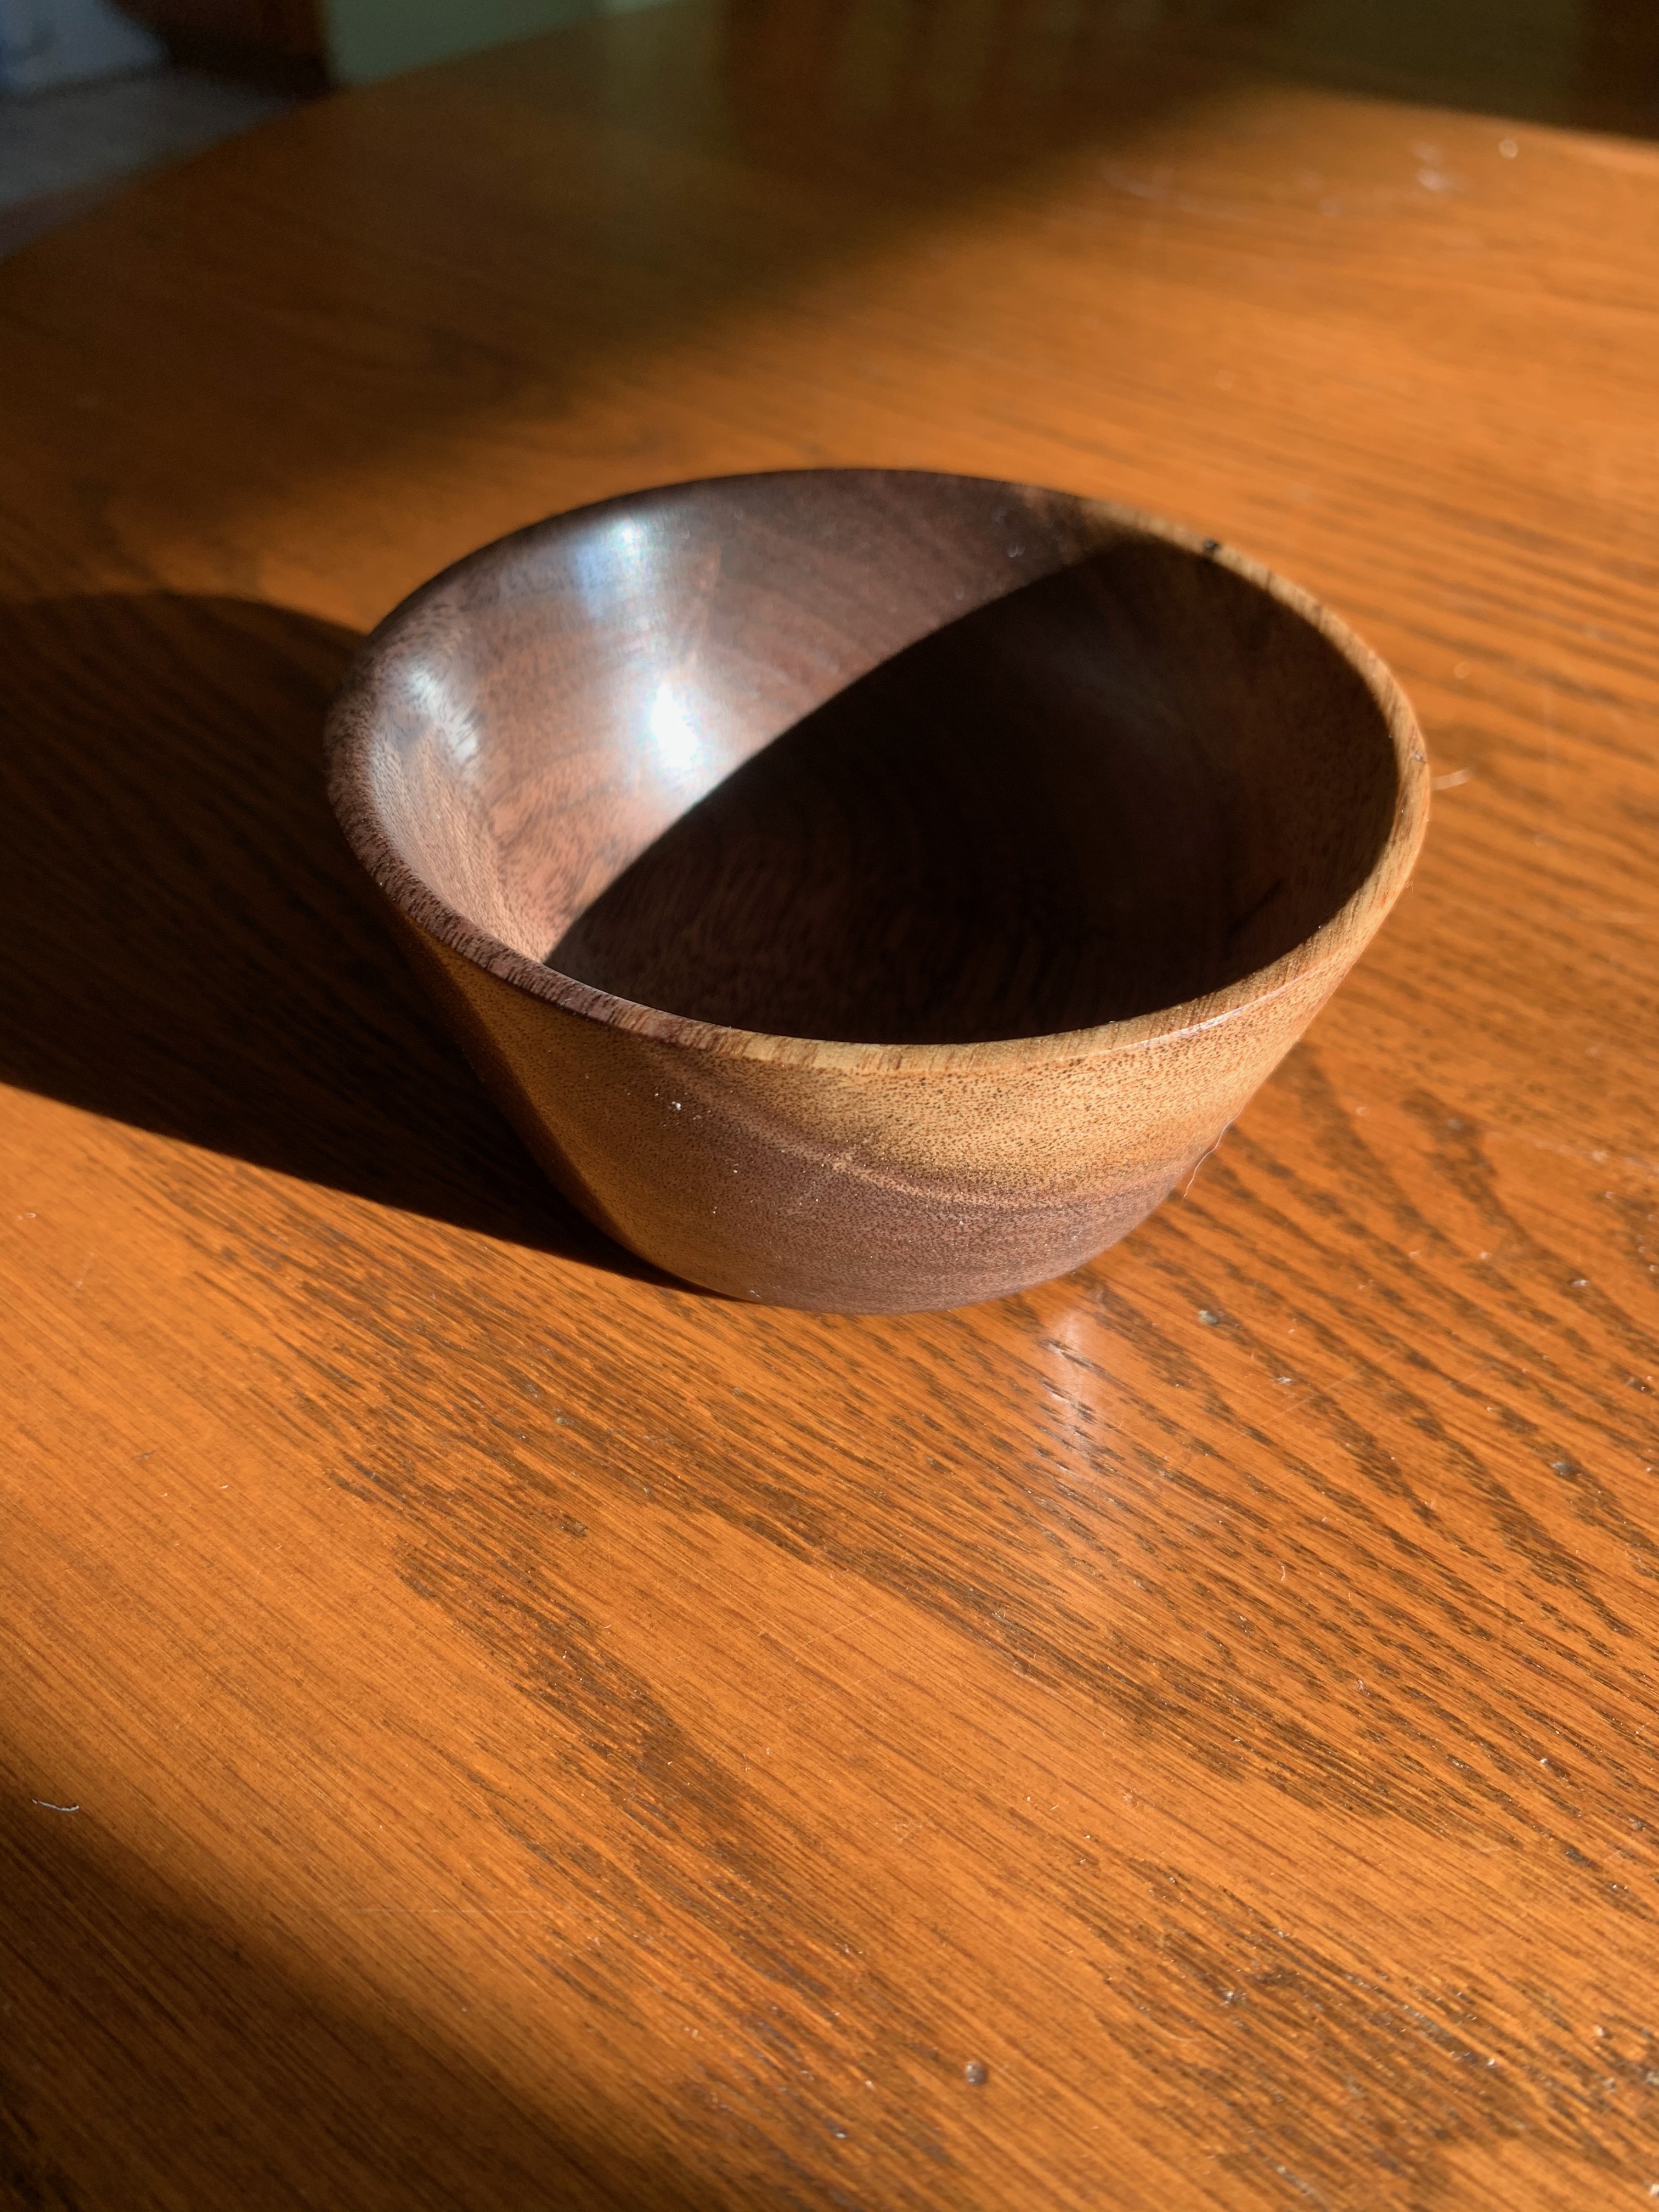
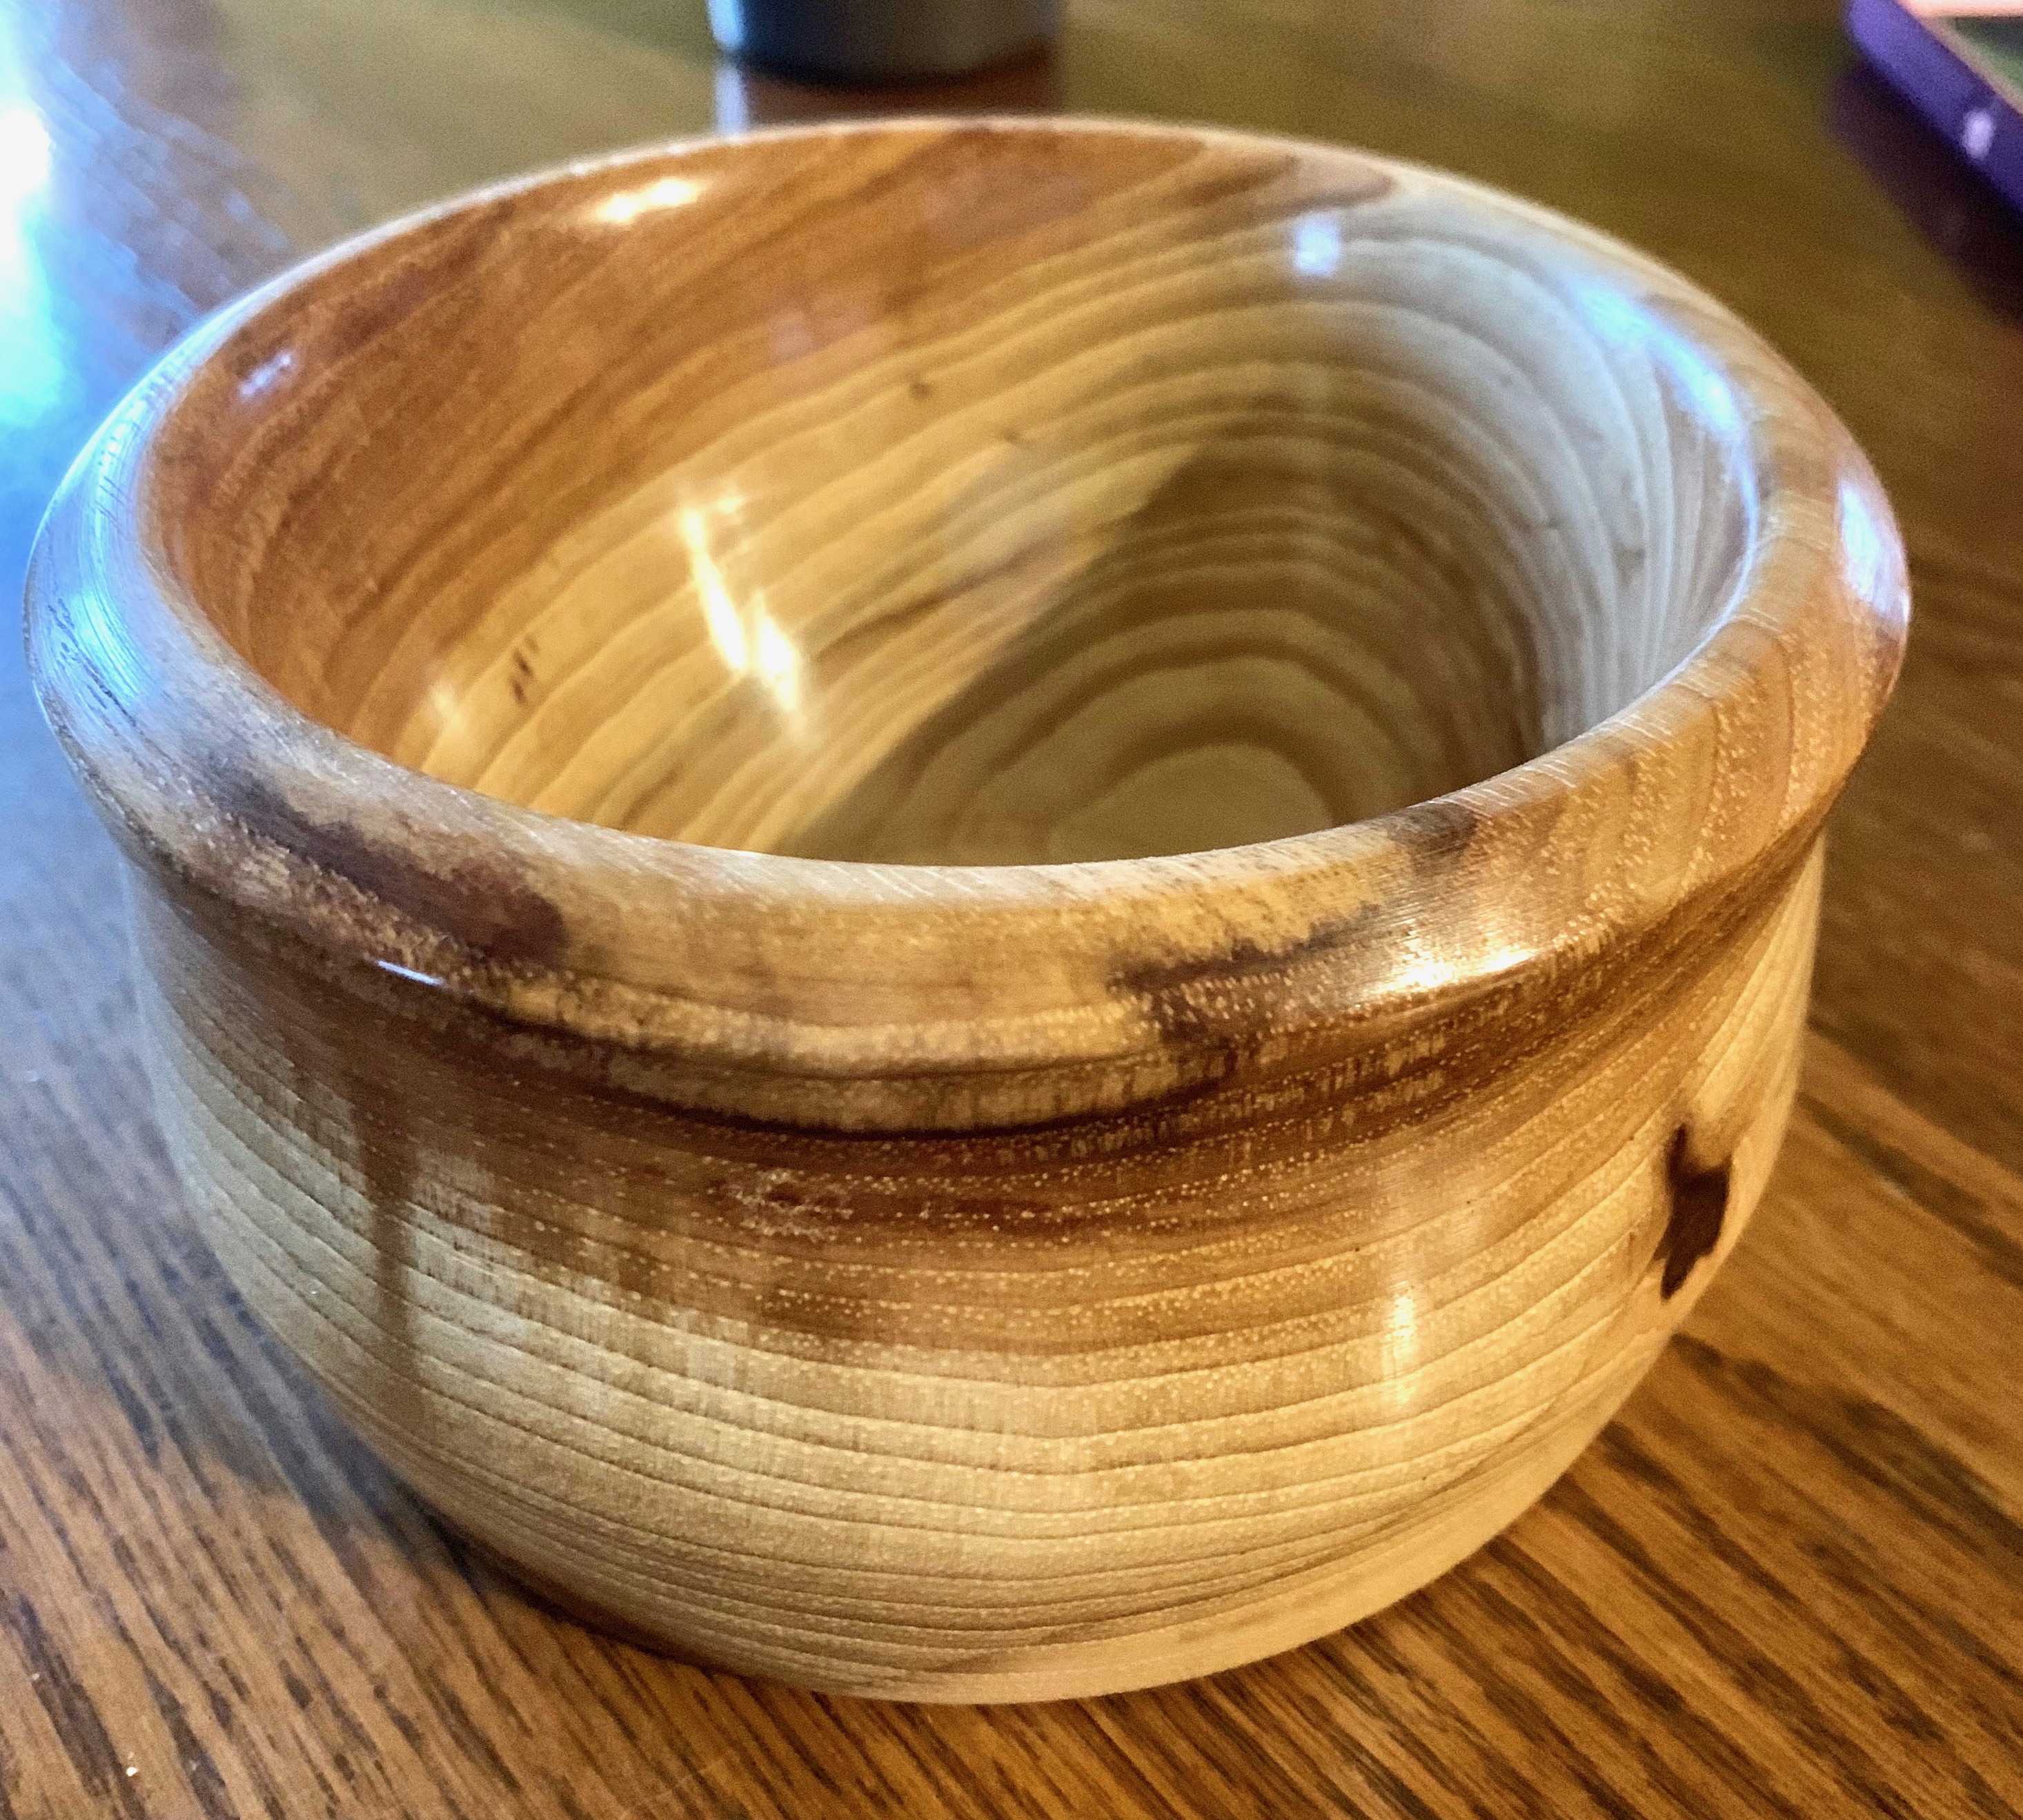
Yes, I’m still doing the wood turning thing. Below is a tiny little bowl I cranked out the other day from a piece of scrap walnut I had laying around. It’s only about 3 inches wide and 2 inches tall. Cute little thing. Useless for just about anything, but cute.
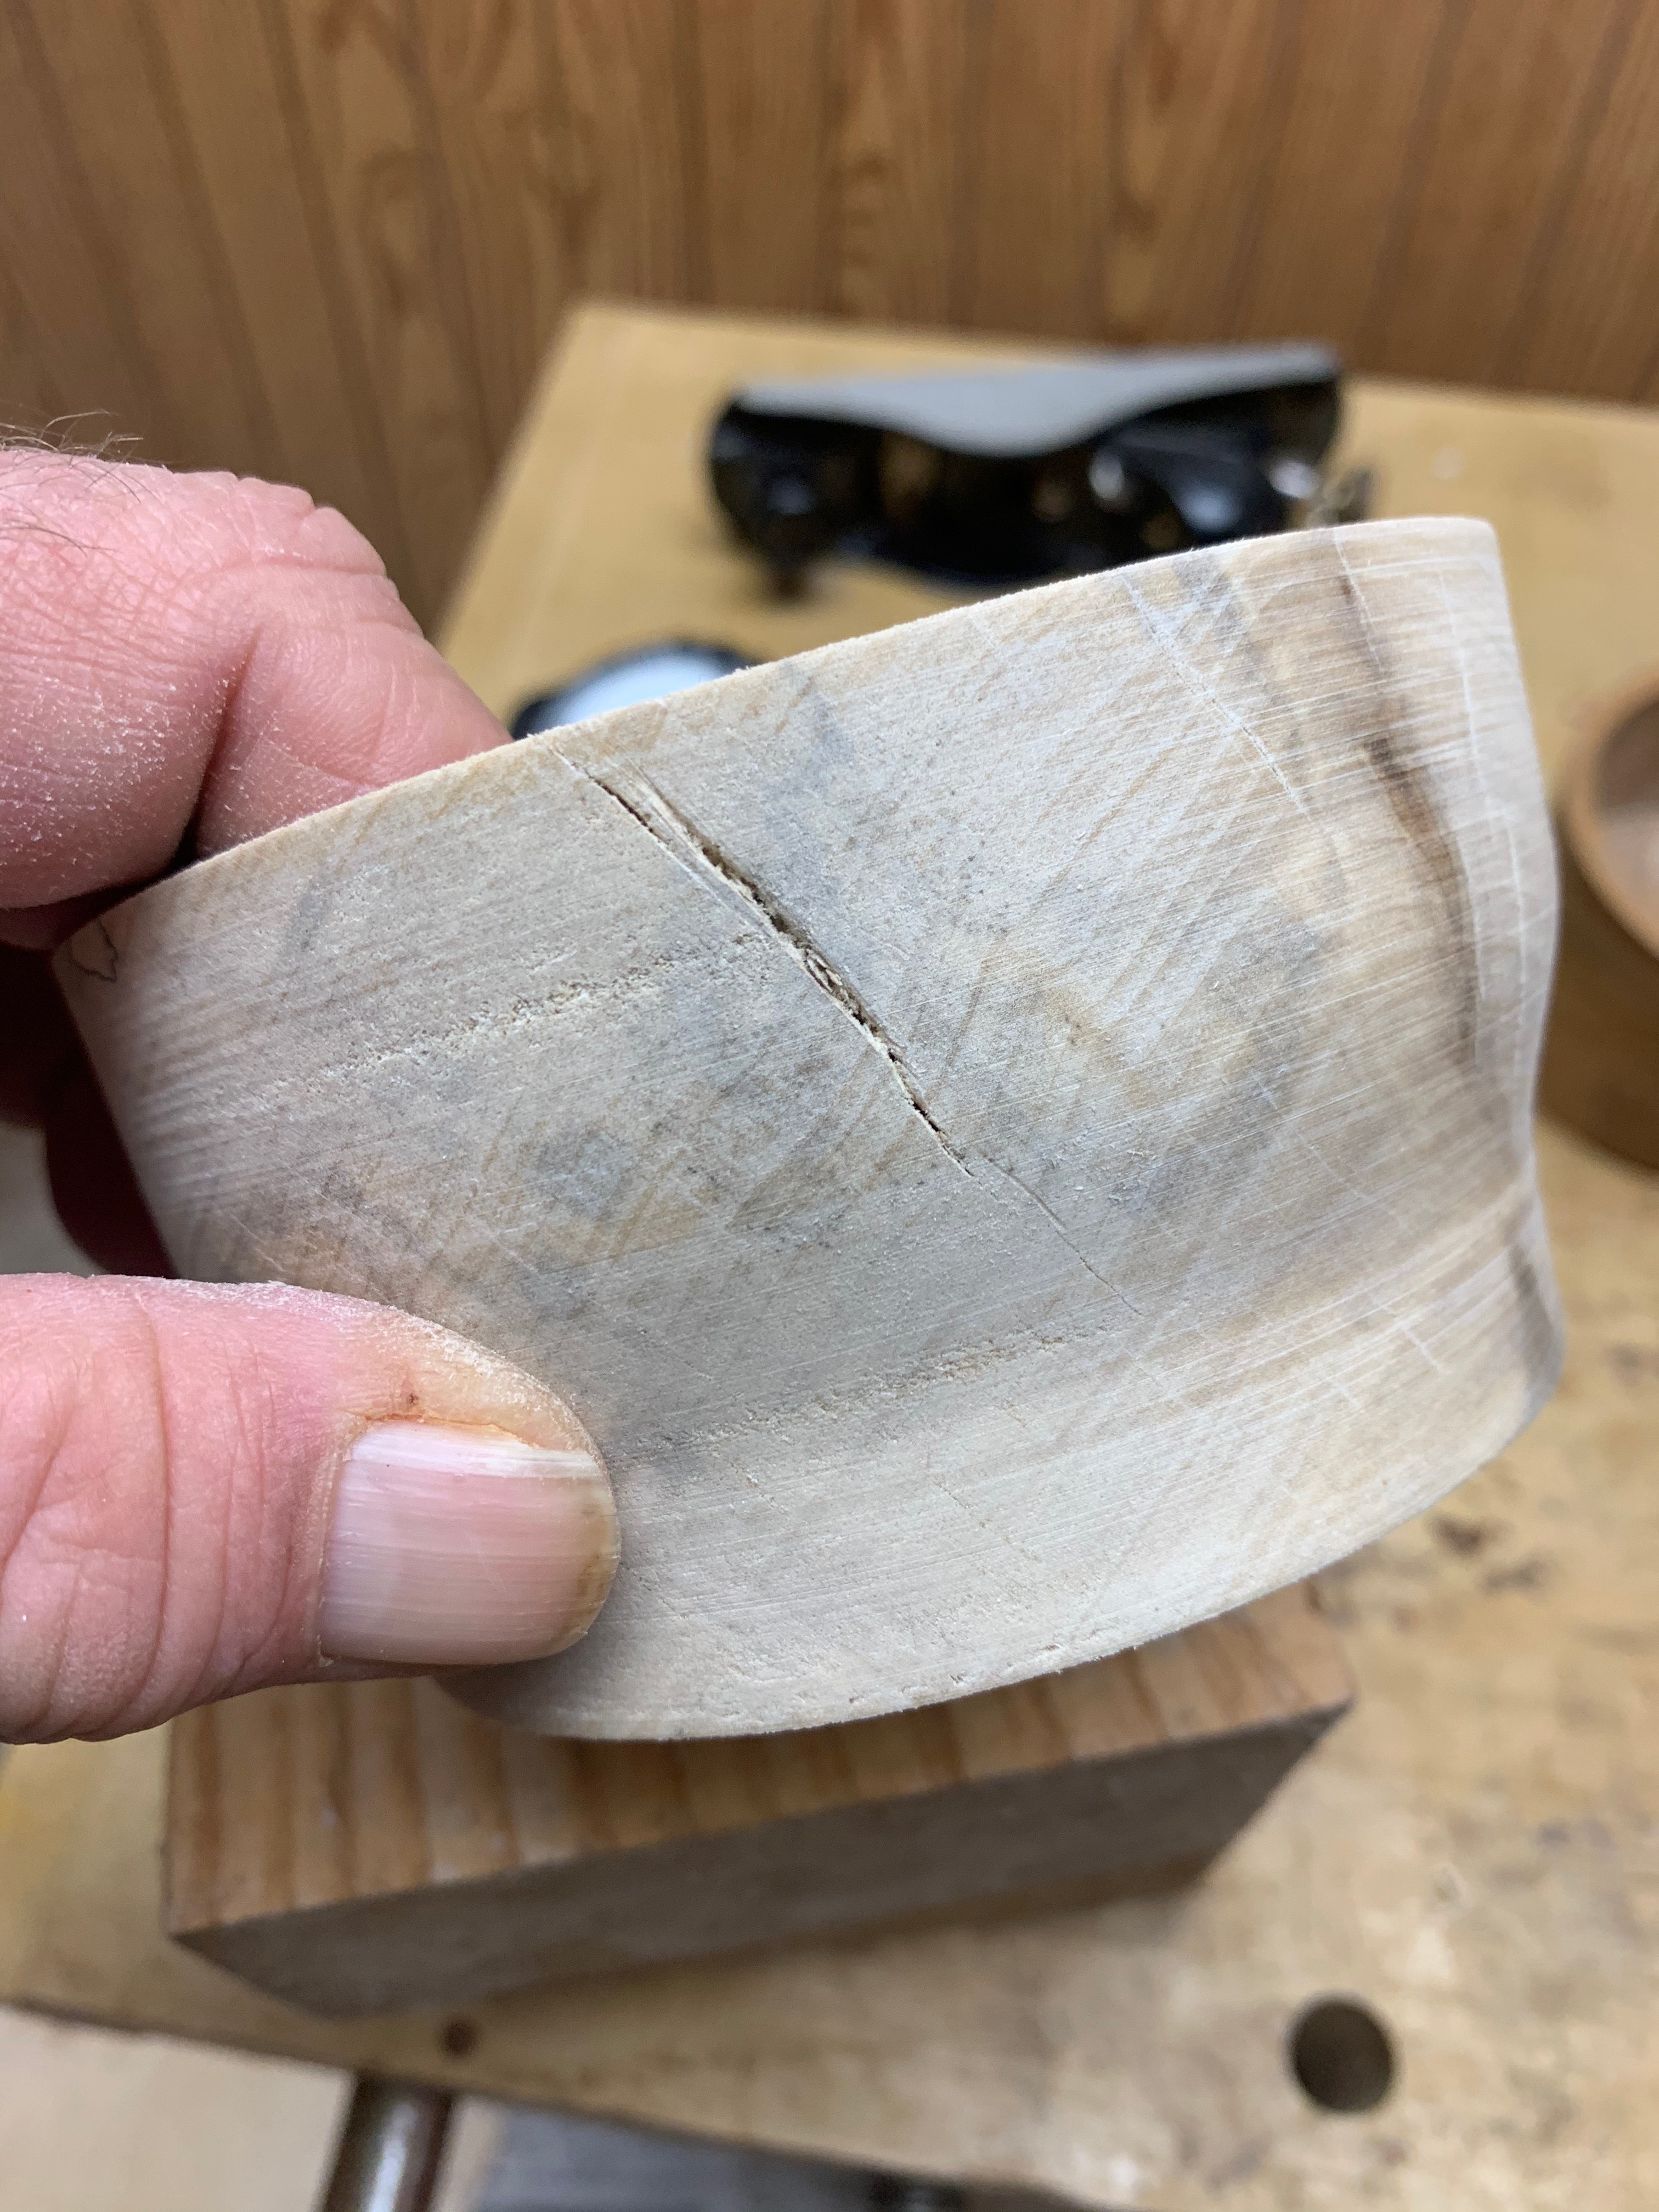
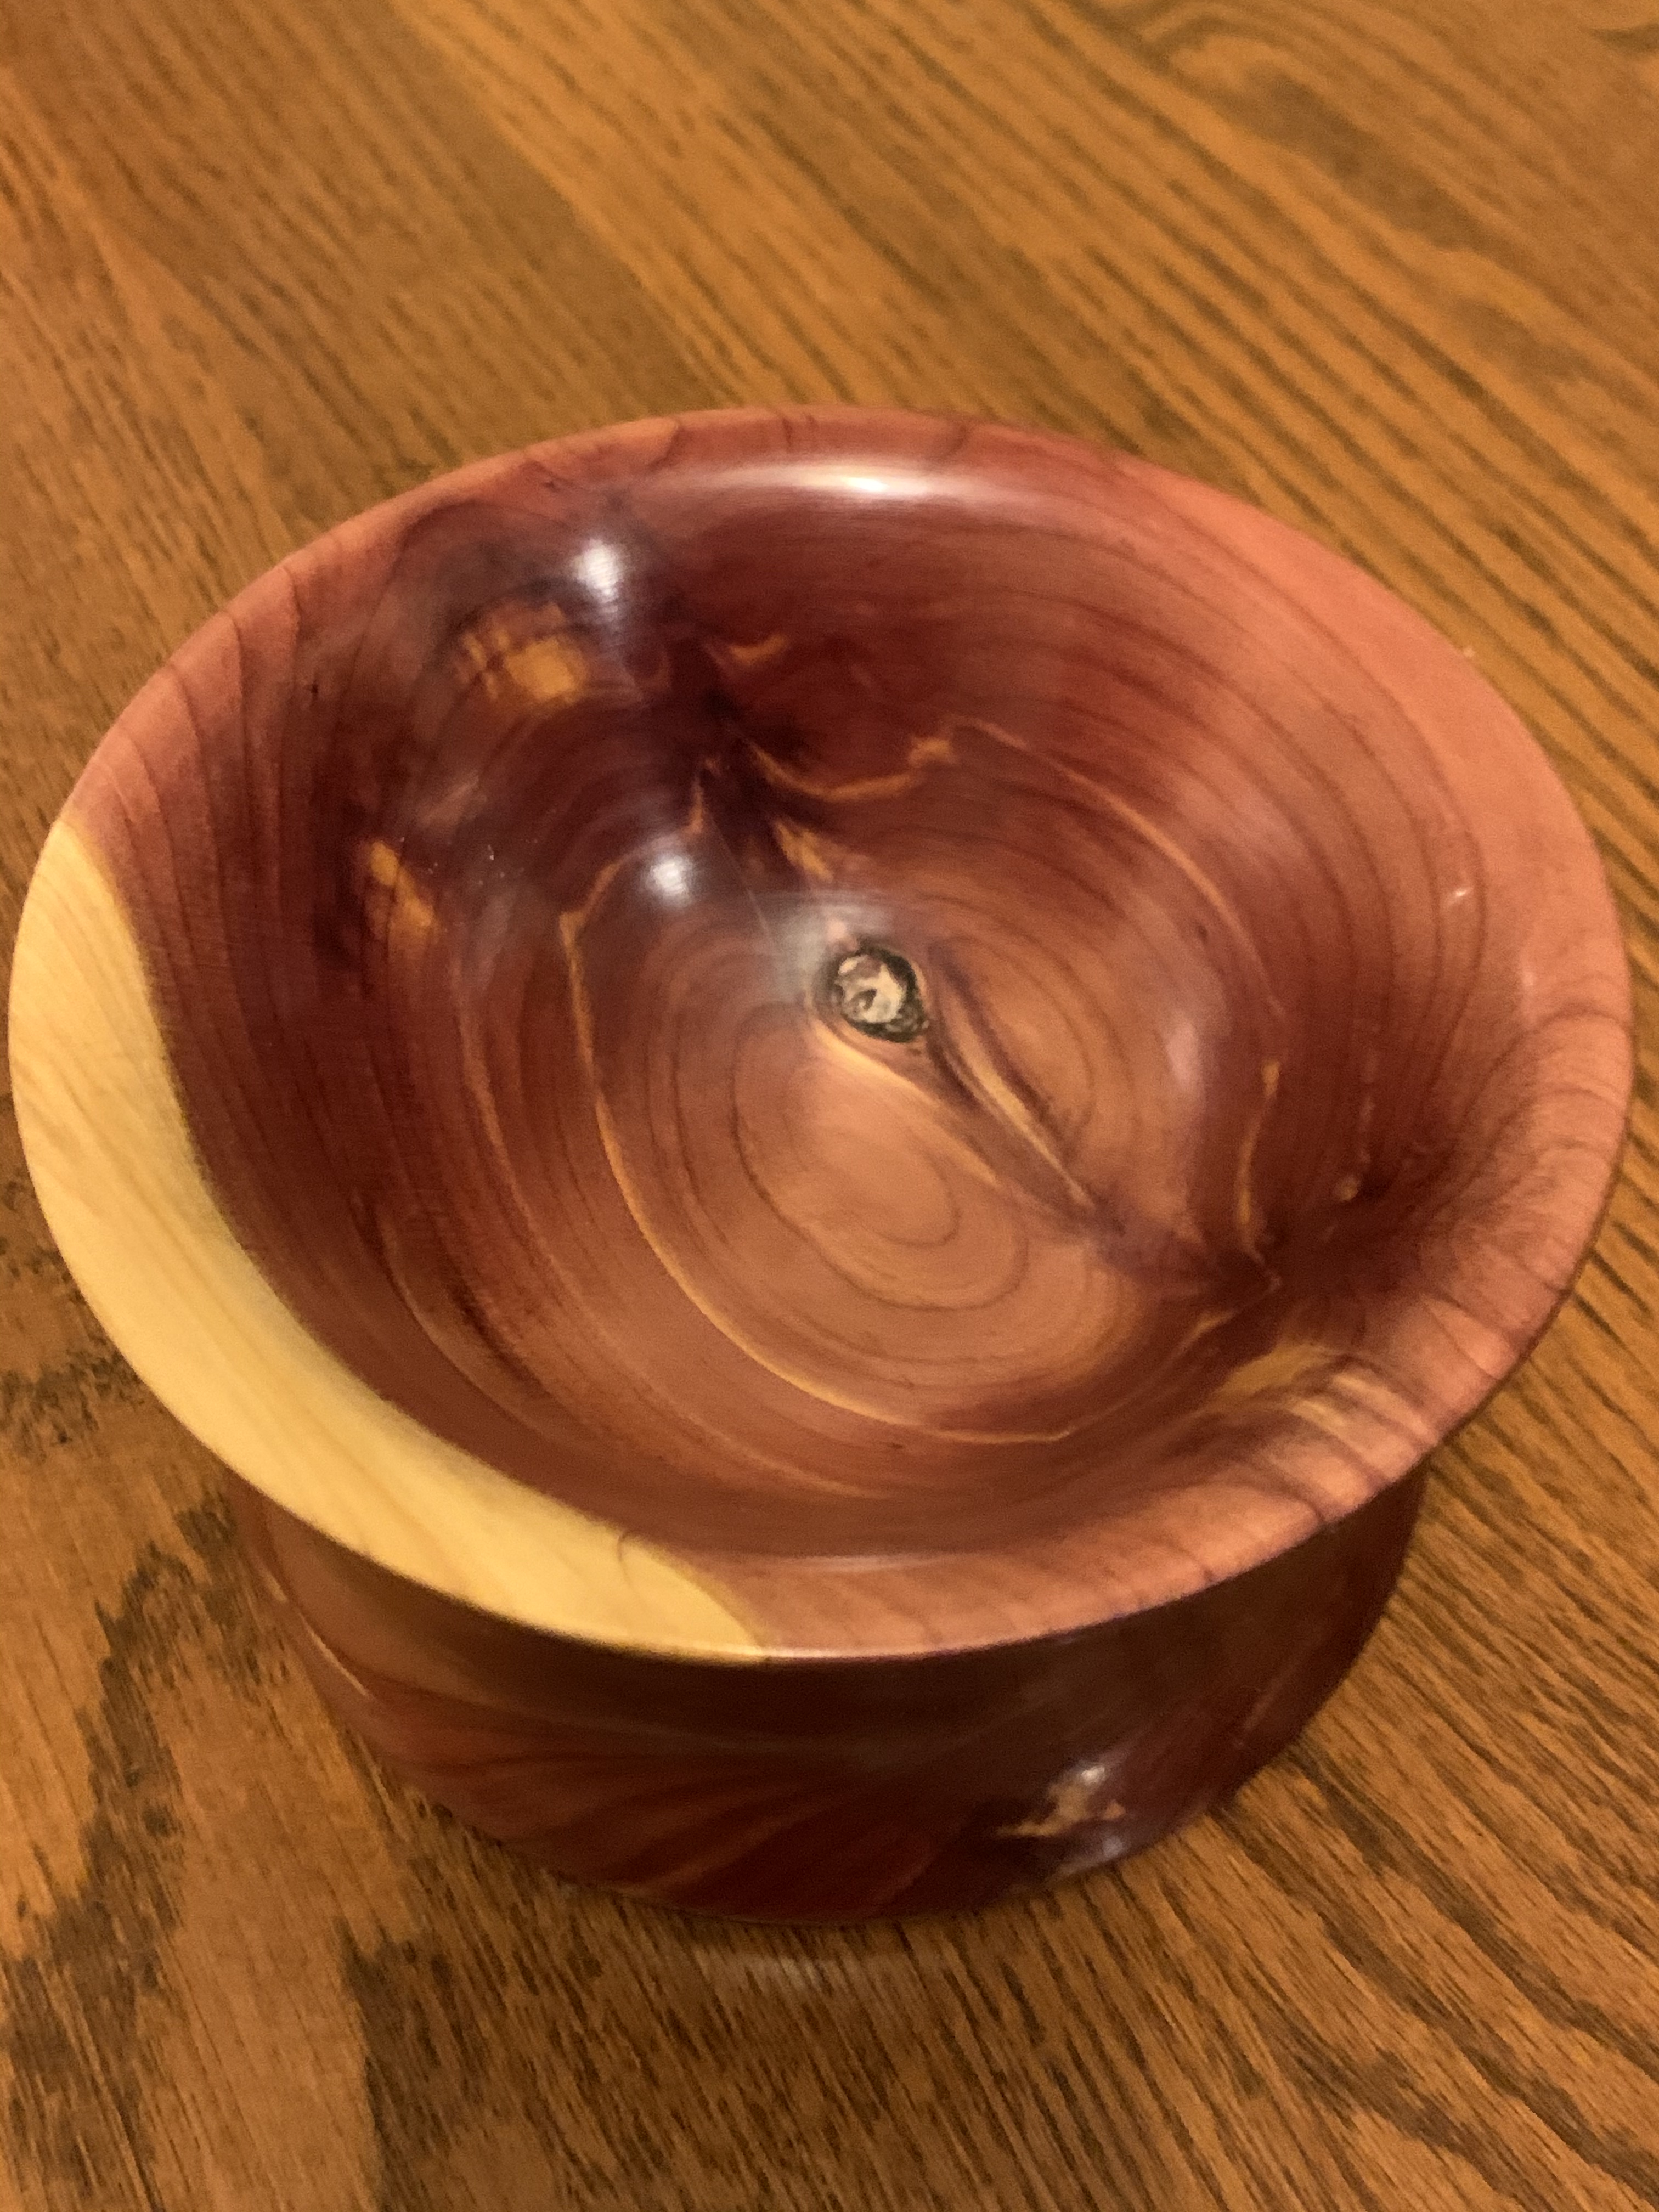
This one down below is a rework. This was a rosewood bowl that started to show microcracks on the surface about a week or so after I made it. So I put it back on the lathe the other day and reworked it.
It turned out that the cracks were surface defects that only extended a few millimeters into the body of the bowl. So I reshaped the bowl, put on a finish, and we’ll see what happens this time.
My experience with rosewood has been puzzling. I’ve made four pieces with Indian rosewood, and three of them exhibited what I’ve been calling microcracks, very, very thin, sometimes lengthy cracks that do not follow the grain of the wood and seem to be confined to the surface of the wood. I’m not sure why, either. The wood was dry and stable, didn’t exhibit any other defects. Someone said that rosewood is very oily and that perhaps the oils were evaporating from the surface causing the wood to shrink, and I suppose that’s possible. We’ll see what happens with this one.
Let’s start out with frogs with this little 30 second video. I put up a video a few weeks ago of some frogs singing when I was out on the bike, but this is in my own backyard this time. As soon as it starts to get dark here, this is what it sounds like here at the house. Turn up your volume and wait a bit. It takes about 10 seconds for the sound to kick in. You aren’t going to see much, it’s dark. It’s the sound that I want you to hear.
Frogs. Dozens and dozens of frogs singing their little hearts out. It one of the most amazing things I’ve ever heard. As soon as the weather got warmer and we got a bit of rain this frog chorus started in and I find myself going out into the backyard a couple of times a night just to listen to these guys.
Lasers
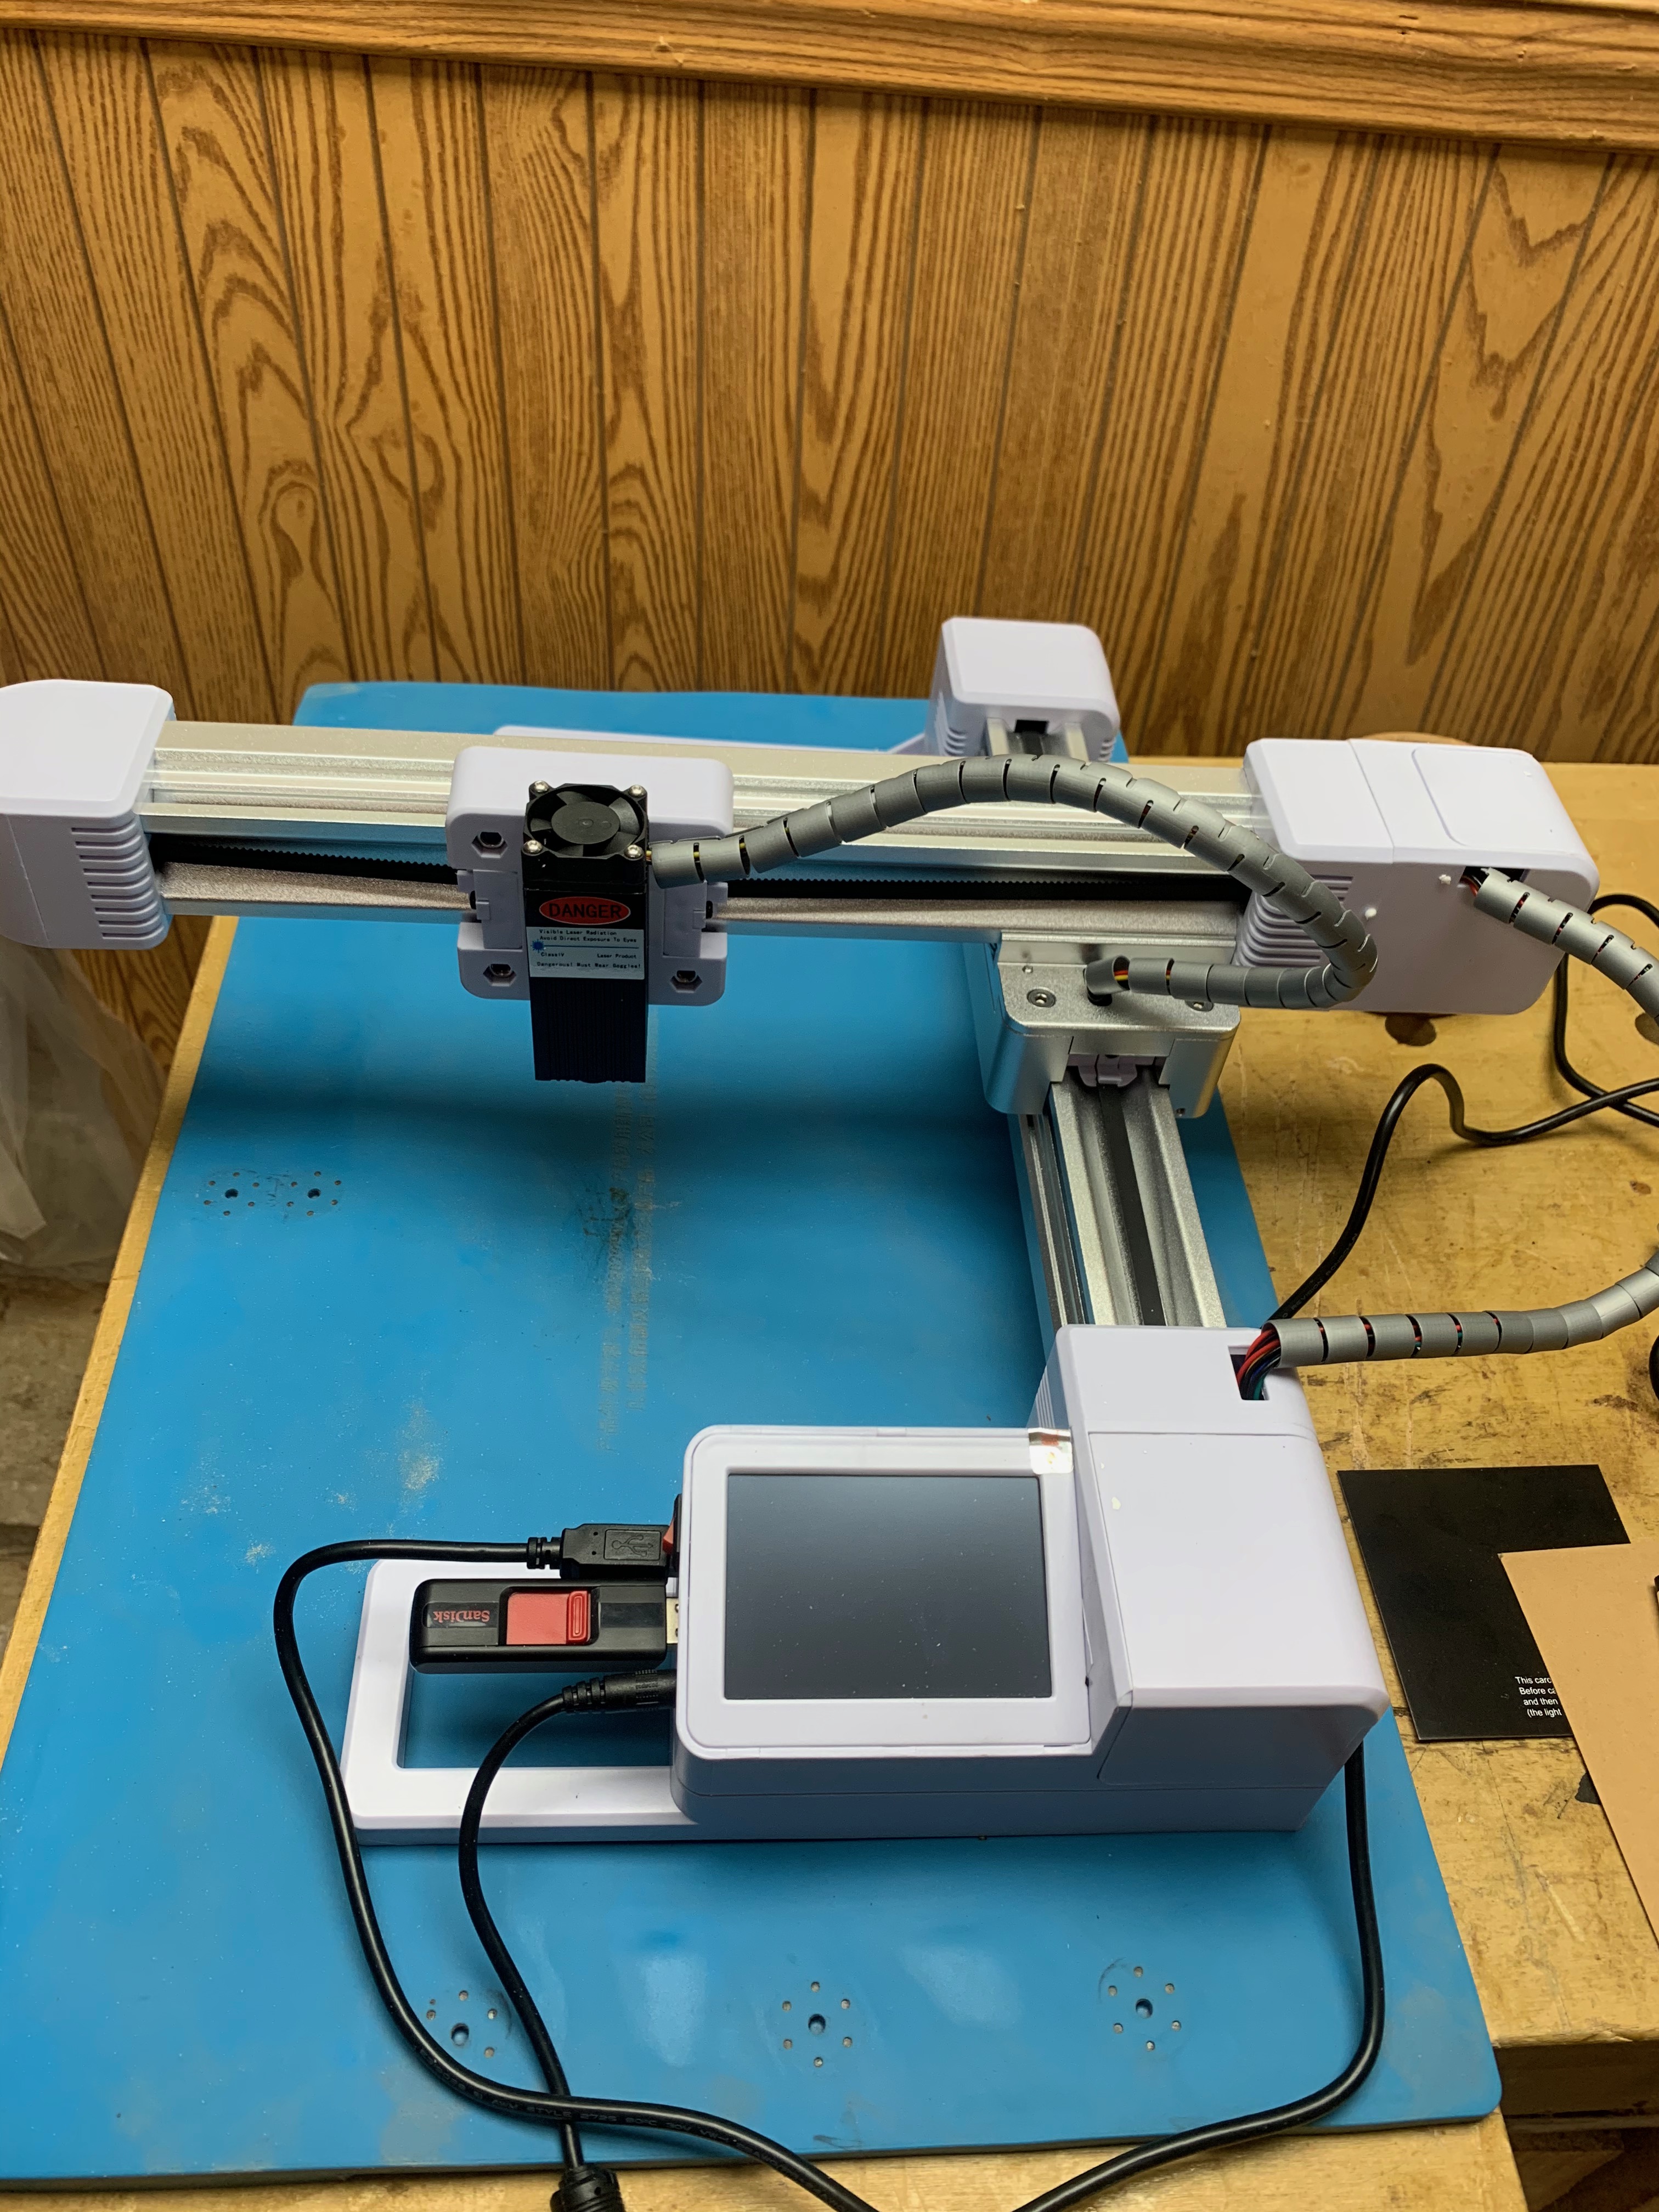
So, let’s move on to lasers, specifically the laser engraver over there on the left. This is the “Laser Engraver laser engraving machine 3000mw laser class 4 Off-line Upgrade Version CNC Pro DIY Logo engraver” from a company called GanGou.
Now I’ve been interested in laser engravers for some time now. You all know by now I fiddle around with wood, and I thought it would be interesting to be able to burn artwork onto some of the things I crank out here from time to time. Especially now that I’ve been getting into this lathe stuff. If I am going to sell this stuff I’d like to put a logo, name, maybe a date, on the bottom of the bowls. A lot of people use custom made branding irons, but those are expensive and can’t be changed without buying a new one. A custom made branding iron with your own logo can set you back well over $100 or more, and then that is all it can do. This laser here costs about $250 and can engrave just about anything you can stuff into a .BMP file.
I never bought one before because they were way, way out of my budget. The good ones anyway. There were always really cheap ones on the market but every one of those I saw was utterly horrible in every single way. ES (Eldest Son) bought one of those a few years ago and it took him days just to get it running and it was utterly useless if he tried to engrave anything bigger than about 1 square inch.
That’s changed, though. Some of the cheap models are now very, very good, and this is one of them. It goes for around $250 on Amazon and it is a lot better than I expected it to be. The build quality on this thing is excellent. It is very, very well made. The hardware is all beautifully finished, the tolerances are excellent, the stepper motors are high quality. It is just very, very good.
This is what comes in the box. Don’t be intimidated. Everything is pre-wired. All I had to do was bolt it together. Four screws hold the arm with the pre-mounted laser to the main arm, 8 screws hold on the feet, and that’s it. It’s ready to go. I went from opening the box to making the first (successful) test engraving in less than 20 minutes.
It does have its quirks, though. The manual is terrible. But then I expected that. Utterly horrible manuals, instructions, assembly notes, etc. are pretty much par for the course with a lot of equipment these days, and this is no exception. The instructions were in both English and Chinese, and interestingly enough the Chinese instructions were just as bad as those in English. (Google Translate makes life for us dabblers in oddball equipment much easier.) The instructions for putting it together are pretty clear, but the rest of the manual deals with the included software, not the engraver itself. And, well…
The software that comes with it, well, you might as well not even bother installing it. In my case I installed it on my test computer, a more or less bullet proof generic, business class Lenovo laptop that I picked up refurbed for $200, running Win 10. This computer will run anything because there is no speciality hardware, no oddball drivers, nothing. It is your basic, simple, 100% compatible Windows 10 computer.
It won’t run the Gangou software, though. The drivers installed. Well, I think they did but it was hard to tell because all of the prompts were in Chinese. The software installed. It ran, and then immediately locked up tight as soon as I tried to click on any of the buttons. As far as I can tell, clicking anywhere in the program, on any control, makes it lock up tight. Sigh… I’ll fiddle with it a while longer to see if I can figure out what’s going on, but I don’t have a lot of hope. I don’t know yet if the hardware will work with the other open source or commercial laser engraver programs out there. I only just got the thing and I haven’t had time to really look into it further.
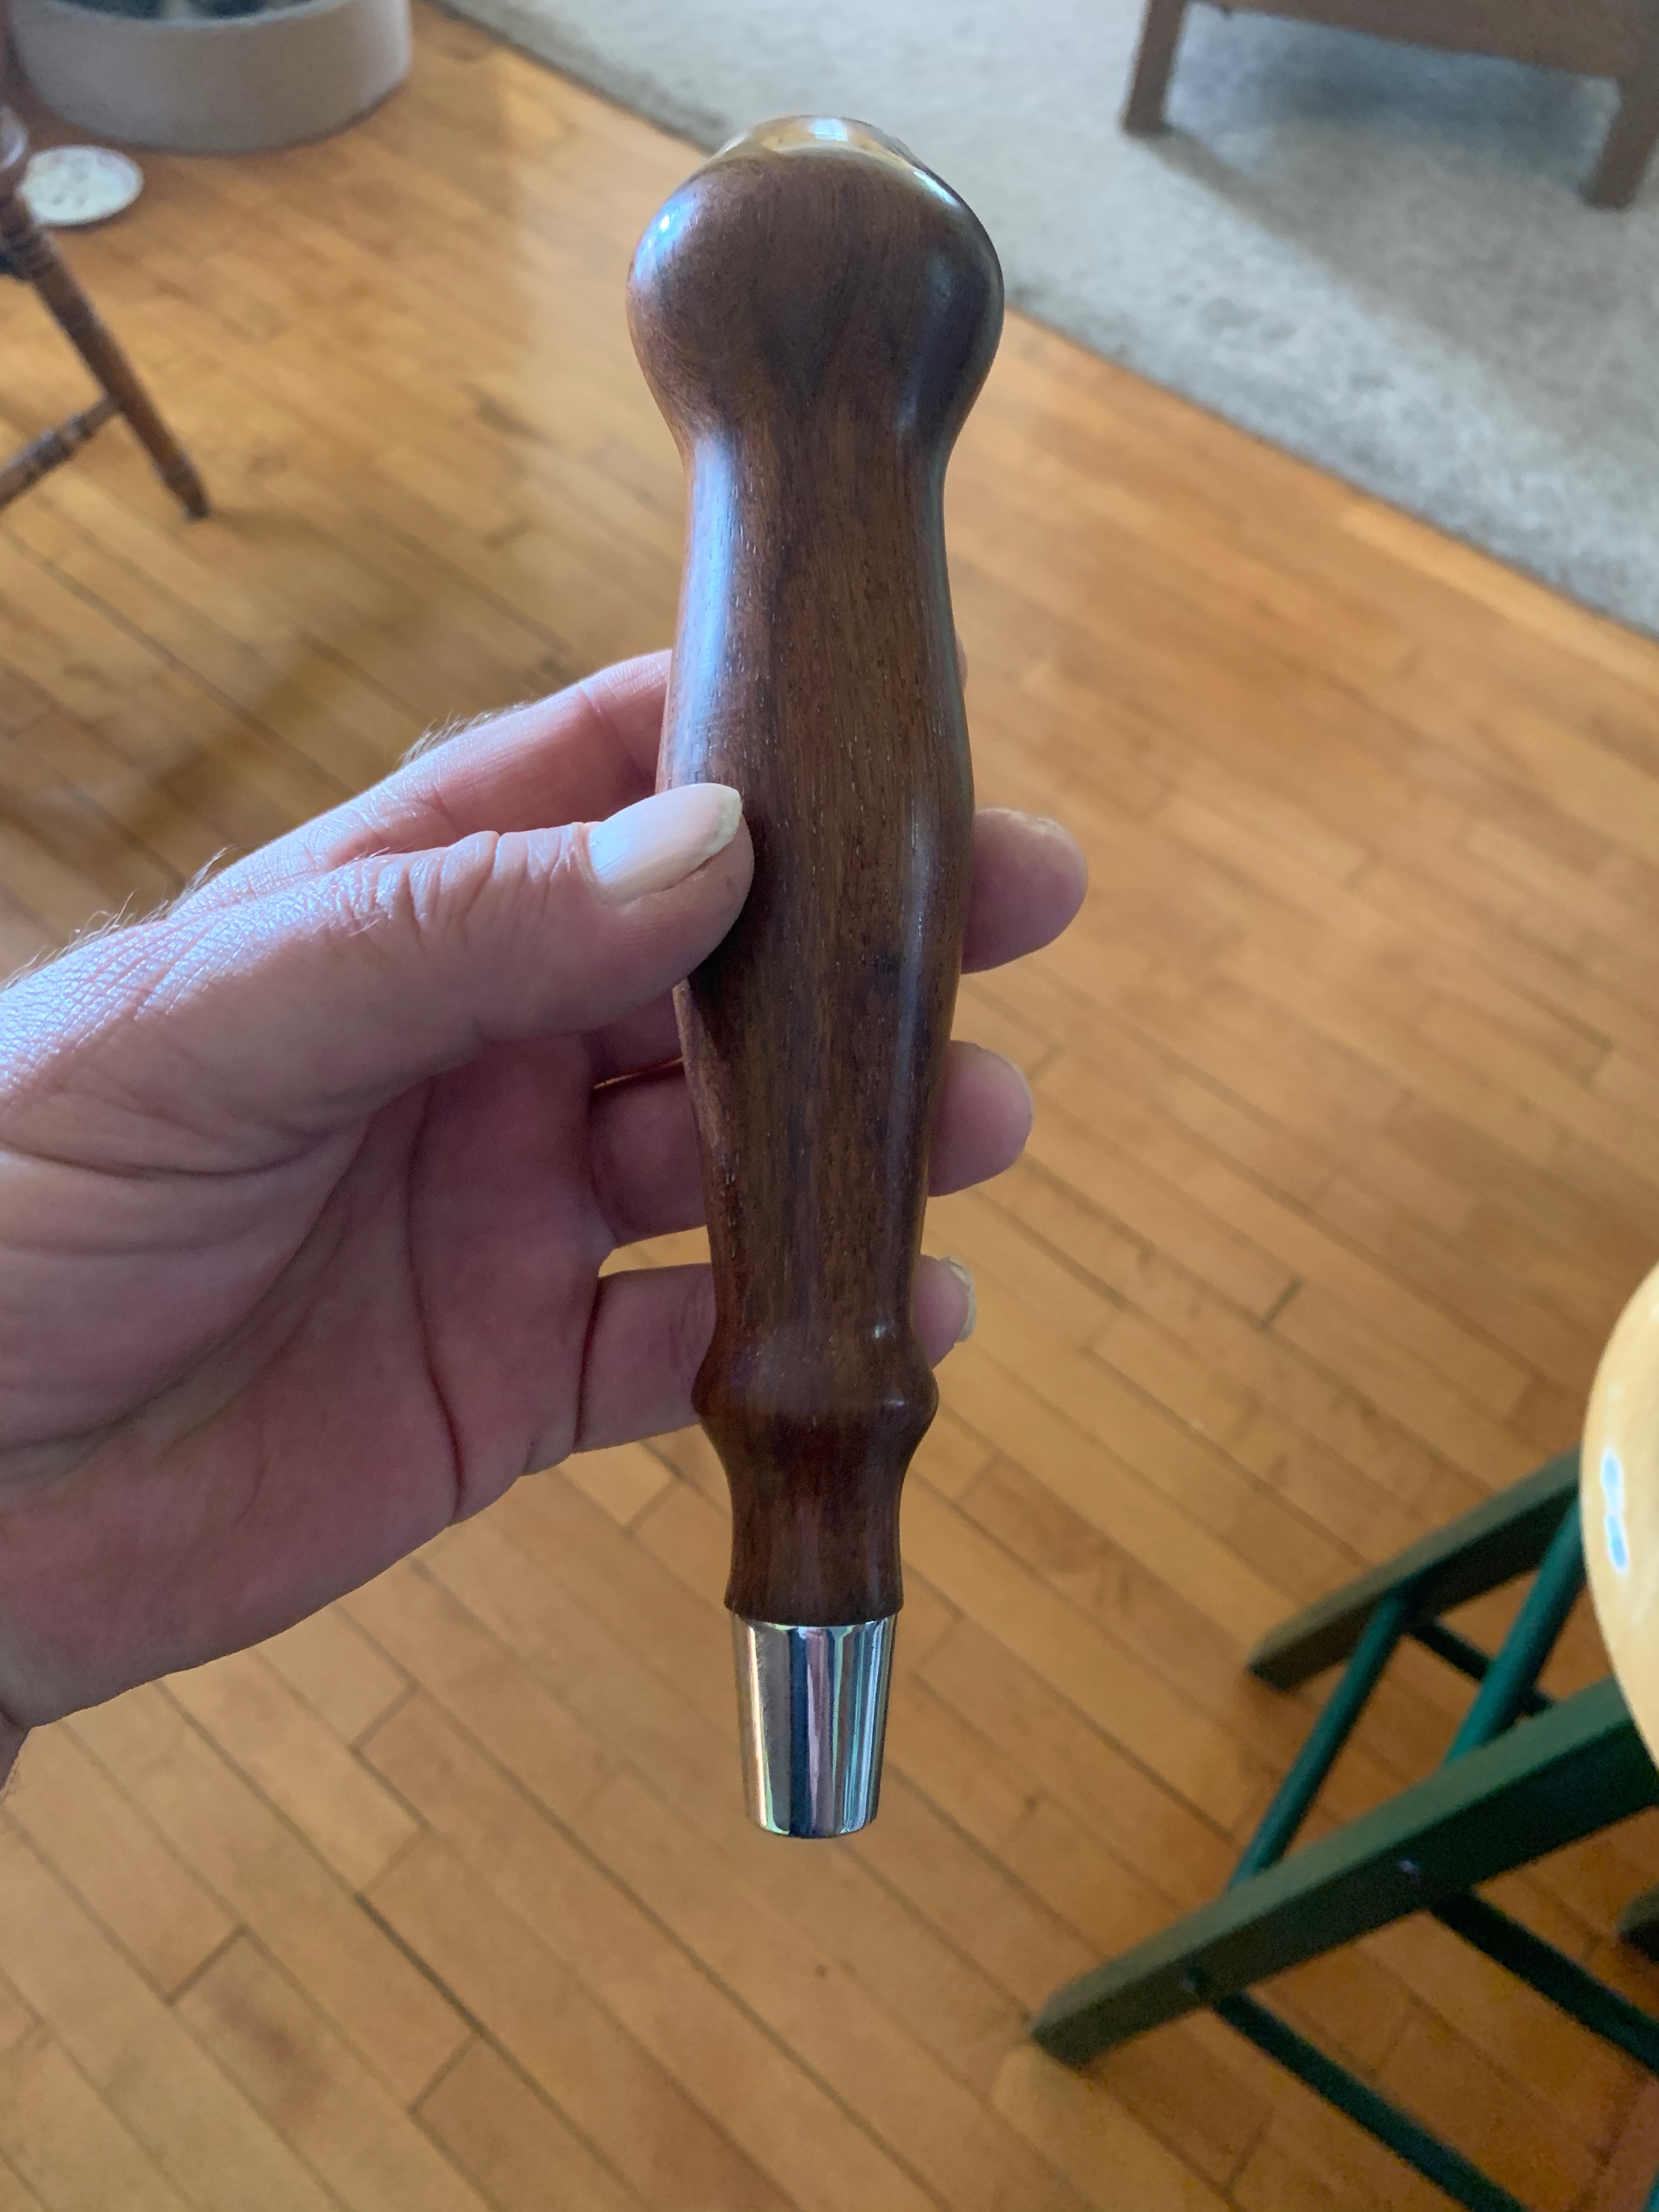
Fortunately you don’t need the software at all to run this thing. You can do everything from that little touch screen. Plug a flash drive with your .BMP file into it, turn it on, select the file you want to use, set the laser strength, do the positioning test to make sure the object is in the right place, and hit start. Using it from the touch screen is about as simple as it gets. And as you can see from the results of a test run on a tap handle I cranked out the other day, it does a pretty darn nice job.
So far I’ve only done about a dozen engravings with it, including test runs, so I have no idea how long it will hold up under continued use, but considering how well made it seems I’m not too worried about that. And at around $250 the price is right. The reviews on Amazon are all over the place. But you have to be really cautious about reviews these days. And a lot of the really negative reviews seem to have been from, well, idiots, to be blunt, people who couldn’t figure out how to put it together, didn’t know anything about laser engravers in the first place and that kind of thing. One of these days I should really do an article about product reviews and how to try to sort the wheat from the chaff, so to speak.
Tap Handles
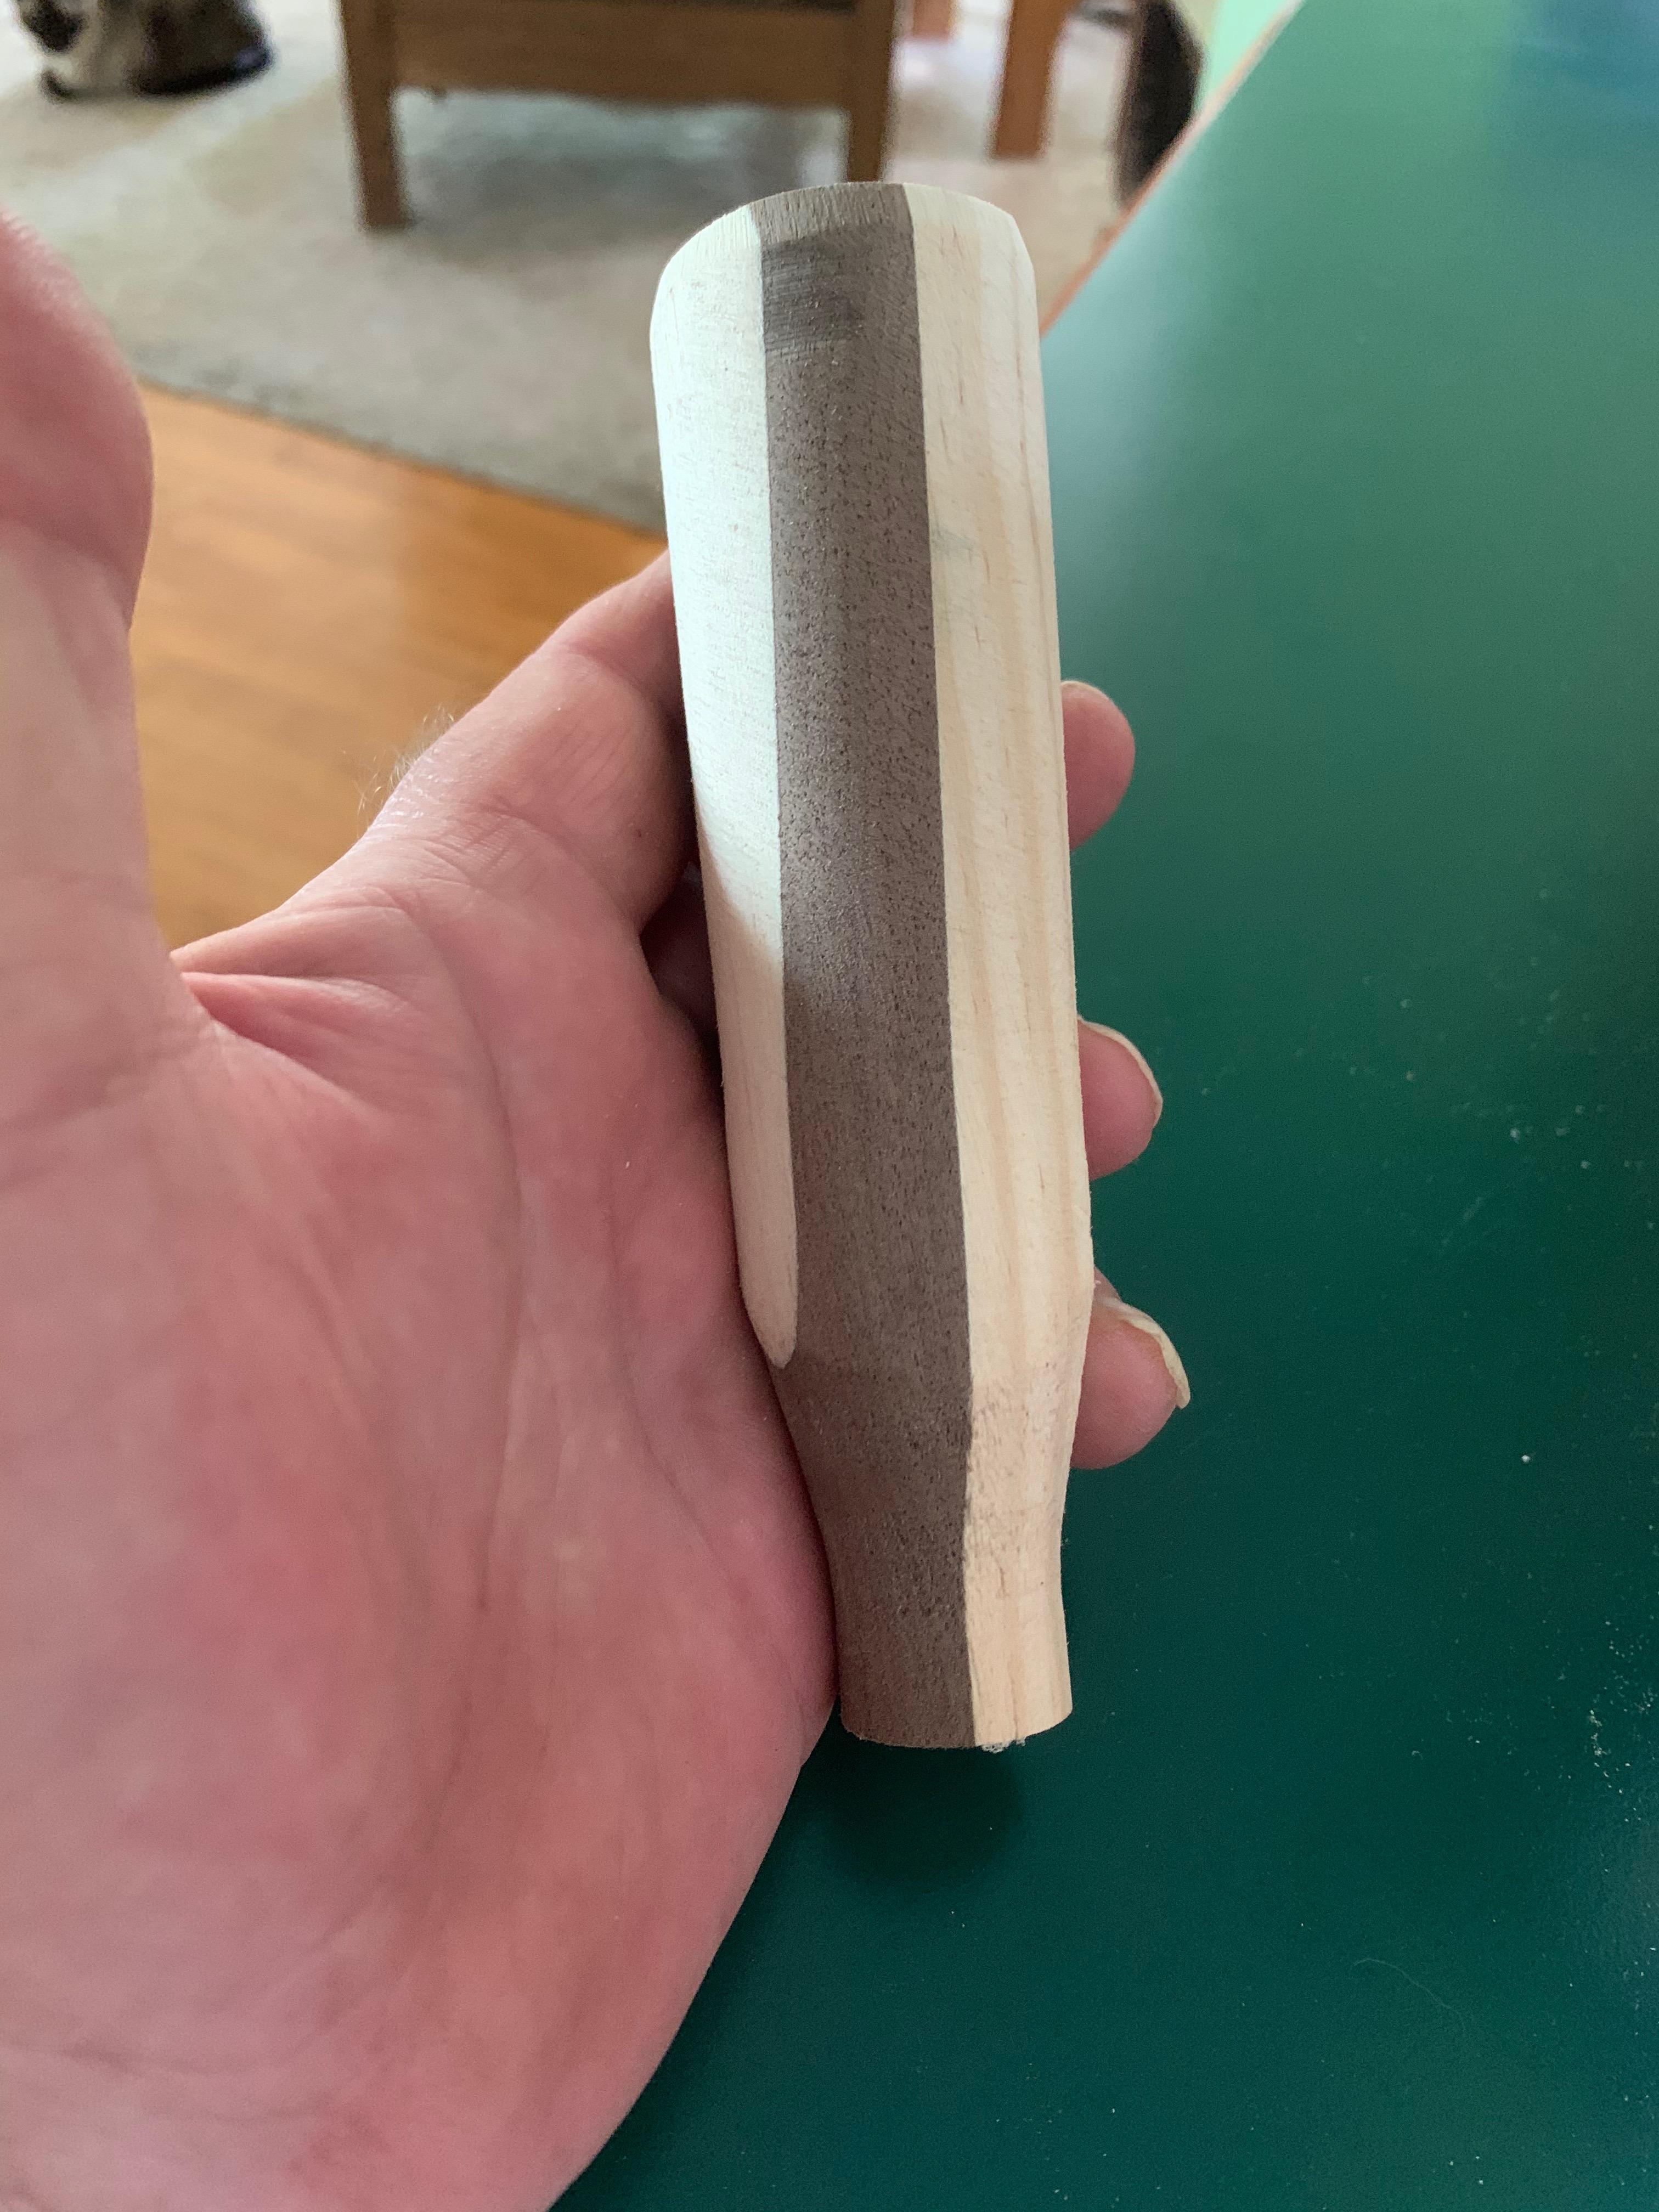
So I’ve been making handles for beer taps of late. A couple of very good friends of ours bought a tavern in a Milwaukee suburb and are converting it into a brewpub, and we might have invested a few bucks in it. The handles on their taps were left over from the previous owner, and all of those handles are left over from the usual big monopoly beer brands which sell stuff that tastes like their breweries are directly connected to the Clydesdale stables drainage ditch. So those handles have to be replaced with something that reflects what’s actually in the kegs they’re connected to. Hence the need for the laser engraver I’ve been talking about. I’ve done a couple of experimental efforts already. They’re dirt simple to turn out in just about any shape I want. The chrome ferrule down at the bottom consists of a threaded rod; a wood screw on one end to go into the tap, machine threads on the other end to fit into a chrome plated brass fitting that then screws onto the tap itself. Those are cheap. I got these for about $1.50 each from a company in India and they’re good quality.
So now that I’ve done some experimenting I am going to crank out about 8 of these for them, and use the laser to engrave their own company logo on them and even specific beer names if they want. And I can make ’em out of scrap wood I have left over from other projects, even glue up blanks with different types of wood like the experiment over there on the left.
Still Biking
Someone asked if I was still bike riding and I am indeed. As soon as the weather started getting warm enough to get out I was out on the bike every chance I had. I’ve had some issues with breaking spokes. I’ve had to have spokes replaced three times already this year and I only have a couple of hundred miles on the bike. I think it’s being caused by shock from going over the railroad tracks around here. The rail crossings have gotten really, really bad over the past year.
Anyway I am out and about, but I haven’t said much here because I figured you all were getting bored with it.
Holy cow it’s dry out there. Thats the river down by the old stone bridge which is on my regular route. This time of year that river up there should be about 3 feet deeper and flowing along at a pretty good speed. Instead it looks more like it normally would at the end of August – completely stagnant, only about a foot or so deep.
We’ve been under fire warnings almost since the snow melted here, and we’ve already had several wild fires. They’re small when compared to those out west, but yes, we have them here too. We got a good shower last night but it doesn’t come close to making up for it. We’ve had to water the gardens here on a regular basis already, something we generally don’t have to do until mid to late summer.
But it still looks amazingly beautiful out there. The road and trailside flowers are in full bloom and I really look forward to getting out of town and into the countryside.
Let’s see, what else… The vegetable gardens are all in. We have the raised beds planted with onions, beans, a variety of peppers, etc. We have one that’s all beets this year because, well, we like beets so why not? We put in a couple of squash, a few cukes. I have two jalapeno peppers growing in pots out front. Only two because I’m the only one who likes jalapenos around here. We only put in 3 tomato plants this year because we still have a lot of canned tomatoes from last year.
The big ash tree in the backyard is going to have to come down. I noticed a large hole near the top of the trunk right where two of the main branches come together and it looks like it’s rotting from the top down. So that has to go before it comes down and damages something. We already talked to a service about doing that and they’ll be coming at the end of summer to take it down. I’m going to keep the wood, at least all of the big stuff, and we’re going to keep the stump and turn it into a decorative feature. That means we get a significantly lower cost for the removal of the tree, all they have to haul out is the brushy stuff.
And that, my friends, is about it for this time.
What’s coming up…
I’ll put up photos of the “official” tap handles once I get those done.
I’m doing some experimenting with the boxelder wood I got from MrsGf’s sister and that stuff looks really nice. If that turns out I’ll put up some pictures of that.
I suppose I should talk about the DeWalt battery chainsaw I picked up a few months ago. That has turned out to work a lot better than I ever thought it would and it deserves a look. I have a Poulan gas chain saw but it is very, very old, very noisy, very messy, leaks oil and is just nasty. So far the DeWalt has been working well. I use it for cutting up large blocks of wood that won’t fit on my band saw or table saw so they’ll fit on my lathe.
Well it was a wild ride on the commodities market this past week as corn hit $7.40 and soybeans hit $15.71. We haven’t seen prices like this in something like ten years or more, and a lot of people are puzzled by why the commodities prices have spiked up this high, this fast. There are no natural disasters or reports of extreme shortages that would cause this, so what’s going on?
It’s a combination of things that have made the markets a wee bit nervous. China is trying to rebuild its pig herds after they were decimated because of culling from African Swine Fever, so there is increased demand there. There are weather problems in parts of South America that are interfering with some corn production down there. USDA announced that US farmers are going to plant less corn this growing season. The reduction isn’t much, but enough to make people think it might make supplies tight. They think people are going to be driving a lot more this summer which is going to mean increased demand for gasoline which, in turn, means more demand for ethanol to meet the blending requirements.
So here we are with corn at 7.49 at the moment. Extended out into the future commodities prices get more reasonable, but not by much. July corn is sitting at 6.73 which is still high but not utterly horrible, and September corn is at 5.92
So, why should you be interested in corn prices? Because volatility in corn prices ripples through the whole economy. High corn prices mean it costs a lot more for the dairy, beef, chicken and pork producers to feed their cattle. That’s going to put pressure on consumer food prices across the board, not just dairy products and meat. High corn prices can force producers to look at other grains like wheat to substitute. That can push wheat prices up, increasing costs for flour, which increases the cost of baked goods. Well, you get the idea.
It also puts pressure on fuel prices. The government mandates that refiners blend a certain amount of ethanol into their fuels, and in the US the majority of that ethanol is made from corn.
Now the markets can absorb some of these increased costs, but not a lot and not for long, and sooner rather than later it’s going to result in increased prices on consumer products. So if corn prices stay this high for much longer, you’re going to see that rippling out into increased prices on food, fuel and other products that you buy yourself. Some companies like General Mills and a few others have already already announced that they’re going to have no choice but to start raising consumer prices. Wholesale beef prices have gone up about 33% already this past month.
And it isn’t just food. Just look at the craziness going on with lumber. And speaking of lumber…
What The Hell Is Going On With Lumber?
That’s a question a lot of people are asking because lumber prices have gone nuts. Prices on lumber have spiked up around 360% in just the past year. That is not a typo. 360% in one year. I was paying under $2 for 2×4 studs last year, now that’s up to around $7 each. MrsGF and I have pushed back plans to do a few remodeling projects here at the house because not only have prices skyrocketed, it’s hard to get materials even at those prices. I talked to one contractor who builds houses. he bid on building one house late last year at $350K and now the same house would be closer to $450K.
Why this abrupt spike in prices? It isn’t because there’s a shortage of trees or something like that. Nor are the people growing trees getting the money. They’ve seen only a 2% increase in the price they’re getting for the logs. It’s all the haulers, sawmills and processors in between that are the cause.
The claim is that it’s being caused by a labor shortage. They can’t find truck drivers, workers at sawmills, tree cutters, etc.
Herbicide and Plastic Shortages
As if corn and lumber prices weren’t enough to worry about, we’re also seeing shortages of herbicides, insecticides, fungicides and, believe it or not, plastics. Farmers are having trouble finding things like field drainage tile and the plastic wrap used to protect bales. There are reported shortages of glyphosate and some other herbicides, some fungicides and insecticides that are used to prevent weeds and protect crops.
What this all adds up to is considerable pressure to increase prices. Someone has to pay for all of these increased costs and in the long run that’s going to be us, the consumers. How bad those increases will be, well, I have no idea. It is going to depend on how long commodities prices remain high and how much of the cost increases the industry is willing to absorb before they have to raise prices. As I said earlier in this, a lot of companies have already announced price increases.
Dairy Pride Act
So, let’s talk about plant based “milk”. I didn’t really want to talk about things like almond milk and all that, but it’s in the news again thanks to the Dairy Pride Act being pushed by Sen. Baldwin from Wisconsin and a few other politicians.
The whole problem revolves around that one word, milk, and how it is defined. There are two real definitions of the word, one biological, and one legal. Biologically speaking milk is the scrections of the mammary glands from mammalian animals and which are used to feed their young. The legal definition is, well, here’s a direct quote from federal government regulations:
“Milk means the lacteal secretion, practically free from colostrum, obtained by the complete milking of one or more healthy cows, which may be clarified and may be adjusted by separating part of the fat therefrom; concentrated milk, reconstituted milk, and dry whole milk. Water, in a sufficient quantity to reconstitute concentrated and dry forms, may be added.”
You will undoubtedly note a lot of problems with the above. The most glaring problem is that it claims milk only comes from cows, ignoring the fact that goats, sheep, horses, oxen, even beavers, give milk. (Mmmm, beaver milk. Yum. Wasn’t there an old Monty Python joke about Peruvian beaver cheese?) (Sorry, my mind just flashed up an image of a farmer trying to milk a beaver. That’s just the way my brain works. It scares me sometimes. My brain, not beavers.)
So, here’s the problem. For years now certain companies have been selling nut, grain or bean based liquids as substitutes for dairy milk and calling the stuff milk. This is, technically, illegal. The US has very strict labeling requirements when it comes to food, and the government has gleefully gone after a host of companies and individuals who mislabel their products. But not when it comes to this stuff. For whatever reason the agencies responsible for food labeling accuracy have blithely ignored the mislabeling of these products, despite a considerable amount of pressure from the dairy industry to do something about it.
Now you might think this whole thing is silly, and you do have a point. But on the other hand the anger of the dairy industry is understandable as well. The dairy industry has spent many, many decades and hundreds of millions of dollars in advertising, propaganda, health claims, puffed up PR campaigns and other efforts to try to make its products appear to be healthy, good for you, pure and wholesome, and even essential. And then along come these upstarts trying to cash in on all of the work the dairy industry put into making milk look good, and claiming that their products are “milk” as well, and, well, they’re pissed.
Legally speaking, the dairy industry has a valid point. This stuff does not meet the legal definition of “milk”. US food labeling laws, if strictly interpreted, should make the labeling of this stuff as “milk” to be illegal. But the court system doesn’t seem to see it that way and has let this continue, so, well, here we are then.
Politicians from large dairy states like Wisconsin are upset about this as well because, well, let’s be blunt here. The only reason they’re upset is because the dairy industry is paying them to be upset. The dairy industry pumps huge amounts of money into the coffers of these politicians and their PACs. The result is this Dairy Pride thingie which basically says that you can only label actual milk as milk.
Will this actually go anywhere? I have no idea. If it passes, will it help the dairy industry? No. Won’t do a thing to help the dairy industry. Will it hurt the fake milk industry? Probably not. They’ll just come up with something else to call their stuff, pump a few more bucks into their advertising budgets, and that will be it.
Now, let’s see, what else did I want to babble about? There was some more stuff… Oh, amateur radio! Gads, almost forgot about that.
My OCFD (that’s an “off center fed dipole” for you non-radio people out there, a kind of antenna) came down again. That is a long wire antenna, about 130 feet long in total. It had snapped before and I’d repaired it and put it back up, but it snapped again now, so I figure that years of hanging in the air and flapping about in the wind has caused metal fatigue or something in the wires, so I didn’t bother fixing it again. It’s going to come down and I already have another one on order. Why not build my own? I could, but I did mention about the lazy thing, right? Why build one when I can buy one that’s probably going to be better than I could make myself.
Meanwhile I’m using a GAP Titan DX vertical antenna which has turned out to be way, way better than I’d hoped. I’ve had that one up for some time now and it works amazingly well. I had contacts with 3 Japanese stations in the space of about 10 minutes yesterday afternoon using less than 100 watts output, plus one or two in Europe and in other exotic places like Texas, New York, etc.
Who wants to sit in a basement workshop when stuff like this is outside?
My woodworking and wood turning has come to a screeching halt recently because I’ve been spending a lot of time out in the gardens hauling compost, tilling up stuff, etc. We got the onions and garlic in but it’s still too early to put anything else out. The weather hasn’t exactly been warm here except for two days when it was in the mid 80s. Generally it hasn’t gotten much above 50 here, with night time temps pushing down into the mid 30s or even a bit lower. That hasn’t kept the tulips from blooming though as you can see from that photo up there.
But back to wood working to wrap this up. I really enjoyed making decorative lamps with resin and wood and want to do some more of those, so I’ve got more resin on order and that should be coming this week yet. The few “jumble” pieces I did as experiments with odd bits of wood cast into resin, well much to my surprise people really seem to like those for some reason so I’ll probably do a few more of those. But what I really want to make are more decorative lamps. Anyway, more about that when I get into that.
Let’s talk about green and wet wood. There are a lot of woodturners out there who love to work with green wood, and there are some advantages to doing so. It cuts very easily, produces less dust and allows you to work far more quickly than if the wood was dry. But that’s where the advantages end because once you’ve turned that bowl or other object you are still left to deal with the fact that you’ve got a wet piece of wood that is going to distort, warp, split and crack as it dries unless you do something about it.
This is generally what I end up with when I’ve tried most of the “advice” given by the people who claim you won’t have any problems at all working with wet wood if you follow their instructions and/or use the products they’re trying to sell.
These experts claim this isn’t a problem and that if you do things right everything will work out just fine and dandy. (Personally I think some of these guys have been breathing lacquer fumes too long.) Their solutions to this problem range from painting it with various substances, cutting it in specific ways on the lathe, burying it in buckets full of strange pellets and I don’t know what all else. I’m fortunate enough that I have the time and resources to be able to experiment with a lot of things and I’ve tried most of these techniques and I can tell you from personal experience that none of them actually work very well. At worst they don’t work at all and what you’ll end up with is a cracked and distorted mess. At best your project won’t crack or split, but it will still distort and the resulting object won’t be the same shape it was when it came off the lathe.
Now if you’re making simple bowls some distortion isn’t going to be a problem so you might be able to deal with it. But I like to make boxes or canisters or whatever you want to call them with fitted lids like the one over there on the right. For something like that any significant change in shape is going to result in a lid that doesn’t fit properly. That means I need to work with wood that is dry and stable to begin with.
But the wood I sometimes get is about as far from “dry and stable” as it can get. Yes, I buy kiln dried wood from commercial sources. But I also like to work with a lot of woods that I can’t get that way. Either the commercial sources sell it only as “processed green” and sealed in wax or anchorseal, or it’s wood I just picked up somewhere from someone trimming trees, or that I found at the town compost site. When I get something like that I have to figure out some way of drying it down to the point where it will be relatively stable. Just putting it on a shelf and letting it dry naturally will work. If I don’t mind waiting, oh, months, maybe years. Wood can take a long, long time to dry, especially something like a 5 inch thick slab.
I could build my own kiln or drying system. They aren’t that expensive or complicated to build and there are plans available all over the internet. Some of them look like they might work reasonably well. But I don’t really have room for something like that. Possibly I will build one in the future, but for the time being that is something I would like to avoid.
So now we come to the microwave. There are a lot of people out there on the internet that claim this works pretty slick if you do it right. But there are also almost as many people who claim that microwaving wood is a very bad idea and it can result in a complete disaster, including starting things like the wood, your microwave, and possibly your house, on fire. So I wanted to find out if microwaving wood really works as a way to reliably dry wood.
Microwave ovens are basically radio transmitters, with consumer microwaves operating at a frequency of around 2.45 GHz (gigaHertz). They work because the radio waves bombarding the object they are directed at cause the molecules of the object to rotate or vibrate, which generates heat. That is a very simplistic explanation but pretty close enough for this. But not all materials absorb this energy to the same degree. Water is very good at absorbing this energy, meaning it will generally heat up faster than other materials in the object in a process known as dielectric heating.
So I know that, theoretically at least, microwaving wood to help to dry it should work. In theory the water molecules in the wood will become warmer than the surrounding wood, causing it to force its way out of the wood fibers. Maybe. Emphasis on that last word: “Maybe”.
The problem with most of the videos and other sources you find on the internet is that they rarely provide you with any real quantitative data. With a lot of these guys they’re like “chuck it into the microwave and nuke it for X seconds (or minutes), then wait a while and do it again. If it starts on fire stop.” This doesn’t exactly give me enough information to get decent results. I decided to go about this in a more thoughtful way, measuring moisture content, weight, temperatures and other factors along the way so if I did get interesting results I could repeat the experiment, altering the parameters to try to get better results.
The Equipment
First I needed a microwave. I suspected MrsGF would not appreciate me using the one in the kitchen, so I went out and bought the cheapest decent microwave oven I could find. That cost me $70 including shipping. And to be honest, well, damn, this thing was nice. Nice fit and finish, stainless steel trim, stainless steel interior, lots and lots of options and one of those rotating turntable thingies inside, which I wanted because I figured rotating the wood while it was being nuked would help to prevent hotspots from developing in the wood. (How can they make an oven this nice, ship it all the way from China, sell it for $70 and still make money off it?) I almost felt guilty about using it for this. Almost.
Next is a wood moisture meter. These things used to be ridiculously expensive but prices have come down to where you can get a pin type moisture meter for around $25 – $35. I’m not going to go into the differences between pin and pinless models or how they work and all that. You can find that info yourself if you’re really curious. The one thing I do want to emphasize is that you shouldn’t trust these things too much. They tell you only what’s going on at or near the surface of the wood. The outside of the wood could indicate it has, oh, 5% moisture level, but just a short distance farther into that hunk of wood the moisture level could be significantly higher.
The best way to measure how much moisture a piece of wood has given up is with a scale. That’s how I keep track of wood I have drying naturally on the shelf. I periodically weigh it, the write down the weight and date. When it stops losing weight that means it has probably dried down to a point where I can consider actually using it. A decent scale isn’t that expensive. This one cost me $27 from Amazon. And it is surprisingly accurate. I used to repair and certify scales for commercial use and I still have my test weights, and this thing was accurate down to something like 0.001 of a gram. It can handle weights up to about 22 pounds according to the manual.
The next piece of equipment is a contactless thermometer because I want to measure how hot that piece of wood gets during this process, and, hopefully, keeping it from getting too hot and starting on fire. Mine is a Fluke but you can get brands that are a lot cheaper than that which will still work reasonably well, especially for something like this.
I want this for three reasons. First I’m going to be handling the wood that I put in that oven so I can weigh it and I want to measure the temperature before I grab the thing so I don’t end up in the ER with burned fingers. Second, I want to do everything I can to make sure that nothing starts on fire. I want to stop this immediately if the temperatures of the wood get too high. And third I want to measure the temperature of the wood at various stages of this process to see how much it heats up after specific periods of time being zapped in the oven.
The final piece of essential equipment is that fire extinguisher up there. Seriously. I’m about to chuck a piece of wood into a microwave oven. I don’t think it will start on fire, not if I am reasonably cautious. But it is far better to be prepared and have it ready to go rather than try to run and grab it after things start smoking.
Sidenote: You should have one, probably several, in any case. If you are a woodworker, you’re working with power tools with motors that can overheat, even produce sparks. You’re sharpening tools which can also produce sparks. So you have a variety of potential ignition sources scattered through your entire wood shop, which is also filled with wood, wood dust and wood shavings. So yes, you need a fire extinguisher. They aren’t that expensive. Buying a few extinguishers and having them located in convenient locations in your shop, garage and house is a hell of a lot cheaper than losing your shop, your garage or your house to a fire that you might have been able to prevent. End of rant.
The Test Subject
The final element in all of this is the wood. I want a chunk of wood that is typically sized. Most commercially available bowl blanks are about 6 inches square and 2 – 3 inches thick, so I needed one about that size. I also wanted a piece of wood I didn’t like very much. So I ended up with a block of cherry because it was the right size, was wet, and I don’t like cherry very much to begin with so if things went horribly, horribly wrong, which was a distinct possibility, I wouldn’t care too much. In hindsight cherry was probably not a good choice for this experiment. But I’ll get to that later. If I remember. (I probably won’t.)
The piece of wood I’m working with here is in the photo up above sitting on the scale. It’s approximately 6″ square and 3″ thick. It’s been sitting on the shelf for several months now and it’s pretty wet. You’ll note that it is coated in what looks like wax. If you buy wet/green wood from commercial vendors this is how it will come, coated in wax or Anchorseal to prevent it from drying too quickly and cracking. You’ll note that at the start of this it weighs 1,411 grams. That starting weight is important because how much weight it loses during this process will tell me how much moisture it has given off during this process.
Gads that was a mess.
I didn’t think that chucking a hunk of wood coated with wax into a microwave was a good idea so first I had to get that wax off. I did that with a hand plane. It was really messy and I had to stop to clean my plane several times but it wasn’t hard to do and only took a few minutes.
Once I did that I proceeded to microwave it, checking the temperature and weighing it after each step to see what happened.
I have to admit that this was a very tedious process. At first I only cooked it for 30 seconds at a time, but it quickly became apparent that wasn’t doing much. Eventually I started increasing the times up to 3-4 minutes. That length of time brought the temperature of the wood up to approximately 180 degrees. At that temperature the wood was uncomfortably warm to the touch, and it was obviously giving off moisture. Parts of the wood became visibly wet, indicating moisture was migrating from the inside of the wood to the outside surface. I kept going, keeping extensive notes about times, temperatures, weights and the visual appearance of the wood during the process. I won’t bore you with all of that data.
There was no doubt that the process was forcing the wood to give up significant amounts of moisture. The exterior of the wood became visibly wet at some points during the process.
Now in hindsight I probably should have done this with more patience but dear lord this got boring fast. I didn’t want to take the wood up to a temperature higher than 180 because I could only measure the surface temperature of the wood and it was possible the interior was much hotter. So I let it cool down to about 80 – 90 degrees before repeating the process. This was possibly also a mistake in hindsight and I’ll tell you why at the end of this. After fiddling with this for a couple of hours I went and did something else until, well, until the next day when I realized I really needed to get back to work on this.
It gave off significant amounts of moisture. It was losing weight with almost every cycle in the oven. And finally it reached the point where it was no longer going down in weight when I put it on the scale. In total it lost almost 500 grams in weight, and the moisture meter registered 2% when I tested it.
Slight end grain cracking but nothing serious.
So, the results. Did it actually work? Well, yes. Sort of. Microwaving it did indeed dry it down. It was by no means a fast process, but I was making tests and notes and doing other things in between and certainly could have wrapped this up a lot sooner if I hadn’t gotten bored and wandered off.
But there were issues. First there was cracking in the endgrain. That had started before I was even halfway through the process. I rather expected that, however. And the cracks seemed shallow and superficial. Once I started cutting the wood on the lathe I found that was indeed true, the endgrain cracks did not extend more than 1/2 inch into the wood. Endgrain is always a problem when it comes to wood. Even if you let the wood dry naturally there is going to be some cracking of the endgrain unless you resort to sealing the ends with Anchorseal or paint.
There was also considerable discoloration on the surface of the wood. But this was cherry. One of the reasons I don’t like cherry is that it often does get blotchy looking, so I had rather expected this to happen. And some of that discoloration was due to the fact some of the wax it had been sealed in had remained in the pores of the wood near the surface.
Also the block of wood was now distorted in shape as you can see in that photo up there. Still that isn’t going to be a real problem either because this is going to get turned into a bowl anyway.
The only way to see what’s going on inside of the wood is to put it on the lathe and start turning it. So here’s what I ended up with in the photo below
The wood was indeed dry and stable. But as you can see there was a problem. There three significant cracks in the wood running diagonally across the grain.
Does this mean the experiment was a failure? No. Not at all. In fact I’d consider this experiment successful. Or at least successful enough that I’m going to try it again in the future.
The wood did indeed get dried down to the point where it was stable. The sample bowl did have those three cracks, yes, but the resulting bowl has been sitting on the shelf now for three weeks now and shows no signs of warping, twisting or otherwise distorting. No new cracks have appeared, only those three. So the process did indeed take a wet piece of wood and dry it down in a relatively short period of time.
As for those three cracks, to be honest I’m not all that concerned about those. The wood could have had internal flaws to begin with. Or, more likely, I overheated the wood. When going back over my notes I see that twice the external temperature of the wood reached 190+ degrees during this. That means it is entirely likely that internally the temperature could have been well over the boiling point of water which means that pockets of steam were being produced inside of the wood which could have caused enough stress to crack the wood. I was also allowing the wood to cool down during the process. That heating and cooling cycle almost certainly was introducing stresses into the wood that could have caused problems.
I’m actually pleased and encouraged by the results of this. There are still a lot of variables to take into consideration. What would happen if I used the “defrost” cycle on the oven for an extended period of time rather than just nuking it at full power? Would that result in a more gentle process that wouldn’t put as much stress on the wood?
What if I tried to maintain a stable temperature, say 150 degrees, rather than letting it cool down between cycles? That also would result in less stress on the wood and might have prevented those three cracks from developing.
Overall I’m very encouraged by the results and I’m probably going to try this again. But I need to make better notes, have more patience and do it in a more methodical fashion to make it easier to get easily reproducible results. If I do it again I’ll keep you posted.
Meanwhile, if you want to try this yourself, do I need to tell you to be very, very careful? From some of the things I’ve seen on the internet it appears to be very easy for this kind of thing to go bad very quickly.
With carbide cutters you can rotate the cutter to use a fresh surface, but eventually you run out of fresh surfaces, so it’s time to sharpen.
I use a variety of tools with the lathe, from traditional steel skews and gouges to carbide tools. Carbide tools come in a variety of shapes and sizes, and they can be extremely useful. I do most of my work with traditional bowl gouges, but I use my carbide tools often enough that they’re right there in the rack with my gouges.
Carbide cutters last a long time but eventually they do get dull, and then you either have to spend a significant amount of money to replace them or you have to sharpen them. Some people think you need special equipment, special jigs, and special sharpening equipment to do it. You don’t. If you have standard carbide cutters like these up above, all you need to sharpen them is a diamond hone.
These things aren’t all that expensive. The one in the photo up there cost me $45 and will probably last for many years. We have one in the kitchen we use to sharpen knives and we’ve had that one for over 20 years and it’s still working well. This one is 325 grit on one side and 1200 grit on the other. The 1200 grit side is the only one we’re going to use.
Note that this will only work on standard type cutters like the ones in the photo. If your cutters have a negative rake or any of that other fancy stuff, all bets are off.
Take the cutter off your tool. Put the diamond hone down on a flat surface. You may want to put a piece of plastic under it because things are going to get wet. You need to use something as a lubricant when you do this. There are fancy honing oils and other stuff out there. I use (drum roll please) glass cleaner. Yeah, seriously. Hey, what can I say? It works for me.
Thoroughly wet the surface of the hone with the stuff. Put your cutter face down on the hone. Then put your finger on top of the cutter and start moving it round in circles using light pressure. Do this for a minute or so, moving all over the surface of the hone so you don’t just wear out one spot.
Add more liquid as needed to keep it wet. After doing this for a while you’ll see the liquid starting to get dirty looking. This is the surface of the cutter wearing off as it is moved against the hone. This means it’s working.
It doesn’t take long to do, maybe a minute or two is probably all it will take.
This square cutter is approaching the end of its useful life. If you look close you can see the corner up by the 2 is slightly rounded and there’s a chip down by the 4 corner. But since I use this cutter mostly for roughing, a small chip isn’t going to hurt.
When you’re done the surface of the cutter won’t be shiny any more, but that doesn’t matter. You don’t cut with the surface, you cut with the edge, and that edge is going to be sharp.
Is it as sharp as a brand new cutter? Possibly not. But it’s certainly going to be sharp enough to let you keep working with that tool, and save yourself some money in the process.
Note that this isn’t going to remove chips. You’re honing, not grinding, so you aren’t removing anywhere near enough material to get a chip out.
(Someone told me I should mention the email address here for people who have questions or comments and don’t want to leave them in the public comment section. It is old.grouchyfarmer.@gmail.com, or, of course you can use the comments section. I only check that account once a week or two so it may be a while before you get a response that way.)
I’ve been getting some questions about wood and woodturning, specifically about what types or species of wood work best, give the best results, what different species are like to work with, how to get wood, how to deal with wet or green wood and other things, so I thought it might be helpful to talk about wood itself. I’m going to write a couple of pieces about wood, starting with what it’s like to work with different species of wood. I’m going to stick with commercially available wood bowl blanks for this bit because if you’re new to this, that is probably what you’ll be working with, bowl blanks you pick up off Amazon or directly from a wood vendor.
Now I come from a furniture making background. When making a piece of furniture I am making an object that not only needs to look good, it needs to have considerable structural integrity. The wood needs to be strong enough to be able to deal with the stresses of being a functional chair or table or bookcase or whatever item I’m making. This limits the kind of woods I am able to use in a project.
But structural integrity isn’t an issue with wood turning. I’m concerned almost entirely with appearance on that situation. The projects I crank out don’t require structural strength. Even a plain, utilitarian bowl doesn’t need a lot of strength, it just needs to hold together and look good. So when selecting wood for a bowl, especially one that is intended to be primarily decorative, the things I’d worry about when selecting wood for furniture don’t really matter to me. All I really care about is appearance. And with turned objects, things that would be considered defects in furniture grade wood can actually make interesting decorative features in a turned object. A lot of woods that would be horrible for furniture work very well for wood turning and can result in some beautiful artistic pieces.
I’ve been fortunate enough to be able to work with a wide variety of different woods ranging from the common to the exotic, so here, in no particular order here are the woods I typically work with and why I like or dislike them, along with some samples of a finished projects with that wood to show you what it looks like. If you’re new to this you’re probably going to be buying pre-made bowl blanks online from Amazon or some other retailer, so I’ll include info on what this stuff can cost if you buy it commercially. Some of these photos have appeared before, some are new.
Walnut can have a wide range of color variations in the same piece of wood, like this one, ranging from a golden brown at the top, to darker chocolate colors.
Walnut and padauk with epoxy inlay
Black Walnut – I’m going to start with my absolute favorite wood to work with, walnut. I love working with walnut. Generally it cuts easily on the lathe with either traditional steel or carbide tools. It is easy to shape, easy to sand. I think the color and grain is beautiful. It can range from a deep, rich chocolate brown to a beautiful, almost iridescent brownish gold depending on how it is cut and finished. It will handle just about any kind of finish you want to use on it, from a low gloss satin to an ultra high polish. Either will work well with this wood. I’ve used waxes, spray lacquers, OB shine juice, bees wax and even just plain shellac and have had good results with all of them. If it gets dull looking all it takes is a quick buffing or polish to bring back the luster.
It is commonly available either kiln dried or green. Cost isn’t too bad either. Prices on wood vary all the time depending on market conditions, of course. A decent sized bowl blank about 6″ square and 2″ thick is going for about $7 – $12 each right now if you shop around. Thicker pieces… Well, prices go uprather quickly as the wood gets thicker. All things considered walnut a darn nice wood to work with and prices are generally reasonable.
Side note: A lot of places are selling green wood, not dried. I’ll talk about that later in more detail. But here’s a hint – if you’re new at this, avoid green/wet wood. Stick with kiln dried at first. Learn the basic skills first, then worry about how to deal with green wood. Some people like to work with green wood, I don’t. It requires lengthy drying times, is subject to warping and cracking and has other problems. I’ll deal with green/wet wood in a later post.
Beautiful wood but pricey.
Padauk – Since that piece up there includes padauk, let’s go with that one next. It’s imported from Africa. It is a very striking wood, especially when freshly cut. Color ranges from red to brilliant orange, with the grain showing up as darker, brownish and in some cases almost black stripes. The first time I saw a piece of this I couldn’t believe it was real. As it ages the brilliant color begins to fade. It will eventually fade into a somewhat duller, reddish brown, even chocolate hue, sometimes even fading into gray. It will still be a beautiful piece of wood, it’s just that the colors change over time. How quickly do they fade? It depends. A good finish seems to help slow down the color changes, but nothing will really stop it.
As for working with it, it’s great stuff to work with. It machines about the same as walnut. It cuts easily, although you may need to sharpen your tools a bit more often than with some woods. It sands easily, but use a dust extraction system. The dust will get everywhere if you don’t, leaving a fine, red film over everything. For finishes, all I’ve used with it so far is a thin seal coat of shellac followed by buffing carnauba wax onto it to get a high gloss. It’s imported from Africa and is available kiln dried only. (Generally speaking wood imported into this country must be kiln dried to prevent pests and diseases from getting into the U.S.)
It isn’t cheap though, typically going for 2 – 3 times the cost of walnut. A 6″ square by 2″ thick piece of padauk is currently going for around $30.
White oak can be very bland looking unless you stain it to bring out the grain. This was my first experiment with white oak scraps glued up into a bowl blank. Far from the prettiest thing I’ve ever done, but that’s why I experiment, to figure out what works and what doesn’t.
White Oak – You wouldn’t normally think of white oak as being all that suitable for wood turning. But in a lot of cases you use what you got, and I have a lot of white oak cut offs from larger boards that were used in furniture projects. The stuff was too nice to just throw out or burn, but what can you do with 1″ thick boards of random short lengths and widths?
Glue it up into bowl blanks, of course. So I glued a few 1″ thick board scraps together into a 4 inch thick bowl blank and gave it a try and, well, damn… The results weren’t utterly horrible? I stained it to bring out the grain, finished it with a sealer and top coat of wax and it turned out as a decent little bowl. I made an even bigger one, almost 11 inches across and about 4 inches tall which was an absolute beast to work with on my midi sized lathe, but that worked out reasonably well too and I ended up with a pretty nice fruit bowl with rather striking grain patterns brought out by the stain.
White oak fruit bowl, about 11 inches across, 3 1/2 inches tall. Made from about 5, 3/4″ thick boards about a foot or so square that were cutoffs from furniture projects, and glued up with standard wood glue. You can end up with some pretty interesting and useful projects by just using up scrap wood.
It was not easy to work with, though. White oak is very hard, dulls tools quickly, and can be prone to chipping, especially if it is really, really dry, as this stuff is. White oak is one of the few woods where I used carbide tools almost exclusively because my steel gouges were dulled within just a couple of minutes and I was getting tired of running over to the grinder every little while. Once I switched to carbide it went better, but it was still a relatively slow process. Sanding wasn’t a lot of fun either.
(Which is possibly why it seems nearly impossible to find white oak bowl blanks on the commercial market? At least I haven’t seen any. )
Ash – Go read the comments about oak again but replace “oak” with “ash” and that pretty much describes it. Ash seems to be just a wee bit more forgiving than oak. I can generally work it without having to resort to using carbide tools. Certainly it has a nicer color, or at least I think so. But like oak it can be pretty bland looking, so you might want to experiment with stains. And wood suppliers who carry bowl blanks seem to frequently have it in stock at fairly reasonable prices. Mostly I’ve seen blanks offered as green wood, but I do see kiln dried stuff available from time to time. Alas, while I’ve made some projects with ash I don’t have photos of any.
(Sidenote: In some areas there is a glut of ash on the market because of infestations of the emerald ash borer, which is decimating the ash tree population all over the country. In a lot of places it is illegal to transport ash wood into or out of certain areas to try to restrict the spread of the beetle and the disease it carries. These restrictions generally don’t apply to kiln dried ash because the kiln generates enough heat to kill the borers. I’ve seen a few vendors offering “green” ash wood. This is possibly illegal in some jurisdictions.)
This cedar worked so nicely that I knocked out this whole bowl from a 5″ square block of cedar in less than an hour, including the time it took to sand and put on a finish.
Red Cedar – I really, really like working with cedar. It’s a soft wood, cuts beautifully on the lathe, and wow, does it smell amazing! It sands easily to a smooth surface, is easy to finish to a brilliant shine. I used OB shine juice on this one. Personally I think the grain and colors are absolutely beautiful but some people don’t like it for some reason. Colors can vary wildly, even in the same piece of wood, as you can see, ranging from a deep chocolate brown, to rich purplish reds, to golden yellows. It’s widely available, and if you live in the right part of the country you might be able to source it locally and save yourself a considerable amount of money.
Cedar does have some issues. It can often have “defects”, knots, inclusions, wild grain, but personally I think that adds to the beauty, like that unexpected knot I discovered in this piece as I was hollowing it out. To me that knot and the wild grain surrounding it makes the piece far more interesting than if had been just plain wood. But because it’s a soft wood, it’s easy to damage a finished piece.
Prices on cedar are pretty reasonable if you can find it. Not every wood seller seems to carry it. My main source for pre cut cedar bowl blanks is Green Valley Wood Products in Indiana and they’re running 6″ square 3″ thick cedar blanks at about 4 for $39.95, or about $10 each. They are green, not dried, but when it comes to cedar I’ve never really had problems with working with green cedar.
small lidded box, mahogany with walnut top.
Mahogany – Mahogany is, well, complicated. Some mahogany is mahogany, some mahogany isn’t… Heck, I don’t know. I do like the stuff, though. Maybe. Sort of. Kinda. Certainly it can be a very pretty wood that can take on a brilliant iridescence when the light hits it just right. It can glimmer and shimmer. But in order to get that shimmer and iridescence you have to have exactly the right piece of wood and have to do exactly the right things to it.
I honestly have sort of a love/hate relationship with mahogany. I’ve built furniture out of the stuff and frankly I didn’t like it that much. I didn’t think it looked all that good and it can be surprisingly soft and easy to damage when used in furniture. It isn’t difficult to work with, but it seems to produce a very fine dust that clings to anything and everything. It seems to dull my tools quickly. For whatever reason carbide tools don’t seem to work very well at all with this stuff. When I try using carbide I get lots of catches, gouges and tearout. So I stick with traditional bowl gouges, scrapers and skews when I’m working with it. And I sharpen them a lot. And while they claim it’s a hardwood, it sure doesn’t behave like one. It’s relatively soft, it is easy to get dings and dents in finished pieces. I ended up somehow with a 15″ square, 5″ thick hunk of the stuff that I into a fruit bowl that looked nice for, oh, about 10 minutes. Oh, it’s a perfectly good utility bowl, and that’s what we use it for, but it sure didn’t stay looking good for very long. But every once in a while a piece like this below comes off the lathe, and and I start to want to work with it again.
This is a mahogany and walnut canister or box or jar or whatever you want to call it. About 5″ wide and 10″ or so tall, and it turned out way better than it had any right to. (The crappy camera in my iPhone doesn’t do this justice. I don’t care what the reviewers claim about the iPhone camera, it’s garbage, especially when it comes to rendering color.)
Back to mahogany, though. It’s decent wood, it can be very pretty. It isn’t all that difficult to work with, but it does have some issues. Prices for dried, pre-cut bowl blanks are generally a bit higher than walnut, depending on where it is sourced from. Right now it’s going for about $11 – $13 for a typically sized 6″ square 2″ thick precut bowl blank. It should be provided kiln dried, not green, because all of it is imported.
Hickory/Chestnut – Okay, I’m going to make a confession here. I’m not sure if that bowl over there on the right is hickory, or the one on the bottom is hickory. I’m not even sure if that is what they actually were, to be honest because I’d never worked with either before I got my hands on these two pieces of wood. That’s what they were labeled when I pulled them off the shelf, though, so we’ll go with that. My experience with these two is extremely limited. Still the results for both were good and I wouldn’t hesitate to use it again if I could get my hands on the stuff. Both were hard, about the same working characteristics as ash, but with a much more striking grain. And the one above had some beautiful coloring and inclusions. Once I saw how nice the grain was, I kept the shapes simple and tried to cut them to show off the wood.
I wish I could remember where I got these two pieces of wood and what they cost so I could give you more info because the wood was really nice.
Note the defect just to the right of center that looks like a scratch. It’s actually a crack that developed after the bowl was finished. All three of the pieces I’ve worked with developed those.
The lid is osage orange and I’m still not sure if I like that color combination or not
Rosewood – Rosewood is amazingly beautiful. It has a rich, lush, chocolate color with a lighter colored, reddish brown streaks, and can include wider bands of lighter reds.
I see the stuff for sale all the time, but only in small pieces suitable for ornaments and pens. I’d never seen the stuff in larger pieces suitable for making bowls or larger decorative objects like I’m interested in making until I ran across these three pieces. One was about 4″ square by 3″ thick and the other two were about 6″ or 7″ square by 3″ thick. I’d never seen it in pieces that large before. The reason why is simple. Holy cow the stuff is expensive! I probably shouldn’t have blown that much money on these three pieces of wood because as it turned out I had serious problems with all three, but I’ll come to that in a minute.
I don’t like that lid, by the way. It’s way too tall and gaudy and distracts from what I want people to look at which is the rosewood vessel. It is no longer with the bowl, I made a different one, but don’t have a current photo so I’m stuck with this one
The stuff works pretty nicely. It cuts well, sands well, looks especially good with a high gloss finish. I think the coloration and grain is absolutely beautiful. It doesn’t show up well in the photo but that larger piece has a beautiful band of a lighter, red tint running through it horizontally that really adds interest to the piece. I can see why penmakers like it so much, the stuff is beautiful.
Drawbacks? You bet. Some serious.
First, it stinks. It literally stinks. To me it smells like sewage. Seriously. The aroma isn’t overpowering but it is definitely there and it is unpleasant. Once it has a finish on it it’s barely perceptible. MrsGF can’t smell it at all, thankfully. I’ve worked with three pieces of this stuff and all three smelled really bad. It is also oily. It left an oily, dark brown residue on my tools and lathe while I was working with it. Nothing serious, but I couldn’t just vacuum it up, I had to wipe everything down when I was done.
The real deal killer, though, is that all three of the pieces I made have developed what I call micro-cracks, very thin, hairline cracks that aren’t noticeable at first and may have developed days or even weeks after I’d finished the bowls. If you look closely at the bowl in the top photo you’ll see what look like scratches. They aren’t, they’re micro-cracks that developed after they’d been finished. The wood should have been stable, they were kiln dried and the moisture content was low, the bowls haven’t warped or distorted to indicate there is some issue with stress going on. But it’s obvious that something is going on with that wood.
So, to sum up rosewood: The wood may be absolutely beautiful. It may cut and finish nicely. But based on my experience with these three pieces I can’t recommend it. It’s expensive. Really expensive. Those three little blocks of wood I used were well over $50 each. I’m going to do some experimenting to see if I can make the cracks less visible, but I’m still disappointed. If I were doing this commercially I would consider all three of the rosewood projects to be unsellable because of the cracking.
Maple
Ambrosia maple piece being finished up on the lathe.
There are a whole cluster of woods that can be classified as ‘maple’, ranging from very hard versions suitable for flooring, other types suitable for furniture, and even very soft types that aren’t useful for much of anything except maybe firewood. I’m going to stick with the one that most woodturners are probably interested in, so-called ambrosia maple. Ambrosia maple isn’t a separate type of maple, it’s standard maple that has been infected with a fungus carried by the ambrosia beetle. The beetles bore into the wood, carrying the fungus into the wood. The fungus causes spectacular staining and discoloration similar to spalted maple. The discoloration is generally centered around the path the beetle bores through the wood. You’ll almost always find holes in ambrosia maple that were made by the beetles.
(Spalted maple and other spalted woods also exhibit similar colorations which is also caused by a fungus, but in the case of spalted woods the fungus is part of the decaying process and you can also find parts of wood that are literally rotting away inside of a piece of spalted lumber.)
Ambrosia maple is generally very easy to work with. It is usually relatively soft, cuts easily, and the end result can be spectacular. Prices are a bit steep, about the same as padauk. If you shop around you can sometimes find some real deals on the stuff if you’re willing to deal with green wood. A single 6″ square by 3″ thick bowl blank will set you back about $20 – $25, green. Larger size blanks get expensive real fast. If you remember the cake platter I made for MrsGF that top piece which started out at about 13″ square and 2″ thick cost me about $75.
Potential problems? It’s generally soft and easy to damage. You can sometimes find “punky” (i.e. rotting) areas buried in pieces. And you have to remember that the discoloration is caused by a fungus, so chances are good there are fungal spores lurking in that wood. Now I’ve never heard of anyone getting actually ill or getting a fungal infection from working with this stuff, but I would always wear a respirator when cutting or sanding it, along with a dust extraction system and air filtration system.
I don’t have a finished sapele project to show you because I never actually finished one because the wood was, well, to put it bluntly, it was bloody awful to work with.
Sapele – I’ve only worked with this stuff once and it was such a disaster that I gave up and chucked it into the burn pile.
Catches, gouges, tear outs, chipping, kick backs… It was horrible to work with. It didn’t matter what tools I used, what techniques I used, how sharp the tools were, whether I used carbide or steel – nothing worked right with this stuff. I don’t know what the heck was going on with that piece of wood but it became obvious real fast that it wasn’t just bad, it was downright dangerous. It is entirely possible that it was just some quirk with that piece of wood I had. Don’t care. My experience with it was so bad that I’m never going to work with it again. There are more than enough other species of wood that are actually pleasant to work with, so I’m not going to risk it again.
If you want to try it, fine. Maybe you’ll have better luck than I did. The stuff is going for about $15 for a kiln dried 6″ square, 2″ thick blank.
Cotton wood – I’ve only worked with this stuff once, and the piece I had was really large and very, very wet. I mean seriously wet. Since I didn’t want to wait for, oh, three or four years for it to dry out, I went ahead and roughed out a bowl shape and stuck it on the shelf for a few weeks to dry. Frankly I fully expected it to crack and warp horribly, but surprisingly it didn’t and the end result was pretty darn nice. Fairly nice grain and the color isn’t bad either.
But stink? Holy cow this thing smelled bad when I was working with it. It was worse than the rosewood. It had a sort of pungent vinegary, swampy, rotten kind of smell to it that even came through the respirator. Fortunately once it dried the smell went away but wow, it almost made my eyes water while I was working on it.
I rather liked working with it. Surprisingly it didn’t warp or crack while the roughed out bowl dried down, and when I finished it up after it had dried down to a reasonable point I ended up with a fairly nice bowl. It cut well, sanded well. I finished it off with a seal coat of shellac topped off with homemade “ob shine juice” and it turned out a pretty decent looking utility bowl.
Cotton wood is fairly cheap. I see Green Valley is selling it for under $10 for a 6″ square, 3″ thick bowl blank, green. It can often be found at reasonable prices for much larger pieces suitable for larger bowls like salad or fruit bowls. The drawback is that it is almost always sold green, so you’re going to have to deal with trying to dry it down yourself.
Pear – The only pear wood I’ve worked with comes from the wood I saved when we took down the pear tree here. I don’t think I’ve ever seen it for sale commercially. But if you know someone who is taking down a pear tree it’s worth looking into getting your hands on some of it.
It cuts well, sands well, and was very easy to work with all the way around. The little bud vase over there on the right was sanded up to about 320 grit, then sealed with shellac, buffed out with OOOO steel wool, then finished with carnauba wax.
Personally I think it’s a bit on the bland side and I’m not sure if I really like the color. MrsGF likes it a lot though. Anyway, if you can get your hands on some, give it a try. It’s worth looking at, especially if you can get it for free from a neighbor taking down a tree.
When I work with cherry the terms that run through my head are words like “dull”, “insipid”, and “boring”.
Cherry – You’ll find a lot of cherry bowl blanks for sale commercially. It seems popular with woodturners and I’m not sure why. I’ve worked with it and I don’t like it all that much. Oh, there’s nothing wrong with it. It is easy to work with. It cuts and sands well, easy to shape into just about anything you like, and it isn’t all that expensive, about the same as walnut.
So why don’t I like it? Dear lord, it’s boring! If I’m going to go to the trouble of making something on the lathe I want the end result to be eye catching. I want prominent grain patterns and interesting colors. And cherry is, well, it’s just dull to my eye. The color is blah, the grain is blah. Insipid, that’s the term I’m looking for. Perhaps it’s just the pieces I had. Every piece of wood is different, after all. Maybe I’ll try it again. I have a half dozen blanks sitting on the shelf still, but I’m going to have to be awfully bored before I resort to using it again.
Cost is about the same as walnut, around $10 – $13 for a standard 6″ square 2″ thick blank. It’s not a bad wood. It’s not real expensive. As I said it is very nice to work with. It’s just, well, dull.
Elm. Maybe.
Elm – I’m going to be completely honest and admit I have no idea what elm wood looks like so I can’t be sure if this is elm or not. It came with a shipment of “miscellaneous bowl blanks”, a sort of grab bag kind of deal. It was labeled elm so I’m going to go with that. Elm was almost completely wiped out in North America because of dutch elm disease, but there are still some out there and occasionally it shows up.
I worked this blank while it was wet, which is normally something I don’t do, and there was some issues while drying the bowl down but nothing too serious. It was easy to work with. It seemed a bit on the abrasive side and I had to sharpen my gouge more often than normal, but nothing serious. It has a very striking grain, with dark brown and black streaks running along with the normal grain making me think this tree had some kind of fungal infection. Personally I don’t like how it looks, but MrsGF likes it. As for cost, I don’t really know. It was in a grab bag deal with a bunch of other chunks of wood.
Holy cow, this got long, so let’s wrap up this part up. There are more types of wood I could have looked at but I wanted to stick with the types that are generally available commercially.
Eventually I’m going to get around to talking about the difference between kiln dried, air dried and wet/green wood, and how to deal with it, why some woodturners really like wet wood (I suspect they’ve been inhaling lacquer fumes), how to dry wood, including the “great microwave experiment”. Well, if I don’t start something on fire or blow something up. I’m stocking up on fire extinguishers for that one. Also how one man’s defect is another man’s “decorative feature”, working with epoxy as a decorative element, playing with india ink and whatever else I can come up with.
… wait a minute, how did a blog about gardening, farming, photographing flowers, travel and ham radio turn into a tutorial on wood turning?
On the pandemic front, MrsGF got her first vaccination last week and I’m getting my first one this week! Wow, maybe we’ll actually be able to hug our kids by summer?