
(Someone told me I should mention the email address here for people who have questions or comments and don’t want to leave them in the public comment section. It is old.grouchyfarmer.@gmail.com, or, of course you can use the comments section. I only check that account once a week or two so it may be a while before you get a response that way.)
I’ve been getting some questions about wood and woodturning, specifically about what types or species of wood work best, give the best results, what different species are like to work with, how to get wood, how to deal with wet or green wood and other things, so I thought it might be helpful to talk about wood itself. I’m going to write a couple of pieces about wood, starting with what it’s like to work with different species of wood. I’m going to stick with commercially available wood bowl blanks for this bit because if you’re new to this, that is probably what you’ll be working with, bowl blanks you pick up off Amazon or directly from a wood vendor.
Now I come from a furniture making background. When making a piece of furniture I am making an object that not only needs to look good, it needs to have considerable structural integrity. The wood needs to be strong enough to be able to deal with the stresses of being a functional chair or table or bookcase or whatever item I’m making. This limits the kind of woods I am able to use in a project.
But structural integrity isn’t an issue with wood turning. I’m concerned almost entirely with appearance on that situation. The projects I crank out don’t require structural strength. Even a plain, utilitarian bowl doesn’t need a lot of strength, it just needs to hold together and look good. So when selecting wood for a bowl, especially one that is intended to be primarily decorative, the things I’d worry about when selecting wood for furniture don’t really matter to me. All I really care about is appearance. And with turned objects, things that would be considered defects in furniture grade wood can actually make interesting decorative features in a turned object. A lot of woods that would be horrible for furniture work very well for wood turning and can result in some beautiful artistic pieces.
I’ve been fortunate enough to be able to work with a wide variety of different woods ranging from the common to the exotic, so here, in no particular order here are the woods I typically work with and why I like or dislike them, along with some samples of a finished projects with that wood to show you what it looks like. If you’re new to this you’re probably going to be buying pre-made bowl blanks online from Amazon or some other retailer, so I’ll include info on what this stuff can cost if you buy it commercially. Some of these photos have appeared before, some are new.

Black Walnut – I’m going to start with my absolute favorite wood to work with, walnut. I love working with walnut. Generally it cuts easily on the lathe with either traditional steel or carbide tools. It is easy to shape, easy to sand. I think the color and grain is beautiful. It can range from a deep, rich chocolate brown to a beautiful, almost iridescent brownish gold depending on how it is cut and finished. It will handle just about any kind of finish you want to use on it, from a low gloss satin to an ultra high polish. Either will work well with this wood. I’ve used waxes, spray lacquers, OB shine juice, bees wax and even just plain shellac and have had good results with all of them. If it gets dull looking all it takes is a quick buffing or polish to bring back the luster.
It is commonly available either kiln dried or green. Cost isn’t too bad either. Prices on wood vary all the time depending on market conditions, of course. A decent sized bowl blank about 6″ square and 2″ thick is going for about $7 – $12 each right now if you shop around. Thicker pieces… Well, prices go up rather quickly as the wood gets thicker. All things considered walnut a darn nice wood to work with and prices are generally reasonable.
Side note: A lot of places are selling green wood, not dried. I’ll talk about that later in more detail. But here’s a hint – if you’re new at this, avoid green/wet wood. Stick with kiln dried at first. Learn the basic skills first, then worry about how to deal with green wood. Some people like to work with green wood, I don’t. It requires lengthy drying times, is subject to warping and cracking and has other problems. I’ll deal with green/wet wood in a later post.

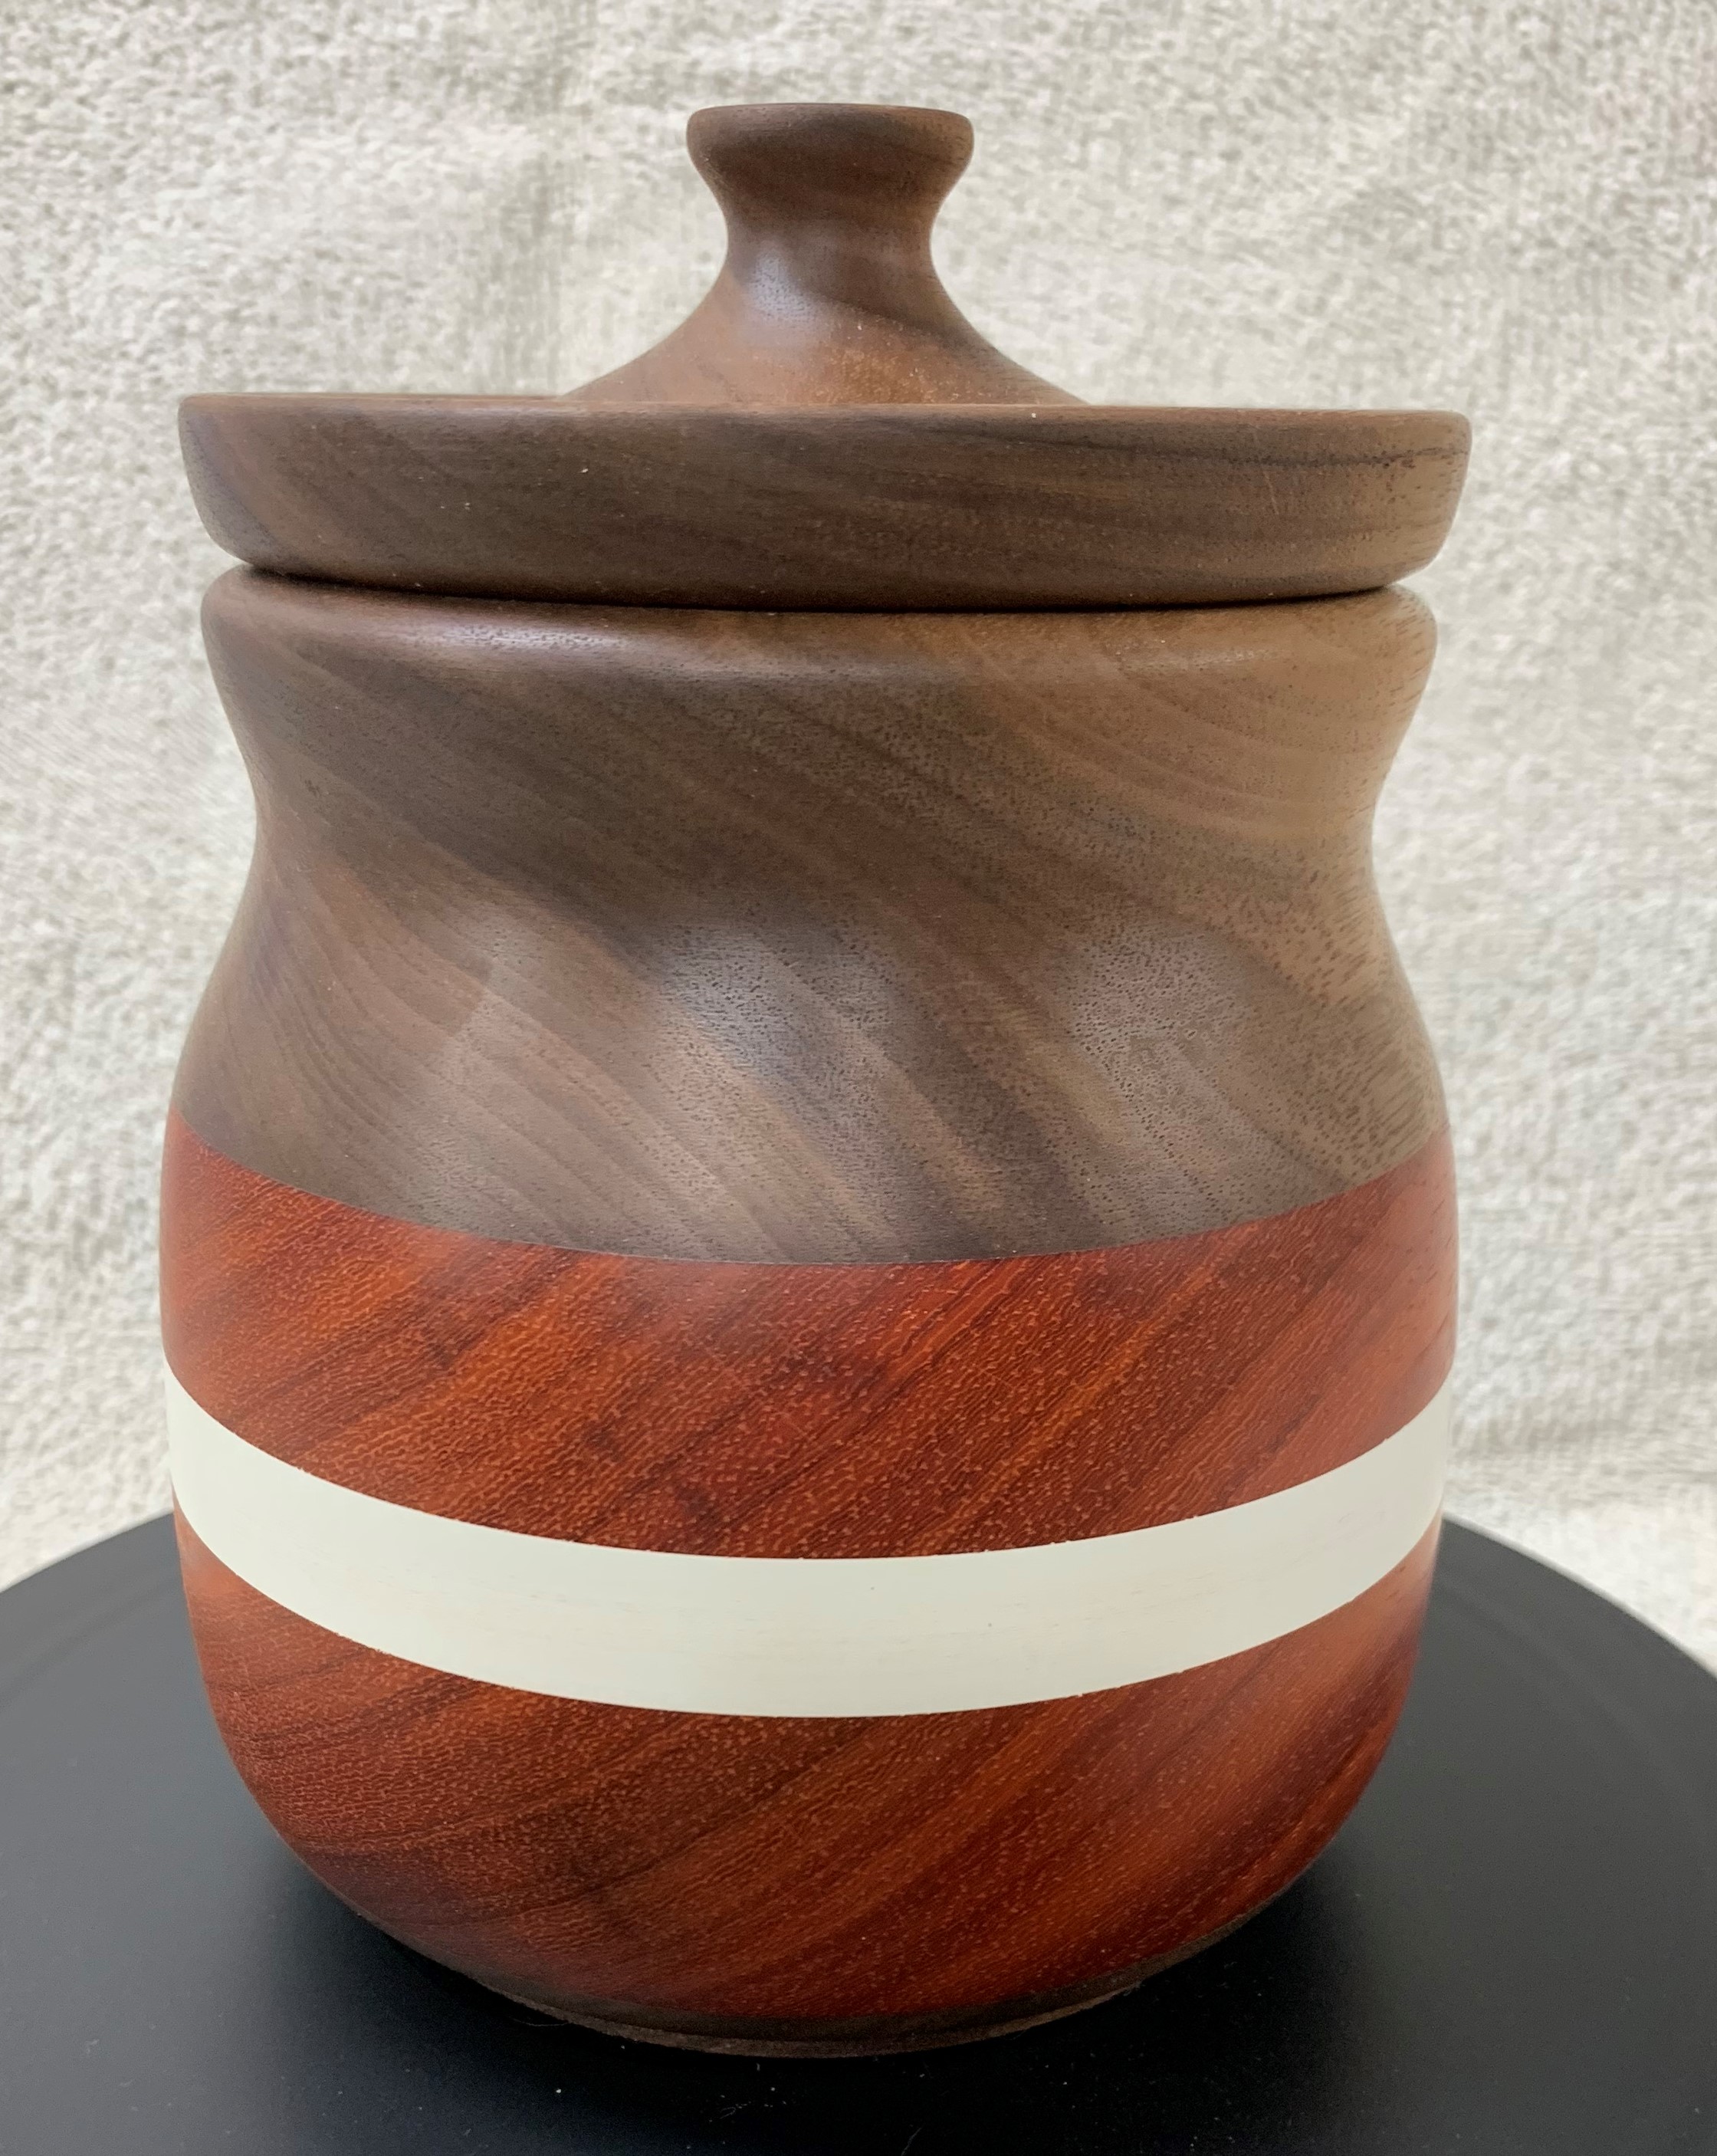
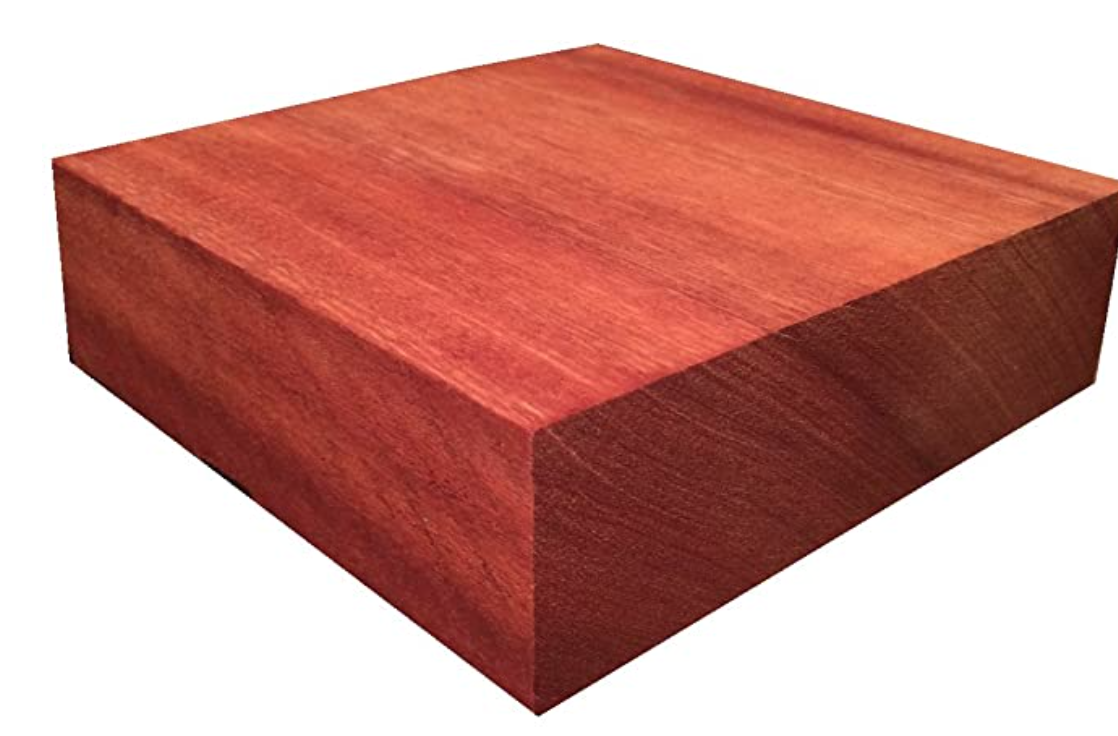
Padauk – Since that piece up there includes padauk, let’s go with that one next. It’s imported from Africa. It is a very striking wood, especially when freshly cut. Color ranges from red to brilliant orange, with the grain showing up as darker, brownish and in some cases almost black stripes. The first time I saw a piece of this I couldn’t believe it was real. As it ages the brilliant color begins to fade. It will eventually fade into a somewhat duller, reddish brown, even chocolate hue, sometimes even fading into gray. It will still be a beautiful piece of wood, it’s just that the colors change over time. How quickly do they fade? It depends. A good finish seems to help slow down the color changes, but nothing will really stop it.
As for working with it, it’s great stuff to work with. It machines about the same as walnut. It cuts easily, although you may need to sharpen your tools a bit more often than with some woods. It sands easily, but use a dust extraction system. The dust will get everywhere if you don’t, leaving a fine, red film over everything. For finishes, all I’ve used with it so far is a thin seal coat of shellac followed by buffing carnauba wax onto it to get a high gloss. It’s imported from Africa and is available kiln dried only. (Generally speaking wood imported into this country must be kiln dried to prevent pests and diseases from getting into the U.S.)
It isn’t cheap though, typically going for 2 – 3 times the cost of walnut. A 6″ square by 2″ thick piece of padauk is currently going for around $30.

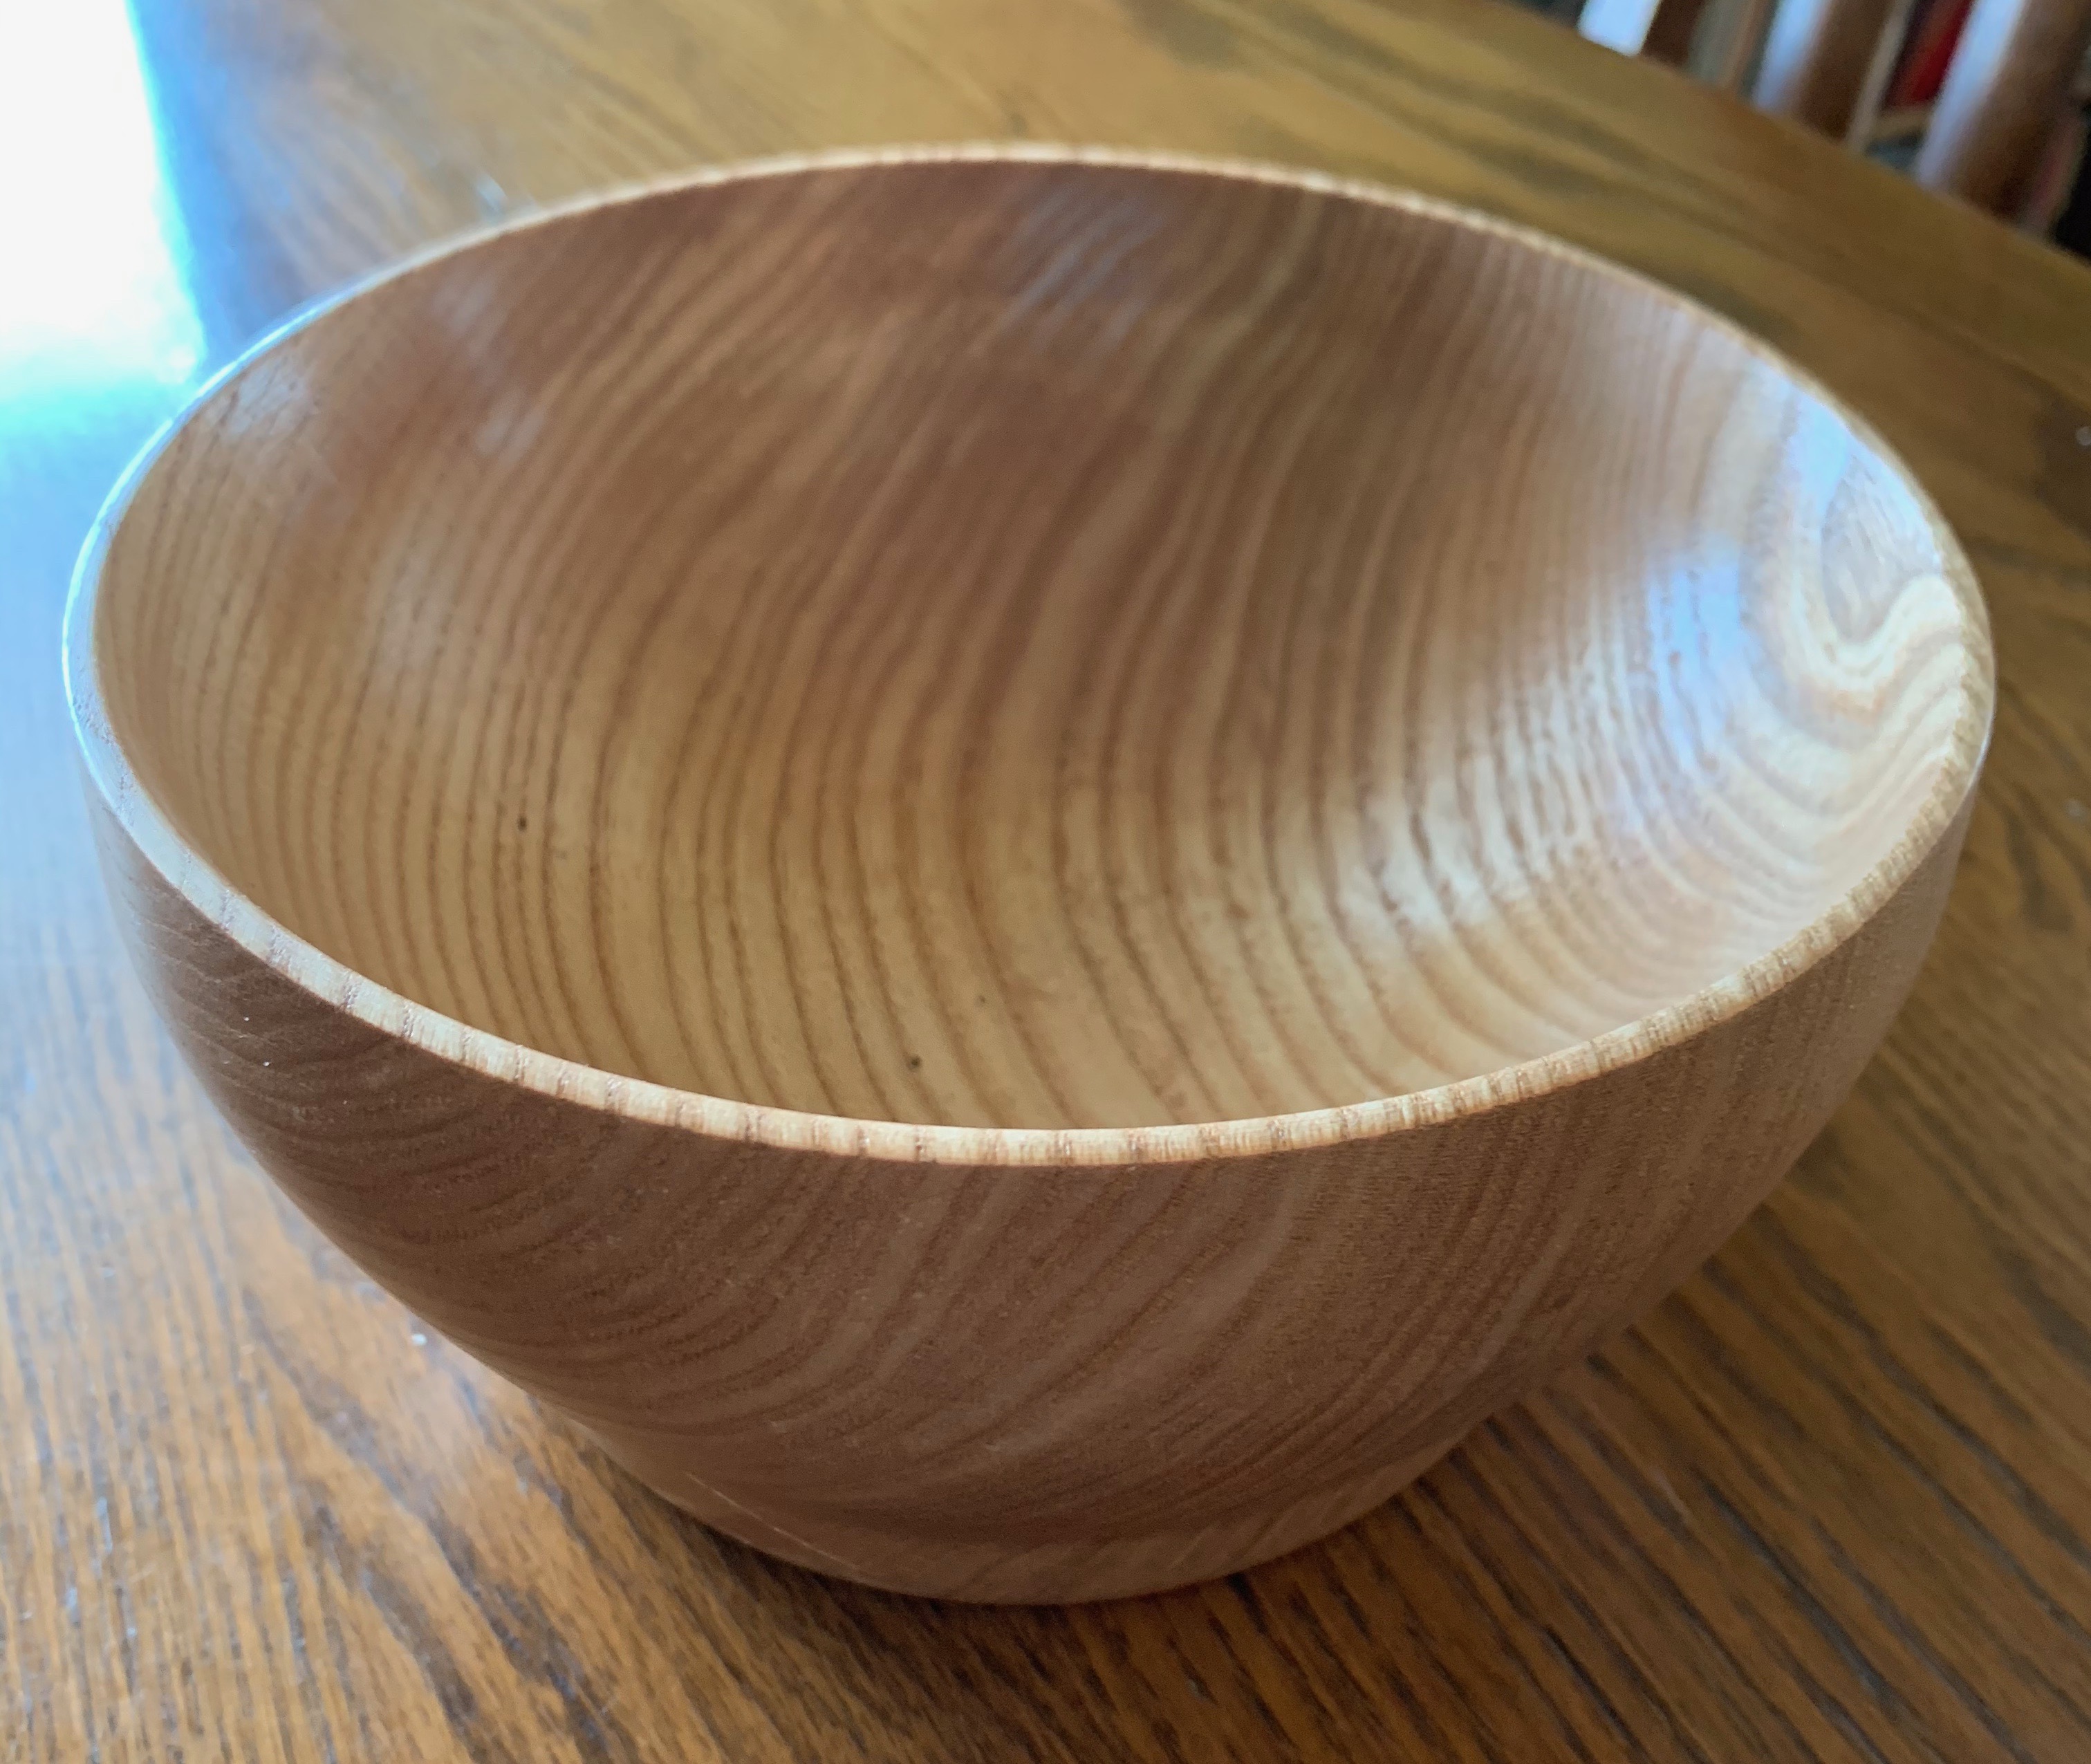
White Oak – You wouldn’t normally think of white oak as being all that suitable for wood turning. But in a lot of cases you use what you got, and I have a lot of white oak cut offs from larger boards that were used in furniture projects. The stuff was too nice to just throw out or burn, but what can you do with 1″ thick boards of random short lengths and widths?
Glue it up into bowl blanks, of course. So I glued a few 1″ thick board scraps together into a 4 inch thick bowl blank and gave it a try and, well, damn… The results weren’t utterly horrible? I stained it to bring out the grain, finished it with a sealer and top coat of wax and it turned out as a decent little bowl. I made an even bigger one, almost 11 inches across and about 4 inches tall which was an absolute beast to work with on my midi sized lathe, but that worked out reasonably well too and I ended up with a pretty nice fruit bowl with rather striking grain patterns brought out by the stain.
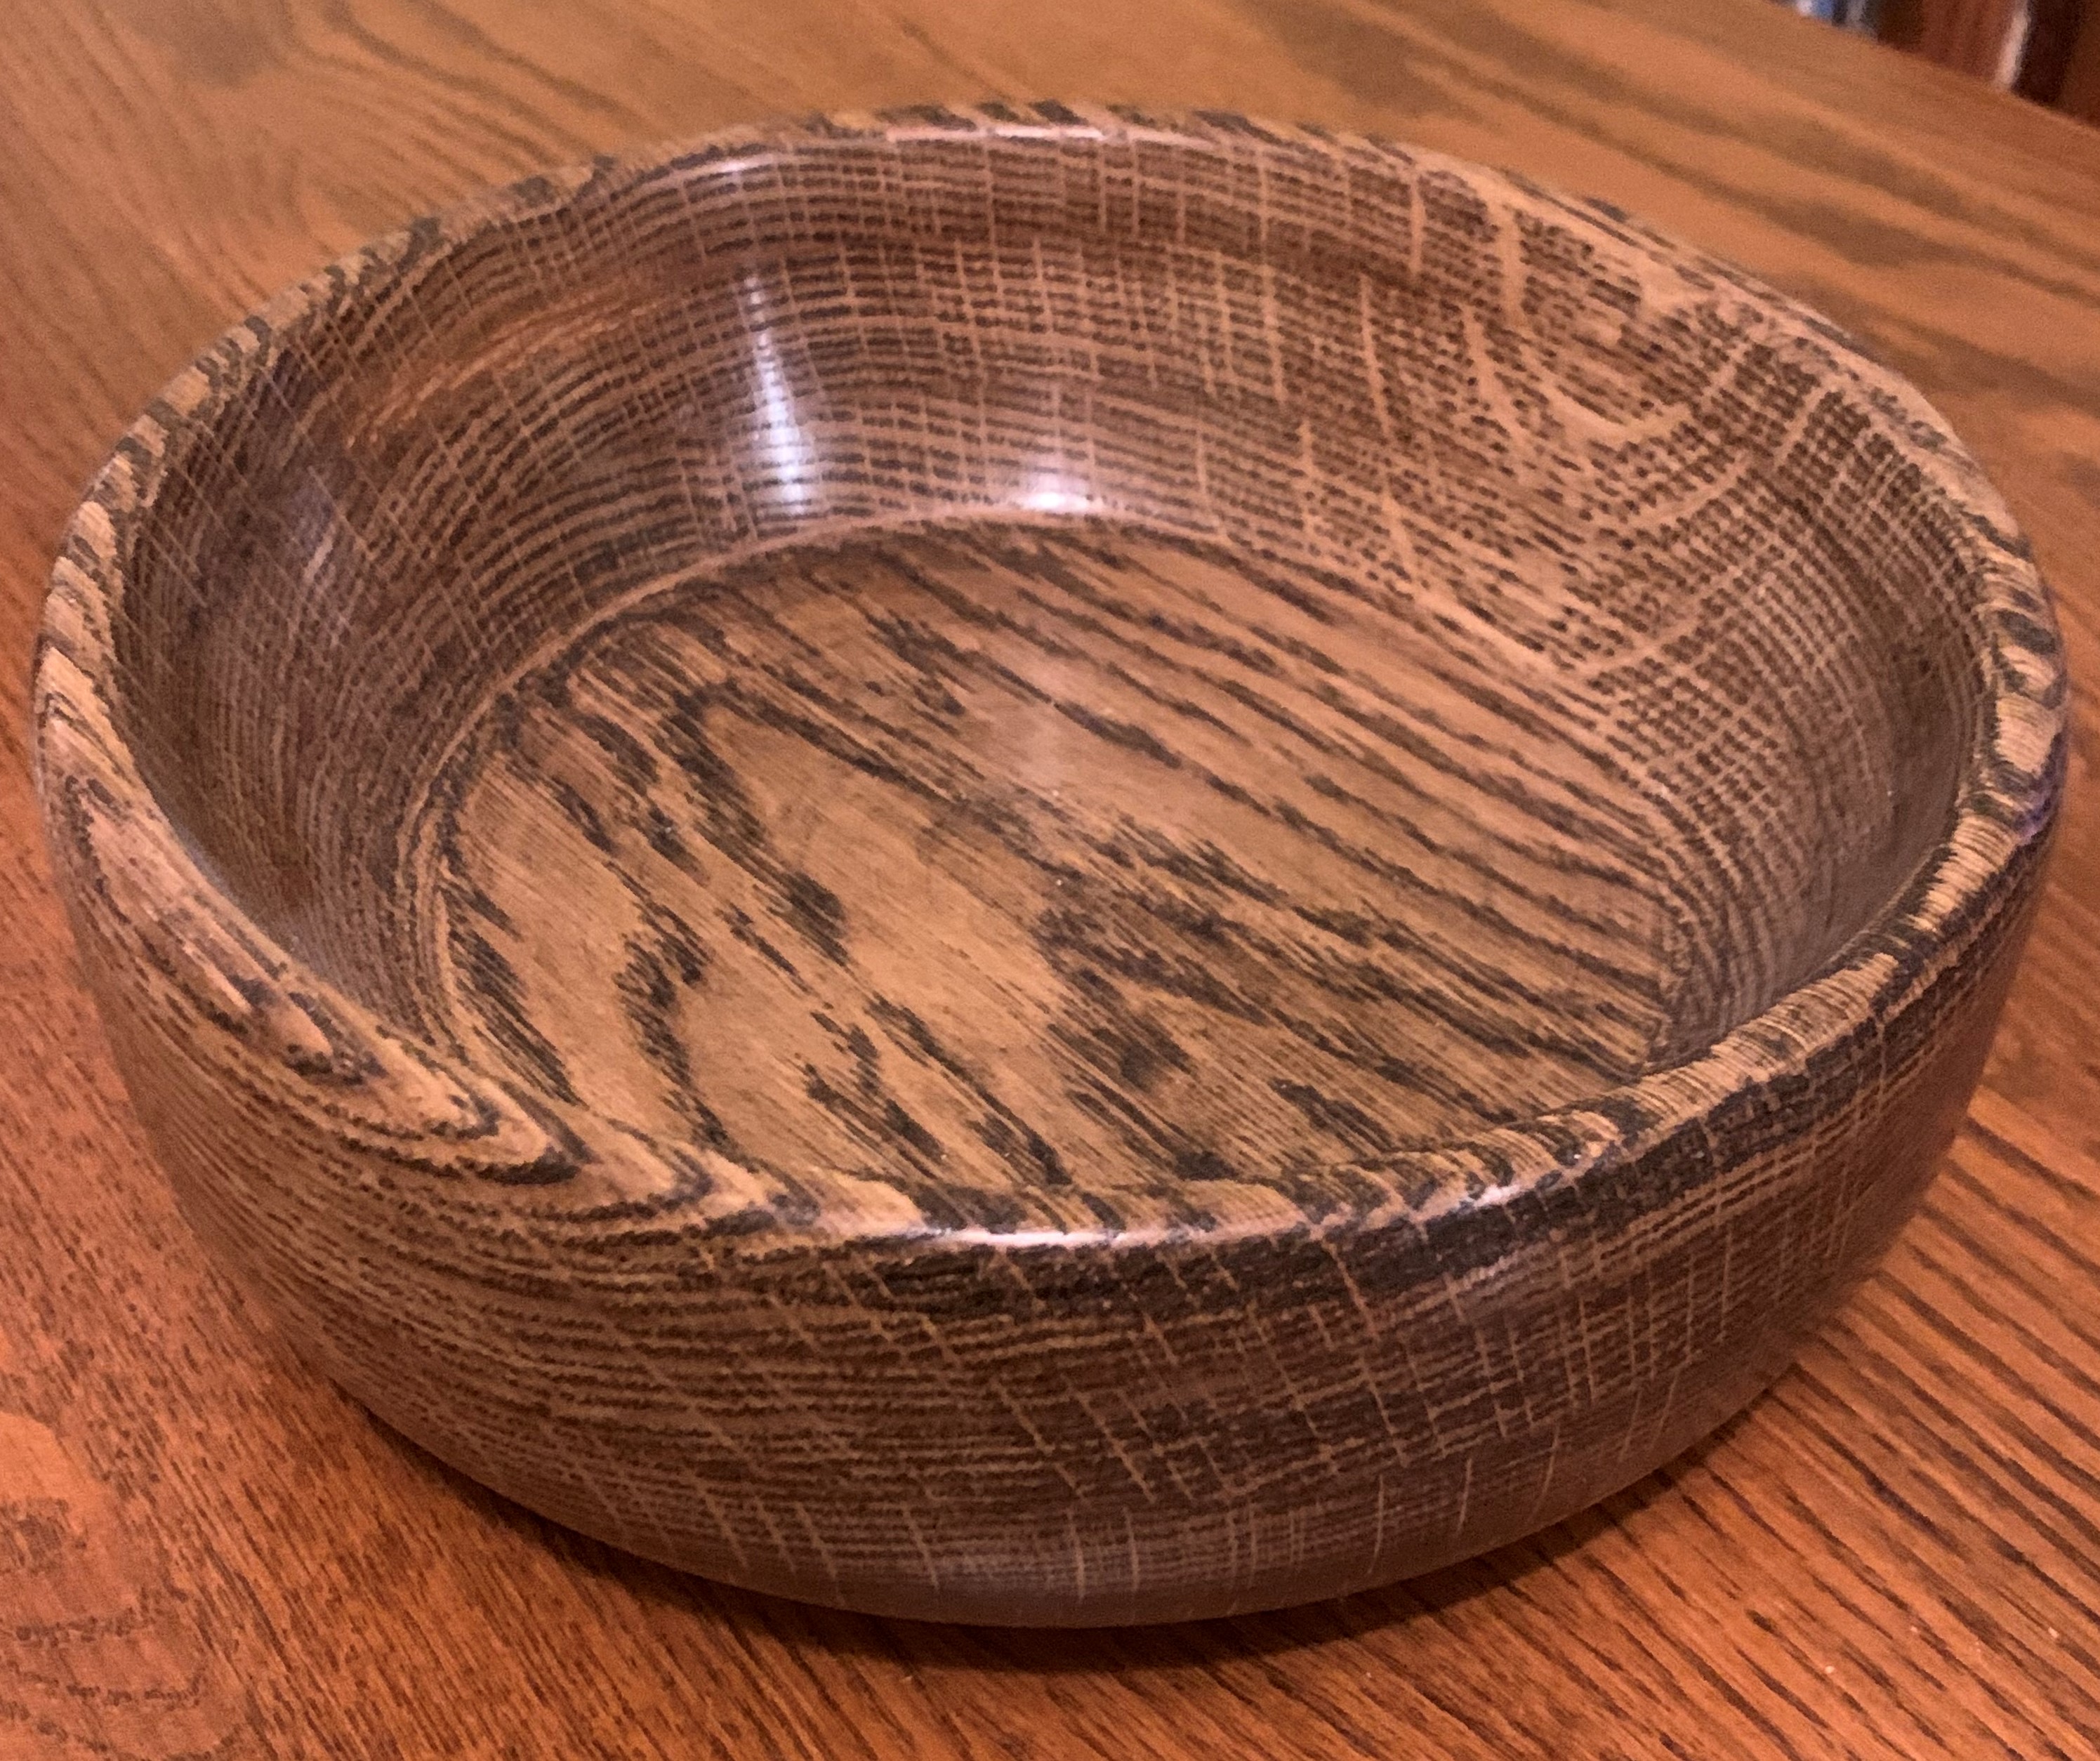
It was not easy to work with, though. White oak is very hard, dulls tools quickly, and can be prone to chipping, especially if it is really, really dry, as this stuff is. White oak is one of the few woods where I used carbide tools almost exclusively because my steel gouges were dulled within just a couple of minutes and I was getting tired of running over to the grinder every little while. Once I switched to carbide it went better, but it was still a relatively slow process. Sanding wasn’t a lot of fun either.
(Which is possibly why it seems nearly impossible to find white oak bowl blanks on the commercial market? At least I haven’t seen any. )
Ash – Go read the comments about oak again but replace “oak” with “ash” and that pretty much describes it. Ash seems to be just a wee bit more forgiving than oak. I can generally work it without having to resort to using carbide tools. Certainly it has a nicer color, or at least I think so. But like oak it can be pretty bland looking, so you might want to experiment with stains. And wood suppliers who carry bowl blanks seem to frequently have it in stock at fairly reasonable prices. Mostly I’ve seen blanks offered as green wood, but I do see kiln dried stuff available from time to time. Alas, while I’ve made some projects with ash I don’t have photos of any.
(Sidenote: In some areas there is a glut of ash on the market because of infestations of the emerald ash borer, which is decimating the ash tree population all over the country. In a lot of places it is illegal to transport ash wood into or out of certain areas to try to restrict the spread of the beetle and the disease it carries. These restrictions generally don’t apply to kiln dried ash because the kiln generates enough heat to kill the borers. I’ve seen a few vendors offering “green” ash wood. This is possibly illegal in some jurisdictions.)

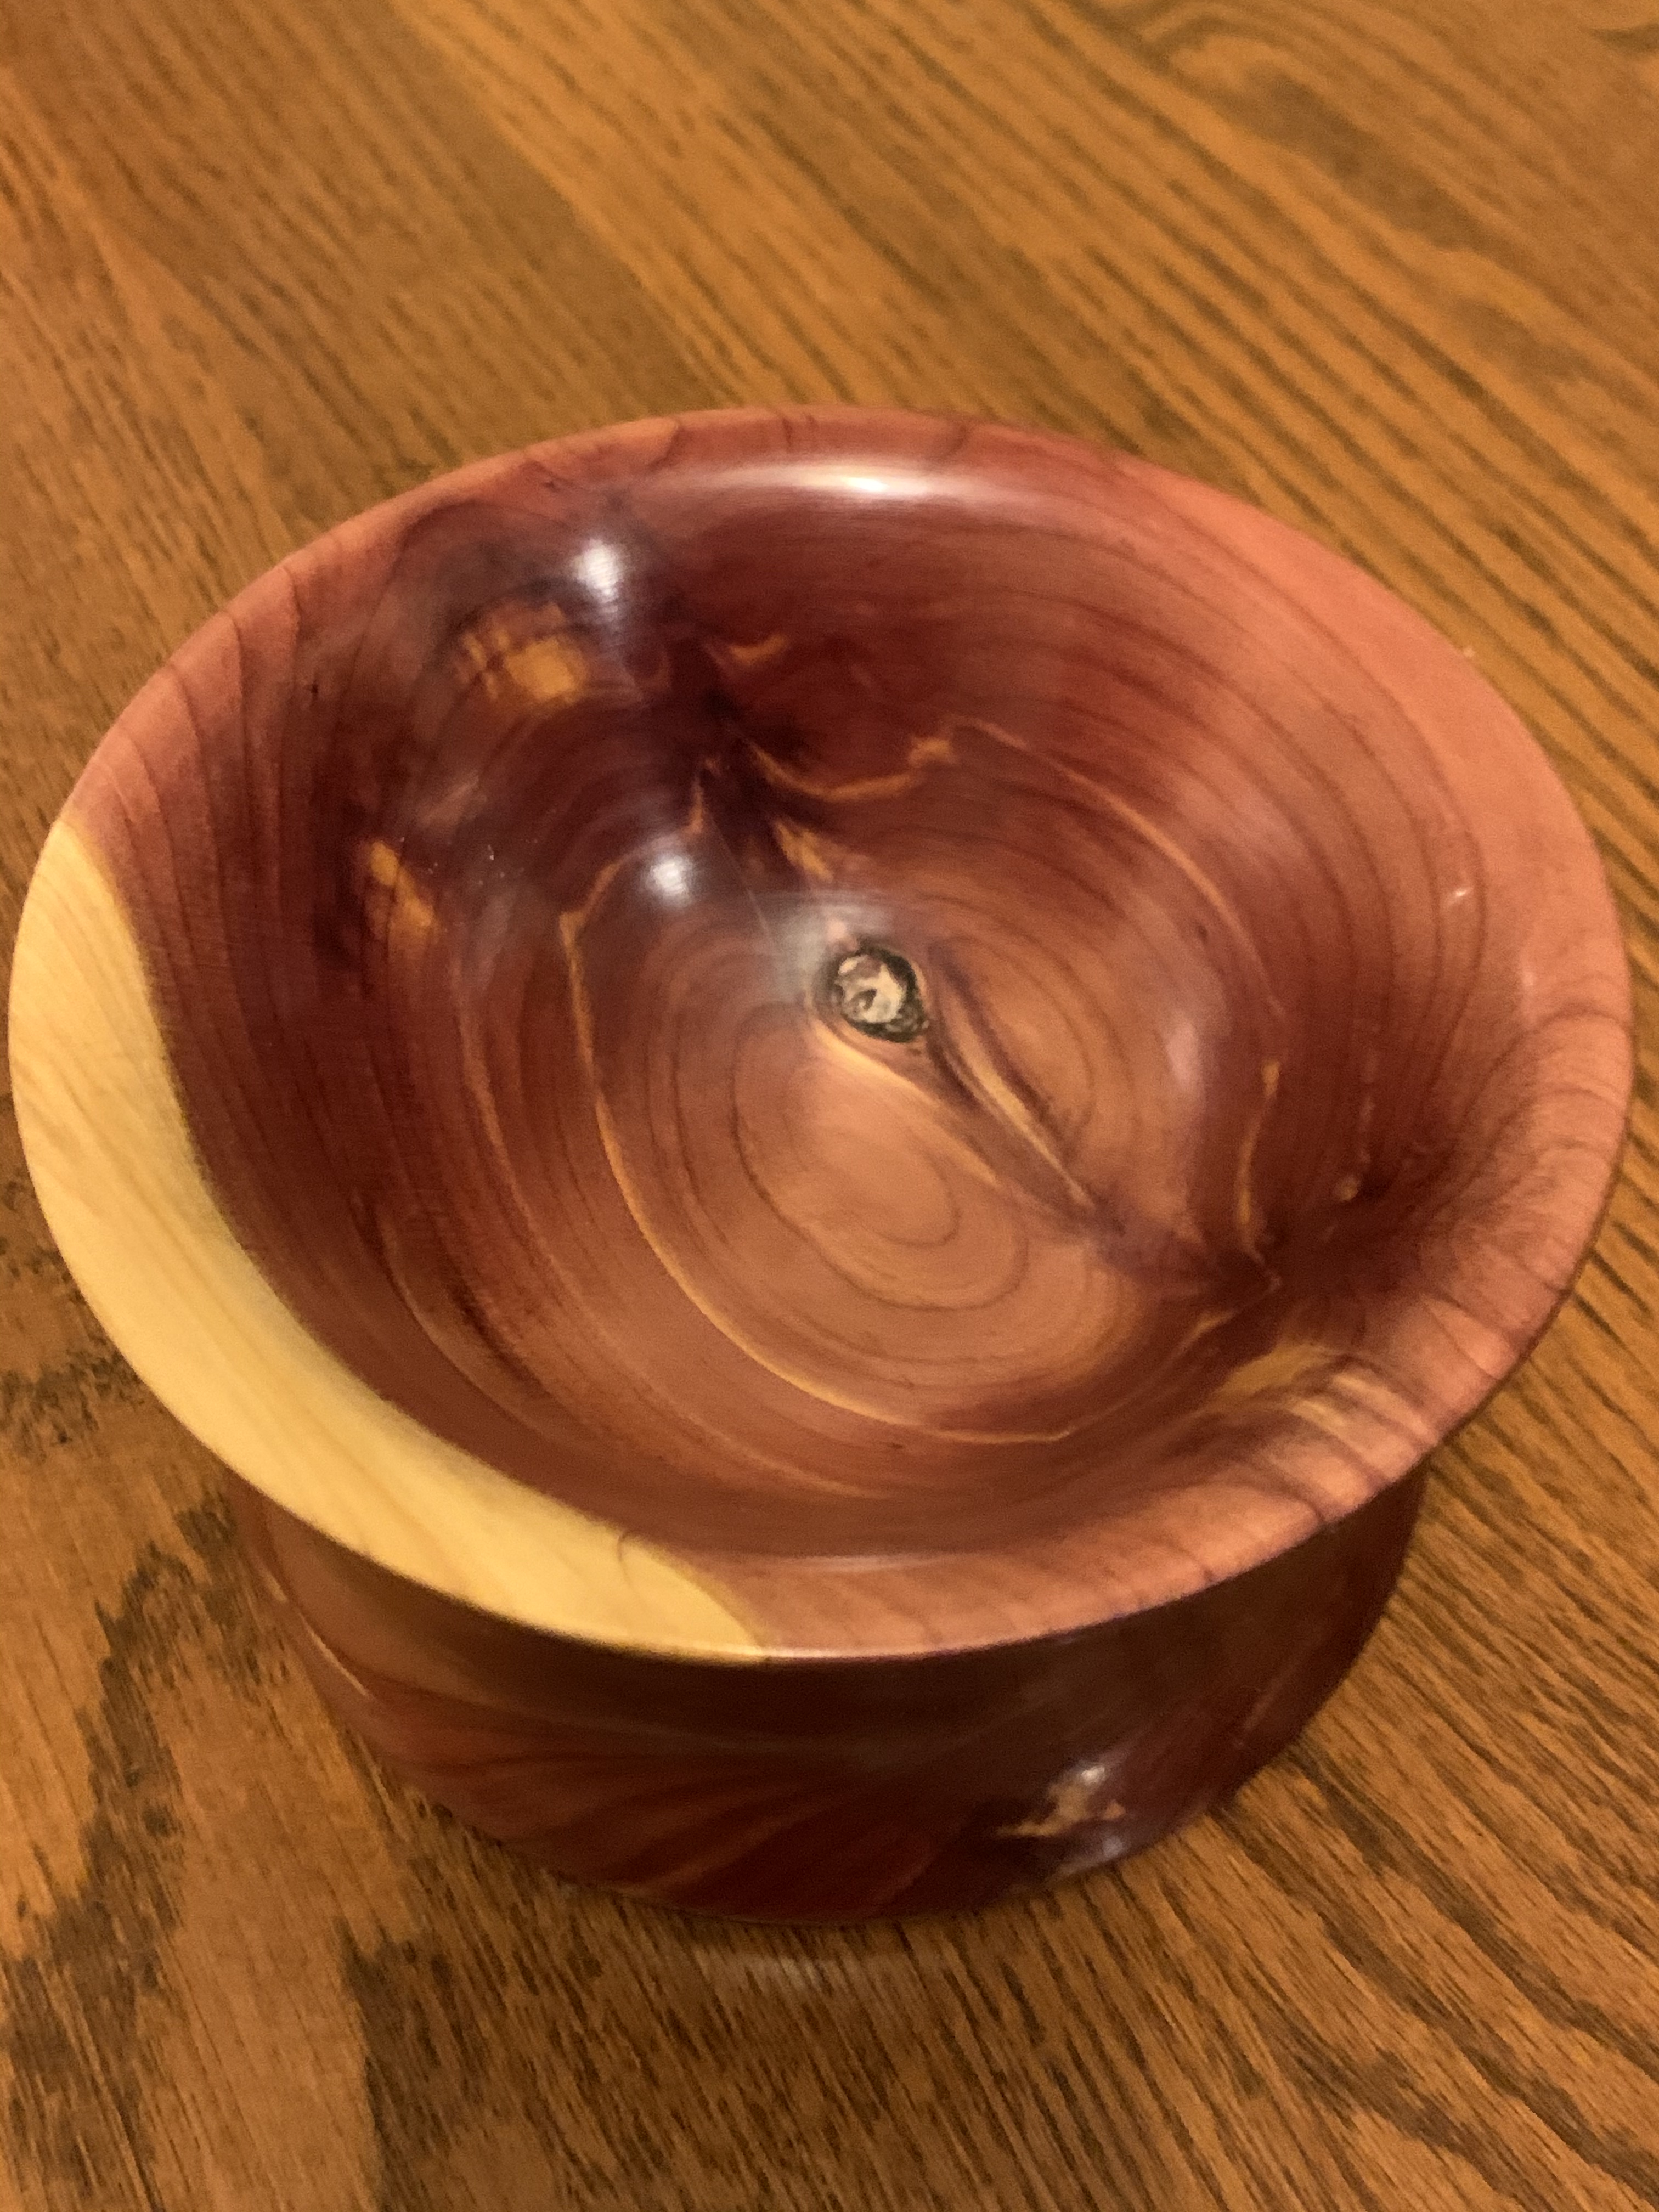
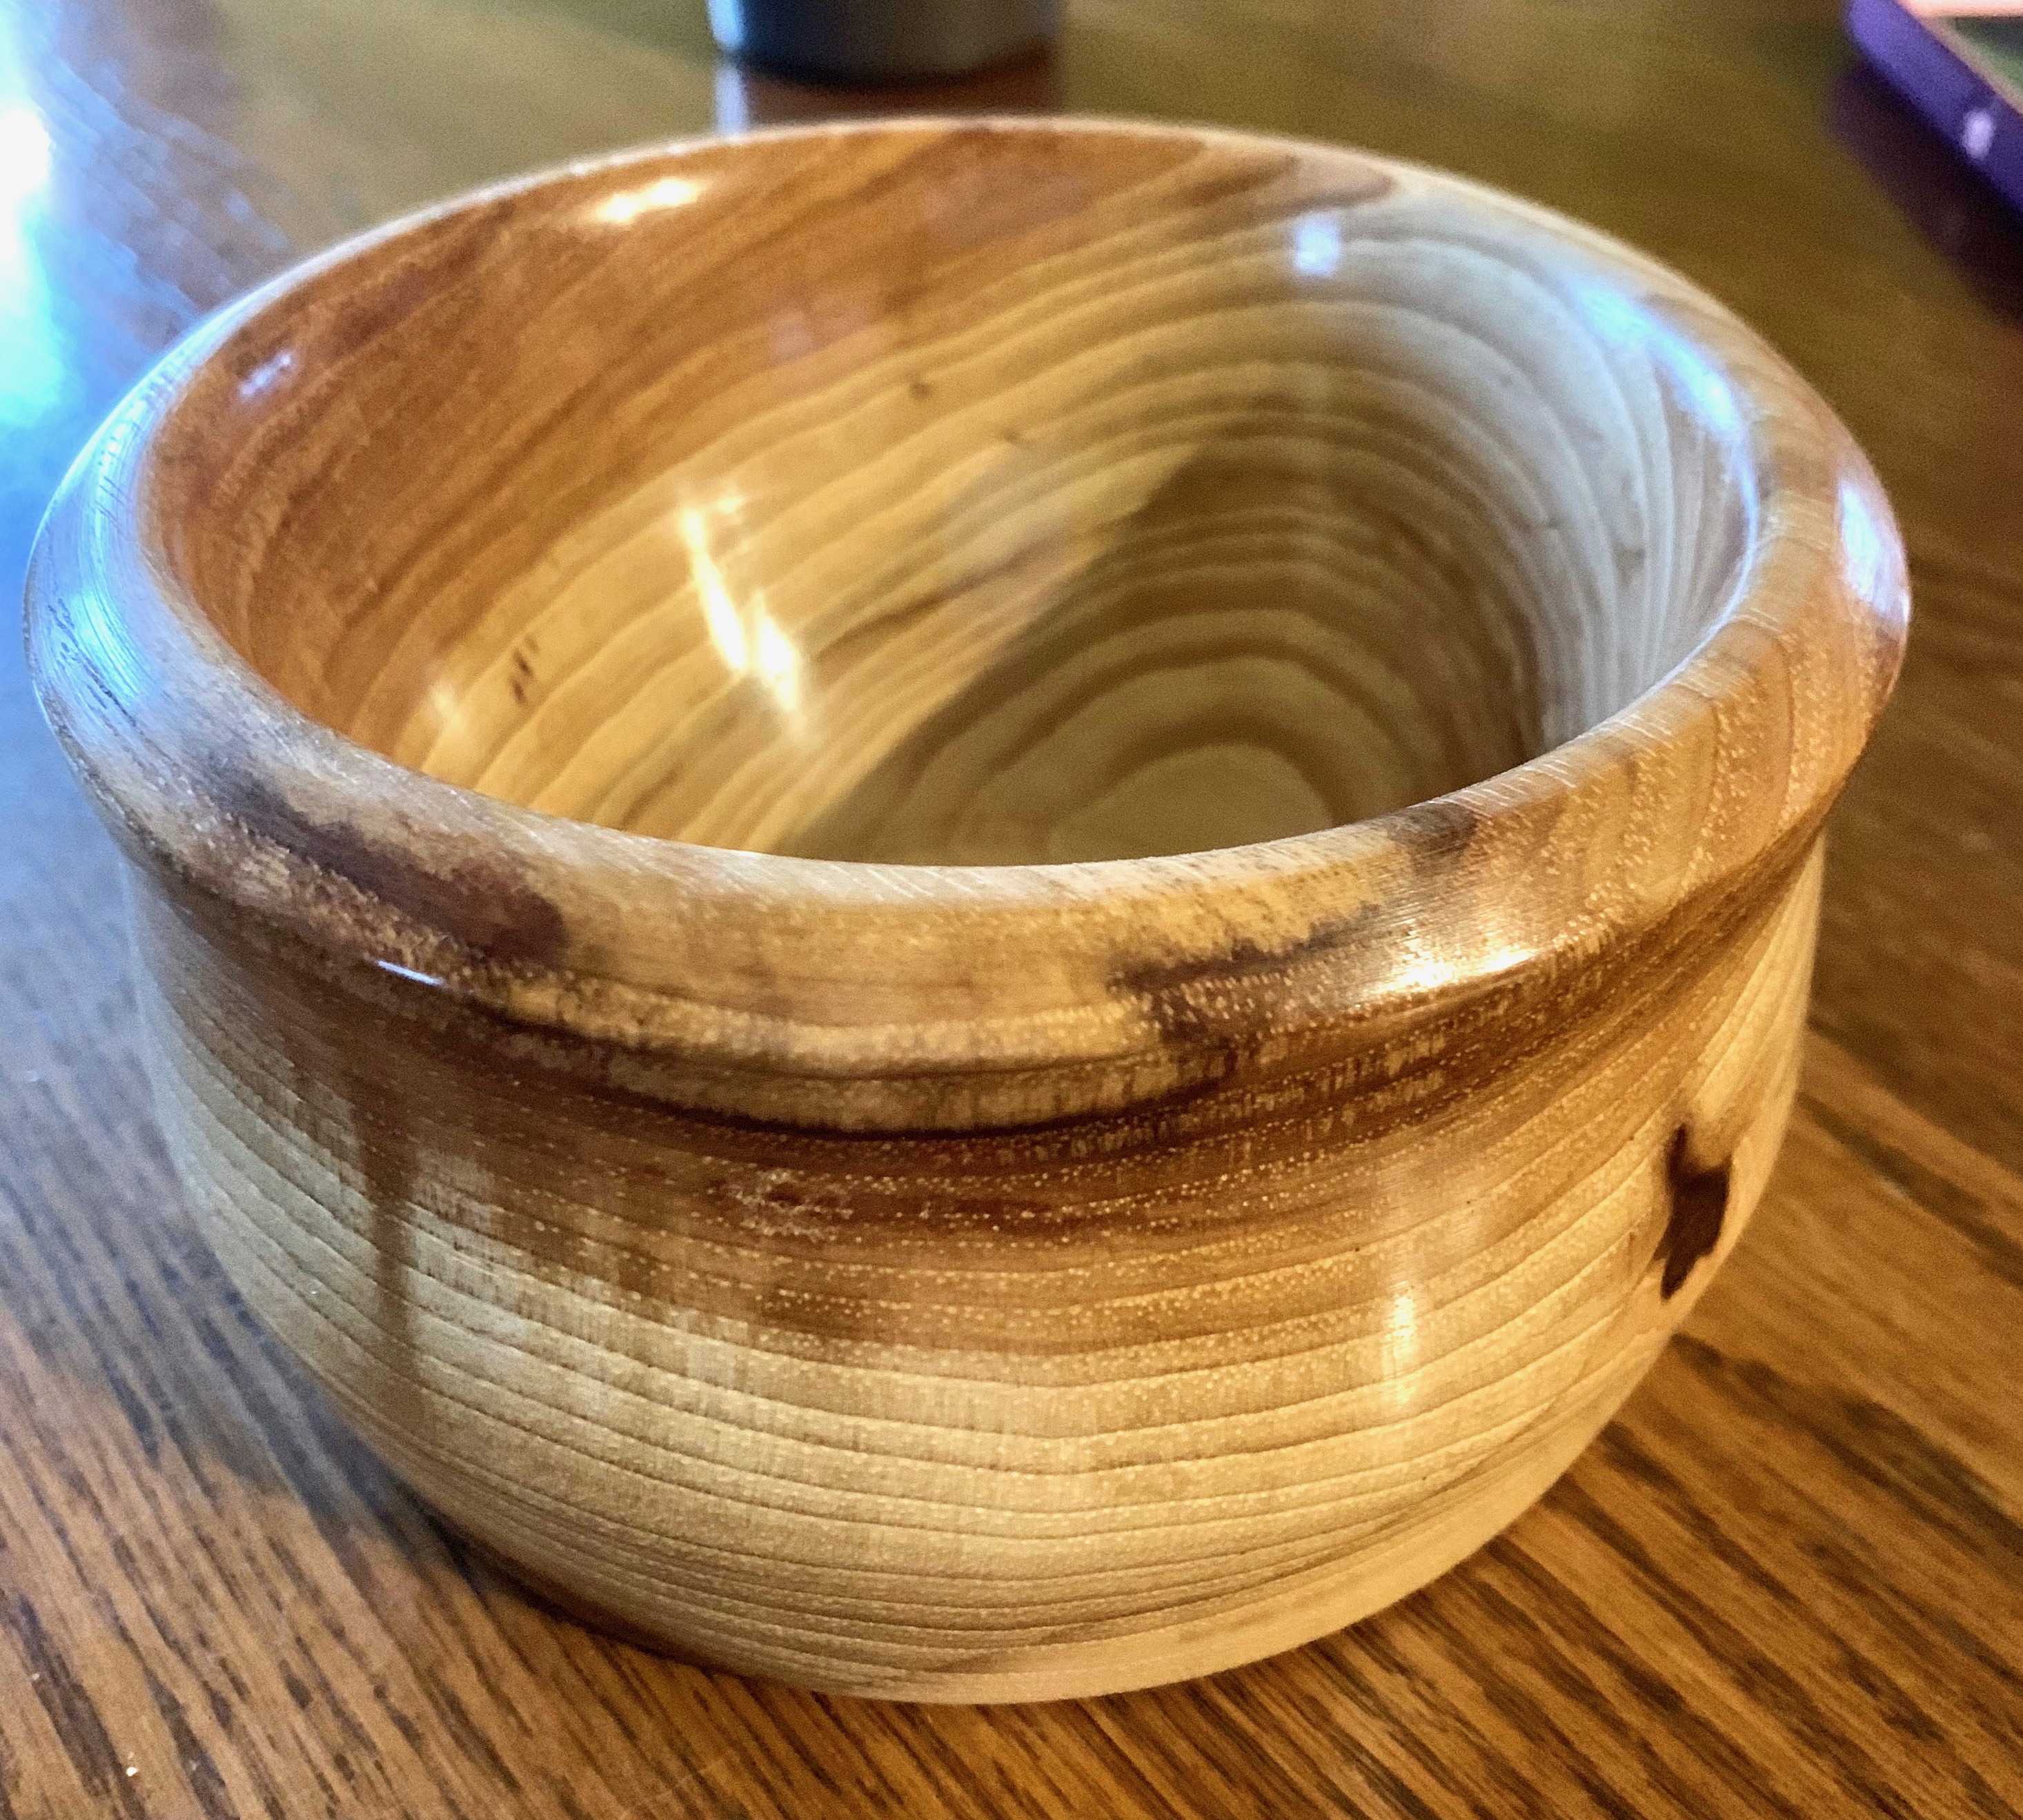
Red Cedar – I really, really like working with cedar. It’s a soft wood, cuts beautifully on the lathe, and wow, does it smell amazing! It sands easily to a smooth surface, is easy to finish to a brilliant shine. I used OB shine juice on this one. Personally I think the grain and colors are absolutely beautiful but some people don’t like it for some reason. Colors can vary wildly, even in the same piece of wood, as you can see, ranging from a deep chocolate brown, to rich purplish reds, to golden yellows. It’s widely available, and if you live in the right part of the country you might be able to source it locally and save yourself a considerable amount of money.
Cedar does have some issues. It can often have “defects”, knots, inclusions, wild grain, but personally I think that adds to the beauty, like that unexpected knot I discovered in this piece as I was hollowing it out. To me that knot and the wild grain surrounding it makes the piece far more interesting than if had been just plain wood. But because it’s a soft wood, it’s easy to damage a finished piece.
Prices on cedar are pretty reasonable if you can find it. Not every wood seller seems to carry it. My main source for pre cut cedar bowl blanks is Green Valley Wood Products in Indiana and they’re running 6″ square 3″ thick cedar blanks at about 4 for $39.95, or about $10 each. They are green, not dried, but when it comes to cedar I’ve never really had problems with working with green cedar.

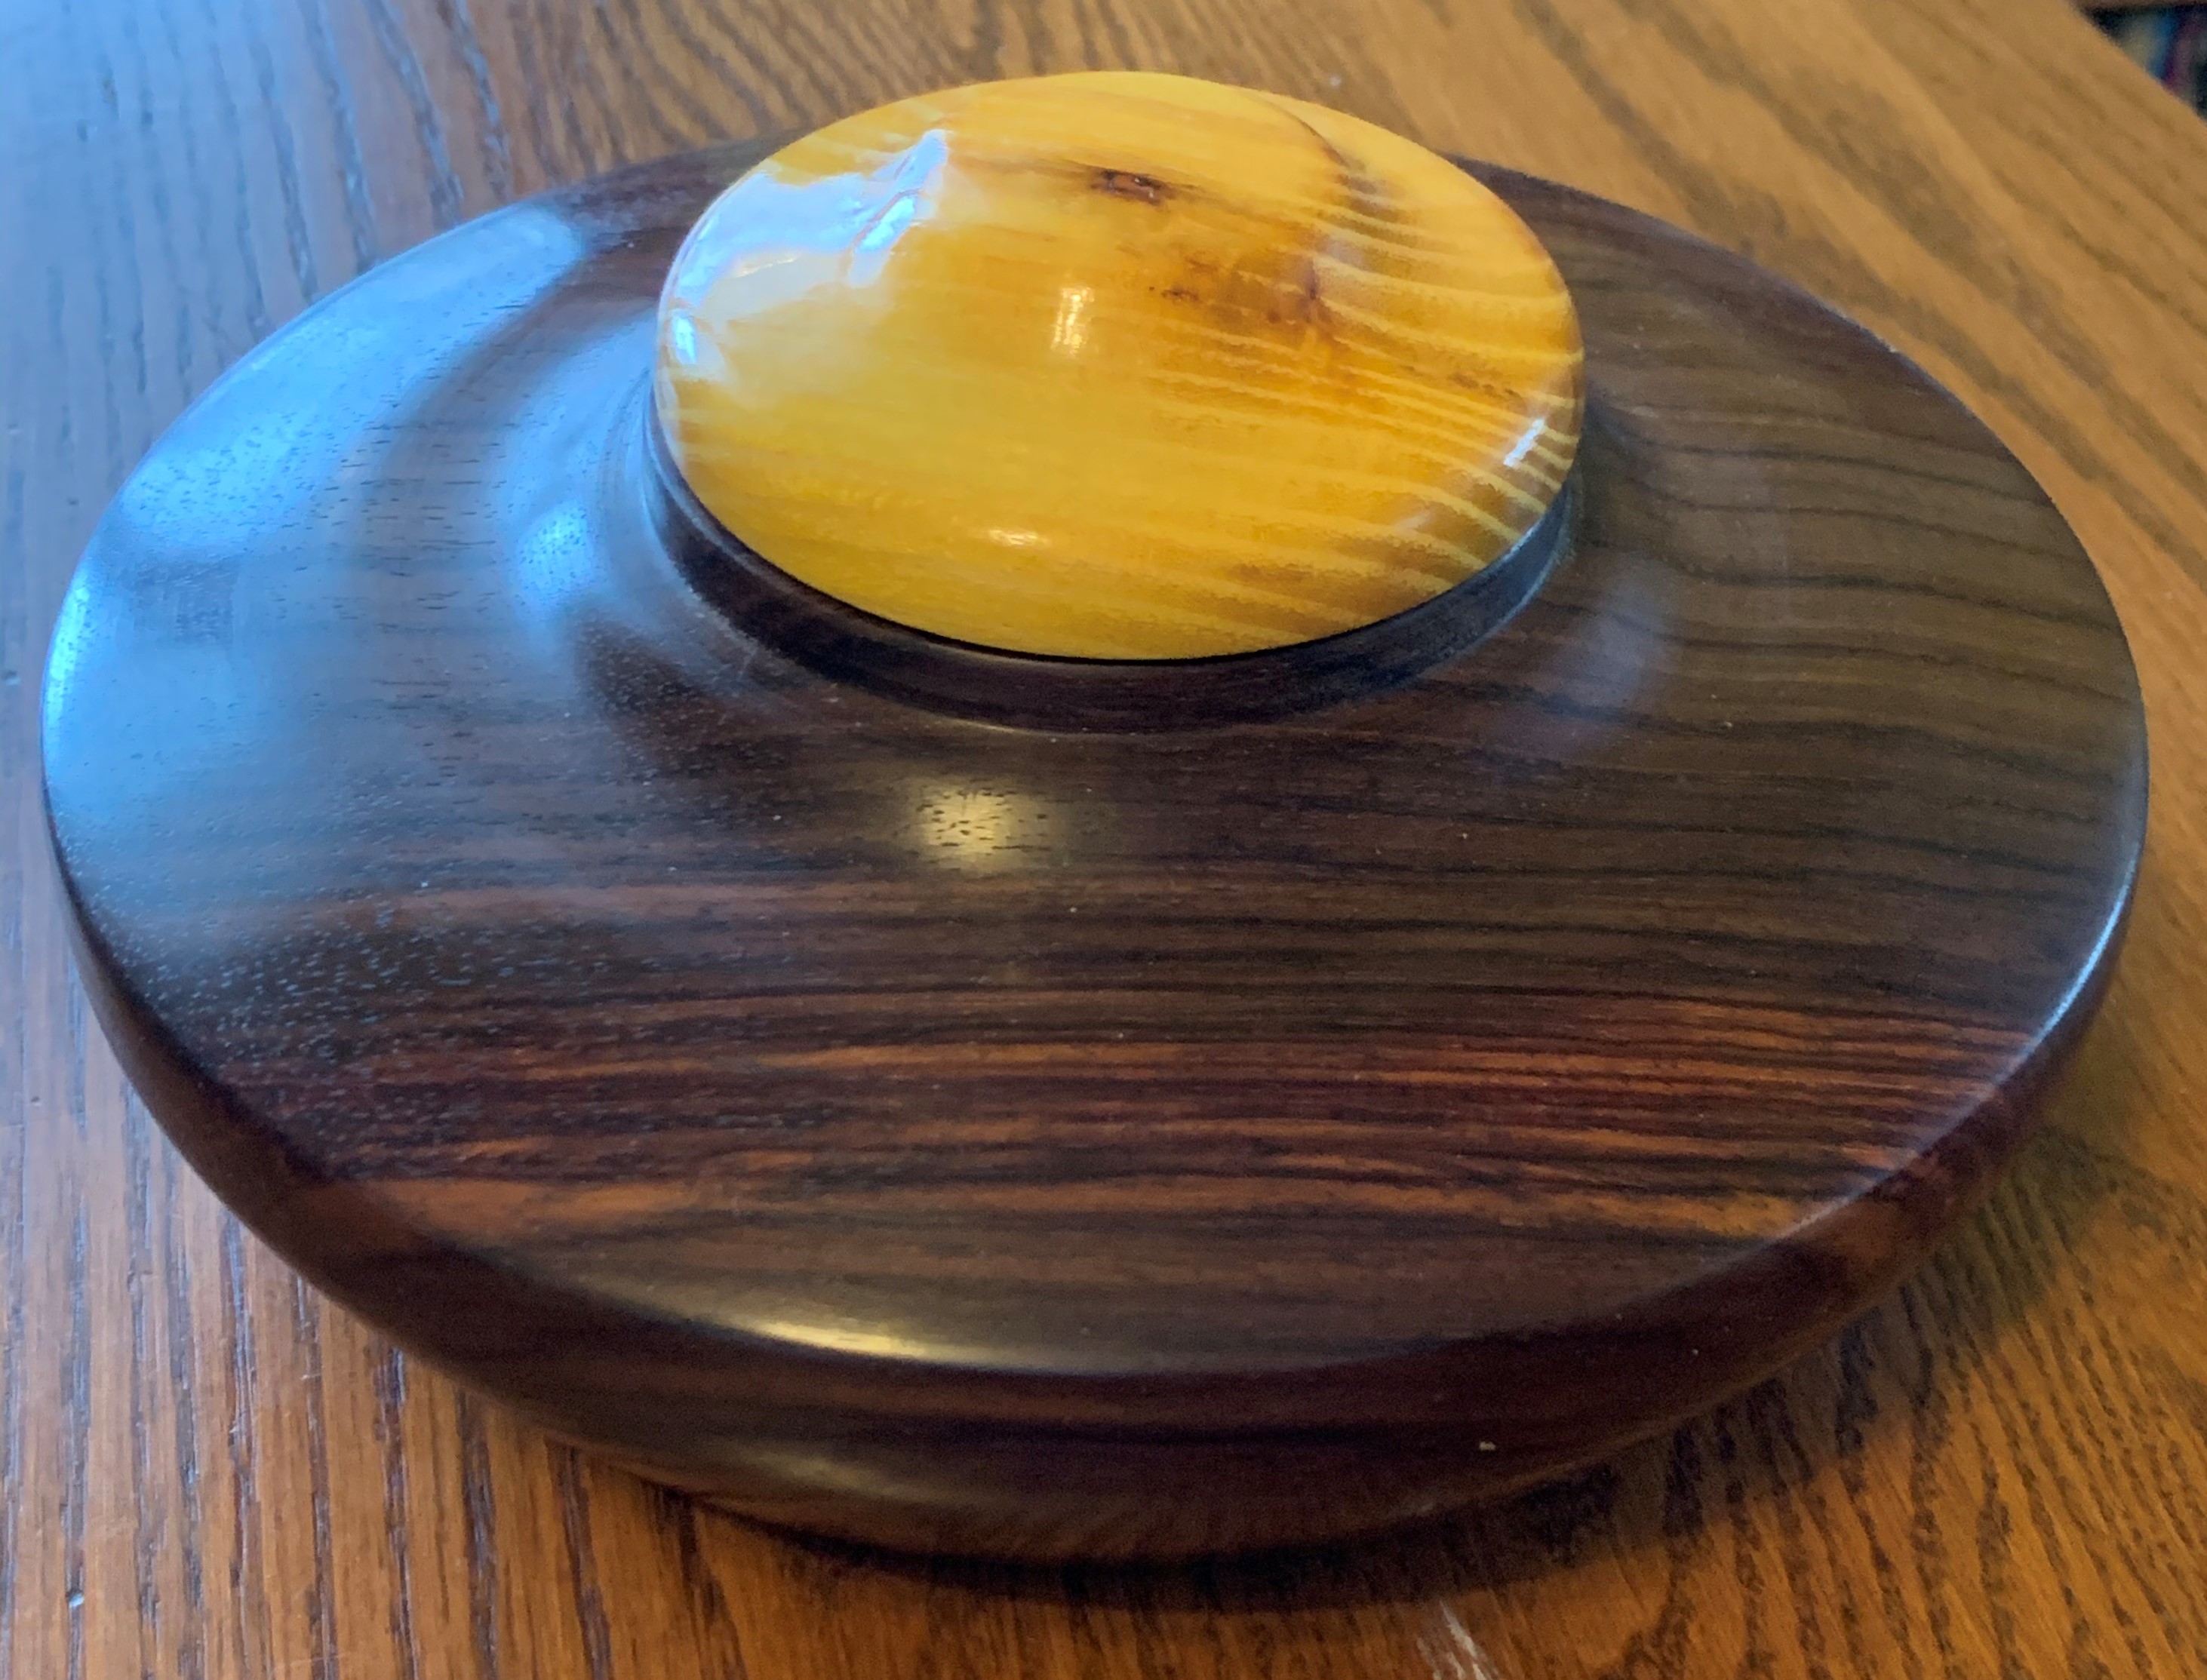
Mahogany – Mahogany is, well, complicated. Some mahogany is mahogany, some mahogany isn’t… Heck, I don’t know. I do like the stuff, though. Maybe. Sort of. Kinda. Certainly it can be a very pretty wood that can take on a brilliant iridescence when the light hits it just right. It can glimmer and shimmer. But in order to get that shimmer and iridescence you have to have exactly the right piece of wood and have to do exactly the right things to it.
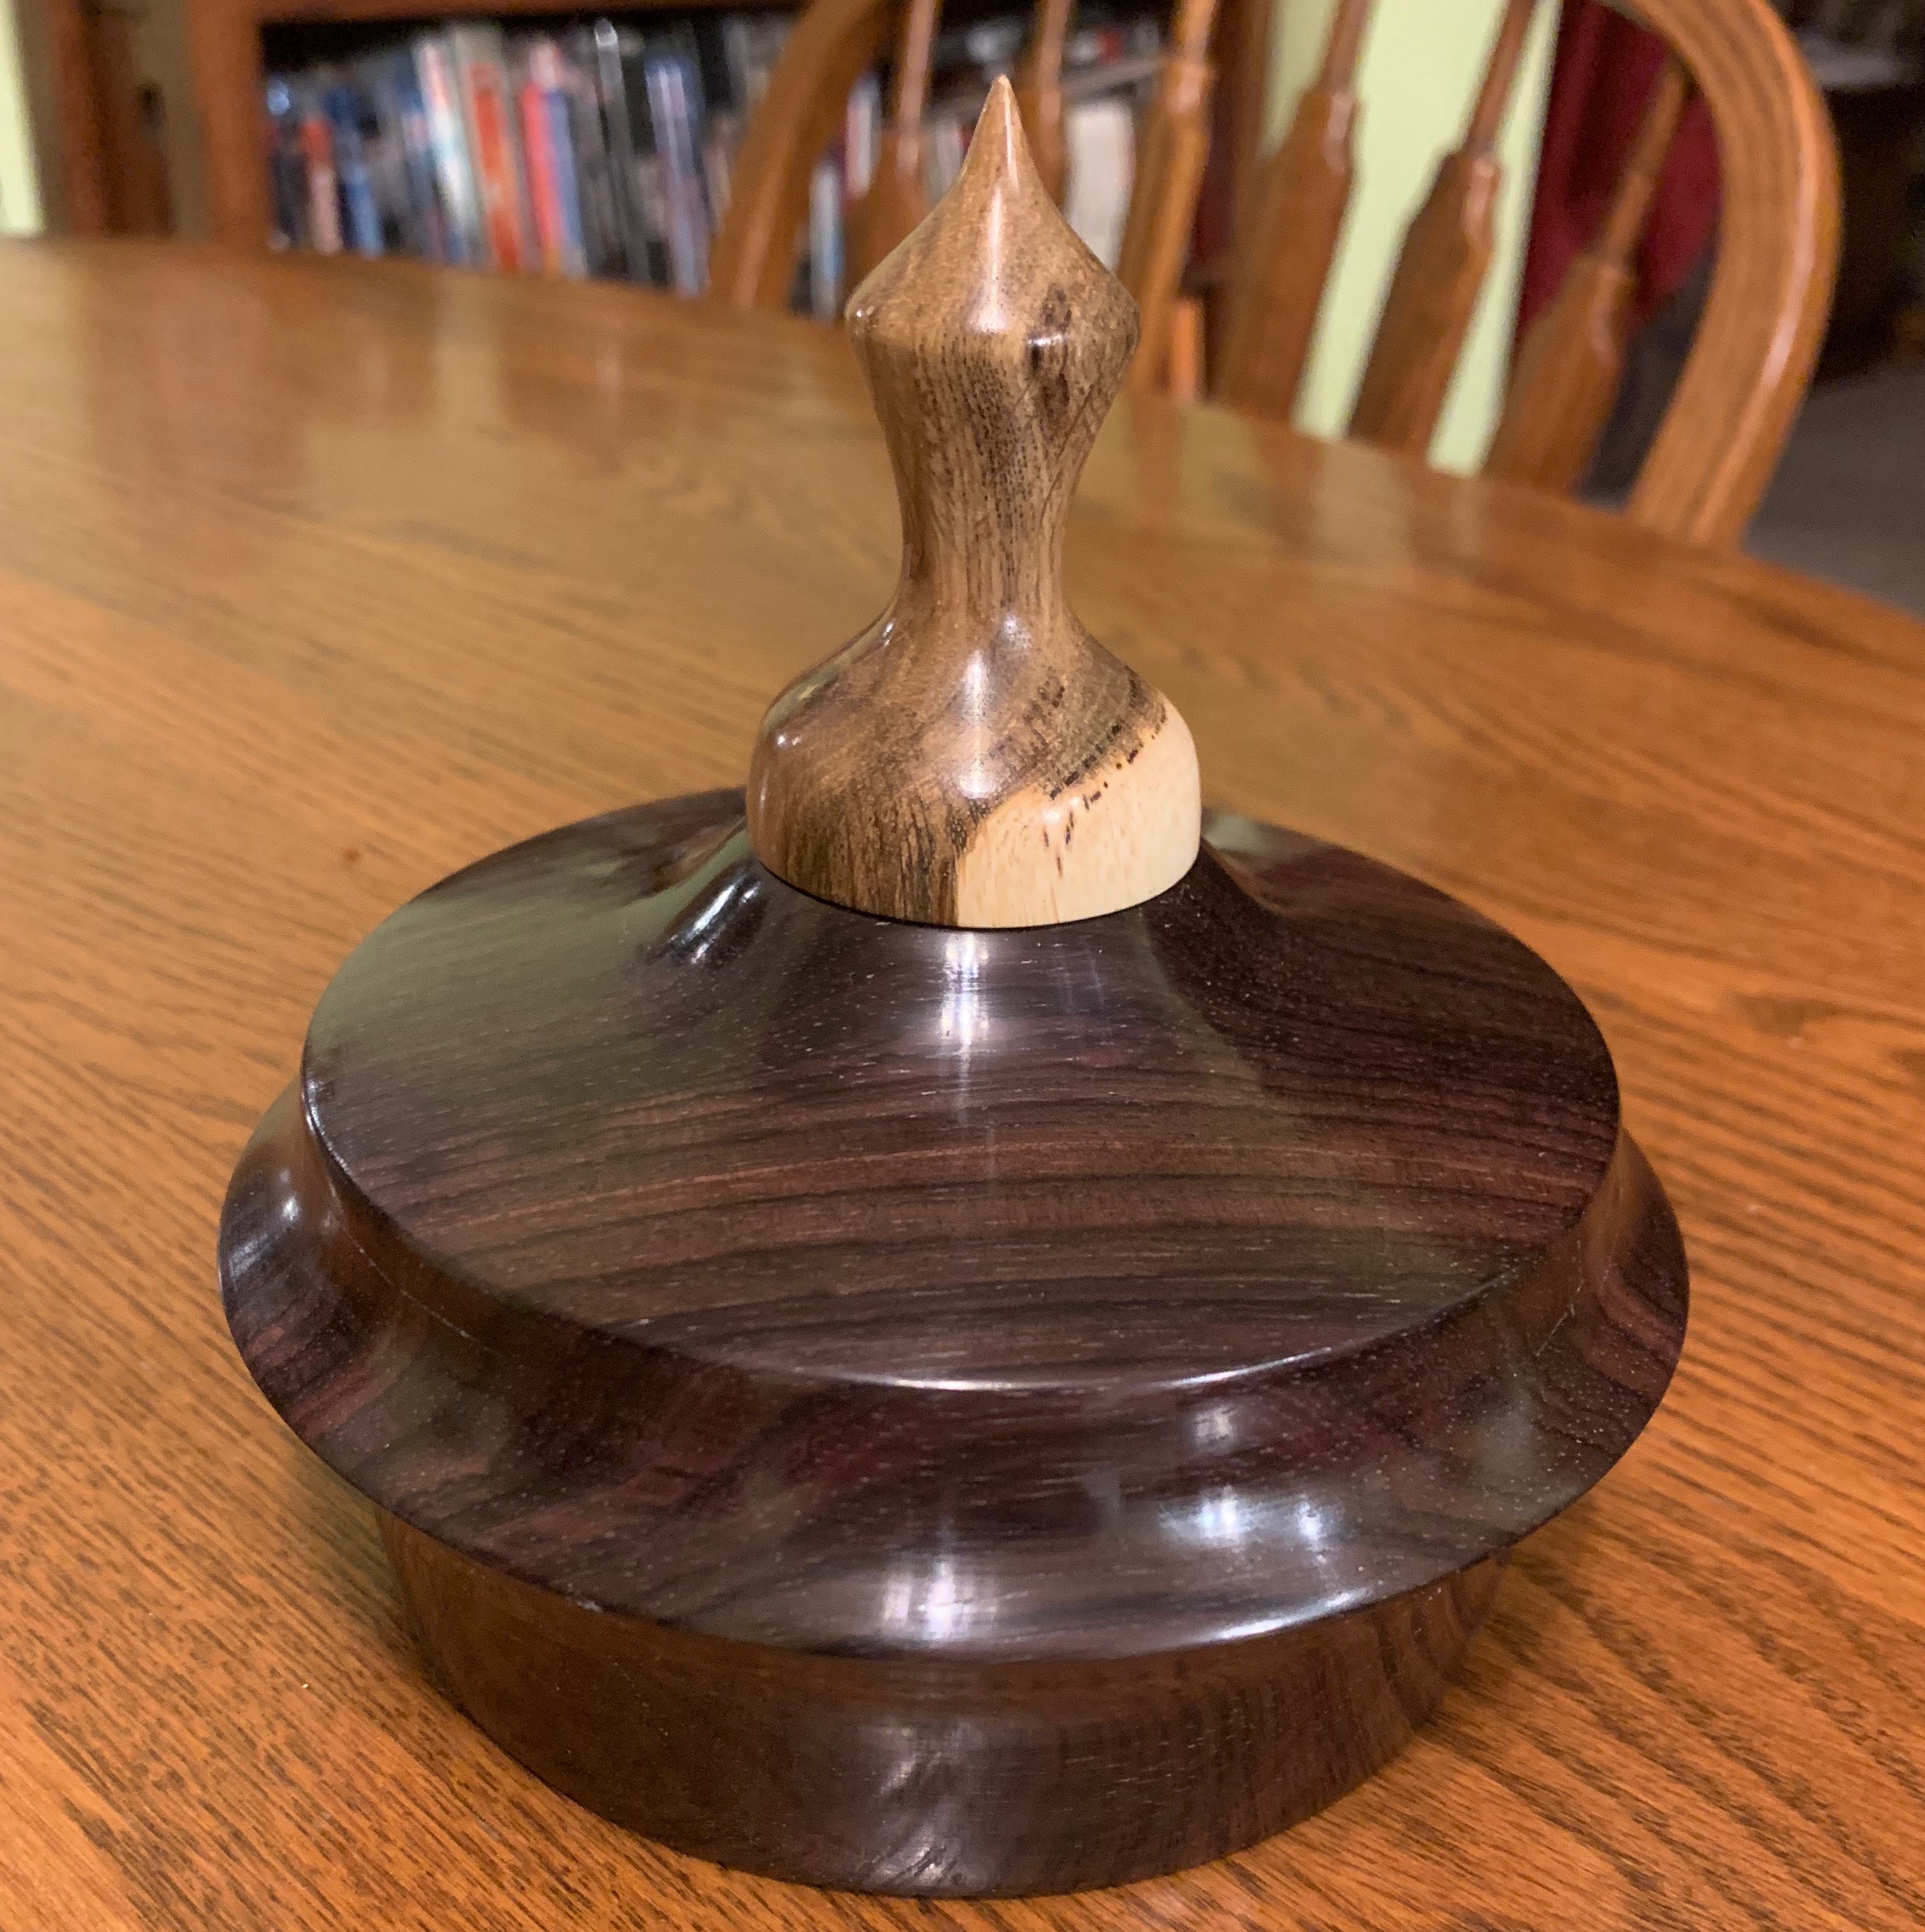
I honestly have sort of a love/hate relationship with mahogany. I’ve built furniture out of the stuff and frankly I didn’t like it that much. I didn’t think it looked all that good and it can be surprisingly soft and easy to damage when used in furniture. It isn’t difficult to work with, but it seems to produce a very fine dust that clings to anything and everything. It seems to dull my tools quickly. For whatever reason carbide tools don’t seem to work very well at all with this stuff. When I try using carbide I get lots of catches, gouges and tearout. So I stick with traditional bowl gouges, scrapers and skews when I’m working with it. And I sharpen them a lot. And while they claim it’s a hardwood, it sure doesn’t behave like one. It’s relatively soft, it is easy to get dings and dents in finished pieces. I ended up somehow with a 15″ square, 5″ thick hunk of the stuff that I into a fruit bowl that looked nice for, oh, about 10 minutes. Oh, it’s a perfectly good utility bowl, and that’s what we use it for, but it sure didn’t stay looking good for very long. But every once in a while a piece like this below comes off the lathe, and and I start to want to work with it again.
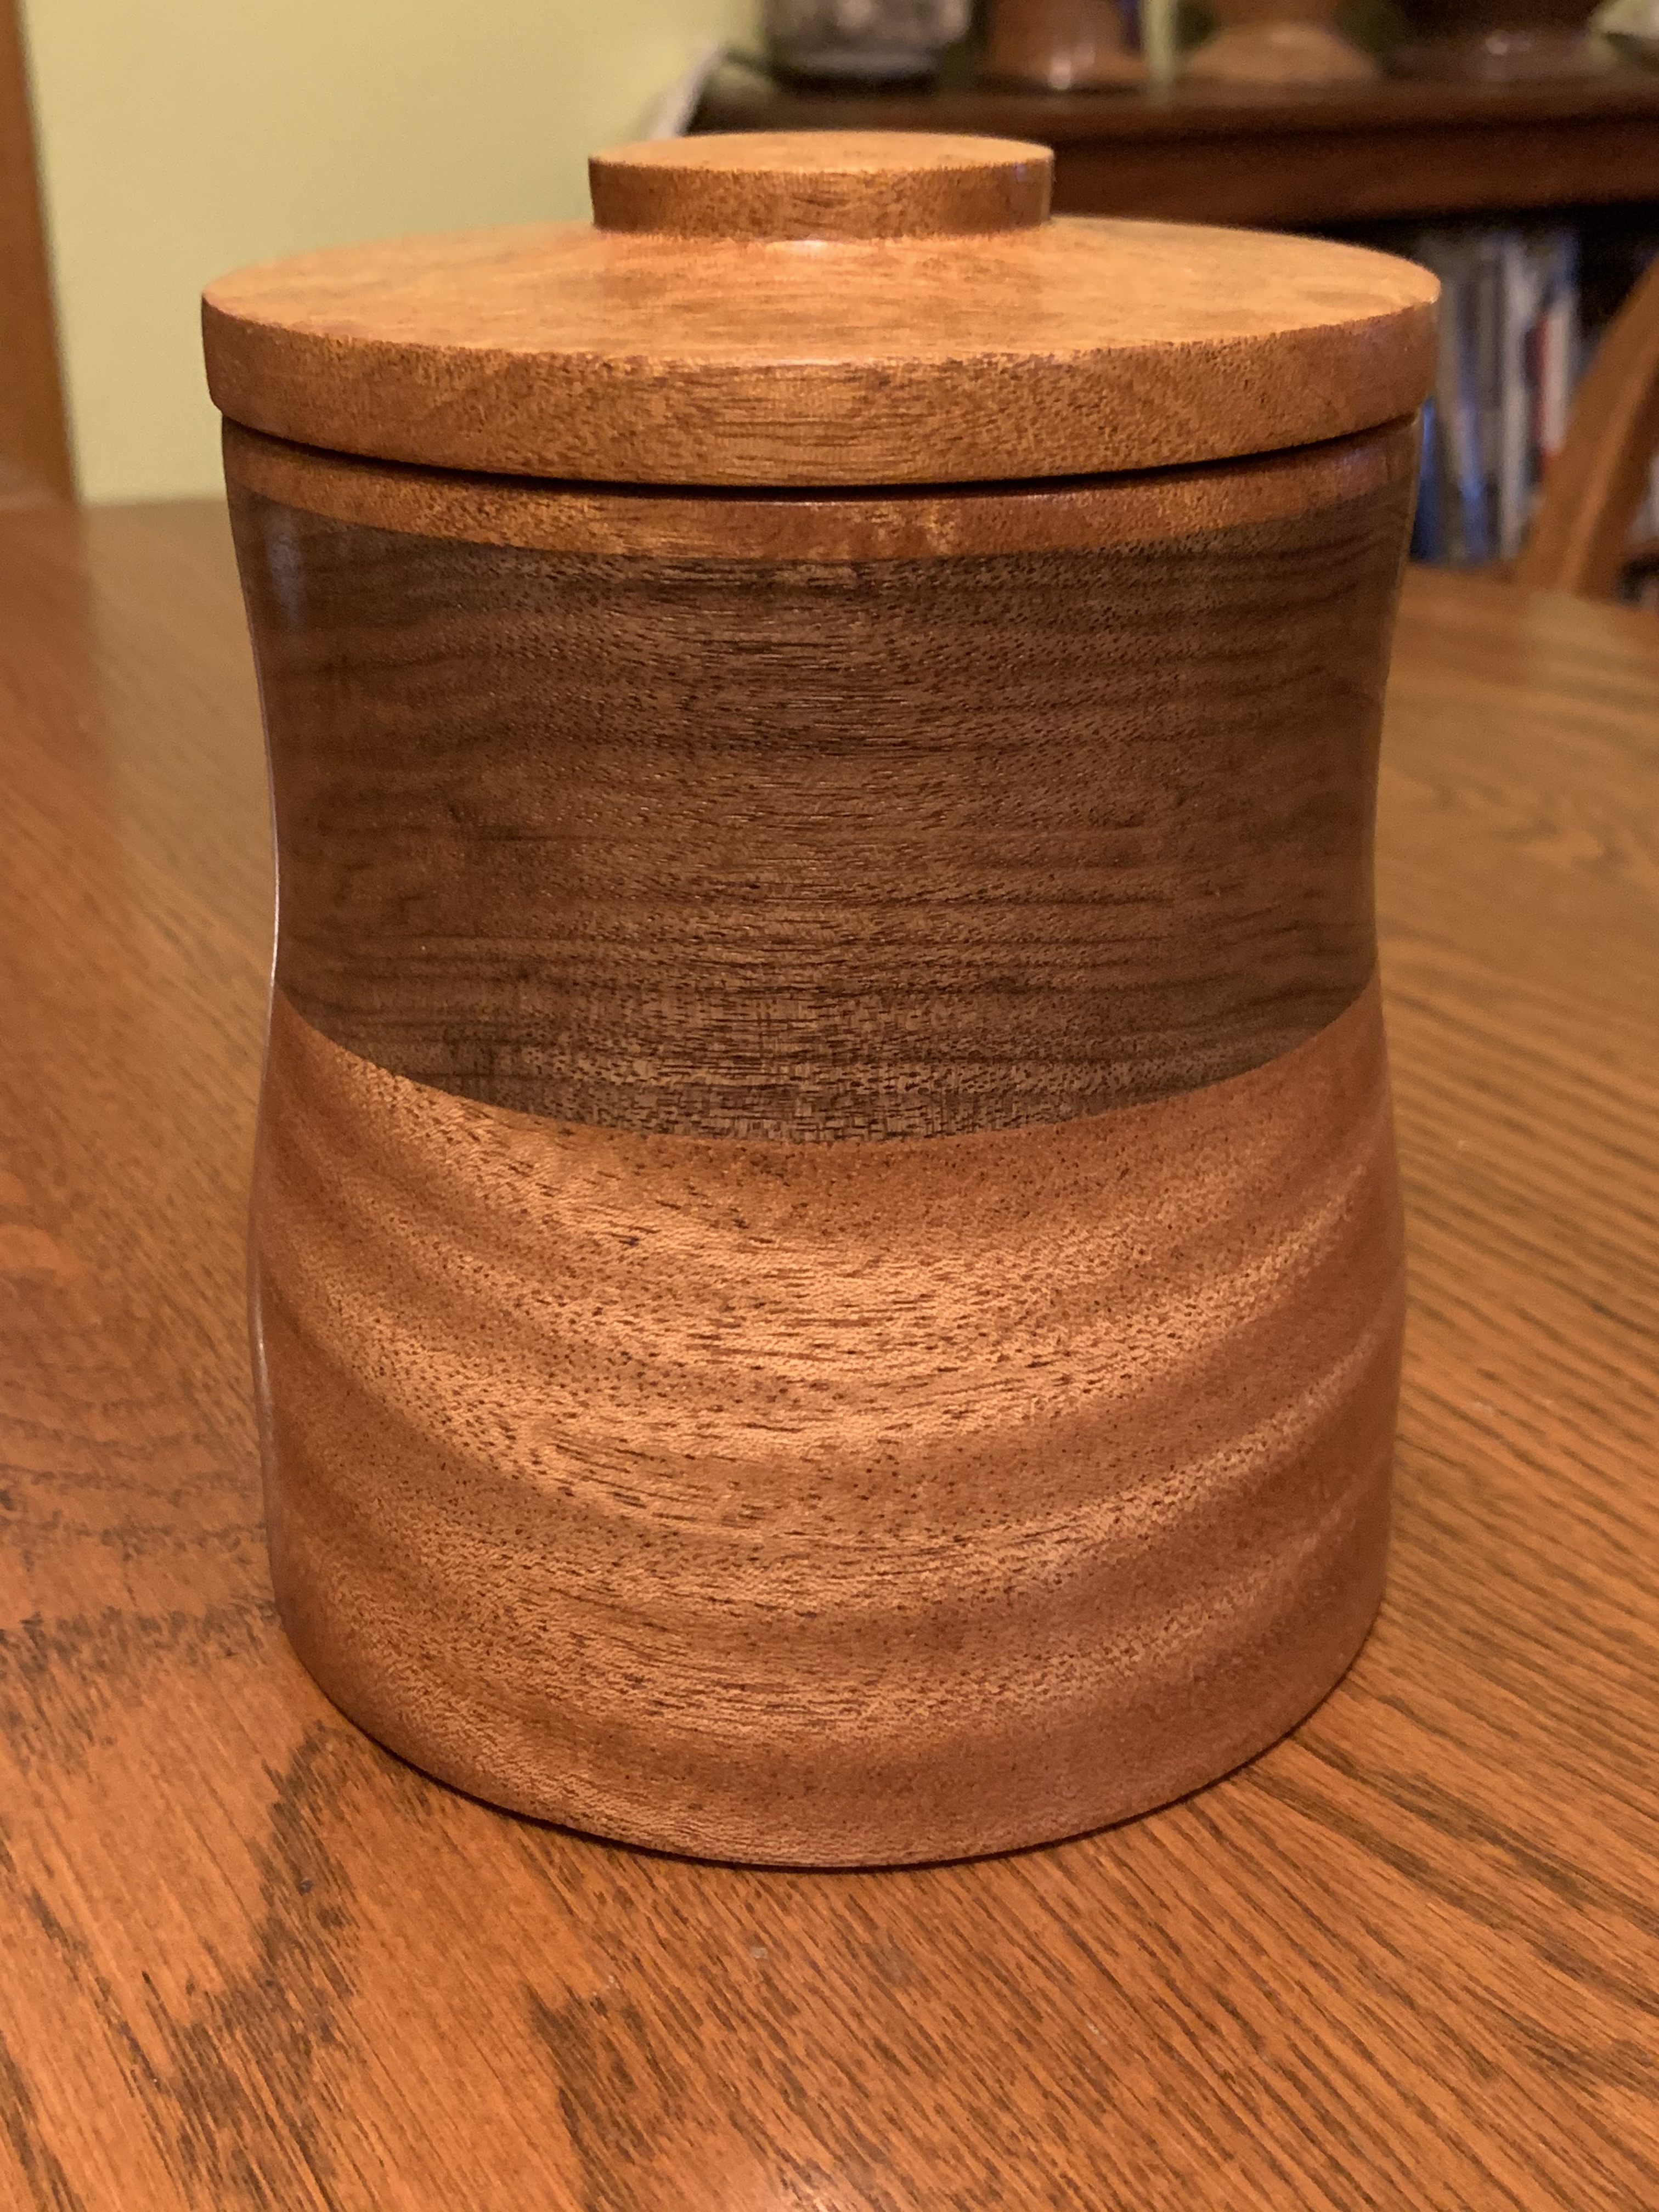
This is a mahogany and walnut canister or box or jar or whatever you want to call it. About 5″ wide and 10″ or so tall, and it turned out way better than it had any right to. (The crappy camera in my iPhone doesn’t do this justice. I don’t care what the reviewers claim about the iPhone camera, it’s garbage, especially when it comes to rendering color.)
Back to mahogany, though. It’s decent wood, it can be very pretty. It isn’t all that difficult to work with, but it does have some issues. Prices for dried, pre-cut bowl blanks are generally a bit higher than walnut, depending on where it is sourced from. Right now it’s going for about $11 – $13 for a typically sized 6″ square 2″ thick precut bowl blank. It should be provided kiln dried, not green, because all of it is imported.
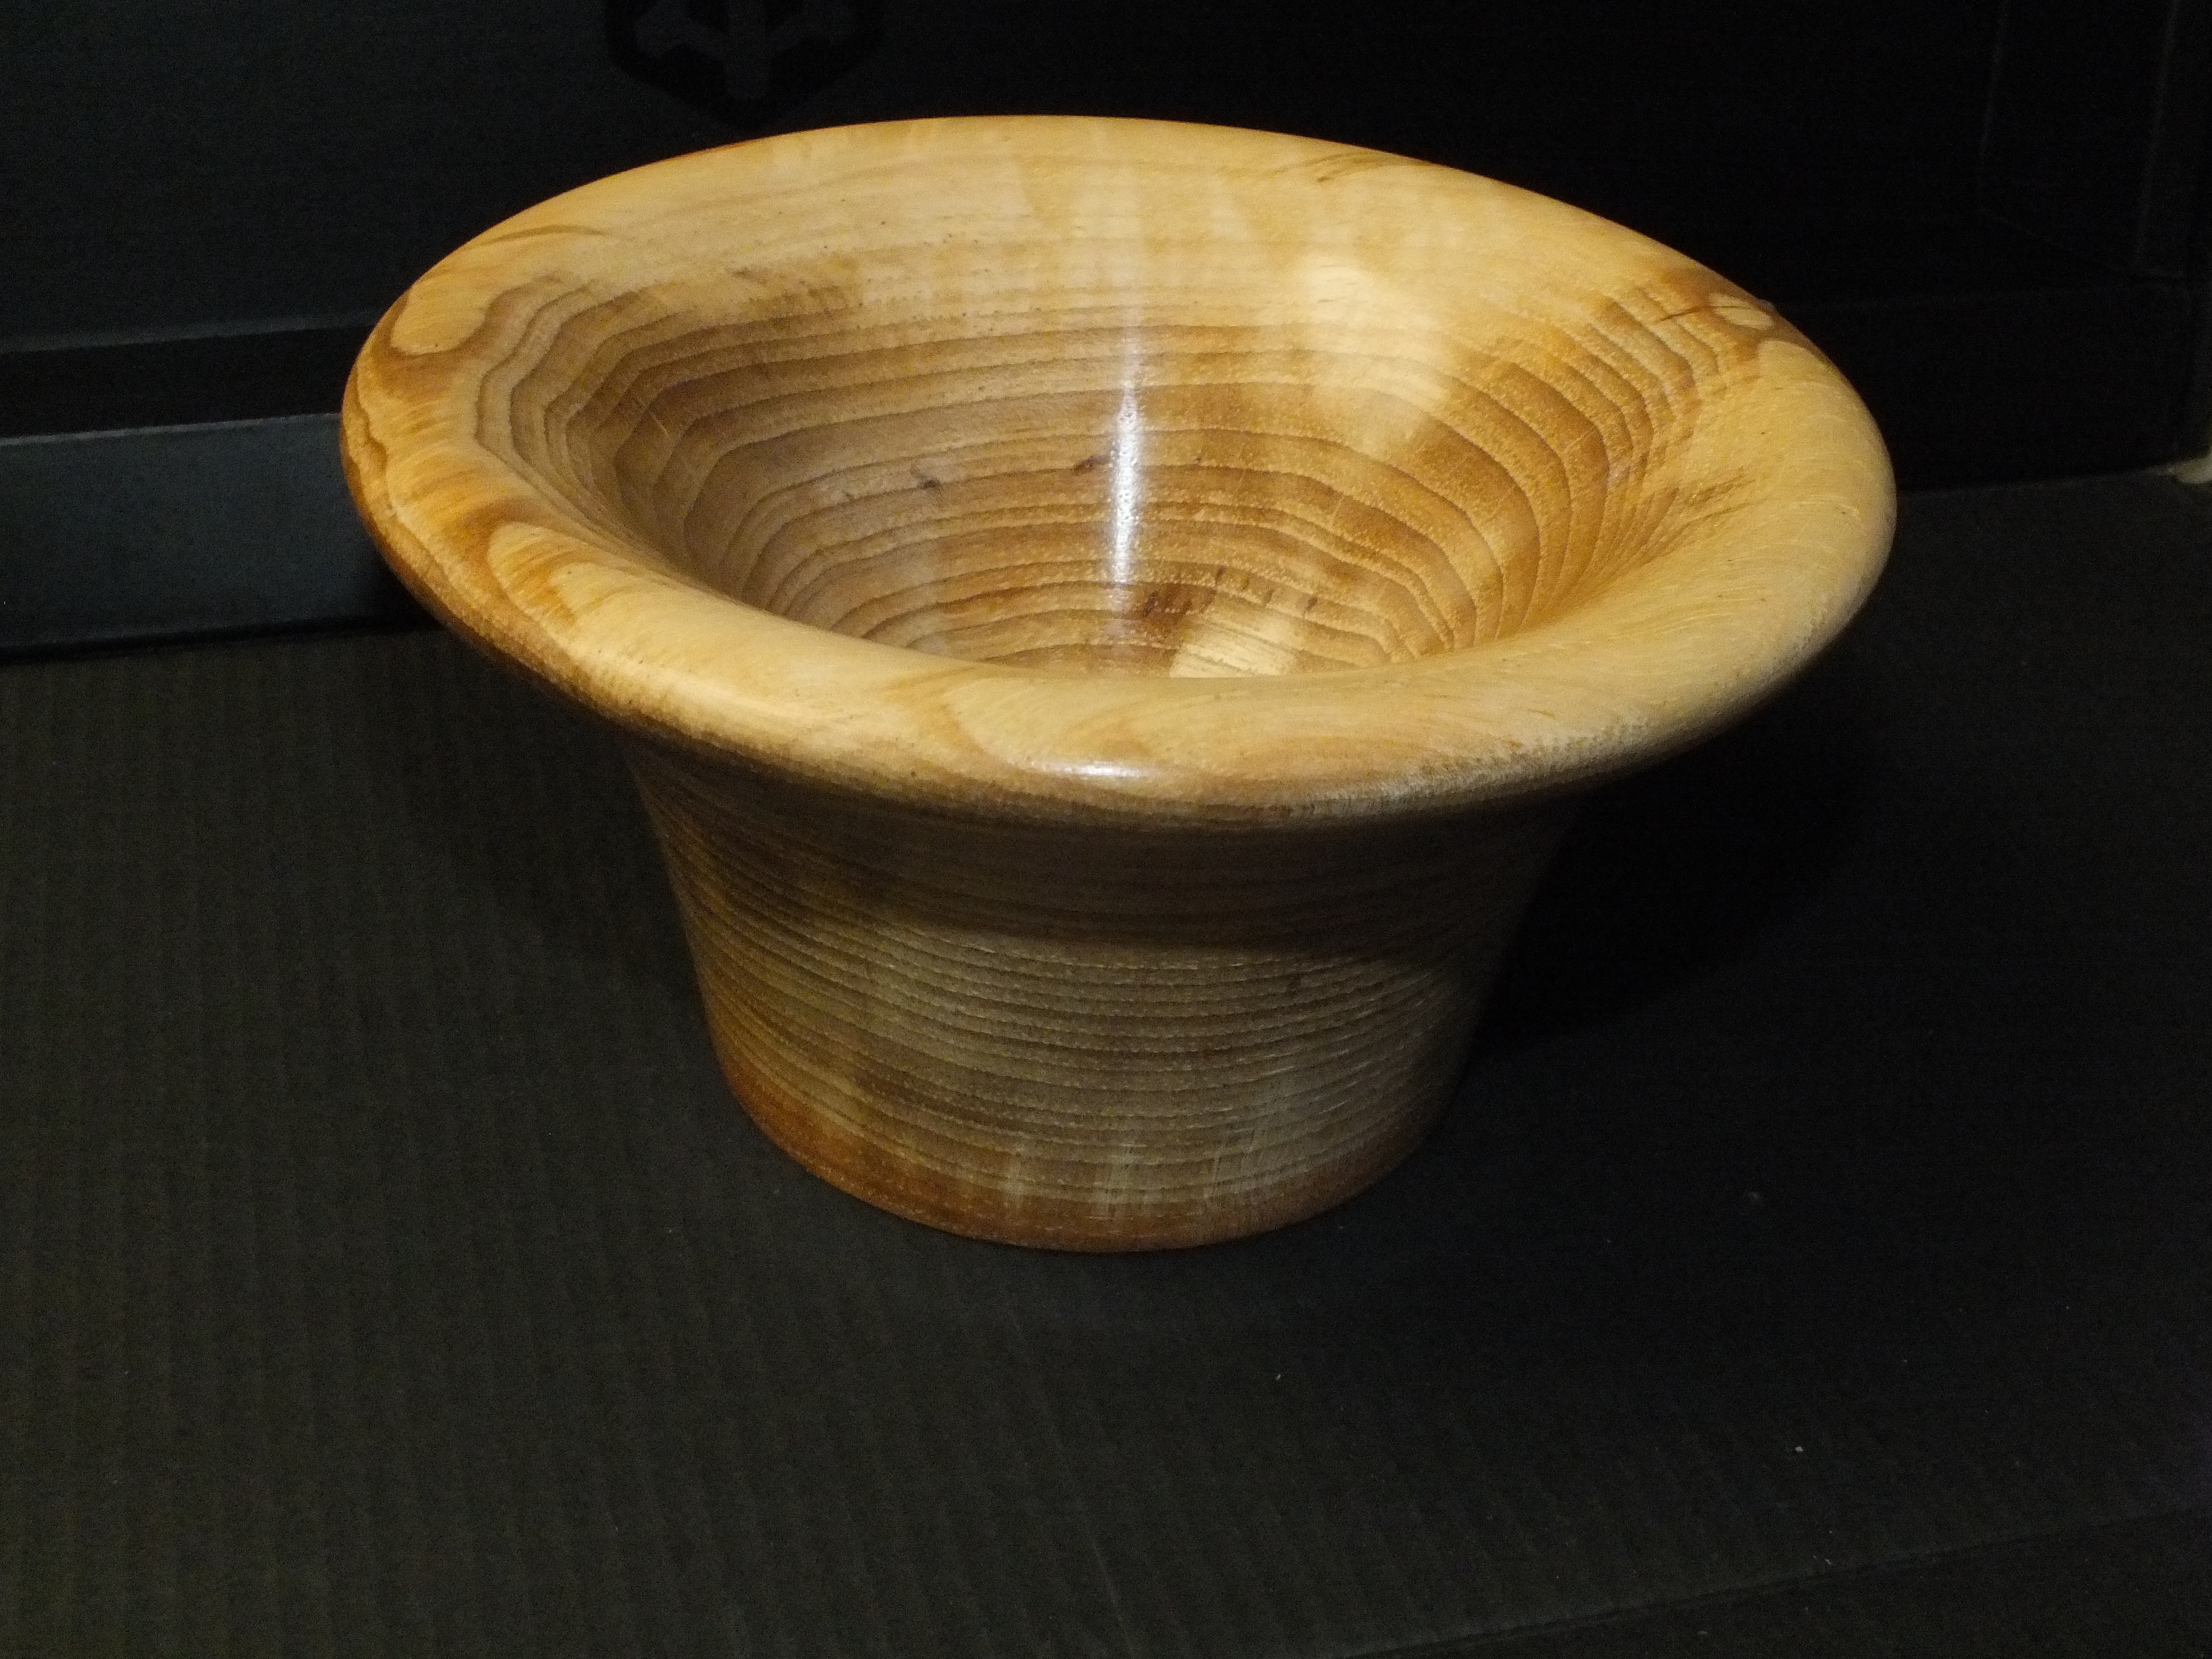
Hickory/Chestnut – Okay, I’m going to make a confession here. I’m not sure if that bowl over there on the right is hickory, or the one on the bottom is hickory. I’m not even sure if that is what they actually were, to be honest because I’d never worked with either before I got my hands on these two pieces of wood. That’s what they were labeled when I pulled them off the shelf, though, so we’ll go with that. My experience with these two is extremely limited. Still the results for both were good and I wouldn’t hesitate to use it again if I could get my hands on the stuff. Both were hard, about the same working characteristics as ash, but with a much more striking grain. And the one above had some beautiful coloring and inclusions. Once I saw how nice the grain was, I kept the shapes simple and tried to cut them to show off the wood.
I wish I could remember where I got these two pieces of wood and what they cost so I could give you more info because the wood was really nice.

Rosewood – Rosewood is amazingly beautiful. It has a rich, lush, chocolate color with a lighter colored, reddish brown streaks, and can include wider bands of lighter reds.
I see the stuff for sale all the time, but only in small pieces suitable for ornaments and pens. I’d never seen the stuff in larger pieces suitable for making bowls or larger decorative objects like I’m interested in making until I ran across these three pieces. One was about 4″ square by 3″ thick and the other two were about 6″ or 7″ square by 3″ thick. I’d never seen it in pieces that large before. The reason why is simple. Holy cow the stuff is expensive! I probably shouldn’t have blown that much money on these three pieces of wood because as it turned out I had serious problems with all three, but I’ll come to that in a minute.
The stuff works pretty nicely. It cuts well, sands well, looks especially good with a high gloss finish. I think the coloration and grain is absolutely beautiful. It doesn’t show up well in the photo but that larger piece has a beautiful band of a lighter, red tint running through it horizontally that really adds interest to the piece. I can see why penmakers like it so much, the stuff is beautiful.
Drawbacks? You bet. Some serious.
First, it stinks. It literally stinks. To me it smells like sewage. Seriously. The aroma isn’t overpowering but it is definitely there and it is unpleasant. Once it has a finish on it it’s barely perceptible. MrsGF can’t smell it at all, thankfully. I’ve worked with three pieces of this stuff and all three smelled really bad. It is also oily. It left an oily, dark brown residue on my tools and lathe while I was working with it. Nothing serious, but I couldn’t just vacuum it up, I had to wipe everything down when I was done.
The real deal killer, though, is that all three of the pieces I made have developed what I call micro-cracks, very thin, hairline cracks that aren’t noticeable at first and may have developed days or even weeks after I’d finished the bowls. If you look closely at the bowl in the top photo you’ll see what look like scratches. They aren’t, they’re micro-cracks that developed after they’d been finished. The wood should have been stable, they were kiln dried and the moisture content was low, the bowls haven’t warped or distorted to indicate there is some issue with stress going on. But it’s obvious that something is going on with that wood.
So, to sum up rosewood: The wood may be absolutely beautiful. It may cut and finish nicely. But based on my experience with these three pieces I can’t recommend it. It’s expensive. Really expensive. Those three little blocks of wood I used were well over $50 each. I’m going to do some experimenting to see if I can make the cracks less visible, but I’m still disappointed. If I were doing this commercially I would consider all three of the rosewood projects to be unsellable because of the cracking.
Maple

There are a whole cluster of woods that can be classified as ‘maple’, ranging from very hard versions suitable for flooring, other types suitable for furniture, and even very soft types that aren’t useful for much of anything except maybe firewood. I’m going to stick with the one that most woodturners are probably interested in, so-called ambrosia maple. Ambrosia maple isn’t a separate type of maple, it’s standard maple that has been infected with a fungus carried by the ambrosia beetle. The beetles bore into the wood, carrying the fungus into the wood. The fungus causes spectacular staining and discoloration similar to spalted maple. The discoloration is generally centered around the path the beetle bores through the wood. You’ll almost always find holes in ambrosia maple that were made by the beetles.
(Spalted maple and other spalted woods also exhibit similar colorations which is also caused by a fungus, but in the case of spalted woods the fungus is part of the decaying process and you can also find parts of wood that are literally rotting away inside of a piece of spalted lumber.)
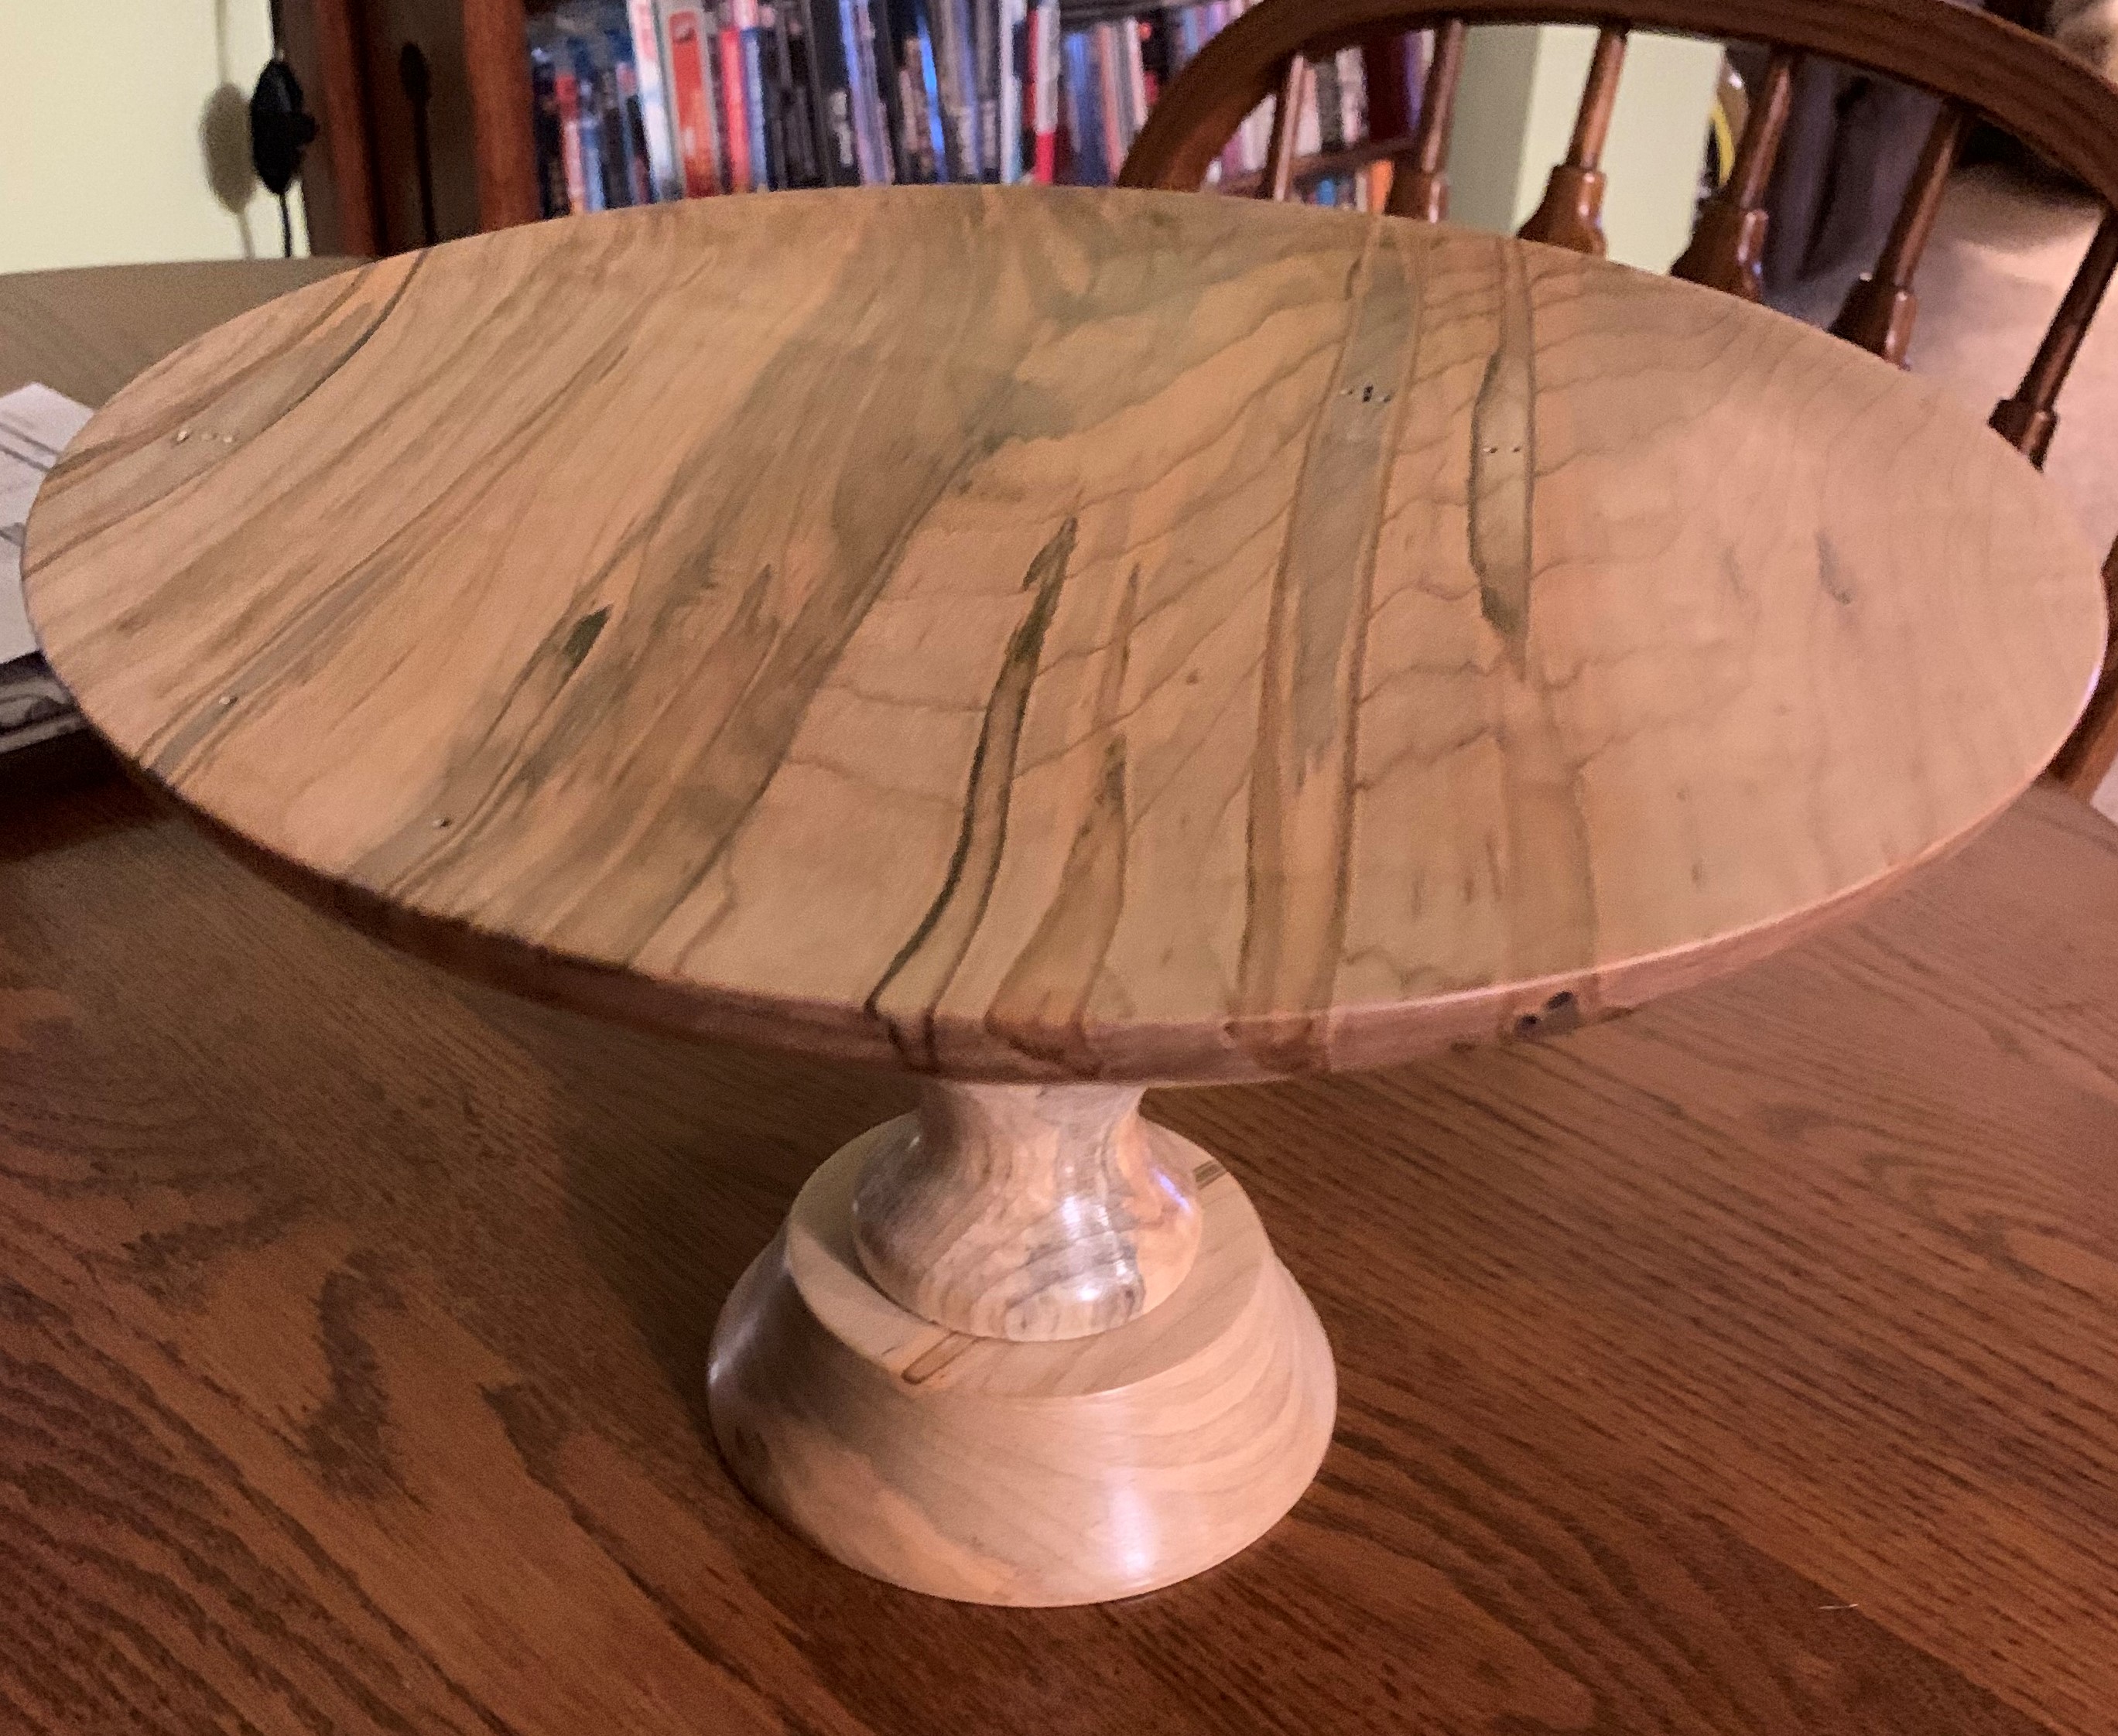
Ambrosia maple is generally very easy to work with. It is usually relatively soft, cuts easily, and the end result can be spectacular. Prices are a bit steep, about the same as padauk. If you shop around you can sometimes find some real deals on the stuff if you’re willing to deal with green wood. A single 6″ square by 3″ thick bowl blank will set you back about $20 – $25, green. Larger size blanks get expensive real fast. If you remember the cake platter I made for MrsGF that top piece which started out at about 13″ square and 2″ thick cost me about $75.
Potential problems? It’s generally soft and easy to damage. You can sometimes find “punky” (i.e. rotting) areas buried in pieces. And you have to remember that the discoloration is caused by a fungus, so chances are good there are fungal spores lurking in that wood. Now I’ve never heard of anyone getting actually ill or getting a fungal infection from working with this stuff, but I would always wear a respirator when cutting or sanding it, along with a dust extraction system and air filtration system.
Sapele – I’ve only worked with this stuff once and it was such a disaster that I gave up and chucked it into the burn pile.
Catches, gouges, tear outs, chipping, kick backs… It was horrible to work with. It didn’t matter what tools I used, what techniques I used, how sharp the tools were, whether I used carbide or steel – nothing worked right with this stuff. I don’t know what the heck was going on with that piece of wood but it became obvious real fast that it wasn’t just bad, it was downright dangerous. It is entirely possible that it was just some quirk with that piece of wood I had. Don’t care. My experience with it was so bad that I’m never going to work with it again. There are more than enough other species of wood that are actually pleasant to work with, so I’m not going to risk it again.
If you want to try it, fine. Maybe you’ll have better luck than I did. The stuff is going for about $15 for a kiln dried 6″ square, 2″ thick blank.
Cotton wood – I’ve only worked with this stuff once, and the piece I had was really large and very, very wet. I mean seriously wet. Since I didn’t want to wait for, oh, three or four years for it to dry out, I went ahead and roughed out a bowl shape and stuck it on the shelf for a few weeks to dry. Frankly I fully expected it to crack and warp horribly, but surprisingly it didn’t and the end result was pretty darn nice. Fairly nice grain and the color isn’t bad either.
But stink? Holy cow this thing smelled bad when I was working with it. It was worse than the rosewood. It had a sort of pungent vinegary, swampy, rotten kind of smell to it that even came through the respirator. Fortunately once it dried the smell went away but wow, it almost made my eyes water while I was working on it.
I rather liked working with it. Surprisingly it didn’t warp or crack while the roughed out bowl dried down, and when I finished it up after it had dried down to a reasonable point I ended up with a fairly nice bowl. It cut well, sanded well. I finished it off with a seal coat of shellac topped off with homemade “ob shine juice” and it turned out a pretty decent looking utility bowl.
Cotton wood is fairly cheap. I see Green Valley is selling it for under $10 for a 6″ square, 3″ thick bowl blank, green. It can often be found at reasonable prices for much larger pieces suitable for larger bowls like salad or fruit bowls. The drawback is that it is almost always sold green, so you’re going to have to deal with trying to dry it down yourself.

Pear – The only pear wood I’ve worked with comes from the wood I saved when we took down the pear tree here. I don’t think I’ve ever seen it for sale commercially. But if you know someone who is taking down a pear tree it’s worth looking into getting your hands on some of it.
It cuts well, sands well, and was very easy to work with all the way around. The little bud vase over there on the right was sanded up to about 320 grit, then sealed with shellac, buffed out with OOOO steel wool, then finished with carnauba wax.
Personally I think it’s a bit on the bland side and I’m not sure if I really like the color. MrsGF likes it a lot though. Anyway, if you can get your hands on some, give it a try. It’s worth looking at, especially if you can get it for free from a neighbor taking down a tree.

Cherry – You’ll find a lot of cherry bowl blanks for sale commercially. It seems popular with woodturners and I’m not sure why. I’ve worked with it and I don’t like it all that much. Oh, there’s nothing wrong with it. It is easy to work with. It cuts and sands well, easy to shape into just about anything you like, and it isn’t all that expensive, about the same as walnut.
So why don’t I like it? Dear lord, it’s boring! If I’m going to go to the trouble of making something on the lathe I want the end result to be eye catching. I want prominent grain patterns and interesting colors. And cherry is, well, it’s just dull to my eye. The color is blah, the grain is blah. Insipid, that’s the term I’m looking for. Perhaps it’s just the pieces I had. Every piece of wood is different, after all. Maybe I’ll try it again. I have a half dozen blanks sitting on the shelf still, but I’m going to have to be awfully bored before I resort to using it again.
Cost is about the same as walnut, around $10 – $13 for a standard 6″ square 2″ thick blank. It’s not a bad wood. It’s not real expensive. As I said it is very nice to work with. It’s just, well, dull.

Elm – I’m going to be completely honest and admit I have no idea what elm wood looks like so I can’t be sure if this is elm or not. It came with a shipment of “miscellaneous bowl blanks”, a sort of grab bag kind of deal. It was labeled elm so I’m going to go with that. Elm was almost completely wiped out in North America because of dutch elm disease, but there are still some out there and occasionally it shows up.
I worked this blank while it was wet, which is normally something I don’t do, and there was some issues while drying the bowl down but nothing too serious. It was easy to work with. It seemed a bit on the abrasive side and I had to sharpen my gouge more often than normal, but nothing serious. It has a very striking grain, with dark brown and black streaks running along with the normal grain making me think this tree had some kind of fungal infection. Personally I don’t like how it looks, but MrsGF likes it. As for cost, I don’t really know. It was in a grab bag deal with a bunch of other chunks of wood.
Holy cow, this got long, so let’s wrap up this part up. There are more types of wood I could have looked at but I wanted to stick with the types that are generally available commercially.
Eventually I’m going to get around to talking about the difference between kiln dried, air dried and wet/green wood, and how to deal with it, why some woodturners really like wet wood (I suspect they’ve been inhaling lacquer fumes), how to dry wood, including the “great microwave experiment”. Well, if I don’t start something on fire or blow something up. I’m stocking up on fire extinguishers for that one. Also how one man’s defect is another man’s “decorative feature”, working with epoxy as a decorative element, playing with india ink and whatever else I can come up with.
… wait a minute, how did a blog about gardening, farming, photographing flowers, travel and ham radio turn into a tutorial on wood turning?
On the pandemic front, MrsGF got her first vaccination last week and I’m getting my first one this week! Wow, maybe we’ll actually be able to hug our kids by summer?
