I normally don’t do this, but I want to plug Affinity Photo which is now on sale until June 20 for half price, $24.99.
Before that, though, I should point out that I am not associated with Affinity in any way. I don’t get paid anything, haven’t received free or discounted products from them, nothing. I recommend it because it is just plain good. And cheap. Even at its original list price of around $50 it was cheap. Now that you can buy it for $24.95, well, that’s about what Adobe gets per month for using PhotoShop. And Affinity does damn near everything PS does.
I’ve had Affinity for my iMac for several years, but because I already owned Adobe CS 6 on the iMac I rarely used it. It was an impressive piece of software, but I was used to PhotoShop and didn’t want to invest the time in adapting to a new program.
But now that I’ve switched over mostly to Windows, and was getting tired of coughing up about $25 a month for PhotoShop on this machine, well, I decided I finally needed to look at alternatives once again. I just bought Affinity for Windows and installed it and so far, well, wow, it’s amazing. Especially at this price.
If you’re a photographer or artist, even someone who only occasionally fiddles around with graphics, take a look at Affinity Photo. At $25 on sale it’s amazing. And if you aren’t willing to drop money now, you can get a free 90 day trial.
Wisconsin is known as a place of snow and cold and rain and giant blood sucking insects big enough to carry away small pets. Oh, and heat and humidity that occasionally rivals Florida at its worst. And tornadoes. Pretty much we get all the bad weather concentrated in this state. Well, at least we don’t have rattlesnakes. Yet. Anyway, the weather has finally gotten better and stuff is growing and we’ve been out in the gardens here for days already. So I was out taking some pictures as I puttered around in the garden.
Not the best picture in the world but I was using my phone because I was too lazy to go in the house and get the camera. This is the “Zombie Rose”. This thing has been there since before we bought the house. We thought it was dead more than once and only laziness on my part kept me from digging it out. And then a few years ago something happened, we don’t know what, and it turned into this ridiculously healthy bush that’s covered with flowers by mid summer and blooms the entire season.
The hostas are looking amazing this spring. All of them in the front hosta garden survived the winter and they’re growing so fast you can almost see them getting bigger. Best thing we did was rip out the ratty grass and old bushes and junk up in front of the house and put this garden in.
winter didn’t hurt the mountain ash tree we put up in the corner of the hosta garden either. We forgot to put screening around it to keep the rabbits out but fortunately the little buggers left it alone. It’s actually a member of the rose family.
Wish I could remember what in the world these little blue flowers are. MrsGF told me once and I immediately forgot, of course. They’re pretty little things. Those flowers are only about 1/8th of an inch across so you have to get down there to really see them.
The pear tree is in full flower and looking very good. Last year it didn’t get pollinated because the weather was so bad we didn’t have any bees around. This year things are looking much better. I haven’t seen any honey bees around but I have been seeing a lot of native bees buzzing around it so hopefully we’ll get some pears this year.
no he doesn’t have a green spike on his head. That’s a bit of grass he picked up by leaping through the freshly mowed lawn.
They say you can tell how healthy your environment is by the number of amphibians living in the area. If that’s true, our gardens must be pretty damned healthy because these little guys are everywhere. I have to be careful mowing the lawn and stop a couple of dozen times to move the little critters out of the way. I’ve spotted about four different types of frog and at least one type of toad in the backyard this year. Go outside on a warmish evening and the number of frogs calling and singing is amazing.
And the lilacs are just starting to flower. In a couple of days these buds will start to open and it will smell amazing. A lot of people have lilacs around here and in early spring when they’re all in blossom you can smell them all over town.
Let’s see, what else… We’ll be putting out the tomatoes and pepper plants over the next few days. But we scaled back the amount of vegetables we’re putting in because we generally go way, way overboard with this stuff and end up with a lot of produce we can’t use. We still have almost enough canned tomato stuff on the shelf from last year to last us the rest of this year. We know we over plant but, well, MrsGF and I are both the kind of people who see a bit of bare ground and go “Hm, now what could be plant in there…”
The storm window on the office blew out during a storm. The main window is okay so it wasn’t an emergency, but we found that the outer frame of the window holding the storm window in place was almost completely rotted away. The only thing holding it in had been the paint apparently. So we’re getting some new windows for the office and a new front entry door while we’re at it. Contractor was over on Monday to take measurements and get an estimate put together.
Haven’t had much time to tinker with amateur radio stuff. I almost always have the rig on 40 meters with the computer running JS8Call doing ACKs and stuff like that when I’m down in the shop/radio shack, but I’m generally just monitoring things unless someone specifically calls me. I did try doing some morse code last night but didn’t get very far. I was showing up on the reverse beacon network but didn’t get any replies to a CQ. Well, maybe because I only did one CQ and then got distracted because I found a new soap opera on Youtube… Anyway that was probably not a bad thing because I’ve been told that a drunken chicken pecking at the key sends CW better than I do. Which is probably true, I fear.
Speaking of soap operas – I am embarrassed to admit it but I am addicted to Chinese romcoms, or dramadies or whatever you want to call ’em. I thought Korean romcoms were often ridiculously silly, but the Chinese versions are just over the top. They’re formulaic, generally all following similar plots, with cliche actions taking place that seem to be required for some reason. Some of the better ones embrace the cliches whole heartedly and basically satirize themselves and gently poke fun of the whole genre. And at the same time the whole thing is surrounded in extreme sexism and actions that would be considered outright abuse and criminal outside of the television environment. They’re silly, charming, innocent, dark, infuriating, irritating, funny, horrifying and hilarious. Often all at the same time.
One of these days I should write something about Chinese television. It is – different.
Some readers managed to discover Grouchy Farmer’s super secret email address and have been sending in questions. (What, you don’t know what it is? Here’s a hint: old.grouchyfarmer@gmail.com) So I thought I’d better deal with some of the stuff that’s been piling up over there.
I heard almost the entire US meat industry is controlled by just three or four companies. Is that right?
That is true. About two thirds of the beef market is controlled by just three companies, JBS, Cargill and Tyson. Add in National Beef and those four companies control 80% of the beef produced in the US. The same is true with pork and poultry. Three or four companies control almost the entire market for both of those products as well. And all of these companies have a long history of, oh, let’s call it shenanigans, shall we? All of these companies have a history of being accused of price fixing, collusion to manipulate markets, abuse of employees, supply manipulation, and, well, the list goes on and on. And in some cases not just allegations, but outright actual criminal activity. JBS took corruption to a whole new level in its home country of Brazil where it was involved in an enormous bribery scandal that involved hundreds of politicians, meat inspectors, etc. Run a Google search on “JBS bribes meat inspectors” and you’ll probably be astonished at the depth of the corruption, and disgusted by the other less than ethical things JBS is accused of participating in.
How is this happening? Don’t we have antitrust laws to prevent this kind of thing? Yes, we do. Laws that the government ignores whenever it feels like it. Antitrust laws intended to prevent monopolies from developing have been conveniently ignored for decades now, with the government either carving out loopholes for certain businesses/industries, or simply ignoring the laws entirely. Why? Because the big multinational monopolies pump millions of dollars into the campaign coffers of influential politicians in Congress who, in turn, pressure the officials who are supposed to police this into looking the other way. Or in the case of JBS, bypassing the clumsy “lobbying” and just passing actual suitcases full of money to people.
Are dairy farmers really being forced to dump milk?
That is also true. I’ve heard estimates that dairy farmers are dumping something like 1.2 million or more pounds of milk every day because they can’t sell it. About half of the milk produced doesn’t go into products sold directly to consumers, it sells to food service operations, school districts, restaurants, or processors that use the products to produce still other products. So when the virus hit and most of those operations shut down or were severely limited, dairy farmers lost almost half of their market literally overnight. While consumer demand did indeed go up because of an increase in usage of dairy products in the home, the institutional type products are in forms or packaging the consumer can’t use. The production facilities that make consumer dairy products were overwhelmed with high demand and weren’t able to keep up, resulting in temporary shortages in some areas. So we have a bizarre situation where farmers have to dump milk while there are shortages of some products at the same time because production facilities can’t keep up or can’t quickly convert over to making consumer products.
When you made that “doomsday” flashlight, why did you have to put a resistor in-line with the LED? Why not hook it up directly to the battery?
Ah, good question. I should probably have explained when I wrote that up back in April. (Link to flashlight post here.)
It would be nice if we could just hook an LED up to a battery or power supply and switch it on without having to worry about it, but, alas, you can’t. (Note: There are some types of LEDs that do not need a current limiting resistor because they either already have one or because the type of LED can deal with the current, but most do require one) You often need a resistor in-line with the LED to prevent it from drawing too much current and burning itself out. The amount of current flowing in an LED is a function of the voltage across the LED. And in an LED the relationship between current and voltage is not linear. A slight increase in voltage can result in a large increase in current. So if you have an LED that wants, oh, 2.7V for example, and you feed it 3V, that can result in a large increase in the current in the LED, overdriving it, causing it to heat up, burn out, or even, in rare cases, explode if the current gets too high. So that resistor is there to drop the voltage in the circuit down to a level that the LED likes.
How do you figure out exactly what size resistor to use? I could go through all of the explanations about forward voltages and all of that, deal with the math and stuff, but it’s a heck of a lot easier to simply point you at someone who does a heck of a lot better at explaining things than I do. It’s pretty simple really. Don’t let the math spook you. It’s very simple to figure out. You can find a detailed explanation of why resistors are needed with LEDs and how to pick the right size resistor over at https://www.evilmadscientist.com/2012/resistors-for-leds/ There are even calculators (free) on-line where you just have to plug in some numbers and it figures out the size of the resistor that you need.
Your resistor doesn’t need to match the calculations exactly, either. If you don’t have one exactly the right size you can pick one that’s a bit bigger than the one the calculations indicate. I picked a larger one than I needed to reduce current draw so the batteries would last a lot longer while still letting the LEDs give enough light to be useful
What happened to the Great Radio Receiver Fiasco Project?
Ah, that. I was afraid someone would bring that up. It did not go well, mostly because of a parts supply problem. First the ferrite rods I’d ordered arrived almost crushed into powder. Then the toroids I’d ordered for coils, after about four weeks of waiting, abruptly were listed as “unavailable” from all three of the suppliers I’d ordered from. Then the tuning capacitor I’d salvaged from another radio turned out to have serious problems and a new one would have cost me almost $40. Anyway the whole thing is on hold while I look at alternatives or really scale back the design. Or just give up. I wanted to build a multiband receiver that would cover just about the entire HF spectrum from 80 meters to 10 meters, and, well, we’ll see. I built a few very simple two or three transistor receivers that sort of, kinda, almost worked, if I kept my fingers crossed, did a little dance and hooked ’em up to my 140 foot wire antenna to be able to receive anything. One I did was supposed to be an AM band receiver and when it picked up anything at all it turned out to be receiving transmissions from a train switching cars in the small rail yard a half block from here. Still haven’t figured out what the hell that was all about. Either my receiver was ridiculously screwed up, or the transmitter the railroad was using was ridiculously screwed up. Or, perhaps, it was aliens.
Are people really attacking cell phone tower technicians in Europe and trying to destroy radio towers, or is it just more clickbait? WTF is going on?
Unfortunately, those stories are all too true. It seems to be the worst in the United Kingdom, but it’s spreading everywhere. In the last two weeks or so alone, in the UK there were 30 incidents of cellular towers being attacked, usually by arson, and almost 200 cases of technicians being abused and even physically attacked, including one having a brick thrown at his head and another being stabbed. And it seems to be spreading almost as fast as the damned virus, fueled by bizarre and utterly ridiculous conspiracy theories, and spread by so-called “celebrities” who aren’t exactly the brightest bulbs in the pack to begin with, and by the anti-vax crowd. And it’s being spread everywhere by social media services who are more interested in raking in as much money as possible than they are in preventing people from using their services to push out insane conspiracy theories and promote violent behavior.
Anyway, that’s about enough of that. Time to wrap this up.
We all need a break from the non-stop news coverage so I’m declaring this a virus (and politics) free zone. It’s spring, or at least the calendar says it is, so it’s time for some photos of what’s going on out in the gardens.
Over the winter someone or something stole all of our bark mulch and wood chips. Okay, I know that’s silly, but it looks like it. We’re probably going to have to haul in a few trailer loads of mulch to cover the hosta garden in the front and the other gardens. Despite the cold weather the hostas are starting to peek out.We worked over the raised beds and they’re looking good with no winter damage. MrsGF wants to put in a third this spring and I agree. They’ve worked out amazingly well and have been incredibly productive.The sedum are starting to peek out at well. They’ve been incredibly tough plants. They’ve been broken apart, transplanted several times, and have handled everything Wisconsin weather could throw at them and they still keep coming back. They don’t look like much now but by the end of summer they’ll be the size of large bushes, three feet tall, and covered with flowers, bees and butterflies.This is a mountain ash tree that was a volunteer we found in the backyard and transplanted into the front hosta garden for the heck of it. It looks like it survived the winter well also. We were afraid the rabbits in the neighborhood would go after it but they left it alone. It is not actually an ash tree despite the name. It’s a member of the rose family. It really liked its new location. It grew about three or four feet last summer.This is the rose that wouldn’t die, my name for it. It’s just a pink rose bush but this thing has somehow managed to thrive despite poor soil, rot, salt from the sidewalk, getting hit with the snowblower, etc. I was ready to dig it out a couple of times because I thought it was dead but it just keeps coming back. Looks like it survived the winter too.I think the hen and chicks would survive a nuclear war! We just threw a few babies on the ground around a fence post and now a few years later they’re everywhere up along the sidewalk. They’re amazing plants and seem to thrive under conditions that would kill just about any other plant.The chives, tucked away in their protected corner, are the first plants to peek out in the winter. There’s still snow on the ground when they start emerging. They’re looking good. We don’t use a lot of chives, but they’re nice to have around. I have to admit that I keep them around not because I like eating them but because they’re always the first new growth in the spring.We have a little circular flower bed where there used to be a firepit. We dug out the old truck rim that was used as a fire ring, filled it with compost and stuck these lilies in there and they’ve been doing good too. It will be a while before they come to flower, but they’re worth the wait.The irises survived the winter too and are already 4-6 inches tall. I love irises and we have a ot of them scattered around. We’ve had really good luck with growing them.Finally a bit of color! These guys have been in flower for over a week now and look absolutely brilliant in the early morning sun.
I haven’t done one of these in a long time so I thought it’s high time I took a look at what’s happening in the agricultural world. Especially now because the situation is difficult, to put it mildly. Well, not exactly agriculture directly in this article. I want to try to explain why we’re seeing empty shelves in the grocery stores when we actually don’t have any real shortages of product.
Empty Shelves
We all know that when this started almost immediately stores were stripped bare of sanitizer, sanitizing cleaners, hand soap, protective equipment like masks and gloves, etc. This was followed by store shelves being stripped of toilet paper, paper towels, and then food products, especially staples like rice, beans, flour, canned foods, butter, etc. And, oddly, even things with short shelf life like milk and cream. (Why in the world would people who almost never drink milk in the first place suddenly need to buy gallons at a time? I have no idea.)
But despite the bare shelves there are no real shortages, at least not of consumer food products. There are several factors behind the empty shelves you’re seeing in the stores. Hoarders (how much hoard could a hoarder hoard if a hoarder could hoard hoard?) and profiteers are behind some of this, of course, but the biggest disruptions are due to the way our manufacturing and distribution systems work.
We have what amounts to two almost entirely separate production and supply systems. The first is the consumer system that makes and sells product to you and me. It provides products that individual consumers want, in relatively small quantities that are suitable for individuals or families. The second is the commercial system that sells in bulk quantities to institutions like restaurants, schools, hospitals, prison systems, etc. and industrial processors that use those products to make still other products, like the processed food industry.
The result of this system is that we are in a rather bizarre situation where we have surpluses and shortages, of exactly the same products, at exactly the same time. Dairy is an example of this. Even while a lot of people are reporting shortages of milk and grocery stores putting strict limits on how much milk people can buy, we have such a surplus of milk on the supply side that a lot of farmers are dumping the stuff down the drain because they can’t find a processor to buy it.
So how the hell can you have a shortage and a surplus at the same time?
Well, we have a situation where most schools are closed, most restaurants are closed, a lot of businesses are closed, and a lot of people who would normally be at work or at school are now stuck at home. This means that meals that normally would have been eaten at school, work cafeterias, food trucks, restaurants, etc. are now being eaten at home. (About 50% of the money we spend on food here in the US is spent on meals eaten away from home.) Which means people are buying a lot more groceries, and more milk and dairy products in general for consumption at home. Add in the hoarders who, for some reason, think they need to buy six gallons of milk at a time (seriously, I’ve seen people doing this) despite the fact it will go bad long before they’ll ever use it, and it puts pressure on the whole distribution system delivering milk to grocery stores.
At the same time, schools are a major buyer of milk for the school lunch program, and they are largely shut down. As are restaurants.
So at the consumer level, the grocery store part of the market, we’re seeing increased purchases of products, while at the same time on the commercial side of things we’re seeing a dramatic loss of sales of similar products. So we’re having both shortages and surpluses, at the same time, of the same product.
Why not switch the commercial production facilities to produce for the consumer market? Well, you can’t. Production facilities used to make the half pint cartons for the school lunch program can’t be switched over to making gallon jugs for grocery stores. They use entirely different manufacturing and bottling equipment. The same is true for other sectors of the market. Attempting to switch from production of products for institutional and commercial markets to production for consumer markets is extremely difficult and very expensive. By the time a switchover could be done, the pandemic situation will have subsided and manufacturers will find themselves with manufacturing facilities that are now set up to make the wrong product.
Instead of dumping milk make cheese out of it? Can’t do that either. Cheese makers were already running at nearly 100% capacity even before this started. And even if there was the capacity to produce cheese, there isn’t any market for it because the cheese market is saturated to begin with.
The same is much the same with other products. The products are there, but those products aren’t in a form consumers would accept because they’re intended for the institutional or commercial market and are available only in bulk or in a form consumers don’t want. Toilet paper is a good example of this. While there are shortages on the consumer side, there is a glut on the institutional side of the market. With schools and a lot of businesses shut down, sales of TP for those markets has dried up. But the TP intended for that market would be entirely unacceptable for consumer use. The rolls are too big, or in sizes that wouldn’t fit a home TP holder, or the quality… Well, if you’ve used a restroom in a school you know what a miserable excuse for toilet paper that stuff is.
I have to mention the distribution system, too. Most companies, including grocery stores, switched to what is generically called a “just in time inventory” system long ago. That means that stores don’t stockpile product. You won’t find back rooms chock full of TP or canned goods or whatever at your average store. The store orders only enough product for a very limited amount of time. If they get deliveries every, oh, three days let’s say, they will order only enough product to deal with three days worth of normal sales. Why? Because storage costs money. Adding square footage to a store not only increases its build cost, it also increases its property tax bills, heating and cooling costs, electric costs, etc. So space devoted exclusively to storage of product is kept to an absolute minimum.
Normally this system works fairly well. But these aren’t normal times, so when a store gets hit by abnormally high sales of specific products, well, the whole system falls apart fast. When the panic buying started, grocery stores would see an entire day’s worth of a product sold out in an hour. Seeing the empty shelves spooked other consumers, who immediately panicked and started cleaning out the shelves of other products. Stores would restock as fast as they could, only to burn through several days worth of product in just a few hours thanks to panic buying.
If the distributors had an adequate inventory on hand it wouldn’t have been such a big problem. But they didn’t either. They were using the “just in time” system too, and were only stocking enough product to support their stores for a limited amount of time. Those stocks were depleted within days, and they were scrambling to get product from the flour mills, dried bean distributors, rice distributors, etc. to try to restock. The mills and packaging companies had more than enough bulk product on hand, but their packaging facilities couldn’t increase production beyond a certain point. Basically the entire distribution system began to fail under the strain of the panic buying and the increase in consumer sales.
The system is, finally, starting to adapt, at least around here. But as for what’s going to happen in the future, well, that’s anyone’s guess.
Since I’m already in a bad mood, let me rant a bit about this whole Foxconn fiasco. I’ve talked about this before going back to 2018, with a couple of brief mentions being tossed into other posts. Basically the situation is that no one seems to know what the hell is Foxconn is up to, not even Foxconn. Anyway, I thought that with the factory supposedly to open in May, this would be a good time to revisit the whole thing.
If you want some background on the situation click that link up there and it will take you to the original item I wrote back then. Go ahead. I’ll wait. (hums ‘Singing in the Rain’ and a few other showtunes)
Ah, good, you’re back. Let’s see what’s going on now, shall we?
The basic answer to that question is that no one seems to know what the hell is going on down there at the Mount Pleasant site. They’re building a factory. Maybe. I think. But what that factory is going to produce is anyone’s guess. No one knows. Certainly not the town of Mount Pleasant itself which borrowed so much money to upgrade the infrastructure around the facility that the inhabitants of the town will probably be paying off that debt for generations to come. Channel 12 in Milwaukee tried to do a story about what was going on with the town a while back, only to have the president of Mount Pleasant literally hide behind a door to try to avoid having to answer reporter’s questions, and their reporter being thrown off the factory site by local security.
Not even Foxconn seems to know what the hell they’re actually building down there. A half dozen different stories about what the company is going to build there, if anything, have come from company spokespersons since this all started, and none of them have anything to do with what the company said it was going to do when they signed the original contracts.
The latest that I heard before the pandemic hit was that they were going to make…
Wait for it… You aren’t going to believe this.
Drum roll please….
Coffee machines for airports.
Seriously. They were going to make, they claimed, automated coffee kiosks for airports according to a story in Milwaukee Business News.
Now that story has changed as well and now the company claims it’s going to make – ventilators for hospitals?
Look, I don’t care how “nimble” a company may be, but… Come on, this is all BS. I’m sorry, but it is. What the hell, exactly, is going on in that building down there in Mount Pleasant? You can’t build a factory specifically to produce flat panel displays, and then suddenly, overnight, decide you’re going to make coffee machines in it. Or then turn around and claim that within just a few weeks you’re going to take your alleged coffee machine/LCD display/whatever factory and start cranking out hospital grade ventilators. Making changes like that would require retooling the entire factory, reprogramming robots, building or buying new equipment, retraining employees. You’re looking at months of lead time plus tens of millions of dollars to retool and, no, ain’t gonna happen.
Well, not that they have many employees to retrain. The 13,000 employees they were going to hire seems to only be about 550.
But let’s ignore all of that for a moment and take a look at the other buildings the company bought here in the state..
Since the company signed the deal it made a huge PR stunt out of buying buildings in Green Bay, Eau Claire, Racine, Milwaukee and Madison. The one in Milwaukee was to be it’s “Wisconsin headquarters” and the others were to be some kind of “innovation centers”. There were big press conferences and media events to publicize the purchases, with the company announcing grand plans for – for something. It was never made clear exactly what they were going to do with the buildings, but it was going to be really, really important.
And absolutely nothing has been done with any of the buildings. At least nothing related to Foxconn itself. It’s been a year or more since the company bought them and they are still sitting empty. The company’s “Milwaukee headquarters” is a seven story building, and it is completely empty except for a bank that leases the first floor. The Eau Claire building is completely empty, and has been since it was acquired. The Green Bay, Madison and Racine “innovation centers” are occupied only by the businesses that were leasing space in them before Foxconn bought them. No renovations, no remodeling, nothing. No signs of Foxconn doing anything, not even any sign of actual Foxconn employees anywhere at any of the sites.
So what the heck is Foxconn actually doing? What will it be doing in the future? No one knows. Not even Foxconn.
Woke up around 4 AM for some reason, pulled open the curtains and saw – snow??? Yeah, snow, not that daffodil up there from this weekend. But I’m not going to put up a picture of snow because things are depressing enough, so hopefully a daffodil will cheer you up. We knew it was coming, the storm, but I don’t think we really believed it. We were lucky because we got just a light dusting. Other parts of the state got as much as 5-8 inches. Sheesh. Welcome to spring.
Perfectly safe to go vote, says the man in full infection control equipment. No need to delay the election.
I have to admit that all of this is getting to me. I’m a rather anxious person to begin with and this whole climate of fear we’re living in with the 24/7 virus news going on right now certainly isn’t helping. I try to avoid even watching the news or reading newspapers, to be honest. But it’s hard not to. You can’t turn on the television, pick up a newspaper, turn on a radio or get on the internet without being bombarded with infection numbers, number of deaths, warnings to stay home and if you do have to go out wear hazmat equipment and treat everyone you meet as if they were infected. And meanwhile we have an administration that is saying everything is going really, really well and the isolation may be lifted at the end of the month, and at the exact same time the crawler down at the bottom of the screen is showing the number of deaths ticking up all the time and an announcement pops up that New York had to hire a contractor to begin digging mass graves on an island in NY harbor because they can’t deal with the number of bodies, and one of the heads of the Wisconsin legislature is shown in full hazmat gear telling people it’s safe to go vote in person without taking any kind of special precautions and later claiming the election is totally valid even though hundreds, perhaps thousands of people gave up trying to vote because of the 4+ hour wait times because most of the polling places were closed (only 5 out of 180 were open in Milwaukee) and the fact that the post office didn’t bother to actually deliver hundreds, perhaps thousands of absentee ballots that people had sent in for weeks ahead of the election, and even if people did get them and sent them in they won’t be counted because the post office didn’t put a postmark on them…
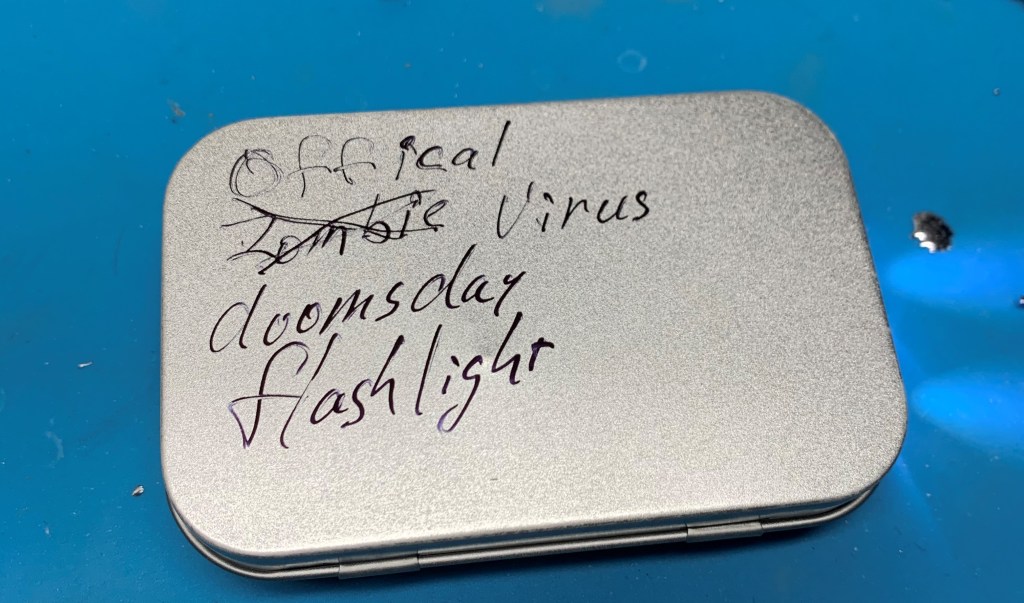
What do you do when you have a lot of time on your hands, a whole case of “Altoid” style metal boxes for a project that never came to fruition, and a bags full of surplus electronics parts? If you’re me, you end up with stuff like this:
I used “doomsday” because I can’t spell apocolypse, appocololips, apocalypse by the way. Is this “project” silly? You bet. Don’t care. We all need to be silly once in a while.
So I was sitting around this morning staring at all this stuff on the shelves down here in my version of a mad scientist’s laboratory (I’m not really mad, only slightly eccentric.) wondering what I could do that would A) kill time because dear lord I was getting bored (so, sooo bored) after being in self imposed exile for weeks, B) be really, really cheap, C) be fairly easy to do because even though I was bored, I’m also lazy, and D) use up some of the junk I have laying around like that bag full of weird little switches. So there I was with a bunch of small metal boxes, a bunch of LEDs, a bunch of switches that aren’t good for much of anything, at least not for anything I normally tinker with, and I started thinking – ooo, it’s lunch time, let’s go eat.
But after lunch I thought hey, there is no such thing as having too many flashlights, is there? I mean whenever you need a flashlight either you can’t find one, or the batteries are dead, or someone took out the batteries to stuff in the remote for the TV or to power a robot or weather station or something. Even better, maybe MrsGF might stop wondering if she needs to call someone about my “problem” with accumulating various parts and gadgets and similar stuff if I actually use some of this stuff to crank out something remotely useful.
(Sidenote: LEDs are a lot of fun to play with, and cheap to boot. A few LEDs, some resistors, a 555 timer, a few transistors, maybe a microcontroller, and you too can have a lot of fun building really cool and utterly useless little gadgets)
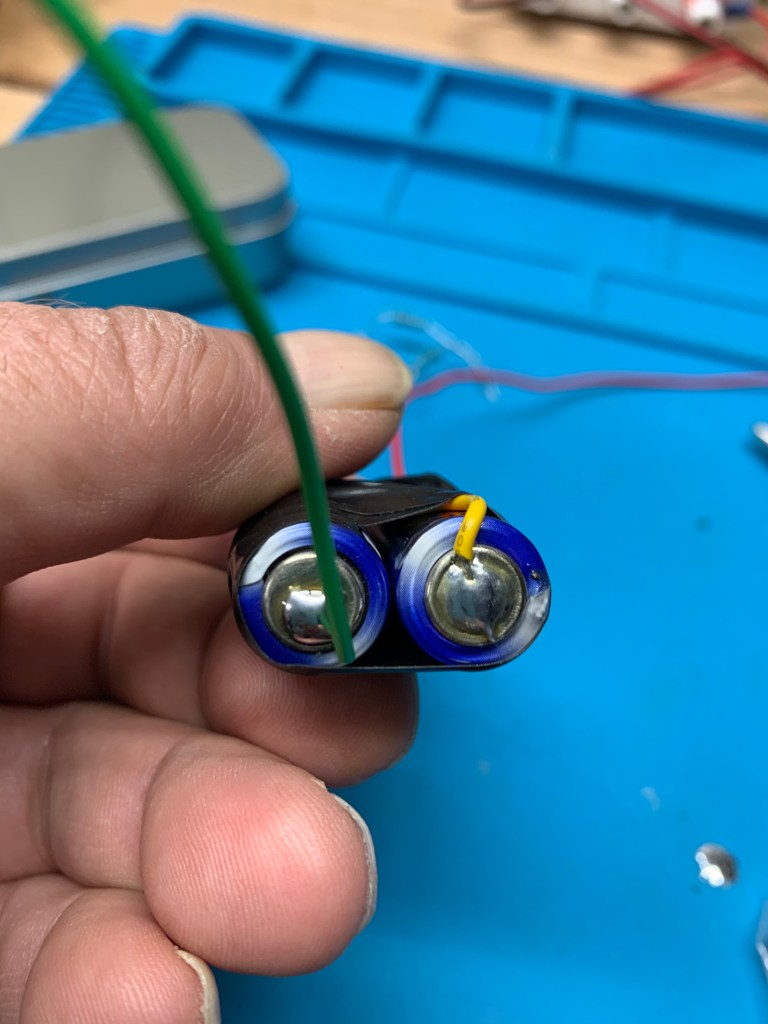
So first I need a 3V power supply of some kind because the LEDs I got want to be fed about 3 volts. AA batteries work well for this. (So would AAA batteries, BTW) Two AA batteries together will put out 3V so… Oh, I didn’t have a battery holder thingie. Ah, well, no problem there. Just solder the suckers together. Solder the negative pole of one battery to the positive of the other with a hunk of wire, solder jumper wires on, and away we go. Instant battery pack.
Is this safe? Um, maybe? Probably not? Is it easy? Not really. It’s a pain in the neck. Solder doesn’t want to stick to those suckers. (Hint: scuff the surface of the battery with fine sandpaper. Seems to help the solder adhere.) But this is a doomsday flashlight, remember? You don’t need neat and tidy and professional looking, you just need something that works. Jury rigging is encouraged.
Speaking of jury rigging…
Solder splashes are an optional accessory. The leads are just twisted together here, but I did eventually solder everything together before I packed it into the box. You really don’t even need to solder anything. Just securely twisting the leads and wires together and wrapping everything in tape would be good enough.
What about actually making some light? That’s the easy part, really. A couple of resistors for current limiting, a couple of LEDs, and away we go.
Now for mounting the LEDs in that case. How the heck do we do that? I don’t have any of those fancy mounts… Well, we’ll just drill some holes just barely big enough to shove the LED through and add lots and lots of glue.
Now, to sort through this lot to find a switch that might work…
The problem when you buy bulk lots of stuff labeled “100 Misc. Switches, $1.99” is that the chances of you getting anything actually useable out of that lot is pretty slim. Still, we work with what we got. All of those are momentary contact switches that stay turned on only as long as pressure is applied to them, and they aren’t really suited for what I want. Unless… Ooo, I know! Use the lid of the case as the switch. Close the lid it puts pressure on the switch and turns it on. Open the lid and it turns off.
And this is what I ended up with. LEDs glued into holes drilled in the end of the case. Lots of plastic tape to insulate the wires. The batteries wrapped in tape and held in with a self adhesive velcro pad, and the switch glued to the top of the battery conveniently makes it exactly the right height to turn on when the lid is closed. Damn, that was lucky there because otherwise I had no idea how I was going to mount that switch. Ooo, can you say serendipity?
And, damn, it actually works??? Yeah, it does. Closing the lid puts enough pressure on the switch to turn it on. Open the lid and it turns off. And puts out a surprisingly large amount of light, too. Damn, I actually made something useful? Wow!
It also uses very, very little power. I put it on the meter and it draws about 0.005 amps. A set of AA batteries will probably keep this thing going 24/7 for a couple of weeks. Which is good because changing the batteries in this thing would be a royal pain in the neck, them being soldered in like that.
Total cost on this, excluding the batteries, is maybe a buck at the most? Most of this stuff like the LEDs and the switches were bought in large lots as “surplus” in a moment of weakness when I was scrounging around on-line. (“Ooo, that’s a real deal! I’m sure I’ll need 1,000 miscellaneous LEDs in the future”) It took maybe half an hour to put it all together, and it only took that long because I’m easily distracted. And because it took me 10 minutes to find a roll of electrical tape.