I Get Questions. Sometimes I Got Answers

Some readers managed to discover Grouchy Farmer’s super secret email address and have been sending in questions. (What, you don’t know what it is? Here’s a hint: old.grouchyfarmer@gmail.com) So I thought I’d better deal with some of the stuff that’s been piling up over there.

I heard almost the entire US meat industry is controlled by just three or four companies. Is that right?

That is true. About two thirds of the beef market is controlled by just three companies, JBS, Cargill and Tyson. Add in National Beef and those four companies control 80% of the beef produced in the US. The same is true with pork and poultry. Three or four companies control almost the entire market for both of those products as well. And all of these companies have a long history of, oh, let’s call it shenanigans, shall we? All of these companies have a history of being accused of price fixing, collusion to manipulate markets, abuse of employees, supply manipulation, and, well, the list goes on and on. And in some cases not just allegations, but outright actual criminal activity. JBS took corruption to a whole new level in its home country of Brazil where it was involved in an enormous bribery scandal that involved hundreds of politicians, meat inspectors, etc. Run a Google search on “JBS bribes meat inspectors” and you’ll probably be astonished at the depth of the corruption, and disgusted by the other less than ethical things JBS is accused of participating in.

How is this happening? Don’t we have antitrust laws to prevent this kind of thing? Yes, we do. Laws that the government ignores whenever it feels like it. Antitrust laws intended to prevent monopolies from developing have been conveniently ignored for decades now, with the government either carving out loopholes for certain businesses/industries, or simply ignoring the laws entirely. Why? Because the big multinational monopolies pump millions of dollars into the campaign coffers of influential politicians in Congress who, in turn, pressure the officials who are supposed to police this into looking the other way. Or in the case of JBS, bypassing the clumsy “lobbying” and just passing actual suitcases full of money to people.

Are dairy farmers really being forced to dump milk?

That is also true. I’ve heard estimates that dairy farmers are dumping something like 1.2 million or more pounds of milk every day because they can’t sell it. About half of the milk produced doesn’t go into products sold directly to consumers, it sells to food service operations, school districts, restaurants, or processors that use the products to produce still other products. So when the virus hit and most of those operations shut down or were severely limited, dairy farmers lost almost half of their market literally overnight. While consumer demand did indeed go up because of an increase in usage of dairy products in the home, the institutional type products are in forms or packaging the consumer can’t use. The production facilities that make consumer dairy products were overwhelmed with high demand and weren’t able to keep up, resulting in temporary shortages in some areas. So we have a bizarre situation where farmers have to dump milk while there are shortages of some products at the same time because production facilities can’t keep up or can’t quickly convert over to making consumer products.

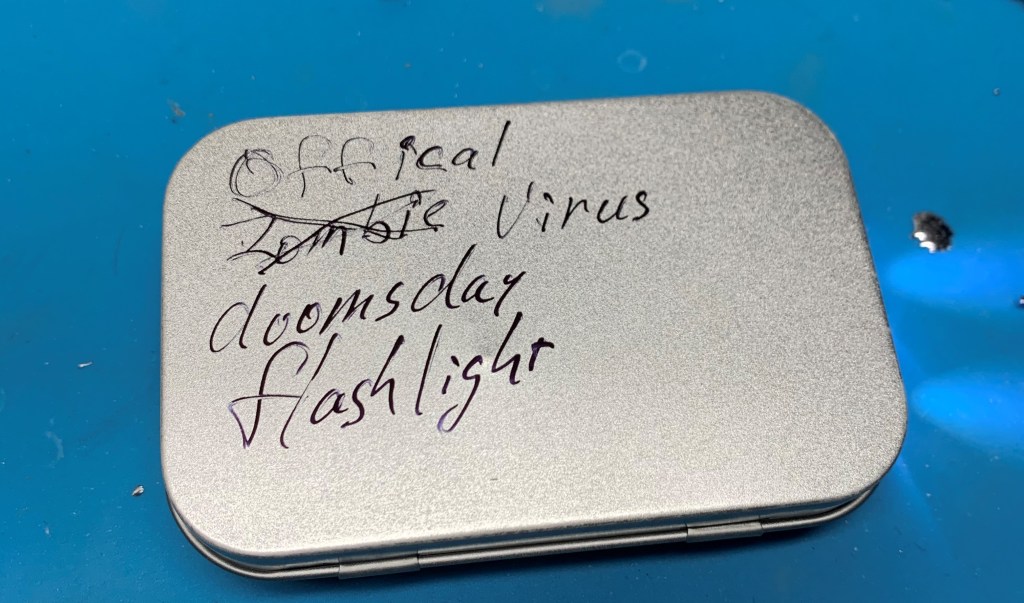
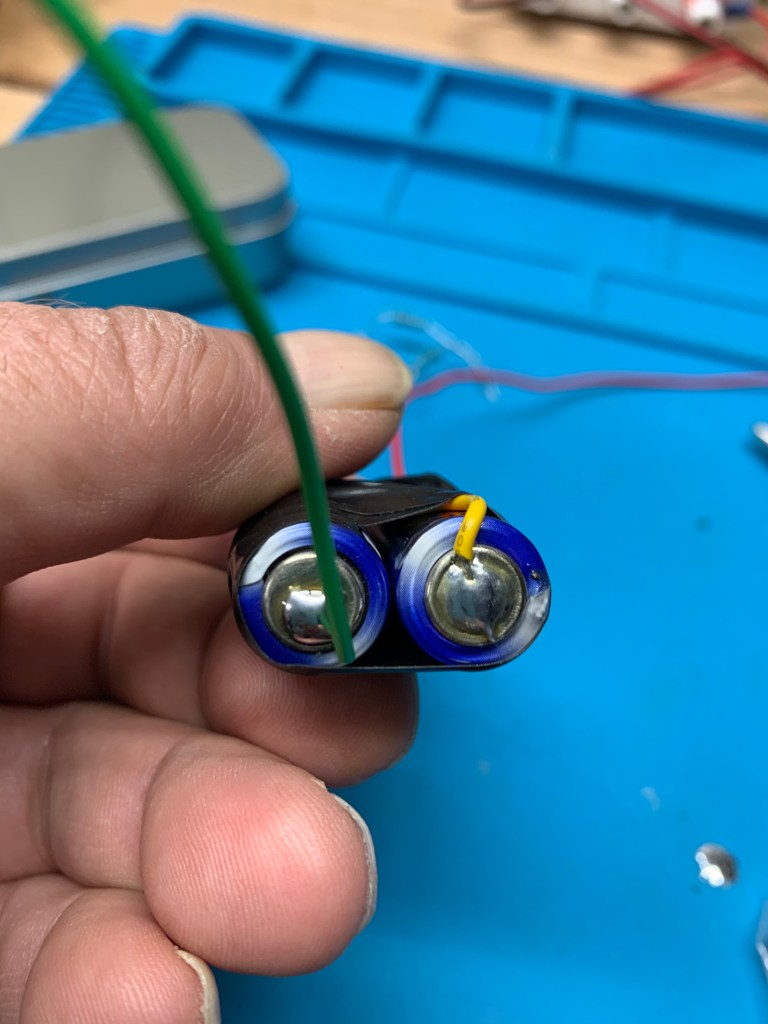
When you made that “doomsday” flashlight, why did you have to put a resistor in-line with the LED? Why not hook it up directly to the battery?

Ah, good question. I should probably have explained when I wrote that up back in April. (Link to flashlight post here.)

It would be nice if we could just hook an LED up to a battery or power supply and switch it on without having to worry about it, but, alas, you can’t. (Note: There are some types of LEDs that do not need a current limiting resistor because they either already have one or because the type of LED can deal with the current, but most do require one) You often need a resistor in-line with the LED to prevent it from drawing too much current and burning itself out. The amount of current flowing in an LED is a function of the voltage across the LED. And in an LED the relationship between current and voltage is not linear. A slight increase in voltage can result in a large increase in current. So if you have an LED that wants, oh, 2.7V for example, and you feed it 3V, that can result in a large increase in the current in the LED, overdriving it, causing it to heat up, burn out, or even, in rare cases, explode if the current gets too high. So that resistor is there to drop the voltage in the circuit down to a level that the LED likes.

How do you figure out exactly what size resistor to use? I could go through all of the explanations about forward voltages and all of that, deal with the math and stuff, but it’s a heck of a lot easier to simply point you at someone who does a heck of a lot better at explaining things than I do. It’s pretty simple really. Don’t let the math spook you. It’s very simple to figure out. You can find a detailed explanation of why resistors are needed with LEDs and how to pick the right size resistor over at https://www.evilmadscientist.com/2012/resistors-for-leds/ There are even calculators (free) on-line where you just have to plug in some numbers and it figures out the size of the resistor that you need.

Your resistor doesn’t need to match the calculations exactly, either. If you don’t have one exactly the right size you can pick one that’s a bit bigger than the one the calculations indicate. I picked a larger one than I needed to reduce current draw so the batteries would last a lot longer while still letting the LEDs give enough light to be useful

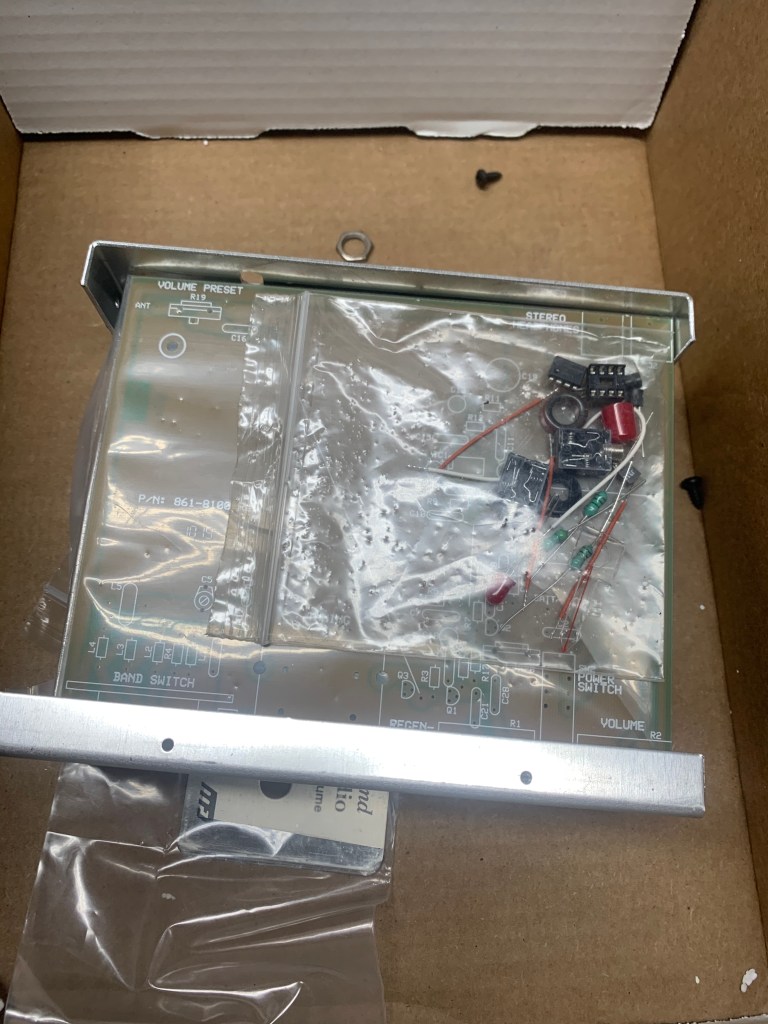
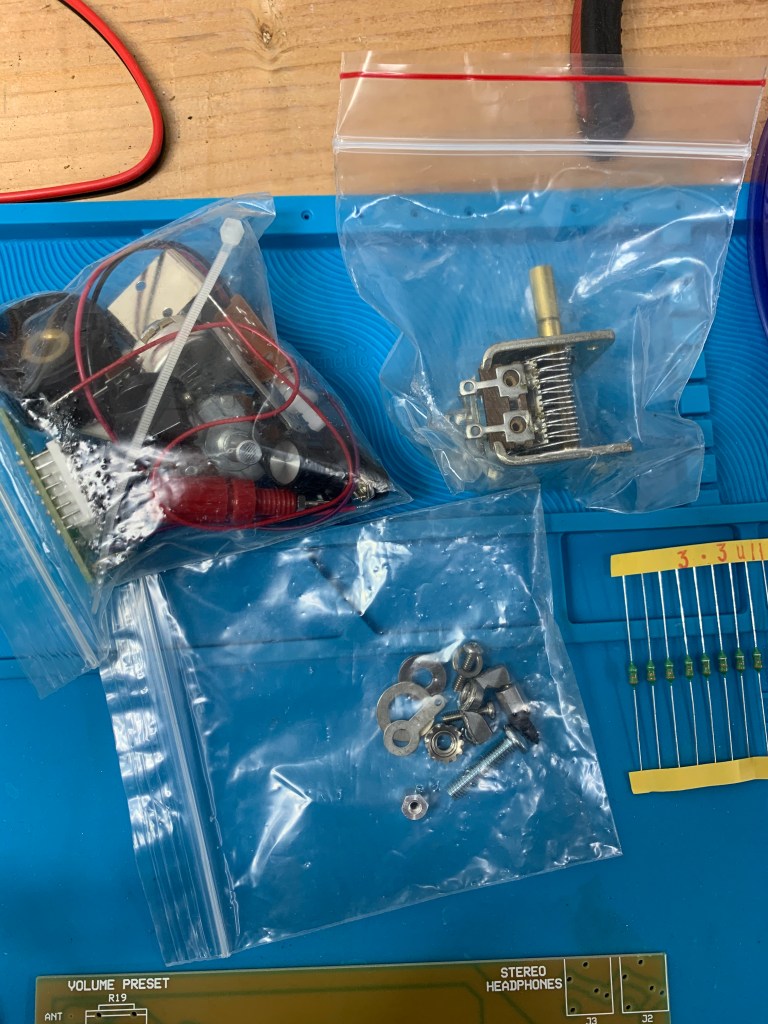
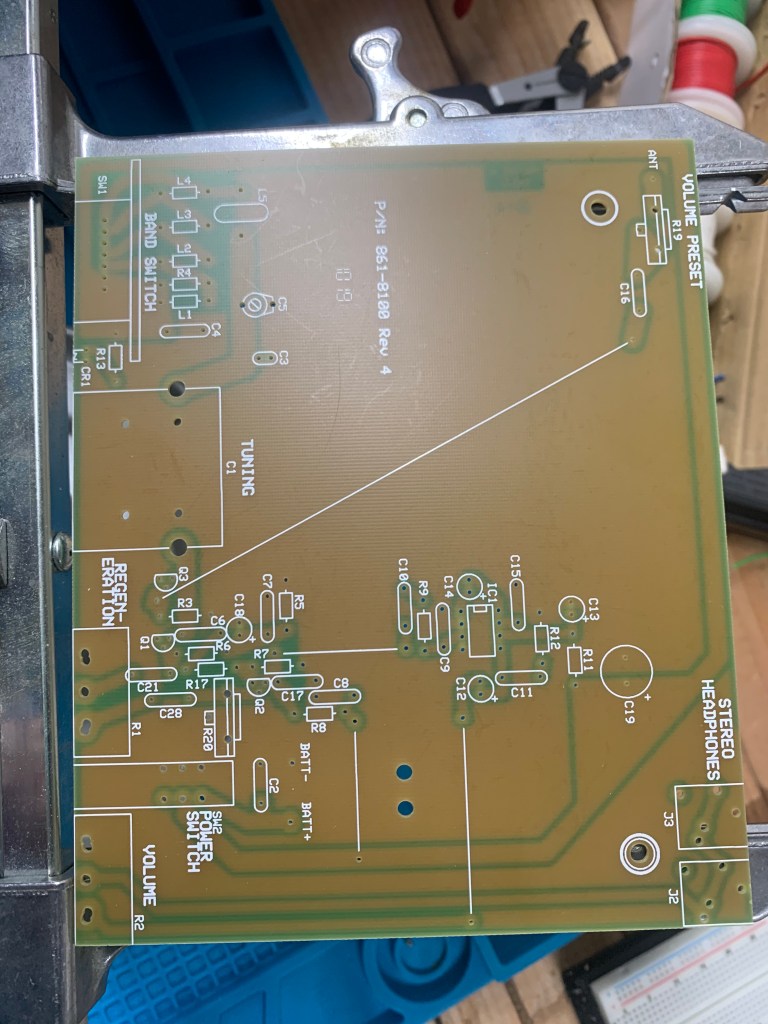
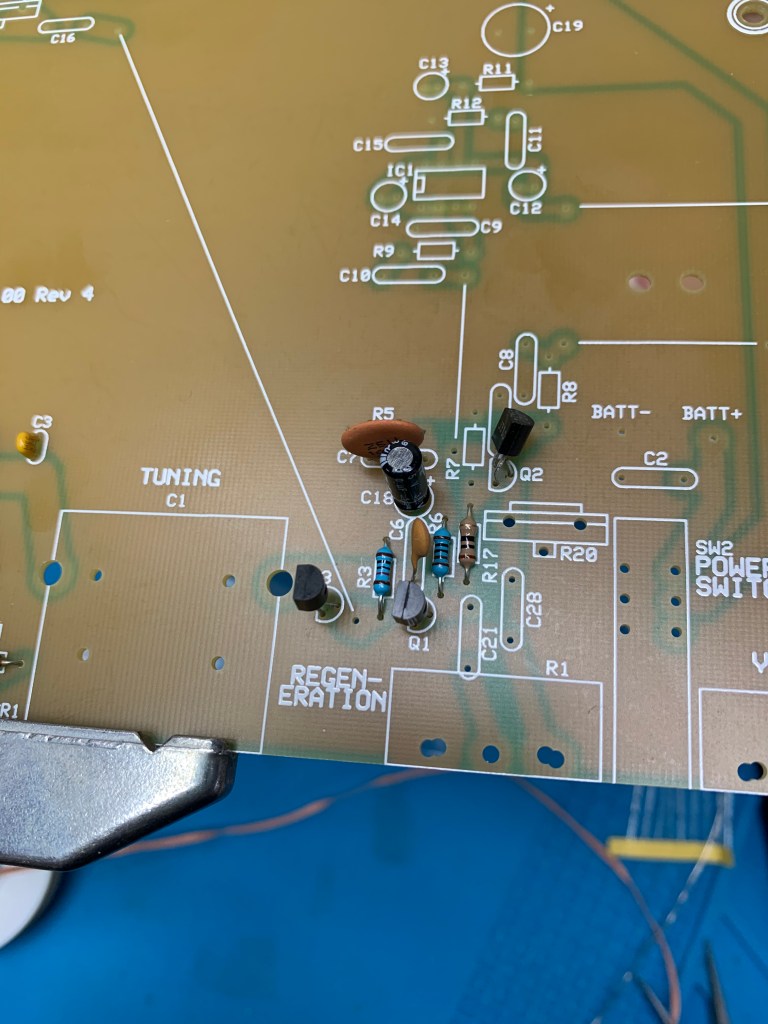
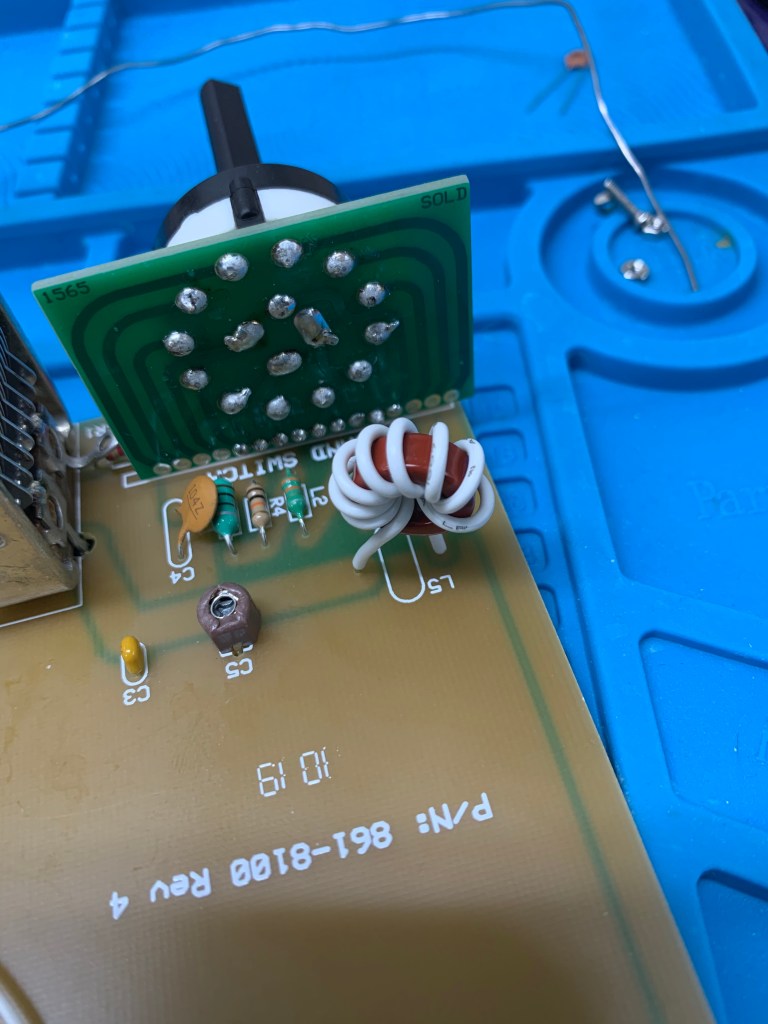
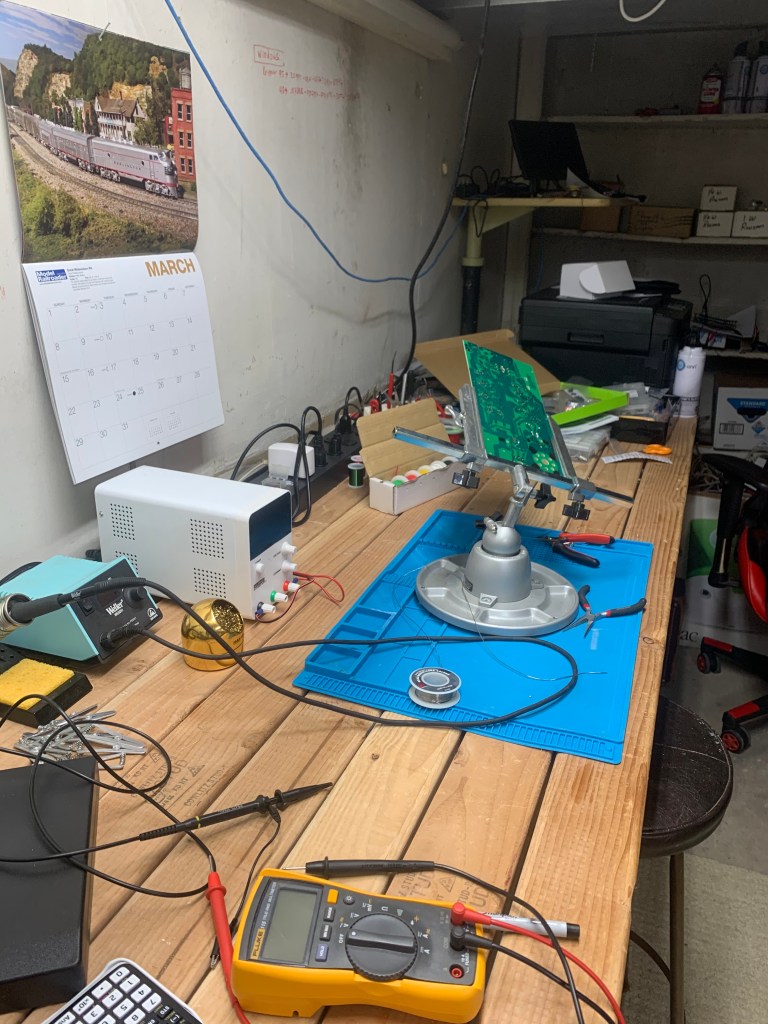
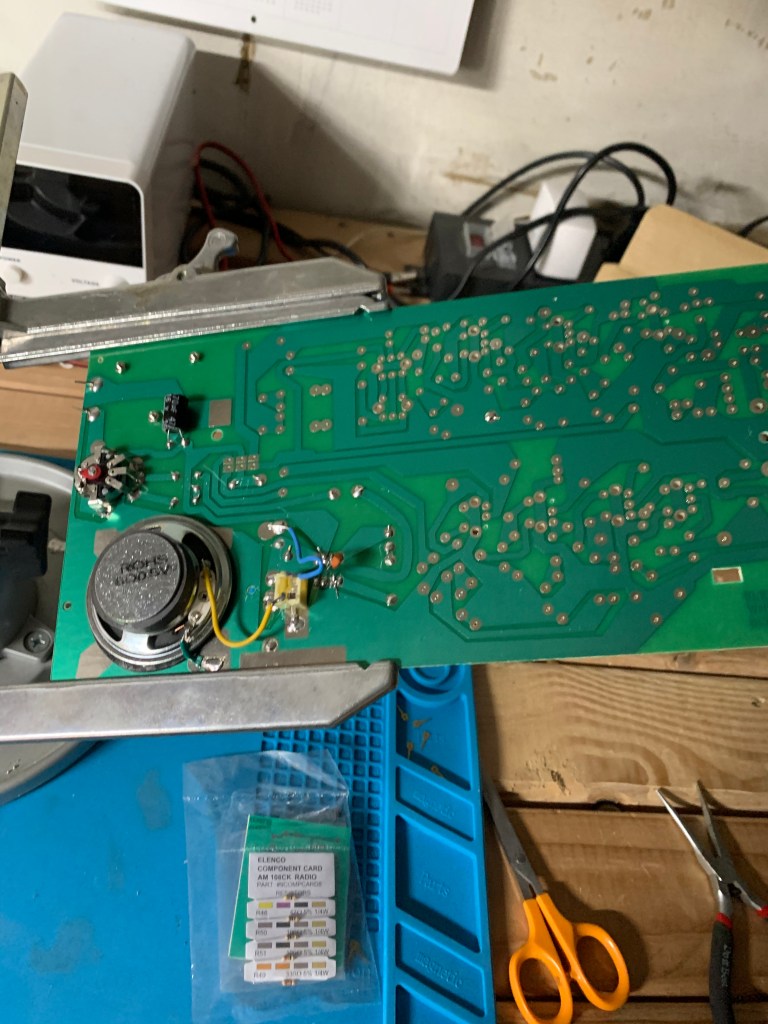
What happened to the Great Radio Receiver Fiasco Project?

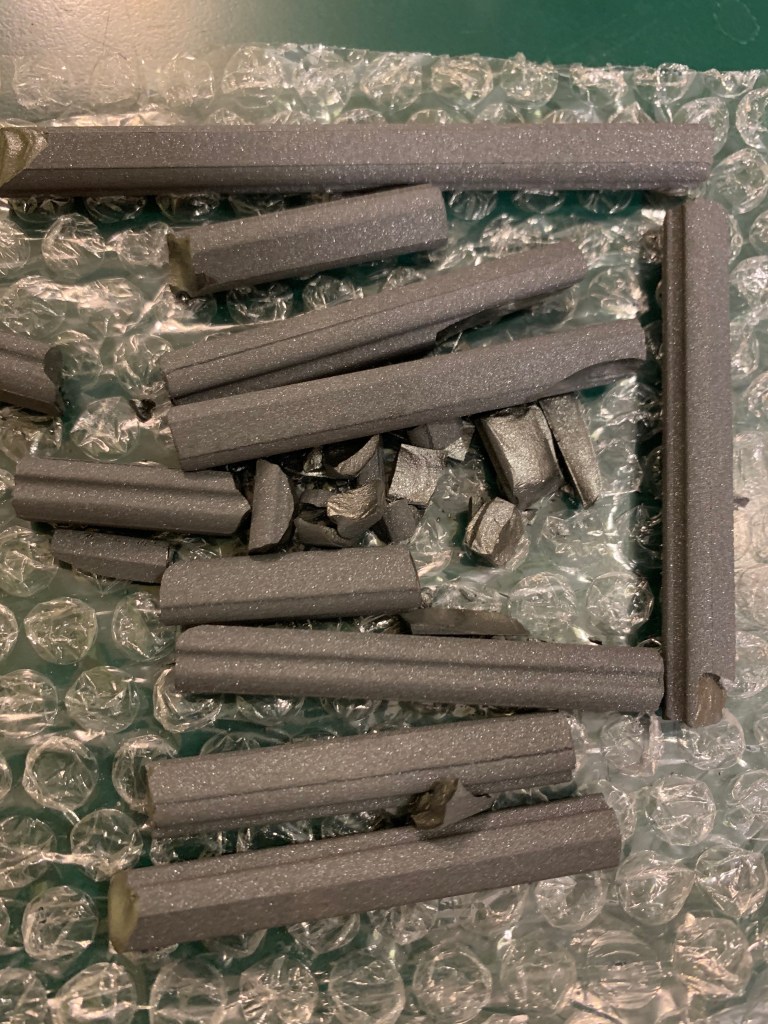
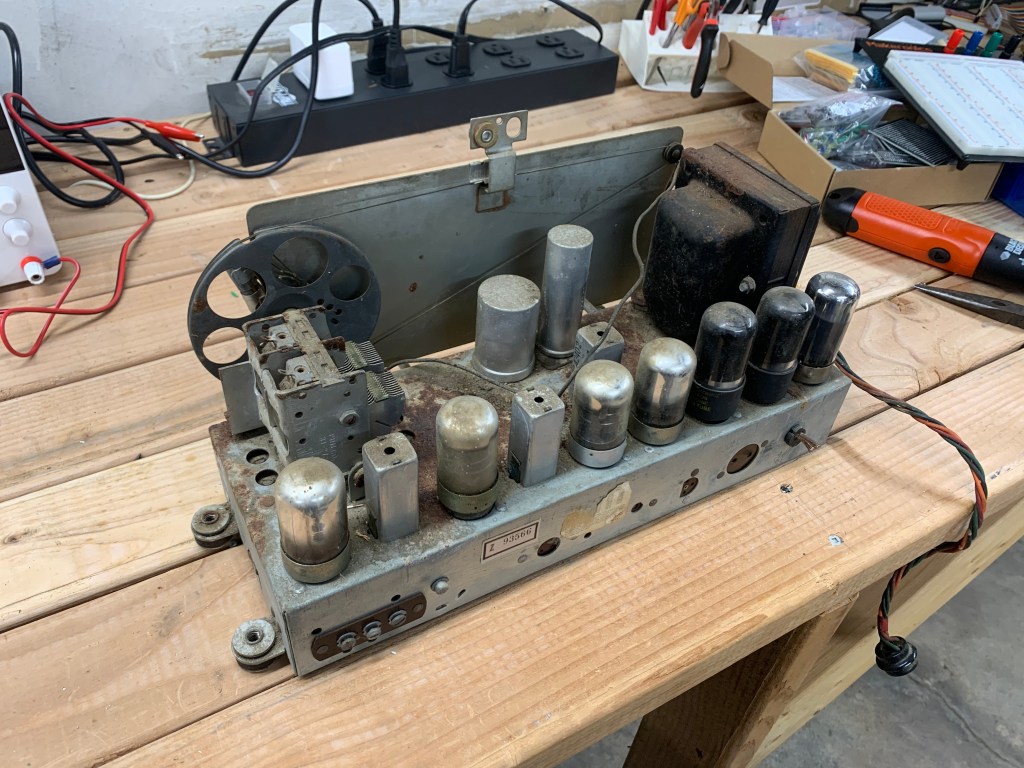
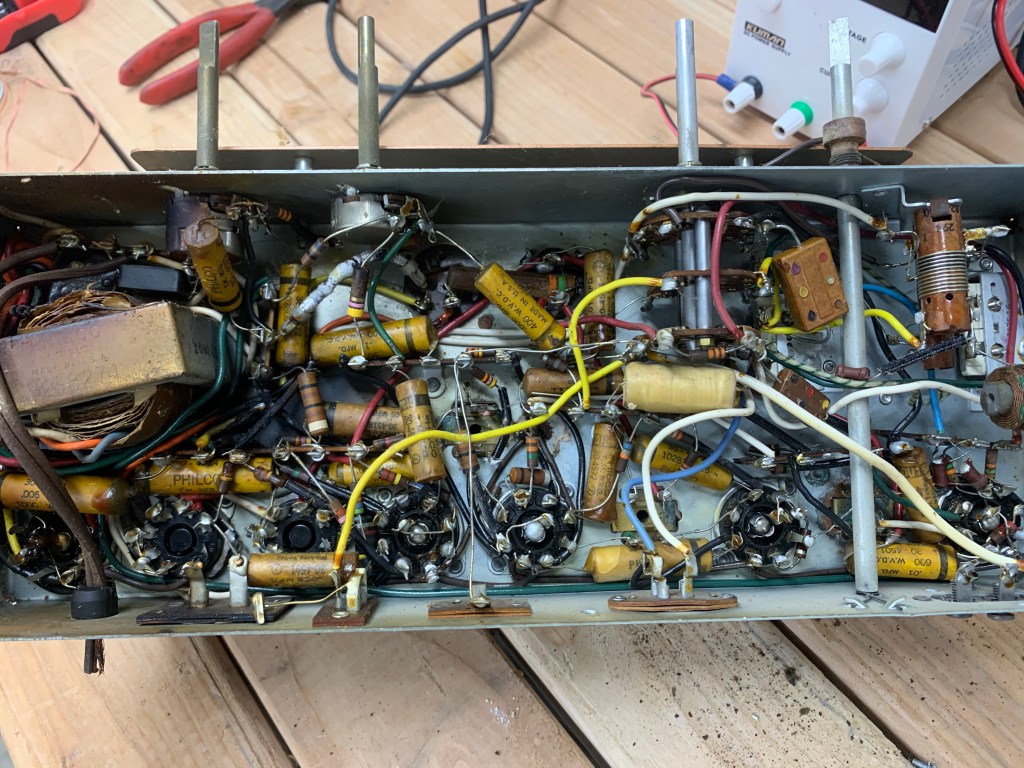
Ah, that. I was afraid someone would bring that up. It did not go well, mostly because of a parts supply problem. First the ferrite rods I’d ordered arrived almost crushed into powder. Then the toroids I’d ordered for coils, after about four weeks of waiting, abruptly were listed as “unavailable” from all three of the suppliers I’d ordered from. Then the tuning capacitor I’d salvaged from another radio turned out to have serious problems and a new one would have cost me almost $40. Anyway the whole thing is on hold while I look at alternatives or really scale back the design. Or just give up. I wanted to build a multiband receiver that would cover just about the entire HF spectrum from 80 meters to 10 meters, and, well, we’ll see. I built a few very simple two or three transistor receivers that sort of, kinda, almost worked, if I kept my fingers crossed, did a little dance and hooked ’em up to my 140 foot wire antenna to be able to receive anything. One I did was supposed to be an AM band receiver and when it picked up anything at all it turned out to be receiving transmissions from a train switching cars in the small rail yard a half block from here. Still haven’t figured out what the hell that was all about. Either my receiver was ridiculously screwed up, or the transmitter the railroad was using was ridiculously screwed up. Or, perhaps, it was aliens.

Are people really attacking cell phone tower technicians in Europe and trying to destroy radio towers, or is it just more clickbait? WTF is going on?

Unfortunately, those stories are all too true. It seems to be the worst in the United Kingdom, but it’s spreading everywhere. In the last two weeks or so alone, in the UK there were 30 incidents of cellular towers being attacked, usually by arson, and almost 200 cases of technicians being abused and even physically attacked, including one having a brick thrown at his head and another being stabbed. And it seems to be spreading almost as fast as the damned virus, fueled by bizarre and utterly ridiculous conspiracy theories, and spread by so-called “celebrities” who aren’t exactly the brightest bulbs in the pack to begin with, and by the anti-vax crowd. And it’s being spread everywhere by social media services who are more interested in raking in as much money as possible than they are in preventing people from using their services to push out insane conspiracy theories and promote violent behavior.

Anyway, that’s about enough of that. Time to wrap this up.

Getting Silly: The Virus Doomsday Flashlight

What do you do when you have a lot of time on your hands, a whole case of “Altoid” style metal boxes for a project that never came to fruition, and a bags full of surplus electronics parts? If you’re me, you end up with stuff like this:

I used “doomsday” because I can’t spell apocolypse, appocololips, apocalypse by the way. Is this “project” silly? You bet. Don’t care. We all need to be silly once in a while.

So I was sitting around this morning staring at all this stuff on the shelves down here in my version of a mad scientist’s laboratory (I’m not really mad, only slightly eccentric.) wondering what I could do that would A) kill time because dear lord I was getting bored (so, sooo bored) after being in self imposed exile for weeks, B) be really, really cheap, C) be fairly easy to do because even though I was bored, I’m also lazy, and D) use up some of the junk I have laying around like that bag full of weird little switches. So there I was with a bunch of small metal boxes, a bunch of LEDs, a bunch of switches that aren’t good for much of anything, at least not for anything I normally tinker with, and I started thinking – ooo, it’s lunch time, let’s go eat.

But after lunch I thought hey, there is no such thing as having too many flashlights, is there? I mean whenever you need a flashlight either you can’t find one, or the batteries are dead, or someone took out the batteries to stuff in the remote for the TV or to power a robot or weather station or something. Even better, maybe MrsGF might stop wondering if she needs to call someone about my “problem” with accumulating various parts and gadgets and similar stuff if I actually use some of this stuff to crank out something remotely useful.

(Sidenote: LEDs are a lot of fun to play with, and cheap to boot. A few LEDs, some resistors, a 555 timer, a few transistors, maybe a microcontroller, and you too can have a lot of fun building really cool and utterly useless little gadgets)

So first I need a 3V power supply of some kind because the LEDs I got want to be fed about 3 volts. AA batteries work well for this. (So would AAA batteries, BTW) Two AA batteries together will put out 3V so… Oh, I didn’t have a battery holder thingie. Ah, well, no problem there. Just solder the suckers together. Solder the negative pole of one battery to the positive of the other with a hunk of wire, solder jumper wires on, and away we go. Instant battery pack.

Is this safe? Um, maybe? Probably not? Is it easy? Not really. It’s a pain in the neck. Solder doesn’t want to stick to those suckers. (Hint: scuff the surface of the battery with fine sandpaper. Seems to help the solder adhere.) But this is a doomsday flashlight, remember? You don’t need neat and tidy and professional looking, you just need something that works. Jury rigging is encouraged.

Speaking of jury rigging…

Solder splashes are an optional accessory. The leads are just twisted together here, but I did eventually solder everything together before I packed it into the box. You really don’t even need to solder anything. Just securely twisting the leads and wires together and wrapping everything in tape would be good enough.

What about actually making some light? That’s the easy part, really. A couple of resistors for current limiting, a couple of LEDs, and away we go.

Now for mounting the LEDs in that case. How the heck do we do that? I don’t have any of those fancy mounts… Well, we’ll just drill some holes just barely big enough to shove the LED through and add lots and lots of glue.

Now, to sort through this lot to find a switch that might work…

The problem when you buy bulk lots of stuff labeled “100 Misc. Switches, $1.99” is that the chances of you getting anything actually useable out of that lot is pretty slim. Still, we work with what we got. All of those are momentary contact switches that stay turned on only as long as pressure is applied to them, and they aren’t really suited for what I want. Unless… Ooo, I know! Use the lid of the case as the switch. Close the lid it puts pressure on the switch and turns it on. Open the lid and it turns off.

And this is what I ended up with. LEDs glued into holes drilled in the end of the case. Lots of plastic tape to insulate the wires. The batteries wrapped in tape and held in with a self adhesive velcro pad, and the switch glued to the top of the battery conveniently makes it exactly the right height to turn on when the lid is closed. Damn, that was lucky there because otherwise I had no idea how I was going to mount that switch. Ooo, can you say serendipity?

And, damn, it actually works??? Yeah, it does. Closing the lid puts enough pressure on the switch to turn it on. Open the lid and it turns off. And puts out a surprisingly large amount of light, too. Damn, I actually made something useful? Wow!

It also uses very, very little power. I put it on the meter and it draws about 0.005 amps. A set of AA batteries will probably keep this thing going 24/7 for a couple of weeks. Which is good because changing the batteries in this thing would be a royal pain in the neck, them being soldered in like that.

Total cost on this, excluding the batteries, is maybe a buck at the most? Most of this stuff like the LEDs and the switches were bought in large lots as “surplus” in a moment of weakness when I was scrounging around on-line. (“Ooo, that’s a real deal! I’m sure I’ll need 1,000 miscellaneous LEDs in the future”) It took maybe half an hour to put it all together, and it only took that long because I’m easily distracted. And because it took me 10 minutes to find a roll of electrical tape.

Reviewing the MFJ 8100K World Band SW Receiver Kit

Being stuck in the house “social distancing” (OMG I’m so bored) has some advantages, one of which is being able to get caught up on a lot of stuff. One of those things is the MFJ-8100K world band shortwave radio kit. That’s the little beastie you see in the photo below that I (ahem) stole borrowed from somewhere on the internet.

Damn, that’s pretty slick looking. It beats the heck out of what the average electronics kit looks like when it’s done. Most of them don’t even offer any kind of decent case. Whether it actually will look like this when it’s done remains to be seen because I haven’t actually built it yet as I write this. Instead of putting it together and taking some photos and talking about it after it’s all done, I’m going to do this live, so to speak, writing and photographing as I go along so you too can experience the joys and pains associated with putting something like this together.

I should warn you ahead of time that this could get pretty lengthy because I’ve done little more than just open the box and it is already looking like this is going to be a problem.

But let’s look at the basics a little more closely before we get started. It’s a world band shortwave receiver with 5 bands. They cover 3.5 – 4.3 mHz, 5.85 – 7.4 mHz, 9.5 – 12.00 mHz, 13.2 – 16.4 mHz and 17.5 – 22 mHz.

As for the basic design, this is a regenerative receiver, a design that dates back to, oh, the 1920s or so, and was quickly abandoned as soon as superhets were developed. And for good reason, as anyone who has ever fallen off their chair from the blast of noise if you tweak the regen just a tad too far and it goes into oscillation can tell you. About the only good thing regenerative receivers have going for them is a fairly low parts count and easy assembly. Well, that’s not really true. They can be decent receivers once you get used to their quirks, but with really high quality superheterodyne designs out there, why even bother with one of these? How did I even end up having this on the shelf in the first place? I don’t remember buying it. Do I have people breaking into the house and leaving me stuff instead of stealing it now?

The first thing I started wondering was why the heck is this thing so expensive?It’s going for $90, for heaven’s sake. And there is nothing exotic or hard to find in the electronics. While that variable capacitor is kind of pricey (that goes for about $20+ alone and I know that because I had to buy one of the things a few months ago) But other than that I think there’s maybe $10 worth of parts in the thing. I suspect that really fancy faceplate and heavy duty metal case probably costs more than the electronics inside does.

But let’s get on with this.

Opening the box and poking around.

This is what the promotional photos tells you is in the box.

First I should point out that this kit starting with the photos below is shown exactly as it came and while I assembled it. The box was still sealed and I hadn’t opened it until I started this. What it really looks like when you open the box is this:

Um, okay… Are those screws and nuts rolling around loose in the box? Yeah, they are. And not just screws and nuts and washers, we got electronic components floating around loose in there too. Oh, goodie.

Opening the box and finding components strewn about all over inside doesn’t exactly inspire confidence about the quality of a product. Whoever originally packed this thing and chucked in the little plastic bags holding the components hadn’t bothered to actually close up the plastic bags.

And as for the case, well, damn, that’s probably the best case I’ve ever seen for a kit in a long time. Beautifully finished, heavy steel, with an equally beautiful brushed polished steel faceplate.

You can’t get much better than that. See what I mean about the case probably costing more than the electronics? It’s – it’s shiny. Oooo

The rest of what was in the box looks like this:

The inductors on the right edge were not included in the kit. See text for explanation

As noted, most of the little baggies containing parts were open and had shed a considerable number of electronic components, screws, washers, etc. all over the inside of the box..

Half of “The Wall O’ Parts.” If I need something, it’s probably in there. Somewhere. Maybe. There’s even an emergency backup espresso machine in there

On the far right of the photo above you’ll see a strip of components held together with bits of yellow tape. Those are 3.3 uH inductors and those were not in the kit. I had to dig those out from my “Wall O’ Parts” because the kit wants one, and MFJ either thoughtfully failed to provide one because they figured I’d be getting bored by this time and needed to get up and stretch or something, or it got lost because of they left the baggies open. I expect I shall have to resort to the Wall O’ Parts several times as I try putting this sucker together. I’ve only just started to look at this and sort through parts and I’m already finding stuff missing, so I’m a wee bit irritated. There is nothing more upsetting than getting into an electronics kit and finding parts missing. Me, I have hundreds of components sitting on the shelf (well, if I can find ’em, that is) but the average person building this is not going to have that luxury and is going to be royally ticked off.

The circuit board looks reasonably well made and the parts locations are all nicely detailed. You could probably put it together without instructions if it weren’t for a few gotchas, like having to wind your own coil on a toroid.

Where’s the fecking Manual???

Now, the more sharp eyed amongst you might have noticed something missing from those photos up there. Where the heck is the manual/assembly instructions? Well, you don’t see it because there isn’t one. Instead of a manual there is a half sheet of paper telling me I need to download the manual from the MFJ website, giving me a URL to go to. So I go to the webpage as instructed and find a bad PDF of the circuit diagram which was so low resolution I couldn’t even make out the symbols or component labels. It looked like someone had almost deliberated fuzzed out all of the labels and component symbols, and the “manual” was actually a booklet in PDF telling me how to use the radio, not how to put it together. No assembly instructions. No readable schematic. Oh, goodie…

This exactly what the schematic I found looks like. Can you read that? Yeah, neither can I

A search on MFJ’s site using its own search function turned up a reference leading straight back to the useless info I’d already seen. I finally ran a general search on Google and found the real assembly manual tucked away somewhere on MFJ’s site and I printed it out.

(Update 3/27/20: And now I can’t even find that website, for pete’s sake! I was going to put the link to the correct PDF in here as I edit this before posting it, and when I just tried I get a “page not found” error. MFJ is apparently upgrading its website and I can’t find it at all. Good job, there, MFJ. I didn’t keep a copy of the PDF, but at least I printed the thing out so I can at least take a stab at this. But anyone else wanting that booklet, well, it looks like you’re on your own.)

The manual itself (if you can find it) is actually pretty good. Sort of. Clearly written, mostly, with lots of detail, but sadly lacking in illustrations.

So let’s sling some solder and see what happens.

Now that’s interesting. Look at the 4 inductors up there. Notice anything different about one of ’em? Yeah, the third from the left is about half the physical size of the other three. The big three were supplied with the kit while the small one is my replacement and is about half the physical size, but it is the right specification according to the color codes and I put it on my tester just to double check, and it should be the right one. Is this going to be an issue? No idea at this point. All of the inductors I have in stock are the smaller size.

Also, more missing parts. Just found two resistors are missing. Look at this pic:

R3 and R6 were missing so I had to pull those off the shelf. Notice that they’re an entirely different color from the kit supplied one, R17. I use the generally more reliable metal film resistors (the blue ones) while the kit supplies carbon resistors (the tan ones). Now very, very rarely the type of resistor can make a difference, so I’m hoping that isn’t the case here.

Later – Missing parts list now sits at 1 missing inductor, 4 missing resistors, and 2 missing capacitors.

And now there’s an issue with one of the electrolytic capacitors.

C14 there next to the IC socket is, according to the instructions, supposed to be a 10 uF cap, but the kit supplies a 1 uF. Or at least I think that’s the one because the 1 uF is the only one left. Do I follow instructions and put in a 10, or use the 1 uF supplied? I finally pulled a 10 uF off the shelf and used that in the hopes that the instructions are right and the parts picker was wrong. (Later – Apparently the 10uF was the right choice because now that it’s done it works)

Watch out for solder bridges or pins with cold solder joints. Here on the bottom row of pins, the third from the left is a bad joint.

And speaking of IC sockets, and this applies to whenever you’re soldering a socket, use caution soldering the pins because it is very easy to apply a tiny bit too much solder and end up with solder bridges shorting out the pins. And it’s easy to do a bad joint as well. Double check under a magnifier.

Time to install the variable cap which is how you tune this puppy. And…

And the solder lugs on the cap are way too big for the holes in the circuit board. I could either drill the holes out, which I don’t want to do because the solder pads are none too large to begin with, or I could trim off the lugs. I finally trimmed the lugs off.

Above here I’m trying to mount the volume control and the regen control. They don’t make this easy either. We’ve gone from holes being to small to holes being way, way too big. Note how some of those holes at the top edge of the board have been double drilled, which makes them way too large for the solder lugs on the potentiometers that are supposed to fit in there.

And speaking of soldering, look closely at those solder pads on that board. It’s difficult to see in the photos but almost all of them seem to be covered with some kind of oxidation that makes it difficult for the solder to adhere. I’ve been using a bit of a scotch brite pad held in a needle nose pliers to buff them before I solder anything.

Then there’s the band switch. The switch has 8 pins, the board has 7 holes. Hmm… Let’s look at the manual. Ah, here we are… Oh, nothing. Says nothing about what to do about the missing hole. Oh, goodie.

I ended up bending the extra pin out of the way and keeping my fingers crossed that it wouldn’t get mad at me. (Later – Don’t know if I was supposed to do this or not but the thing is working this way.)

That circle thing with the white wire wound around it is a coil made by winding 8 turns of wire around a provided toroid core. Some people get a bit weird about winding their own coils. I’m not sure why. A small one like this is a piece of cake. They don’t get nasty until you start having to make ’em with, oh, 30 or 40 turns.

And there it is, ready for testing. It runs off 9V and supposedly a 9V battery will last for weeks and weeks as long as you remember to turn it off. I don’t have a 9V battery, tho, so I hooked it up to my DC power supply and…

Damn, I wish my upload speed wasn’t about 15K baud so I could put up a video of this, but the damned thing actually works! I won’t go through all of the alignment procedures because they will bore you to tears. This is, believe it or not, an actual, working SW receiver. Not a very good one, granted, but it will pick up something.

But then there’s this

This is it fully assembled, mostly. You will note that I don’t have the knobs on. There is a reason for that. MFJ neglected to include the collar nuts you need to actually attach the front properly, anchor the controls down so I can put the knobs on. Now there were indeed collar nuts in the box. You probably saw that in the photos from the box opening. But they were for control shafts about twice the size of these. Sigh… Thanks again, MFJ. Complete assembly is going to have to wait until I can get the right sized nuts.

Okay, this has gone on long enough. Let’s wrap this up. What’s the overall assessment of this beastie?

Well, on the plus side it looks good. It is, amazingly enough, a working radio receiver, although not what I’d call a good working radio. It wasn’t hard to put together. Just about anyone who knows which end of a soldering iron to grab could put this together. Well, mostly, with the application of a bit of common sense. And that case sure looks cool.

Elenco AM/FM superhet kit under construction

But then we come to the negative side.

First problem is the price. They’re getting $90 for this thing, my friends. While the Elenco AM/FM receiver I put together a couple of weeks ago is far more sophisticated, much more sensitive, has an actual amplifier so it can drive a speaker and not just headphones, and sells for half the cost of the MFJ kit at about $44. Granted, it doesn’t come with the fancy case, but you can always cobble together something to throw the Elenco into. And when you’re done with the Elenco you’ll have a radio you can actually listen to, whereas the MFJ is never going to be more than a curiosity for most people.

Then there are the missing parts. A half dozen or so resistors, two capacitors, an inductor, the collar nuts to hold the controls in place, all missing. I don’t know if this was a problem with the person who packed up the parts in the first place, or if they were lost somehow because the bags weren’t closed, or what. My guess is that they were never in there to begin with, because while parts did spill out, the box was sealed and there were no openings for anything to fall out.

As I said before missing parts isn’t much of a problem for me, but for someone who doesn’t have a “Wall O’ Parts”, like some kid doing this for a STEM project or someone who just enjoys occasionally tinkering with kits, this could be a real problem. Sure, you could probably email MFJ and they’d probably replace the parts. Eventually. Maybe. But come on, they should have all been in there in the first place.

Then there’s the manual. Or, rather, the lack of one. What’s the matter with you people over at MFJ? You could throw an 100 page product catalog into the box but you couldn’t be bothered to run off a 30 page manual on the office printer and throw that in too? And then even worse, direct me to a website to find the manual that doesn’t exist? Or to utterly useless schematics?

I’m really disappointed with this because this could have been a really good kit if MFJ had bothered to just just be a little more careful.

So, because of the high price, the missing parts, the missing manual, etc. I can’t score the 8100 very high. On a scale of A to F, where A is excellent and F is abysmal, I’d give the 8100 kit a D+.

Electric Stuff and, Well, Stuff. And the Virus.

How did it get so cluttered so fast?

When I started moving my stuff from the office upstairs to the new workspace in the basement I knew I was in trouble when I plugged in the laser printer, turned it on, and the lights all went dim. So the electrical contractor got here at 6:50 AM the other morning and some two hours later I had the radio shack/shop rewired with new circuits and outlets. The electrical in this space was a bit scary. I think the whole room was connected to a single 15 amp circuit. I was running my radios and other equipment off heavy duty extension cords running into my woodshop and, well, it was just nasty all the way around. The grand total for all of the work and parts ran about $500 but it’s going to be worth it, for safety alone if not for convenience.

So now I have two, 4 outlet 120V boxes, each on its own circuit, plus a 220V outlet over on the radio bench, and two new 120V circuits for the workbench.

Why call in a contractor instead of doing it myself? Because I know where my areas of competence are. I worked on a farm and in building maintenance for years and I can do just about anything – framing, finish carpentry, drywall, installing doors, plumbing, laying tile… But electrical? I’ve had no training or experience in doing household electrical, and considering how dangerous it can be, well I’m going to let a trained electrician do that.

Tubes & Stuff

So eldest son shot me a text Friday asking me if I wanted a vacuum tube tester, free, and I texted back “r u nuts? yeah i want toob thingie!” or something to that effect and he showed up last weekend with this:

The thing with free equipment is that it’s often going to be something useful only for parts, if that, but in this case it turned out to be a genuine, working vacuum tube tester. Oh, it has a few issues. The tube sockets have some corrosion that needs to be cleaned up and it could use a good cleaning in general. The insulation on the cords is brittle so they need to be replaced, but other than that the thing actually seems to work and inside it actually looks almost new.

on the inside it looks almost brand new.

I haven’t done much with equipment with vacuum tubes of late, but I never know what’s going to show up around here, so this could come in handy.

Tinkering with Stuff

I am building a radio receiver. No, not The Great Radio Fiasco Project. That project is more or less on hold until I can get some parts that seem to have become unobtanium for some reason. I may end up having to change the design. No, this is an Elenco AM/FM receiver kit. Best of all it was free! Well, maybe it was? I found it in a box of junk I was sorting through as I continued the apparently never ending project of cleaning out the basement.

I don’t remember ever buying this thing and have no idea where it came from, but it’s in my basement, in my box, so I’m assuming it’s mine, so I’m going to put the thing together and see what happens. It’s a fairly elaborate little radio and from time to time the instructions seem to go wandering off into fantasy land. I suspect that the instructions that were in the box were written before the circuit board was changed and no one bothered to correct the instructions. So that makes things a bit interesting.

Also in the same box of junk I ran across an unopened multiband shortwave receiver kit distributed by MFJ. I don’t remember ever buying that either, and I would remember since that one costs about $80 and I darn well wouldn’t have spent that much. I suspect both were in a boxes full of “valuable assorted radio parts” (i.e. junk) I picked up for next to nothing at a hamfest, and the box just got shoved on a shelf and forgotten about before I bothered to sort through it.

Weather Stuff

Over the weekend it hit 50 degrees. Almost all the snow melted, motorcycles were out on the streets, a very pleasant weekend all around. Tomorrow it’s supposed to hit 55 degrees!

So, of course, today it snowed. Sigh… I know Wisconsin in known for having some odd weather, but this is ridiculous.

Virus Stuff

I am sure you heard about covid-19. You’d have to have been living in a cave on Mars to not have heard. Wisconsin has only 6 confirmed cases, but the potential of it spreading, and spreading quickly, has everyone concerned. At least one school district has closed, the UW system is extending spring break and advising students not to travel, companies are canceling employee travel. The state basketball tournaments are starting up this week and WIAA just announced that general spectators will not be allowed, only the teams and necessary personnel and a small pool of sports reporters will be permitted.

I want to think a lot of this is hype and paranoia, but, well, I’m right smack dab in the middle of the category of the highest risk for death if I catch this sucker, so yeah, I’m a wee bit paranoid. MrsGF and I are supposed to go to the symphony this weekend, but sitting elbow to elbow in a theater full of hundreds of coughing, sneezing, hacking people for two hours? Uh, no.

What I really find troubling is the huge amount of misinformation being spread, some of it through ignorance, but a lot of it being spread deliberately. Some of it by our own government. I wasn’t going to spend a lot of time talking about this because, well, let’s face it I don’t have that many people who read this so it isn’t going to make a dent in things, but if it helps correct some of the stuff floating around, I suppose I should go into this a bit.

First, there is no cure for covid-19. None. Zip. Zilch. Zero. There is no drug, no “natural remedy”, no combination of herbs, no “silver” concoction. None. If anyone is trying to sell you such a thing, it is an outright scam.

Second, there is no magic herb or substance or “essential oil” or vitamin or magic crystal or “holy oil” that will somehow keep you from catching the virus. Again, if anyone tries to sell you such a thing, it is an outright scam.

Third, there is no vaccine “just around the corner”. Yes, a vaccine is being worked on and there are some promising candidates. But it will be months before one is generally available and even longer before it can be mass produced.

So what can you do?

Wash your hands. A lot. The best preventative is hand washing. Wash your hands using soap and running water. This doesn’t kill the virus, but it does physically remove it from your hands, which is just as good. Do not touch your face except immediately after you’ve washed your hands. A primary method of getting the virus into your system is touching your eyes, nose or mouth.

Do hand sanitizers work? Yes, but only if they’re the right kind. They have to have at least 60% alcohol content. Non alcohol based sanitizers are out there, but no one knows if they actually work or not. The so-called “all natural” hand sanitizers don’t work at all. They’re little more than hand lotion.

Face masks – there is a lot of debate about whether they work or not, and the consensus is that they don’t do much to keep you from getting the virus. They can prevent people who already have it from contaminating others, it seems. The problem, though, is that most of the masks I’ve seen people wearing are dust masks intended to keep dust from getting into your lungs, and were never intended to keep out viruses to begin with. Most people also don’t know how to wear them properly. Heck, I’ve seen a lot of people who have them pulled down to expose the nose. If you do that you might as well not bother at all. Same for guys with beards. If you have a beard, don’t bother. If you can’t seal the mask against bare skin, it isn’t going to work at all.

Social Distancing – what the hell is social distancing? It’s a polite term for keeping the hell away from people. Do not shake hands, do not hug, do not kiss people. Try to keep at least one meter (three feet) away from people if you do have to interact with them.

Avoid crowds. Do not attend sporting events, concerts, meetings or other events where large numbers of people have gathered. I don’t know about where you live, but here most such events have been canceled or postponed anyway. (Although a seriously troubling number have not and are still scheduled). And yes, that goes for church services too. No, being in a church is not going to somehow protect you from getting the virus despite what some utterly irresponsible ministers and priests have been saying. Remember that the primary spreaders of the virus in South Korea when the outbreak first began there were churches. Even the Pope canceled most of his public appearances for heaven’s sake. And if you’ve booked a cruise on a plague ship (ahem, excuse me) cruise ship, well, you’re on your own.

If you’re sick, stay home. About 80% of the people who get it have symptoms that are relatively mild and a lot of people will be tempted to continue with their normal daily routine. And thus risk spreading this to even more people. I realize this is damn near impossible for a lot of people, but the primary way this is spread is by people with relatively mild cases going out in public. Do you really want to be responsible for infecting your friends, your family and your neighbors with this?

Anyway, enough of this. I’ve been babbling long enough.

Equipment Review: Want to Conquer the World? First You Need A Variable DC Power Supply!

So, Mr. (or Ms.) mad scientist, you’ve finished work on your Nuclear Confabulator Disinto Beam 3000 Mark IX at last! You’re all set to begin your conquest of the world, and you go to power up your NCDB3 to bring the world to its knees and…

Oh, $#%@&&@! The damned thing needs 17.3 V DC to run and you don’t have a 17.3 V power supply. Grrrr… Wait, you think. All is not lost yet! You sort of remember you had an old 17V power supply from an old fax machine that you kept because it might come in handy someday. (Us mad scientists never throw anything away. Never know when it might come in handy.)

I really do have a Giant Box ‘O Cables®. Need an MFM hard drive cable? I got ’em. Need a SCSI cable? Got them too. Old parallel printer cable? Yep. Yes. I am ashamed. Also afraid the family will start an “intervention” one of these days. I think there’s a US Robotics 1200 baud modem in there somewhere, too. I wouldn’t know, though, because I wouldn’t touch that thing with a ten foot pole. Afraid I’d lose my hand if I started digging around in there. Might be things living in there.

Now if you can just find the thing… Oh, wait, it must be in your Giant Box ‘O Cables®! You dig it out of the closet and eye it suspiciously. There’s no way you’re going to dig through that mess. And you can’t have one of your minions do it because your last minion left a week ago because you had to eliminate free coffee in the break room because, well, world domination costs money and you needed to cut back somewhere. Wait, did something just move in there? Eeek! Run and hide! It’s alive!

See? This is why you need a variable DC power supply on your workbench.

Long ago I got tired of fiddling around trying to find wallwarts, building battery packs or messing with transformers and rectifiers and all that nonsense to power some of the junk that comes through the doors here or that I tinker with myself. When you’re messing around building something, especially something that might not actually work anyway (i.e. most of my projects), you don’t want to go through all the trouble and expense of building or buying a power supply just for that one gadget. So I’ve had variable DC power supplies for a long time, and since my last one sort of … Well, it didn’t actually start on fire. I mean there weren’t actually any flames or anything. But it sure did smell funny.

So off I went scrounging around for a new one and eventually I ended up with this.

Should I confess that the first thing I did was immediately lose the damned manual for this thing? This is embarrassing, but yeah, I did. I remember that there was one. I remember taking it out of the box and setting it down somewhere. And when I turned around to pick it up and read it, it was gone. I think my house is haunted.

This puppy set me back about $60. It’s made in China… Well, just about everything is made in China these days, isn’t it? There are cheaper ones on the market, but with a lot of those the reviewers were, well, let’s just say the reviews were less than kind and leave it at that, shall we? The reviews for this one were pretty good, although you can’t believe that any more, either, because there are services out there which will, for a fee (of course) provide you with positive reviews for your products on just about any social media or sales site.

To be honest, I wasn’t sure what to expect from this thing. You can spend, heck, over $1,500 on a variable DC power supply depending on the quality, amperage and features you want or need, or as little as $30 or $40. So for a $60 power supply I would have been satisfied it was at least reasonably close to the voltage it indicated, and didn’t produce so much ripple that it looked like a roller coaster when I put it on the ‘scope. And not start on fire when I plugged it in and turned it on. Important, that. Not starting on fire I mean. One of the main questions you should ask is “How often does it start on fire?”

Let’s talk about power in general for a minute. If you already know all this stuff, just skip over this the following paragraph because you’ll find it boring. But there are people who don’t know, so let me give a very simplistic explanation of what’s going on.

We work with two entirely different forms of power. Both are electricity, yes, but the two systems, DC and AC, have entirely different qualities and uses. AC (alternating current) is fine for sending power long distances over power lines, running motors (some of them) and things like that, but for powering electronics, it sucks. Alternating current, well, alternates. DC doesn’t. And most electronics wants DC, not AC. That means almost all electronic devices that plug into your wall socket will have some kind of power supply which converts that 120V AC into a much lower voltage direct current which is fed to your device. Once upon a time this was done with bulky and heavy transformers, diodes and capacitors which took the AC, stepped it down to a lower voltage, and filtered out the sine waves, flattened out the curves, etc. and produced a constant DC voltage. Nowadays it’s mostly done with semiconductors and other lightweight components, but depending on the application you can still sometimes find equipment that uses the old transformer type systems.

So, back to the review of the Kuman.

As you can see from the photo it’s a nice looking little unit. It’s very light. I don’t think it weighs more than a pound or two. Fit and finish is nice. According to the specs it can put out up to 30V DC and handle amperages up to 5A. I plugged it in and hit the power button and…

Well, nothing happened. Uh ??? Oh, great. Was it DOA? I hit the power button a few more times and the display lighted up at last. I’m not sure what was going on there. That was the only time that happened, so I suspect there was some kind of coating or contamination on the contacts in the switch that wore off after I worked the button a few times. It’s worked every time since then.

It’s Alive!

I suppose the first thing I should have done was hook it to the VOM to make sure it was putting out power reasonable close to what the display claimed it was, but me being me, I just set it for 5V and plugged my clock kit into it and it worked just fine and dandy.

Then I thought oh, wait a minute, maybe I should check this thing out before I actually use it to try powering something expensive, so I got out the meter and hooked that up to it.

Voltages were within 0.01V or better across the entire range. Oh, I should point out that the Current knob doesn’t change the current it puts out, it limits it to a specific value. So you can set it to limit itself to only, oh, 1 Amp, let’s say if you want to do that for some reason. The voltage knob does indeed change the voltage. The knobs are a bit on the stiff side, but not enough to be a real issue.

The voltage tests were very good. According to my Fluke the voltage of the PS was generally within 0.01V or better across the entire range that the PS puts out.

Next it was time to hook the oscilloscope to it and see how bad the ripple was.

Ah, what is ripple, you ask? Well, okay, you didn’t ask but I’m going to tell you anyway. To explain that we have to go back to the difference between AC and DC again. If you want a detailed explanation you can scoot over to Wikipedia and read this, or if you can’t be bothered, well, I don’t blame you because it’s boring unless you’re into electronics.

AC current, the stuff that comes out of the plug in your wall, is a sine wave. Which is shown in this little graphic over there on the right that I just stole borrowed from Wikipedia. The red line shows how the AC current alternates over time, going from positive to negative, and doing so at about 60 cycles per second, or 60 Hertz. But as I said before, most electronics doesn’t like AC current and wants to be fed DC. Your electronics don’t want that current cycling from plus to minus like that, it wants a nice, flat line that doesn’t alternate at all.

Ripple.

So, to see how good a DC power supply is, you need to look at the voltages it is producing and how it changes over a period of time, like plotting it on a graph. And that is exactly what an oscilloscope does, measure voltages over time and plotting it on the display (graph). What you want to see on the scope is a flat line, not something like, well, this over there on the left.

So I hooked it up to my scope and this is what I got

And, well, that’s not bad at all, really. In fact, that’s a hell of a lot better than I expected it would be. The PS was set to 4V. You’ll see in the lower left corner than I have the scope set so each division is 2V, the line is two divisions up from center, so that’s spot on 4V. And the line itself is pretty much smooth.

Well, you see a tiny bit of hash. The line isn’t perfectly smooth. But I zoomed in farther and fiddled with the timing and other technical stuff that would bore you to tears (it did me) and found out that while there is a tiny, tiny bit of ripple, that hash you see on that line works out to a deviation of about 0.0014 volts. And while some purists might be irritated by that, out here in the real world where I live that’s pretty darned good, especially for a sixty buck power supply, and isn’t going to be an issue for anything I’d use this PS with.

So, let me wrap this up because I’ve been babbling along here long enough.

For $66 this is a nice little power supply. Well made, attractive, small, light weight, handles 0 – 30V, and up to a little over 5 Amps. Calibration of the display is spot on according to my meter. And as for ripple, that’s down to around 0.001V which is pretty good for a PS in this price range.

And – you can’t get it any more. At least not off Amazon where I got this one. Sigh… It’s listed as unavailable now. I have seen it available from other vendors, though. And I’ve seen units that look exactly the same except for the brand name on Amazon. But watch out because this same PS, although with a different brand name on it, is going for nearly $100 and you can get it for at least $30 cheaper than that if you shop around.

GF Builds Something – And It Actually Works!

Now if you’ve been reading this for a while you know there are two things I really, really like – gardening and fiddling with electronics. And when winter rolls in and shuts down gardening, that leaves electronics to occupy my time. Since I am still waiting for parts for the Great Radio Fiasco Project, I was looking for something else to play with and I ran across this on Amazon-

I like playing around with kits, but I hadn’t built one in ages because there aren’t a lot of them out there any more, and the ones that are on the market seem to either be for things I don’t want or need, or are geared for the kids STEM market and are pretty much useless. This one seemed interesting, though. And it was only fourteen bucks, so if it did turn out to be junk, I wouldn’t be out a lot of money. And it I might get an article out of it for the blog.

Let’s talk about kits in general, first. Once upon a time there was a very good reason why kits came about. Before the advent of things like printed circuit boards and semiconductors and all that stuff we take for granted these days, electronic devices like radios, record players, television sets, etc. were built almost entirely by hand, by workers who strung all of the connecting wires, soldered all of the components, etc. Building even a simple radio receiver required placing, by hand, dozens of individual components and hand soldering dozens, even hundreds of connections. Armies of individual skilled assembly people labored for hours at workstations to put these things together. Labor costs money. A lot of money. And eventually technologies like printed circuit boards and robotic assembly systems largely replaced those armies of workers, resulting in the ultra-cheap electronics we have today.

But back then, with labor such a huge part of the cost, someone came up with the idea of eliminating the labor entirely and just selling the parts and some instructions to people and they could build it themselves. The company still made a few bucks, and the buyer of the kit saved a lot of money by replacing factory labor with his/her own. And there were a lot of people willing to do this. Not just to save money but because a lot of people get a great deal of satisfaction from building things.

But as electronics became more complex with people demanding more and more features, designing and producing kits became increasingly expensive. At the same time because of robotic assembly lines and other advances in technology, it became cheaper and cheaper to produce fully assembled and tested electronics. It got to the point where making a kit was often considerably more expensive than just buying the thing outright. There are still kit makers out there, of course. But most of the kits I see these days are for cheap and pretty much useless little gadgets that you’d build and tinker with for a while, then shove it into a box until your children throw it away after you’re dead.

This looked like it might be interesting, though, and it was only $14 bucks, so what the heck. When you buy these cheap kits these days it’s something of a crapshoot. Reading the reviews can help, but with so many fake reviews, and reviews by, well, idiots, really, not even those are very helpful, I’m afraid. (I could probably do a whole column on just how to try to decipher product reviews on Amazon and other online vendors.)

This is what your $14 gets you. Do not despair, my friends. This is actually above average quality for cheap kits like this, and all of the essentials are there. BTW I highly recommend these silicon soldering mats. You can get ’em on Amazon and they not only protect your workbench top, they also resist burns, have compartments to hold small parts and generally keep stuff from getting scattered all over. This one has a magnetized compartment to hold screws.
The instructions were a single sheet of paper and were actually pretty good. If you take the time and read carefully, most of it will make sense. Sort of. There is a website you can go to for further instructions, it says on the sheet, but I found that the website didn’t actually exist. That’s not uncommon with these either. But by carefully reading the instructions, following the diagrams and knowing a bit about electronics, you can get through it. This is most definitely not a kit for a beginner, though.

When it arrived it was about what I expected. Instructions were almost certainly translated from Chinese into English by computer, but unlike a lot that I’ve read, they were actually useful and covered all the important points if you take your time.

Tools

Necessary tools are pretty basic.

Now before you get started you’re going to need some basic tools. If you’ve ever tinkered with electronics before you almost certainly have everything you need to put this sucker together. You’ll need a needle nose pliers with a fine tip to help place components. A tweezers will help too. Some of the components are pretty small. You’ll also need a wire cutter for snipping off the wires on components after they’ve been soldered onto the circuit board. You’ll need solder, of course, and you’re going to need the smallest diameter solder you can probably get. The solder I used was 0.032″ in diameter, 60/40 rosin core. If you use anything bigger than that you’re going to have a lot of problems with solder flowing places where you don’t want it.

You need a soldering iron, of course. Just about any hobbyist soldering pencil will work if it has a fine enough tip. I have a Weller variable temp soldering iron that I’ve had for years now. I like variable temperature soldering equipment because it lets me adjust the temperature to suit the type of solder I’m using, the size of the components, etc. They’re more expensive than a hobbyist soldering pencil, but not that much more expensive. This one isn’t in production any more, I think, but you can get a variable temp soldering iron for about $100 or less. A lot less if you shop around. Unless you use a soldering iron a lot, don’t spend a lot on one. What’s most important is that it has interchangeable tips so you can change the size of the tip to suit the work you’re doing. With this kit I used a very small spade shaped tip because I was working in rather tight quarters on this kit.

You’re going to need two more things. One is absolutely essential, the other highly recommended but not absolutely necessary.

If you do any kind of work on circuit boards you absolutely need something like this to hold it and let you get at the parts from different angles.

You need something to hold the circuit board while you’re putting everything together. You’re going to be holding your soldering iron in one hand, solder in the other, holding a part in place with your third hand, and holding the circuit board with your fourth hand… Hm? What? You only have two hands? Yeah, so do I, which is why you need something like this. It’s a Panavise circuit board holder and while it isn’t ridiculously expensive, at around $60 – $70, it isn’t exactly pocket change either. I do a lot of work on circuit boards so something like this is absolutely necessary for me. If you’re just slapping a kit together, you can get away with something a lot cheaper or even cobble something together on your own out of alligator clips and stiff wire.

The other item that is very nice to have but not absolutely essential is a light on an articulated arm so you can aim it where you need it, with a built in magnifier. A lot of the components are very small, and a lot of circuit boards are very tightly packed, and even if you have good eyesight it can be a real strain to work on some of this stuff without some kind of magnification and good lighting. A light like this on an articulated arm with a built in magnifier can be had for about, oh, $40 or so.

It may look complicated but it really isn’t. Just take your time, double check parts placement before soldering and read the instructions.

Now, on to the clock itself. Putting it all together isn’t extraordinarily difficult, but it is a bit fiddly. There are a lot of solder joints to make. There’s a 28 pin IC socket, two 8 pin IC sockets, 16 resistors, assorted capacitors, a few transistors, a surface mount LED and several other goodies that all have to be fitted onto that board and soldered.

A few words about soldering: I’m not going to try to teach you soldering here. I’ve heard people claim that soldering is an art. It isn’t. Soldering is basic physics. It is the application of heat to a connector causing the solder and flux to flow and adhere to the connectors to form an electrically conductive connection between two or more components. Anyone can learn to solder, but it takes some knowledge and a lot of practice to do it properly. If you don’t know how to solder, or are just learning, this kit probably isn’t the place to practice. There are a lot of solder joints, spaced very close together, and it’s easy to end up with solder bridges, spatter and other problems. So if you’re new to this I’d recommend you try something more simple. Run a search for “solder training kit” over on Amazon or look at the other electronics suppliers out there and you can find more kits that are designed to teach you how to solder.

Ooo, tiny!

Some of the parts in this kit are very tiny and can be difficult to deal with, like soldering headers to a very, very tiny circuit board with an SMD chip on it that has to plug into one of the sockets. And the LED on the board is surface mount. Don’t let that scare you.

I’ve been soldering for, well, probably for longer than a lot of you reading this have been alive, so I zipped through that pretty quickly.

Anyway, the whole kit is very well designed, certainly above average for this kind of thing. The circuit board itself is beautifully made, with outlines and labels printed on the board itself showing the position of the components. All things considered, this is one of the better kits I’ve seen.

Almost fully assembled. It went together quite well.

There were no missing parts, the instructions were decent, everything was well made. It is definitely a winner all the way around.

Even better, it worked the first time I powered it up! It requires about 5V DC and is intended to run off USB, but I just hooked it up to my variable DC power supply, turned on the power and away it went. It’s a really nice little clock, too. It has a photocell to adjust the brightness of the display depending on ambient conditions, a thermistor that lets it sense the temperature (the display cycles between time and temperature), has an alarm and it talks! Well, I’m not sure about the talking part because I haven’t hooked the speaker up yet. It comes with a clear plastic case that I haven’t put together yet. Eventually I’ll probably put together a power supply for it because I don’t want to have to run it off a computer’s USB port. I should have a 5V wallwart kicking around that would do the job.

Disclaimer: I do not get paid for reviewing products. I do not get special deals, free equipment, components or anything else. All the tools, equipment, parts, and everything you see here or I write about were purchased by me at full retail prices.

Catching Up With Stuff

First of all, there’s this…

MrsGF and I were coming back from her sister’s place and we saw this. The photos don’t do it justice. That sunset almost looked like an atomic bomb going off, lighting up the whole horizon with that single shaft of light extending up. We had to pull off and just stare at it for a while because we’d never seen anything like it before.

Sunsets and sunrises (when we can see them, usually the cloud cover is too thick) have been spectacular of late. I imagine that’s due at least in part to so much particulate matter being in the atmosphere at the moment because of all of the forest fires we’ve been having worldwide.

As far as the weather goes, well, it’s winter, and we have some snow, as you can see from the photos, but it has been, well, weird. Just like 2019 was. Temperatures have been well above normal this winter. So much so that the ice fishermen have been getting nervous because they can’t get out on the lakes. This late in the season the lakes and rivers should have enough ice that you can at least walk out on the ice, and in some cases even drive a vehicle out. But you couldn’t pay me enough money to make me risk walking out on the ice this year. Most of the rivers and streams are still mostly open with almost no ice at all.

Ice fishing is a Big Deal around here. Generally as soon as we get a couple of inches of ice on a lake you’ll see little huts springing up or guys in cold weather gear huddling over holes drilled in the ice hunting for elusive panfish like bluegills and crappies. They endure it because one, they think it’s fun, and two, well, if you’ve ever eaten a freshly caught pan fried bluegill or perch, you know why they do it.

But The big event around here in mid winter is sturgeon season on Lake Winnebago. During sturgeon season there are thousands of people out on that lake, with hundreds of cars, 4 wheelers and snowmobiles, hundreds of ice shanties full of people huddling over holes in the ice hoping to get themselves one of the biggest fish you can get in Wisconsin. These things get to be five, six feet long or even bigger, and can be well over a hundred years old.

But we need ice for that, and we don’t have any. Or at least not enough ice that you can trust it. Unless we get a cold snap that really freezes things up, I’m not sure if there is going to be much of a sturgeon season this year.

We may not have ice but we do have snow. Just had another 3-5 inches, much of which will probably melt over the next few days. But still, it sure looks pretty out there.

While it may be winter outside, MrsGF’s rose in the living room is blossoming again.

I have no idea how she does it, but I’m not complaining. Having roses growing here in the middle of January is huge fun.

The Great Radio Fiasco Project Update

Considering I’m lazy and about the most unambitious person around, I bet you figured I’d sort of conveniently “forgot” about that whole thing, didn’t you? Ha! I wish! Sometimes I’m more stubborn than lazy, though, and when I get a bug about something I get a bit obsessed, and that’s what happened here.

Anyway, that hasn’t been going very well because of stuff like this –

Ferrite rods that were supposed to be part of antenna coils for an AM transistor radio I’ve been trying to build.

One of the first things I discovered when I started doing some research was that I pretty much had none of the parts I was going to need. I may have had hundreds of diodes, capacitors, resistors, potentiometers, transistors and other goodies sitting on the shelf from other projects, but it seemed that none of them were what I needed for building any kind of radio receiver except for the most basic of items. So once I decided more or less on what kind of radio I was going to build, I had to order some parts. And as you can see above, sometimes it doesn’t go so well.

The main project is going to be a multi-band shortwave receiver, but I was also going to build an old fashion 1960s style AM transistor radio which uses a ferrite rod wound with wire as an antenna. What you see in that photo above is what was in the package when I opened it. Sigh… Don’t get me wrong, though. I order a lot of parts, and the vast majority of the stuff gets here in perfect condition. But every once in a while something like this happens, and all you can do is just sigh and go on. It doesn’t pay to try to do anything about this in this case. I only paid about $10 for them, the company is in China, and any chance of getting a refund or replacement is so slim it’s not worth the effort. On the plus side one of the rods is relatively undamaged with just a chip on the end, so it will work well enough for the AM radio.

But it does help to illustrate one of the problems I’ve been having, which is tracking down various parts. The days of being able to go to a local electronics or radio repair shop, or even Radio Shack, and picking up a couple of capacitors or an opamp or whatever are long gone. While I still do have a local Radio Shack (how I don’t know, but I do), it only carries the most common types of components, and I already got those by the dozens.

I need a germanium diode for one radio circuit I’ve been tinkering with. Do I have one in those boxes on the shelf with hundreds and hundreds of diodes? Of course not! The one I need is the one I don’t have, of course. And, well, you generally can’t order just one. So I ended up spending something like $15 to buy 50 of the dopey things. It’s like the robot vacuum cleaner I repaired a few years ago. I needed one tiny, tiny screw that held on the side sweeper brush. That was all that was left to fix it, just attach that stupid brush. Do you think I could find that damned screw? No. No one locally had it. I checked hardware stores, Radio Shack, auto parts stores, no one had one even close. I started looking online and found I wasn’t the only one having trouble find it. I finally did get one, but in the end the only sources I found for it sold them only in lots of 500. So I ended up paying something like $25 to get a single screw, and I now have a whole bag full of 499 tiny, tiny screws sitting in a closet somewhere that I’ll never use for anything else.

The same thing is often true of electronic components. You can’t get just one or two, you have to buy in bulk sometimes, and you end up paying $25 or $40 for a whole box of parts just to get one $0.75 component. The end result is that while the cost of the individual parts for this project is pretty cheap, I’ve ended up spending a significant chunk of money on this already because I often can’t get just one or two, but have to order in bulk.

But enough with boring you with that. Once I get further along with the radio thing I’m going to split it off to its own web page so it doesn’t clutter up the blog.

Catching Up

It’s been a while since I talked about what has been going on in the ag industry. And I’ve probably been babbling far too much about radio and other non-farming/gardening stuff lately anyway, so let’s take a look at the ag sector. And I’ll slip some radio stuff in at the end that you can ignore if you want.

USMCA (NAFTA 2.0) Passes the House

As I mentioned in a previous post the trade deal to replace NAFTA is finally done and being considered by Congress.. The House has passed one version of it now, with some minor changes, but it has yet to be dealt with by the Senate. It’s not likely it will get passed this year yet (it’s already Dec 21 as I write this) and considering what is going on in D.C., it’s anyone’s guess as to when the Senate will be taking it up. Despite all of the hype coming out of Washington, right now the agreement looks like it is going to be at least as bad as the original NAFTA was. There are some improvements in the protection of workers in Mexico and environmental protections, but other than that, it doesn’t really make many changes. It’s basically NAFTA 1 with a bandaid on it. The claims that it will create jobs for tens of thousands of people and boost the US economy are completely unrealistic. This is another of those deals where the only people who benefit from it are the big corporations and a handful of special interests, but that’s par for the course with agreements like these. The original NAFTA wiped out tens of thousands of jobs, drove a lot of US manufacturing into Mexico, and disrupted the Mexican economy, especially in rural areas. This one probably won’t be as disruptive, but it isn’t going to help much. You can go look up the analysis of the treaty yourself, but right now it looks like it is going to have little or no positive effects on the US economy, and might even be worse for us than the original treaty was.

Trade War Update

It looks like things might finally be calming down a bit with China on the trade front. The administration has been claiming agreements have been made and that China is going to start buying massive amounts of soybeans and other agricultural products from the US. And, well, no, they aren’t. At least not the quantities that they’re claiming in D.C. Some of the numbers I’ve been seeing are simply ridiculous. Things are getting better, yes, but don’t look to China to start importing massive quantities of anything from us. There might be some buys, yes, but I suspect most of those are going to be little more than token purchases with few exceptions.

China lost half of it’s entire pig production because of African Swine Fever. It seems to have finally gotten the outbreak under control, but it’s going to be years before things are close to normal. Most of the soybeans China had been buying from the US was going to pig feed. So it’s unlikely it will be making massive soybean buys to feed a pig herd that doesn’t exist any more.

One thing that has improved hugely for US agriculture is China increasing the amount of pork and chicken. Because of ASF China’s lost half of its pig production, which has caused food prices to increase and there is a shortage of protein. So China has increased its buys of US pork and it recently granted permits and licensing to Tyson to sell US chicken in China. While this will certainly help the pork and chicken producers in the US, this is going to be a temporary bump that will only last until China can rebuild it’s pig herds.

African Swine Fever

ASF continues to be a major problem not only in China, which lost over half of its pigs, but also throughout South East Asia. Serious outbreaks are going on in Vietnam and the Philippines. In Sumatra it’s killed about 33,000 pigs. It’s also been found in North and South Korea, Mongolia, Cambodia, and Myanmar, as well in eastern Europe and parts of Africa. Some people feel it’s only a matter of time before it hits Australia despite it’s extremely strict regulations. For some reason people keep trying to smuggle pork from the ASF contaminated countries into other places. Smuggling is an ongoing problem in the US. We confiscate tons of sausages and other pork products from these countries that airline passengers try to smuggle through in their luggage, and even whole shiploads of pork from them. Australia confiscated 32 tons of pork products just from passengers and mailed packages alone in the last half year, half of which was contaminated with the virus. The virus itself hasn’t been seen in the U.S. yet, but it is in the wild pigs in Europe which is making everyone over there more than a little nervous. The US has a pretty good wild pig population, and while they aren’t a big issue (yet) here in Wisconsin, the DNR has issued an advisory to hunters with just about any kind of hunting license to shoot wild pigs, no “season”, no bag limit, just shoot ’em. They’re a huge problem in a lot of states, causing massive amounts of damage. Plus they carry a lot of diseases. If ASF ever gets into the wild pig herd here we’re going to be in trouble.

It was a Rough Year in the Midwest


That’s not one of my photos over there. MrsGF’s surgeries and other things kept me from getting out with the camera, but that is pretty much how it looked around here this year, especially at harvest time. Water everywhere. We officially had the wettest year ever. According to one report I read the longest dry spell we had without rain was three days. That sounded a bit odd to me so I started digging through some of the weather data and it isn’t far from the truth.

By anyone’s standards, it wasn’t a very good year for midwest farmers. Almost non-stop rain made it difficult to get anything done. There were delays in planting, delays in harvest, reduction in yields, all because of the wet weather. Around here there are still a lot of soybean and corn fields that haven’t been harvested at all because of the rain.

Corn prices never broke $4, although soybean prices weren’t horrible. But on top of relatively low corn prices, we had propane shortages which made getting the corn dried difficult and expensive.

The only bright spot was that milk prices finally came up to a fairly decent level for the first time in years. Class III milk is currently sitting at over $19 on the commodities market, but it doesn’t look like it will stay there much longer. January and February prices are down to $17 on the futures market.

Housing Issues

As if farmers didn’t have enough to worry about, finding employees continues to be a major problem both here in Wisconsin and in the ag business throughout the country. And as if that isn’t bad enough, an increasingly serious problem is where the heck are your employees going to live even if you do find some? This is a problem for almost every employer around here, not just farmers. Chances are good that employees aren’t going to be able to afford to live anywhere reasonably close to where they actually work. There is virtually zero housing in this town that would be affordable for the average low income worker. And it’s not going to be getting better any time soon. The town is putting in a new subdivision, and is quite proud of itself for doing so, but it isn’t going to actually help the average factory or farm worker around here because all of those new houses are going to be in the $180K to $250K range. What we really need are apartments that rent for about, oh, $500 – $600 a month, not houses that will have $1,500 to $2,000 a month mortgage payments.

What’s happening here is that we have a larger and larger population of people who live here, but don’t actually, well, live here, if that makes any sense. Yes, their houses are here, but their entire lives are up in the Fox Valley area about 20 miles away (the cluster of cities and towns up in the corridor that runs from Appleton, Neenah, Menash, and extends up to Green Bay). They can’t afford a house up in the Fox Valley any more, but they can afford one here. So while this may be their residence, their entire lives are centered around the Fox Valley. They buy groceries there, go to restaurants up there, meet their friends up there, do all their shopping up there. So they may live here, but they don’t actually live here. They don’t patronize local businesses, don’t send their kids to school here, don’t participate in local social events, and aren’t really part of the community.

So not only do we not have housing that is affordable by the average person bolting together snowblowers for $14 an hour, we have an increasing percentage of the population of the town who aren’t really engaged with the community at all. Their residences are here, yes, but they live their lives up in the Valley. They almost totally disengaged from the community they live in. And as a result we no longer have a clinic, no longer have a real grocery store, no longer have a pharmacy… Well, you get the idea.

It’s especially difficult for the immigrant community who make up the majority of labor in low paying jobs like farming, manufacturing (they like to talk about how well manufacturing pays – yeah, right. Starting wages at the snowblower place are about $12.95 an hour with no benefits and technically they don’t even work for the company, but for a “temp” agency.) They’re glad to get the jobs and the employers are glad to have them because they can’t find anyone else to do the work. But where are they going to live?

The Move

I’ve been talking for a while about moving all my electronics gear, the radio equipment, etc. down into a new shop/radio shack in the basement so MrsGF can take over our shared office so she’ll have room for her own projects. She enjoys sewing, making things, and would like to do quilting, but her existing workspace is a tiny, virtually unheated room upstairs, and there isn’t the room for it up there. Plus its cold in the winter up there. And even with her new knees I don’t want her to have to go up and down stairs a lot. So she’s going to be taking over the office area and I’m moving into the basement.

Now that she’s pretty much recovered from the 2nd knee replacement, I’ve started moving the “big stuff” down there. I have my primary computer down there now (I actually have space for the drawing tablet now!), the big TS-990, the antenna tuner, etc. Much to my surprise, I actually remembered how all of the cables hooked up and when I fired it all up everything actually worked! First time that’s ever happened.

I still need to do a lot of work down there. I have walls that still need to be painted. I still don’t have the electrical straightened out. I need to add at least two outlet boxes on the wall by the computer and radios, plus I need a 240V outlet there for the amplifier. Not sure why because I haven’t used the amp in years, but would be nice if I could.

I didn’t show it in the photos because it’s a huge mess at the moment, but behind me and to the left of that photo is my work bench which is covered with misc. parts, test equipment, tools, bits and pieces of RaspberryPi computers and accessories and breadboards where I’m testing radio circuits intended for the receiver I’m building. And that leads us to…

Update On The Great Radio Fiasco Project

Nice soldering technique she’s got there… (This image is somewhat infamous. Can you see why?)

I bet you thought I conveniently ‘forgot’ about that project because I am the seventh laziest person in the state (hey, I’ve gotten better, I used to be third). I haven’t, though. I’m still puttering along with this thing, even though I haven’t even fired up a soldering iron yet. Mostly I’ve been doing research. There’s no point in reinventing the wheel. Considering that radio has been around for like a gazillion years, someone, somewhere, must have already published plans for a radio receiver that I could steal (cough cough) borrow, right?

I had some basic criteria in mind when I started this. First it had to be as simple as possible, something that just about anyone who, unlike the young woman in the photo up there, knows how to use a soldering iron without suffering third degree burns can put together. Second, it had to use easily available parts, stuff the average person could get from Amazon or one of the parts suppliers like Mouser. Third, it had to be cheap. I want to encourage people to experiment and build stuff, not blow the family’s entire grocery budget for the month on exotic electronics parts. Fourth, it was going to use “old school”, so to speak, construction techniques and components. No printed circuit boards, no ICs, no SDRs, no surface mount devices, etc.

And fifth and possibly most important, it had to be a genuinely useful radio receiver that people could actually use. There are dozens, even hundreds of plans out there of various types for things like crystal radios and one transistor receivers and other nonsense that… Well, okay, so they might work, under absolutely ideal conditions, with a great deal of fiddling around, and if you live right next door to a 100,000 watt transmitter. But in the real world none of those actually work very well, if at all.

Anyway, I’m looking at various ideas and sketching some things out and doing some experimenting, and hopefully in a short (short? Ha!) time I’ll have something to show for all of this. Hopefully something that actually works. What’s been discouraging is that the schematics and projects I’ve found often contain such basic, fundamental mistakes that it makes me believe that the author never actually built the project himself and just, well, stole it, to be blunt, from someone else who also hadn’t actually built it either. I’ve been seeing things like electrolytic capacitors installed backwards, emitter and collector pins on transistors reversed, wrong pinouts shown on ICs like opamps and similar basic errors that should have been caught if anyone had bothered to actually look at the schematics.

And that’s it for now.

Old Radios And What To Do With Them

Because people know I like fiddling with radios, sometimes people give me old radios they don’t want or that don’t work in the hopes I can do something with them. I thought you might be interested in how your grandparents listened to radio, so take a look at this beast. I’ve had this thing sitting on the shelf for a long time now and finally decided to pull it out and deal with it because I need the space.

There is a technical term for radios like these: Junk

I have a term for radios like these – junk. It’s a shame, really. Once upon a time this was probably a nice little multi-band radio receiver. The rust on the chassis isn’t a big deal, that’s pretty common and can be dealt with, but this thing has some other, much more serious problems. It is unrepairable, but there are some useful parts I can salvage.

I looked all over this thing and I can’t find a manufacturer’s name or brand name. If I did some research I could probably find out what company made it originally, but there’s no real point because it isn’t worth the effort. There might have been a paper label that fell off long ago.

Or it’s entirely possible there never was a maker’s mark stamped on it. It wouldn’t be that uncommon. Like today, the name you see on the case of a piece of equipment isn’t necessarily the name of the company that actually made it. Back when this radio was made, big retailers like Sears and others would contract with manufacturers to produce equipment that the retailer would sell under their own brand name. Sometimes they’d buy the electronics from one company, buy the case from another, assemble it somewhere, slap their name on it and sell it as their own. It’s very common even today.

You’ll also note there is no outer case for this unit, either. That’s how it was when I got it. I find that fairly often today as well. Often the outer cases were made of cheap plywood with a thin veneer of nice wood on the outside to make it look fancy, and the cases would never last long. The plywood would begin to delaminate if it got damp, and they’d get damaged easily. Or if the case was in good shape, it’s fairly common for people to strip the old electronics out of it and throw them away and use the case as a decorative item or even build a modern radio into it.

Now if that radio up there looks complicated with the big transformer, variable capacitor, all the tubes and coils, well, you ain’t seen nothing yet. Wait until you see what’s underneath:

That – that mess up there, my friends, is what all radios looked like under the cover back in the day. When this radio was built, there were no transistors or solid state devices. This radio even predates printed circuit boards. Every single bit of this radio was built by hand. All of those components and wires were soldered in place by some poor schmuck who stood at a work station all day long doing nothing but soldering bits and nubbins and gubbins together.

Radios back then were very, very expensive, partly because they had to be all assembled by hand. It’s hard to tell how much this particular radio cost when it was new. Let’s say it was made in 1950, and it cost about $60 back then, which was a fairly common price for a decent, but not top of the line, multi-band receiver back then. That doesn’t sound like much until you take inflation into account. Accounting for inflation, that radio up there would sell for about $640 today. Ouch!

Another reason they were expensive was the sheer number of parts necessary, and, of course, these things:

Those are vacuum tubes. Now there is a wave of nostalgia going on about tubes, especially among stereo and audio aficionados who claim that sound amplifiers that use vacuum tubes sound “better” somehow, than those that use solid state devices and, well, it’s all BS, really. Vacuum tubes, to put it bluntly, suck. (Vacuum? Suck? Is there a pun in there somewhere? No, don’t go there…)

Sidenote: To give you an idea of how ridiculous this whole tube amplifier thing has gotten in the audio market, let me give you an example. An acquaintance of mine had a friend bring over a tube style stereo amplifier that had some problems. The four prominently displayed vacuum tubes on the top of the unit weren’t lighting up. But interestingly enough, it was still working as a stereo amplifier. Which it shouldn’t have been if the tubes were actually doing anything. Which they weren’t. The only connection to the tubes was a line to feed power to the filaments so they’d light up. None of the other pins were even connected. The tubes were being used for nothing but decorative lighting.

Vacuum tubes look really cool and retro and all that, but as actual electronic components they’re horrible. They suck up huge amounts of power, give off large amounts of heat, are physically large, often require massive transformers to provide high voltages, are expensive to make, and as soon as solid state devices began to be mass produced, radio manufacturers abandoned them as fast as they could redesign their equipment.

As I was looking this thing over, I found it had a rather serious problem. This:

If you look close at that photo up there, you’ll see what I mean, charred parts, melted wires – basically this thing was damn near on fire at one point. Probably some component failed, overheated, and started the insulation on the wiring on fire.

So what am I going to do with this thing? There are some parts I can salvage. The tube sockets are still good, and they’re hard to come by, so I’ll pull those out. The tubes themselves – I’ll keep ’em but I don’t know if they’re any good. They do make nice decorative items, though. Some of the big rotary switches may be salvageable as well. The actual electronic components aren’t worth even bothering with. A lot of them probably would still work within their original specifications, but without tearing them out of the circuits and testing them it’s impossible to tell, and frankly it isn’t worth the effort. Would you use a 50 or 60 year old resistor in a project you’re building today, even if a meter said it was within specification? I wouldn’t. But I am hoping I can salvage this:

These big air variable capacitors were (and still are) used for tuning, and they’re damned expensive if you have to buy them new. So I’m hoping that once I get this one out and cleaned up it might still be useful. It looks in pretty rough shape with some significant rust issues, but that seems to be limited to the nonessential parts. I can’t tell until I can pull it out and test it. I’m hoping it will work because a new one like this sells for about $50.

Is Repairing Old Radios Worth It?

Well, I’m not going to give you a whole lecture on antique electronics, but the answer to that question is … Well, to be perfectly honest, probably not unless it is something you personally enjoy.

My SX-43 isn’t worth much, maybe $100 – $150 if I wanted to sell it, but it is a really cool looking radio. And yes, it works quite well. This one has the advantage of receiving not just the ham bands, but also the AM and FM broadcast bands.

Financially speaking repairing and refurbishing old radios is almost never worth it. You aren’t going to get much money for them unless they are something rare or exotic. Often the people who buy antique radios aren’t so much interested in them working, they want them for decorative items. Considering the amount of time, effort, research, and the difficulty in finding some parts, you’ll be lucky if you break even if you try making money off restoring old radios. Fiddling with old radios is sort of a hobby of mine, but to be honest I don’t do it very often because I generally find it more rewarding to spend the time on other things.

Damn, I need to paint that wall and those shelves. Sheesh that looks like crap. Anyway, this is one of my other old receivers, an SX-96. I didn’t have to do anything to this one. The person who owned it before me completely refurbished it and it works probably better than it did when new. This one also isn’t really worth that much. I’ve seen people asking a lot of money for this model, but even in near perfect condition it isn’t worth more than about $125- $175

There are exceptions, of course. Old amateur radio equipment is one of them. Sometimes. It depends on the condition of the unit (external physical appearance is very important in this market, almost as important as it’s actual functionality), the desirability of the particular brand and model, and, of course, whether or not it works up to its original specifications. I’ve seen some old Collins, Hallicrafters, Hammerlund and the other “legendary” brands of amateur radio equipment being sold for eye-wateringly high prices. But it depends on the model, condition, etc. While at the same time other equipment of the same era, from a lesser known manufacturer, may sell for a fraction of what the popular models sell for, even if electronically speaking the off-brand was superior.

Replacing things like capacitors, resistors and other common components is fairly simple and cheap. You can almost always use easily available modern day equivalents. But things like vacuum tubes can be a serious issue. I don’t think anyone makes vacuum tubes except for a few Chinese and Russian companies, and they only make a very, very small variety of tubes, mostly for amplifiers. There are used ones out there, maybe, and some “new old stock” (NOS) laying around, but they’re getting harder and harder to find, and more expensive. If you can find them at all. Transformers can be a problem too.

Some of these old radios had some serious safety issues as well. I really doubt if some of these old radios would pass modern UL safety standards. So there are liability issues here as well. If a radio you repaired or restored causes a problem later, like someone gets an electric shock from it or a 60 year old component fails and starts a fire, could you be held liable and get sued?

I don’t want to discourage you from dabbling with repairing and restoring old electronics, but I do want you to know that you probably aren’t going to make any money at it, and if you do try to sell the equipment you repair, there could be legal issues as well. It can be a fun hobby but you need to be aware of the potential problems as well.

Amateur Radio Stuff: What’s Going On

It’s been quite a while since I mentioned mentioned amateur radio, but that’s been because of a lack of time, not a lack of interest. Things back in the radio room are about to get — interesting, as they say. I’m facing a situation that every amateur radio operator does sooner or later, having to tear down everything.

IMG_0356
It’s even worse than this looks here. There are two more desks crammed into that room, an old drafting table, three book cases, a work table… It’s bad.

The radio room is, to put it bluntly, a mess. There is equipment piled everywhere, test gear shoved onto book cases or in drawers, amplifiers and radios laying on the floor, piles of printouts of manuals, booklets, stacks of mystery electronics in those anti-static bags, drawers full of connectors and parts, coax jumpers, meters, microphones, tools three full sized computers, three printers, all my Raspberry Pi stuff. There are cables and wires snaking along behind the desks, running into holes in the floor. The operating position is too cramped and awkward. The old drafting table my solid state amp is parked on it is too tall and too small, the desk the radios are on is in poor condition. The list goes on and on.

So everything is going to get torn down, moved out of the room. The room is going to get a good cleaning, etc. Then I start trying to put everything back together.

What sparked this is that MrsGF found a huge old teacher’s desk, made out of solid oak, for $50 at St. Vinnie’s. MrsGF already has one of these and I’d been looking for one for a while. The finish isn’t very good and it has it’s share of scratches and scars, but it is rock solid, lots of big drawers, and is long, wide and deep. That is going to get moved in, some of the old, particle board crap I’ve been using is going to go away before it collapses under the weight of the equipment, and then I can start trying to put everything back together again.

If I can remember how to do it… Meters, jumpers, wires, coax. You’d think I’d know enough to label all that stuff, right? I mean I have a label maker laying right there. But no, of course I didn’t. Sigh…

Anyway, Monday is the day when I start all of this. It’s taken me three years to accumulate this mess and put together that rat’s nest of wiring behind the desks, so this could take a while…