Catching Up


Covid

So on Dec. 23 MrsGF got an unwelcome Christmas present, Covid. Don’t worry, she’s doing fine. She still has a nasty cough but she’s feeling much better and has been testing negative for two days now so we’re hoping it’s all over. Somehow I avoided coming down with it. I took precautions, staying in the basement most of the time, eating our meals separately, wearing N-95 mask whenever I was upstairs, etc. But even so I figured I’d come down with it too. Well, I still might. She’s been testing negative for 2 days now. They say that the incubation time for the current strain is about 2 – 4 days, so I’m not going to be able to relax much for another couple of days.

And me… I’m a hypochondriac. All through the pandemic, every time I coughed or sneezed or my head got stuffed up, I was convinced I had Covid myself. And I have some pretty nasty upper respiratory allergies on top of it, so I pretty much have mild symptoms that could be mistaken for the early stages of Covid all the time.

The Great Pi Famine

RaspberryPi 4. I’m still amazed that they can squeeze a complete quad core computer with 8 gig of RAM, hdmi video, sound, 4 usb ports and WiFi into a package this small. Storage on this one is a 128 gig micro-SD card.

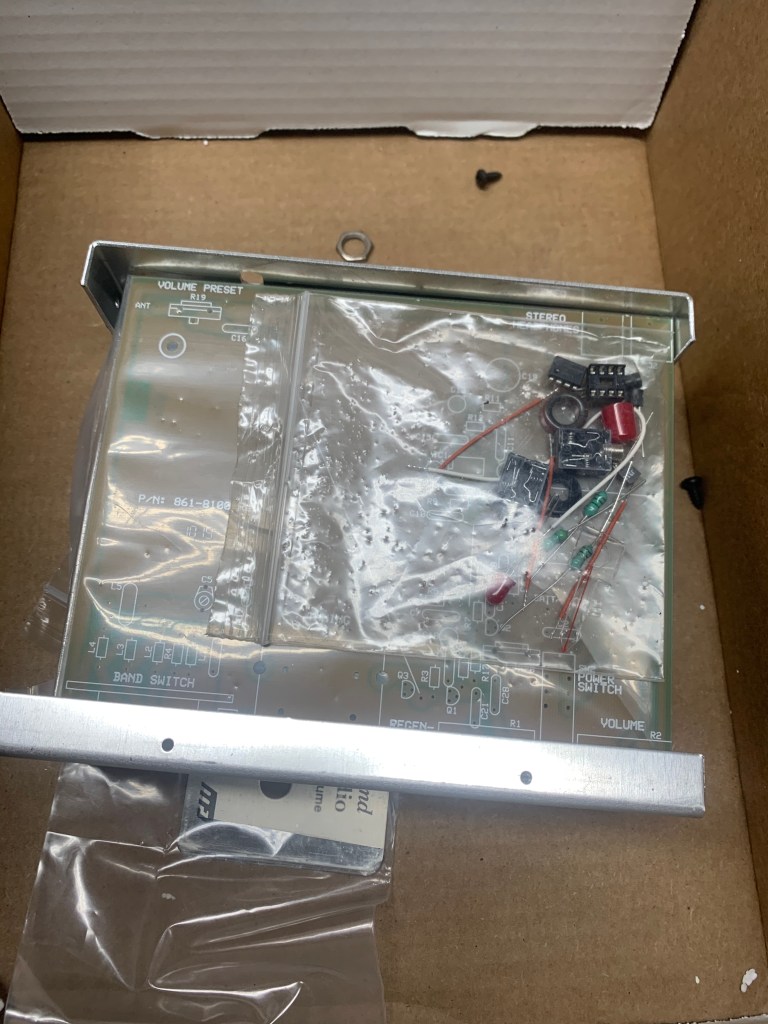
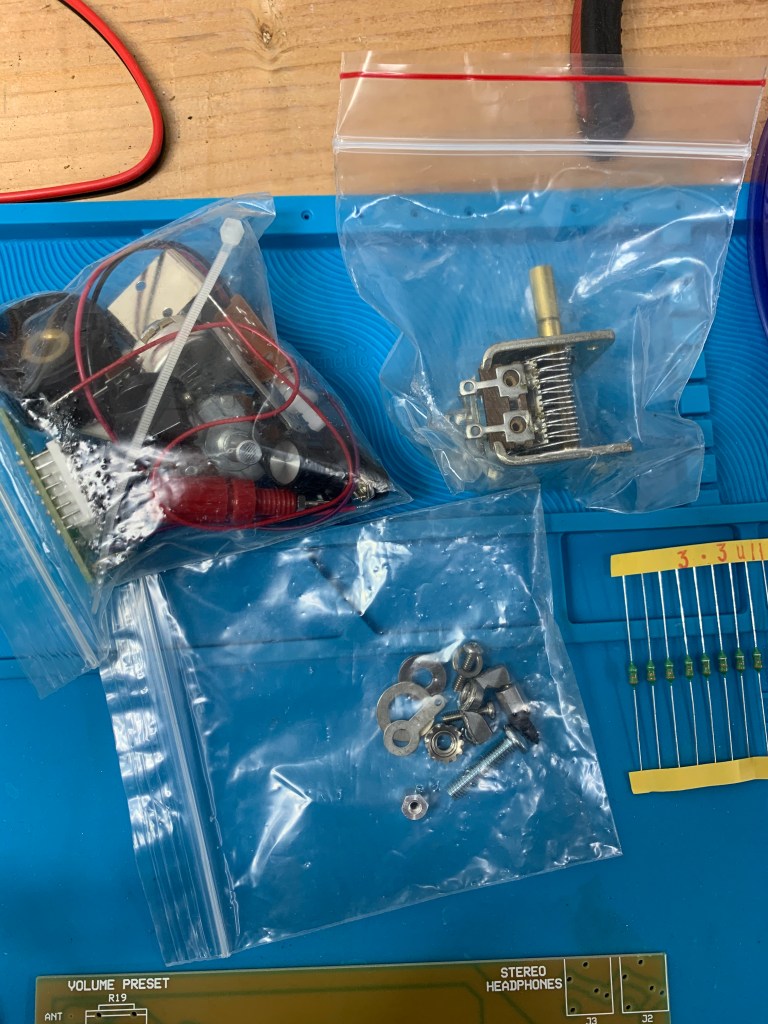
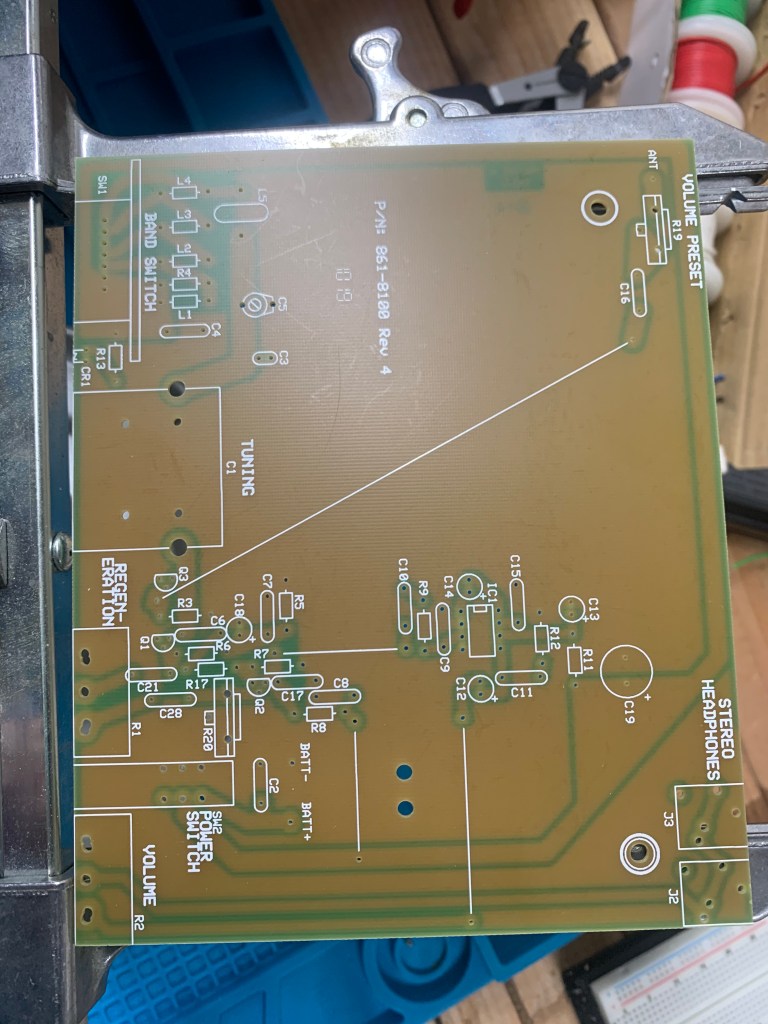
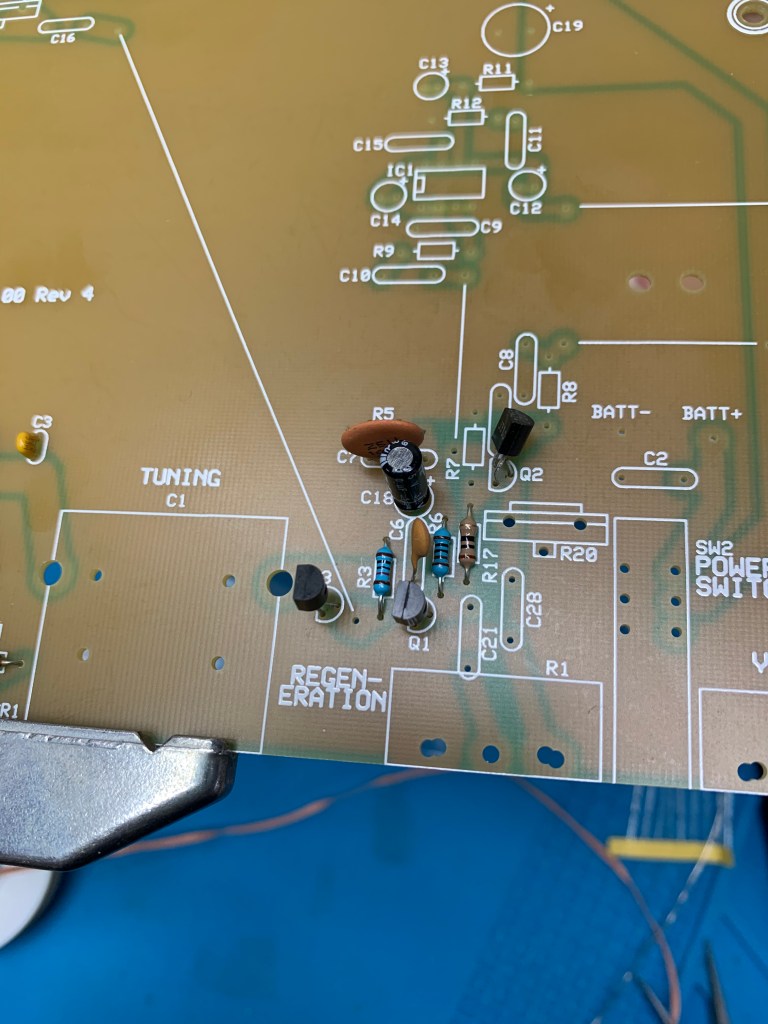
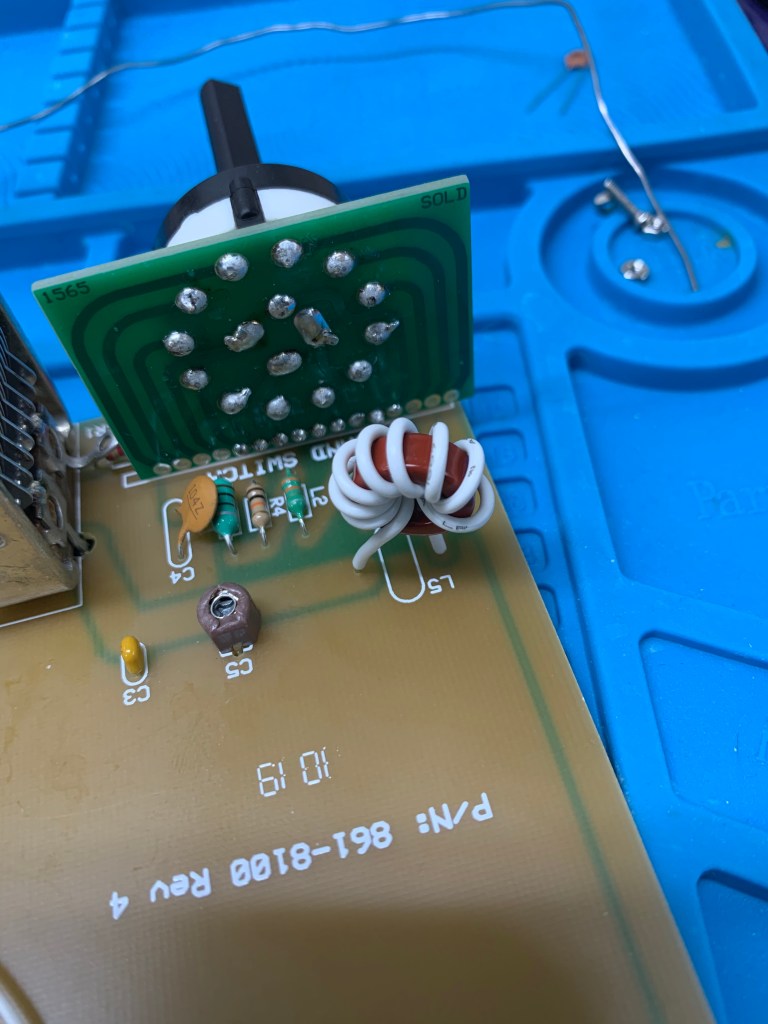
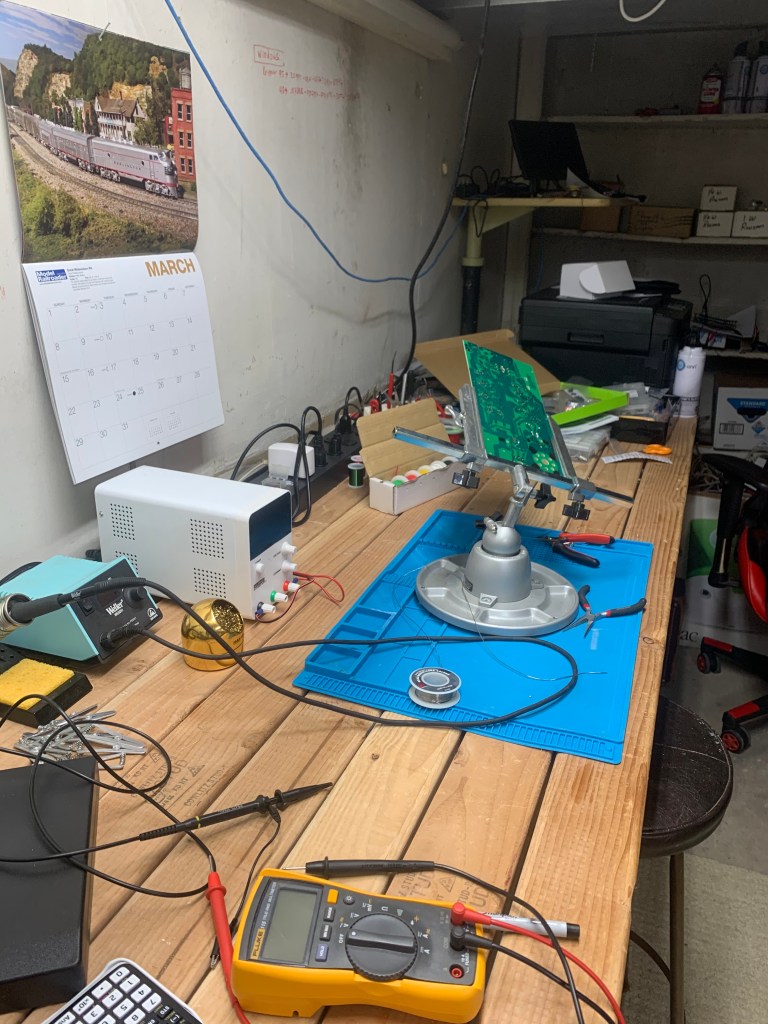
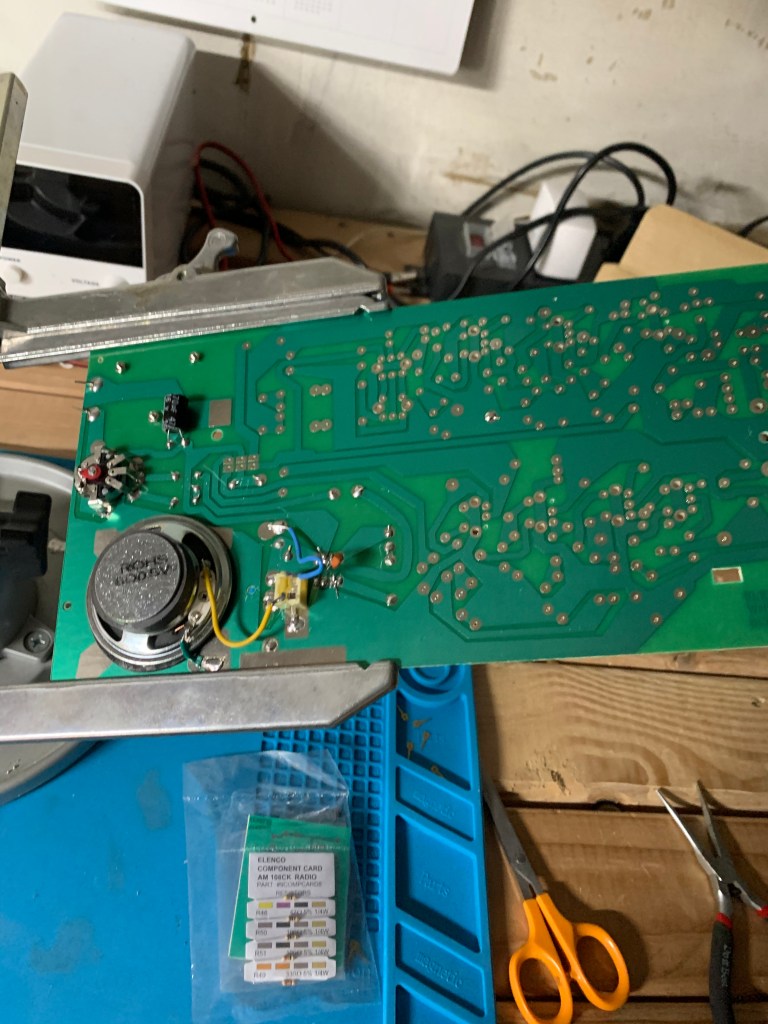
If you’ve been following this blog for a while you know I like to fiddle around with electronic gadgets and gizmos and tinker and build stuff. One of the mainstays of the electronic tinkerers out there as a controller of electronic equipment of all types has been a tiny little single board computer called a Raspberry Pi. They’re available in a variety of types ranging from tiny little units that are used as controllers for a variety of gizmos, to a full blown Linux computer that’s smaller than a deck of cards, the Raspberry Pi 4 and now the new, more powerful Pi 5. There are four things that make them attractive. They’re small. Very small. They are designed to make it easy to interface them to the outside world in order to use them to control robots, motors, actuators of various types, collect data from sensors, etc. And three, they’re relatively easy to use, easy to program and enormously powerful for their size.

And the fourth thing, they were cheap. Like really cheap. The Pi 4 which is basically a full blown Linux (using a variation of Debian) computer with up to 8 gig of RAM, built in WiFi, HDMI video, USB 2 and USB3 ports sold for about $40 or even less. If you ever wanted to play around with Linux to see if it could be a viable replacement for the ever increasing horror that is Microsoft Windows, a Pi 4 is an easy and cheap way to do it. Just plug in a monitor, keyboard and mouse, get yourself a good introductory book on the Pi computers, and away you go.

Sidenote: I was just reading an article the other day that illustrated just how much computing technology had advanced in the last few decades. Someone pointed out that the Raspberry Pi 4 is six times more powerful than the original Cray 1 “super computer”.

Note that I used the past tense there. They were cheap. Then the pandemic hit, supply chain problems hit, demand for Pis increased because people were stuck at home and were looking for things to do, and, perhaps most importantly, the profiteers struck. Scalpers, profiteers, scammers and the like snapped up every Pi they could get their hands on, and then turned around and re-sold them for three, four times their original cost. I saw Pi 4s, a computer that sold for about $35 – $40 originally, being sold for $250 or more.

Pre pandemic I had a half dozen or more of the things laying around the house. But I gave them to a friend who was an electronics experimenter and solar power experimenter before the drought hit. Get them back from him? Yeah, well, he lives in Barcelona half the year so that ain’t gonna happen.

After the pandemic, when I couldn’t get them for a reasonable price any more, I switched to using Arduinos for the fiddling around I was doing. But while they and other microcontrollers are extremely useful and fun to play with, they aren’t computers.

But now prices have finally started to settle down. They’re still over priced when compared to what they were before the pandemic, about $75. But that’s cheap enough that I’m willing to get one and start playing around with it.

To make a long story short the nice fellow from UPS dropped one off here (two, actually) and I spent a couple of hours setting it up, updating the software and fiddling around with it last night. So you might be seeing some more stuff pop up here concerning Linux and the Pi in the future.

If you want to fiddle around with one of these yourself and you’re new to the Pi I’d recommend you get something like this from a company like CannaKit in the photo below.

No, I don’t get a kickback from CanaKit or anything like that. There are a lot of disreputable vendors out there, but I’ve bought stuff from CanaKit several times now and they provide exactly what they advertise, ship quickly and their prices, while a bit high, aren’t horrible.

It includes everything needed to get the thing up and running. The Pi 4, a power supply for it, HDMI cables to connect a monitor, a case for it along with a tiny cooling fan, heat sinks for the CPU and two other chips on the board, and a micro-SD card with the operating system pre-installed. It’s more expensive than buying a bare bones Pi but it has everything needed to get it operational. Just plug in a keyboard and mouse, and a monitor.

Lettuce In December

From about the end of may through September we had fresh greens whenever we wanted them out in the garden. All we had to do was go outside, clip off some of the lettuce mix we’d planted, and graze to our heart’s content. I really missed that. And then I was in the basement doing stuff and saw the little portable green house we used to start seedlings in the early spring with the grow lights and heater and thought why the hell aren’t we using that to grow some fresh greens? So we did. And this is what we ended up with.

We didn’t put in a lot because we weren’t sure it was going to work, but as you can see it worked very well indeed. We got more than enough for a couple of good sized salads plus a bit more. And yes, it tasted very, very good. 😊

Other Stuff

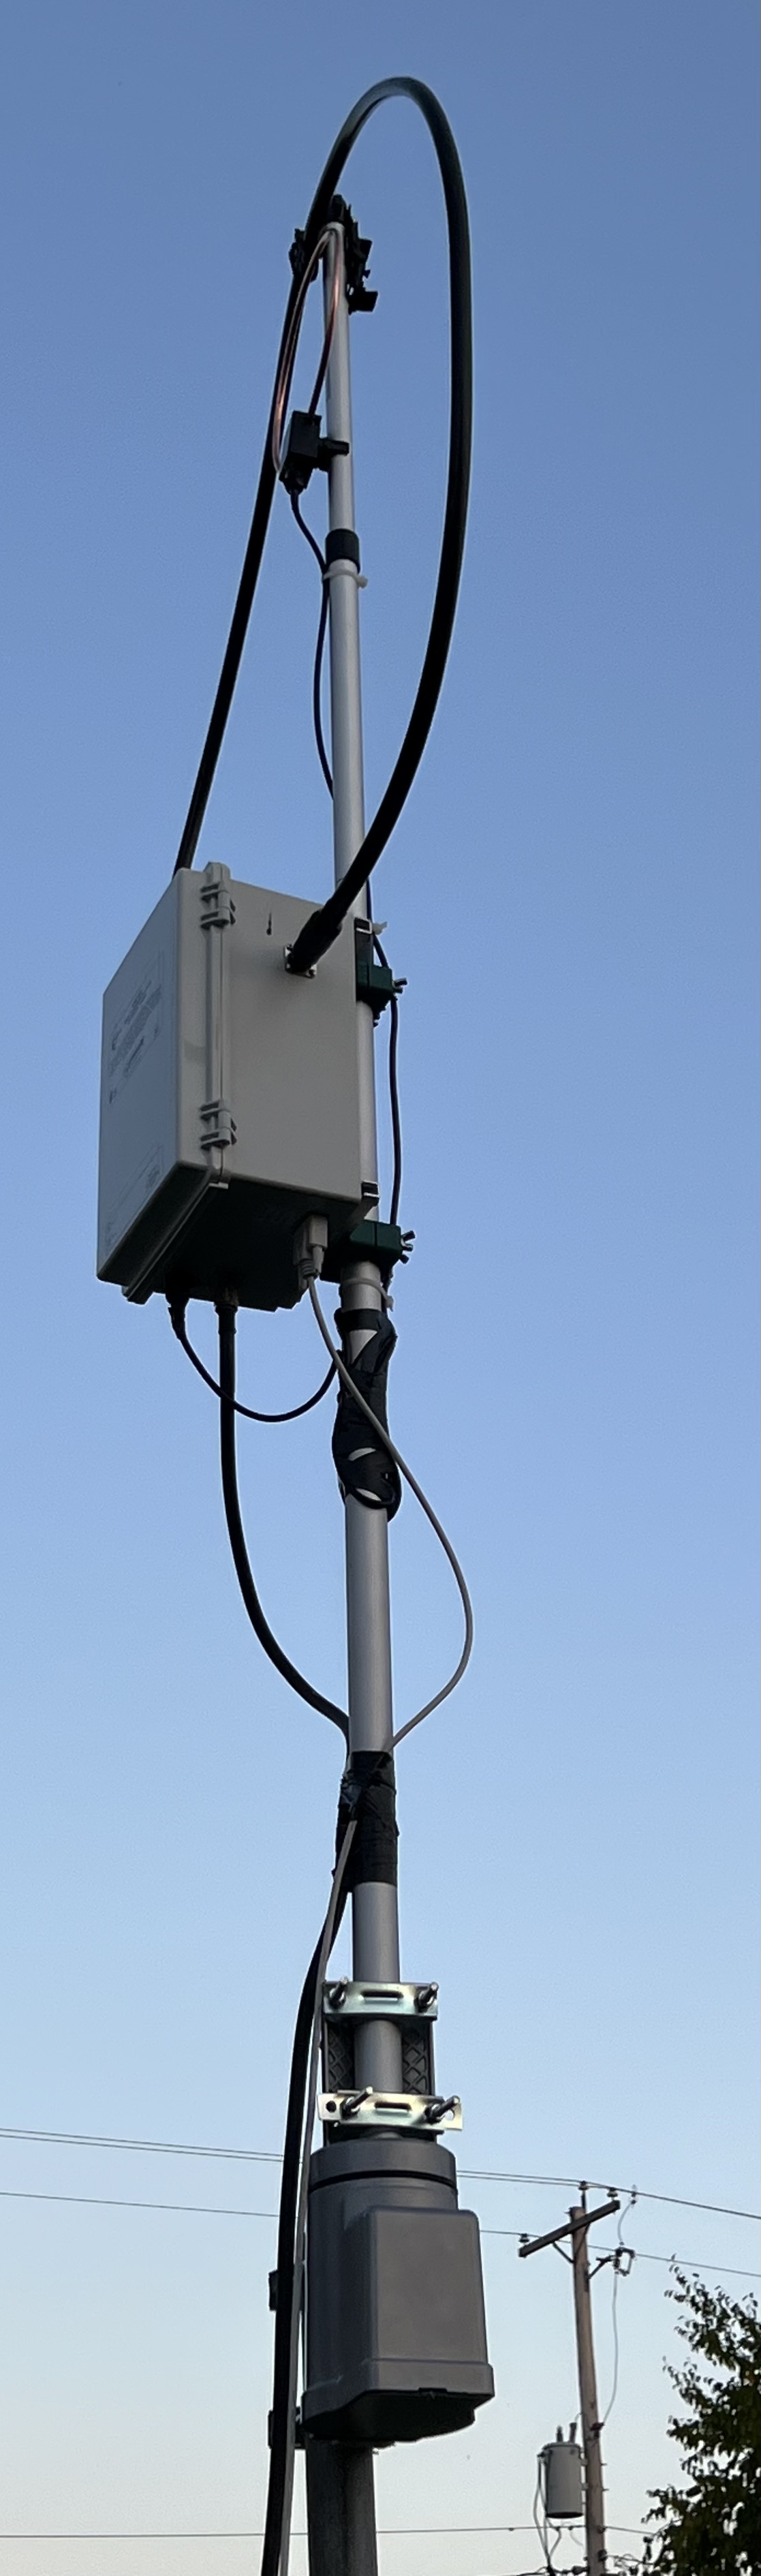
The PreciseRF magloop antenna continues to work surprisingly well for me. I was concerned about it’s survivability when set up out in the weather but it’s been holding up well despite the rain, snow and colder weather we’ve had. But the real test is yet to come when it gets really cold here. It’s been abnormally warm here all through December. Even now, on Jan. 3 at 4:30 AM, it’s 35 degrees out there. We’ll see what happens when it’s -30 and blizzard like conditions.

Weather

If we ever get cold weather, that is. Temperatures have been running well above normal here. I vividly remember one New Year’s Eve before MrsGF and I got married. When we got out of the pub where we’d spent the evening it was -34F with a stiff wind and everything, including the car, was frozen solid. We spent the night at a friend’s house and managed to get the car started the next morning, somehow.

It was brutally cold for weeks that January. On Jan 1 after I got back to the farm I had to put a new alternator on one of the tractors. It was so cold that the insulation on the wires the old alternator shattered when I bent them. I managed to get the tractor running well enough to pull it into the heifer barn and then close everything up. 30 or so young heifers put out a lot of heat and it was warm enough in there that I could get the job done. The heifers thought it was great fun. They were all crowded around watching me.

What’s Coming Up

I got a woodworking project going. This is a joint project by ES (Eldest Son) and myself. One of his hobbies is doing stained glass so I’m making a backlighted frame for a piece he did. That promises to turn out to be pretty interesting. More about that when it gets closer to completion. That’s still in the planning stage.

One thing, though, dear sweet lord has good quality lumber gotten expensive! I’ve been spoiled. Years and years ago I bought a whole pickup truck load of very good quality, kiln dried, white oak about 1 1/4 inches thick, 6 feet long and of various widths that ranged from 6″ up to 13″. That’s pretty much run out now so I had to actually go out and buy wood and prices of good quality, furniture grade hardwood are absolutely nuts.

I don’t really have plans for the Raspberry Pi. It’s something I wanted just to be able to play around with Linux and mess around with. If something develops from that I’ll let you know.

Dreams

Dreams are weird. At least mine are. I was up at 3 AM this morning and just couldn’t get back to sleep so I came out here dealt with my email and then started writing this up. I do vividly remember the dream I was having when I woke up. I rarely remember my dreams, but when I do they are often extremely vivid and detailed. This one was like that.

MrsGF and I were having dinner at a rather fancy restaurant with a very nice young couple from India. I have absolutely no idea who they were or why they were in this dream. Nice people, though.

When MrsGF and I left we went out into the parking lot and the car, my Buick, was gone. We thought we mis-remembered where we’d parked it so I pulled out my phone to use the app that tracks my car. And my phone didn’t work. It had been infected with some kind of malware that just kept cycling through obnoxious ads over and over again.

There was a strip mall nearby and a T-Mobile store was there so we walked over there. They were about the close but a nice young woman kept the place open. She got me a replacement phone right away, restored all my stuff and got the phone working. We went back to the parking lot and activated the tracking app and yeah, the car was gone. We called the police and they found it, and the thief, rather quickly.

Elon Musk had stolen it. He’d been at the table behind us and had overheard me making disparaging comments about how utterly hideous his “cybertruck” looked so he’d gotten huffy, hacked the electronic systems in my car and took it.

Still, it’s better than the vivid, realistic dream I had about painting the garage. That was the entire dream, painting the garage. That was it. It was so boring that I bored myself awake.

Let’s Talk Antennas: PreciseRF HGR QRO-A Magloop Antenna

Hams will immediately recognize this thing up there but the rest of you are wondering WTF I have perched in the air outside of the house. Read on if you want to know more.

If you’ve been following this blog for a while you know that I’m an amateur radio operator. And one thing all amateur radio operators (Or hams, as they call us.) need to deal with is antennas. And the one up there in that photo just went up here at grouchyfarmer.com’s headquarters and is what I want to talk about.

For a lot of people, including, unfortunately, a lot of amateur radio operators, antennas are a strange and arcane mixture of magic, sorcery, science and blind luck. That’s not true, of course. How antennas work is hard science. We’ve been using antennas for well over a hundred years and how they work is well established. But because the effectiveness of antennas is affected by a wide variety of external factors and operating practices, the experiences of individual hams with exactly the same antenna can vary wildly. This, along with a lack of understanding of exactly how antennas work and a strong aversion to mathematics has resulted in a lot of… I hate to use the term nonsense, but that’s an accurate way of describing a lot of what I see turning up on Youtube and various amateur radio oriented forums.

And of all the antennas out there that hams commonly use, the one that is surrounded with the most nonsense is probably the magnetic loop antenna. According to the self appointed experts, magloop antennas are either the best things ever and deliver absolutely magical results, mediocre at best, or they don’t work at all and you’re better off wiring the rain gutter on your house to your radio. I’ve been playing with magloop antennas for years, both commercially made ones and ones I’ve cobbled together myself. I reviewed one back in 2019 if you want to click the link there and go back and look at the one I own that I use for portable operations. And I’ve had good results with both the Alpha I bought and my home brew copies.

Ultimately it isn’t a matter of which is the best antenna. There is no such thing as a perfect antenna. it’s a matter of which one will do what you need in the situation you are in. The big advantage of magloop antennas is that they are small, relatively unobtrusive and work pretty well, even indoors in some circumstances. This makes them attractive for people who don’t have the space to put up something like my 135 ft long OCFD or a huge beam antenna, or who live in an area where local zoning ordinances or home owners associations restrict the size and placement of antennas or even prohibit them entirely. Something like a magloop antenna may be the only option some people have.

How do they work? I’m not going to launch into a pages long lecture on that. There are very good resources out there available for free on the internet so I’ll leave it to you to do your own research. I’m going to restrict my comments to the HGR-QRO-A MLA .

And before I start in I should point out that I have no relationship with PreciseRF except as a customer. I receive no compensation from them in any way whatsoever. The antenna was purchased through their website and was paid for out of my own pocket. I don’t get free stuff or make any money off these reviews. And considering the conclusions I come to at the end of this review, PreciseRF is never, ever, going to send me free anything. This antenna… It works very, very well as an antenna but there are some serious issues with it that are very troubling. But I’ll come to that later.

If you read CQ magazine or QST, you’ve probably seen this ad:

This is what I’m talking about, the HG series of MLAs from PreciseRF. Specifically the one of the far right. The HGR QRO-A MLA antenna. And yes, this thing really costs $3,000. Let me repeat that. Three. Thousand. Dollars. For an antenna. And yeah, I bought one.

Well, it seemed like a good idea at the time…..

So why is this antenna worth three grand? It’s because of that “QRO” bit they stuck on the name. QRO is one of the “Q-codes” that amateur radio operators used as abbreviations back in the days when morse code was pretty much the only way you could send information long distances. Originally it was one ham telling another to increase the power of their transmitter so they could hear them better. But it has also come to mean someone operating a transmitter at full legal power allowed by the FCC, up to 1,500 watts. That’s why this thing is so expensive, the full power bit.

It is hard to make a magloop antenna that can handle more than a few watts of transmitter power. My Alpha MLA can handle up to 100W using SSB or CW on some bands, but I use digital modes and it can only handle up to about 20W using digital. The reason why, well, it’s complicated. MLA antennas can generate some pretty serious voltages internally when they are in operation, and the commonly available variable capacitors used in the less expensive ones can’t handle those kinds of voltages without arcing and causing damage. If you want to use higher transmitter power to reach out farther with your signal, you need to resort to using electronics, circuits and a vacuum variable capacitor that can handle those voltages. And that takes money. A lot of money.

The HGR QRO can handle up to 1,500 watts SSB or CW, and up to around 400 watts with digital modes. I know of only two MLA antennas that can handle that kind of power, this one and one that’s even more expensive than the HGR.

But let’s get back to this specific antenna. I don’t do “unboxing” or assembly reviews, especially for something as easy to put together as the HGR is. Took me all of twenty minutes to assemble it. There is a collapsable ‘twist ‘n lock’ mast that everything clips or bolts to, a cable that goes from the copper loop to the big gray “box o’ gubbins” which contains the vacuum capacitor, stepper motor that adjusts it and the electronics that controls the system, which also bolts to the mast, and then the DB9 control cable and your coax hooks to the bottom of the box with standard connectors. And that’s it for assembling the antenna itself. I stuck it up on top of a cheap RCA rotator, and all of that is bolted to a 4×4 pressure treated post set in concrete and about 6 ft tall.

There is also the control box. That goes next to your transceiver. The DB9 cable from the antenna connects to the controller. The coax from the antenna goes into the control box, and a short jumper connects from the box to your transceiver. Oh, and you need a 12V power supply to operate the control box. Putting the whole thing together only takes a few minutes. Running the cables and mounting it is going to take longer than assembly does.

Oh, and you’re going to need an SWR meter because the one in the HGR QRO’s control box isn’t even close to accurate, something PreciseRF warns you about in the owner’s manual. And it can only handle about 5 watts of transmitter power. It’s useful only for the auto-tune function. I use the one built into my Kenwood TS-990S transceiver in normal usage.

The control box is what controls the tuning of the antenna. Unlike my Alpha that requires me to be right next to the antenna so I can adjust the variable capacitor by hand whenever I change frequency, the HGR has remote tuning controlled by that box there in the photo on the right up there. And it is very, very nice to be able to sit in my comfy chair in the basement and re-tune the antenna by just pushing a couple of buttons or turning that knob.

The first thing necessary when turning on the antenna is something called indexing. The stepper motor in that big box o’ gubbins out there on the mast starts to sort of recalibrate itself, turning the variable capacitor from its minimum to maximum to recalibrate itself so it doesn’t end up trying to crank the capacitor past its max and minimum range. And it takes a while to do this so be patient. Once it’s done that you generally don’t need to do it again and just bypass the indexing option when turning it on.

MLAs have a very narrow bandwidth so the antenna needs to be re-tuned whenever you change frequency. That’s easily done with the buttons on the front panel. When changing bands it will automatically re-tune the variable capacitor out there on the antenna to something reasonably close to where it needs to be for that band. After that you transmit a carrier at less than 10 watts, watch your SWR levels on your meter, and tune for the lowest SWR. Doing this manually can be a bit fiddly and time consuming.

This version of the HGR has auto-tune, though, and a built in SWR meter. So just press the AUTO button. It will prompt you to transmit a 5 watt carrier. Press OK and transmit, and the controller will re-tune the antenna relatively quickly. It works pretty well too. After some experimenting I never bothered to try to tune it manually. The auto-tune function almost always resulted in the lowest SWR readings all by itself.

I need to tell you right up front that this antenna doesn’t like the lower bands, at least on the digital portions of the band where I operate. On 17, 15, 12 and 10 meters it will easily tune down to an SWR of about 1.1 to 1.4. But on 20 meters the best I could get is 1.8, and on 40 the best was around 2.0. On 20 and 40 meters, after I tune the antenna for the best match, I switch on the transceiver’s internal antenna tuner. And before you start to complain about that yes, it works just fine and even PreciseRF’s documentation tells you to do that if you can’t get a good match and you feel it’s necessary.

Once the antenna is tuned, that’s all you need to do. Just operate as you normally would. All things considered, it’s as easy to use as it was to assemble.

The ultimate test is how well the thing works as an antenna, and my results there have exceeded my expectations.

The first thing I noticed was the background noise level. There is a lot of background noise out there in the radio spectrum. Most of it is caused by electronic devices in our homes and neighborhoods, and the background noise level can be so high sometimes that it makes receiving weak and even moderately strong radio signals almost impossible. Here my noise level is pretty high, usually running around S5 to S7 or even higher.

When I first hooked up the HGR and turned on my transceiver on 40 meters my S meter read zero. No noise at all. None. WTF? I thought the coax cable was bad or a connector was bad. But then I changed frequency to the FT8 part of the band and instantly the radio started chirping with that annoying FT8 chorus and the display on the radio lighted up full of signals. But still no background noise? None? Yeah, none. Between FT8 transmissions the noise level was zero.

This is what my display showed on 40M with my OCFD antenna.

Those yellow and orange lines are FT8 transmissions. The gray fuzzy stuff is the random background noise I normally see.

This picture below is the display when I switched over to the HGR antenna a few minutes later, on the same frequency.

The signals are a full 2 S units stronger. I’m seeing many more actual radio signals than I did using the dipole. And all that annoying hiss from the background noise? There was almost none. Stronger signals, no noise. Wow… I mean seriously, wow. How does it even do that? i am impressed.

Reception results weren’t always this good of course, but generally speaking the HGR was eliminating almost all of the background noise that I picked up on both my dipole and vertical antenna. And actual radio signals were coming through much stronger than on the other two antennas.

So that’s on the reception side of things. What about transmitting? I tuned up to the FT8 area on 15 meters, turned the transmitter up to 50 watts of power and started calling CQ and in about 5 minutes I’d worked Iceland, Japan, the Netherlands, France, Spain and a half dozen different US stations scattered all around the country. Well here’s a screen shot from PSK Reporter down below showing all of the amateur radio stations that were hearing me at that time down below. I was lighting up the entire continental US, Canada, Alaska, Japan, the EU, using 50 watts and a three foot loop antenna sitting about 6 feet off the ground?

As I said before, wow.

Overall my results using FT8 and JS8Call at 50 watts of power or less have been astonishing when compared to what I get with my OCFD or the GAP Titan vertical. And I’ve gotten similar results on all the bands from 40M up to 10M.

Of course as I pointed out at the beginning the results you see from a specific antenna are highly variable and depend on your local conditions, the weather, solar conditions and a lot of other factors.

So the antenna is small, easy to put together, easy to operate, and gives excellent results. Looked at only from the point of view of the results I’ve been getting the HGR-QRO is, frankly, amazing.

So you’re all waiting for the “But…” aren’t you? You know there’s one coming. In fact there are several.

Some of the “buts” are due to the nature of the beast and I knew they were going to be there. Magloop antennas are fiddly. They have very narrow bandwidth so that means if you change your operating frequency even slightly you’re probably going to have to retune the antenna. Also the SWR changes during the course of the day. I suspect that’s being caused by heating and cooling and the main antenna element, the LMR 600 loop, expanding and contracting as it heats up from the sun and then cools down in the evening. That means you have to check the SWR from time to time and may need to periodically retune the antenna.

No, the real problem with the HGR has nothing to do with how it works as an antenna. The biggest and most serious problem is that while the electronics in the box hanging under the antenna seem to be of high quality, the rest of the antenna isn’t. I’m sorry, but it just isn’t. Everything else uses the cheapest parts they could get away with.

The mast that supports the loops and the box with the vacuum capacitor? It is, frankly, a piece of junk. it’s a thin walled aluminum and plastic “twist n lock” adjustable pole that looks like it came off a bargain basement camera tripod from Amazon. Will it survive the Wisconsin weather for long? I highly doubt it and I’m already scouting around for something to replace it with.

The BNC cable that connects the copper loop to the top of the box? It’s a cheap piece of junk too with ill fitting connectors that don’t even properly lock into place. I had to tape them in place or they would have fallen off all by themselves. That’s going to get replaced ASAP.

The 50 foot RS-232 communications cable? Same as above. Cheap, cheap, cheap… Nasty connectors that were almost impossible to fit into the sockets. The screws that are supposed to hold the connectors in place had bad threads on them so they wouldn’t screw in. After trying to test fit them, I tossed it in the trash and bought a decent 75 ft cable.

Then we come to the control box. The controller works reasonably well and isn’t difficult to use but… The controller is housed in what looks like a cheap, off the shelf project box straight out of a 1980s era Radio Shack. The 4 line monochrome LCD display is like something right out of the 1980s as well, crude looking, difficult to read unless looking at it from the right angle and it’s just, well, nasty.

Am I being too critical? I don’t think so. Remember, this is a $3,000 antenna. Three. Thousand Dollars! Considering I can get a state of the art transceiver, even a decent amplifier for that kind of money, this thing should be top of the line all the way around. For that kind of money you’d think they could afford to give you a mast that wasn’t a repurposed selfie stick and a controller that didn’t look like an antique project that some ham threw together back in 1985. You can get a full color 5 inch touch screen for less than $50 these days for pete’s sake. There’s no excuse for a display like that on a $3K piece of equipment.

And if they cut corners that much on the basic quality there, I find myself wondering what other corners they may have cut when it comes to the electronics in that “big box o’ gubbins” hanging under the antenna out there in the weather.

I’m definitely going to keep using it. There’s no doubt at all that it performs very well indeed as an antenna. But I have serious questions about how long this thing is going to hold up. If they cut corners by providing the cheapest mounting hardware they could find, the cheapest cables they could find, the cheapest everything they could find, how can I be sure that they didn’t cut corners elsewhere in places where it really counts, like the vacuum capacitor, stepper motor and its driver circuits, the electronics inside the controller, etc.?

PreciseRF claims that box mounted up on that mast is weather proof, and while it seems reasonably well made, when I look at how poorly made other components are, i have to wonder about that too.

What it boils down to is that nothing about this antenna instills confidence in its ability to survive in real world conditions. Nothing about it says “Yes, this is a $3,000 antenna and it’s damn well worth it”. It might work very, very well as an antenna, but I have no real confidence that this thing will hold up long. So I simply cannot recommend it. At this price, it should be much, much better than this.

Bluetti Review Update

So far so good, but there have been some curious issues so I thought I’d throw this out there quick.

I was looking at the thing sitting there the other day and I said to myself, Self, it’s kind of silly having that $2,000 box sitting there doing nothing possibly for months waiting for a power failure. You should do something with it.

So I did. I took my entire radioshack/office/mad scientist lab off-grid with it. Well, sort of off-grid. My solar panels haven’t arrived yet so I still have to charge the AC200MAX off the grid but I wanted to see if it would work, and yes, it did. Quite well, with a couple of glitches.

Making the switch over was simple because all of my sensitive electronics are all plugged into UPS systems that include meters that tell me many things about the power coming into them, brown out protection, surge protection, etc. (I very strongly urge people to always, always keep their electronic equipment plugged into one of these instead of plugging directly into the mains. I lost a very expensive gaming computer due to multiple brownouts/power surges during a storm a couple of years ago. These things aren’t cheap but they can keep you from losing thousands of dollars of equipment.)

So I unplugged the UPSs from the wall and plugged them into the Bluetti and, well, everything just worked just fine.

Then I noticed that the meter on one of the UPSs was showing the voltage coming out of the Bluetti was shifting +- 2 volts, about 118 VAC to 120VAC. That was curious.

Something odd going on with the inverter in the AC200? Bad plug on it maybe?

I switched the flickering UPS to a different plug on the Bluetti. Did the same thing. I plugged it into the wall outlet. It showed a stead 119V.

Hmmm…

I got out my meters and started checking things. My Fluke definitely showed that the AC coming out of the Bluetti was shifting +- 2 volts.

Now I should point out that a volt or two fluctuation in the current coming into my house from the grid happens rather often. In fact the electrical service coming into the house can go from a high 0f 122V to a low of 110V during the day.

That bothered me, though. I put the scope on the Bluetti and it showed the AC coming out was at a virtually perfect 60 Hertz sine wave, so that was okay.

I shut everything down. I started up the Bluetti again and the voltage fluctuation was still there. I did a ‘restore to factory defaults’ on the device and restarted it and tried it again. The fluctuation was still there.

And then later it just went away. I ran my entire office/lab/radioshack off it for two days, and the power fluctuations just went away. Why? No idea. Did it just need to, oh, stabilize somehow, to ‘burn in’? No idea. All I know is that all day yesterday the voltage coming out of the Buetti was an almost perfect 119V.

Then there was the light issue. I replaced the overhead fluorescent lights in there with LED versions a year or two ago. They give better light and use a fraction of the energy. I plugged one of those into the Bluetti and it flickered rapidly. Sigh…

I got out the meter again and expected to see the voltage fluctuation had gotten worse, but the meters were showing a solid 119V. I put the scope on it again. A perfect sine wave. Okay, now what was going on?

I plugged in a different LED light. That one worked perfectly. I scrounged up several more LED lights. All of them worked fine. Only my overhead tube lights flickered. As far as I can tell the problem is only with that specific light and no others.

Okay….

Now let’s talk about radio. I’m an amateur radio operator as you probably know if you’ve been reading this blog for a while. Solar power systems and these battery inverters can be troublesome when it comes to causing RFI (radio frequency interference). So I was anticipating some problems, and I found them. This is what the scope on my Kenwood TS-990 shows when I’m running it off the Bluetti.

See those vertical lines? Those are not supposed to be there. They represent spikes of radio interference that appear at regular intervals throughout almost the entire HF range.

Now if you’re an amateur radio operator and that image up there just sent you into a panic, it isn’t as bad as it looks. At least not in my particular case. Yes, those spikes are nasty, but with my particular AP200Max none of those spikes appear in any of the amateur radio bands. Whether that will be the case with other units I don’t know. But in my case the situation is tolerable.

There is some more or less generic RFI coming off the thing that seems, in my case anyway, to be concentrated on 40 meters. 30M was completely clear, no RFI at all. 20M was decent, 17, 15, 12, 10 meters were all good. On 40 there was some significant RFI but not enough to prevent me from operating. And engaging the noise blanker on the transceiver knocked a lot of that out.

What the RFI situation will be like once I hook in the solar panels, well, we’ll just have to wait and see. But if necessary I could run my whole radioshack off the Bluetti with very few problems.

I did send a complaint in to Bluetti describing the issues I had with the light flickering, the voltage fluctuations and the RFI issues, including that photo up there showing the RFI problem. I got a canned response back that they would respond within 48 hours, so we’ll see.

Overall the test running my office/radioshack was successful. I discovered that I actually use surprisingly little energy in there. Typically less than 300W, which rather surprised me because that’s including a gaming laptop, two monitors, the Kenwood TS-990, big stereo speakers and a few other goodies. I didn’t try running larger loads like my soldering equipment, the 3D printer or the laser engraver. And, of course, when actually transmitting with the TS-990 the wattage went up considerably.

Coming Up

I have 4, 100W solar panels coming that should be here by the end of the month. I picked the cheapest ones I could find and I’m not expecting much out of them, but it should be enough to be able to test charging the Bluetti off solar. Well, if we ever get sunlight, that is. My eventual goal is to get semi-permanent solar panels up on the garage roof, as much of it as I can afford and fit up there. The roof faces straight south and it is already at nearly the perfect angle, and that location should provide me with solar through almost the entire day now that the trees around the garage are gone. I’d like to get at least 800 – 1,200 watts of solar up there this year.

The other thing I did was buy one of the expansion batteries for the AC200Max, the 3,000Wh one. That should be here by the end of the month as well That will push the capacity of the system to up over 5,000 watt hours. So watch for a review of that in the near future.

Comments and questions are always welcome!

Spring Cleanup, Antennas, Tree, Gardens, Laser Engraver and Stuff

It’s spring. Sort of?

This is sort of a catchup post because I haven’t really had enough material to justify doing an update to the blog until now, so let’s get started.

It’s spring cleanup time. Or at least that’s what the calendar tell me. Outside, though, well, it’s been bloody cold and nasty. We had about only three days here where the temperature got above fifty. Mostly it’s been in the 40s, even dipping as low as the mid twenties at night. Not exactly my idea of April weather.

It’s still a mess back here but it’s starting to look a lot better. Spent almost an entire day cleaning up the yard.

It’s a mess back there in the yard, alas. MrsGF and I have been working on cleaning up the debris left from the winter and it’s starting to shape up now finally. The old ash tree in my yard and the dying maple in my neighbor’s both have been shedding branches and bark all over. The smoke you see in the photo up there is because we lit the fireplace back there both to warm up and to deal with the twigs and sticks and bark that had come off the trees during the winter.

We’re probably going to do a major expansion of the corner garden in the photo up there. That’s prime growing area there in that corner. It faces the south west so it gets full sun almost all day long, with light being reflected off the white siding, and in that sheltered area it’s the first ground to thaw in the spring and the last to freeze in the fall, and it’s very well drained. We’re going to expand that area in a semicircle out past that post with the birdfeeder, and it’s going to extend along the right side of the house past the downspouts. That will more than double the amount of square footage we have there.

Back here hopefully within a couple of weeks that big tree will be gone. It looks relatively healthy but it really isn’t. It sheds branches like rain drops whenever there is a stiff breeze and up near the top of the tree it’s starting to rot where to large branches come together off the main trunk. It’s also an ash tree so I’m surprised the emerald ash borer hasn’t attacked it yet. If we don’t take it down soon a good wind storm will take it down for us. We already had a tree service come in to look at it, and as soon as it dries out enough for them to get their equipment in there without sinking into the ground it’s coming down, along with the neighbor’s dying maple.

Getting that tree out of there will also open up a large part of the yard to full sun so we can grow a lot more stuff. We aren’t quite sure what we’ll do with the area but we’ve been sketching out some preliminary plans for a large decorative feature. Maybe. Depends on how ambitious we get.

Antenna stuff: I finally got the new off center fed dipole up when we had a rare warm, sunny day. So I was up on the roof of the garage, then about 20 feet up a couple of different trees and, well, let’s just say it was an interesting experience.

Those of you who are amateur radio operators will undoubtedly note that it is not exactly the ideal configuration for an OCFD. It’s way too low to the ground, the two legs are running in a rather tight ‘V’ configuration instead of running out straight, etc. It’s only about 12 feet off the ground and it really should be something like 30 – 40 feet up. But you work with what you have. I don’t have a tower, don’t have tall trees, and I don’t have the space to string up a 140 foot long antenna in what is supposed to be the “ideal” configuration.

And guess what? Despite all of that, the antenna works just fine and dandy, thank you very much. According to the good ole boys I sometimes listen to down on 75 meters pontificating about antennas and other things, this antenna shouldn’t work very well in this configuration. Only it does. Since I put it up I’ve had contacts in California, the Carolinas, well, all over the continental United States and Canada, and according to PSK Reporter I’ve been heard in Europe and Australia as well.

Would it work better if it were in the “ideal” configuration, up above 30 feet with the legs extended properly? Probably. Don’t care. You work with you got.

Looks like I got this one up in time because my vertical antenna is now doing weird things. The thing got whacked by a fairly good sized branch from one of the trees and I think it knocked something loose so I’m going to have to pull that thing down one of these days and check that out.

Laser engraver: The nice delivery driver who brings me goodies from time to time just dropped off the Laserpecker 2 the other day. I’ve been looking forward to getting my hands on this one after playing with the Laserpecker 1 for a few months. I have the LP2 up and running and it is very, very, very nice. It is much more powerful than the original, much, much faster, offers much higher resolution. The version I have here comes with the roller system in the box on the right. That allows it to engrave cylindrical objects like water bottles and the like. And most interestingly of all, the roller mechanism can be reversed and turned into a drive mechanism for the LP2 allowing it to travel along a board or tabletop or other smooth surface to make continuous long engravings. I haven’t set up the roller system yet and I’m looking forward to trying it.

And best of all, for me anyway, it is no longer tied to a stupid phone app to run it. You can still use a phone app, but there is actual real PC software that will control this thing. It looks like the PC software gives much better control over the engraver than the phone app did. Best of all I don’t have to fiddle around trying to get artwork I make in Photoshop imported into the stupid phone app. I can do everything right on the computer now.

Unfortunately the PC software has some serious problems with it. It’s riddled with bugs, odd quirks, difficulties in connecting the PC to the LP2 and other issues. Most of those can be worked around but frankly the PC software looks like it was never properly tested before being released.

The LP2 is most definitely not cheap. I can see a hobbyist spending $250 on the Laserpecker 1 to do the occasional engraving on an art project. It’s a fun little gadget that works pretty well and at that price you don’t need to use it a lot to justify the expense. The Laserpecker 2 package that you see here with the roller system will set you back $1,200. IMO this pushes it well outside of the hobbyist level product. In order to justify that kind of expense you need to have a serious application for something like this.

Anyway, look for a full review of the LP2 in the near future.

And that’s about it for this time. Now if only the weather would start to warm up…

Ham Radio Stuff: Its Alive!

It’s Alive! (Cue evil laughter)

Way back in October we had a nasty thunderstorm roll through here that did some damage here. My much patched and cobbled together OCFD (off center fed dipole) antenna had come down again, my Gap Titan vertical had some minor damage to some of the vertical elements. All of my radio equipment was just fine but the storm did take out my primary computer down in the office/shop/radio shack/mad scientist lab. It’s power supply couldn’t deal with the rapidly fluctuating voltage fluctuations that included brown outs, surges and complete blackouts. We had a dozen or more of those in the space of just a few minutes. It didn’t actually start on fire but it sure did smell funny. And I lost two large capacity external hard drives as well. Fortunately all that data was backed up.

That computer was already giving some odd errors that seemed to indicate that the SSD was having problems and that the main memory might be going bad, so I already had a new replacement computer set up on the other workbench ready to go. I set up the new computer, started replacing all of the software that had been installed on the old one, got two new 10 TB external hard drives to replace the ones that had been lost, copied all my data back to those from the RAID array on the iMac up in the main office, recovered all of my photos from “the cloud” where they are backed up (they’re also backed up to two small, portable 1TB hard drives that are only connected to the system for backups. I don’t want to risk losing thousands of photos so I have a triple backup system, the cloud, plus two separate external hard drives. That may be paranoid but I know one person who lost all of her family photos and videos, all of the images of her kids, her late parents, everything. Ever since that happened to her I’ve been paranoid about backing up everything.).

Then I looked at my radio gear and, well, dear lord, what a mess. Everything was hooked up in haphazard fashion, cables were running everywhere, most of them unlabeled, it was almost impossible to reach the physical controls of the transceiver or anything else. I decided all of it needed to be torn down and set up to make it neater and easier to work with. So I took everything apart, cleared off the space on the bench where I was going to set it all back up and…

Well, thanks to procrastination, sheer laziness, and getting involved in other things for a time, it’s only just now, months later, that I have everything back up. A week ago we had some really nice weather with temps up around 60 so I spent the entire day outside fiddling with antennas. I got the vertical straightened out, mostly. I took down what was left of my old OCFD antenna and spent a large part of the afternoon climbing about 20 feet up two different trees to anchor the end points of the new OCFD (A Buckmaster that I picked up somewhere.) Then was up the ladder at the end of the garage to hang the massive balun that’s used to feed the antenna. That’s up at the peak of the garage roof. Good thing MrsGF wasn’t around that day or she’d have freaked seeing me up those trees and that ladder…

To make a long story a bit less long, here’s what the new setup looks like.

The wiring has been straightened out, I can actually reach all of the controls I need to reach. I finally have space to put my iambic paddle, that’s the chrome thing in front of the speaker with the red paddle like things on it. It’s used for sending morse code (CW). I have the Palstar tuner sitting up on an old monitor stand bolted to the bench, the amplifier is perched on a stand above the transceiver where I can reach it easily. Everything is now arranged so I can operate everything easily.

Then there was the software… These days it seems computers are everywhere and amateur radio is no different. A lot of what we do in amateur radio is now intimately linked to computers of one type or another.

The most important bit of software for me is Ham Radio Deluxe. Yes, I know, once upon a time I was not pleased with HRD and I made that fact known in posts here in the past. There was even a nasty scandal involving a one or more persons in customer support that I will not get into. That’s all changed. In the last few years HRD has worked very, very hard to fix the problems with the software and to improve customer support and HRD has become my primary piece of software not only for running the transceiver but also for logging contacts and operating in digital modes like PSK.

Downloading, installing and setting up HRD only took a few minutes. But then there was the question of the log of the contacts I’d made in the past. I lost the contact log I’d been keeping in HRD when the computer blew and, of course, I had neglected to make a backup. QRZ to the rescue. I’d had HRD set up to send all of my contact information to my log on QRZ.com. Downloading my log from QRZ and importing it into HRD only took a few minutes.

Getting some of the other software working was considerably more difficult but eventually I got all that working as well and I was back on the air.

I still have one issue I need to deal with and that’s Logbook of the World, LOTW. That’s the ARRL’s system of confirming contacts with other amateur radio operators. I log all of my contacts to QRZ.COM, eQSL, and LOTW. Those are ways of confirming to other amateur radio operators that a contact has actually been made. Personally I don’t care if I get a confirmation or not. But some people do because they’re trying to get certificates for specific achievements like having made contacts in all 50 states, or for various contests and things like that, and those contacts are confirmed by some service like LOTW or EQSL. One of the neat things HRD does is it will automatically upload contacts I make to all three services without me having to mess around with it. EQSL and QRZ both work just fine, but LOTW is a different story. It just doesn’t work and the error messages I’ve been getting don’t tell me exactly what the problem is. Until I can figure that out logging to LOTW is not going to be used. And since I don’t use it personally and don’t really like it in the first place, getting it working is going to be a low priority item.

Anyway, the system is back up and running and working. I even made a couple of contacts in North Carolina as soon as I had the antennas finished.

More Pics and Catching Up

Panoramic shot that shows almost the entire backyard. Makes it look a lot smaller than it really is. That central island surrounded by blocks is about 25 feet long and 16 feet wide. Tomatoes in raised beds off to the far right. Garage off to the left showing the “garage garden” where we have raspberries squash and ornamentals.

If this time of year could be described by a single word, it would probably be “color”.

Almost everything is in full flower this time of year except for the autumn flowering plants. Just walking outside is a feast for the eyes.

So, let’s get caught up on what’s been going on. I haven’t talked about it much but one of the things I do is build furniture like, well, like this:

It looks a bit beat up now, especially the upholstery, but considering it’s lived through two teenaged boys, a rambunctious golden retriever and several assorted cats, it’s doing pretty good. Over the years I’ve built chairs, coffee tables, wardrobes, bookcases, decorative chests and I don’t know what all else. A few years ago one of my sons gave me a cheap wood lathe from Harbor Freight and I finally started fiddling around with it. It was super cheap and to be honest the build quality isn’t exactly what I’d call good. But I’ve messed around with it a bit, bought a decent set of tools for it and I’m going to see if I can add woodturning to my skill set. We’ll see how that goes. I’ll let you know if anything comes of it.

We’ve been spending a lot of time out in the gardens, of course. Where else would we be this time of year and with the pandemic still raging? Gardening is probably the safest and most satisfying activity we can do right now. But we’re still dabbling in radio. And I mean “we”. MrsGF is a licensed amateur radio operator as well. She’s more into the emergency services aspect of it while I’m more into the technical stuff.

It looks like the Great Radio Fiasco Project is back on the agenda. I was finally able to get the toroids I needed to wind the coils I need. But considering how busy we are with other things this time of year it’s likely that will be pushed back until the fall.

Let’s see, what else… Oh, I’m working on an upcoming post that answers some questions about amateur radio that people have asked. That will be coming up in the near future.

I’ve been working on getting better at CW (morse code). I’m still struggling, especially with receiving. I’m nowhere near good enough to be able to actually use it out in the field. If someone sends at like, oh, one word per minute or slower, I can generally figure it out. But any faster than that and everything sort of blurs together and I start to fall so far behind I have to give up.

Someone asked me if I was going to do anything for the ARRL Field Day exercise. Nope. Don’t have the time. This is probably the worst time of year for me to try to participate in an event like that.

We’re going to be doing some major renovations to the house this summer, replacing a bunch of windows, the front entrance and some other stuff. That’s going to be a mess, but it needs to get done. And expensive. Sigh… Oh, well. Owning a house is great. Until you start seeing the bills for maintaining it.

Stuff Is Growing, Frogs, 500 HP Engine, CW, and What’s Coming Up

Let’s start off with this little guy.

These little guys are amazing critters. They’re tiny little things. That cable you see there is less than a half inch thick so you can see just how small he/she is. Frogs are some of the most amazing and, I think beautiful creatures around. I’m still astonished that we have these little tree frogs around here.

Speaking of trees, the pear tree looks like it’s getting a good start.

It is absolutely loaded with baby pears. That ought to make up for last year when we got maybe a dozen pears total off the whole tree.

The ornamental gardens are looking great here. The recent rains and warm weather has everything growing like crazy right now. Most of these plants have tripled in size in the last week or so. You can almost see them getting bigger. Oh, and the bird houses are occupied again this year. Looks like some type of wren?

We restrained ourselves and didn’t crowd things into the two raised beds this year. Just 6 tomato plants and the outer edges with onions. Even six is probably too many because we probably still have six months worth of canned tomatoes of various types on the shelf. But the lure of fresh tomatoes is something we just can’t ignore. And we can always give ’em away if we have too may.

This is garden faces south and west and is the most productive spot we have. Sheltered from the wind, with light concentrated here, it gets warm early and stays warm late into the fall. Have to be careful what’s planted here because the warm, sunny conditions means a lot of stuff like lettuce and radishes will bolt. Also it has to be watered a lot. But we usually get ridiculously amounts of produce out of this corner. The tripods in the back are for pole beans. There are various baby pepper plants protected with #10 cans, and more beans and parsley seeded down in front.

Time for a musical interlude. You may want to turn your volume up. Or maybe not?

When I start getting bored I take this thing out on the road. Great fun 🙂

People sometimes ask me what I’ve been doing since we can’t really travel or do much except putter in the garden. I’ve been playing amateur radio, of course, and trying to get better at CW. That’s morse code for you non radio people out there.

Doing CW is something I never really thought I’d get into. I’ve always been far more interested in the digital modes like PSK and JS8Call. But I also love QRP, using extremely small amounts of power to try to communicate, and what works best for QRP is CW. And unlike the digital modes, CW doesn’t require you to lug a computer along. So I’ve been spending about a half hour or more a day trying to learn and get better at this. I’m up to, oh, maybe two words a minute?

Then there’s this thing.

I’ve been looking at solar power and batteries to power my QRP gear and even my full power radios for some time but never got around to actually getting involved with solar because A) I’m lazy, B) I wasn’t sure I’d ever actually use it, and C) the stuff can get a bit expensive. But then this deal came along…

I have to admit I have very little experience with solar power. I never even heard of this company before this deal came along. But the stuff seems to get decent reviews and the price, well, I picked up the 20 Ah LiPo battery pack, with a built in 120V inverter (sort of), USB and 12V power outlets, built in high intensity LED lights, LCD display and other goodies, and a folding 40W solar panel for less than, well, let’s just say that I’ve dropped more money on a meal at a nice restaurant than I spent on this deal.

Anyway, I’ll be taking a closer look at this in the near future to see if it’s a real deal or not. I’ve only just taken a quick look at it, but right now it looks pretty good. Especially that folding solar panel. That thing looks like it’s very high quality. Well, we’ll see.

That’s it for now.

I Get Questions. Sometimes I Got Answers

Some readers managed to discover Grouchy Farmer’s super secret email address and have been sending in questions. (What, you don’t know what it is? Here’s a hint: old.grouchyfarmer@gmail.com) So I thought I’d better deal with some of the stuff that’s been piling up over there.

I heard almost the entire US meat industry is controlled by just three or four companies. Is that right?

That is true. About two thirds of the beef market is controlled by just three companies, JBS, Cargill and Tyson. Add in National Beef and those four companies control 80% of the beef produced in the US. The same is true with pork and poultry. Three or four companies control almost the entire market for both of those products as well. And all of these companies have a long history of, oh, let’s call it shenanigans, shall we? All of these companies have a history of being accused of price fixing, collusion to manipulate markets, abuse of employees, supply manipulation, and, well, the list goes on and on. And in some cases not just allegations, but outright actual criminal activity. JBS took corruption to a whole new level in its home country of Brazil where it was involved in an enormous bribery scandal that involved hundreds of politicians, meat inspectors, etc. Run a Google search on “JBS bribes meat inspectors” and you’ll probably be astonished at the depth of the corruption, and disgusted by the other less than ethical things JBS is accused of participating in.

How is this happening? Don’t we have antitrust laws to prevent this kind of thing? Yes, we do. Laws that the government ignores whenever it feels like it. Antitrust laws intended to prevent monopolies from developing have been conveniently ignored for decades now, with the government either carving out loopholes for certain businesses/industries, or simply ignoring the laws entirely. Why? Because the big multinational monopolies pump millions of dollars into the campaign coffers of influential politicians in Congress who, in turn, pressure the officials who are supposed to police this into looking the other way. Or in the case of JBS, bypassing the clumsy “lobbying” and just passing actual suitcases full of money to people.

Are dairy farmers really being forced to dump milk?

That is also true. I’ve heard estimates that dairy farmers are dumping something like 1.2 million or more pounds of milk every day because they can’t sell it. About half of the milk produced doesn’t go into products sold directly to consumers, it sells to food service operations, school districts, restaurants, or processors that use the products to produce still other products. So when the virus hit and most of those operations shut down or were severely limited, dairy farmers lost almost half of their market literally overnight. While consumer demand did indeed go up because of an increase in usage of dairy products in the home, the institutional type products are in forms or packaging the consumer can’t use. The production facilities that make consumer dairy products were overwhelmed with high demand and weren’t able to keep up, resulting in temporary shortages in some areas. So we have a bizarre situation where farmers have to dump milk while there are shortages of some products at the same time because production facilities can’t keep up or can’t quickly convert over to making consumer products.

When you made that “doomsday” flashlight, why did you have to put a resistor in-line with the LED? Why not hook it up directly to the battery?

Ah, good question. I should probably have explained when I wrote that up back in April. (Link to flashlight post here.)

It would be nice if we could just hook an LED up to a battery or power supply and switch it on without having to worry about it, but, alas, you can’t. (Note: There are some types of LEDs that do not need a current limiting resistor because they either already have one or because the type of LED can deal with the current, but most do require one) You often need a resistor in-line with the LED to prevent it from drawing too much current and burning itself out. The amount of current flowing in an LED is a function of the voltage across the LED. And in an LED the relationship between current and voltage is not linear. A slight increase in voltage can result in a large increase in current. So if you have an LED that wants, oh, 2.7V for example, and you feed it 3V, that can result in a large increase in the current in the LED, overdriving it, causing it to heat up, burn out, or even, in rare cases, explode if the current gets too high. So that resistor is there to drop the voltage in the circuit down to a level that the LED likes.

How do you figure out exactly what size resistor to use? I could go through all of the explanations about forward voltages and all of that, deal with the math and stuff, but it’s a heck of a lot easier to simply point you at someone who does a heck of a lot better at explaining things than I do. It’s pretty simple really. Don’t let the math spook you. It’s very simple to figure out. You can find a detailed explanation of why resistors are needed with LEDs and how to pick the right size resistor over at https://www.evilmadscientist.com/2012/resistors-for-leds/ There are even calculators (free) on-line where you just have to plug in some numbers and it figures out the size of the resistor that you need.

Your resistor doesn’t need to match the calculations exactly, either. If you don’t have one exactly the right size you can pick one that’s a bit bigger than the one the calculations indicate. I picked a larger one than I needed to reduce current draw so the batteries would last a lot longer while still letting the LEDs give enough light to be useful

What happened to the Great Radio Receiver Fiasco Project?

Ah, that. I was afraid someone would bring that up. It did not go well, mostly because of a parts supply problem. First the ferrite rods I’d ordered arrived almost crushed into powder. Then the toroids I’d ordered for coils, after about four weeks of waiting, abruptly were listed as “unavailable” from all three of the suppliers I’d ordered from. Then the tuning capacitor I’d salvaged from another radio turned out to have serious problems and a new one would have cost me almost $40. Anyway the whole thing is on hold while I look at alternatives or really scale back the design. Or just give up. I wanted to build a multiband receiver that would cover just about the entire HF spectrum from 80 meters to 10 meters, and, well, we’ll see. I built a few very simple two or three transistor receivers that sort of, kinda, almost worked, if I kept my fingers crossed, did a little dance and hooked ’em up to my 140 foot wire antenna to be able to receive anything. One I did was supposed to be an AM band receiver and when it picked up anything at all it turned out to be receiving transmissions from a train switching cars in the small rail yard a half block from here. Still haven’t figured out what the hell that was all about. Either my receiver was ridiculously screwed up, or the transmitter the railroad was using was ridiculously screwed up. Or, perhaps, it was aliens.

Are people really attacking cell phone tower technicians in Europe and trying to destroy radio towers, or is it just more clickbait? WTF is going on?

Unfortunately, those stories are all too true. It seems to be the worst in the United Kingdom, but it’s spreading everywhere. In the last two weeks or so alone, in the UK there were 30 incidents of cellular towers being attacked, usually by arson, and almost 200 cases of technicians being abused and even physically attacked, including one having a brick thrown at his head and another being stabbed. And it seems to be spreading almost as fast as the damned virus, fueled by bizarre and utterly ridiculous conspiracy theories, and spread by so-called “celebrities” who aren’t exactly the brightest bulbs in the pack to begin with, and by the anti-vax crowd. And it’s being spread everywhere by social media services who are more interested in raking in as much money as possible than they are in preventing people from using their services to push out insane conspiracy theories and promote violent behavior.

Anyway, that’s about enough of that. Time to wrap this up.

Reviewing the MFJ 8100K World Band SW Receiver Kit

Being stuck in the house “social distancing” (OMG I’m so bored) has some advantages, one of which is being able to get caught up on a lot of stuff. One of those things is the MFJ-8100K world band shortwave radio kit. That’s the little beastie you see in the photo below that I (ahem) stole borrowed from somewhere on the internet.

Damn, that’s pretty slick looking. It beats the heck out of what the average electronics kit looks like when it’s done. Most of them don’t even offer any kind of decent case. Whether it actually will look like this when it’s done remains to be seen because I haven’t actually built it yet as I write this. Instead of putting it together and taking some photos and talking about it after it’s all done, I’m going to do this live, so to speak, writing and photographing as I go along so you too can experience the joys and pains associated with putting something like this together.

I should warn you ahead of time that this could get pretty lengthy because I’ve done little more than just open the box and it is already looking like this is going to be a problem.

But let’s look at the basics a little more closely before we get started. It’s a world band shortwave receiver with 5 bands. They cover 3.5 – 4.3 mHz, 5.85 – 7.4 mHz, 9.5 – 12.00 mHz, 13.2 – 16.4 mHz and 17.5 – 22 mHz.

As for the basic design, this is a regenerative receiver, a design that dates back to, oh, the 1920s or so, and was quickly abandoned as soon as superhets were developed. And for good reason, as anyone who has ever fallen off their chair from the blast of noise if you tweak the regen just a tad too far and it goes into oscillation can tell you. About the only good thing regenerative receivers have going for them is a fairly low parts count and easy assembly. Well, that’s not really true. They can be decent receivers once you get used to their quirks, but with really high quality superheterodyne designs out there, why even bother with one of these? How did I even end up having this on the shelf in the first place? I don’t remember buying it. Do I have people breaking into the house and leaving me stuff instead of stealing it now?

The first thing I started wondering was why the heck is this thing so expensive?It’s going for $90, for heaven’s sake. And there is nothing exotic or hard to find in the electronics. While that variable capacitor is kind of pricey (that goes for about $20+ alone and I know that because I had to buy one of the things a few months ago) But other than that I think there’s maybe $10 worth of parts in the thing. I suspect that really fancy faceplate and heavy duty metal case probably costs more than the electronics inside does.

But let’s get on with this.

Opening the box and poking around.

This is what the promotional photos tells you is in the box.

First I should point out that this kit starting with the photos below is shown exactly as it came and while I assembled it. The box was still sealed and I hadn’t opened it until I started this. What it really looks like when you open the box is this:

Um, okay… Are those screws and nuts rolling around loose in the box? Yeah, they are. And not just screws and nuts and washers, we got electronic components floating around loose in there too. Oh, goodie.

Opening the box and finding components strewn about all over inside doesn’t exactly inspire confidence about the quality of a product. Whoever originally packed this thing and chucked in the little plastic bags holding the components hadn’t bothered to actually close up the plastic bags.

And as for the case, well, damn, that’s probably the best case I’ve ever seen for a kit in a long time. Beautifully finished, heavy steel, with an equally beautiful brushed polished steel faceplate.

You can’t get much better than that. See what I mean about the case probably costing more than the electronics? It’s – it’s shiny. Oooo

The rest of what was in the box looks like this:

The inductors on the right edge were not included in the kit. See text for explanation

As noted, most of the little baggies containing parts were open and had shed a considerable number of electronic components, screws, washers, etc. all over the inside of the box..

Half of “The Wall O’ Parts.” If I need something, it’s probably in there. Somewhere. Maybe. There’s even an emergency backup espresso machine in there

On the far right of the photo above you’ll see a strip of components held together with bits of yellow tape. Those are 3.3 uH inductors and those were not in the kit. I had to dig those out from my “Wall O’ Parts” because the kit wants one, and MFJ either thoughtfully failed to provide one because they figured I’d be getting bored by this time and needed to get up and stretch or something, or it got lost because of they left the baggies open. I expect I shall have to resort to the Wall O’ Parts several times as I try putting this sucker together. I’ve only just started to look at this and sort through parts and I’m already finding stuff missing, so I’m a wee bit irritated. There is nothing more upsetting than getting into an electronics kit and finding parts missing. Me, I have hundreds of components sitting on the shelf (well, if I can find ’em, that is) but the average person building this is not going to have that luxury and is going to be royally ticked off.

The circuit board looks reasonably well made and the parts locations are all nicely detailed. You could probably put it together without instructions if it weren’t for a few gotchas, like having to wind your own coil on a toroid.

Where’s the fecking Manual???

Now, the more sharp eyed amongst you might have noticed something missing from those photos up there. Where the heck is the manual/assembly instructions? Well, you don’t see it because there isn’t one. Instead of a manual there is a half sheet of paper telling me I need to download the manual from the MFJ website, giving me a URL to go to. So I go to the webpage as instructed and find a bad PDF of the circuit diagram which was so low resolution I couldn’t even make out the symbols or component labels. It looked like someone had almost deliberated fuzzed out all of the labels and component symbols, and the “manual” was actually a booklet in PDF telling me how to use the radio, not how to put it together. No assembly instructions. No readable schematic. Oh, goodie…

This exactly what the schematic I found looks like. Can you read that? Yeah, neither can I

A search on MFJ’s site using its own search function turned up a reference leading straight back to the useless info I’d already seen. I finally ran a general search on Google and found the real assembly manual tucked away somewhere on MFJ’s site and I printed it out.

(Update 3/27/20: And now I can’t even find that website, for pete’s sake! I was going to put the link to the correct PDF in here as I edit this before posting it, and when I just tried I get a “page not found” error. MFJ is apparently upgrading its website and I can’t find it at all. Good job, there, MFJ. I didn’t keep a copy of the PDF, but at least I printed the thing out so I can at least take a stab at this. But anyone else wanting that booklet, well, it looks like you’re on your own.)

The manual itself (if you can find it) is actually pretty good. Sort of. Clearly written, mostly, with lots of detail, but sadly lacking in illustrations.

So let’s sling some solder and see what happens.

Now that’s interesting. Look at the 4 inductors up there. Notice anything different about one of ’em? Yeah, the third from the left is about half the physical size of the other three. The big three were supplied with the kit while the small one is my replacement and is about half the physical size, but it is the right specification according to the color codes and I put it on my tester just to double check, and it should be the right one. Is this going to be an issue? No idea at this point. All of the inductors I have in stock are the smaller size.

Also, more missing parts. Just found two resistors are missing. Look at this pic:

R3 and R6 were missing so I had to pull those off the shelf. Notice that they’re an entirely different color from the kit supplied one, R17. I use the generally more reliable metal film resistors (the blue ones) while the kit supplies carbon resistors (the tan ones). Now very, very rarely the type of resistor can make a difference, so I’m hoping that isn’t the case here.

Later – Missing parts list now sits at 1 missing inductor, 4 missing resistors, and 2 missing capacitors.

And now there’s an issue with one of the electrolytic capacitors.

C14 there next to the IC socket is, according to the instructions, supposed to be a 10 uF cap, but the kit supplies a 1 uF. Or at least I think that’s the one because the 1 uF is the only one left. Do I follow instructions and put in a 10, or use the 1 uF supplied? I finally pulled a 10 uF off the shelf and used that in the hopes that the instructions are right and the parts picker was wrong. (Later – Apparently the 10uF was the right choice because now that it’s done it works)

Watch out for solder bridges or pins with cold solder joints. Here on the bottom row of pins, the third from the left is a bad joint.

And speaking of IC sockets, and this applies to whenever you’re soldering a socket, use caution soldering the pins because it is very easy to apply a tiny bit too much solder and end up with solder bridges shorting out the pins. And it’s easy to do a bad joint as well. Double check under a magnifier.

Time to install the variable cap which is how you tune this puppy. And…

And the solder lugs on the cap are way too big for the holes in the circuit board. I could either drill the holes out, which I don’t want to do because the solder pads are none too large to begin with, or I could trim off the lugs. I finally trimmed the lugs off.

Above here I’m trying to mount the volume control and the regen control. They don’t make this easy either. We’ve gone from holes being to small to holes being way, way too big. Note how some of those holes at the top edge of the board have been double drilled, which makes them way too large for the solder lugs on the potentiometers that are supposed to fit in there.

And speaking of soldering, look closely at those solder pads on that board. It’s difficult to see in the photos but almost all of them seem to be covered with some kind of oxidation that makes it difficult for the solder to adhere. I’ve been using a bit of a scotch brite pad held in a needle nose pliers to buff them before I solder anything.

Then there’s the band switch. The switch has 8 pins, the board has 7 holes. Hmm… Let’s look at the manual. Ah, here we are… Oh, nothing. Says nothing about what to do about the missing hole. Oh, goodie.

I ended up bending the extra pin out of the way and keeping my fingers crossed that it wouldn’t get mad at me. (Later – Don’t know if I was supposed to do this or not but the thing is working this way.)

That circle thing with the white wire wound around it is a coil made by winding 8 turns of wire around a provided toroid core. Some people get a bit weird about winding their own coils. I’m not sure why. A small one like this is a piece of cake. They don’t get nasty until you start having to make ’em with, oh, 30 or 40 turns.

And there it is, ready for testing. It runs off 9V and supposedly a 9V battery will last for weeks and weeks as long as you remember to turn it off. I don’t have a 9V battery, tho, so I hooked it up to my DC power supply and…

Damn, I wish my upload speed wasn’t about 15K baud so I could put up a video of this, but the damned thing actually works! I won’t go through all of the alignment procedures because they will bore you to tears. This is, believe it or not, an actual, working SW receiver. Not a very good one, granted, but it will pick up something.

But then there’s this

This is it fully assembled, mostly. You will note that I don’t have the knobs on. There is a reason for that. MFJ neglected to include the collar nuts you need to actually attach the front properly, anchor the controls down so I can put the knobs on. Now there were indeed collar nuts in the box. You probably saw that in the photos from the box opening. But they were for control shafts about twice the size of these. Sigh… Thanks again, MFJ. Complete assembly is going to have to wait until I can get the right sized nuts.

Okay, this has gone on long enough. Let’s wrap this up. What’s the overall assessment of this beastie?

Well, on the plus side it looks good. It is, amazingly enough, a working radio receiver, although not what I’d call a good working radio. It wasn’t hard to put together. Just about anyone who knows which end of a soldering iron to grab could put this together. Well, mostly, with the application of a bit of common sense. And that case sure looks cool.

Elenco AM/FM superhet kit under construction

But then we come to the negative side.

First problem is the price. They’re getting $90 for this thing, my friends. While the Elenco AM/FM receiver I put together a couple of weeks ago is far more sophisticated, much more sensitive, has an actual amplifier so it can drive a speaker and not just headphones, and sells for half the cost of the MFJ kit at about $44. Granted, it doesn’t come with the fancy case, but you can always cobble together something to throw the Elenco into. And when you’re done with the Elenco you’ll have a radio you can actually listen to, whereas the MFJ is never going to be more than a curiosity for most people.

Then there are the missing parts. A half dozen or so resistors, two capacitors, an inductor, the collar nuts to hold the controls in place, all missing. I don’t know if this was a problem with the person who packed up the parts in the first place, or if they were lost somehow because the bags weren’t closed, or what. My guess is that they were never in there to begin with, because while parts did spill out, the box was sealed and there were no openings for anything to fall out.

As I said before missing parts isn’t much of a problem for me, but for someone who doesn’t have a “Wall O’ Parts”, like some kid doing this for a STEM project or someone who just enjoys occasionally tinkering with kits, this could be a real problem. Sure, you could probably email MFJ and they’d probably replace the parts. Eventually. Maybe. But come on, they should have all been in there in the first place.

Then there’s the manual. Or, rather, the lack of one. What’s the matter with you people over at MFJ? You could throw an 100 page product catalog into the box but you couldn’t be bothered to run off a 30 page manual on the office printer and throw that in too? And then even worse, direct me to a website to find the manual that doesn’t exist? Or to utterly useless schematics?

I’m really disappointed with this because this could have been a really good kit if MFJ had bothered to just just be a little more careful.

So, because of the high price, the missing parts, the missing manual, etc. I can’t score the 8100 very high. On a scale of A to F, where A is excellent and F is abysmal, I’d give the 8100 kit a D+.

Electric Stuff and, Well, Stuff. And the Virus.

How did it get so cluttered so fast?

When I started moving my stuff from the office upstairs to the new workspace in the basement I knew I was in trouble when I plugged in the laser printer, turned it on, and the lights all went dim. So the electrical contractor got here at 6:50 AM the other morning and some two hours later I had the radio shack/shop rewired with new circuits and outlets. The electrical in this space was a bit scary. I think the whole room was connected to a single 15 amp circuit. I was running my radios and other equipment off heavy duty extension cords running into my woodshop and, well, it was just nasty all the way around. The grand total for all of the work and parts ran about $500 but it’s going to be worth it, for safety alone if not for convenience.

So now I have two, 4 outlet 120V boxes, each on its own circuit, plus a 220V outlet over on the radio bench, and two new 120V circuits for the workbench.

Why call in a contractor instead of doing it myself? Because I know where my areas of competence are. I worked on a farm and in building maintenance for years and I can do just about anything – framing, finish carpentry, drywall, installing doors, plumbing, laying tile… But electrical? I’ve had no training or experience in doing household electrical, and considering how dangerous it can be, well I’m going to let a trained electrician do that.

Tubes & Stuff

So eldest son shot me a text Friday asking me if I wanted a vacuum tube tester, free, and I texted back “r u nuts? yeah i want toob thingie!” or something to that effect and he showed up last weekend with this:

The thing with free equipment is that it’s often going to be something useful only for parts, if that, but in this case it turned out to be a genuine, working vacuum tube tester. Oh, it has a few issues. The tube sockets have some corrosion that needs to be cleaned up and it could use a good cleaning in general. The insulation on the cords is brittle so they need to be replaced, but other than that the thing actually seems to work and inside it actually looks almost new.

on the inside it looks almost brand new.

I haven’t done much with equipment with vacuum tubes of late, but I never know what’s going to show up around here, so this could come in handy.

Tinkering with Stuff

I am building a radio receiver. No, not The Great Radio Fiasco Project. That project is more or less on hold until I can get some parts that seem to have become unobtanium for some reason. I may end up having to change the design. No, this is an Elenco AM/FM receiver kit. Best of all it was free! Well, maybe it was? I found it in a box of junk I was sorting through as I continued the apparently never ending project of cleaning out the basement.

I don’t remember ever buying this thing and have no idea where it came from, but it’s in my basement, in my box, so I’m assuming it’s mine, so I’m going to put the thing together and see what happens. It’s a fairly elaborate little radio and from time to time the instructions seem to go wandering off into fantasy land. I suspect that the instructions that were in the box were written before the circuit board was changed and no one bothered to correct the instructions. So that makes things a bit interesting.

Also in the same box of junk I ran across an unopened multiband shortwave receiver kit distributed by MFJ. I don’t remember ever buying that either, and I would remember since that one costs about $80 and I darn well wouldn’t have spent that much. I suspect both were in a boxes full of “valuable assorted radio parts” (i.e. junk) I picked up for next to nothing at a hamfest, and the box just got shoved on a shelf and forgotten about before I bothered to sort through it.

Weather Stuff

Over the weekend it hit 50 degrees. Almost all the snow melted, motorcycles were out on the streets, a very pleasant weekend all around. Tomorrow it’s supposed to hit 55 degrees!

So, of course, today it snowed. Sigh… I know Wisconsin in known for having some odd weather, but this is ridiculous.

Virus Stuff

I am sure you heard about covid-19. You’d have to have been living in a cave on Mars to not have heard. Wisconsin has only 6 confirmed cases, but the potential of it spreading, and spreading quickly, has everyone concerned. At least one school district has closed, the UW system is extending spring break and advising students not to travel, companies are canceling employee travel. The state basketball tournaments are starting up this week and WIAA just announced that general spectators will not be allowed, only the teams and necessary personnel and a small pool of sports reporters will be permitted.

I want to think a lot of this is hype and paranoia, but, well, I’m right smack dab in the middle of the category of the highest risk for death if I catch this sucker, so yeah, I’m a wee bit paranoid. MrsGF and I are supposed to go to the symphony this weekend, but sitting elbow to elbow in a theater full of hundreds of coughing, sneezing, hacking people for two hours? Uh, no.

What I really find troubling is the huge amount of misinformation being spread, some of it through ignorance, but a lot of it being spread deliberately. Some of it by our own government. I wasn’t going to spend a lot of time talking about this because, well, let’s face it I don’t have that many people who read this so it isn’t going to make a dent in things, but if it helps correct some of the stuff floating around, I suppose I should go into this a bit.

First, there is no cure for covid-19. None. Zip. Zilch. Zero. There is no drug, no “natural remedy”, no combination of herbs, no “silver” concoction. None. If anyone is trying to sell you such a thing, it is an outright scam.

Second, there is no magic herb or substance or “essential oil” or vitamin or magic crystal or “holy oil” that will somehow keep you from catching the virus. Again, if anyone tries to sell you such a thing, it is an outright scam.

Third, there is no vaccine “just around the corner”. Yes, a vaccine is being worked on and there are some promising candidates. But it will be months before one is generally available and even longer before it can be mass produced.

So what can you do?

Wash your hands. A lot. The best preventative is hand washing. Wash your hands using soap and running water. This doesn’t kill the virus, but it does physically remove it from your hands, which is just as good. Do not touch your face except immediately after you’ve washed your hands. A primary method of getting the virus into your system is touching your eyes, nose or mouth.

Do hand sanitizers work? Yes, but only if they’re the right kind. They have to have at least 60% alcohol content. Non alcohol based sanitizers are out there, but no one knows if they actually work or not. The so-called “all natural” hand sanitizers don’t work at all. They’re little more than hand lotion.

Face masks – there is a lot of debate about whether they work or not, and the consensus is that they don’t do much to keep you from getting the virus. They can prevent people who already have it from contaminating others, it seems. The problem, though, is that most of the masks I’ve seen people wearing are dust masks intended to keep dust from getting into your lungs, and were never intended to keep out viruses to begin with. Most people also don’t know how to wear them properly. Heck, I’ve seen a lot of people who have them pulled down to expose the nose. If you do that you might as well not bother at all. Same for guys with beards. If you have a beard, don’t bother. If you can’t seal the mask against bare skin, it isn’t going to work at all.

Social Distancing – what the hell is social distancing? It’s a polite term for keeping the hell away from people. Do not shake hands, do not hug, do not kiss people. Try to keep at least one meter (three feet) away from people if you do have to interact with them.

Avoid crowds. Do not attend sporting events, concerts, meetings or other events where large numbers of people have gathered. I don’t know about where you live, but here most such events have been canceled or postponed anyway. (Although a seriously troubling number have not and are still scheduled). And yes, that goes for church services too. No, being in a church is not going to somehow protect you from getting the virus despite what some utterly irresponsible ministers and priests have been saying. Remember that the primary spreaders of the virus in South Korea when the outbreak first began there were churches. Even the Pope canceled most of his public appearances for heaven’s sake. And if you’ve booked a cruise on a plague ship (ahem, excuse me) cruise ship, well, you’re on your own.

If you’re sick, stay home. About 80% of the people who get it have symptoms that are relatively mild and a lot of people will be tempted to continue with their normal daily routine. And thus risk spreading this to even more people. I realize this is damn near impossible for a lot of people, but the primary way this is spread is by people with relatively mild cases going out in public. Do you really want to be responsible for infecting your friends, your family and your neighbors with this?

Anyway, enough of this. I’ve been babbling long enough.