
We’ve been very fortunate in the tomato department this season, especially with the Early Girl variety that we planted. They’ve been ridiculously prolific. MrsGF already did plain canned tomtoes, chili sauce and we froze a lot for use later. But they’re coming on fast now and it’s getting hard to keep up. So Thursday I dealt with this:
That’s about 28 pounds of tomatoes in those two boxes,
So while MrsGF was at work I dealt with this situation. I made spaghetti sauce because, well, good lord this stuff is good. Once you’ve made your own you’ll never want to go back to the stuff you get at the grocery store. It’s fairly easy, although it does take some time.
Start with about 20 pounds of ripe tomatoes. If there are some that aren’t quite ripe yet, don’t worry about it, throw them in too. Wash them, then cut them in quarters. You don’t need to core or peel them, but do remove the stems.
Now get a big stainless steel stock pot with a thick, heavy bottom. Big because it has to hold at least 20 pounds of cut up tomatoes. You can’t use one of those cheap, thin bottomed stamped metal ones from the discount store because you will almost certainly scorch the tomatoes during the cooking process and ruin the whole batch. It must have a thick bottom, and must be stainless steel, not aluminum. The acid in tomatoes reacts with aluminum, and not only will it affect the flavor, it will stain the aluminum and even leach aluminum into the food, something you do not want. Aluminum, when ingested, has some serious health concerns.
Yes, a good, big stainless steel stockpot is expensive, but you can get good deals if you watch for sales and it’s worth it if you do a lot of this kind of thing.
And yes, you can do this in smaller batches if you can’t handle this much at one time. Nothing wrong with just doing 10 pounds and adjusting the recipe accordingly.
Dice up two whole onions and about a pound of green peppers or sweet banana peppers. No need to remove the seeds, they’ll be taken care of later.
Put about a quarter cup of olive oil (no, it doesn’t need to be the expensive stuff) in the bottom of the pot, put it on the stove, turn the heat up to about medium and put in the diced peppers and onions. Add about 6 nice sized cloves of garlic, crushed or finely minced. Cook them until they just start to soften a bit.
 Now dump your tomatoes in. Yes, all of them at once. Bring the heat up to medium high. You’re going to have to bring this whole mess to a boil. You’re going to need a very sturdy, very long handled spoon or spatula so you can stir it up from time to time.
Bringing this amount of material to a boil is going to take time so be patient. And no, you don’t need to add any liquid. More than enough juice will come off of the tomatoes to turn it into, well, turn it into this:

This rather nasty looking mess is going to turn into spaghetti sauce. Be patient. I know it looks like something the cat threw up at this point. Don’t worry and instead of thinking of how nasty it looks, concentrate on how good it smells.
You need to keep this mash boiling for about 20 minutes, stirring once in a while to make sure it isn’t sticking to the bottom of the pot and burning on. The long boiling process is necessary to make it easier to deal with the next step, putting it through a food mill.
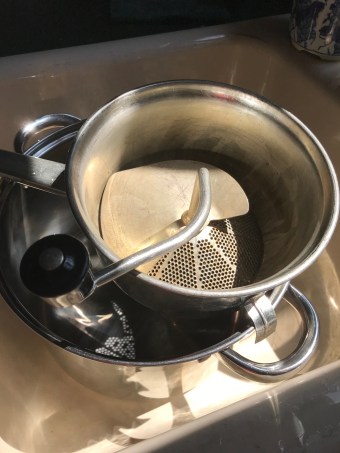 This is a food mill in case you’ve never seen one before. It is a heavy duty strainer with a crank handle, an angled plate that fits over the strainer part, and a nut on the bottom side with a scraper, usually a long, springy piece of wire, that holds the plate and handle in place.
It’s a simple tool that works quite well. The mash is put into the strainer basket, the handle is turned, and the plate presses the mash against the strainer forcing the juice and pulp through the holes while leaving the seeds and skins behind. to be discarded.
As you can see on the lower right, there are hooks on the side of the mill so you can set it on top of a pot to catch the juices and pulp that come out.
Put the mill over a clean, empty pot. Put about a cup of the tomato mash into the mill and rotate the handle. The good stuff that you want to keep will be squeezed out into the pot below, and the skins and other debris will remain on top. Once the juice and pulp is squeezed out, rotate the handle backwards to scrape the skins and debris off the strainer, and discard.
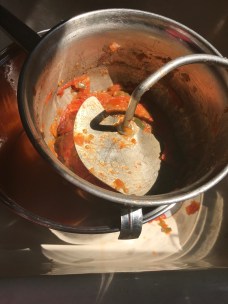 Yes, it’s a rather messy and labor intensive process, and it’s going to take some time to deal with that entire pot full of mash.
Is there an easier way to do it? I suppose there is but we haven’t really found one. I suppose you could try running the mash through a blender to grind up the seeds and skins, but I’d think that might alter the taste.
It doesn’t really take that long to do it this way. Think of it this way, it’s a good opportunity to build up your arm muscles.
Once you’re done you’ll have a large amount of what is basically tomato juice and pulp. Bring out that big stock pot you used to cook up the tomatoes originally. Rinse it out, dump your juice into it, and put it back on the stove and crank the heat up to about medium high or high because you’re going to have to bring this back to a boil.
Now we add the spices. Everyone has different tastes, but this is what we use for this amount of juice: 2 tbl basil, 2 tbl oregano, 1-2 table thyme, 2 tsp salt, 1 tsp ground pepper, 1/4 – 1/2 cup of brown sugar. The amount of sugar depends on your tastes and on how acidic the tomatoes are. You can adjust that after the cooking process is done.
Now comes the part everyone hates most, cooking it down. You need to bring it to a full boil, then reduce the heat until it’s at a nice, gentle rolling boil. You want it bubbling nicely, but not so hot that it scorches on the bottom. This part takes a long time. You want to reduce this down by at least half until it gets to the consistency you want for your sauce. You need to stir it every 15 -20 minutes, making sure it isn’t scorching on the bottom. If you find it’s building up a sludge on the bottom of the pot, turn the heat down a bit or stir it more often.
Everyone gets impatient during this process but there isn’t much you can do to hurry things along. Just keep it at a nice, gentle boil, stir it once in a while. You’re going to have to reduce it down by about half to get the right thickness.
Once you get it cooked down to about the right thickness, we’re not done quite yet. We add two small cans of tomato paste, not so much for flavor but to help with the texture. It gives it a thicker, more pleasing texture. You can skip this part if you like, but we think it helps. Once the tomato paste is thoroughly incorporated (it takes a lot of stirring, tomato paste is difficult to get to dissolve completely sometimes) give it a taste. This is where you can add more sugar or a bit more salt to compensate for the tomato paste.
Now I’m looking at about 5 quarts of delicious sauce, so it’s time to can it.
I pressure can sauces like this. I do not recommend water bath canning for this kind of sauce. I have a big Presto canner that can hold up to 12 quarts. It was fairly expensive, I think it was about $120 when I got it a few years ago, but it was worth it because we use it a lot.
Follow the usual recommended procedures for prepping the jars and lids (i.e. wash the jars, sterilize them and the lids, etc.). Put the recommended amount of water in your canner, put it on the stove and bring up the heat.
You want to “hot pack” the jars. That means the sauce is still very hot, just off the boil, when you fill the jars. Add 1 tablespoon of lemon juice in each quart. This isn’t for flavor, it’s an added safety measure to increase the acidity of the product. Put on the lids and rings (use hotpads or heat proof gloves because they will be hot!) and tighten down. Place the jars in the canner and attach the lid according to its instructions.
 I did these at 11-12 lbs pressure for 25 minutes. I should point out that how you process depends on the canner you are using, the product you are canning, and currently recommended processing techniques. Canning your own produce is a great way to preserve your fruits and vegetables, but safety is the most important thing to consider when canning. Please be sure to follow all of the instructions and safety recommendations. Don’t just rely on some recipe you find in an old cookbook because a lot of those techniques are now considered unsafe.
The University of Wisconsin Extension system has a good website for information about how to safely can foods. You can find it by clicking the link above.’

And this is what we end up with.
A lot of work, yes, but consider this. When you can your own, you know exactly what is in that product. There are no strange chemicals with names you can’t pronounce, no corn syrup, no “flavor enhancers”, just your tomatoes, peppers, onions, spices, salt and sugar. You can adjust the flavor to suit your own tastes, you can reduce or eliminate the salt if you’re on a salt restricted diet, you can add additional spices or leave some out if you don’t like one. And there is something enormously satisfying about pulling out that jar of your own sauce during a blizzard in January and allowing that amazing flavor to take you back to those hot, humid days of late summer when everything was growing, tomatoes were glowing red in the sun, and letting that aroma from that sauce transport you back in time.
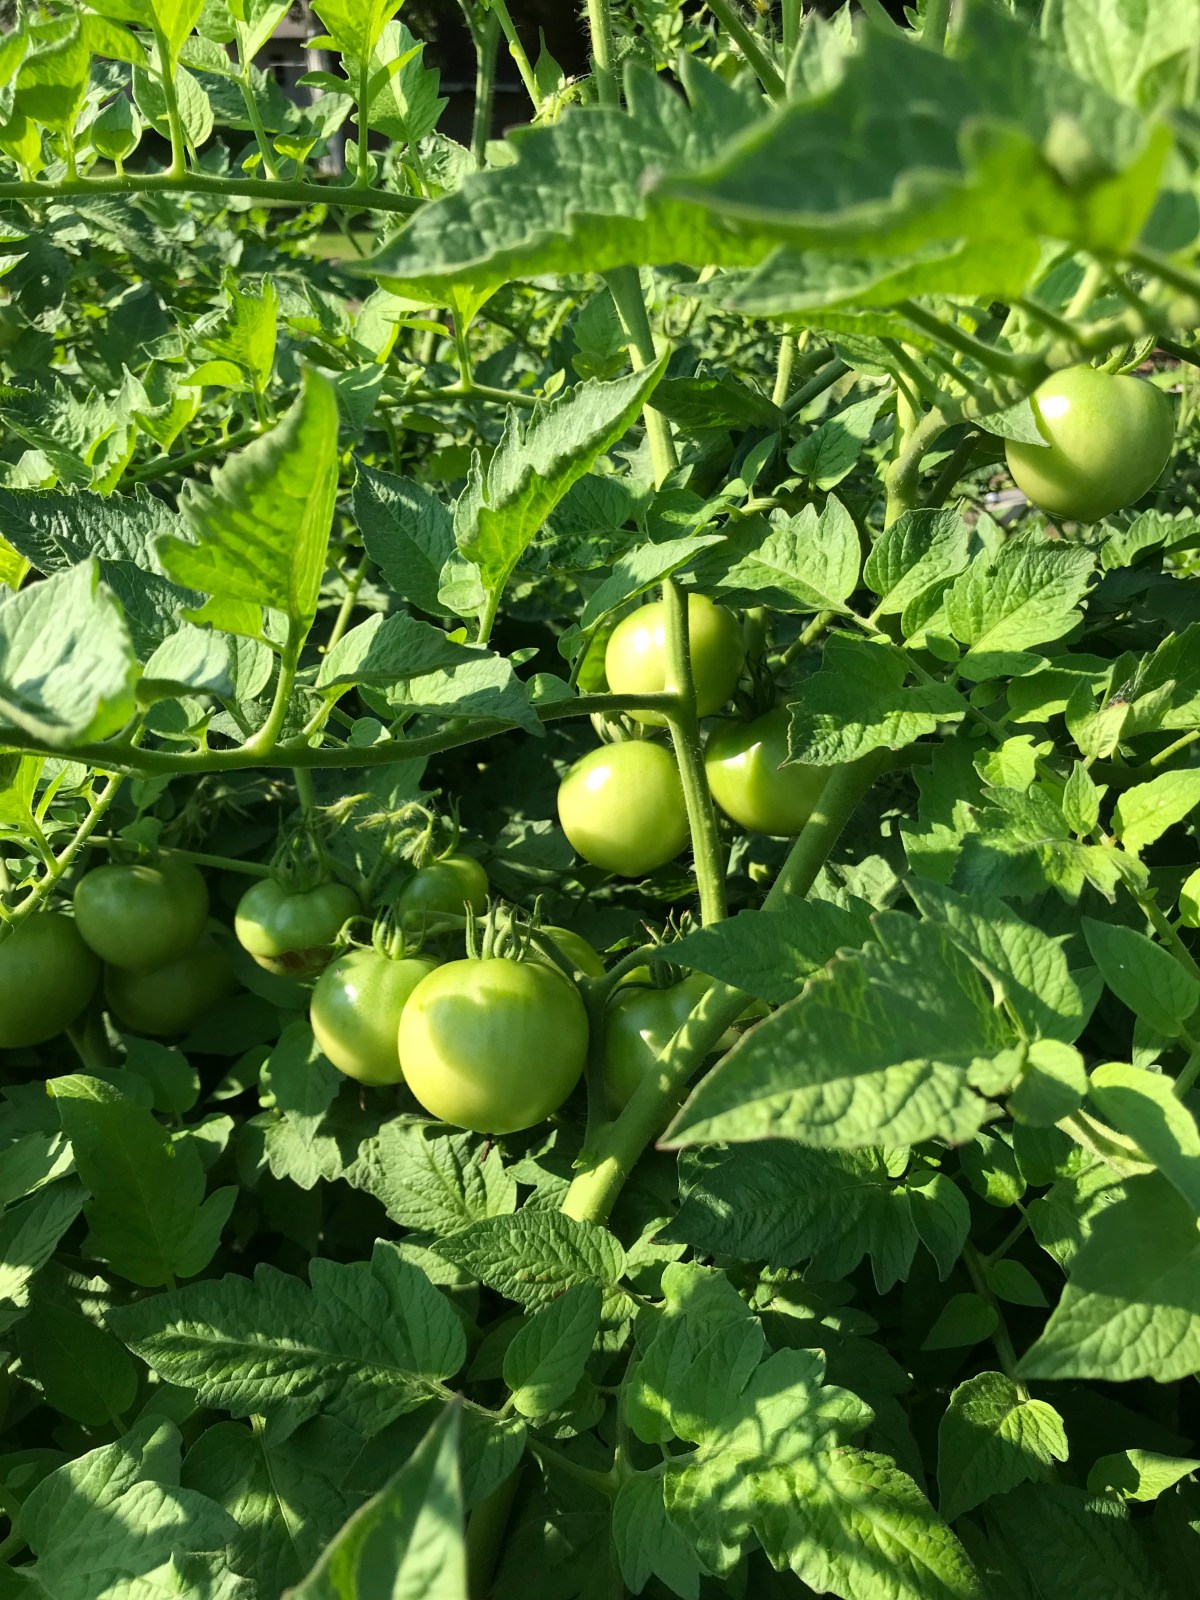
 I don’t think I’ve ever seen our tomatoes look quite this good. The plants are amazingly lush and have gotten absolutely enormous. The two Wisconsin 55 plants are about 4-5 feet across and would be probably 4 feet tall if the weight of the fruit wasn’t pulling the stems down. The tomato cages have proven woefully inadequate and have started collapsing. It’s ridiculous. The other variety we planted are Early Girl, a smaller tomato, but they’re just as lush and prolific as the 55s are.
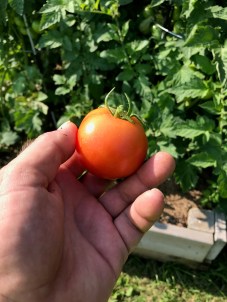 I got the first ripe one of the season yesterday. I saw it peeking through the dense canopy of leaves, a flash of red, did some digging around and there it was. I still get a bit excited when I find the first tomato of the season. I found a total of three yesterday. The rest are still pretty green but they’re coming on fast.
 The banana peppers are in full production and are just as loaded with fruit as the tomatoes are. We’re starting to chop and freeze them. They’re easy to deal with. Just clean ’em, dice them up, stick them in freezer bags or an airtight container and chuck them in the freezer and pull out for omelets, soup, sauce, pizza or whatever when needed.
 MrsGF put in 3 squash plants this year in the garden at the back of the garage and they’re pretty much taking over everything back there like they did last year. The vines grow astonishingly fast. We’re constantly pulling vines out of the lawn, out of the raspberries, out of the rhubarb… They look like they’re doing pretty good too. We’re seeing some nice sized squash already and lots of baby squash just starting to develop.
 Other stuff — I worked out a deal with Eldest Son on my Honda Goldwing. With her back and knee issues it’s almost impossible for MrsGF to get on and off a motorcycle any more, so the Wing has sat mostly unused since I got it. I’ve had it since 2013 and it has a whopping 3,400 miles on it. Sigh… So I worked out a deal with ES. I don’t want to give up on biking, so we’re doing a swap, his Honda VTX, which is really a one person bike, for the Wing plus some cash and other stuff.
 The corner garden here has been completely redone. In the past it was mostly herbs and decorative plants, but this year we more than doubled it in size, hauled in a tons of compost (well, my aching back claimed it was tons) and it’s being switched to mostly vegetables this year. MrsGF put in something like 20+ pepper plants of varying types (can you tell we like peppers?) plus two blueberry bushes and a couple of rows of beans down along the front. The soil in there is so utterly horrible that I did something I very rarely do, I raked in some commercial fertilizer as well. We’ll see what happens. It will either be wildly successful or everything will die off.
 We were not going to make the same mistake we did last year by crowding too many plants into the two raised beds. It’s very tempting when putting in seedlings to crowd them in because it seems like there is so much wasted space, and forgetting just how big those plants get when they’re mature. We only put 6 plants in each of the beds this year and I hope that will help to eliminate some of the issues we had last year. While we avoided the dreaded blossom end rot last year, we did have some fungus problems because the plants were so crowded together.
 And then when I was walking around the yard yesterday I nearly stepped on this guy. Yes, we have snakes in Wisconsin. You wouldn’t think they could survive our winters up here, but several species do quite well. Heck, until the 1950s or 60s we still had timber rattlers around here. This little guy… Little? Ha, he was a good two and a half feet long. He scared the heck out of me although I’m sure nearly being stepped on while he was sunning himself in the grass scared him more.
 After the fiasco of wrecking the fold down mount for the GAP antenna, I put the crappy old Comet 250 vertical back up, hooked up the coax, went inside, checked to make sure everything looked OK, turned on the transceiver and — and immediately made about 6 different contacts all over North America with the thing on 40, 30 and 20 meters, running about 40 watts of power, less than it takes to run a modern lightbulb.
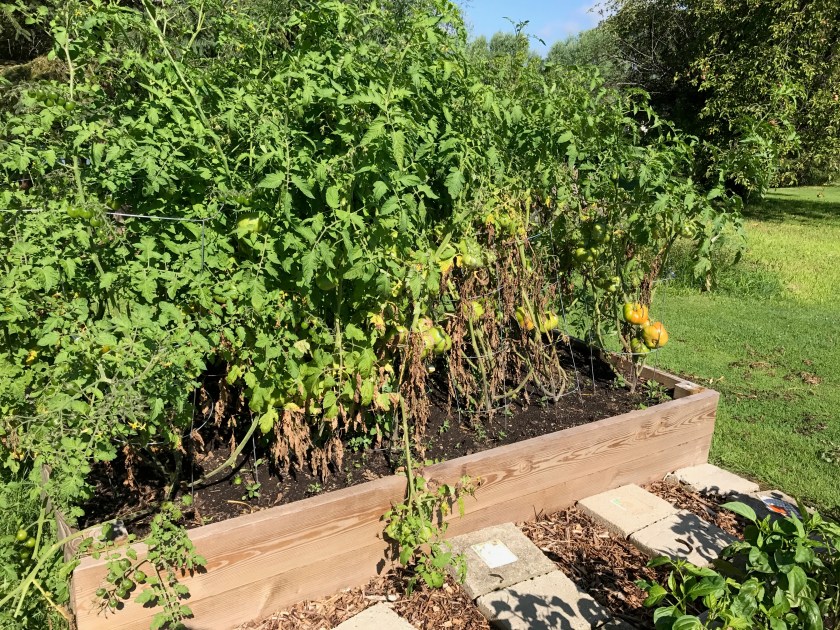 We messed up with the tomatoes this year. It’s partly our own fault, partly the fault of the weather this year. They’ve developed a kind of fungus that’s slowly working it’s way up the plant from the bottom, taking out the leaves. Not exactly pretty. We’re getting fruit, but we won’t get anywhere near as much as we should because of it.
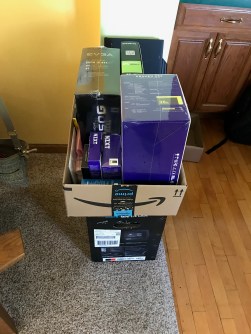 Computer stuff: My gaming computer, a really really nice Razor Blade laptop, decided it didn’t like me any more, got so hot the case burned my hands, and then died. I suspect the graphics card went bad, but we’re not really sure. In any case, it’s well outside of the warranty period and would probably cost more than the computer is worth to try to get it fixed. And it was pointed out to me that I could build a computer with much better specs than any gaming laptop had, for half the cost, if I went with a desktop system. So Saturday we were sitting here looking at the box full of stuff you see there on the left.
 I ended up with is this over on the right.
