Cake Plate, Air Filters, Schrodinger’s Microwave, Farmers Shafted Again

Egads, it’s been a while since I did one of these, isn’t it? This time of year as the weather gets colder it’s tempting to just hunker down in my warm radio room and play with radios and computers and stuff instead of doing something useful. But stuff has been getting done, things have been going on and, well, let’s start at the beginning.

I should point out that I hate the color rendition on iPhone cameras. The real life colors of that platter up there are much richer, much deeper, and considerably darker. I don’t know what’s going on with that camera, but colors look washed out, pale, harsh, even cartoonish sometimes, especially with indoor photos.

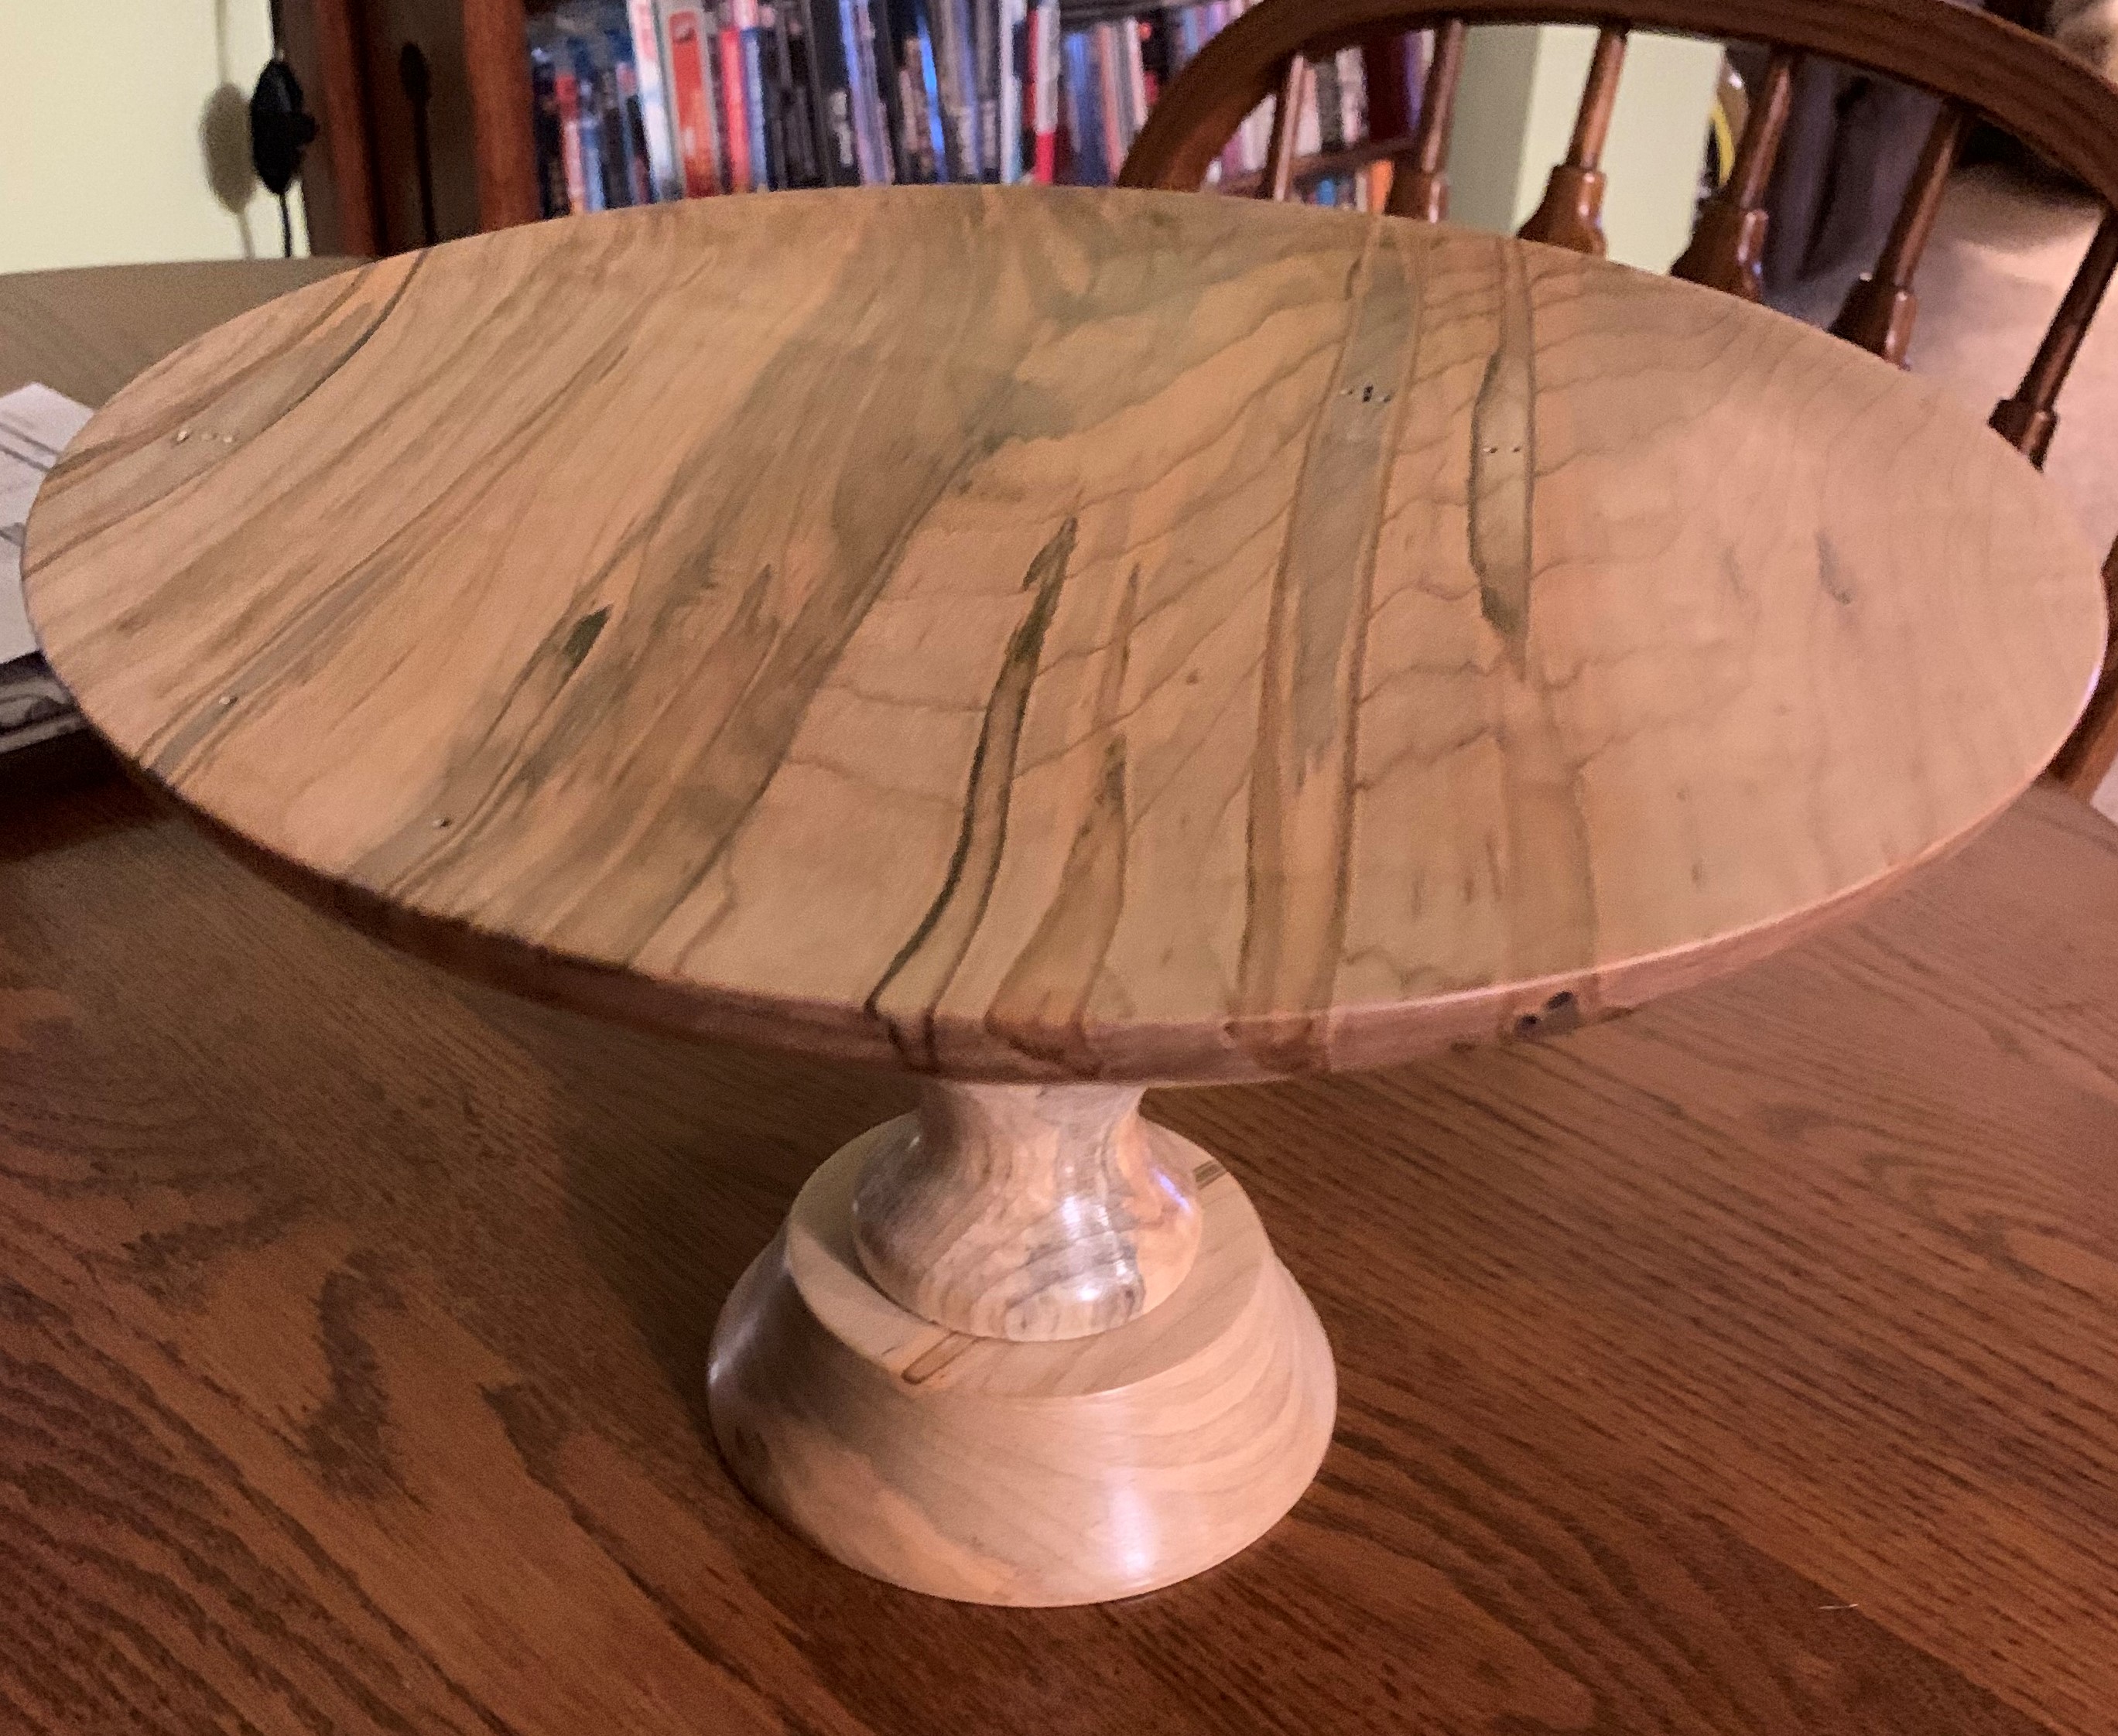
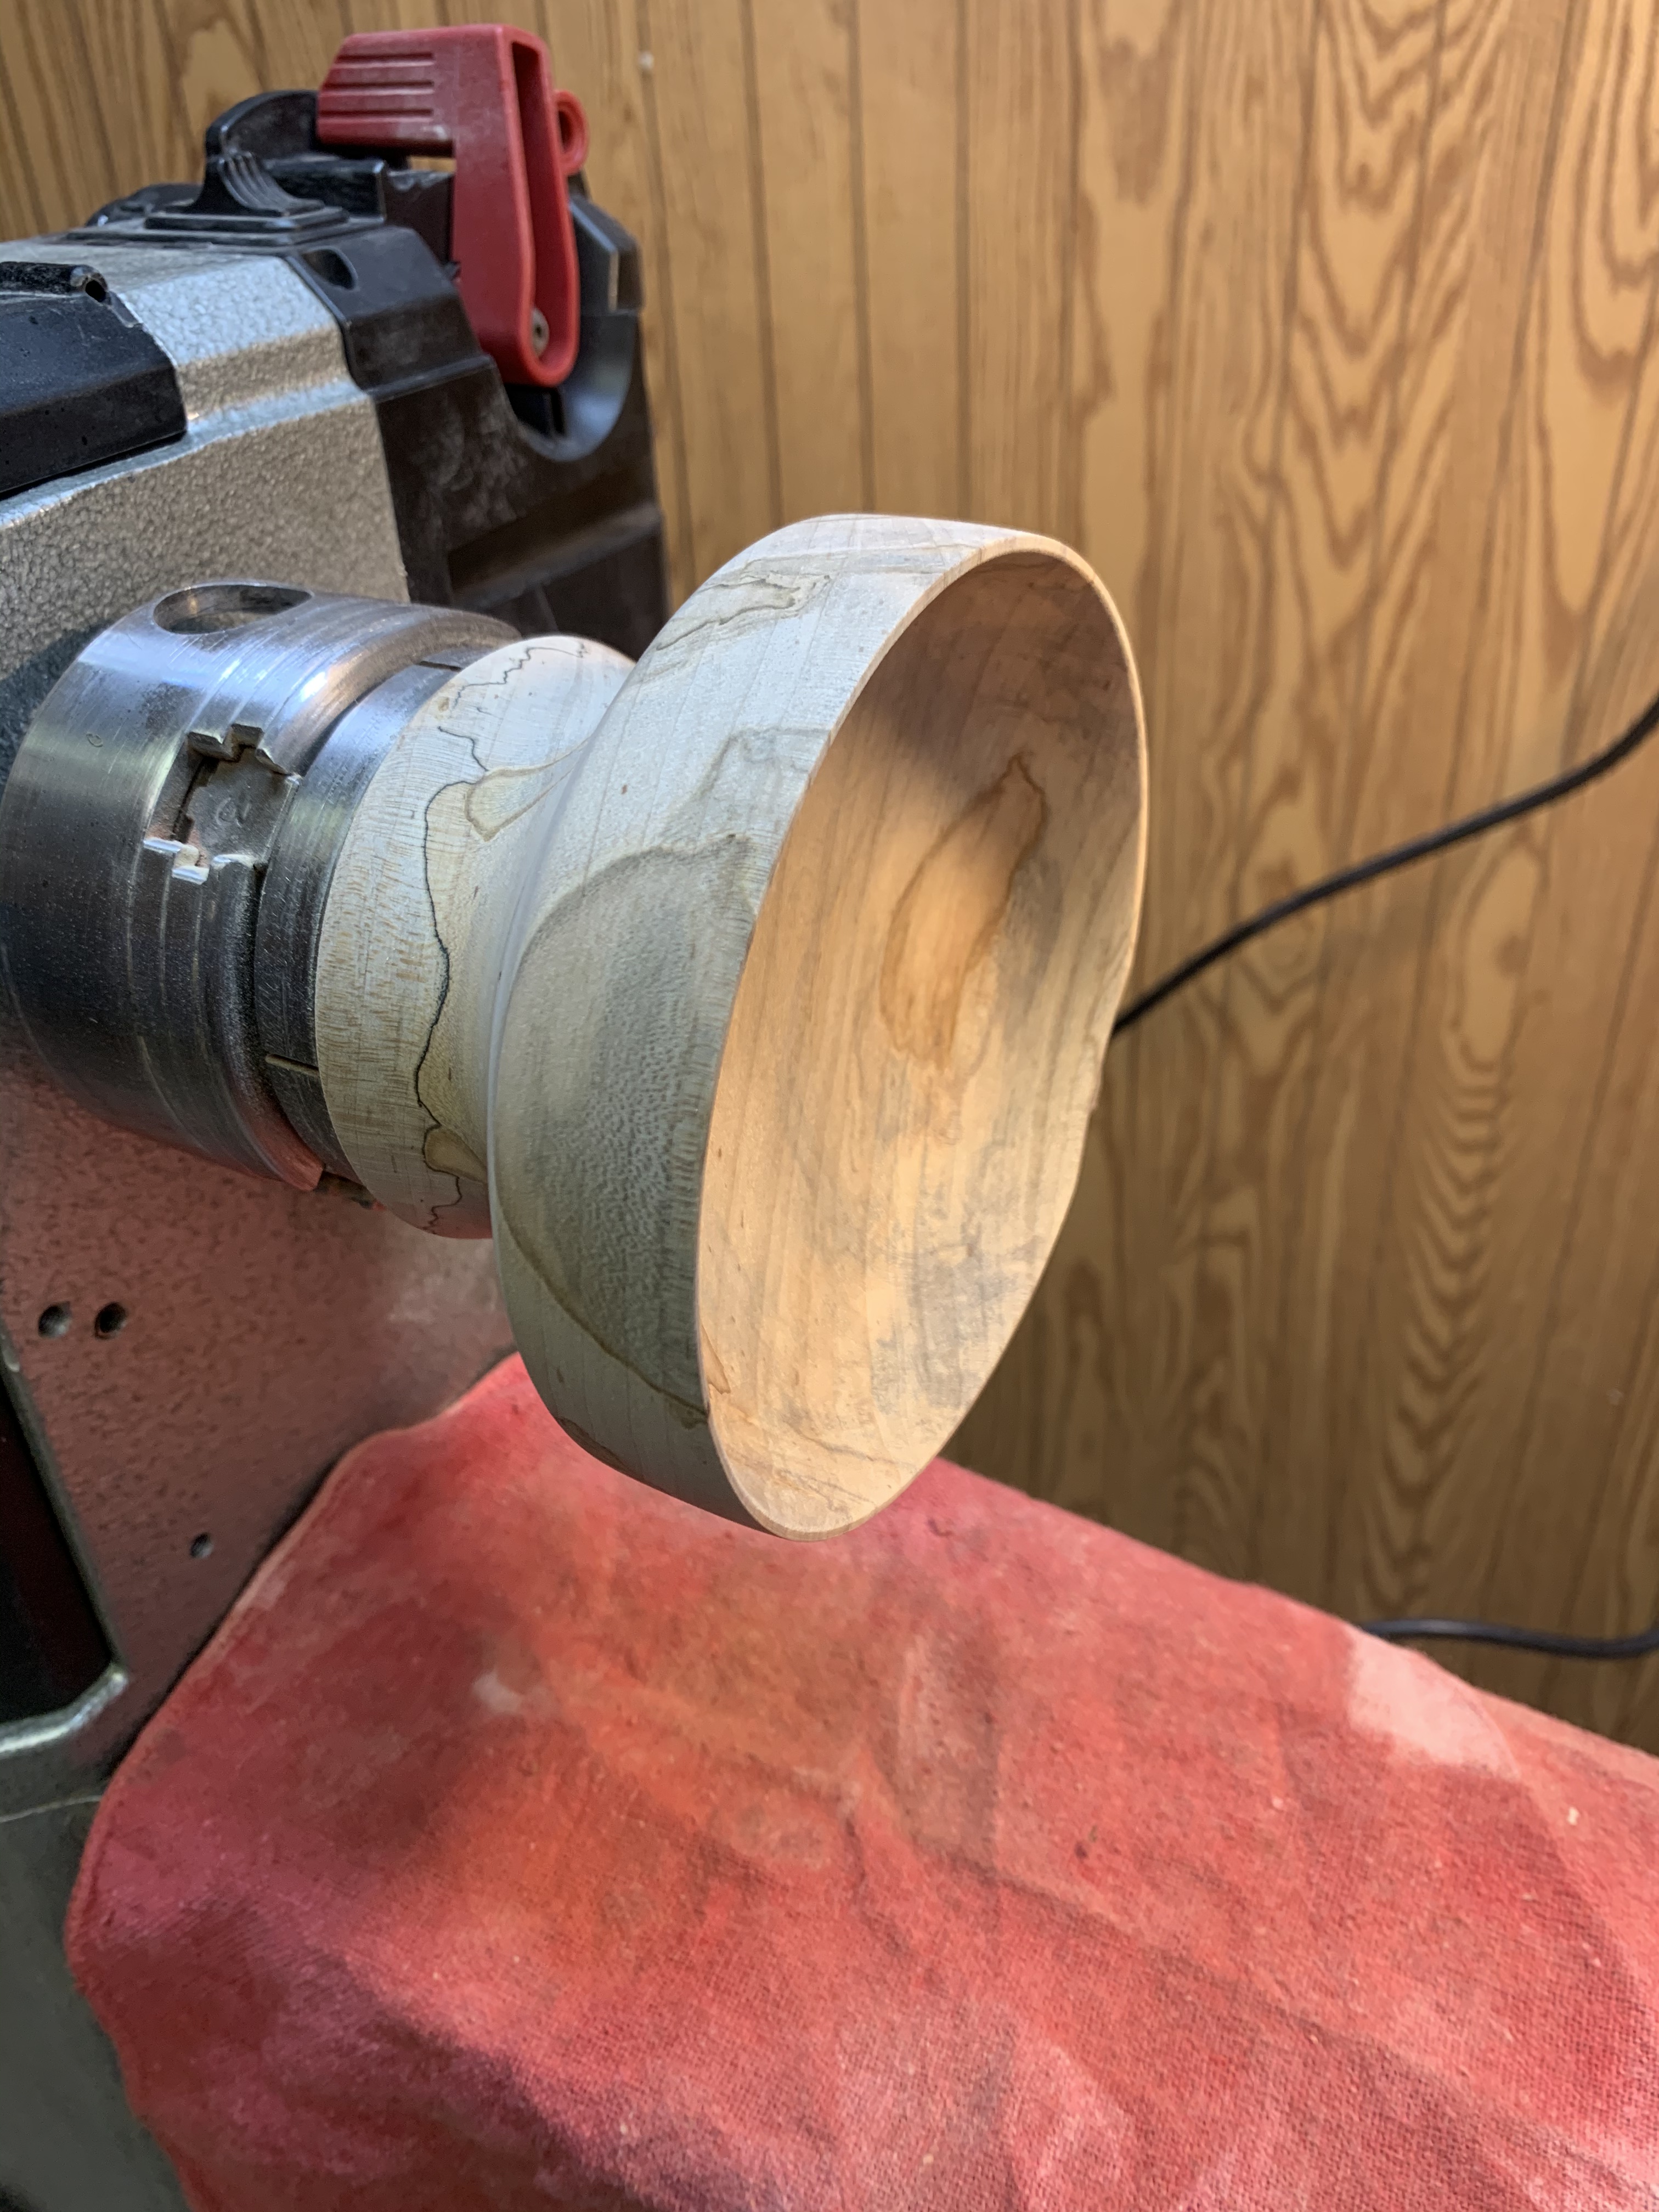
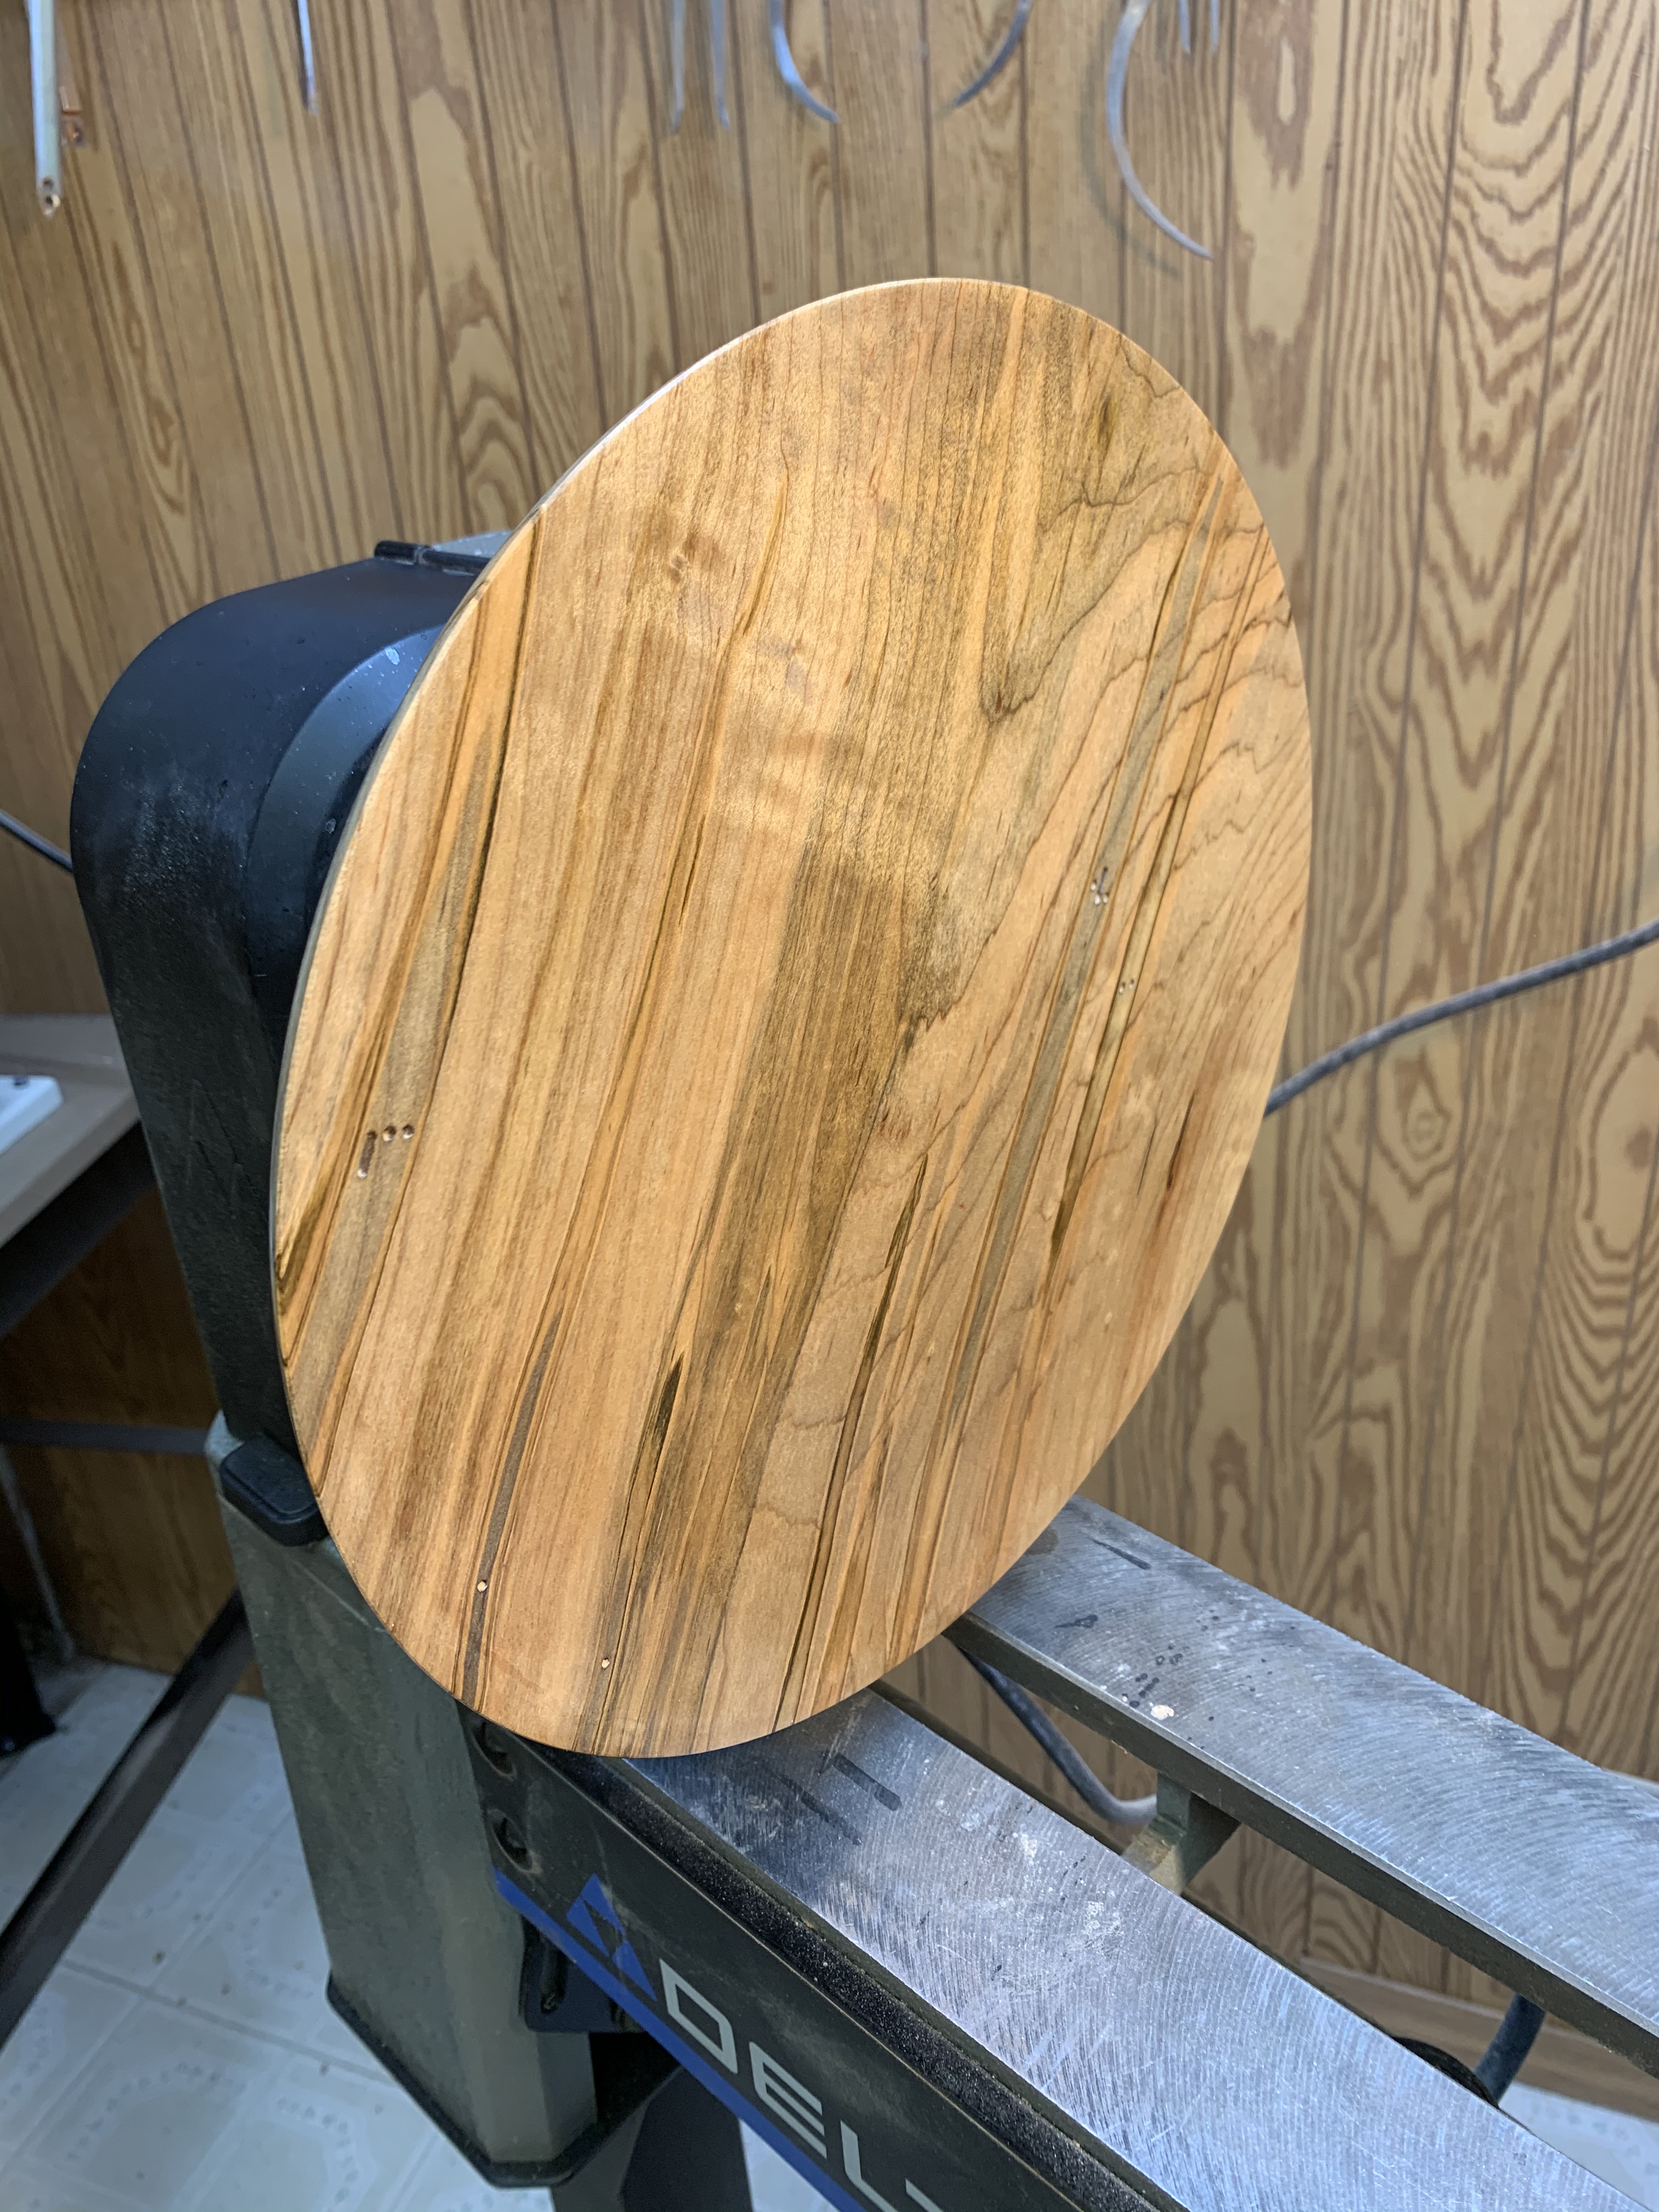
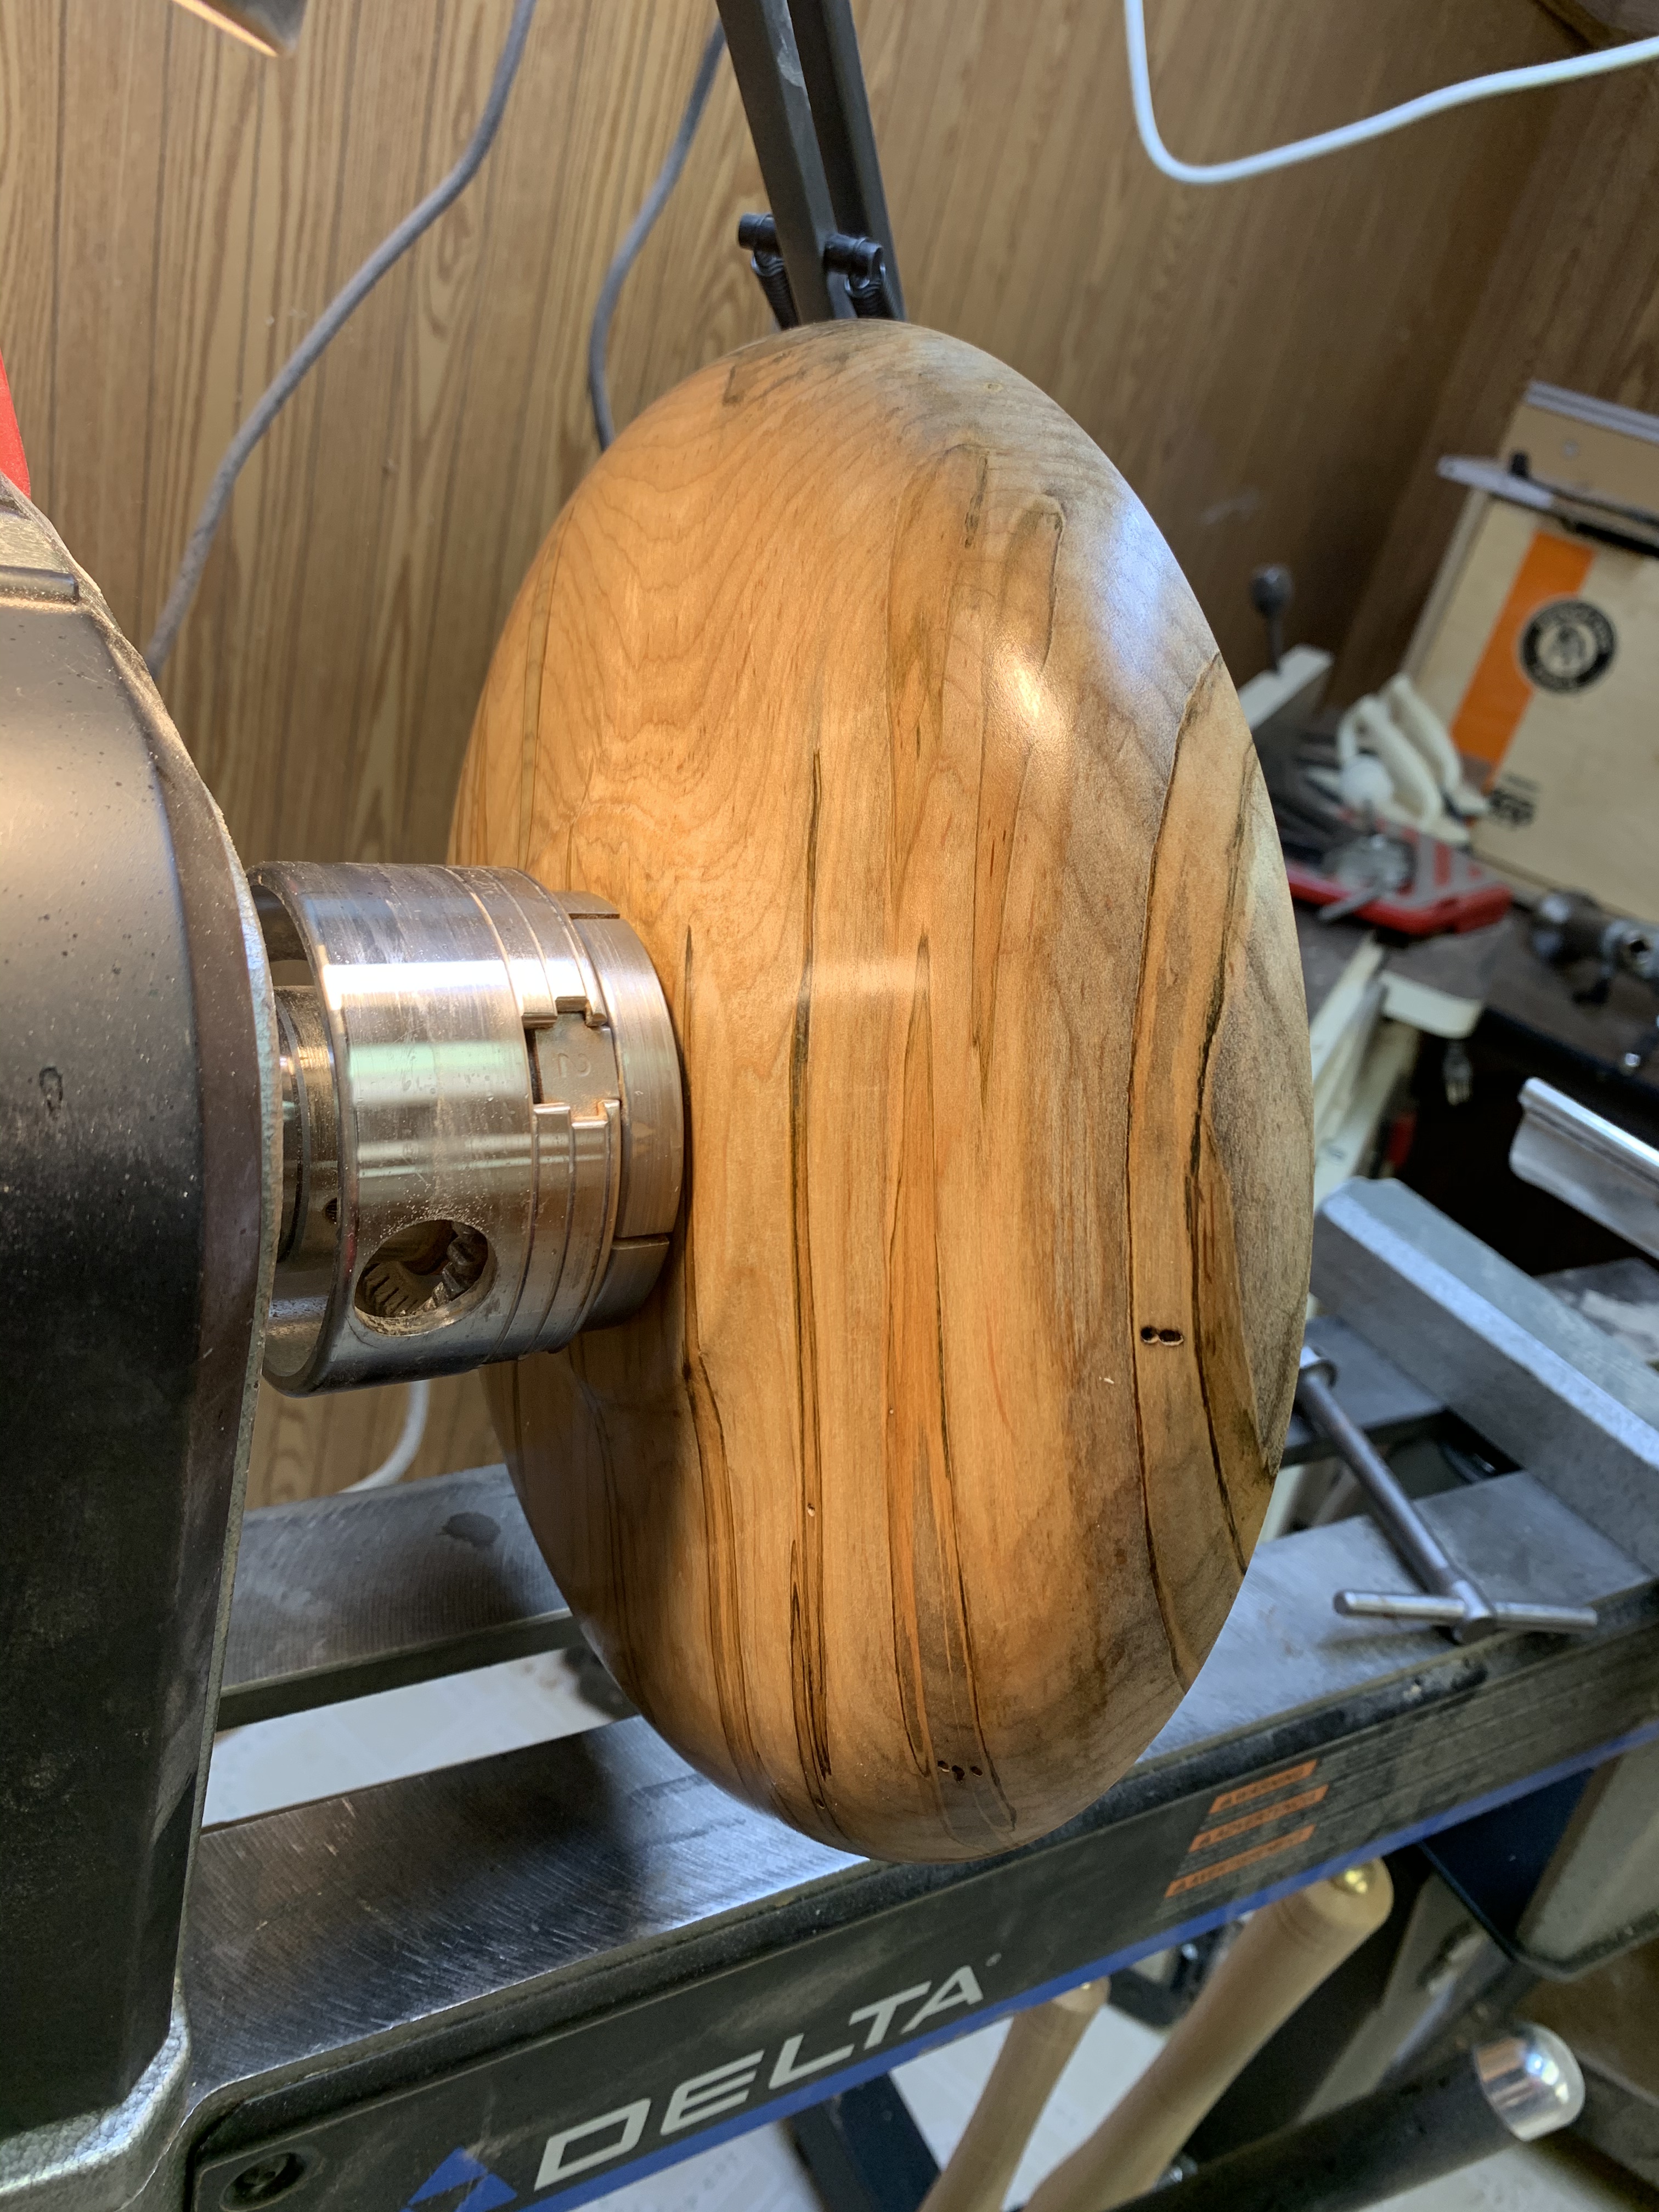
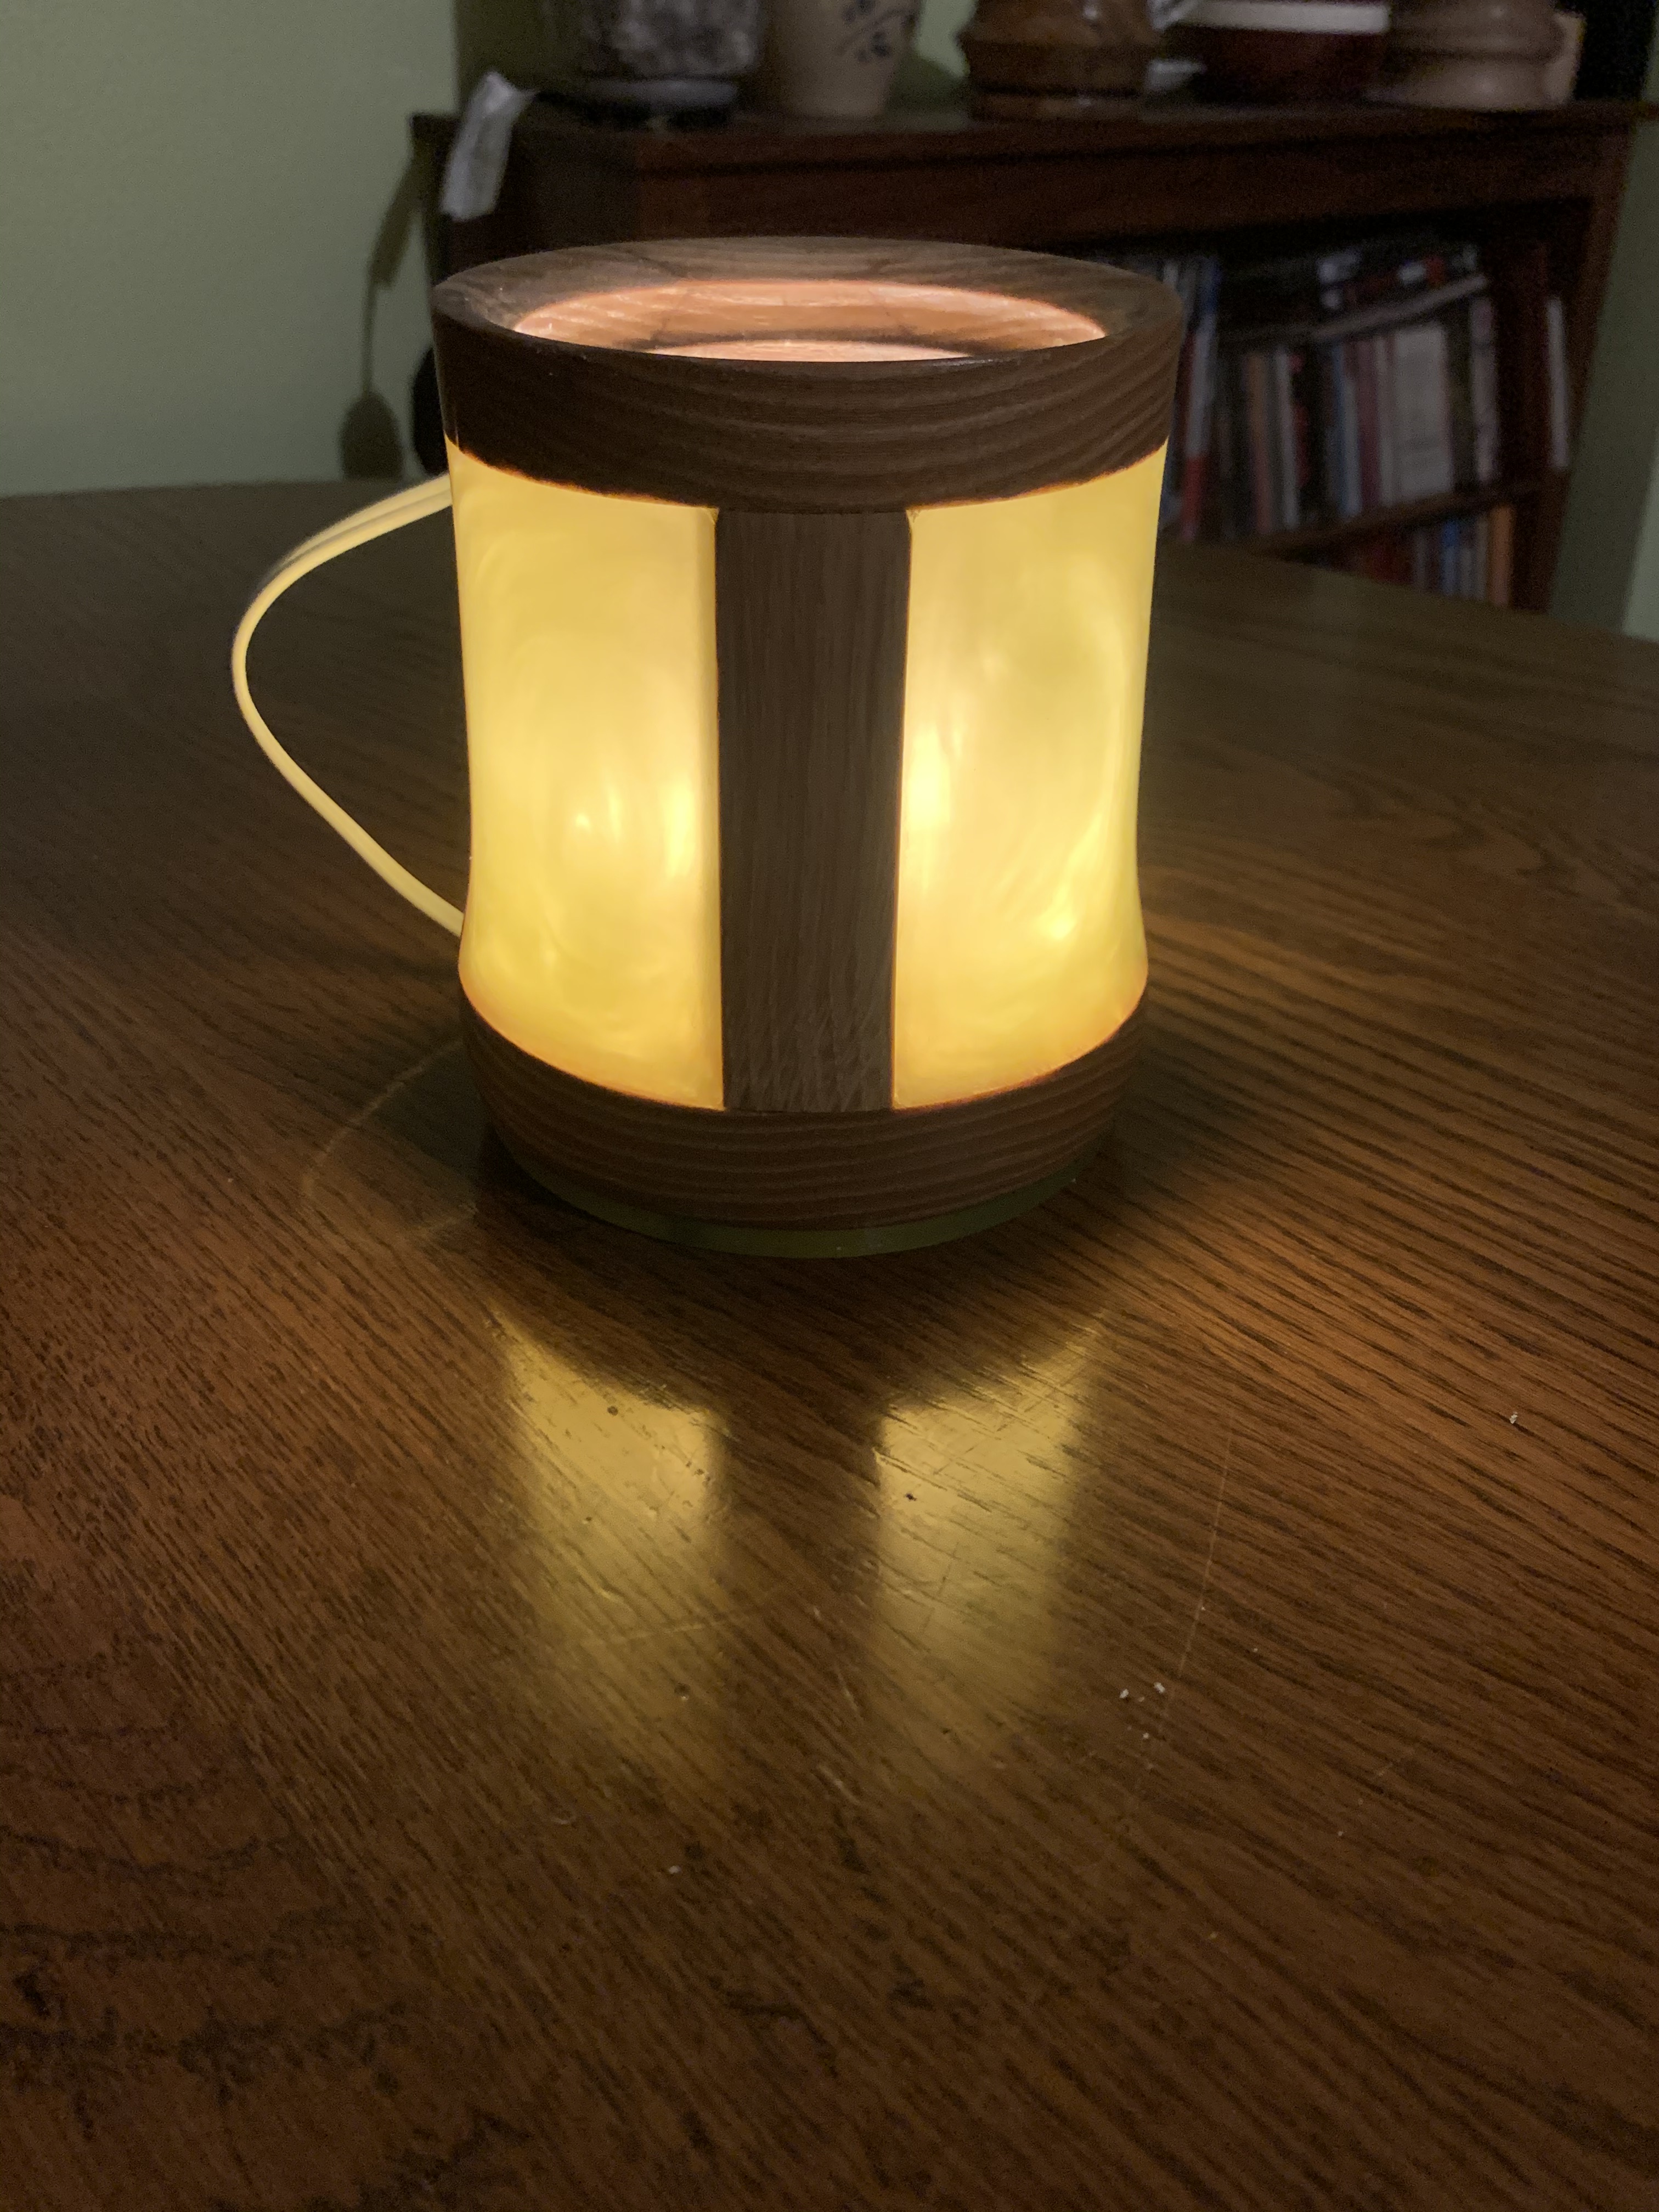
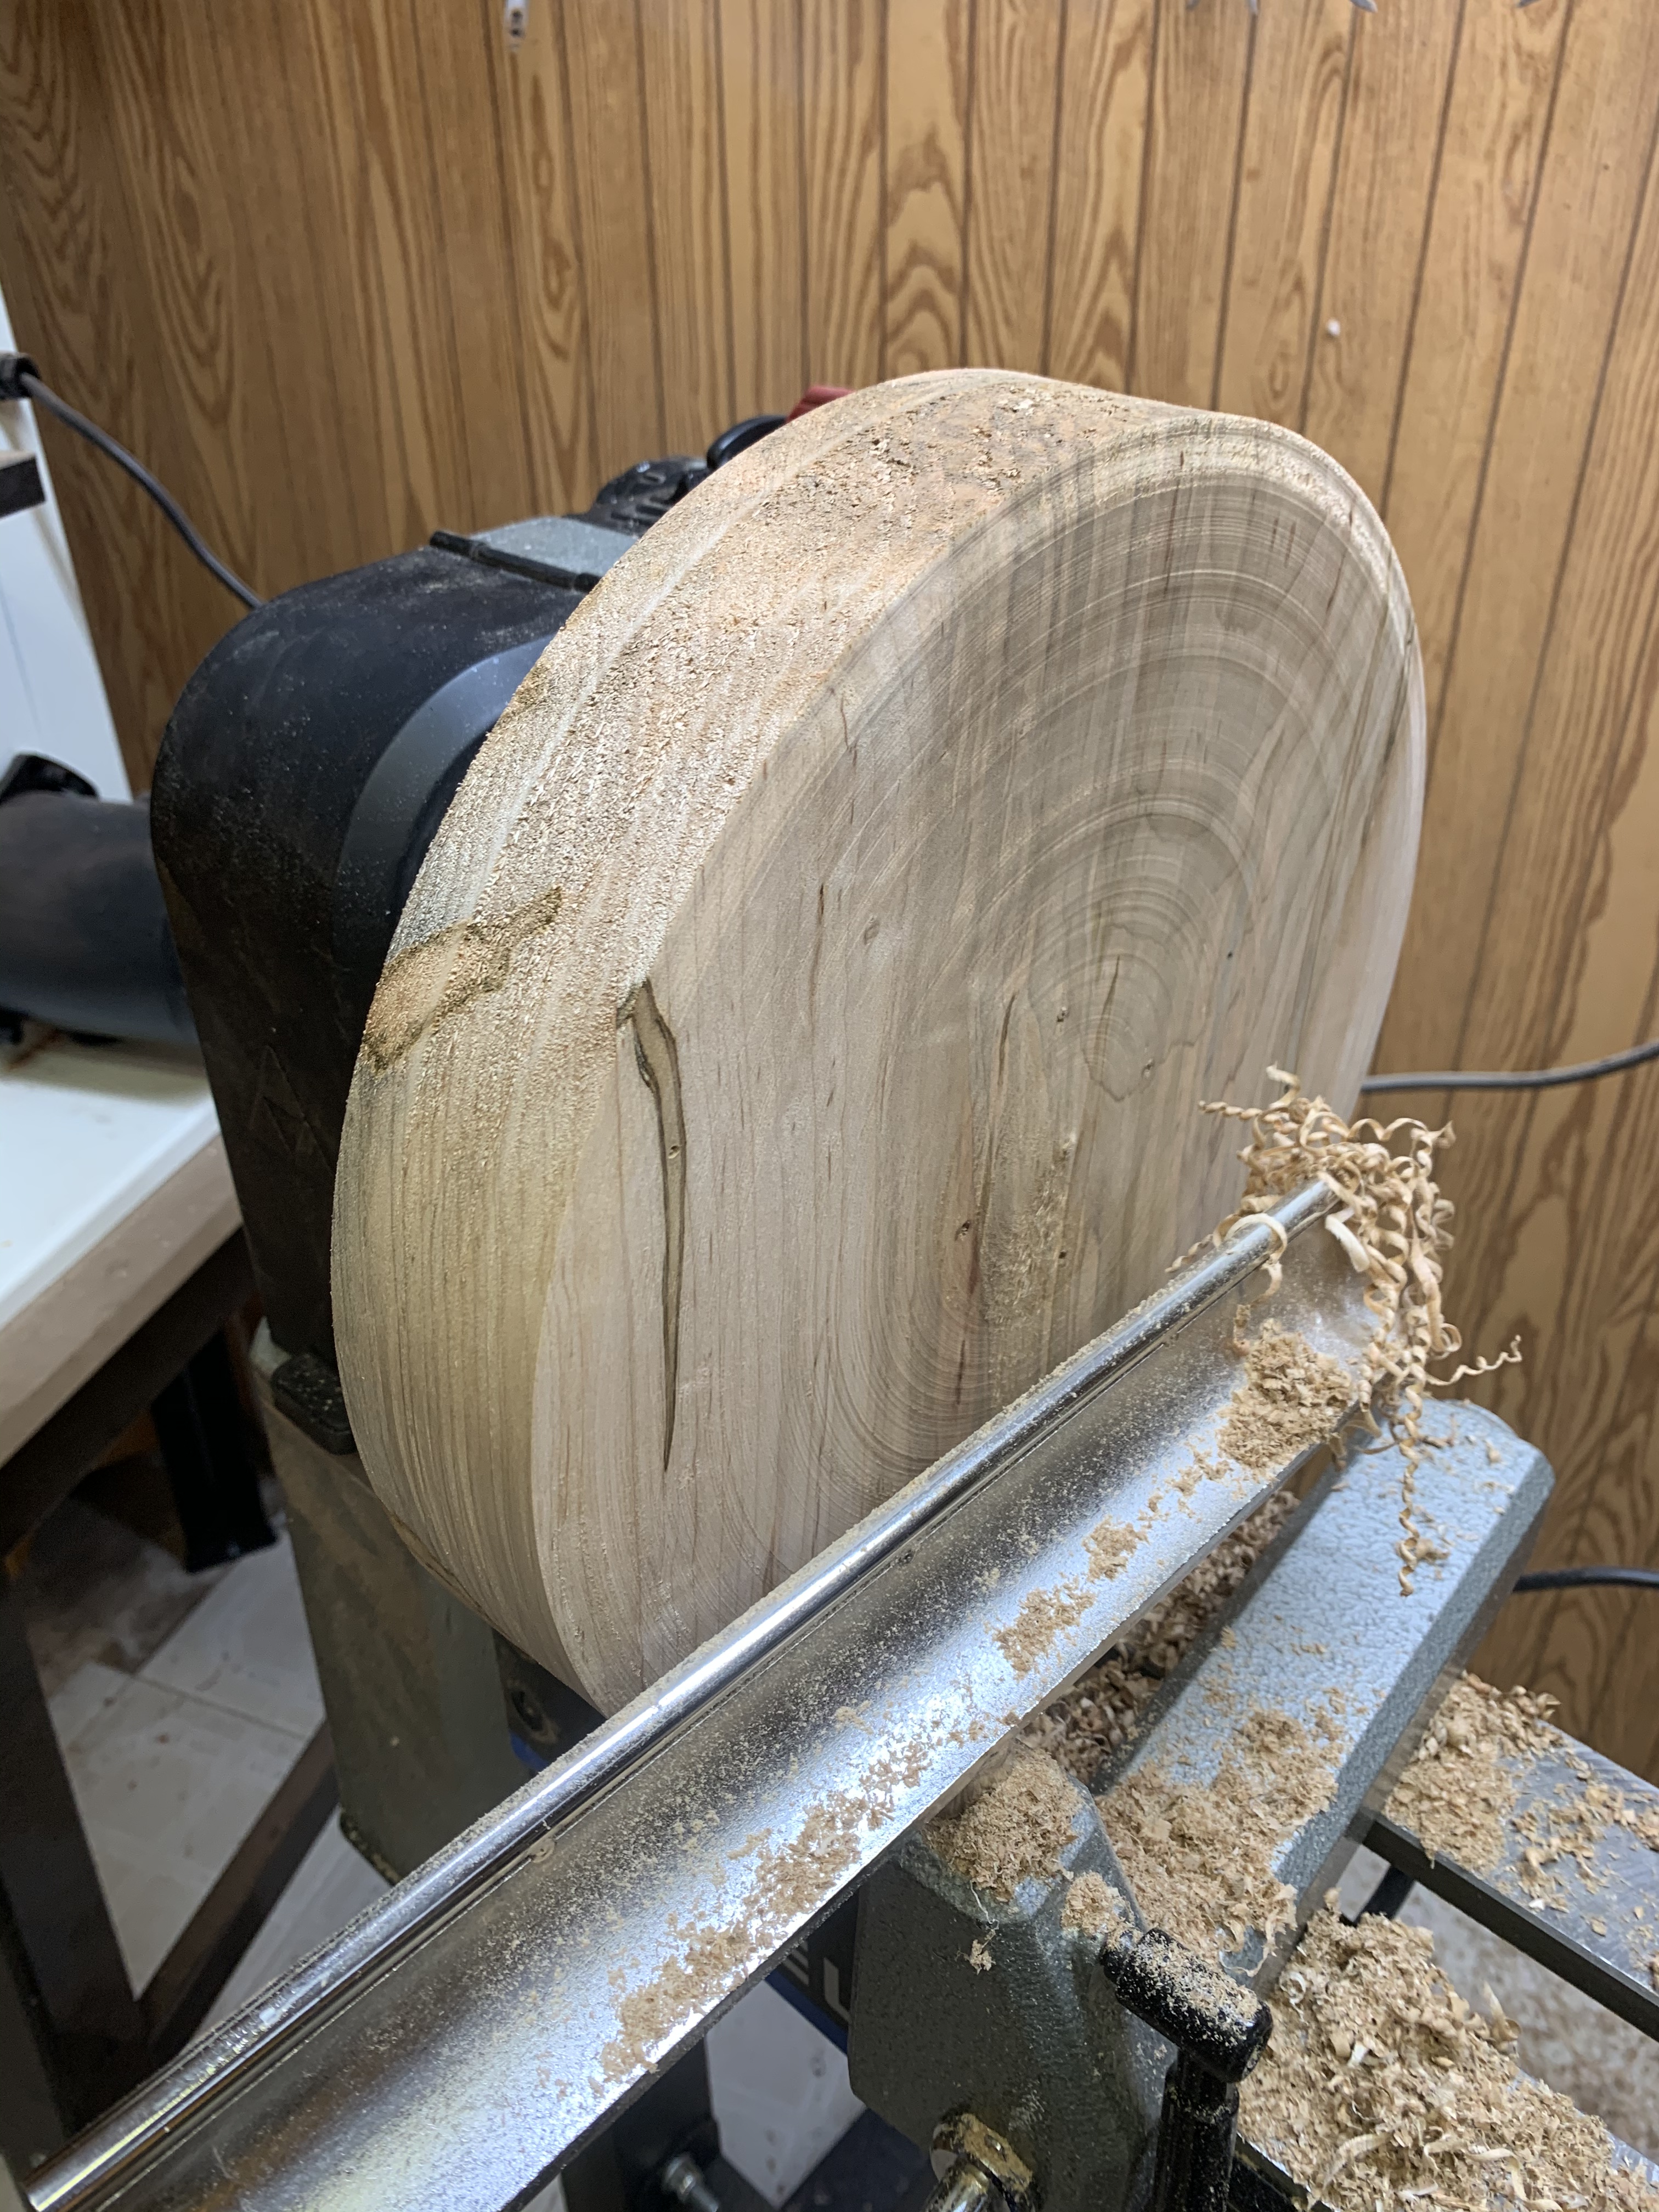
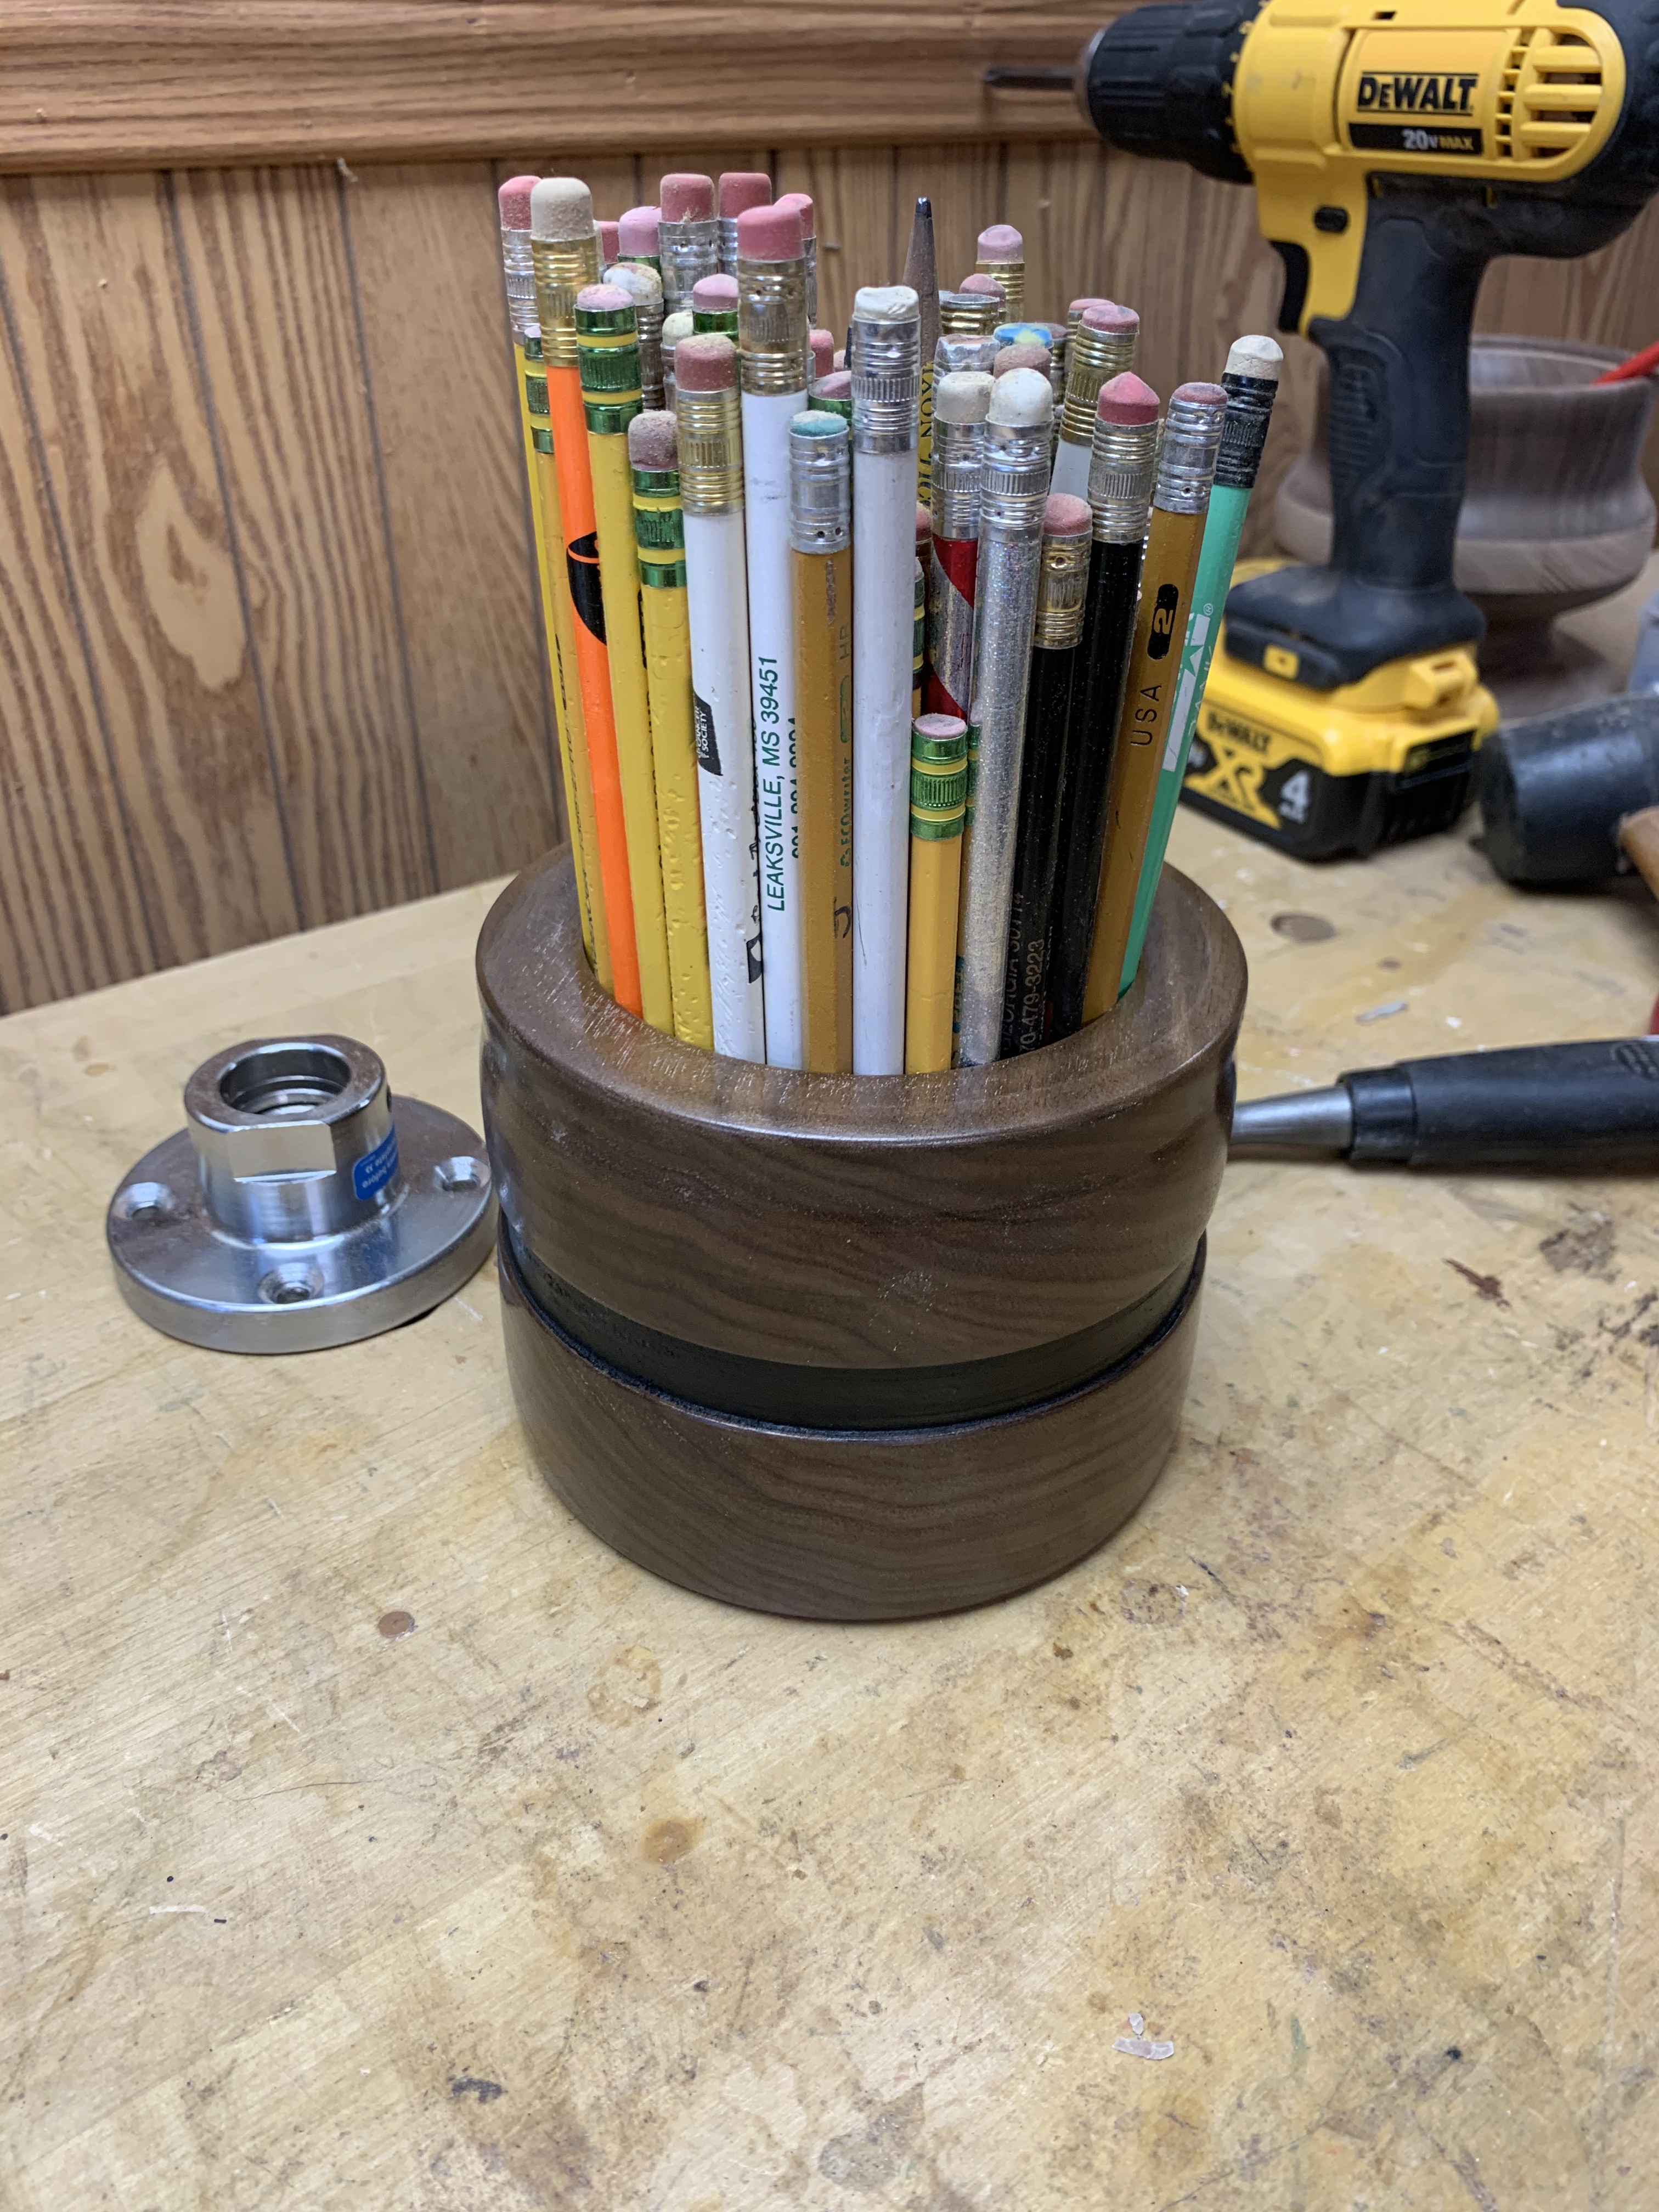
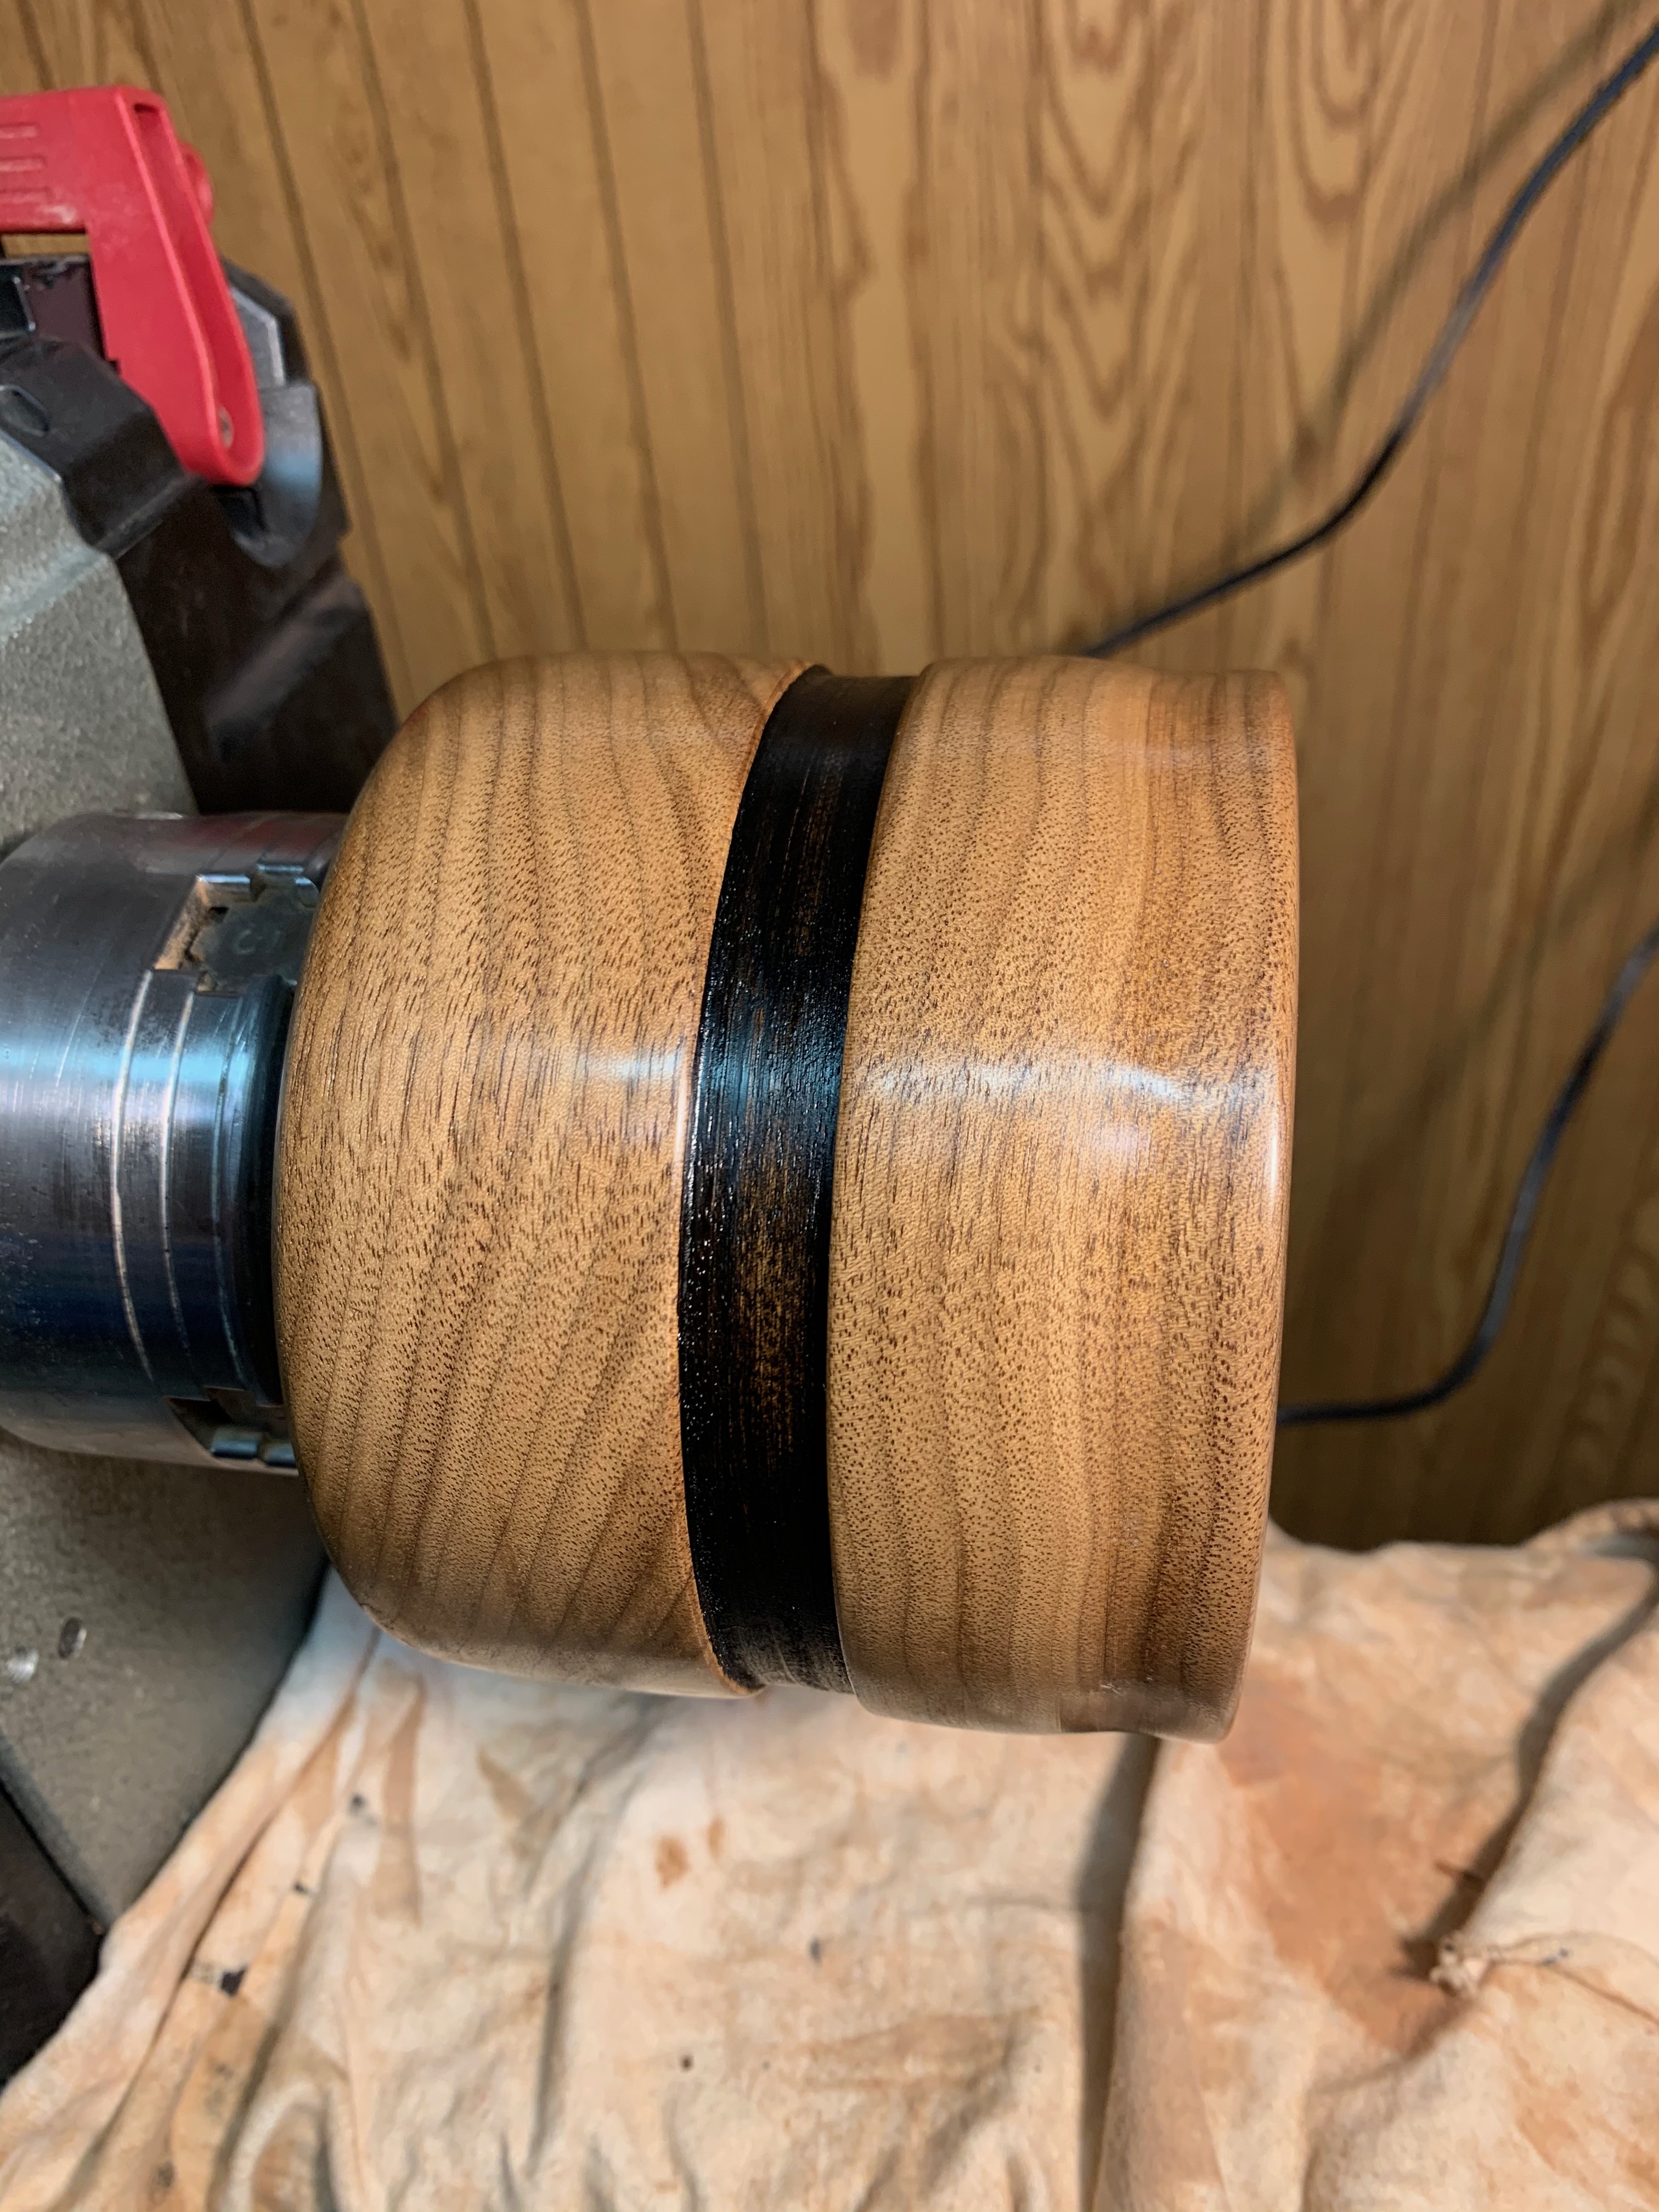
I don’t know if I mentioned the plate before, and I’m too lazy to go back through the archives to check, but I got MrsGF’s cake plate done finally. It’s hard to judge size in these photos so to give you an idea of size the top plate is about 11″ across and it stands about 5″ high. It’s made of ambrosia maple, finished with shellac and carnauba wax so it’s a food safe surface. I think it turned out reasonably well.

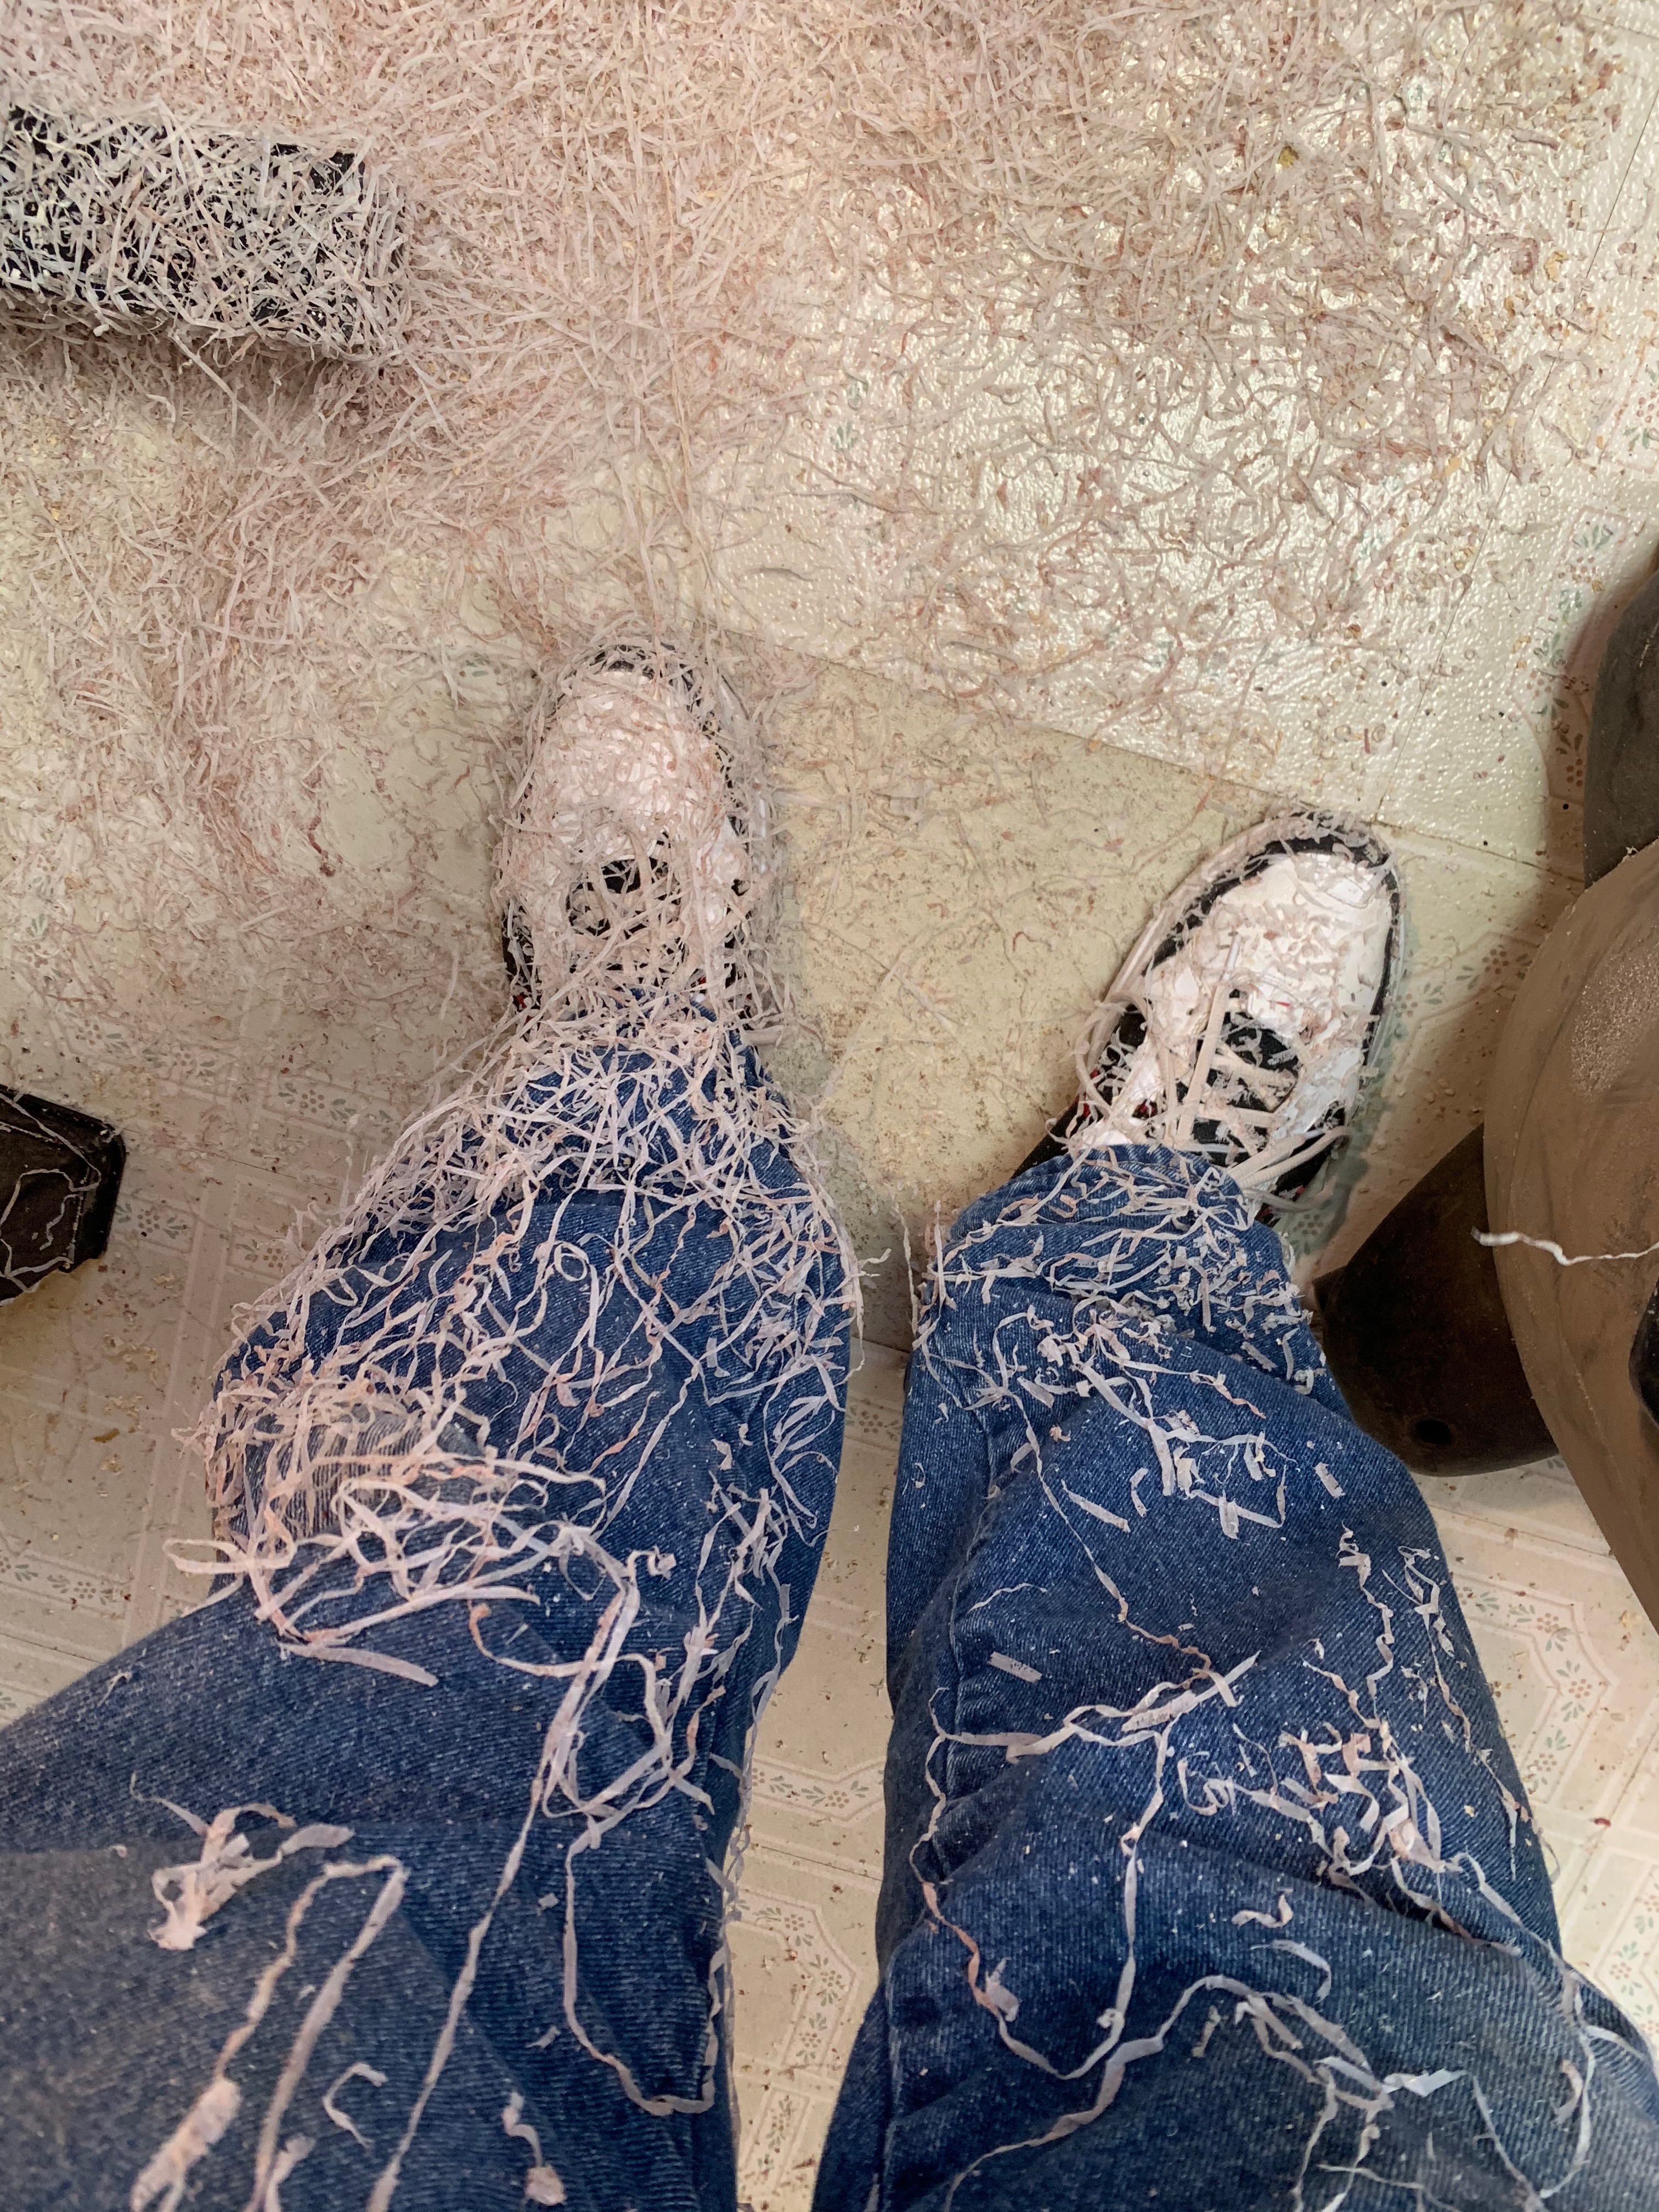
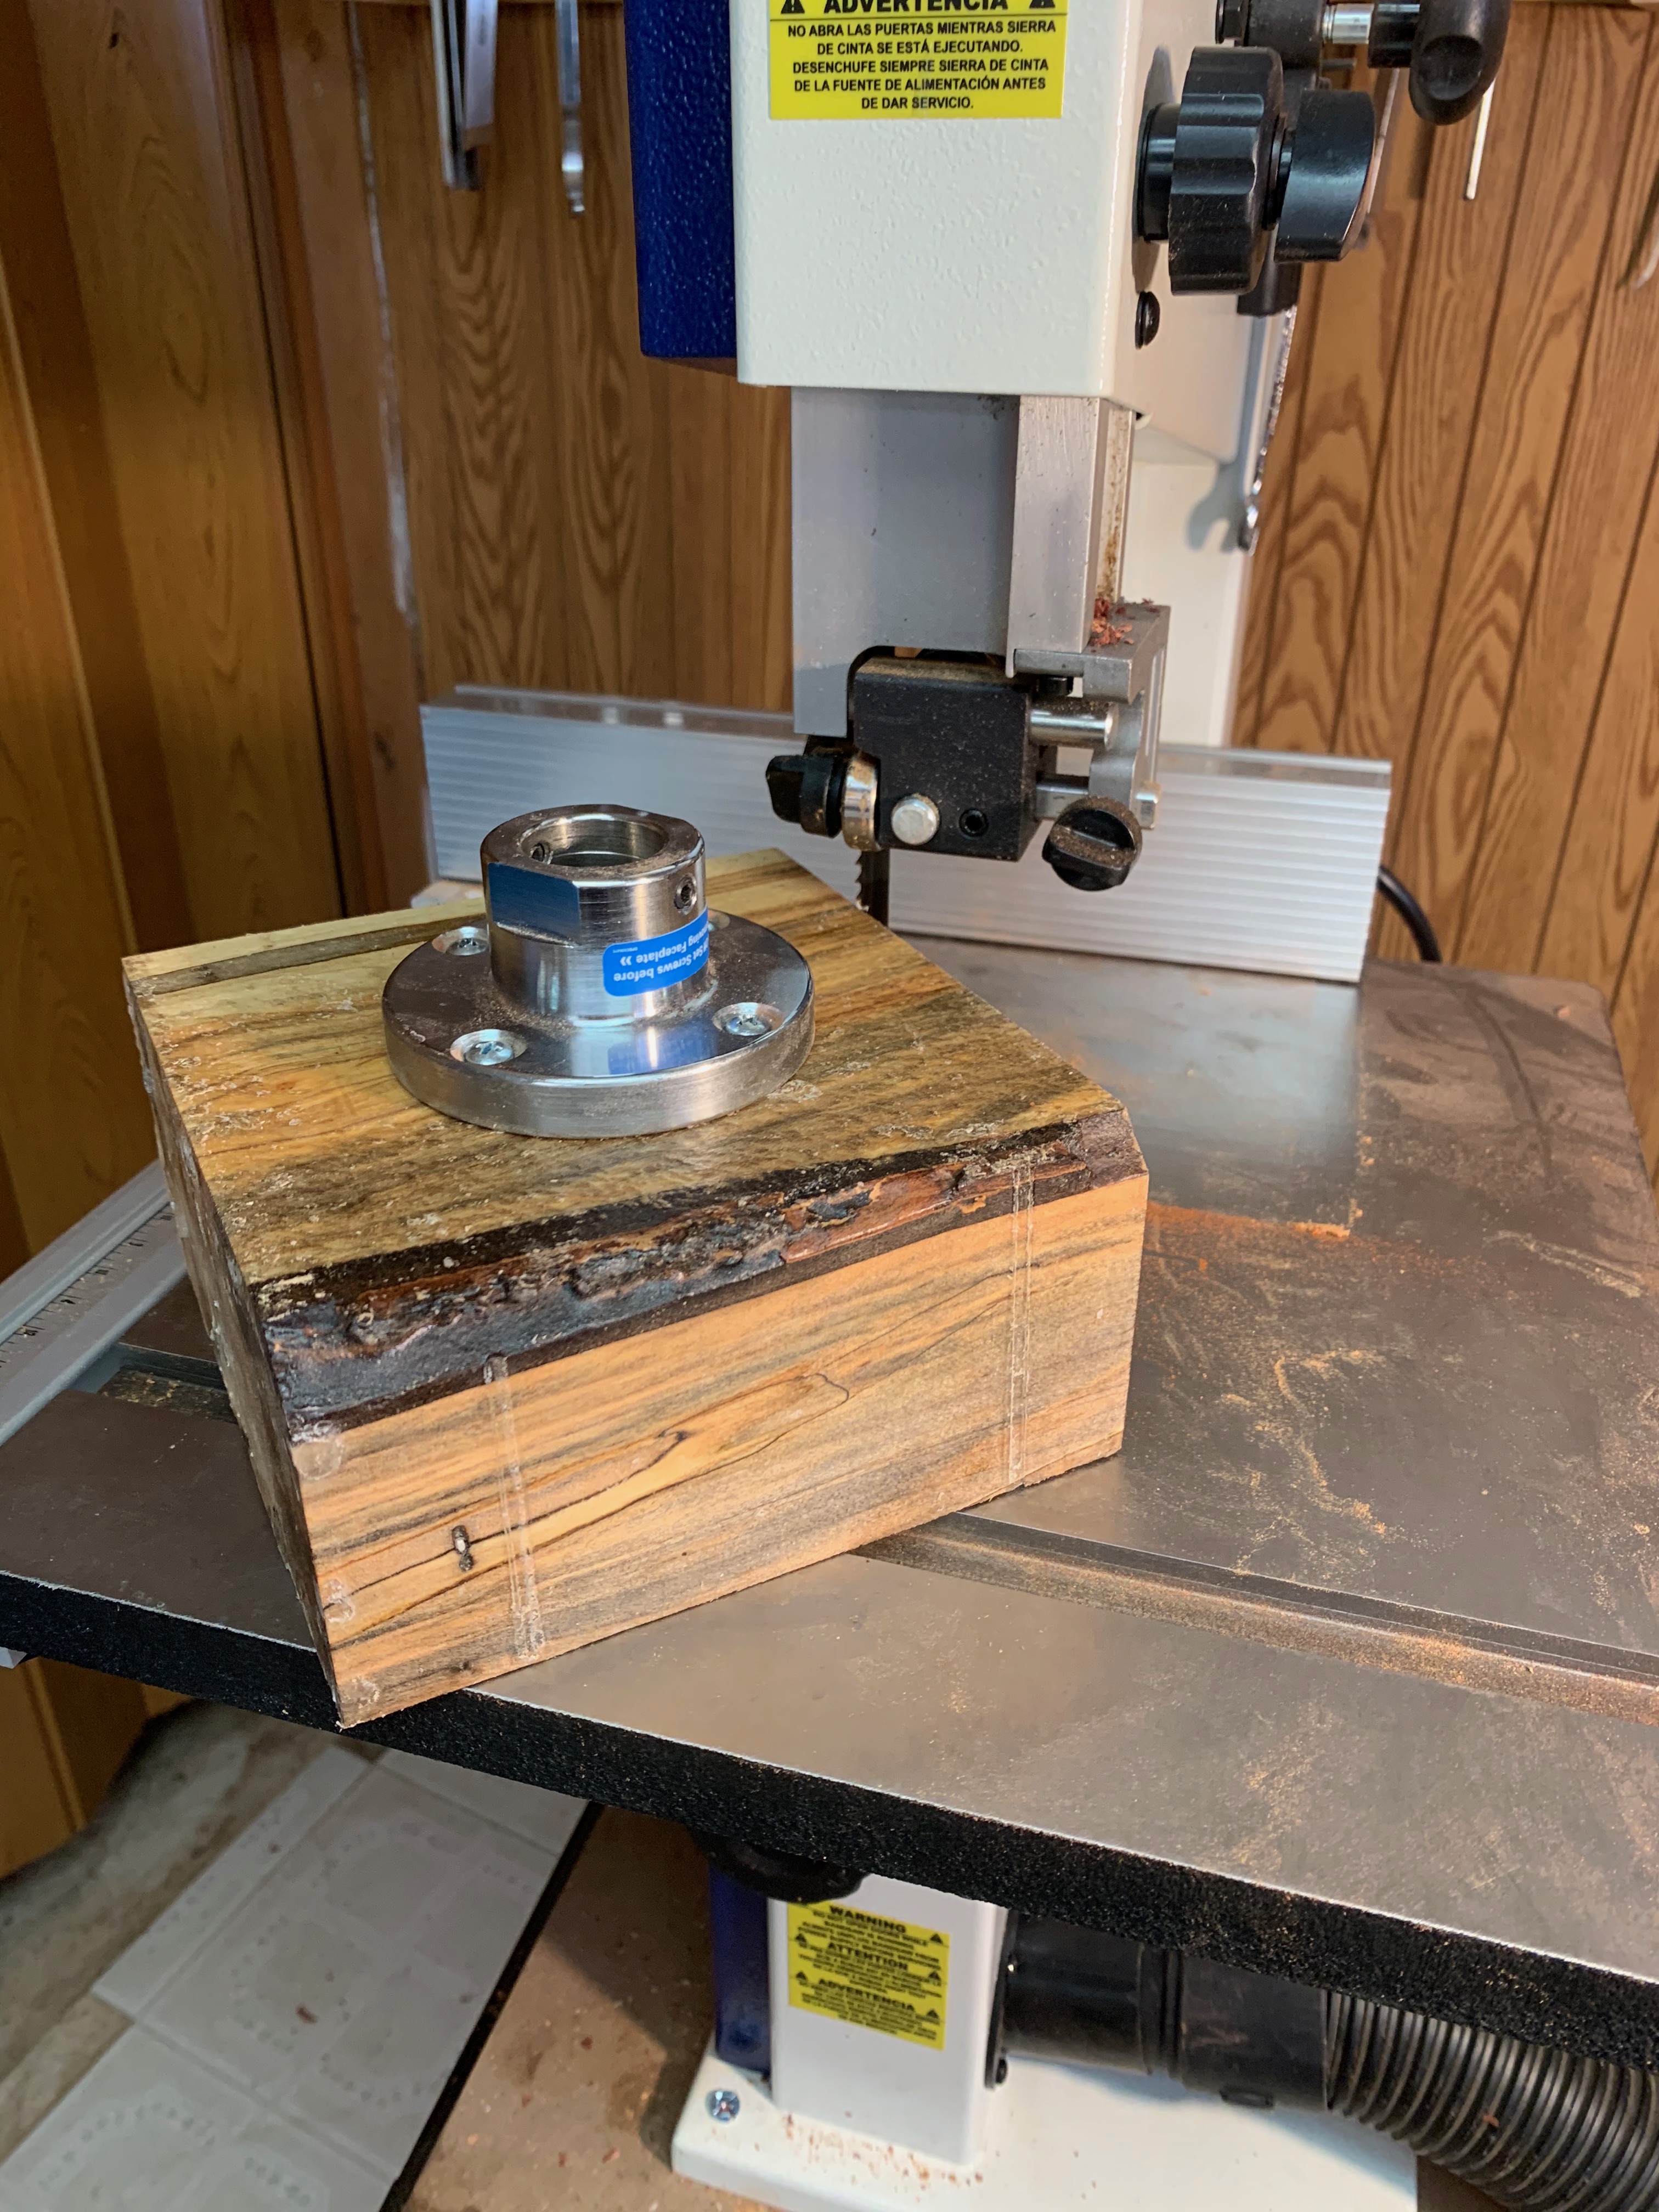
The base and spindle are made out of packing material. I ordered a bunch of wood from a company called Green Valley Wood Products and the wood didn’t quite fit into the box so they chucked in some rough cut pieces of wood as packing material that turned out to be some rather nice ambrosia maple once I cleaned it up. The stuff didn’t look like it was very good at first but I trimmed it up on the bandsaw and discovered there was enough there to make the base and spindle.

I should probably have mentioned Green Valley before. I’ve bought several hundred bucks worth of wood from these guys over the past few months and it has all been excellent quality and the prices are reasonable. Anyway, here’s a shameless plug – If you’re looking for wood, check out Green Valley Wood Products, Brazil IN. I don’t get free wood or get paid by them or anything like that, I just like the quality of their wood, shipping times are reasonable and the prices are fair.

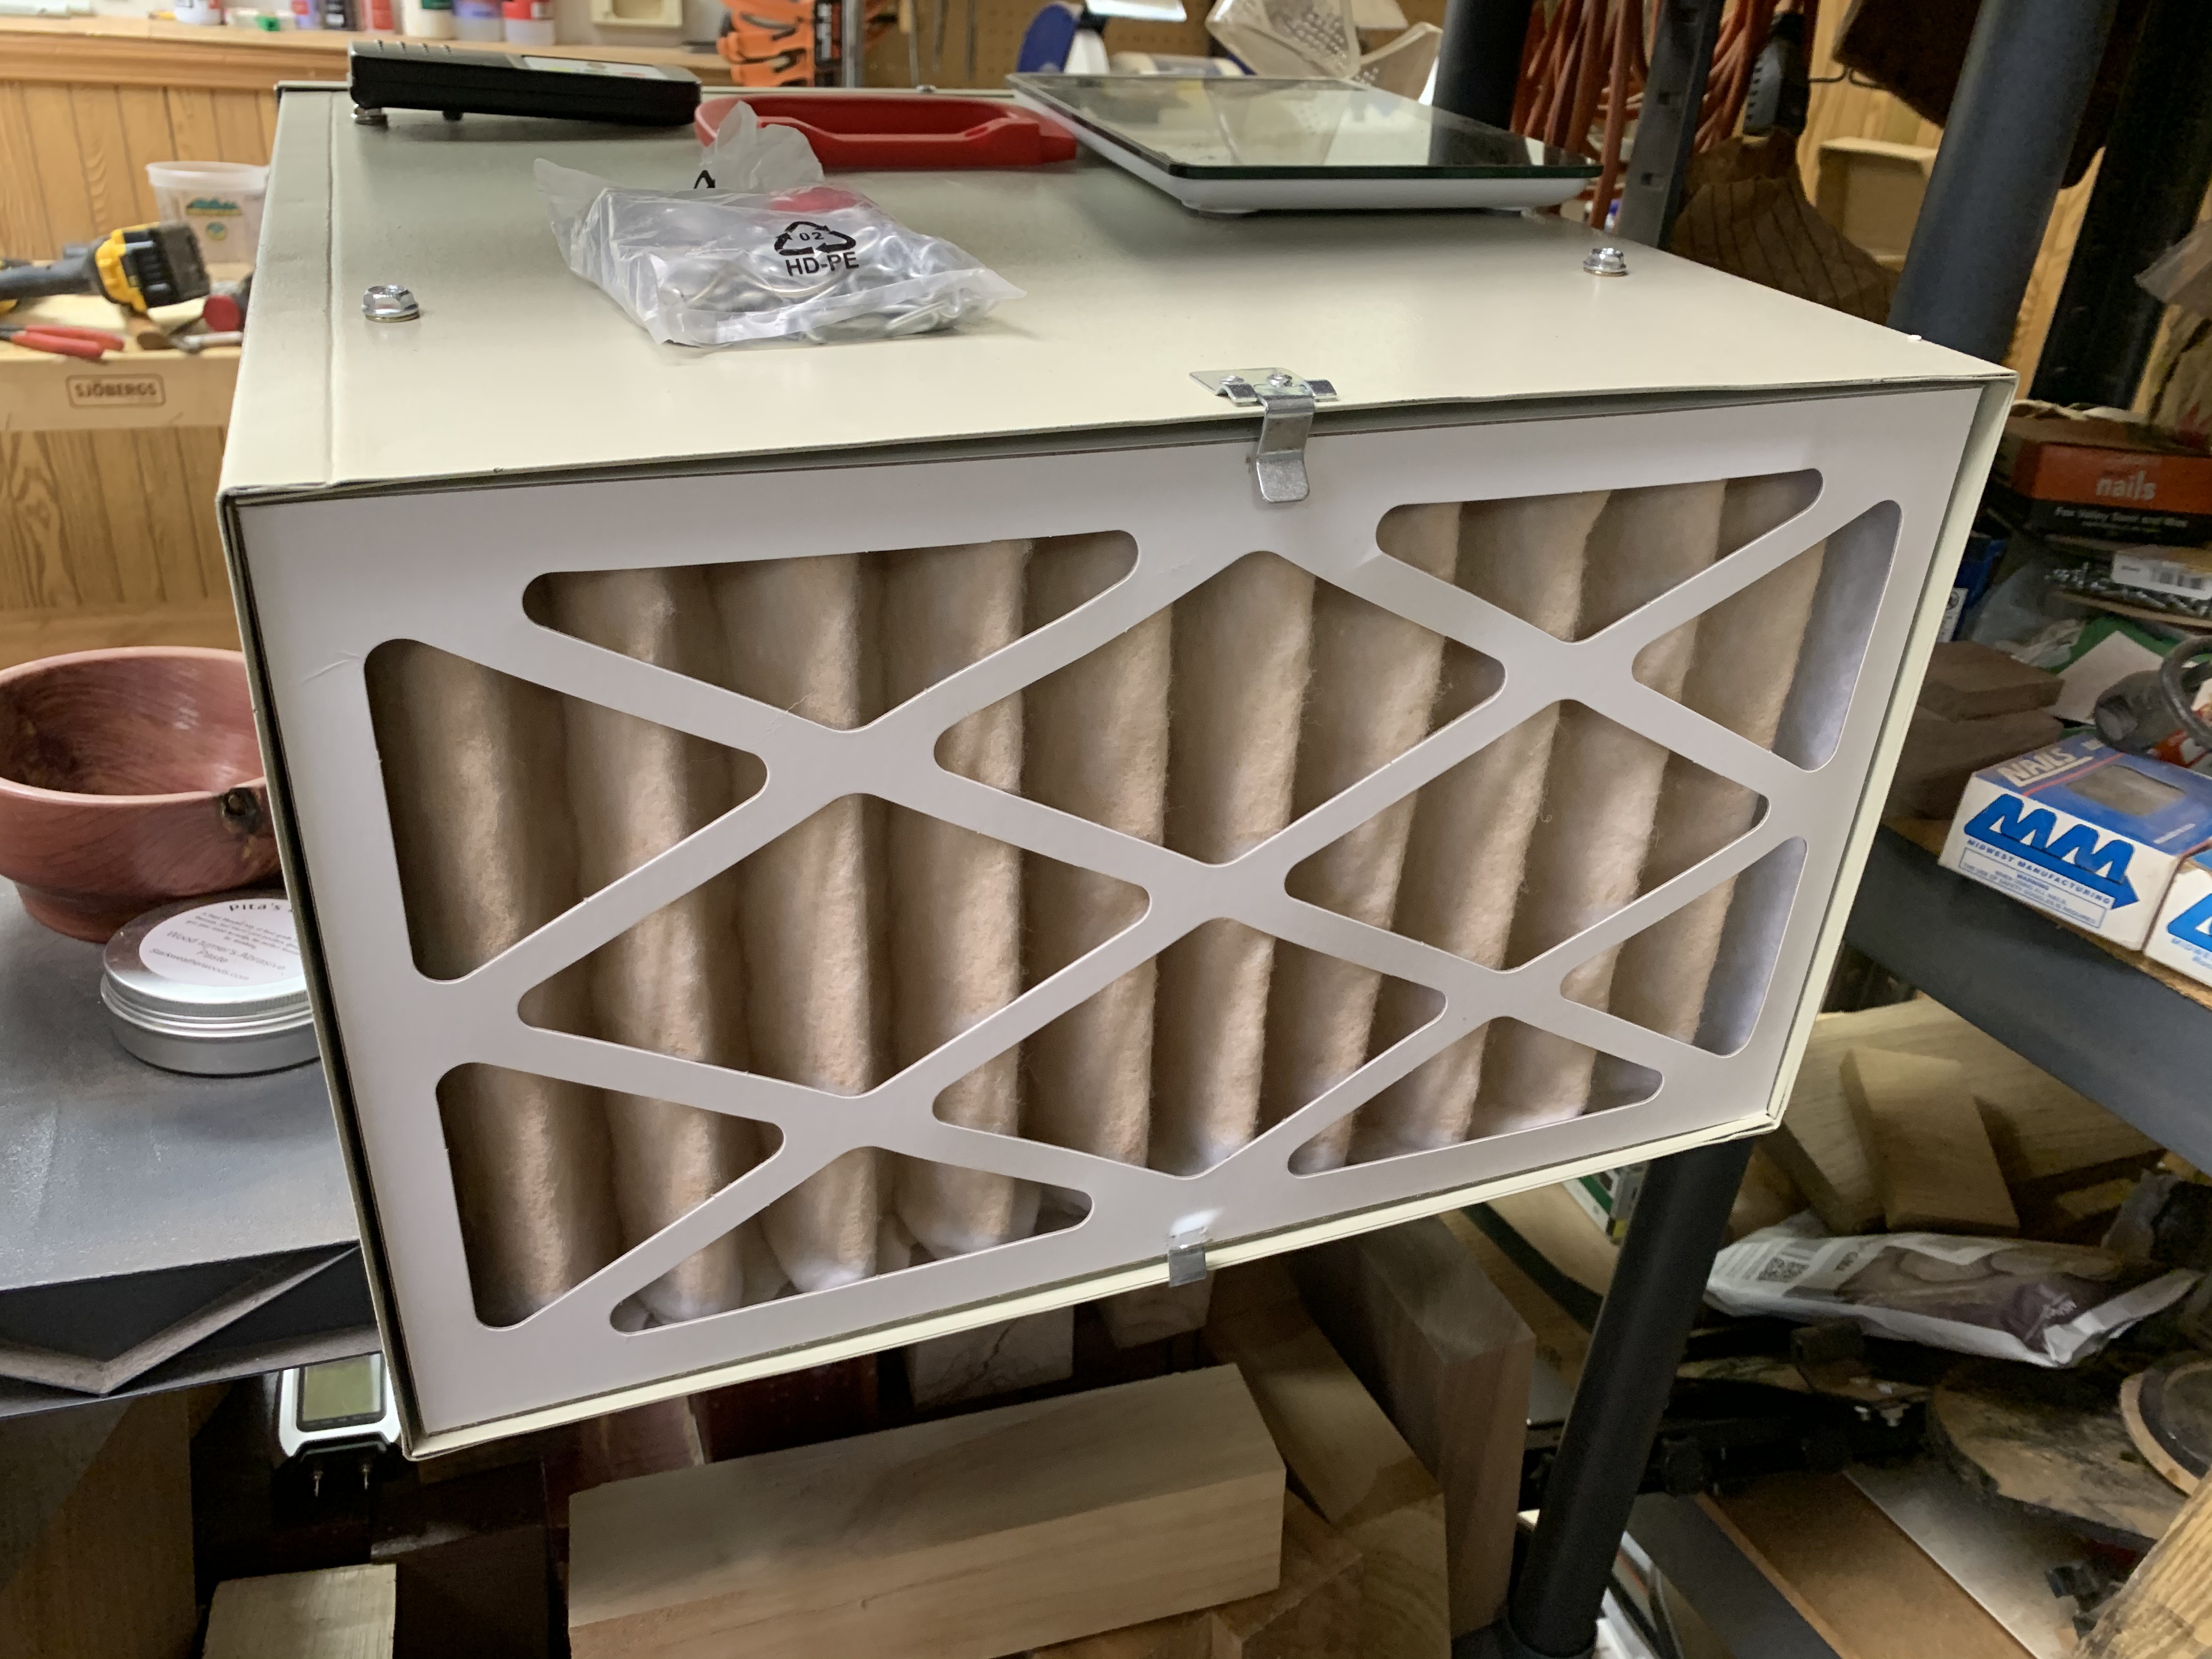
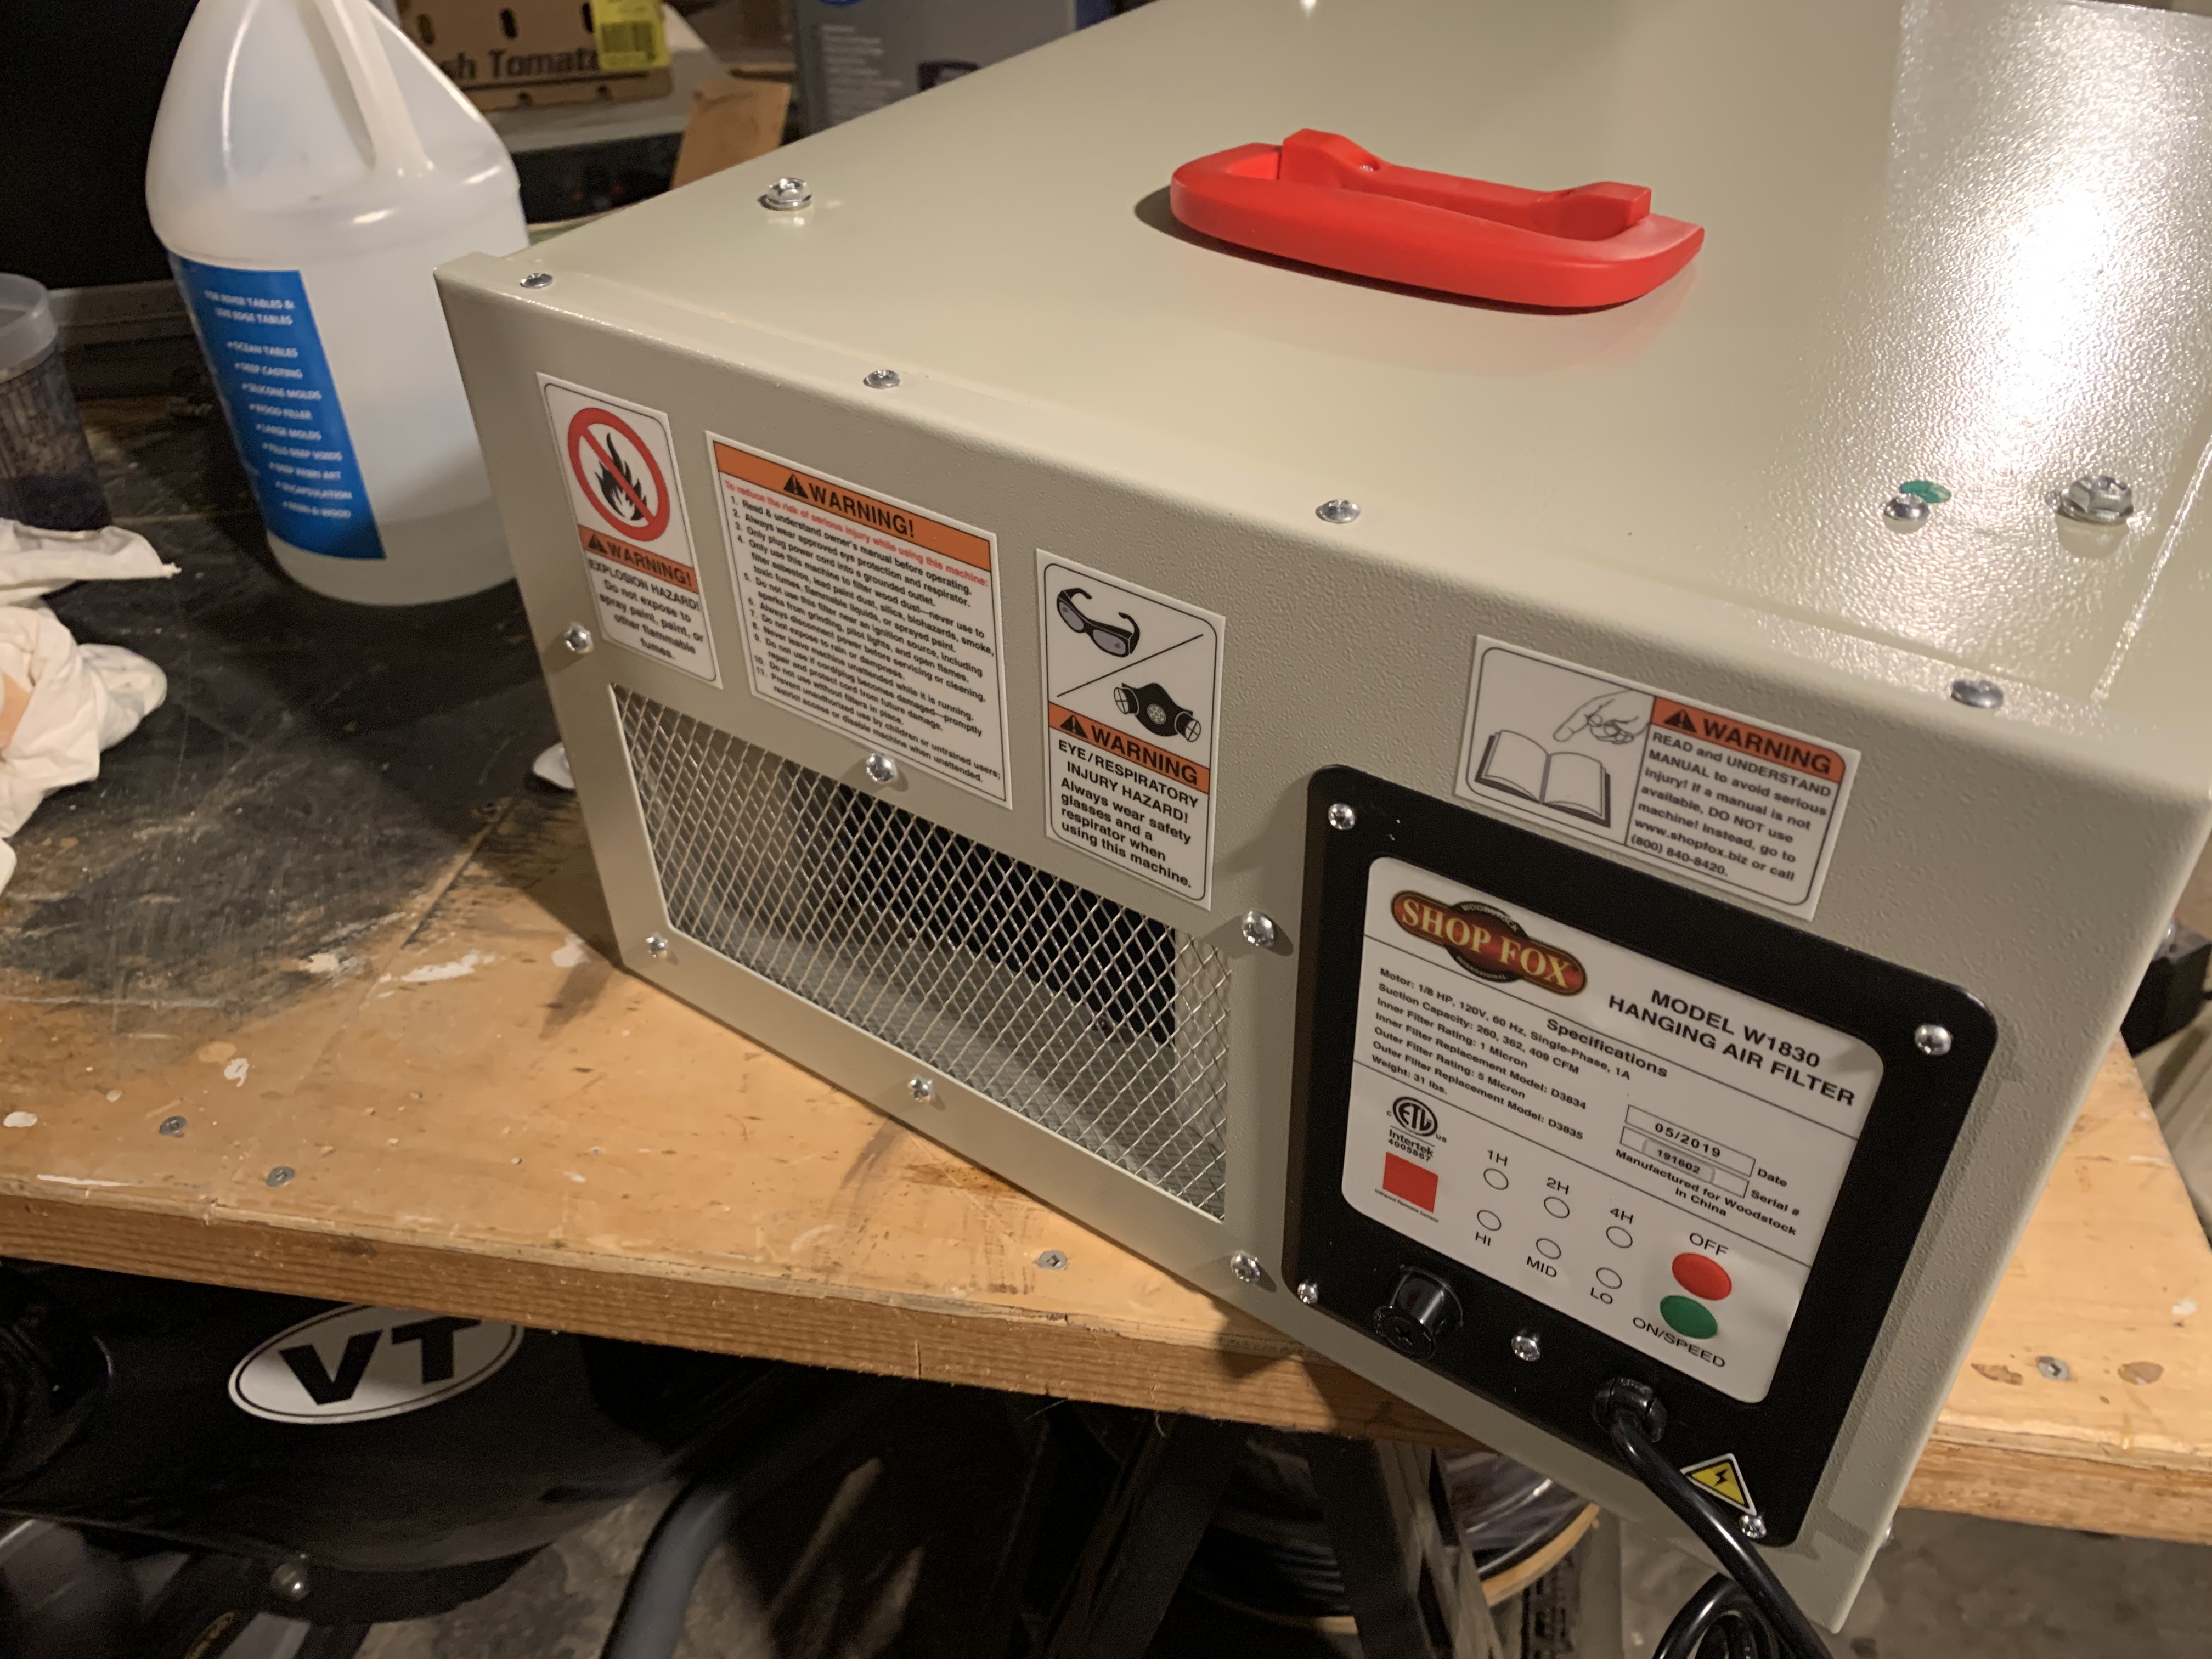
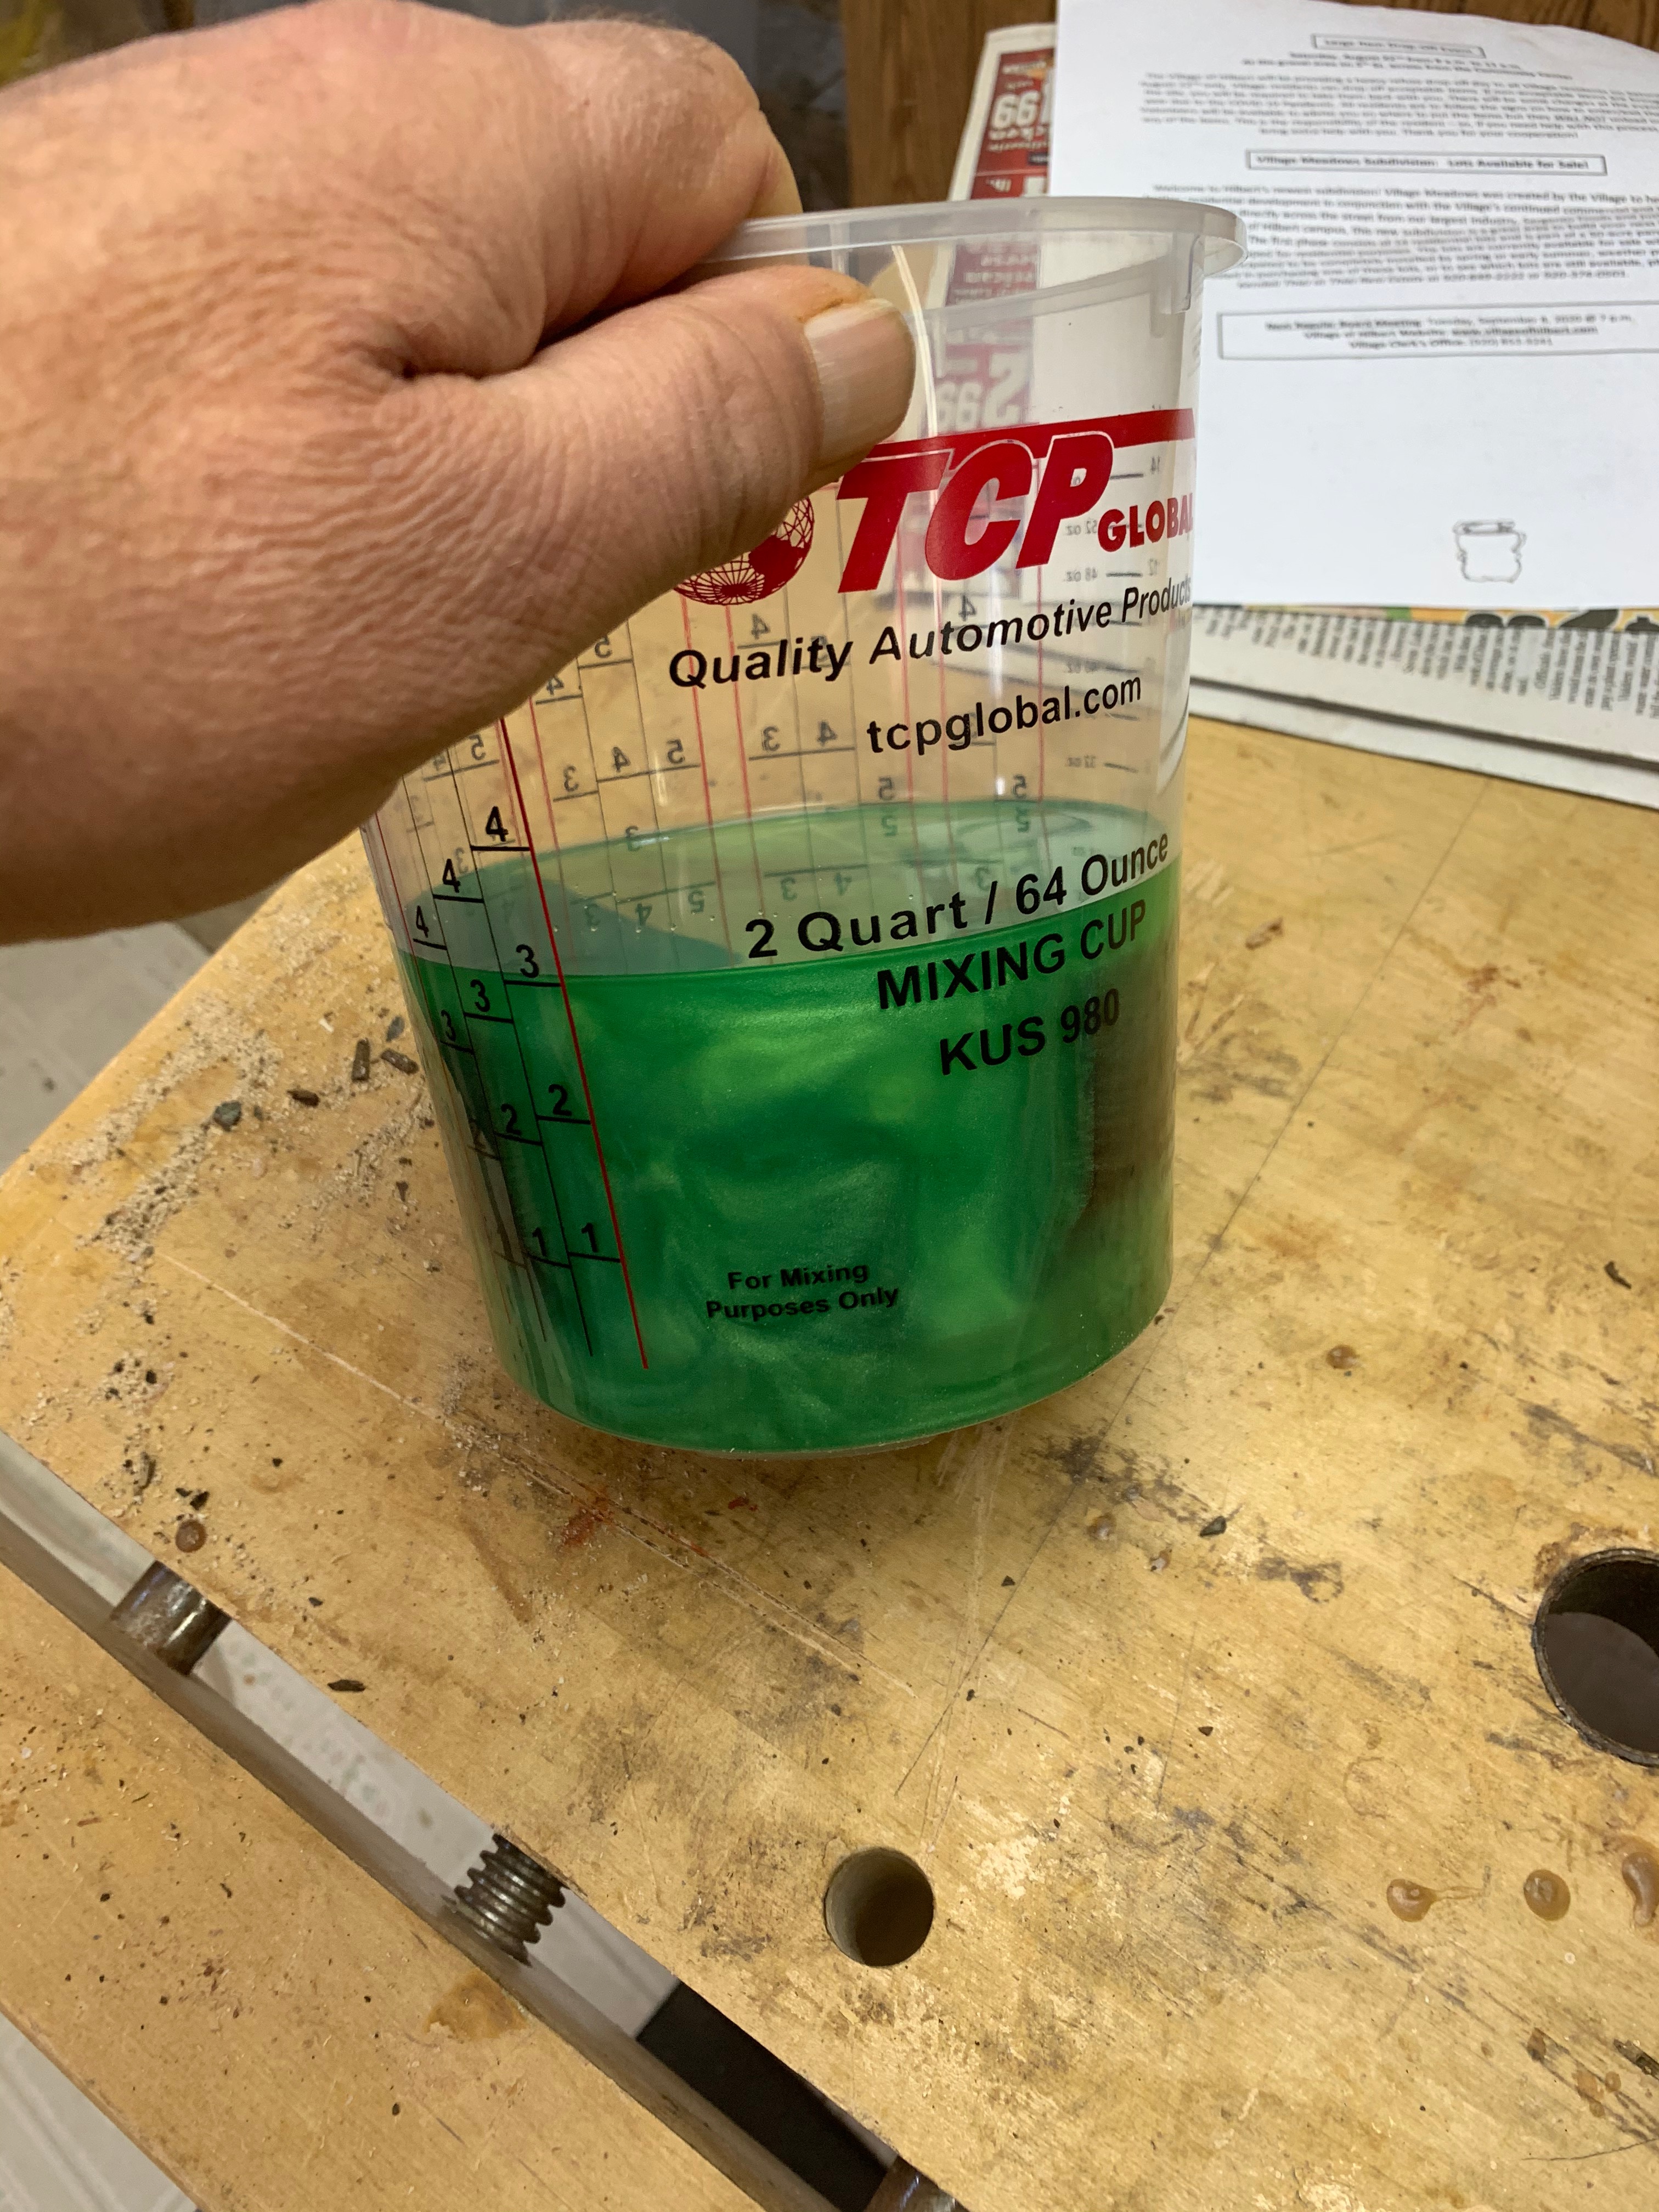
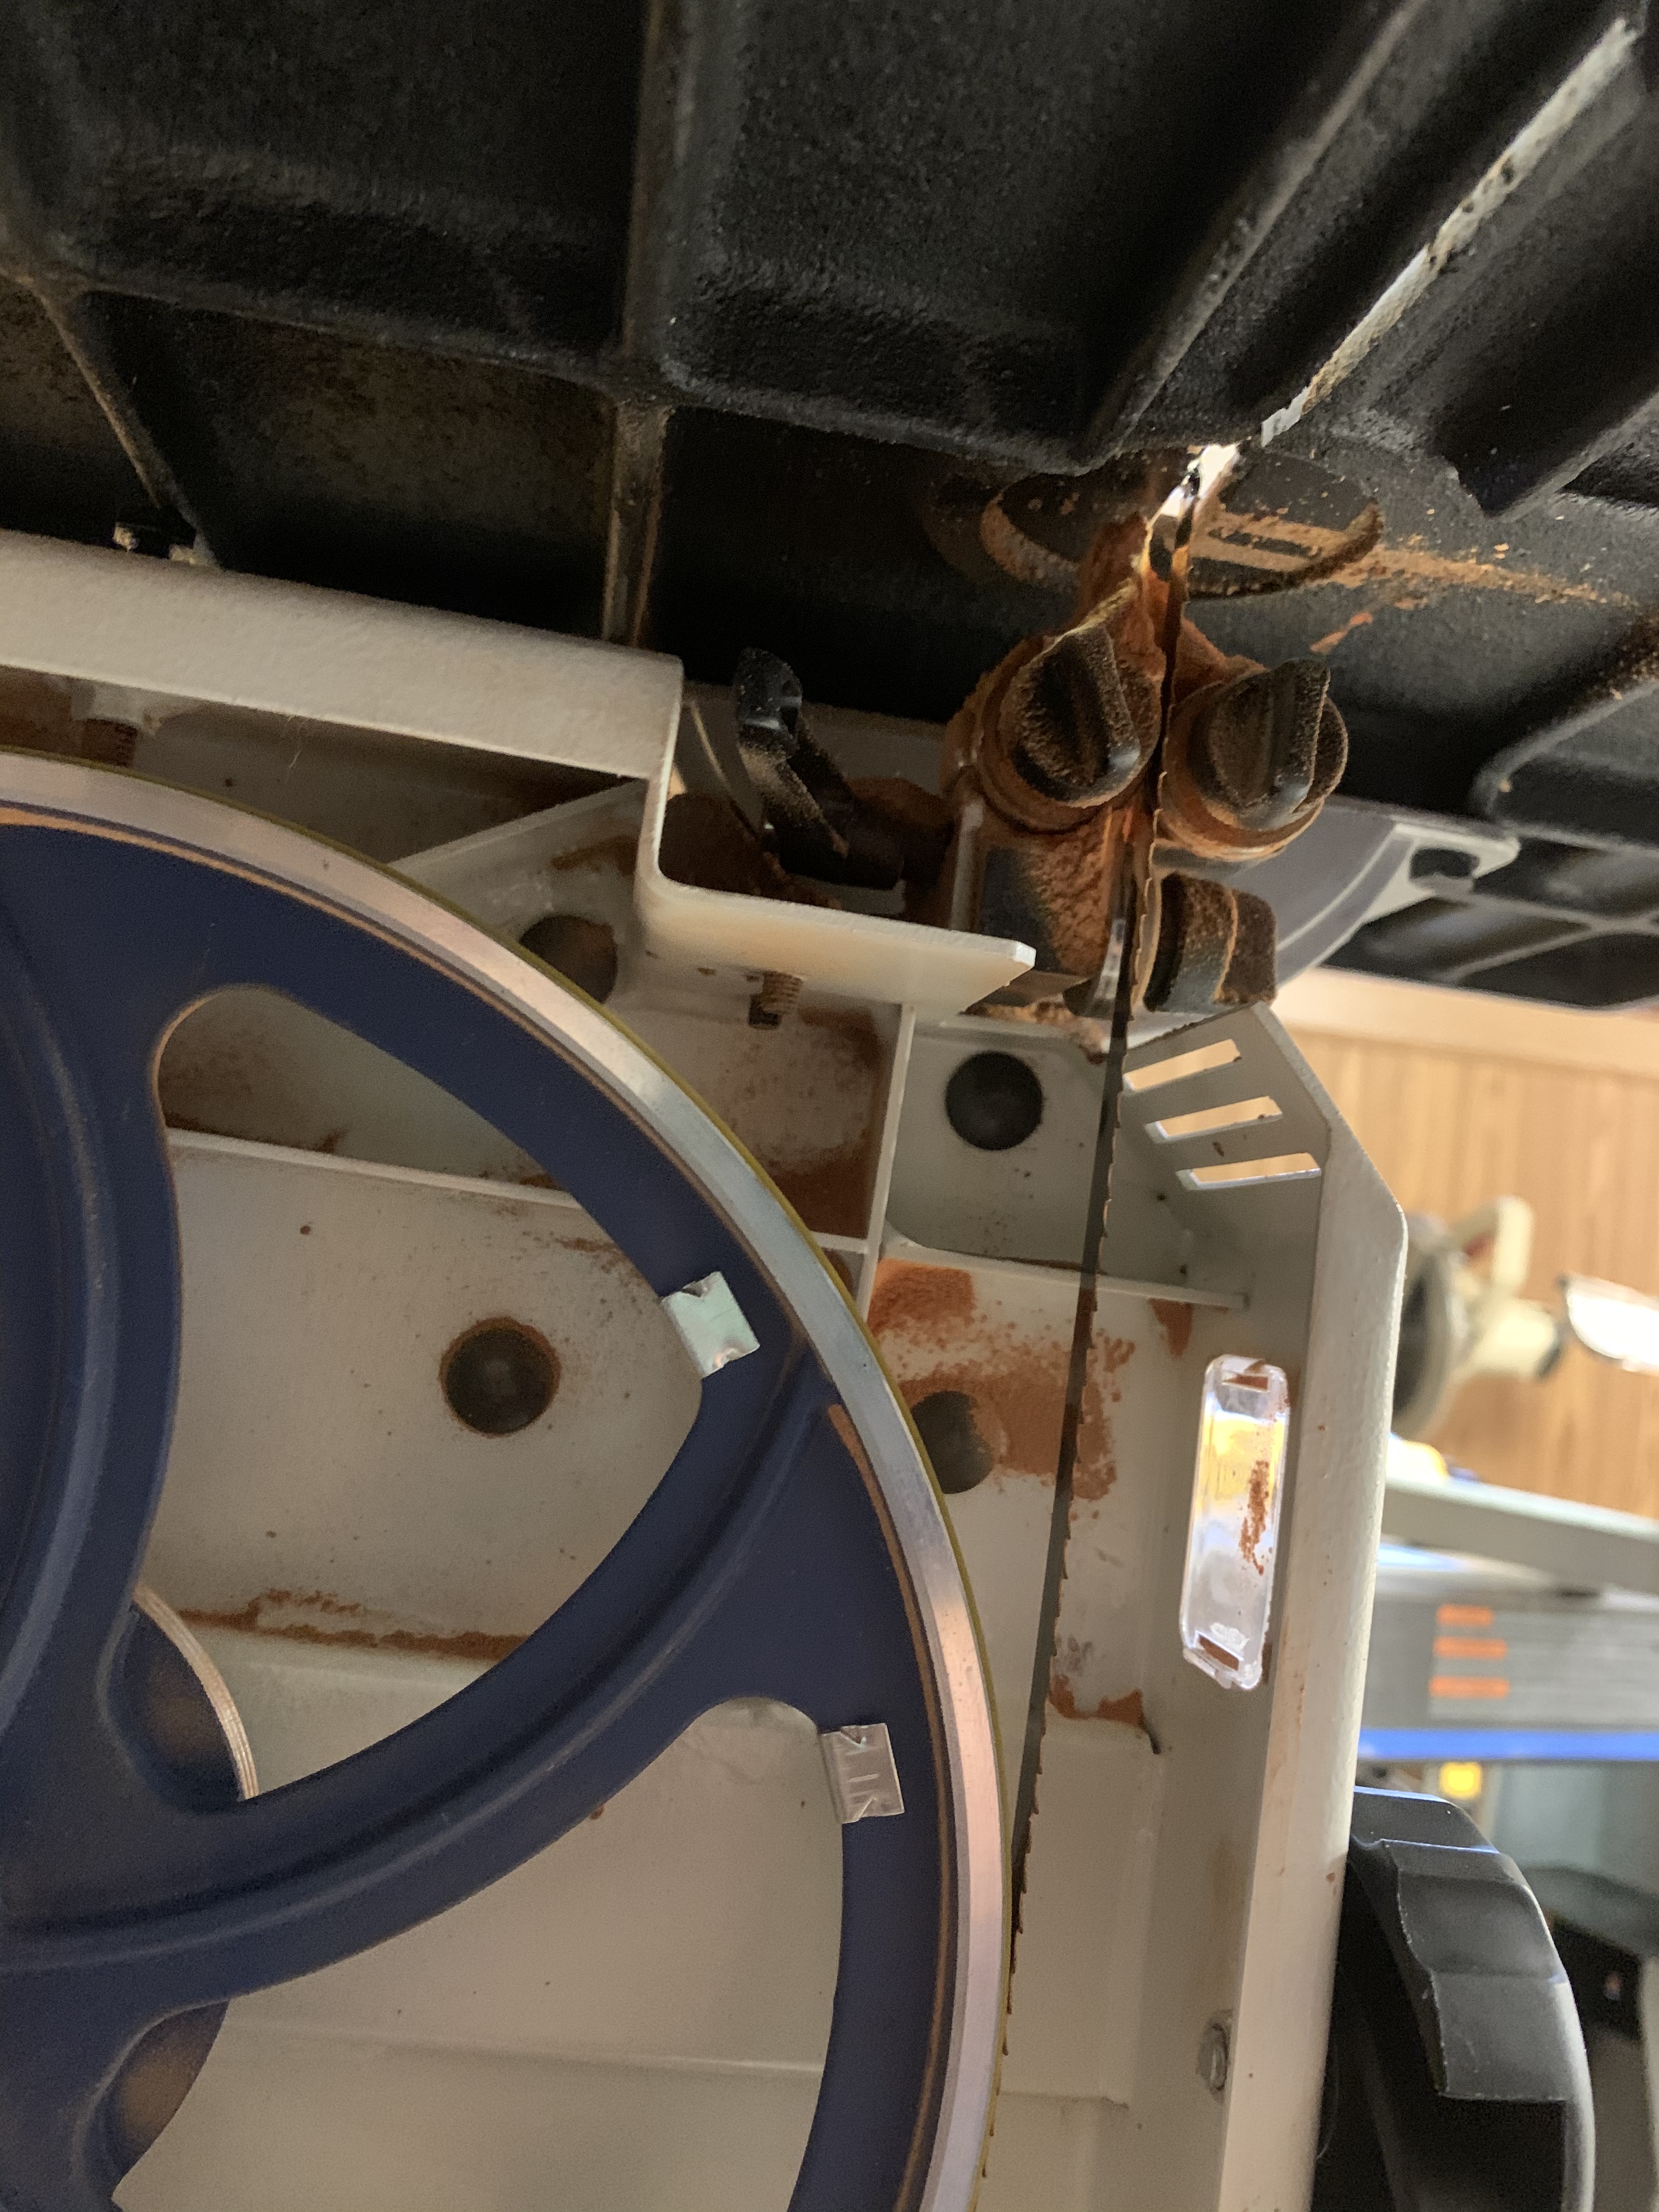
The new air filtration system seems to be doing it’s job quite well. As you can see from the dirt on the filter up there it’s pulling stuff out of the air. It’s hard for me to tell exactly how well it’s working because I don’t have any way of testing particulate content in the air around here, but it seems there is a lot less dust through the whole house since I started using it.

Even with the new filter system I still use this thing. I figure running both of them can’t hurt.

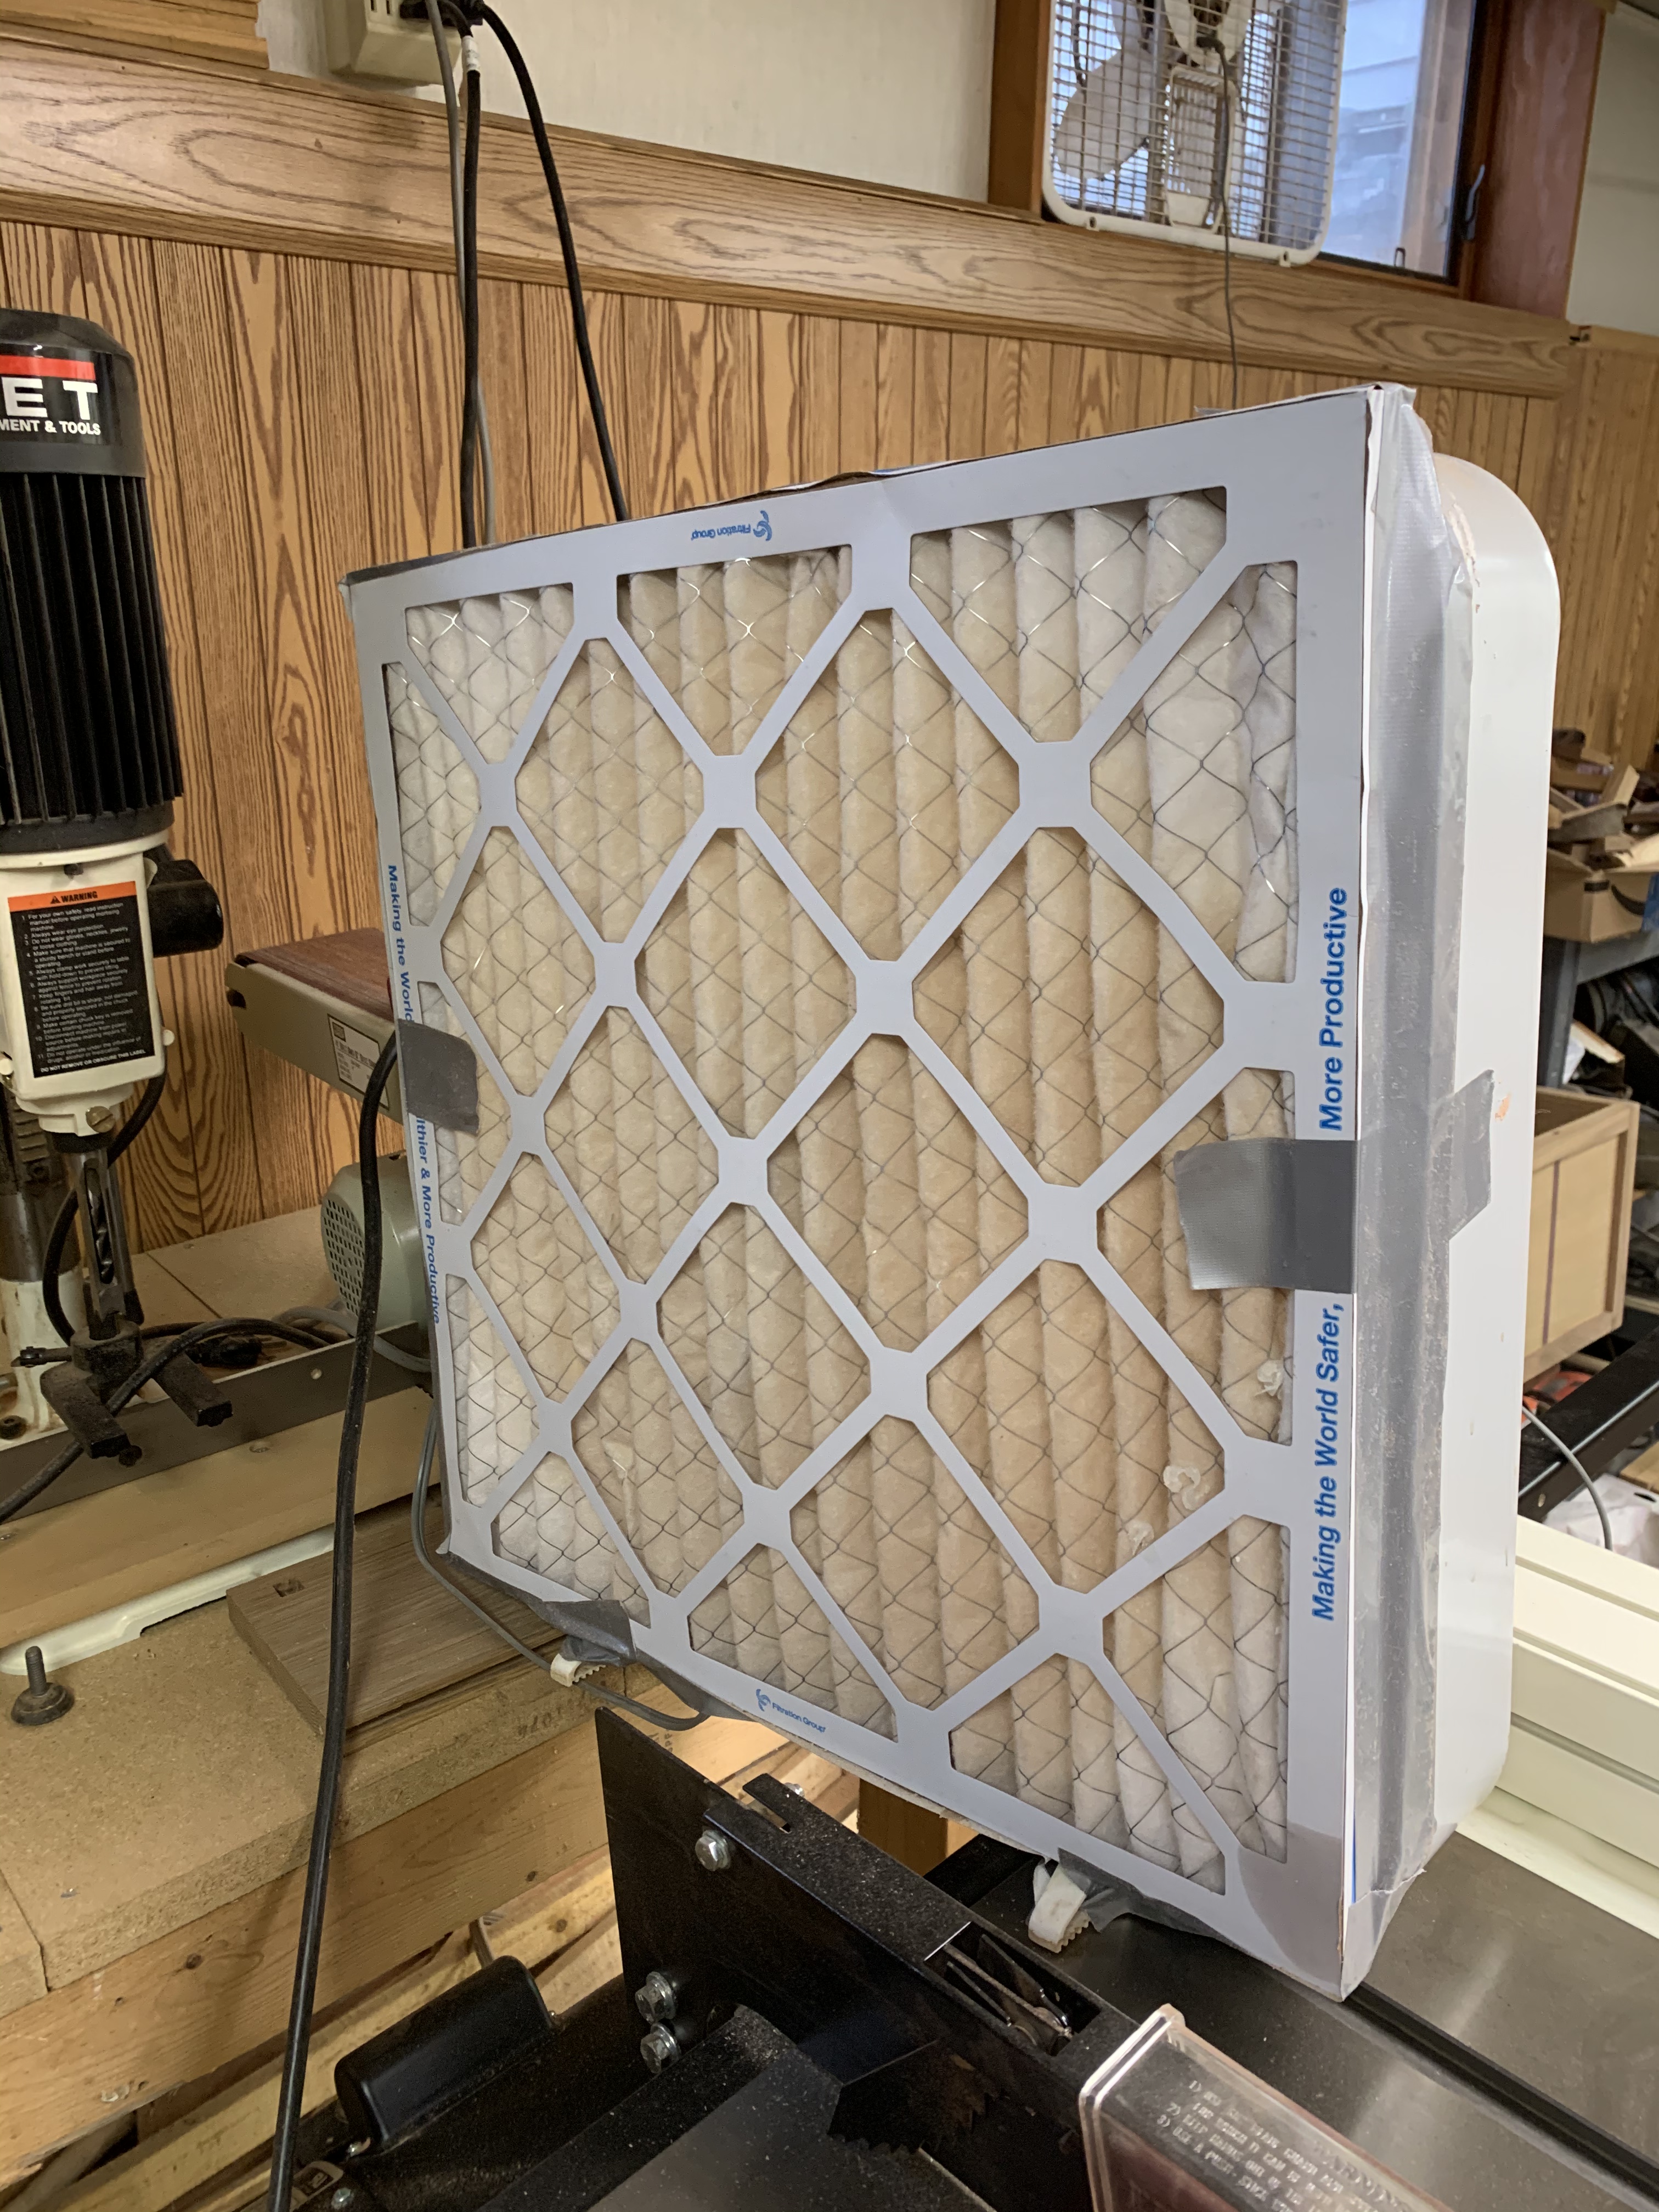
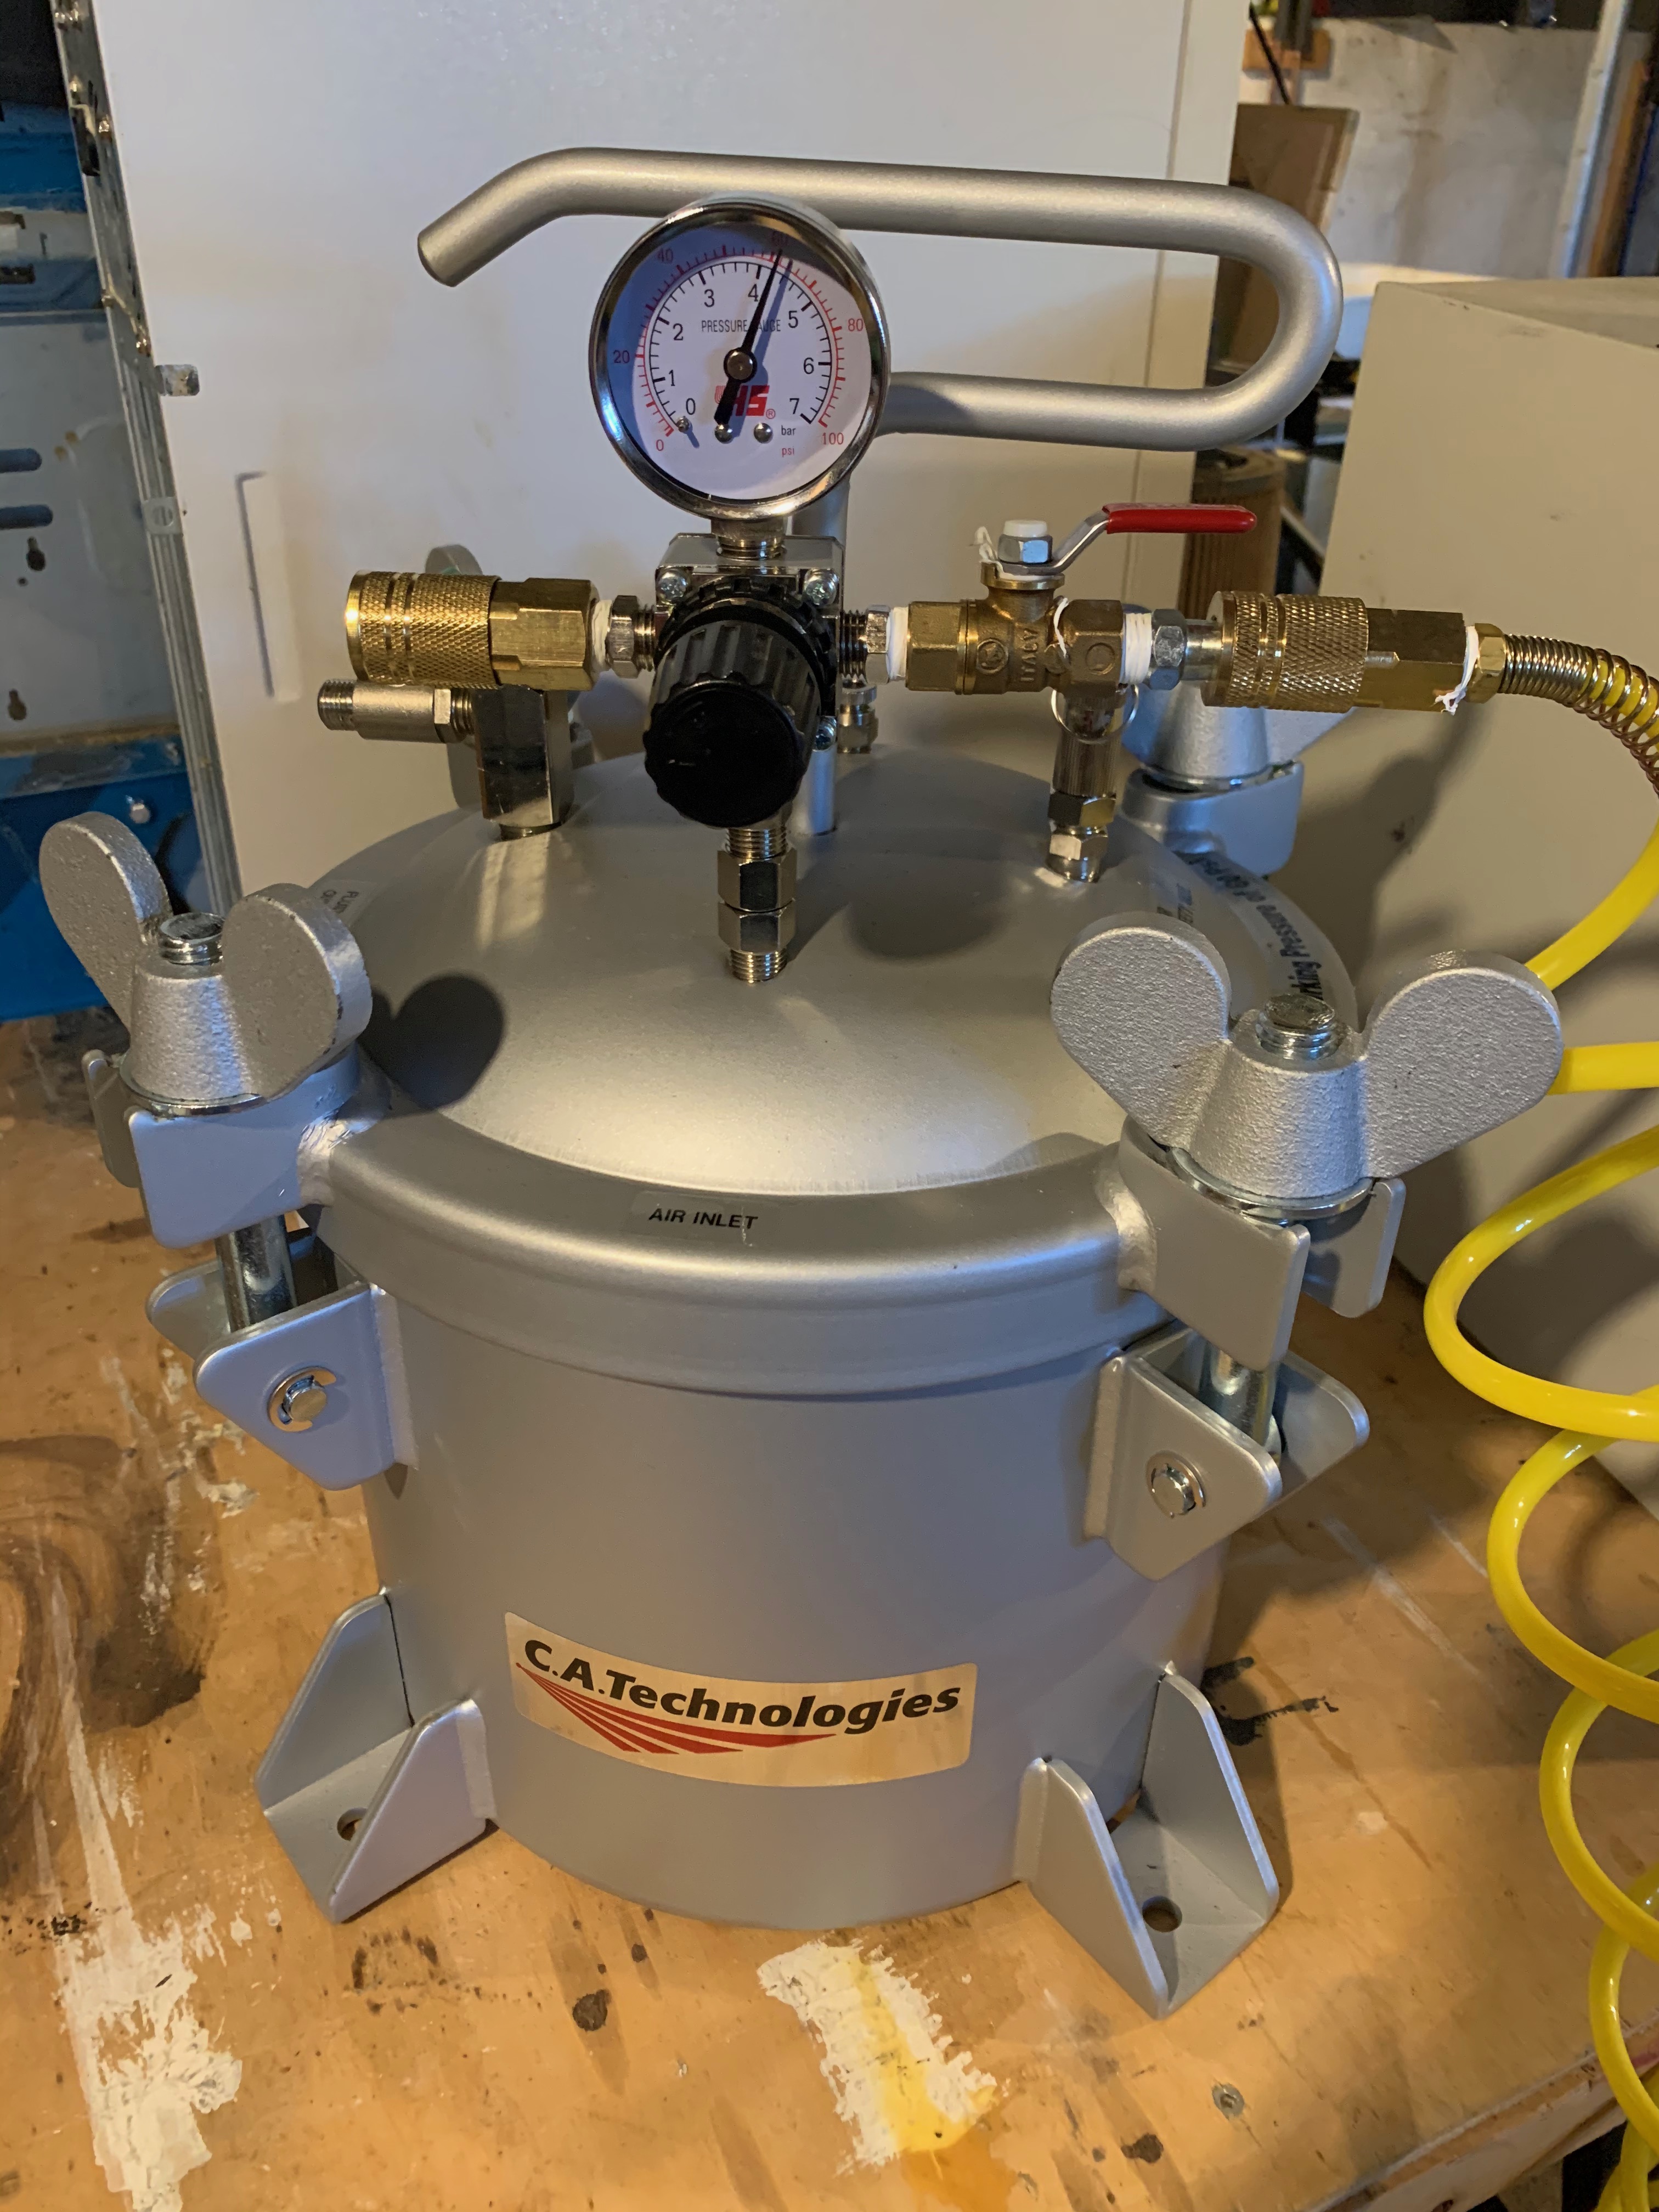
Is it any better than something like this Rube Goldberg thing over there on the left? Heck, I don’t know. Taping a furnace filter to a box fan does help pull stuff out of the air, but how effective it really is… Well, judging from the amount of dust I saw in the rest of the basement when I was doing things like this, it doesn’t work all that well. The volume of air being moved through this thing isn’t anywhere near as great as what the Shopfox thing pulls through its system. At a rough guess I’d say the Shopfox moves 5 times as much air through its filters as the box fan does. That’s just a rough guess, of course, based on the air movement I feel. I don’t have any way to actually measure CFM.

Let’s see, what else? Ah, how could I forget about the Schrodinger’s microwave fiasco? I call it Schrodinger’s microwave because it seems to both exist and not exist, at the same time.

Handy hint: Don’t buy a black microwave. It may look cool in the display room or online, but in real life trying to keep it clean is a major pain in the neck.

So, let’s start at the beginning. Last year we had to buy a new microwave oven. We ended up getting a Maytag, the one in the photo over there on the right. And it’s a very nice microwave. A bit pricey, but it’s well made and works very well indeed. We really like the thing. The problem is that this model doesn’t seem to actually exist.

We needed to replace the filters in this thing. MrsGF went out on the internet and started scrounging around looking for replacement filters. And couldn’t find any. In fact, she couldn’t even find this oven.

You’re kidding, said I. You must have typed the model number in wrong or overlooked something. Ah, said she, if you’re so smart, you go try to find it. Okay, said I, I will.

She was right. None of the parts vendors on Amazon list this model. None of the parts vendors outside of Amazon list this model. I went directly to Maytag. Maytag itself didn’t have this model in its database. Apparently we bought a microwave that doesn’t actually exist???

I took a closer look at the tag with the manufacturing data on it, including the date it was made and…

Well, that was interesting. Apparently this oven was manufactured three months after we bought it. Okay… Well, I ruled out the possibility that somehow this thing slipped through some crack in the spacetime continuum from some alternate universe or that the guy who actually installed it was Dr. Who or that it was some kind of quantum oven that both existed and didn’t exist at the same time. So what was going on? Some kind of counterfeit perhaps? It does happen. There are companies out there that gleefully rip off name brand manufacturers all the time. But that didn’t make sense. This thing is extremely good quality. Everything about it is rock solid, made to perfect tolerances, made of high quality materials, the fit and finish is flawless, it works beautifully. If this thing is a counterfeit they’re making products of better quality than most of the name brand stuff out there. So that didn’t make any sense.

Anyway, eventually I did find a filter, but by searching on the filter dimensions instead of models or brands. The one I found was actually for a Whirlpool. Of course it is entirely possible that this is a Whirlpool, or, rather, made by some OEM in China that makes ovens for two or more different companies and the only difference between them is the brand name. That kind of thing happens all the time in most industries. The name you see on the product isn’t the company that actually made it. Heck, the Ford truck I had many years ago was actually made in Canada by Mazda.

Farmers Getting Screwed Again?

Yeah, it seems so. Here’s the deal – Farmers who sold their milk to the now bankrupt Dean Foods are getting letters from lawyers demanding the farmers repay the money they were paid for milk they shipped to Dean during the “preference period” of the bankruptcy. Supposedly these parasites can go back 90 days and demand the farmers repay the money Dean paid them. Will the farmers then get their milk back or something? Of course not. Is it ethical? Good lord no! Ethically speaking this is flat out extortion. Is this legal? Apparently it is. It’s called a Trustee Avoidance Claim. But in actual fact most, if not all of the farmers who dealt with Dean who are receiving demands like this qualify for an exemption and can avoid having to repay anything. But the trustees, of course, hope the farmers don’t know this and will just cough up the money. As Roger McEowen of Washburn University said,  “These are extortion letters, there’s no other way to put it. They’re seeing what they can get.”

But if you get one of these letters, you’re going to have to get your own lawyer to respond properly, so you’re going to have to foot the bill for that. Still, hiring a lawyer is going to cost a lot less than having to potentially repay tens of thousands of dollars to these parasites.

And on that rant, let’s wrap this up.

Air Filter, Another Finish Experiment, Cleaning

I mentioned that I needed to do something about the dust getting into the rest of the house and ordered an air filtration system made by ShopFox. It arrived on Saturday and I have it set up in the shop now. So far it looks pretty good, but I haven’t done any serious sanding or wood turning yet, so we’ll see just how well it actually works once I get a new project started.

It looks well made, steel outer case, handle on top so you can move it around. Two stage filtration system. A 2″ thick pleated filter with a 2nd filter made of some kind of cloth like material on the inside. It weighs maybe 20 pounds, and while it’s intended to hang from the ceiling you can really just put it anywhere. This one is going to end up on a shelf in the shop because my ceiling is too low to hang it up without cracking my head open on it.
Controls are simple, an on/off switch and one to control motor speed. The timer function can only be used from the included remote control. The remote is a nice touch, but it only works when pointed directly at the back of the unit so the remote’s usefulness is seriously limited. Note the silly safety stickers on the back of this thing. Obviously they just slapped every sticker they had from their other machines, whether they were appropriate or not.

If you go shopping for one of these don’t let the hype in the advertising fool you. All these things are is a box with a fan and motor, with one or more filters in it. How well these things work is entirely dependent on the filters used and how much air the fans pull through the filters. And that’s it. Everything else is just fluff and nonsense you don’t need.

This one looks fairly robust. The outer case is sheet steel, looks well made, nice fit and finish to it. It has a 3 speed fan that looks like it should be more than capable of handling the size room it will be in. The only other control is a timer so you can set it to turn itself off after 1, 2 or 3 hours. It came fully assembled, with the filters already installed. I just took it out of the packing material, took it out of the plastic bag and turned it on. And supposedly the filters are cleanable/washable and can be reused. So we’ll see about that.

Anyway, I’ll keep you updated about how well it works and if it does a better job than the makeshift furnace filter taped to a box fan trick. Considering how much dust I generate when I’m sanding I may end up using both the Shopfox filter and the box fan trick.

A New Finish Experiment

I’m always looking for ways to finish wood that improves its appearance and that is easy to use. I’m also addicted to Youtube (sigh… the hours I’ve wasted there…) and learned about something called “OB Shine Juice”, some kind of miraculous, easy to use, virtually instant finish you just slap on and buff out and…

But like most of these “tricks”, it turns out that in real life, no, it’s not that easy to use, at least not any easier than most of the other methods I’ve used. And while it might be useful for somethings it isn’t some kind of miraculous super finish. And it has some serious drawbacks including the fact that it is potentially dangerous. The danger is slight, true, but it’s still there, and I’ll talk about that at the end of this segment. Is it useful? In some cases, yes. But it isn’t going to replace my usual finishing methods.

All you need to make OBSJ

You can’t buy this stuff, you have to make it, but there are only 3 ingredients and all are easily available and fairly cheap. Boiled linseed oil, shellac (most of the recipes call specifically for Zinsser shellac apparently because Zinsser seems to be the only company that still makes the stuff) and denatured alcohol. Just chuck equal parts of each into a bottle, shake it up, and there you go.

I didn’t have Zinsser’s on the shelf because I make my own shellac. I could have used my own but most of the recipes for this stuff called for Zinsser specifically, and I wanted to stick with the instructions exactly for this test. I ran down to the local hardware store and found some and scurried home with my prize.

Right off the bat I started to have doubts about all of this because as soon as I opened that can I began frowning.

Now the shellac I make is in that photo over there on the left, almost completely clear, no cloudiness, a nice golden amber color that dries clear and almost colorless, and the only thing you can smell when you open that jar is the alcohol. I’ve said before that I really, really like shellac. It’s a great sealer, sanding sealer, and even makes a pretty darn good final finish if you use one of the thicker cuts. So I figured the commercial stuff would look pretty much like what’s in that jar.

This is shellac? Seriously?

I was wrong. When I opened that can of Zinsser’s… Oh dear. This stuff was just nasty. I mean seriously nasty. Thick, cloudy, even muddy looking. And it smelled just as nasty as it looked. First thing I thought was that somehow I’d got a bad batch or something. So the next day I went to a different hardware store and bought another one. I popped it open and it was exactly the same. How old was this stuff, anyway? Shellac has a limited shelf life. I looked all over the can and I couldn’t find a manufacturing date or an expiration date or anything that might indicate when it was made. So for all I knew this stuff had been sitting on the shelf for years.

Well, I wanted to follow the instructions exactly so I mixed the stuff up using the Zinsser’s anyway. I mixed 4 oz of each of the three products and, frankly, it didn’t look very good. Or smell very good. But let’s try it and see what happens.

I had a small, simple ambrosia maple bowl on the lathe that I’d just finished sanding and decided to try it on that. The instructions for using the stuff are pretty simple. Just slather the stuff on using a paper towel until the wood doesn’t absorb it any more. Then spin up the lathe and start applying very, very light coats until the wood doesn’t seem to be absorbing anything and then start to slowly buff it out. So that’s what I did.

I didn’t have high hopes for this stuff, but I have to admit that it turned out fairly nice.

But to be honest, it isn’t as nice as I’d hoped it would be, and certainly isn’t as nice as the proponents of this stuff claim. Nor is it as easy to use as they claim. In fact it is considerably more time consuming and difficult to use properly than my usual method of just putting several seal coats of thin shellac on a piece of wood followed by carnauba wax and buffing it out.

First thing I discovered is dear lord do not use paper towels, which is what a lot of these guys recommend. Paper towels began to disintegrate almost immediately, leaving shreds of paper all over the wood. I ended up having to go over the whole thing with OOOO steel wool to remove the tiny paper shreds and start over using a piece of lint free fabric.

Second, this is not a fast process. They make it seem so fast and easy in the videos. It isn’t. It takes a considerable amount of time, and many, many coats of this stuff before it starts to get even close to glossy. And it took me quite a while before I began to figure out just how much pressure and how much ‘juice’ to use to get it to start to buff out properly.

Does it work, though? Sort of. The end result looks pretty good. I can see this being useful for projects that have a lot of detail and odd shapes where it would be difficult to get waxes or other finishes into all of the little nooks and crannies. But is it something I’ll use frequently? Probably not.

Now, the dangerous bit. I’m not joking around here – linseed oil is a serious fire hazard. It generates heat as it dries, a lot of heat. Enough to cause rags, paper towels, etc. to spontaneously combust. I like to think I am not a paranoid person, but linseed oil scares me because I’ve seen this happen in real life. This stuff can and will cause fires if you don’t handle it properly.

Is OB shine juice a potential fire hazard then? It is only one third linseed oil so the risk is probably minimal. But do you want to take the chance? I don’t. The rags I used for this project were soaked in a material that contains alcohol, which is highly flammable, plus linseed oil which can spontaneously combust. Do you think I’m going to keep that in the house? I may be crazy but I’m not stupid (I hope). They were immediately dumped into a container of water and taken outside and they’ll end up in the firepit. Am I being paranoid? Maybe. Don’t care. I’m not going to take the chance.

It seems that if there is a space anywhere where I can shove wood, there is wood shoved into that space.

Cleaning – ah, yes, cleaning… I was getting tired of not being able to find stuff and having to dig through all of the clutter in the shop. And finding piles of dust, dead spiders, cobwebs, bits of sandpaper, pieces of wood piled all over, etc. whenever I moved something. So I started cleaning up the shop and trying to organize things better.

And what do I do with some of this stuff? I have a $200 biscuit joiner that I used exactly once about 15 years ago that’s been gathering dust ever since. I have jigs that cost some serious money and were used once before I figured out that setting the damned jig up and doing test cuts to fine tune it took three times longer than just doing the job by hand. A half dozen plastic carrying cases for tools I don’t have any more (why didn’t I toss those years ago???). There’s an ancient Skil router with a bad collet that I can’t get parts for. I found three (three??? How did I end up with three???) scroll saws. A couple of dozen paper bags filled with screws and nails of every imaginable size. But of course none of them are ever the size I actually need for a specific project so I have to buy more. And then there are the bits and pieces that obviously came off of some tool, somewhere, but what tool? What were they used for? Should I just throw it away? Of course if I throw it away I’ll almost immediately remember that I really needed it…

And wood stuck away everywhere… Sheesh. But then is there even such a thing as having too much wood?

Anyway, it’s cleaning time!

Catching Up: Light Finished, Purple Thing, and What a Mess

That sort of arts & crafts style decorative light is finally completely finished. I made a matching lid for it, permanently installed an 120V LED lamp inside of it and I’m actually pretty pleased with it.

I think it turned out well. The only real issue is that the lid is a bit loose fitting and slides around about 1/8 of an inch or so. as you can see in the photo. The dopey camera in my iPhone simply cannot take a decent photo of lighted objects, but here’s one anyway. There’s no way to adjust the exposure or defeat the metering algorithms used in the iPhone camera, and I was too lazy to dig out the real camera to take a photo just for this, so this is what I’m stuck with. Oh, well. Anyway, I’m really pleased with this one.

The purple thing I showed you after I pulled it out of the pressure tank, that one – meh… I hate to call it a complete failure because it was an experiment and experiments often do fail for a variety of reasons. So if nothing else it was a learning experience. The resin turned out way, way too intensely colored, and the addition of the wood shavings didn’t help things at all. I’d hoped it would be useful as a lamp, but the resin was way too dark and there was too much wood shavings in the mix to permit it to be translucent.

It actually looked pretty promising when I first pulled it out of the mold and put it on the lathe. The color looked pretty nice on the surface. But once I got it going… If you’re interested in what a project like this looks like while in progress, here’s what it looks like after I started to work with it on the lathe and was roughing it out to shape.

Not exactly impressive looking, is it? Downright ugly, in fact. But that’s the case with almost all projects like this, the intermediate stages don’t look anything at all like the finished product that’s been sanded and polished. What it finally turned out to be was this.

This one is probably going to get thrown out.

Not exactly impressive, but not utterly horrible, I suppose. You can sort of see the wood shavings there in the resin, but overall it would have been better if they hadn’t been in there at all. And I used way too much coloring as well. I have to admit that there is a very good chance this one is going to end up in the trash. The only reason I finished it was because I wanted to see what the final result would be like.

But this is, after all, a learning process. I learn more from my mistakes than I do from anything else, so even this wasn’t a waste of time.

One interesting thing I’ve learned is that when you throw something like this into a pressure tank and let it sit at about 60 PSI it does some interesting things to the wood that I hadn’t noticed before. The wood parts looked completely normal, but they weren’t really, well, wood any more. It has been so thoroughly saturated with the resin that the wood behaved more like resin when I was machining this thing. I hadn’t noticed that before, so I imagine that the species of wood, its moisture content and other things may have something to do with that.

Oh, in case you’re interested, this is what it looks like when I’m actually working on a resin project on the lathe.

Do I really need to tell you that you absolutely have to wear protective gear when doing this? At the very least you need a good respirator with the proper filters and an impact resistant full face shield.

Holy cow it gets messy! If you’re using sharp tools, the resin, which is essentially just plastic, peels off in long, long thin strings that fly all over the place and cover me pretty much from head to foot.

Generally when I’m done working with the lathe I have to go over my whole body with the shop vac to get all of the dust and debris off me. Including vacuuming my hair.

Dust, dust everywhere.

I’ve been doing a lot of fiddling around with wood of late, and because my shop is located in the basement dust has become a significant issue, especially now that the weather has turned cold. I’m not talking about wood shavings and the like, that stuff is fairly easy to deal with. I mean the fine particulates that get into the air and can float around for a long time. During the warmer months it’s not a real problem. I stick exhaust fans in the windows and all the dust gets sucked outside. But now that the house is closed up, the dust is a real problem.

One cheap and easy to implement method of dust control that I’ve resorted to is the good old fashioned duct tape a furnace filter to a box fan trick. And that’s what I’ve done in the past. It really does work. Judging from how fast the filters get dirty, it pulls a lot of crap out of the air before it gets into the rest of the house. But judging from how often I’m having to change the furnace filters and the amount of dust still getting into the rest of the house, it isn’t adequate to deal with the situation any longer. So I went and bought an actual real air filtration system in the hopes it will deal with the problem better than my existing methods. That is supposed to be arriving Saturday. This one costs about $200 which I suppose isn’t ridiculously expensive. It’s supposed to filter down to 3 microns, whatever that means, but I’m told that’s pretty good. Once I get this thing set up and running I’ll let you know how it works out.

Sunrise, Christmas Cactus, Cake Plate Project and WTF is he trying now?

The christmas cactus is now in full bloom and looking spectacular! I don’t know how MrsGF does it, but this cactus of hers puts on these amazing shows of color at least twice a year. But she also brings in an outdoor rose bush and somehow keeps it blossoming most of the winter as well, and I don’t know how she does that, either.

I haven’t had to get up early in the morning for a long time but I still have this silly habit of waking up ridiculously early in the morning, usually just before sunrise. It’s worth it, though. The sunrise this morning was absolutely beautiful. Seeing the silhouette of the trees against those pinks and oranges and reds was a gentle reminder of just how beautiful this world can be if you take the time to just sit back and see what’s around you.

I’ve been puttering along with the cake plate project and I finally finished the top platter the other day. The final shaping is done and I spent way, way too long sanding and smoothing it down, then sealing it and putting several coats of wax on it. Even the bottom of it looks pretty good.

Yes, your eyes are not deceiving you, there are holes in that wood, worm/insect holes. This is “ambrosia” maple. These striking colors and patterns are caused by a fungus carried by the ambrosia beetle. It’s beautiful stuff but you have to deal with the holes left in the wood as well sometimes. I’ll be sealing those up with epoxy. It will eventually be perched on a short pedestal made of the same wood.

Even I question my mental stability sometimes.

So, I have lots and lots of wood shavings. I have a bunch of ‘free’ resin left. So, I thought, what happens if you shove a whole bunch of random wood shavings into a plastic tub and fill it with violet resin? That’s the question that absolutely, well, that absolutely no one has been asking. So, of course, I decided to try it because hey, why not?

So I stuffed a plastic tub full of random wood shavings from various turning projects, glued some wood discs on the top and bottom to hold everything in place, then got out the last of my ‘free’ resin and mixed it up, dumped in a bunch of “Shimmer Violet” iridescent coloring, and almost immediately regretted it because holy cow it’s weird looking.

It’s a good thing this Naked Fusion “Deep Pour” has a long pot life because took a long time to pour this, with lots of banging, tamping and poking around with sticks to try to get all the air out of that mess.

I suspect this is going to be a complete failure, but, what the heck. I don’t think I’ve ever written about the projects I’ve tried that have been utter failures. Fortunately I’ve had very few complete failures over the years. But this one looks like it’s going to be one where I’ll look back on it and say “what the hell was I even thinking?” Well, it’s in the pressure tank right now so I’ll see in about two days. If you don’t see anything here about it in the near future it’s because it was so ugly I couldn’t figure out what the heck to do with it.

More on Resin Casting

I got very impatient to see how the green blob over there on the left would turn out so I set aside the cake plate project for the time being to work on this new one. It didn’t look all that promising when I started out, and I had some issues with the thing as I started to work with it. But finally I ended up with something with a relatively pleasing shape and look to it, fitted the lamp into the thing, and the end result is below.

I still need to make a top for it. Rather than go for a high polish I left the translucent parts a mat finish. I think it looks better that way.

And it has some problems. If you look at the middle photo you’ll see some cracks in the top wooden ring. I don’t know if those were in the wood to begin with and I didn’t notice them, or if they developed as I worked on the piece.

All things considered, it’s not too bad for my third attempt at this. I’ve made quite a few mistakes but at least I’ve ended up with three projects that weren’t too bad for a beginning. And I’ve learned a lot.

I really need to do more experimenting with color mixing. I’m not at all satisfied with how some of the colors turn out.

Unpotting the – the ‘thing’

It’s been sitting in the pressure tank for about 48 hours now, so let’s open that sucker up and see what we got…

Eeewww… Well, that’s not too encouraging looking

Yeah, not sure about that color. Not at all

He’s going to make this into a lamp? Seriously? He must be nuts.

Demolding requires large rubber hammers. Did you know that? Well, I require them. Great fun beating on large hunks of plastic with hammers. And now that I got it in decent light, that color doesn’t look too bad. Let’s get it out of the mold

Ooo, I kinda like that. All shimmery and stuff. It still needs to sit another 24 hours before it can go on the lathe. It’s still tacky to the touch.

Meanwhile I got this going…

This is going to be the top plate for a pedestal cake stand. I hope. Maybe. This puppy is literally nearly touching the bed of the lathe. About 12″ across. Damn, this better work. I’m not even going to tell you how much that hunk of wood cost me. If all goes well, this is going to be a Christmas gift for MrsGF. Or it will fit nicely into the neighbor’s firepit if it goes bad.

Before And After, Working with Resin, Christmas Cactus, and Stuff

I really should take more ‘before and after’ type photos of these little experiments because it’s interesting to see what a project looked like at the start and what it ended up as. My latest resin casting experiment started out looking like that over there on the right. Basically it looks like a vaguely iridescent plastic blob in a tub, and the end result is in that photo at the top.

If you want to see what it looks like lighted up there’s a short video way down at the end of this.

I didn’t take much care in designing this thing, I just basically chucked some wood scraps I thought were neat looking into the mold, mixed up some resin and dumped it in and this is what I got. I really need to take more care in planning out the actual design of what I want, especially for something that’s going to have a light in it as this one does. It doesn’t do much for the look of a lighted piece if there’s too much wood blocking the light from showing through.

My third experiment is currently in the pressure tank and should be ready for unmolding by Wednesday. This one is taller and wider than the previous two. And unlike the first two this one was actually done with some planning. The current one is going to be interesting for a couple of reasons. First it’s going to be more resin than wood. The previous two were mostly wood scraps with the voids filled with resin. Second, it’s a considerably larger pour than the others, about 40 ounces in total. I already don’t like the color. I had about 5 ounces of resin left over sitting in the mixing cup and looked at this morning and I’m disappointed with the coloring. But I won’t know for sure until I get it unmolded, shaped and lighted up, not just tea light holders like the first two. This one is designed to be an actual lamp. I already have a LED lamp insert ready to go for this one.

So, what have I learned?

First, there are an enormous number of different manufacturers and types of resin out there, and most of them aren’t going to be suitable for the kind of thing I’m doing. A lot of the ‘hobbyist’ kinds of resins are only intended for small, thin pours or for coating table and counter tops and that kind of thing. What I am doing are so-called ‘deep pours’ of two or more inches in depth, and the resin being used must be formulated to work that way.

Some of these resins are toxic. Read the specifications very, very carefully and follow all safety instructions. The stuff I’m using has no VOCs or fumes and is safe to use indoors with proper ventilation. Some of the stuff is downright nasty. So make sure you are aware of any safety concerns before using it.

Resin is not difficult to machine on the lathe. I’ve used both steel and carbide tools with equally good results. As long as the tools are very sharp there doesn’t seem to be a problem. It is, however, difficult to sand, and can clog sandpaper quickly, especially if spinning the object too fast in the lathe. What seems to happen is that friction will heat up the resin to the point of melting into the sandpaper and clogging it up. Keep lathe speed down, way down.

The longer a resin project sits, the more prone it is to chipping. The curing process continues long after the object is solid enough to work with, it seems. Of course this is going to be different with different types of resin. What works for me and the product I’m using may not work for others. With the stuff I’m using, the “sweet spot”, so to speak, seems to be 4 – 7 days. Before that, it’s too soft to work with. After that chipping becomes a concern. I can still work with it, but I have to be very careful, use very sharp tools, and be patient.

If you scrounge around Youtube and look at videos of guys turning resin projects, you’ll see them going to extraordinary, even obsessive lengths to polish the stuff, sanding it up to 4,000 grit or even higher, wet sanding (sorry, I did enough wet sanding when I worked in an autobody shop, I sure as heck don’t want to start dealing with that mess now) then using abrasive polishing pastes and buffing wheels and I don’t know what all else. That all seemed just a wee bit excessive to me. I rarely sand wood beyond 240 or 320 grit. Experience has told me that going farther than that isn’t going to make much difference, if any at all, on the final finish. And I wondered if that might be the case with resin. So I’ve been sanding my resin projects up to about 400 grit, then sealing the wood, a quick sand at 400, then carefully clean the piece and then slap a coat of wax on it and buff it out, and the stuff looks just as shiny and nice to me as the projects where these guys spend hours, even days polishing to perfection.

I only have two completed resin projects, of course, so my experience is extremely limited, so there is every chance I’m wrong about this. But so far I don’t see any reason to go to the extraordinary lengths some of these guys resort to in order to get a high gloss surface.

Anyway, I’m having fun with this and just ordered about $200 worth of resin so I can keep playing around. Hopefully this batch will be packaged better and won’t arrive with a punctured bottle.

Oh, the cactus! Almost forgot about that. It’s just coming into blossom right now and it looks like it’s going to be spectacular once it comes into full bloom.

Weather has been utterly amazing the last few days. Temps in the low 70s, sunny. It’s hard to believe we’re on the cusp of winter. We’ve been enjoying it while we can because we know what’s coming. Went out and drove around for a while in the convertible the other day. I actually put more miles on the bicycle this year than I did on the Corvette. That’s not necessarily a bad thing, but it is a bit disappointing. All of our travel plans were disrupted by the virus. So we adapt and go on, right? That’s all you can do.

Here’s a short video of the new project while lighted up.

New Resin cast

I just pulled the new resin cast out of the pressure tank and it’s looking pretty good.

I really like the color on this one. It’s an iridescent emerald with a bit of bright yellow mixed in. It was in the pressure tank for 48 hours at 60 PSI to deal with bubbles and seems pretty clear as far as I can tell at this point. It’s nice and firm but a bit tacky to the touch so it needs to cure a while longer before I can start working with it.

There’s wood in there. Somewhere.

Now the question is what to do with the thing? I’m still leaning towards making a lamp out of it. I’ll see once I get it on the lathe and start working with it.

More Details on finishing, New BandSaw, plus Stuff

Someone asked what kind of wax and finish I’ve started using recently so here’s a bit more info.

The basic formula for the sanding sealer I use is one ounce (weight, not volume) of shellac flakes to one cup of denatured alcohol. Put the flakes into a glass jar that has a tight fitting lid. Add one cup of denatured alcohol. Give it a stir, put on the lid and let it sit for at least 24 hours. If there is still undissolved shellac at the bottom of the jar after 24 hours, give it a gentle shake and let it sit another 12 hours. By that time everything should have dissolved. Once it’s dissolved, pour it through a coffee filter into a clean jar and put an air tight lid on it, and it’s ready to use. It will be pretty thin. That’s ok because for this application I don’t want a thick product. You can make different “cuts”, i.e. concentrations, of shellac for different purposes. It’s pretty useful stuff for a woodworker. If you make it yourself it’s of better quality than the pre-made stuff you get at the home improvement stores. I am not sure how long of a shelf life it has, to be honest. I’d think that as long as you have it in an airtight container it should last for months.

Not sure why it looks so dark in the photo. It’s really a pale gold color in real life. Just made this batch earlier in the week.

I use it mostly as a sealer. I figured out (I think at least) that the reason the beeswax/tung oil finish was looking so poor after a couple of months was that it was being absorbed into the unsealed wood. Maybe. I do know that after I started putting on the sealer before the final finishes the projects look much better and doesn’t seem to degrade over time.

I use a disposable brush to put a thin coat on the raw wood after it’s been sanded. Don’t load up the brush and really slather it on, use just enough to cover the wood. A lot of it will absorb into the wood, especially on end grain, so I put on 2-3 thin coats. Then I buff it lightly with #OOOO steel wool. Wipe it down with a clean cloth and look for any imperfections or problem and sand and apply another coat if needed.

This is what walnut looks like after three coats of the shellac has been applied.

People with good eyes will note that this thing should have been sanded more. But this is going to be a pencil holder for my workbench so I don’t really care that much so I only sanded it up to 240 grit and I wasn’t real careful even doing that. It’s going to get beat up anyway. This has 3 coats of shellac on it.
There is no such thing as too many pencils in a shop.

Now you could just buff this out as-is, maybe put on a thicker cut or more coats as necessary to get a nice finish. Shellac makes a perfectly good wood finish all by itself and has an advantage in that it is repairable. You can just apply another coat, the alcohol will dissolve the existing shellac and it will all blend together. But shellac is fairly easy to damage and I want something a bit more durable and harder, so I’ve started using carnauba wax.

Carnauba is interesting stuff. It’s made from the leaves of a palm tree from South America. The stuff is incredibly useful. Go look it up over at Wikipedia if you want to know more.

I learned an interesting trick for applying the wax from watching videos on Youtube. I buy solid carnauba formed into a bar about the size of a candy bar. I spin the bowl or whatever on the lathe at about medium speed and press the bar against the spinning bowl.

This leaves a deposit of wax on the bowl. Then I turn up the speed on the lathe and buff it out with a clean cloth.

That generates enough friction to heat the wax up and melt it, leaving behind a nice, glossy surface.

BTW: the black stripe is India ink. It’s a great way to add accents to a piece. But if you use the ink make sure you seal the wood first or it will seep into the wood, sometimes traveling a considerable distance through the wood fibers.

As far as I’m concerned, there are a lot of advantages to this. It doesn’t take long to do. The shellac dries pretty quickly so I generally just leave the piece on the lathe during the whole process. It only takes a few minutes to apply a coat of the wax. The resulting finish looks pretty darn nice. And it seems to be pretty durable as well. Best of all there are no harsh or harmful chemicals in this stuff. Shellac and carnauba wax are both so safe they’re used as food ingredients. The alcohol evaporates within a few minutes. Some caution is necessary because of alcohol fumes, but that stuff is heck of a lot safer to use than many of the additives they put into commercial finishes.

It’s also reasonably cheap. That bar of wax cost me about $13 and it looks like it will last me a year or longer. It takes very little to cover a bowl. That 1 lb bag of shellac flakes cost me about $30. At the rate I’m using it that bag will last me over a year as well. The actual cost of the shellac works out to about $1.87 of shellac flakes per cup of liquid product at the rate I use it. Denatured alcohol sets me back $35/gallon, or $2.18 per cup. Rounding everything off, it costs me about $4 per 8 oz cup to make the liquid shellac I use. Now I could get commercially premade stuff for about that cost or even a bit less than that, but this way I know exactly what’s in the product I’m using. I don’t have to be afraid of some kind of weird chemicals being in the stuff that could be potentially harmful. Some commercial producers throw in additives to extend the shelf life because that can could be sitting on the shelf in a store for years before someone buys it. They also add coloring agents, chemicals to control evaporation rates and I don’t know what all else. And the quality seems much better than what I’ve bought commercially.

It does slightly alter the color of the wood, however. The lightest grade of shellac will add a sort of golden tone to woods, especially lighter colored woods. It generally isn’t all that noticeable, though. It is available in different colors that range into a deep, reddish brown.

Rikon Band Saw

I mentioned a week or so ago that I bought this. So far it looks like it’s a pretty nice saw, but it’s early days yet. I bought it from Amazon. It arrived well packed in a single big box weighing around 80 lbs. I had to use a handcart to get the thing down into the workshop. It does not come with a stand so I had to spend another $50 to get a stand for it. It went together pretty easily. It took longer to put the stand together than it took to put the saw together. The saw comes with all of the tools needed to put it together except for a screwdriver. The only thing I had to put on the saw was the table and a few bits and pieces, and do basic setup of the blade guides. The blade was pre-installed. Installing the table was a bit fiddly, and I think I’ll need to get in there and do a bit of fine tuning to get everything perfectly square.

So far it looks like a really nice saw. I’ve wanted one of these for a long time and it is already proving itself to be one of the more useful tools I have in the shop.

To be honest I didn’t really expect much from a bandsaw in this price range. I paid $430 for the Rikon and I assumed that despite the glowing reviews it would be under powered, be flimsy and have problems. I was wrong. Build quality seems to generally be excellent. The motor hasn’t bogged down even when cutting 4+ inch thick stock. Dust collection isn’t as good as I’d like it to be but even there it isn’t horrible. It does a good job cutting curves and circles.

It does have some minor issues that aren’t deal killers. They claim it has a full 5″ cutting capacity. It’s actually a bit less than that. It seems rather noisy when cutting, but I don’t have a lot of experience with bandsaws so this might be normal. I’m a bit concerned about the amount of sawdust that accumulates on the lower blade guides as shown in the photo up there. The fence is, well, a basic fence that pretty much works, but I’d have liked one a bit more sturdy. Still, at this price I should be grateful it comes with a useable fence at all.

Let’s see, what else is going on- oh, I have a new resin piece sitting in the pressure pot that should be coming out in 2 days. I’m using up some scrap wood and am going to try to make a small decorative lamp. I picked up some small LED lamp inserts with in-line switches for about $7 each that look like they should work. So we’ll see how that goes once the resin is cured and I get it out of the pot. I figure it will take at least 2 – 3 days for it to cure.

The weather has been, well, this is Wisconsin. The weather here is always a bit strange. I remember days when we literally had snow storms in the middle of May. In the last week we went from winter like conditions where the temperatures never got above 35 degrees and one or two snow falls, to temperatures now up in the mid to high sixties.

Not much is going on out in the gardens. MrsGF got bored yesterday and did some more cleanup in the gardens, but other than that most gardening stuff is going to be on hold until late winter when we start planning what to grow. And somehow that dopey rose bush in front of the house is still in flower.

I don’t know how this thing does it. After days of temperatures under 35 degrees, dipping down to about 20 at night, this thing is still flowering?

I picked up a really nice piece of ambrosia maple and I’m trying to figure out what to do with that. It looks like a really interesting piece of wood. The problem is it’s green. My moisture meter says it’s up about 35% moisture. That means I can’t just start whacking away at it. I’ll have to work it down into a rough shape and then let it sit and dry for a few weeks before I can actually finish it up.

A lot of wood turners love working with green wood because it is a lot easier to rough into shape on the lathe. I think these people are silly. Working with dry wood is, in my personal experience, not that much more difficult than working with the green stuff if your tools are sharp and you’re using the right techniques. I like to think I’m a patient person, but sitting around waiting weeks or even months for a green bowl blank to dry down? No thanks. Plus green wood warps, cracks and checks as it dries down and I’ve ended up with nice pieces of wood being tossed onto the scrap pile. So I’d much, much rather work with dry wood than green.

And that’s about it for now.