
That sort of arts & crafts style decorative light is finally completely finished. I made a matching lid for it, permanently installed an 120V LED lamp inside of it and I’m actually pretty pleased with it.
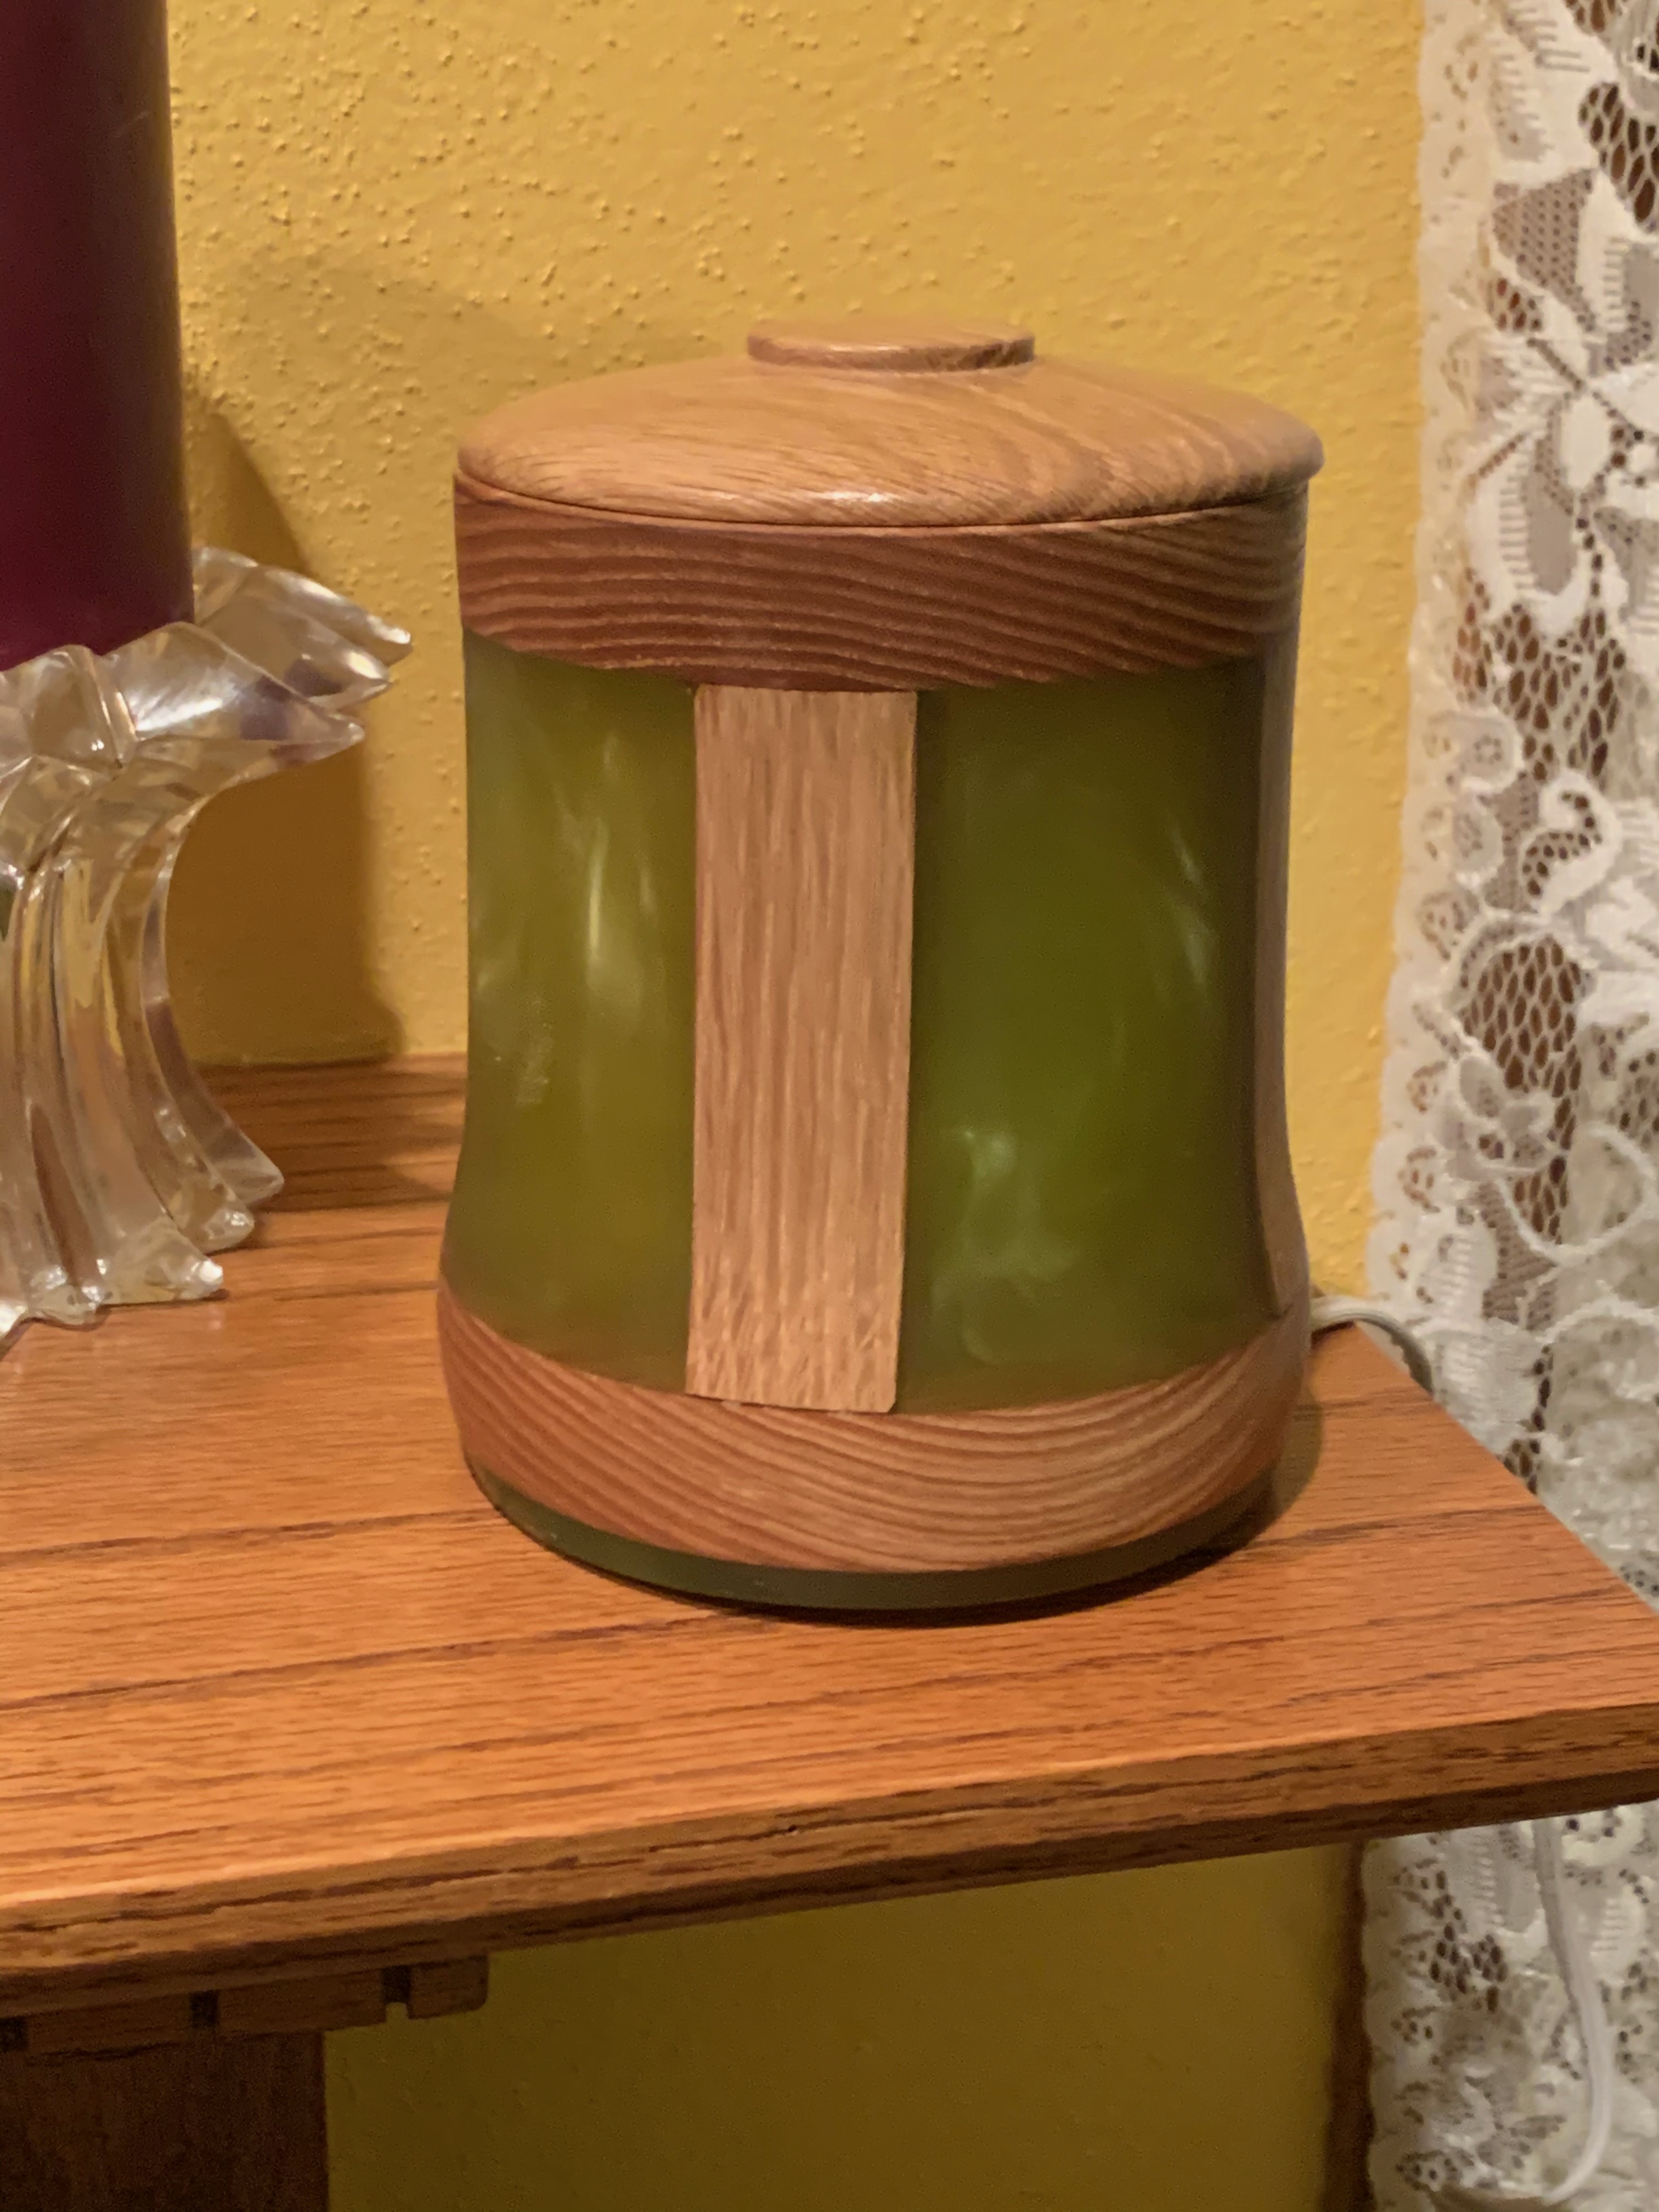
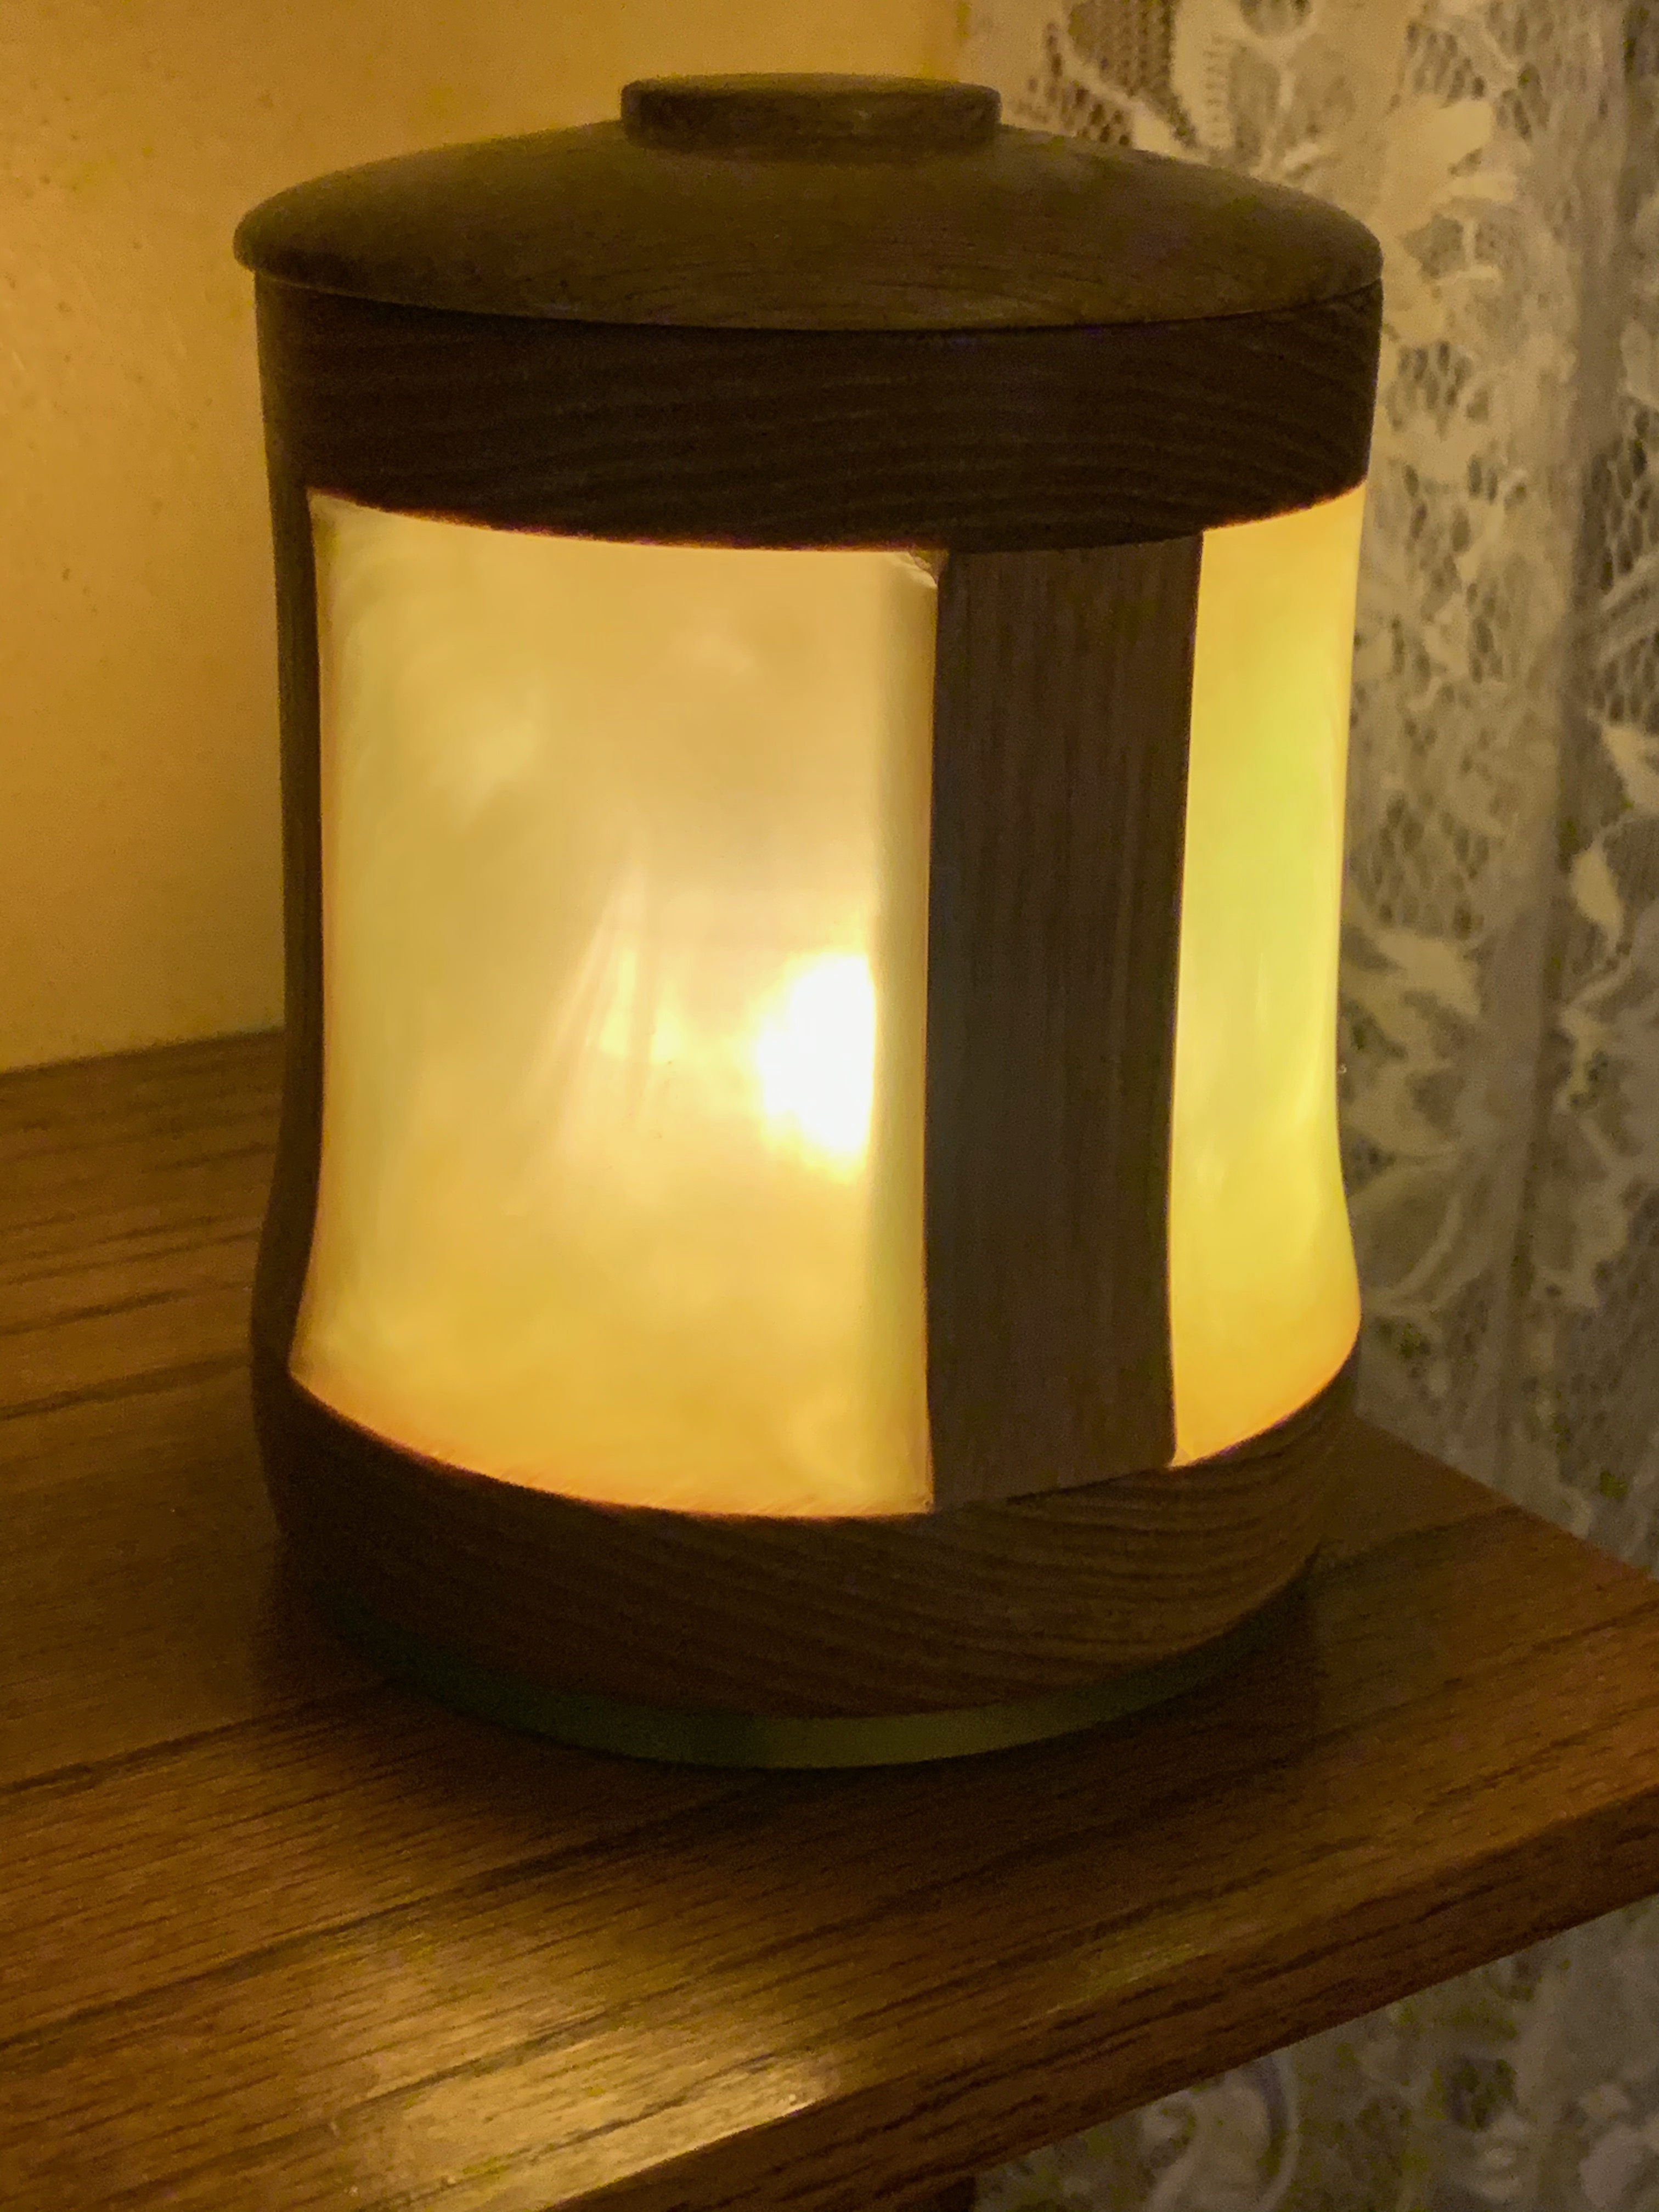
I think it turned out well. The only real issue is that the lid is a bit loose fitting and slides around about 1/8 of an inch or so. as you can see in the photo. The dopey camera in my iPhone simply cannot take a decent photo of lighted objects, but here’s one anyway. There’s no way to adjust the exposure or defeat the metering algorithms used in the iPhone camera, and I was too lazy to dig out the real camera to take a photo just for this, so this is what I’m stuck with. Oh, well. Anyway, I’m really pleased with this one.
The purple thing I showed you after I pulled it out of the pressure tank, that one – meh… I hate to call it a complete failure because it was an experiment and experiments often do fail for a variety of reasons. So if nothing else it was a learning experience. The resin turned out way, way too intensely colored, and the addition of the wood shavings didn’t help things at all. I’d hoped it would be useful as a lamp, but the resin was way too dark and there was too much wood shavings in the mix to permit it to be translucent.

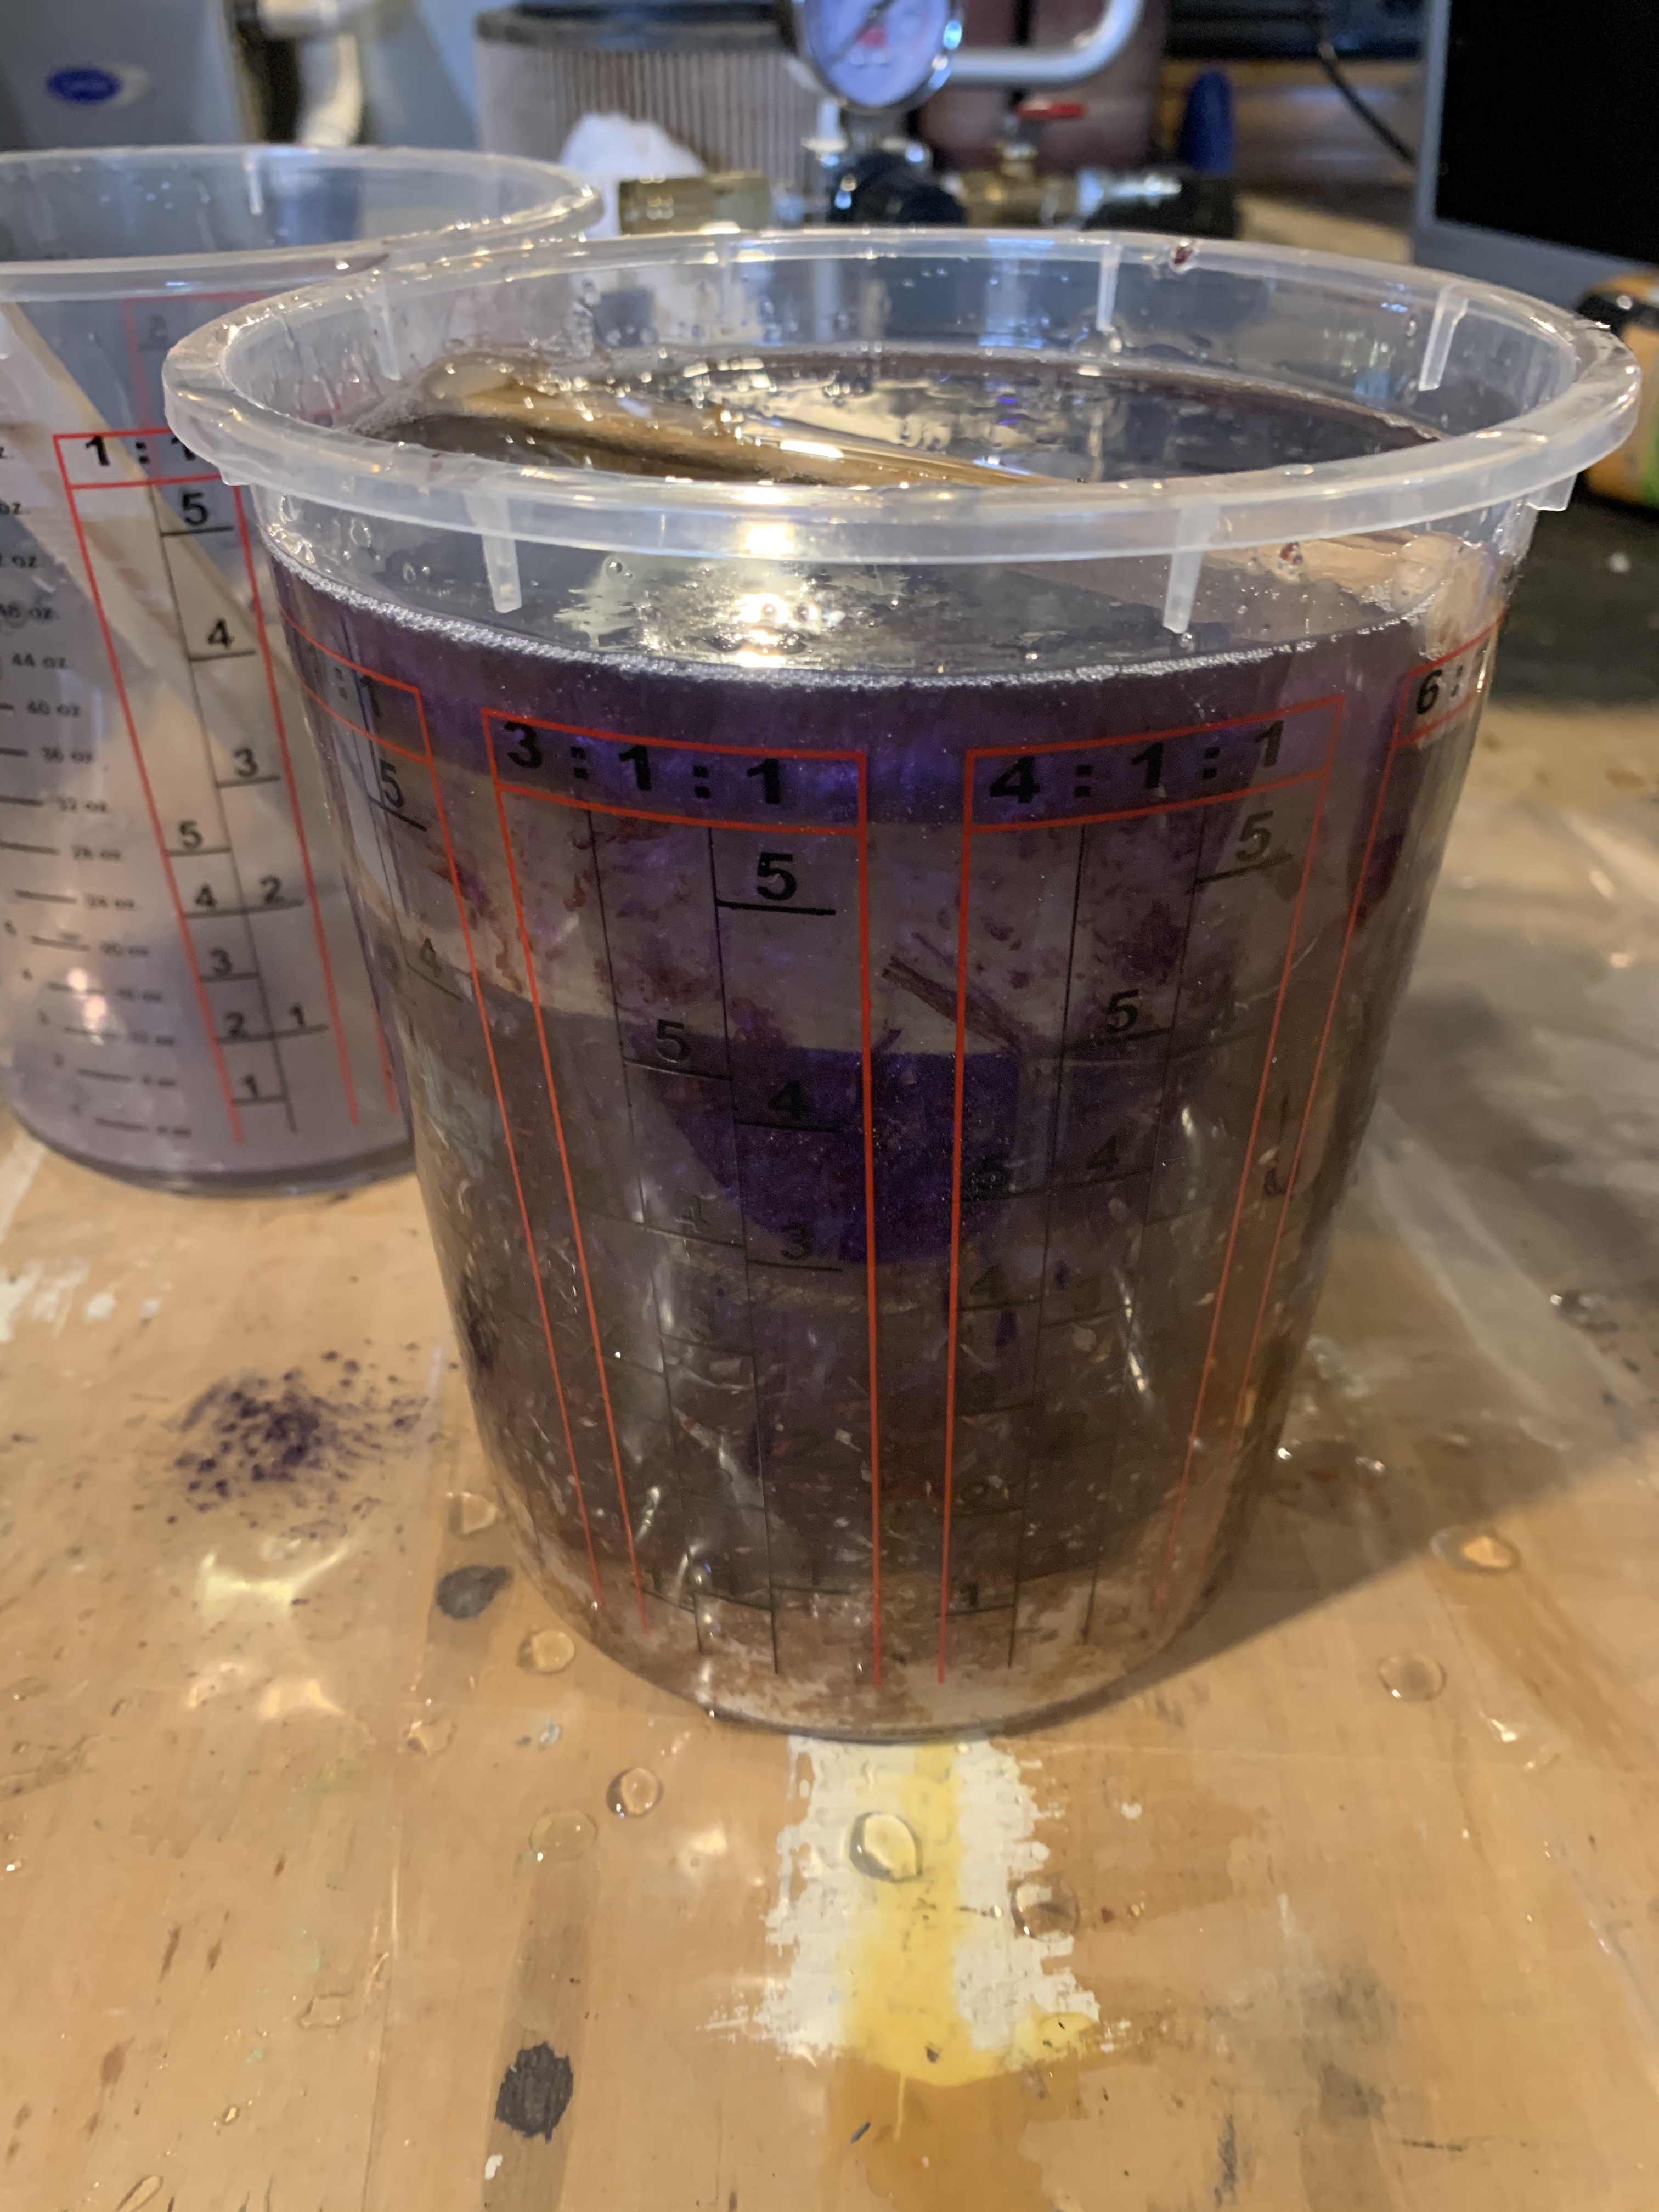
It actually looked pretty promising when I first pulled it out of the mold and put it on the lathe. The color looked pretty nice on the surface. But once I got it going… If you’re interested in what a project like this looks like while in progress, here’s what it looks like after I started to work with it on the lathe and was roughing it out to shape.

Not exactly impressive looking, is it? Downright ugly, in fact. But that’s the case with almost all projects like this, the intermediate stages don’t look anything at all like the finished product that’s been sanded and polished. What it finally turned out to be was this.
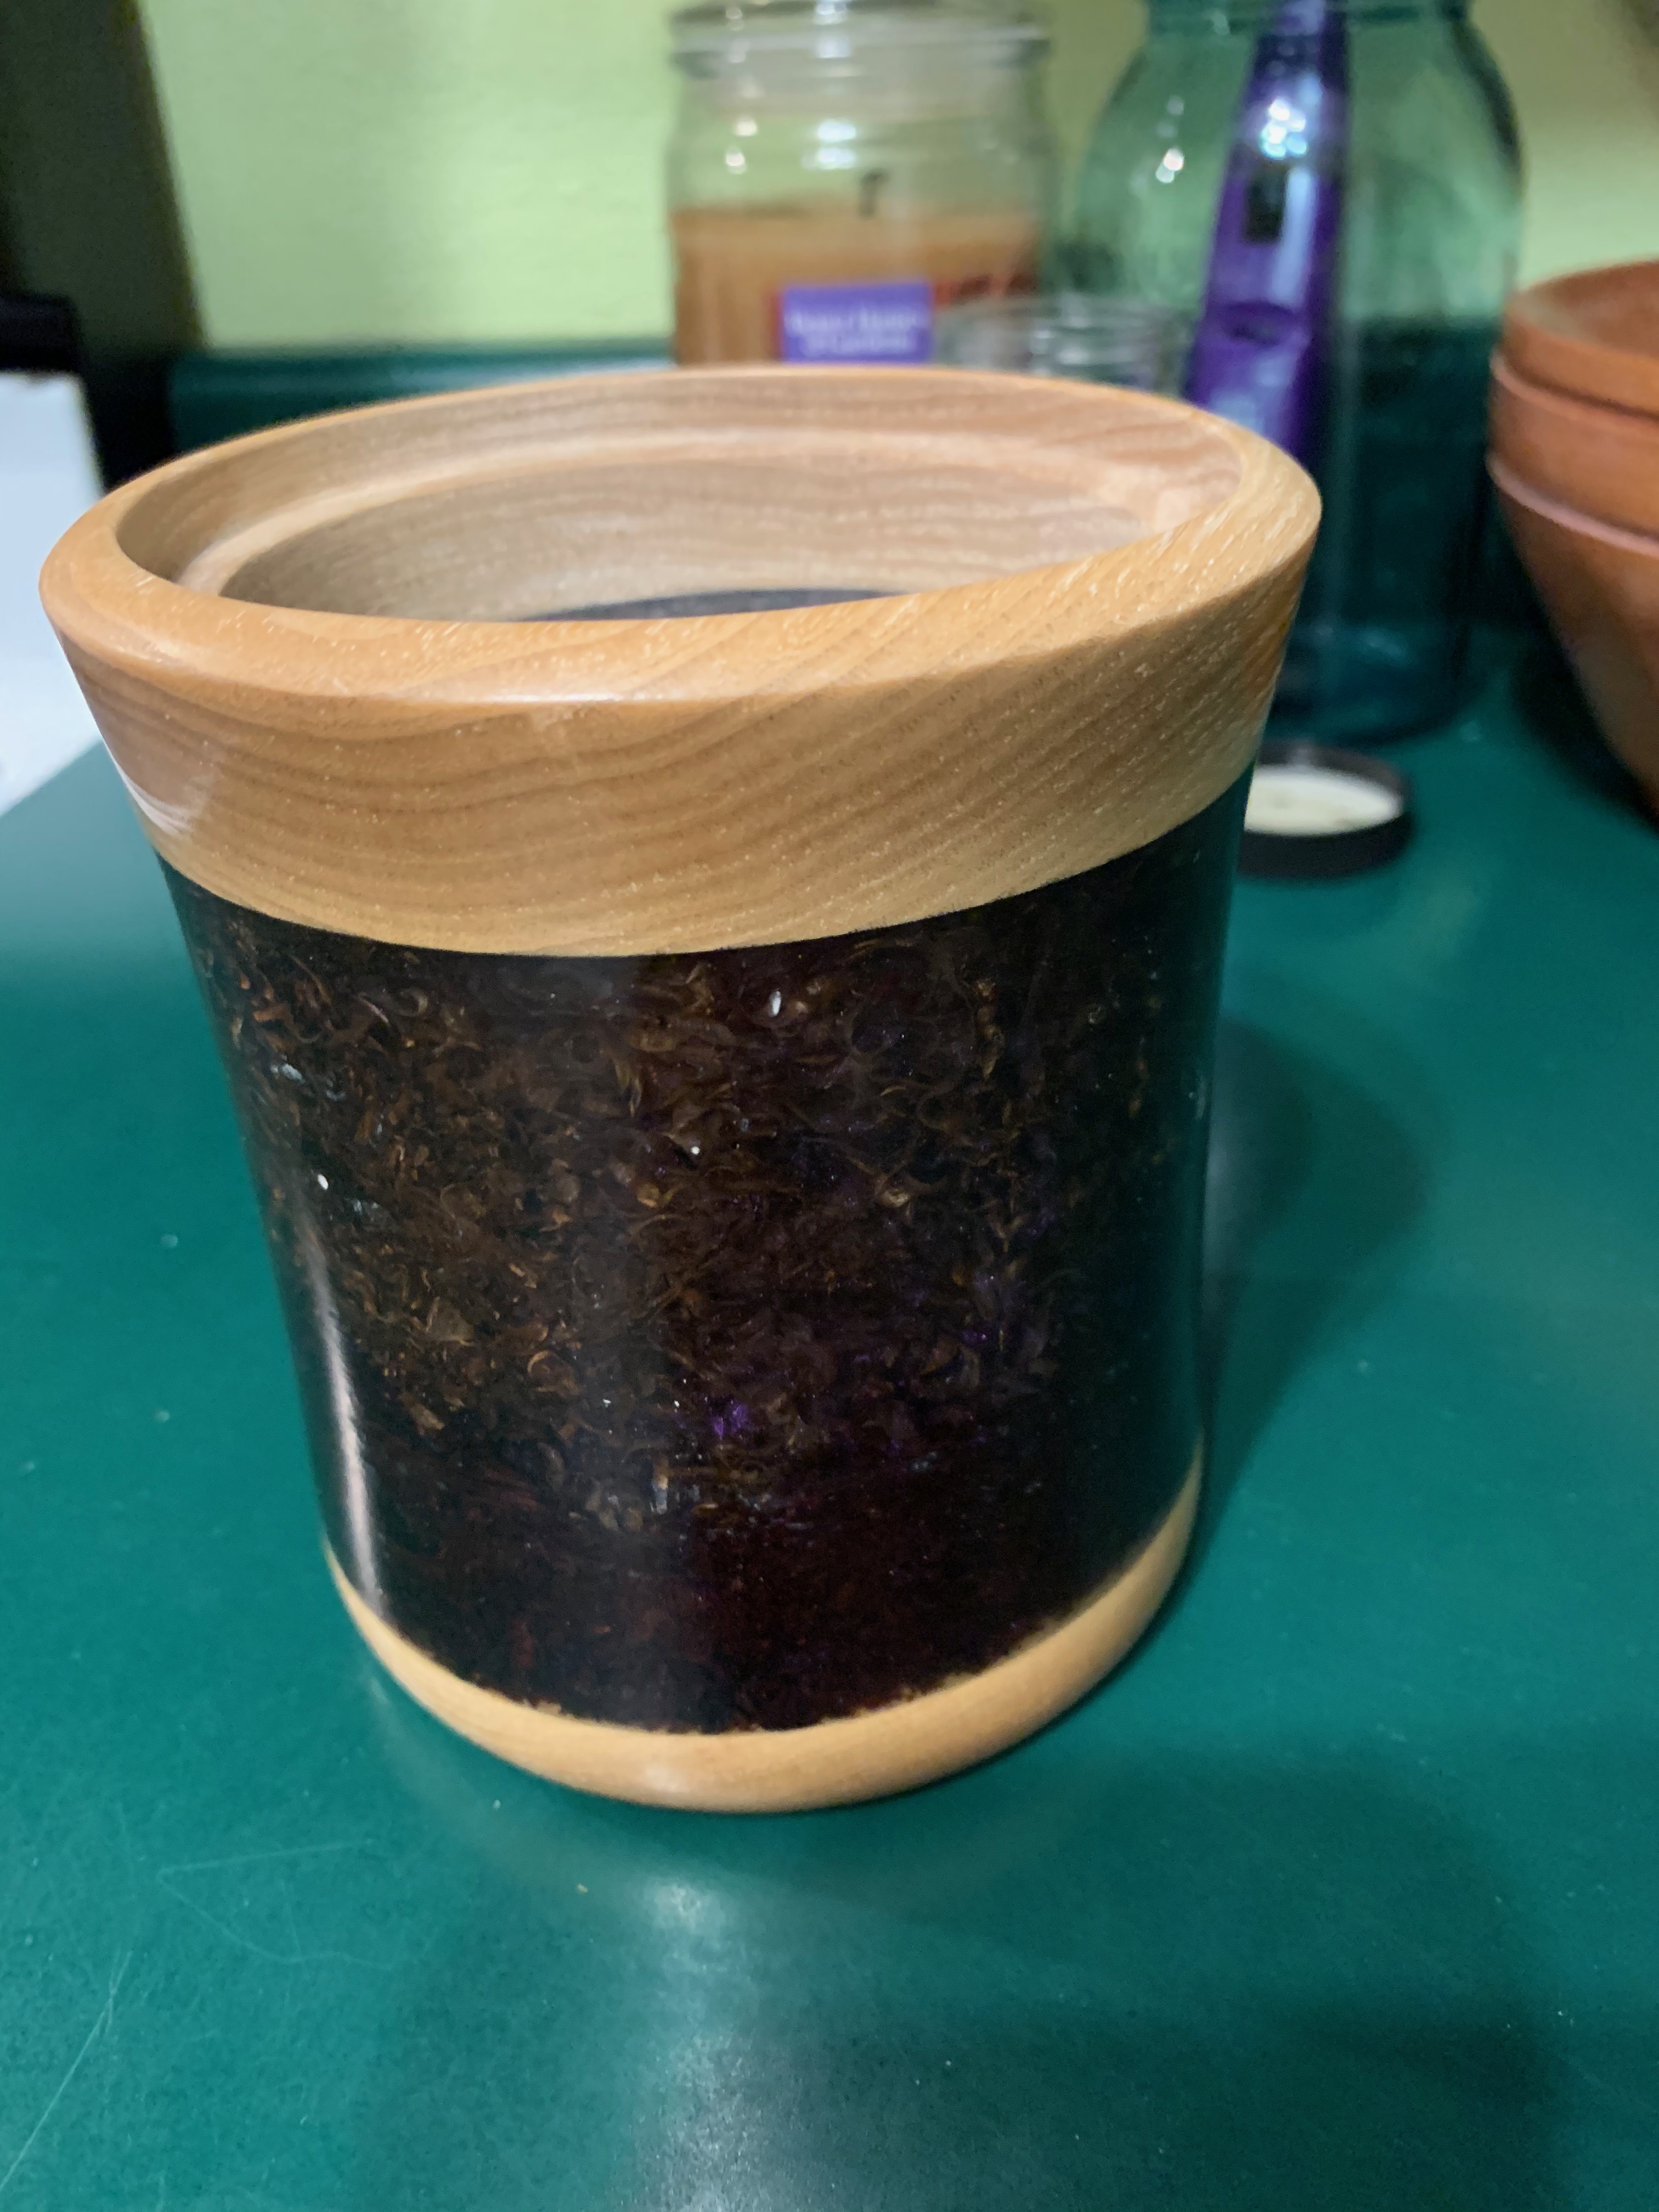
Not exactly impressive, but not utterly horrible, I suppose. You can sort of see the wood shavings there in the resin, but overall it would have been better if they hadn’t been in there at all. And I used way too much coloring as well. I have to admit that there is a very good chance this one is going to end up in the trash. The only reason I finished it was because I wanted to see what the final result would be like.
But this is, after all, a learning process. I learn more from my mistakes than I do from anything else, so even this wasn’t a waste of time.
One interesting thing I’ve learned is that when you throw something like this into a pressure tank and let it sit at about 60 PSI it does some interesting things to the wood that I hadn’t noticed before. The wood parts looked completely normal, but they weren’t really, well, wood any more. It has been so thoroughly saturated with the resin that the wood behaved more like resin when I was machining this thing. I hadn’t noticed that before, so I imagine that the species of wood, its moisture content and other things may have something to do with that.
Oh, in case you’re interested, this is what it looks like when I’m actually working on a resin project on the lathe.

Holy cow it gets messy! If you’re using sharp tools, the resin, which is essentially just plastic, peels off in long, long thin strings that fly all over the place and cover me pretty much from head to foot.
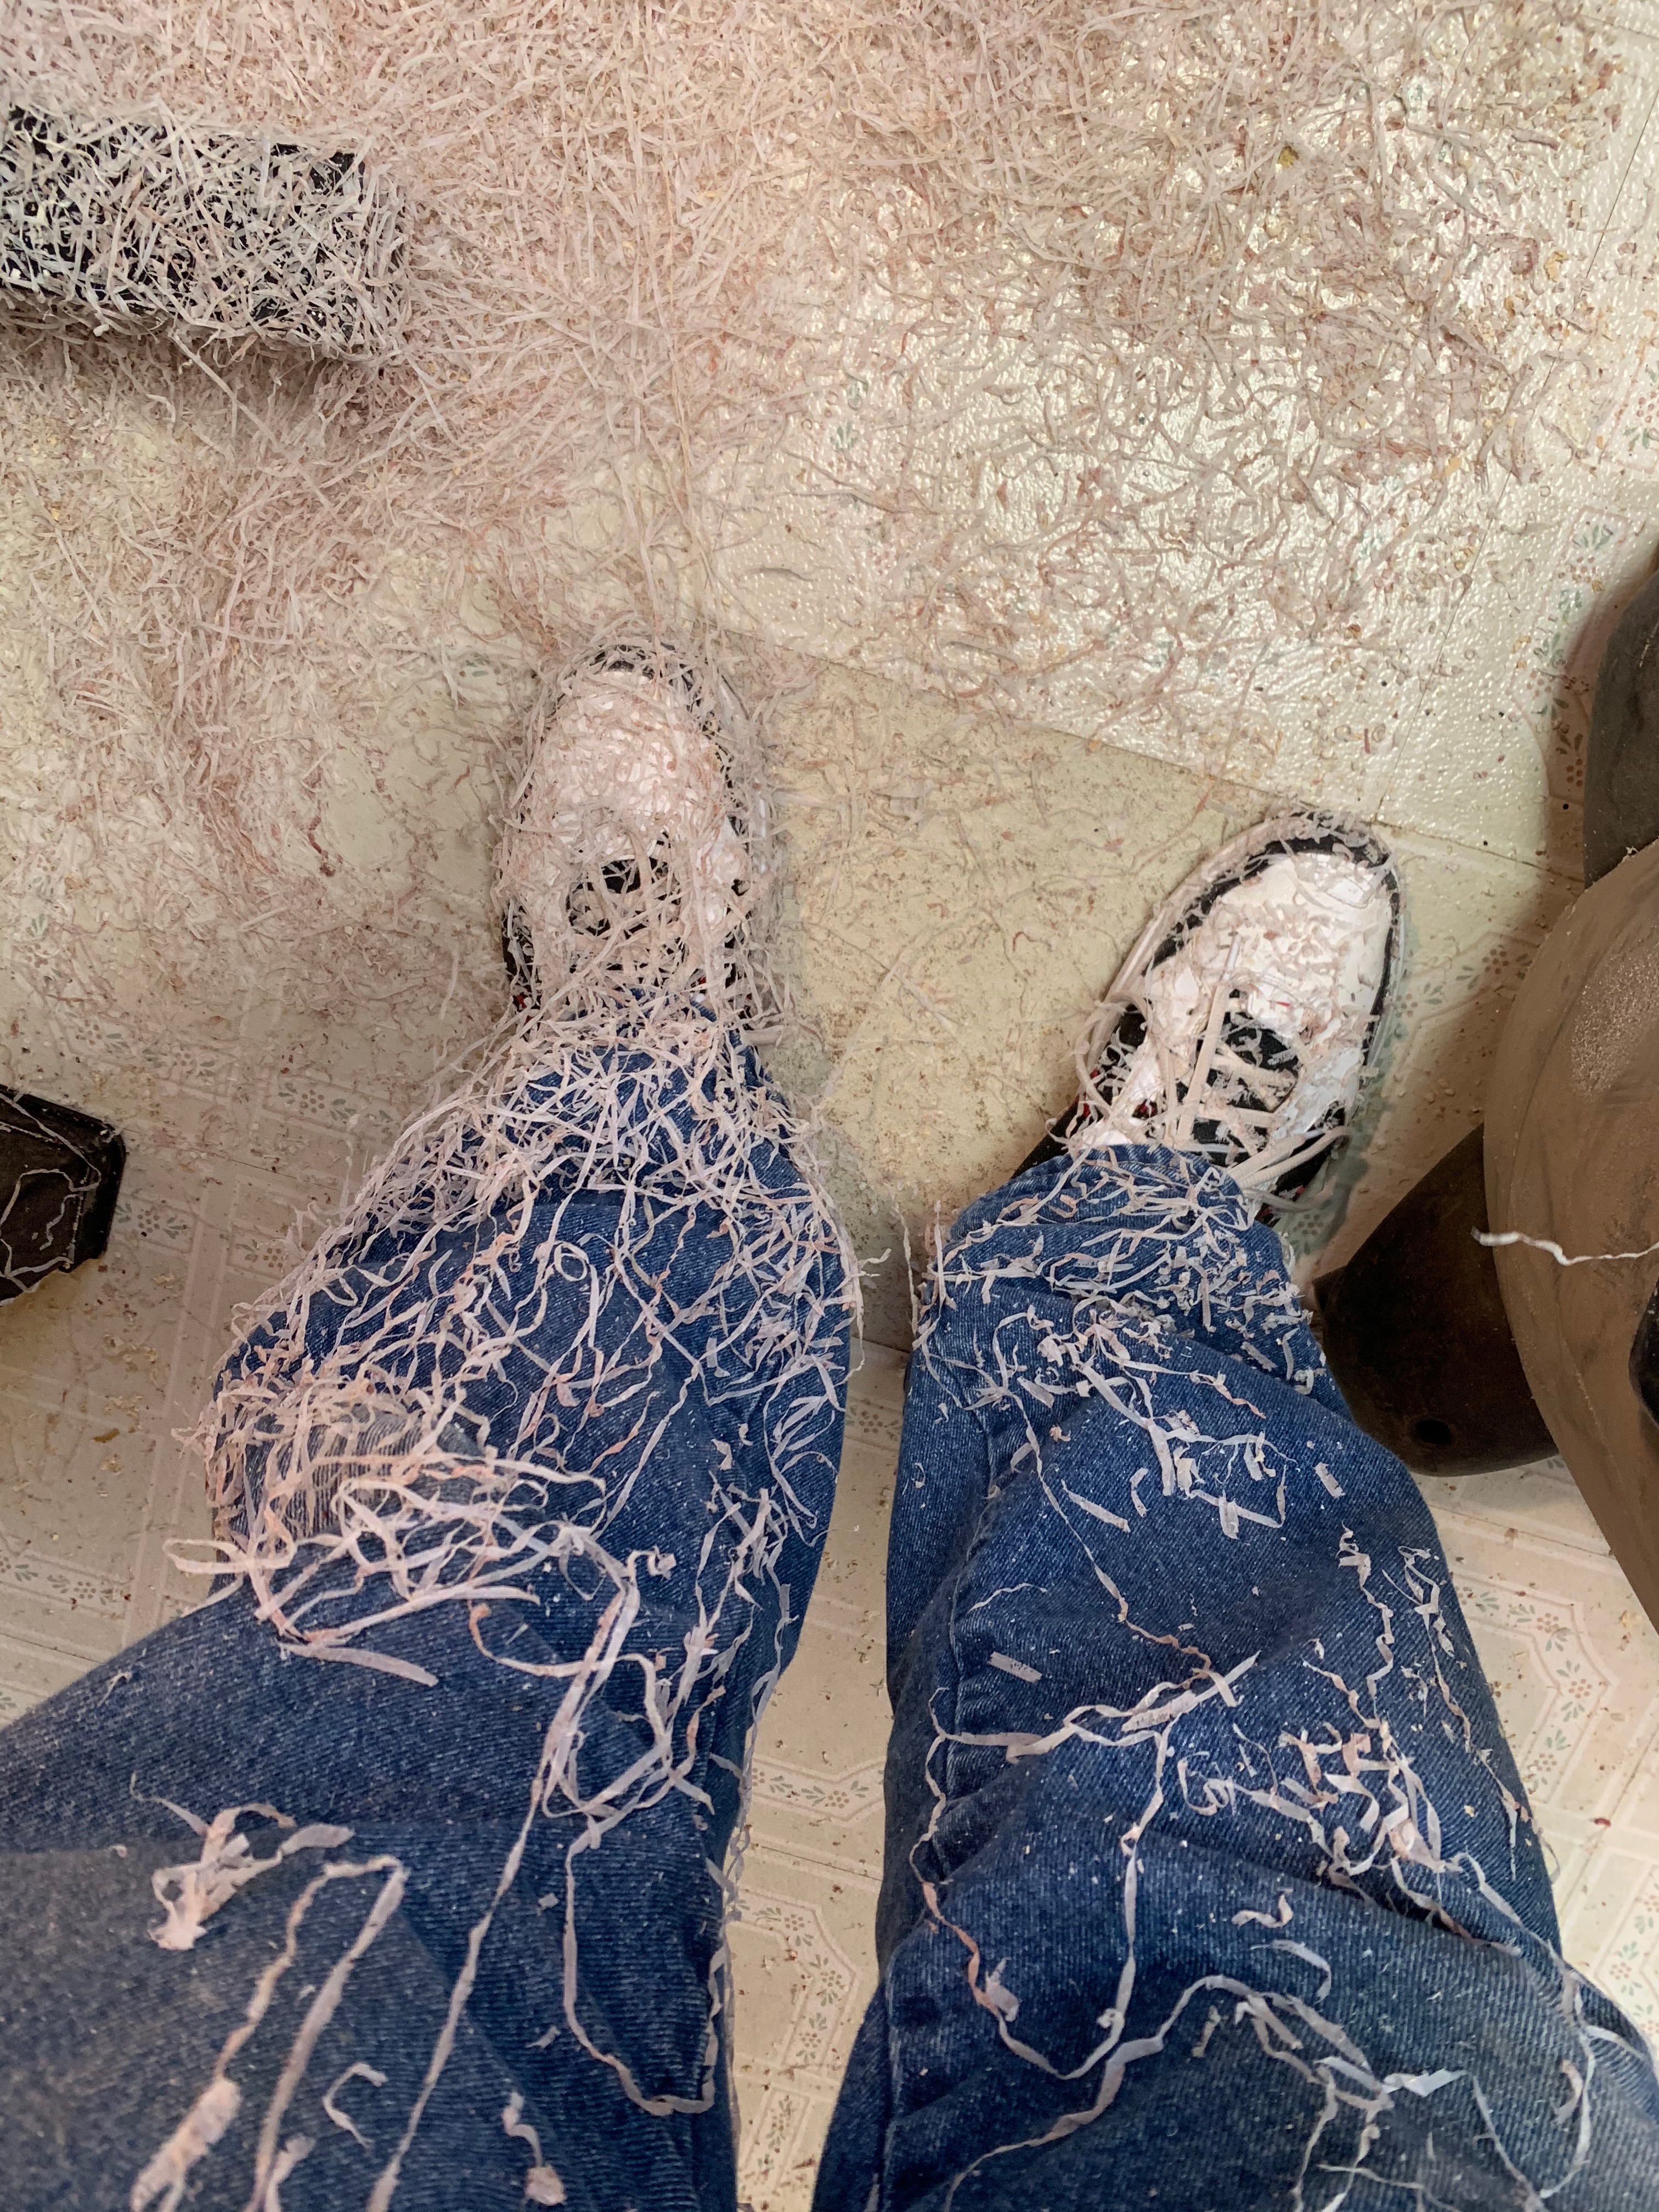
Generally when I’m done working with the lathe I have to go over my whole body with the shop vac to get all of the dust and debris off me. Including vacuuming my hair.
Dust, dust everywhere.
I’ve been doing a lot of fiddling around with wood of late, and because my shop is located in the basement dust has become a significant issue, especially now that the weather has turned cold. I’m not talking about wood shavings and the like, that stuff is fairly easy to deal with. I mean the fine particulates that get into the air and can float around for a long time. During the warmer months it’s not a real problem. I stick exhaust fans in the windows and all the dust gets sucked outside. But now that the house is closed up, the dust is a real problem.

One cheap and easy to implement method of dust control that I’ve resorted to is the good old fashioned duct tape a furnace filter to a box fan trick. And that’s what I’ve done in the past. It really does work. Judging from how fast the filters get dirty, it pulls a lot of crap out of the air before it gets into the rest of the house. But judging from how often I’m having to change the furnace filters and the amount of dust still getting into the rest of the house, it isn’t adequate to deal with the situation any longer. So I went and bought an actual real air filtration system in the hopes it will deal with the problem better than my existing methods. That is supposed to be arriving Saturday. This one costs about $200 which I suppose isn’t ridiculously expensive. It’s supposed to filter down to 3 microns, whatever that means, but I’m told that’s pretty good. Once I get this thing set up and running I’ll let you know how it works out.

Not a failure. You know things now that you didn’t know before you started. It doesn’t have to be a light. Just use it as a container for bits and bobs
LikeLike
That’s certainly true. We might try using it as a planter. The wood is thoroughly impregnated with the resin so it should be rot resistant.
LikeLike