So I went and did something I promised myself I wouldn’t do again, I got a video camera. Yes, I could use my iPhone to take videos but using a very expensive phone to make videos in situations where it could be easily dropped into rivers, mud holes and trails while biking, or inside of laser engravers, etc. did not seem like a good idea to me so when a GoPro turned up for sale at a huge discount, I bought the thing.
I suspect this is going to be one of those situations where “well it seemed like a good idea at the time” comes to mind when I find it covered in dust on a shelf after not using it for months. That’s what happened to the last video camera I had.
Anyway, there is an excellent chance you will be inflicted with videos in the future, so allow me to apologize in advance. Videos like, well, this one below which is not only the first video I took with the thing but also illustrates my latest project.
That is made from a kit called a “Marble Run”, the Spaceport edition. And it is without a doubt the most ridiculously complicated thing I’ve ever put together. I didn’t keep track of how many hours I have invested in building that thing, but it was a lot. Handling hundreds of parts, many of them so small I needed to use a needle nose pliers to put them in place and chasing tiny, tiny parts across the floor when they went flying were par for the course. And whoever engineered this thing is absolutely, positively, a bloody genius. The engineering and creativity behind designing and making something like this almost entirely out of nothing but wood and a few pins and a couple of screws, is mind boggling.
It’s difficult to envision just how complicated this thing is from that video so here’s a more detailed photo.
I mean just look at that thing. Trying to put all that together was bad enough, but can you imagine trying to design something like that from scratch? There are close to 500 individual pieces, most come in sheets of laser cut plywood of varying thicknesses.
And there is another one of these that is just as complicated waiting for me that eventually will be joined up with this one, along with third kit that is a motor drive and lighting system to drive both of them.
I don’t recommend a lot of products here, but this is one I would definitely recommend if you’re into building kits or 3D puzzles. It’s from a company called Rokr that makes a variety of these marble run type kits/puzzles for adults that range in price from about $30 on up to well over $100 depending on size and complexity.
The instruction/assembly manual is very well written but some caution is necessary because some of the illustrations can be a bit confusing. It’s generally broken down into subassemblies that are then connected together or to the main mounting board which makes it easier. It comes with everything you need, including any tools that are necessary. It includes sandpaper for smoothing off edges, wax for lubricating the gears and friction points, screwdrivers, etc. I would strongly urge you to also have on hand a small needle nose pliers for working with small parts especially if you have big, fumbly fingers like mine. And keep a bottle of instant glue with accelerant handy as well. If you are careful you won’t need the glue, but me? I managed to break a couple of small parts. I’d also recommend some very good lights as well.
Even more impressive was the thing actually worked after I got it together. I needed to do a bit of adjusting and in some cases some trimming to get everything to work smoothly. But having something this complicated actually work when I was done with it should give you an idea of how well the instructions are written.
And while I’m talking about videos, how about a kitty? Sure, why not.
That’s Marvelous Mercy The Wonder Cat and yes, you have to use her entire name when you call her or she will ignore you. She is a real sweety. She is considered a “senior” cat although you couldn’t tell it from looking at her. She’s about as sleek and athletic as they come.
If I do start doing more videos, there is the question of storage space. While WordPress gives me a more than generous amount of storage space here, these videos take up a huge amount of space so I suspect that what I’ll end up doing is uploading them to my Youtube account and just linking to them from here.
Well if I ever get around to it. If I start to do video stuff it means I’m going to have to learn how to use editing software. Ick…
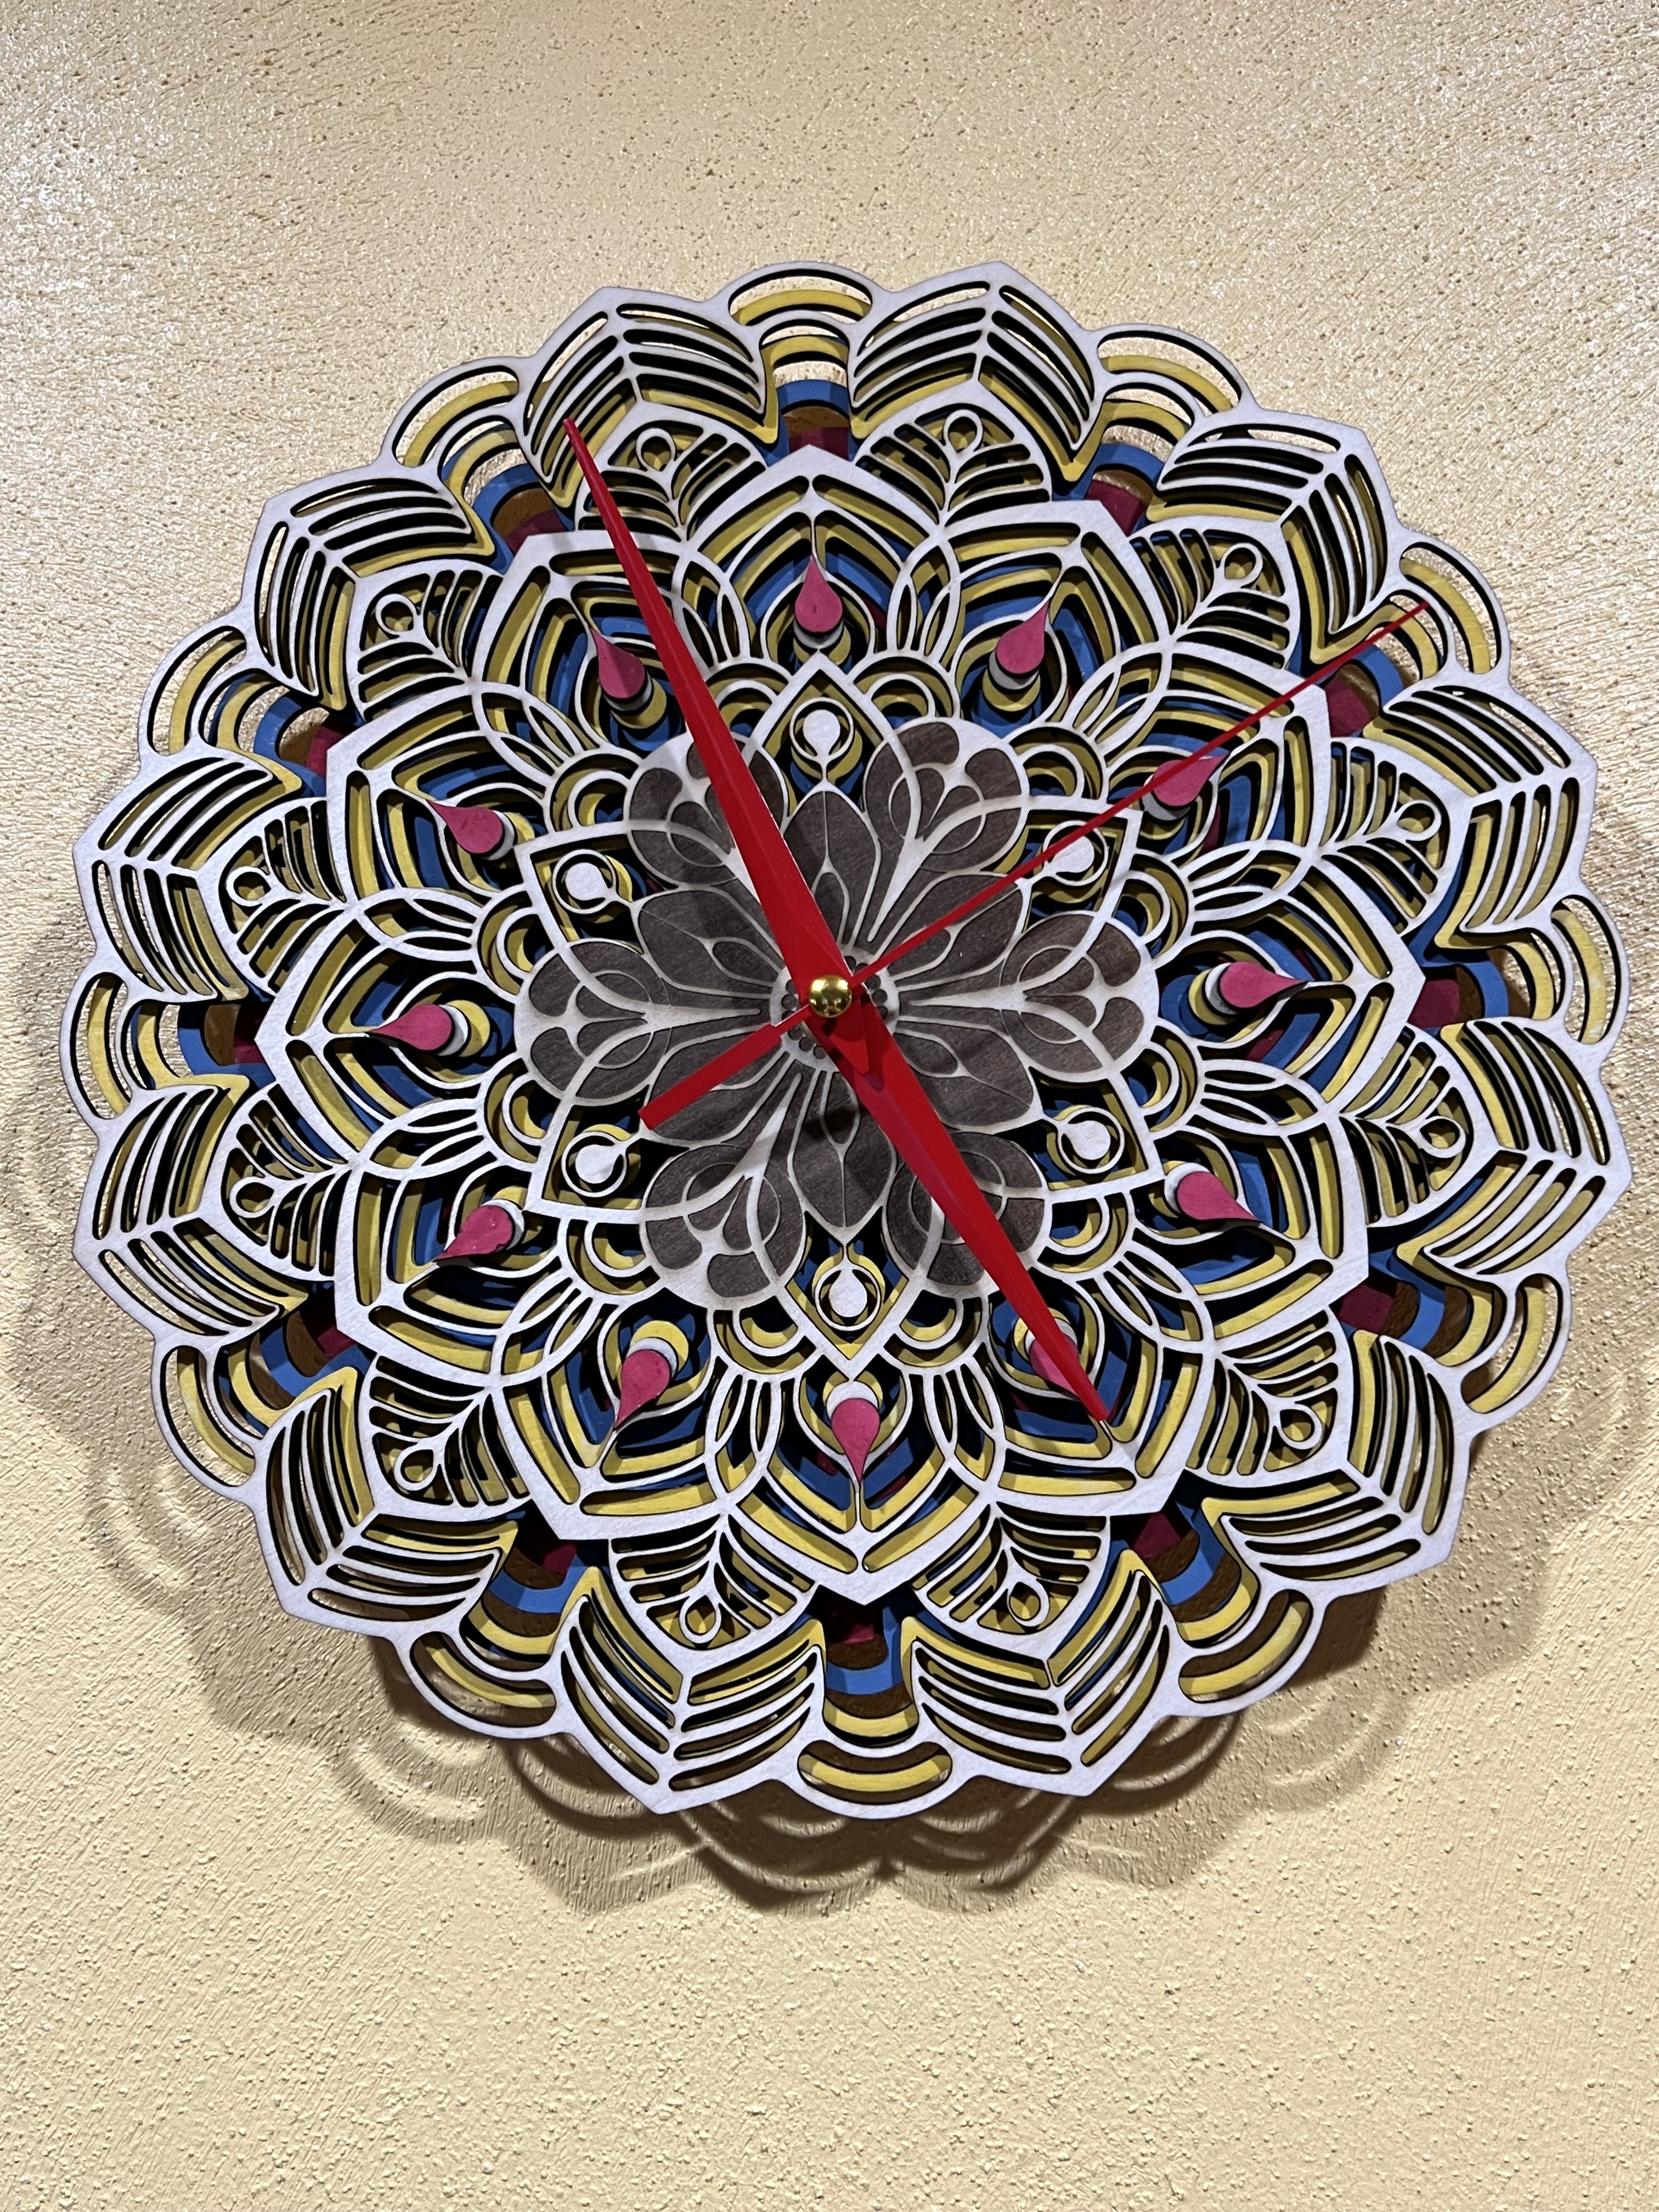
Let’s see, what else? Oh. I made a clock! Well, several of them, actually.
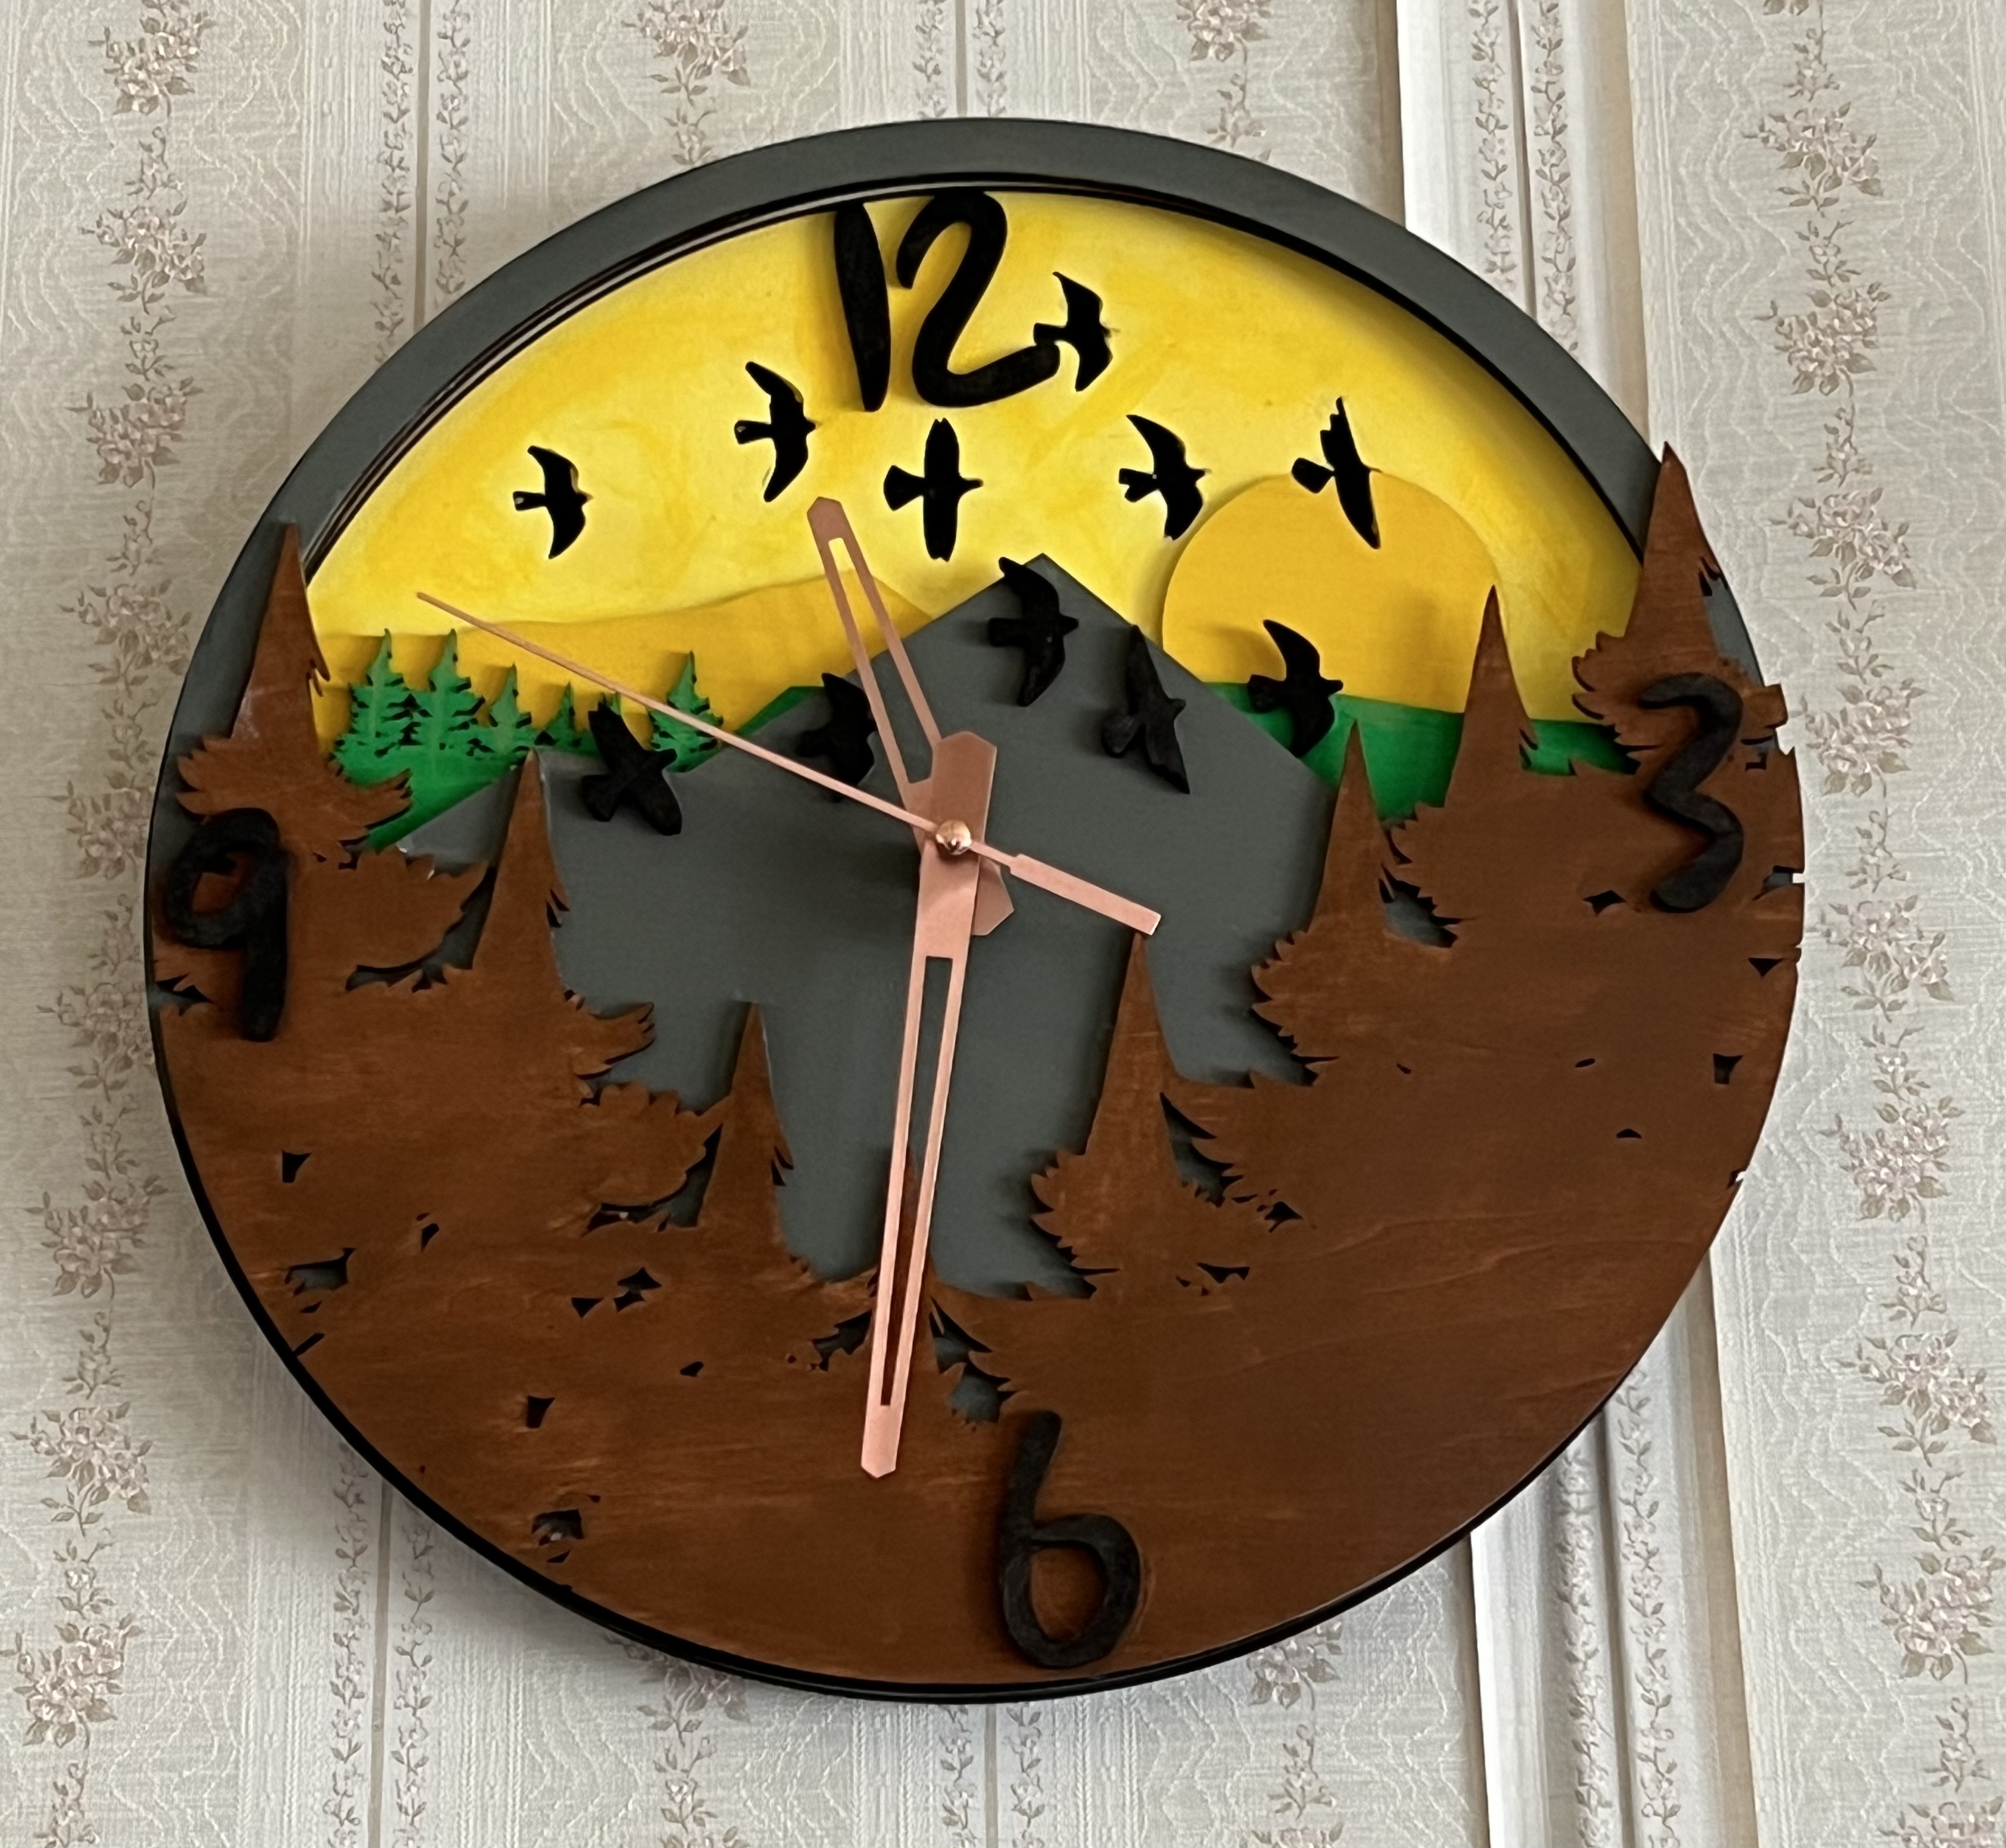
MrsGF likes that one up there so much that it’s now hanging over the fireplace in the living room. Here’s another one that I did the other week that MrsGF has hanging up in her office.
I’m really surprised people don’t make more of these. They’re easy to make and cheap? You can make them out of any scraps of wood you have laying around, and these battery operated clock modules are ridiculously cheap. I picked up a box of 15 of them, complete with an assortment of hands, for $27. That’s about $1.80 each.
And I’ve run out of things to talk about for the moment. Aren’t you glad?
Coming up in the future: I’m putting together a list of on-line resources for craftspersons who dabble with laser engravers/cutters. That’s one of the most frequent requests I get. So I’m putting together a list of websites for things like free images, .SVG and other files you can use for cutting or engraving, resources for finding materials at decent prices, etc. So keep an eye out for that sometime in the next few weeks.
(Sidenote: It’s Feb. 15 as I type this and it’s 50(F) degrees outside. It hit 52 yesterday and tomorrow is supposed to be just as warm. 50 degrees in the middle of February? In Wisconsin? This just ain’t right. Normal temperatures for us should be in the 25 – 30 range.)
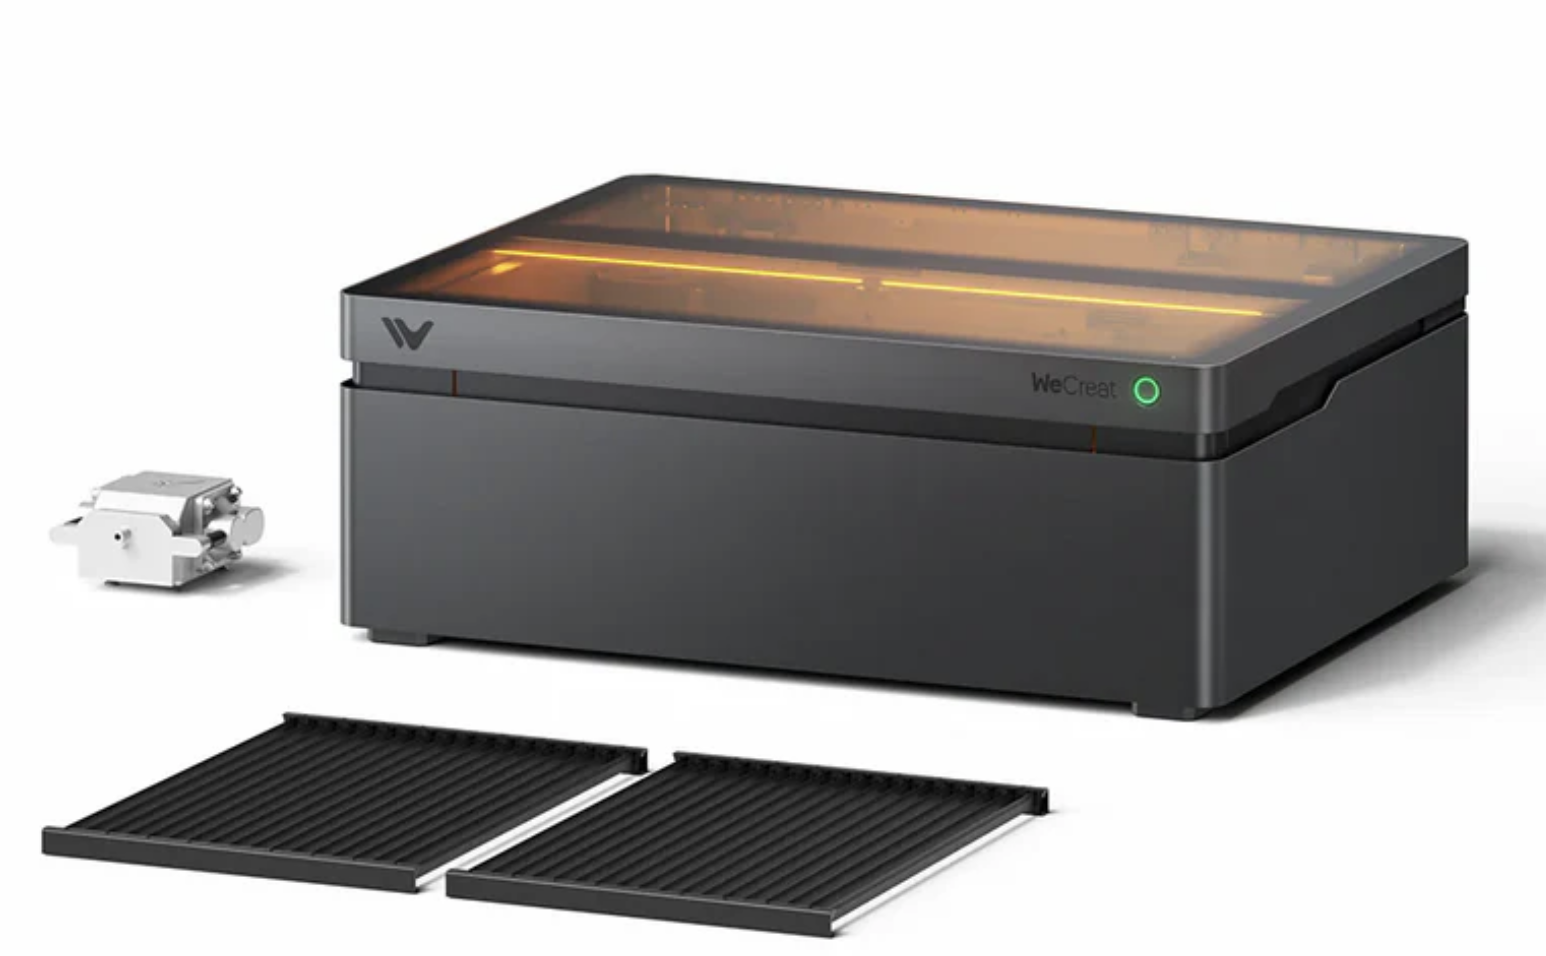
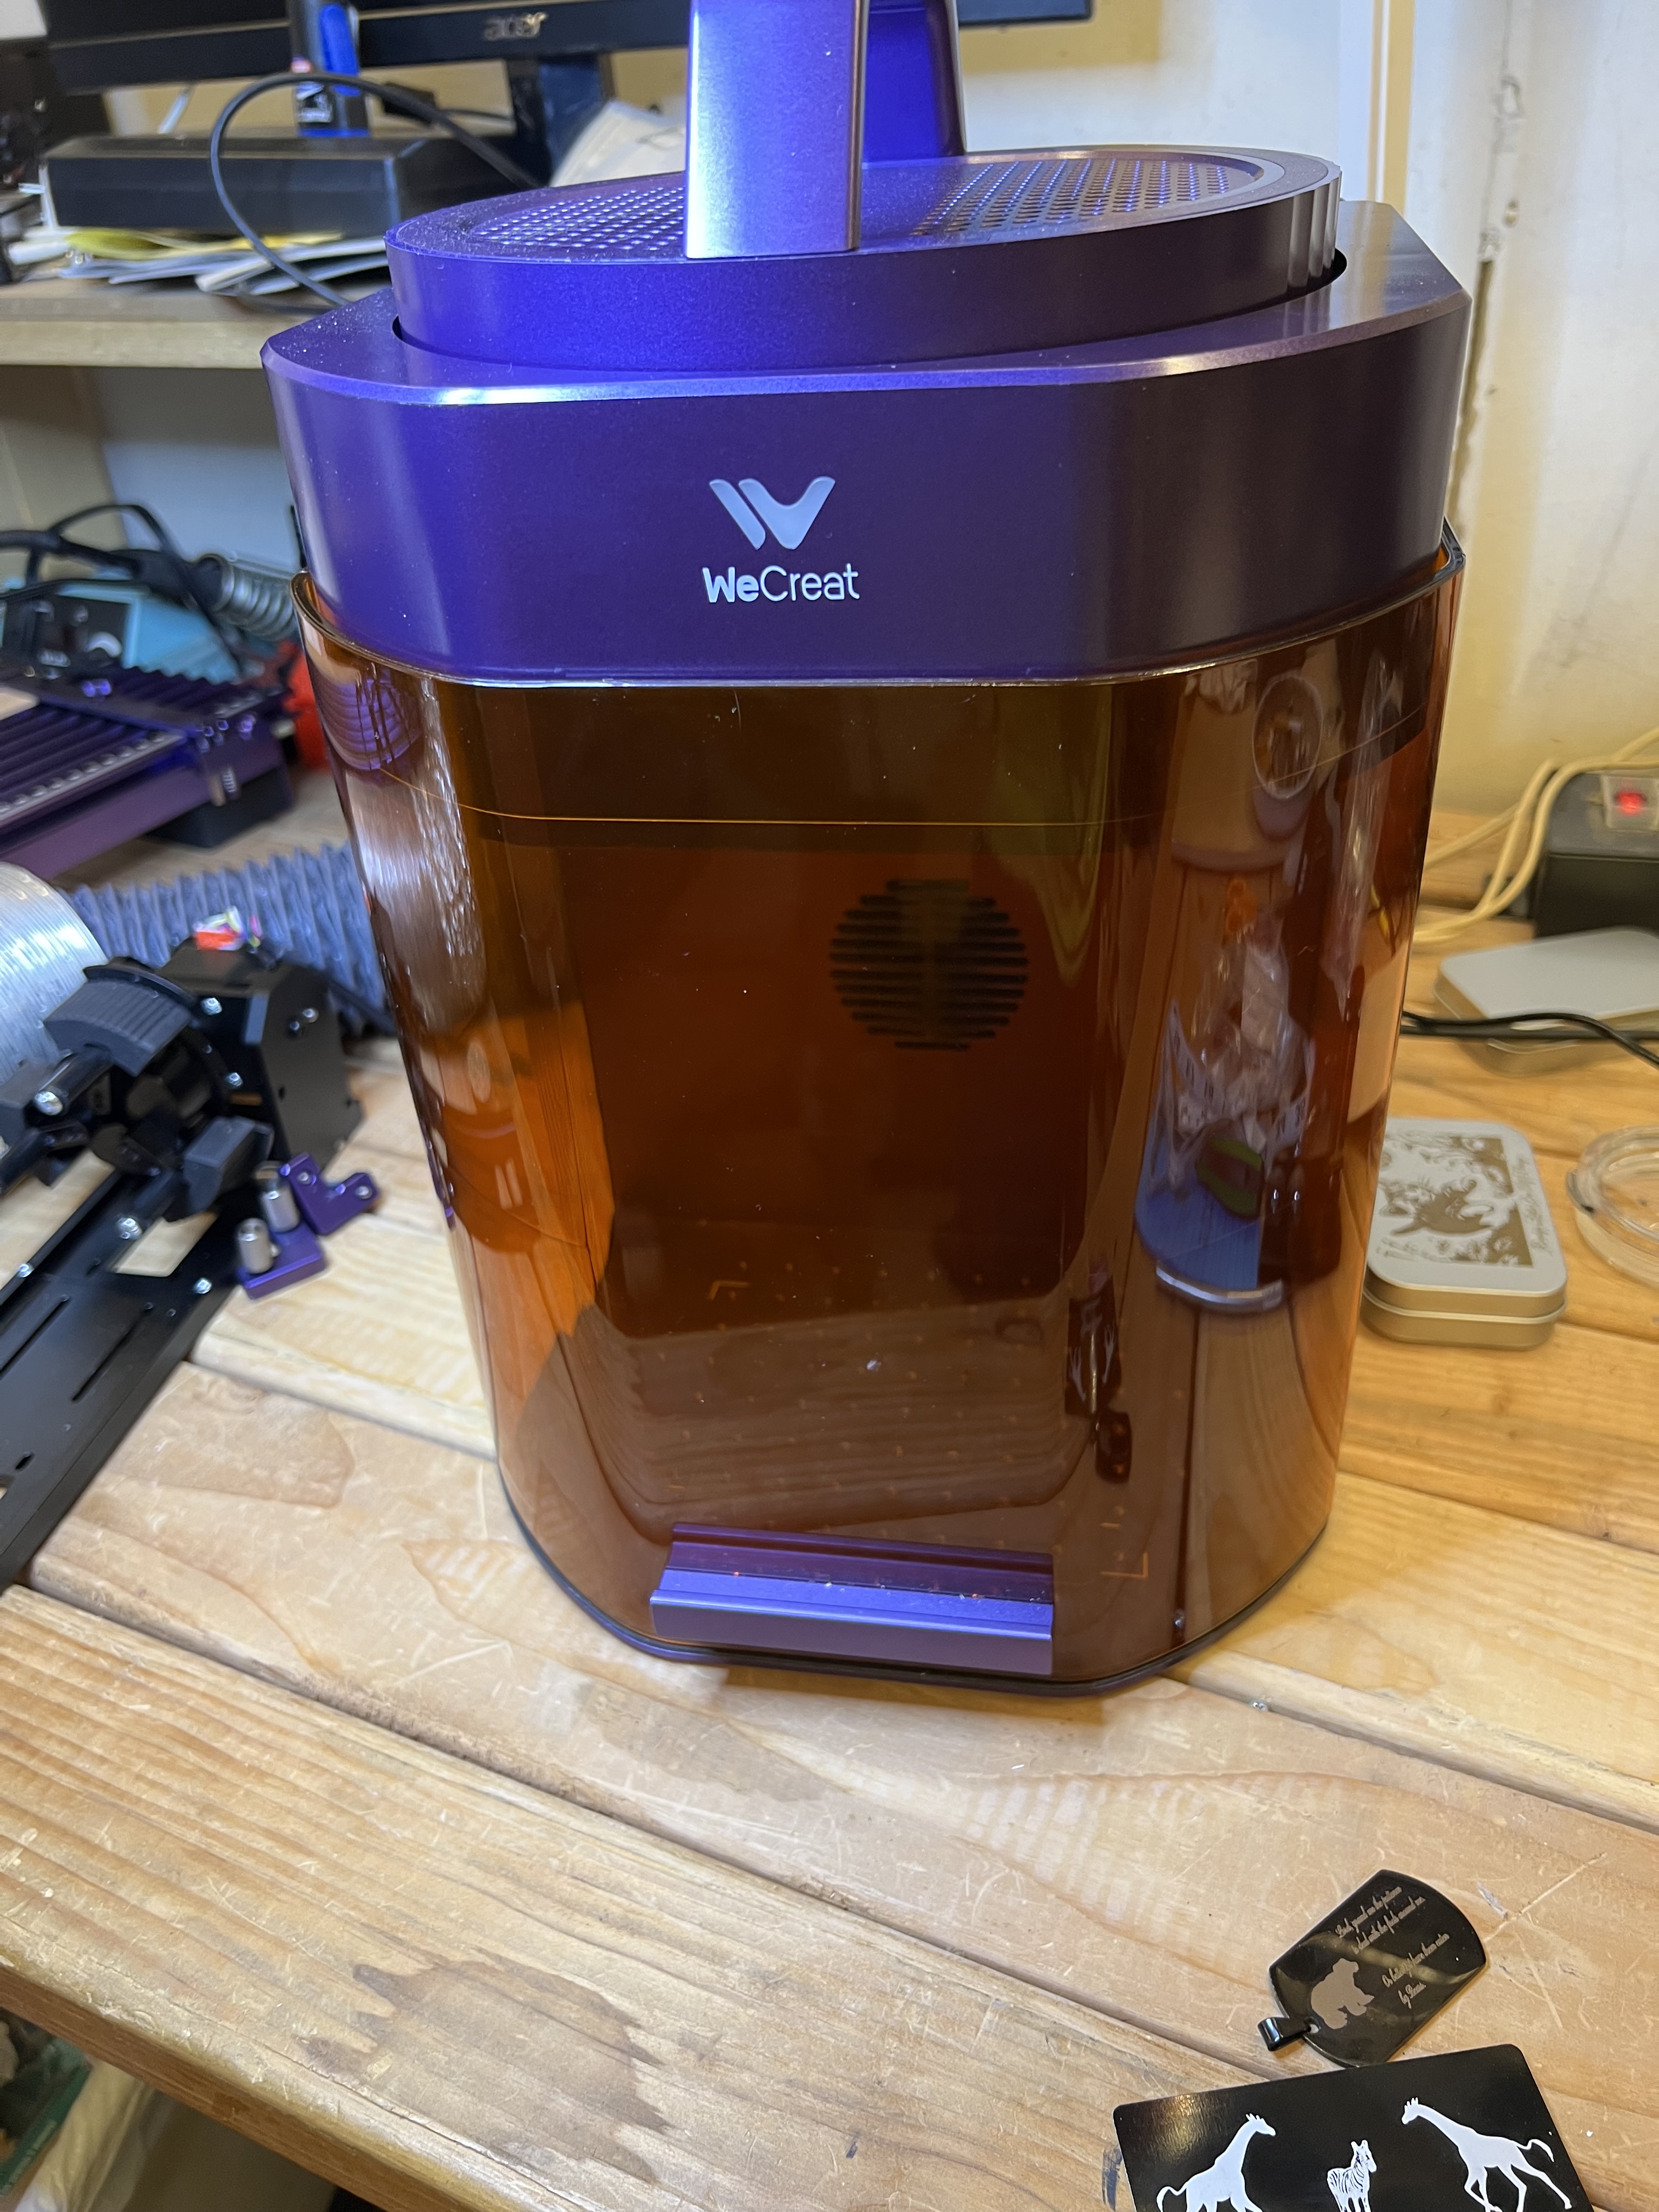
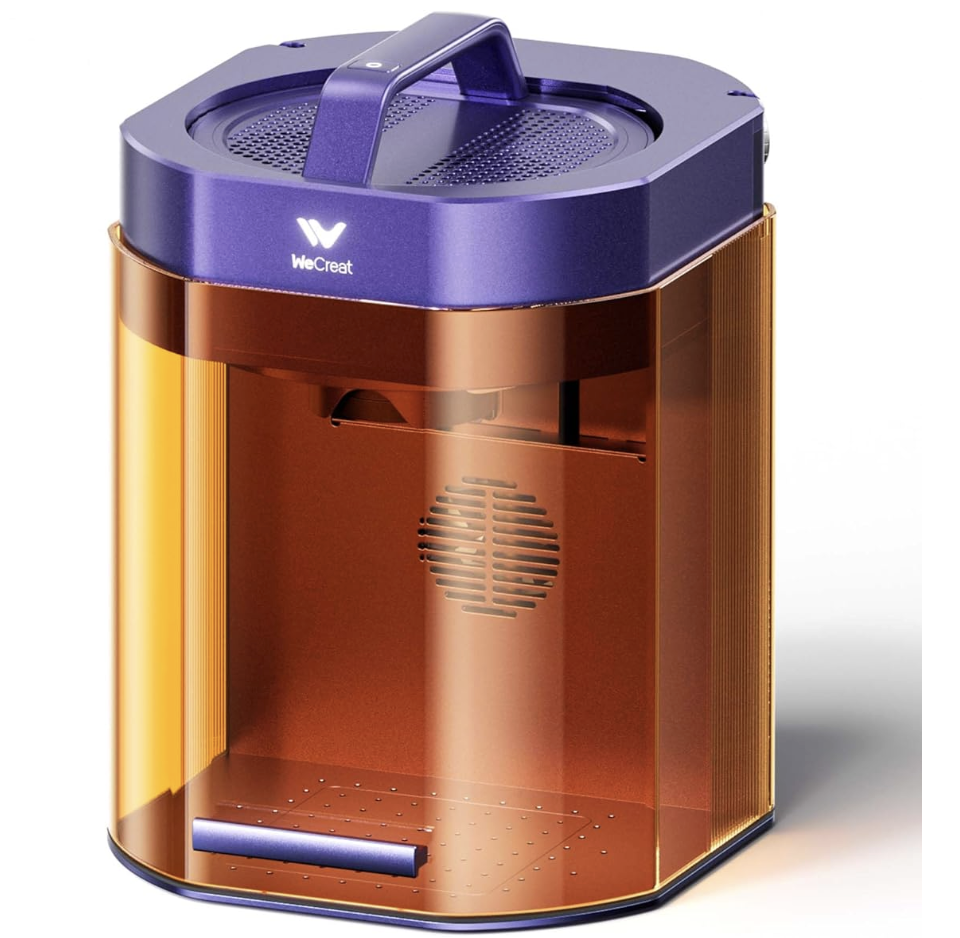
That beastie up there is the Vision Pro 45W laser from Wecreat and it’s been living on my workbench for about three weeks now. Since I already have the Falcon and the Lumos, why would I need another one? This was not an impulse purchase on my part. The Lumos is excellent for what it does, but it is more of a specialty tool. The Falcon is an excellent introductory level laser at a reasonable price and would be good for someone new to this or who only needs to do engravings occasionally and is only going to be cutting 3mm plywood. But I’ve reached the point where I needed a tool with much greater capability.
Specifically I wanted to be able to work with much thicker wood and much larger pieces of wood and after a lot of research the Vision Pro was what I ended up with. The Vision up there has an optional pass-thru roller feeder that allows it to work with boards up to 130″ long and up to 15″ wide. It’s going to let me work with lumber in the same dimensions that I use for my traditional woodworking projects, and that’s exactly what I was looking for. I don’t have the roller feed yet because I’m going to have to do some major rearranging in my woodshop where this thing is eventually going to live, so there’s room for the passthru feeder. At the moment I have way, way too much junk packed into my little woodshop. Some major house cleaning needs to get done in there. I really, really need to get the lasers out of my electronics/radio work area where they’ve been occupying the space that normally was used for my soldering station and test equipment.
Anyway I’m not going to do a review of the Vision because there are dozens and dozens of them already out there. But I do want to talk about what it’s like in actual use over an extended period of time, which is something you almost never get with these so-called reviews you find on Youtube and places like that.
So far I really like this thing. It’s pretty much exceeded my expectations as far as it’s capabilities as a laser are concerned. I picked it up primarily for cutting material. I use this thing more like a sort of CNC machine than a laser engraver. If I want to do engraving I’ll turn to the Lumos which has a much higher resolution and is many times faster, and if it’s something that will fit in the Lumos restricted working area. Doing engraving with a gantry style laser takes a long, long time. Something like one of those coasters I do that takes maybe 2 – 4 minutes with the Lumous would take 15 or 20 minutes on the Vision or Falcon.
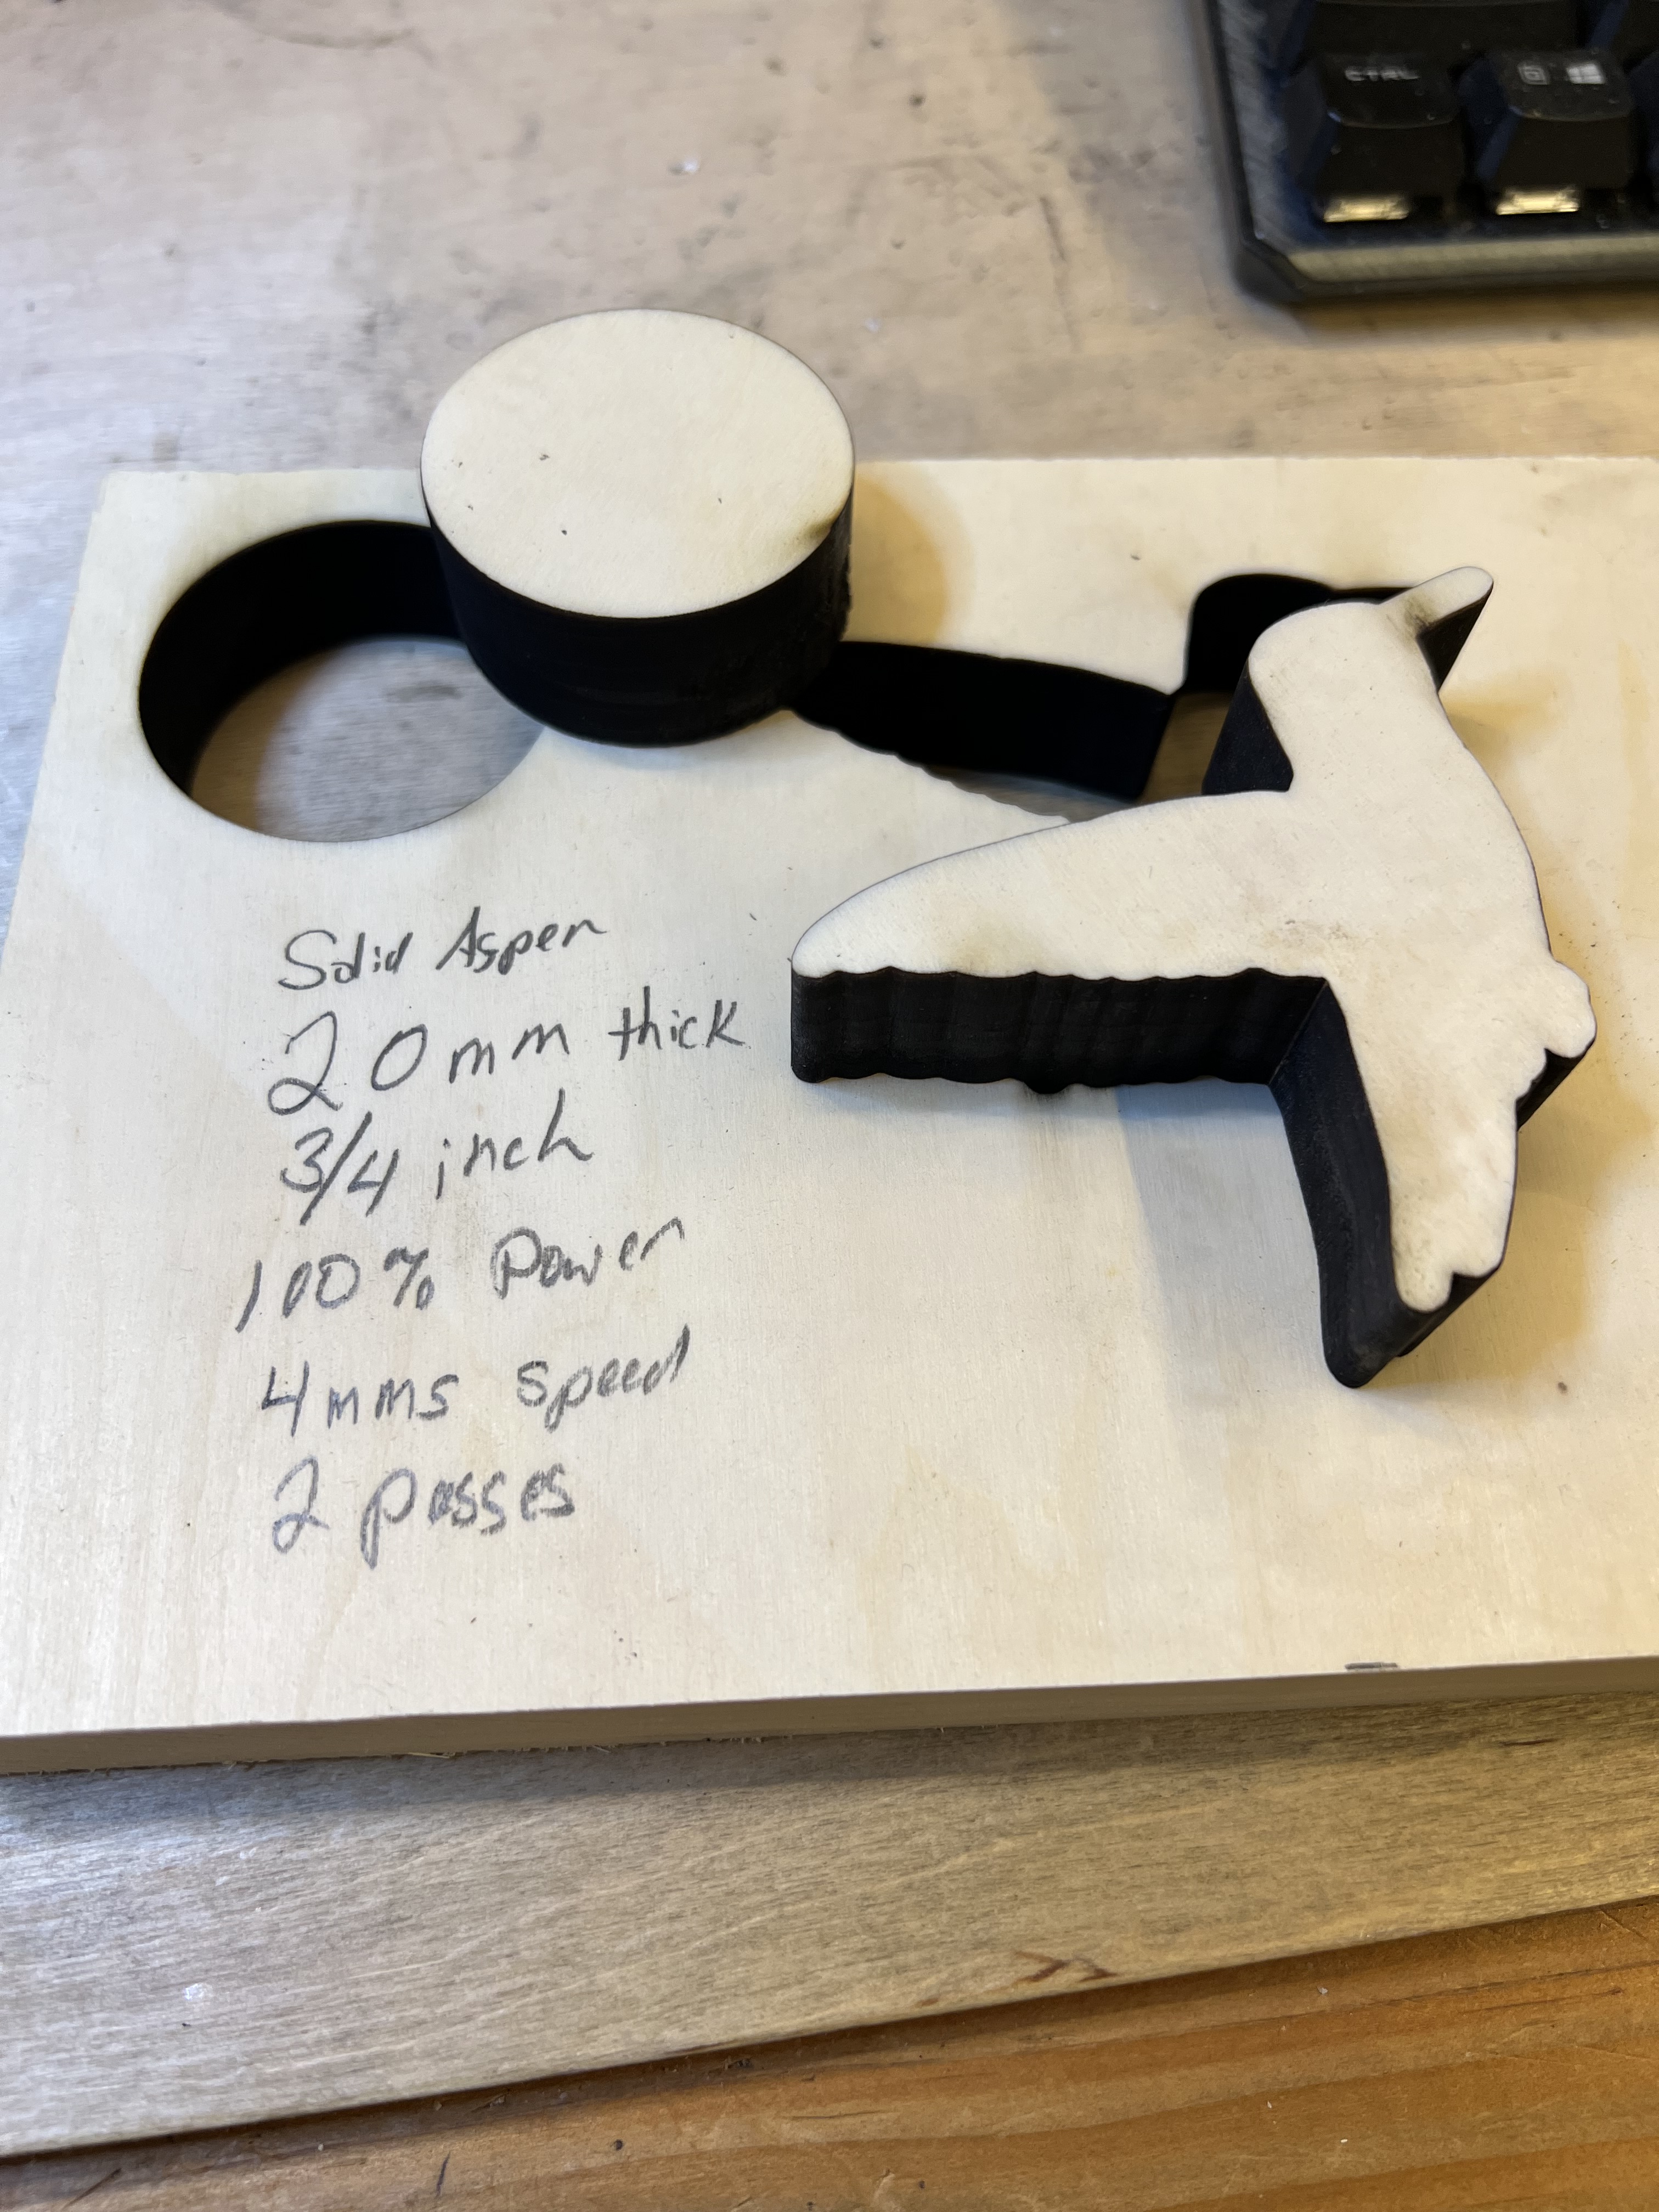
Where this thing really shines is when it comes to cutting material. This thing can cut 3/4″ thick solid wood as you can see in that test cut over there on the left. I cut 1/2″ walnut with this thing in one pass with minimal charring, and it slices through 3/8″ thick solid white oak and ash like the proverbial hot knife through butter.
It does have its issues and irritations, though. Some of them are puzzling because they never should have made it into a production model without being corrected first. Especially on a machine this expensive. This thing isn’t cheap. The base version goes for around $2,300 and depending on what options you add, you can end up spending over $3,000 easily. So before you buy one of these. you’d darn well had better have a serious use for it because we’re well out of the “impulse buy” price range here.
If you’re thinking of buying one of these yourself, here are some of the things I found to be irritating or annoying. None of them are deal breakers but they certainly aren’t marks in Wecreat’s favor either because all of these should not have been there in a production machine in the first place.
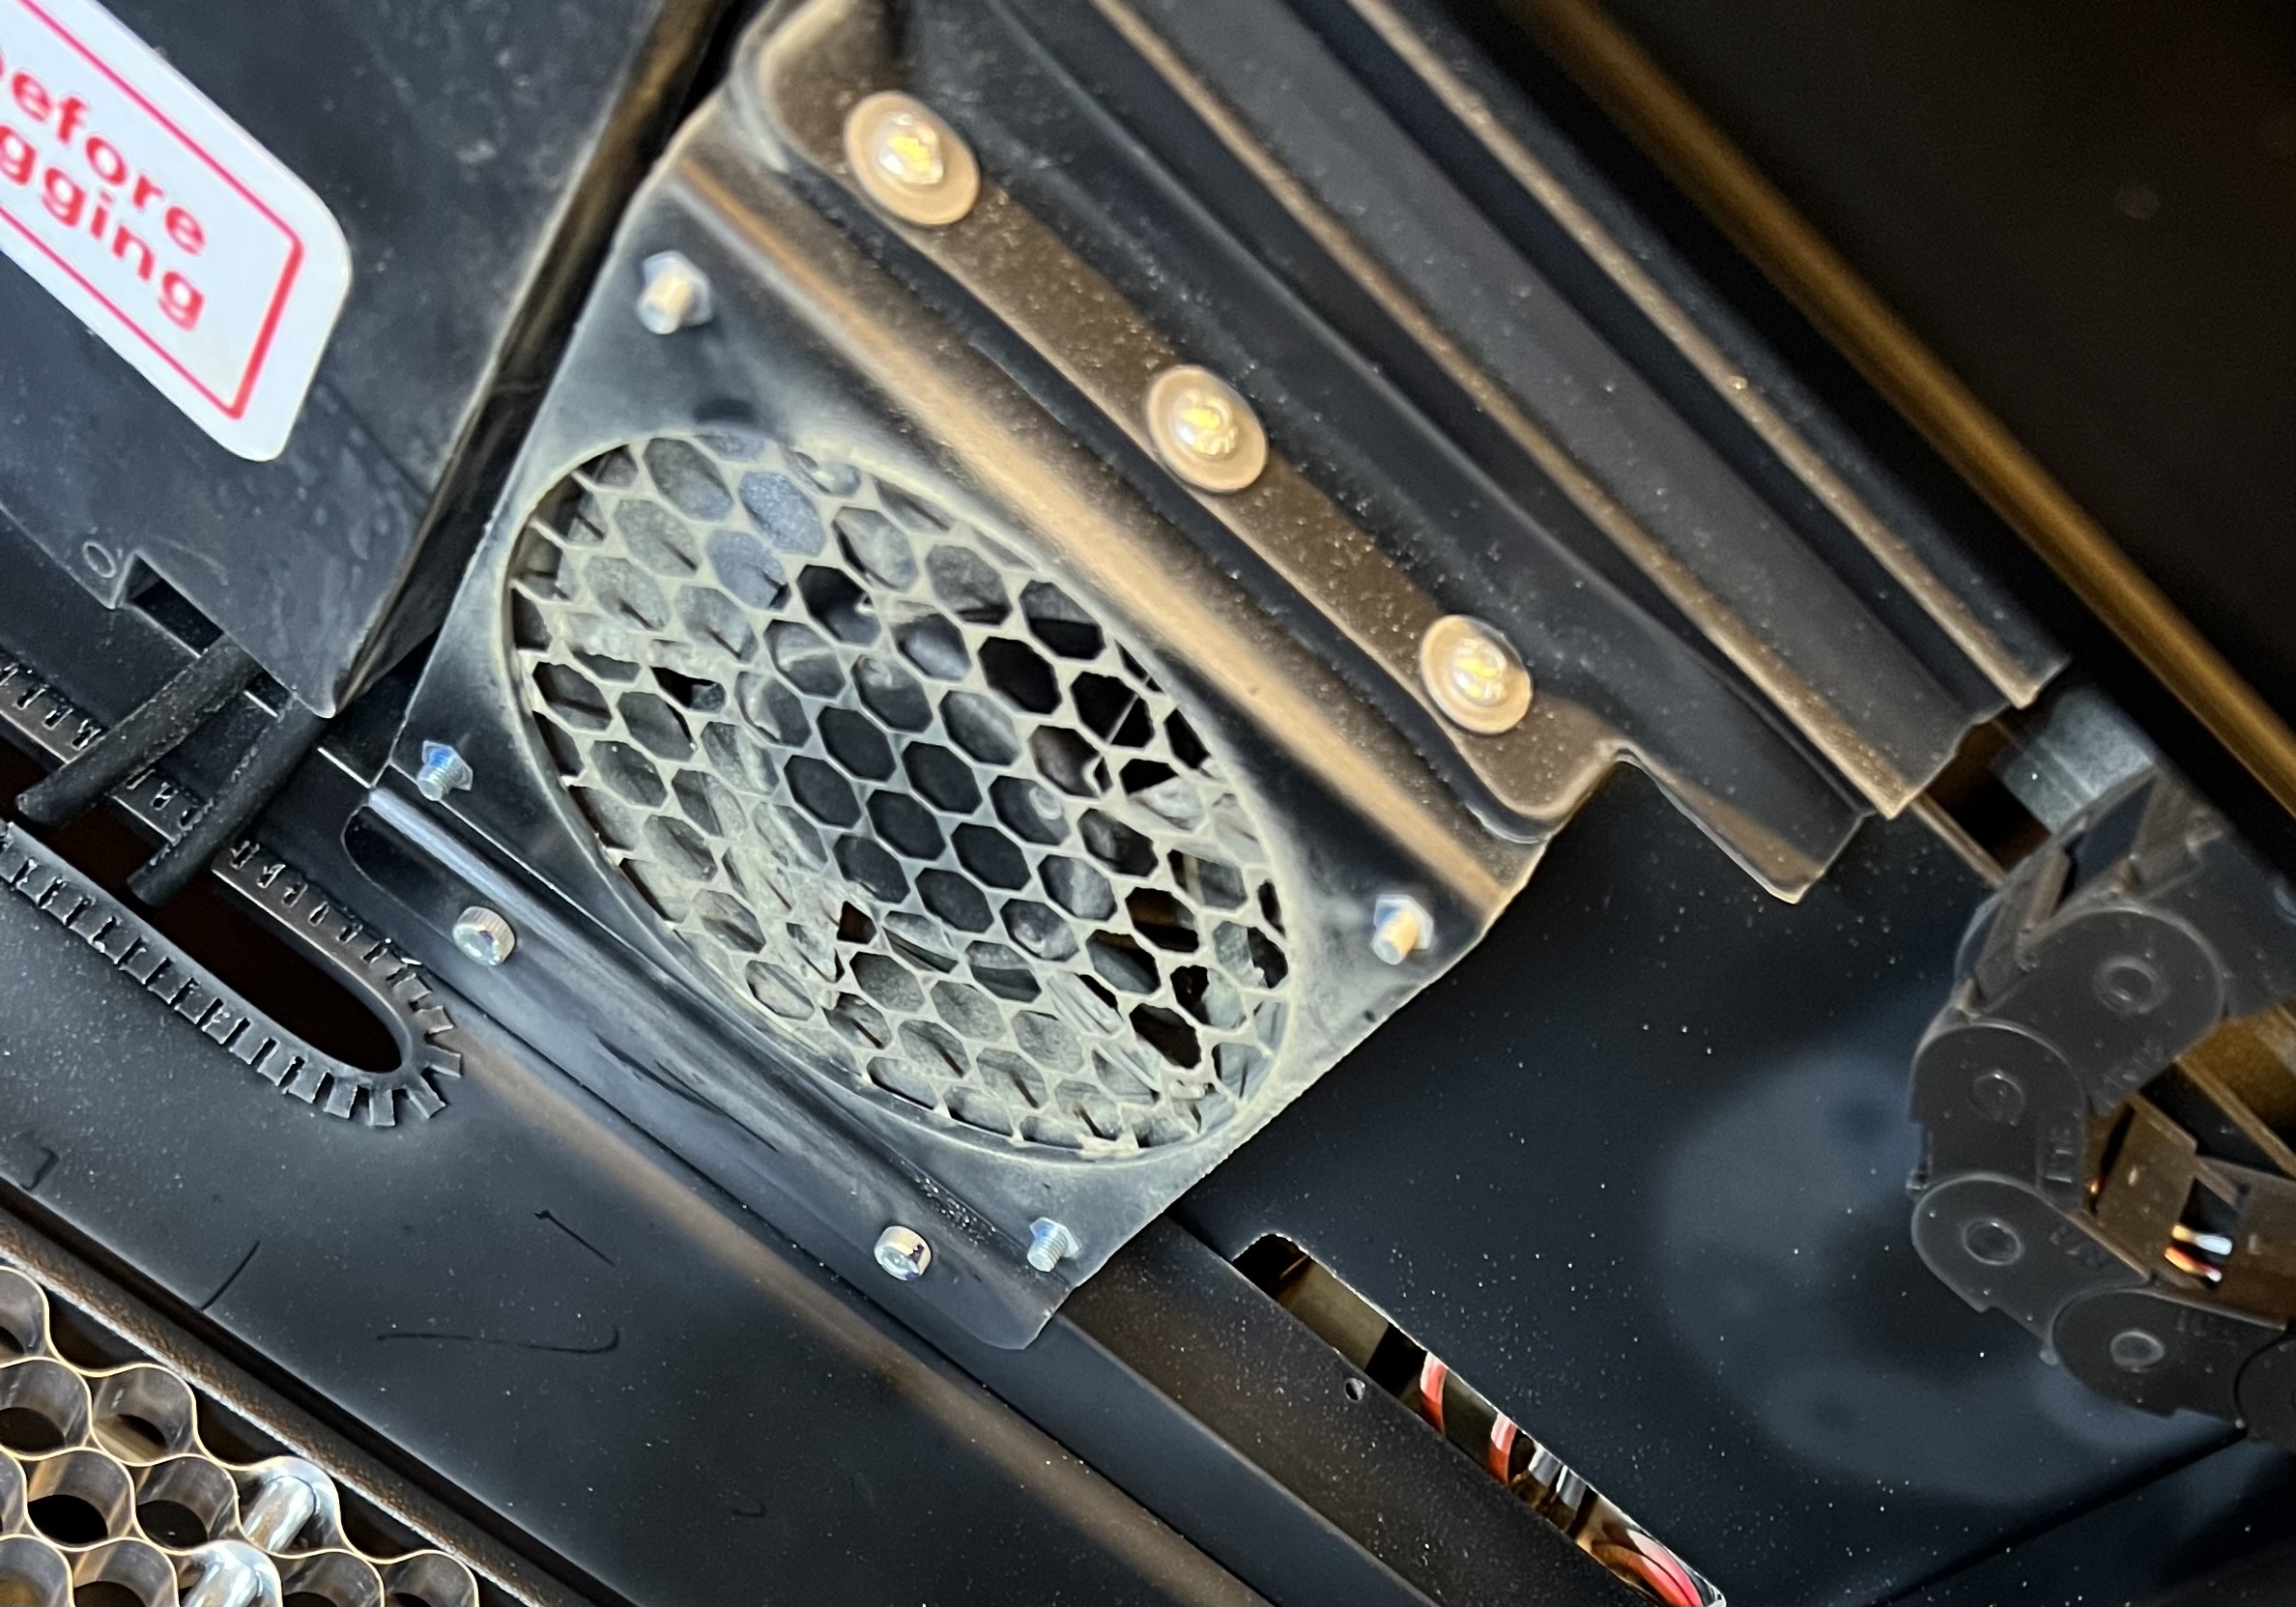
The Fan Sucks. Or, Rather, the Fan Doesn’t Suck
That little fan is almost totally worthless.
At least not enough. All of these enclosed lasers have (or should have) some kind of exhaust fan that sucks the smoke out of the chamber and exhausts it through a hose or pipe either into an air purifier or to the outside.
(Important: Make no mistake about it. These things make a LOT of smoke and fumes. If you run one of these in your home without adequate ventilation it will not only set off every smoke detector in the house, it will expose you to fumes that are absolutely unhealthy to breathe. )
Now you can get fume extractors that use filters and fans that will allegedly clean the air coming out of these things so it is fit to breathe and won’t set off your smoke detectors. And they work. Sort of. But they’re expensive. The decent ones are on the order of $700+ and they have disposable filters that need to be replaced on a regular basis. So if at all possible you’re going to want to vent these things to the outside. And none of these lasers have an extraction fan that’s powerful enough to push the smoke more than a few feet at best so you’d need to set one up right in front of a window and then seal the window off except for the hose coming off the laser to keep it from blowing back into the room.
I had a 250 CFM fume extraction system installed for years now to vent fumes from my soldering station and that proved to be adequate to vent first my LaserPecker engravers, and then the Falcon and the Lumos. It worked quite well. But for the Vision? Yeah, not so much.
It’s hard to tell because the plastic cover is very dirty but if you look towards the top of the video you can see the smoke this thing puts out. It doesn’t show up very well on camera but in person it’s pumping out great clouds of smoke
Using the Vision to it’s full capacity generates huge clouds of smoke inside of it, and the fan they use isn’t even powerful enough to adequately pull the smoke out of the enclosure much less blow it through ductwork to the outside.
The Vision is made up of two parts. The entire top half of the unit moves up and down to focus the laser. That means there are gaps between the upper and lower parts of the cabinet and smoke is going to seep out between those gaps unless the extraction fan is powerful enough to suck the smoke out before it can escape. And that pathetic little muffin fan isn’t even close to being powerful enough to do it. Even if I’d had the laser parked next to a window and was using only the short little hose that came with it to exhaust it, that wimpy little fan wouldn’t have had enough power to adequately vent the thing and smoke would have seeped into the room. Even the 250 CFM exhaust fan I used had struggled to deal with the smoke the thing generates under hard use. It wasn’t until I replaced it with a 450 CFM fan that I was able to adequately vent the thing to prevent smoke from backing up into my workspace.
The Bed.
If you’re cutting anything with a laser you need some sort of bed to lift the workpiece up off the baseplate. Otherwise when the laser burns through the material the heat and energy of the laser reflects up off the plate and onto the back of your workpiece causing scorch marks or even burns.
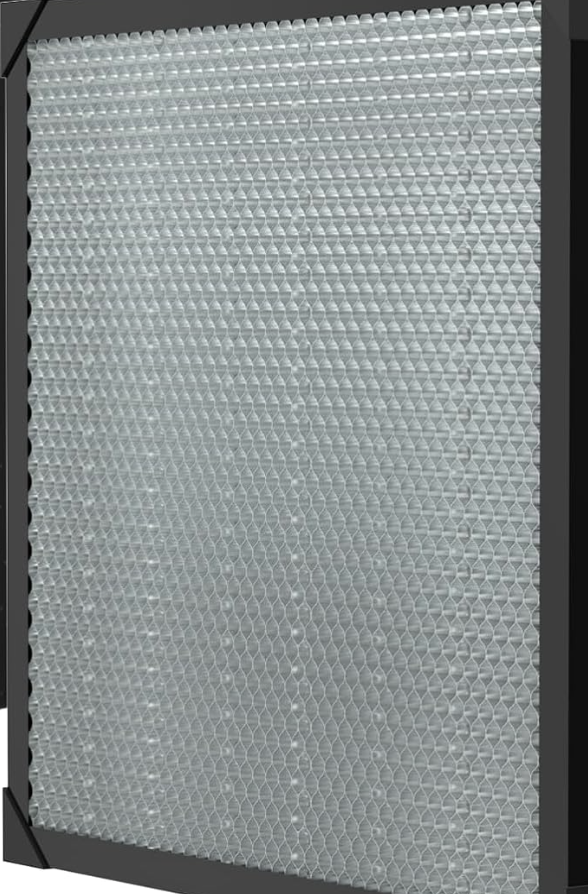
The standard bed type in the industry is called a honeycomb bed because that’s sort of what it looks like. A typical honeycomb bed is shown over there on the right in a photo I stole borrowed from somewhere on the internet. These work pretty well. It holds your workpiece up off the baseplate to reduce or eliminate flashback, the edges are sharp enough so that there is little or no reflected energy from the honeycomb itself, and the small openings mean that small parts that are being cut out don’t fall through under it.
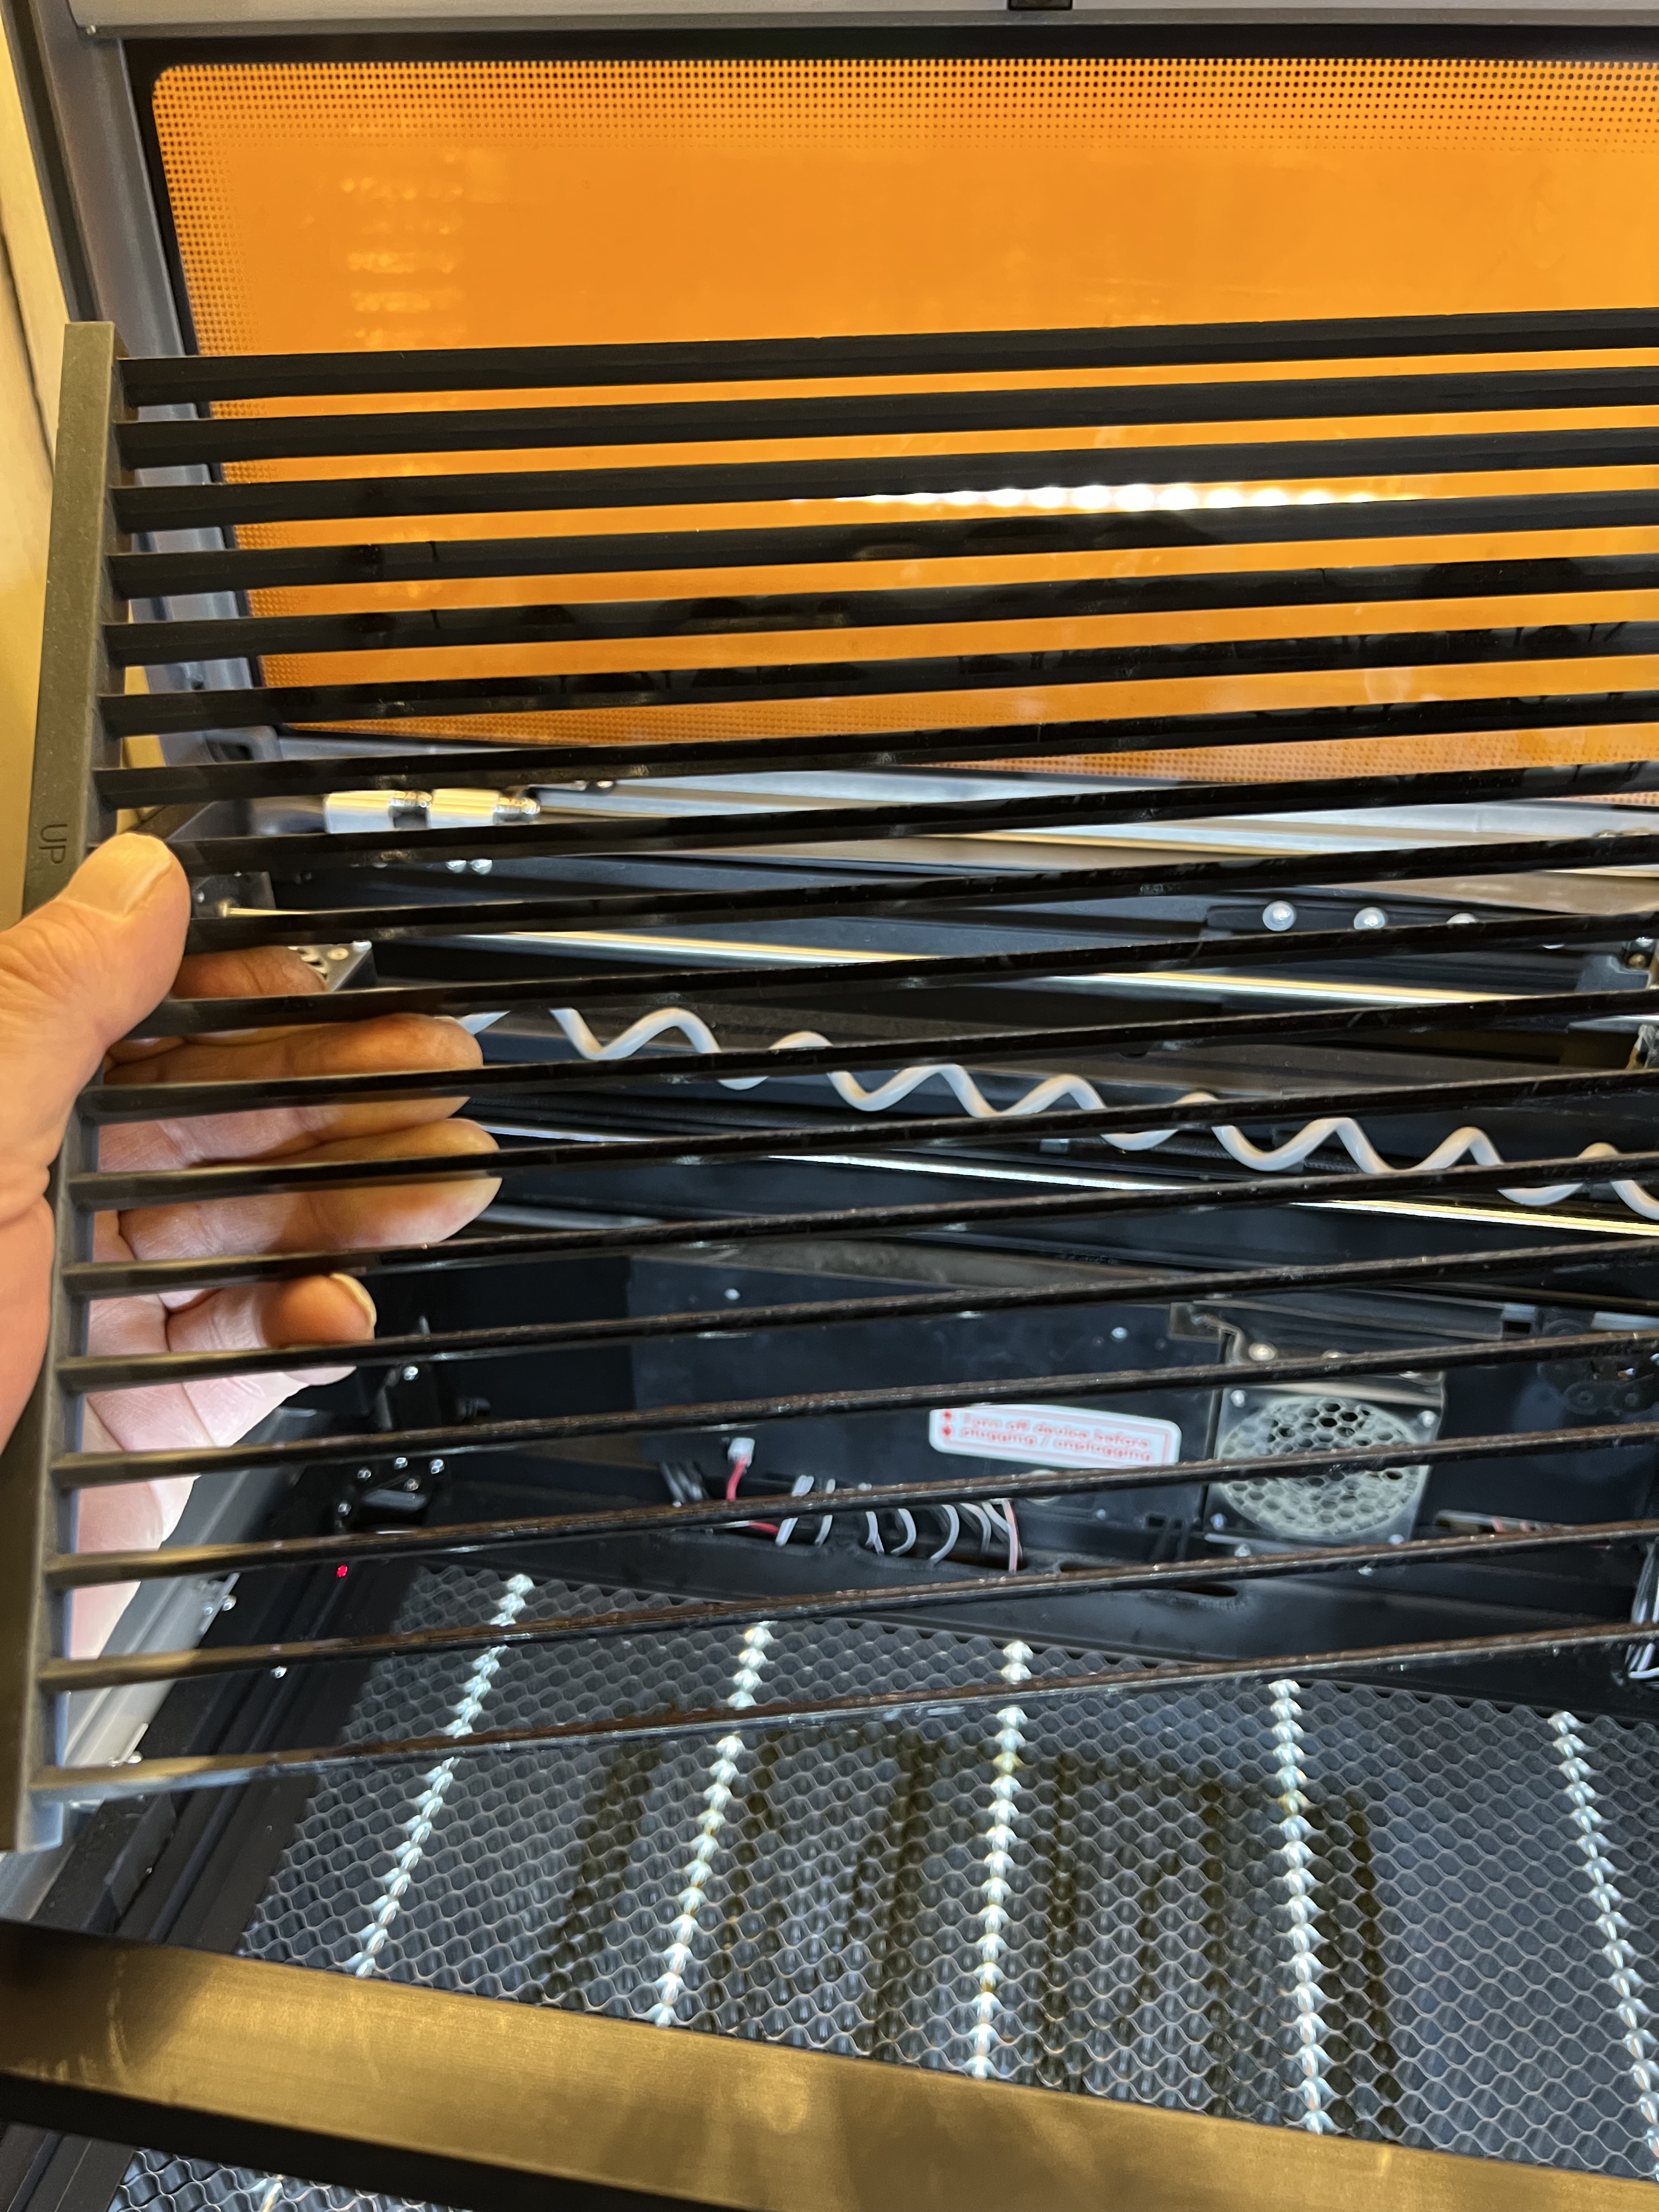
And the Vision doesn’t come with one. It comes with some kind of nasty slats in frames that just don’t work very well at all. I suppose I should be grateful that it comes with anything. A lot of lasers don’t come with any bed at all.
I’m holding it over there in that photo on the left and if you look down into the machine you can see that one of the first things I did was replace it with a standard honeycomb type.
I quickly learned to hate that slatted bed when I first got the Vision. The slats are spaced too widely apart so that small pieces fall straight through it onto the crumb tray at the bottom. Or even worse, small pieces will get wedged between the slats and tilt up far enough so the laser head will hit them as it moves across the workpiece, knocking everything out of alignment and ruining the workpiece if you don’t quick pause the laser and pull it out.
Wecreat doesn’t ship a honeycomb with the unit, as noted, but they will gladly sell you one specifically sized for the Vision for… for how much, exactly?
Ah, well now here is where things get interesting. I went looking for a honeycomb bed and found that Wecreat was selling the one for the Vision on its website for $169. Which I thought was way, way too much. So I went looking on Amazon and found… Ready for this? The exact same honeycomb bed, being sold by Wecreat itself, for $69. Yeah. Seriously. On their website they were selling it for $169 while they were selling it for $69 on Amazon.
Addendum: I just did some price checking now and found Wecreat’s website is now offering it for $99 marked down from, they claim $149? Meanwhile it’s still for sale for $69 on Amazon. Sigh…
Loud Cooling Fan
The cooling fan on the laser head absolutely howls when the laser is in operation. I mean it is seriously loud. It’s to the point where it is almost uncomfortable to be in the same room with it. Here, let me demonstrate:
If you crank up the volume on that video up there you’ll hear what I’m talking about. You’ll also see how much smoke this thing generates sometimes.
That hose on the laser head
And that video also shows another thing I’m concerned with, and that’s that coiled cable you see attached to the print head. That’s not a cable, it’s a hose for the air assist system. The Vision (and almost all gantry style laser engravers these days) come with what they call air assist. A jet of air is directed down around or near the laser beam itself as it cuts material. That jet of air is extremely important. It blows smoke and debris away from the path of the laser making it cut much more efficiently and to reduce charring and scorching of your work material. Plus it has the added benefit of helping to prevent your work material from starting on fire which is generally considered a good thing.
The Vision comes with an external air pump that looks sort of like the air pump for an aquarium. It connects to a port on the back of the machine, and then it’s routed up through the side of the machine to that coiled hose you see there and then into the laser head.
It works quite well but I’m wondering about that coiled hose because now after several hours of use it is now in the habit of bunching up when the head travels to the right side of the machine and it rubs against the inside of the top cover. That wouldn’t make me worry much, but there is also an interior light bar and camera mounted on that cover, and it’s hitting that. Now I haven’t had any issues yet but I’m wondering about the long term durability of that hose if it’s rubbing against the top cover and hitting that light bar all the time.
The software
I want to talk a bit about the software too. As I noted earlier the Vision uses exactly the same software, Makeit, that the Lumos uses so I was already very familiar with it. And it’s actually a pretty good program for doing basic design work. It has all of the tools you need for drawing, placing shapes, importing graphics, inserting text, etc. It lets you do the usual settings for adjusting the laser power, the speed the laser travels, etc. Overall it’s a pretty good program and it’s probably the only thing most craftspersons or even semi-professional users will ever need.
The problem is that you can’t export projects in a format that can be used by other software or other lasers. Oddly enough an “Export” function does appear in the menu on the version of the software I’m using, but having that function there is silly because the only format you can “export” to is the proprietary Wecreat format that it saves to anyway. You can import graphics files of different formats including vector files. But export? Nope.
What this means is that unless Wecreat changes this in Makeit or someone has a translator program out there, projects you create in Makeit simply will not work with any other software or hardware platform. This isn’t an issue for me because I do almost all of my design work in Photoshop or Adobe Illustrator. But if you don’t have tools like that you’re stuck.
There are AI components built into the software but after an initial free trial period you need to subscribe to be able to keep using them. If you don’t subscribe or pay to become a “member” the basic functions of the software will keep working just fine, but the AI functions will be disabled. I don’t really have a problem with this because Wecreat has to pay for access to those AI functions itself. All of those functions are being performed on a special computer out in the “cloud” somewhere located in one of those massive data centers, and somebody has to pay the bills to keep all of that working. I found it useful enough to go ahead and drop the $99 they want for one year “membership” but it’s entirely up to you.
Safety
There is absolutely no doubt that lasers are potentially dangerous. These thing can and will start things of fire under some circumstances so you cannot leave them running unattended. Some of the more expensive ones have some kind of fire detection system to shut the laser down if your work starts burning. Some of them even come with built in fire extinguishers. I keep a fire extinguisher right alongside the workbench both by the lasers and in my wood working shop, and so should you.
The Lumos comes with a fire detection system that seems to work (and sometimes works too well) that will shut the laser down. But it doesn’t have an extinguisher.
The Vision has nothing at all. Not even an emergency shutdown button on the side or front of the machine. A lot of lasers these days, especially the more expensive ones, have an emergency stop button, a big red button that you just slap to immediately cut power to the machine. Even the cheap Falcon has that. But not this one.
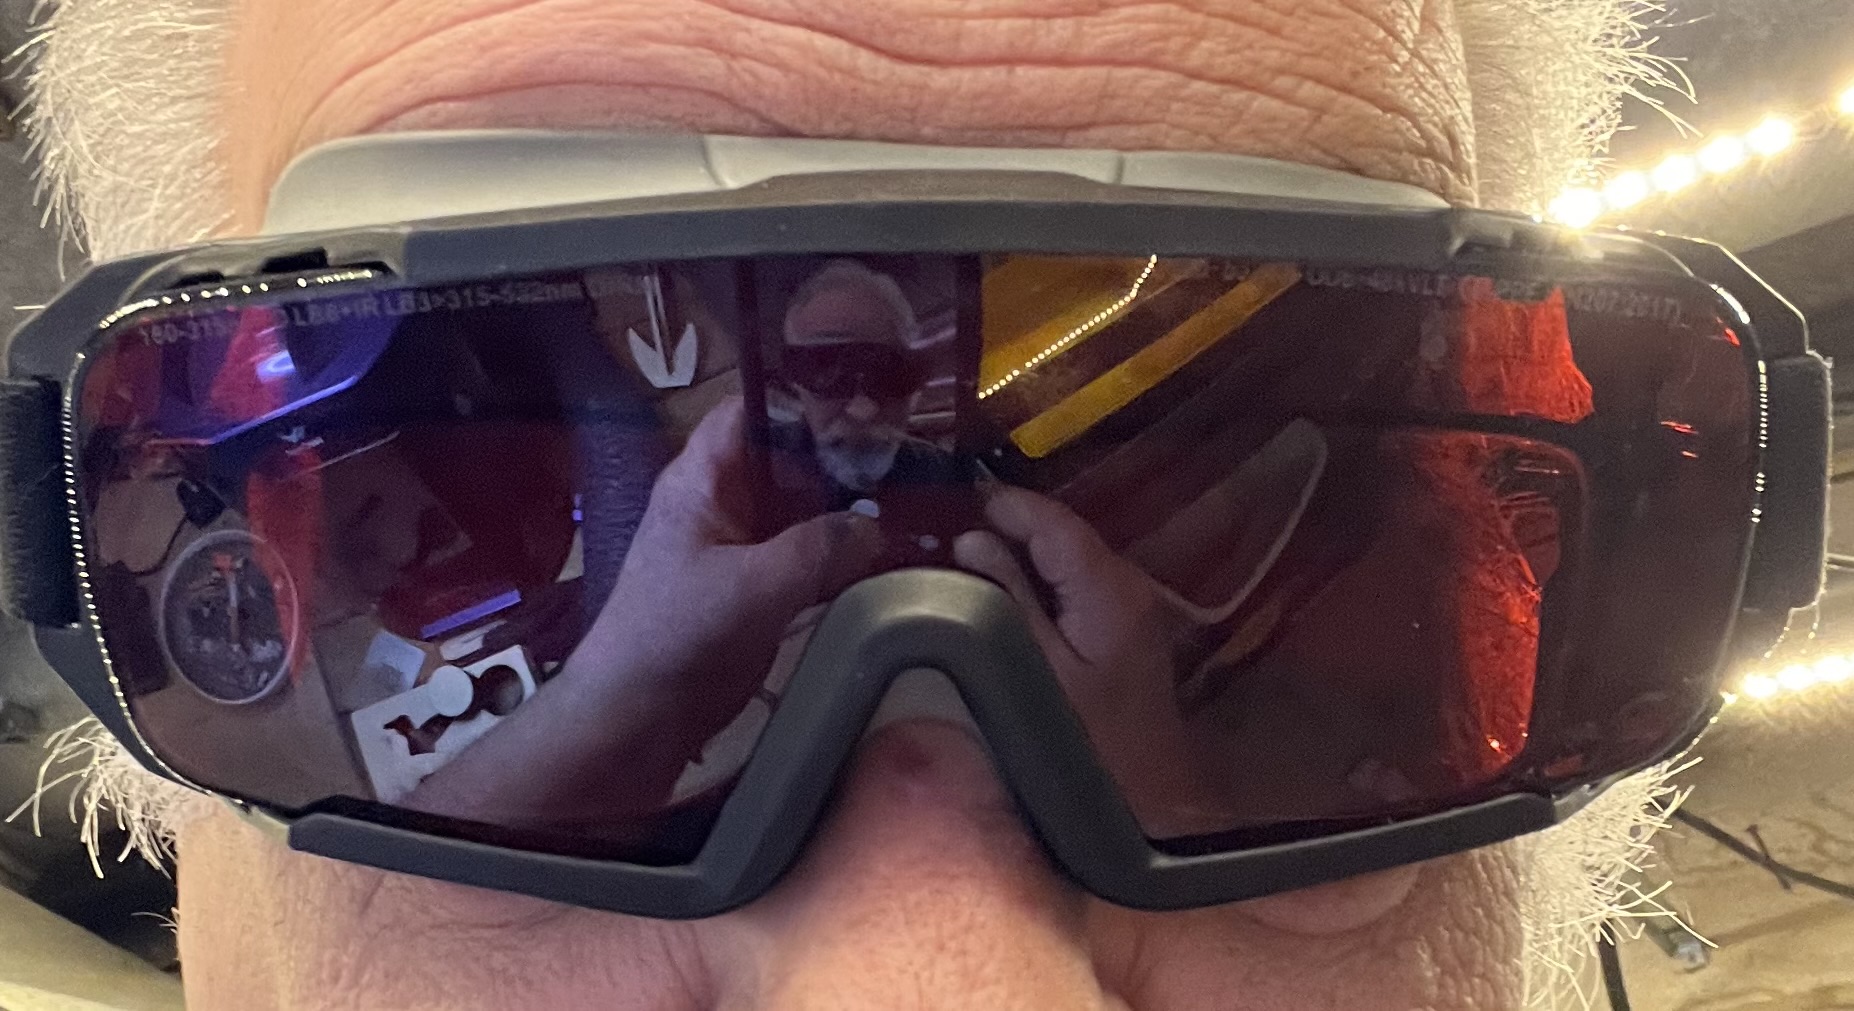
The other thing I’m a bit concerned with is eye safety. Lasers, even reflected laser light, can be harmful to your eyes. That’s why I prefer the fully enclosed machines like the Vision and Falcon. The widows that let you look into the machine are supposedly made of a plastic that blocks harmful light so it won’t damage your eyes.
Maybe. I wonder sometimes. I was looking into the Vision when I first got it, looking through the safety glass and watching the laser, and when I looked up I could see spots in my field if vision as if I’d been staring at the sun. Not good. I’ve become a wee bit paranoid in my old age. Here’s the thing, I’ve gotten to the point where corporations, even allegedly reputable ones, have lied to me so often that I don’t trust anything they say any more. Does that safety glass/plastic really block harmful light from the laser? I just don’t know. Maybe? I don’t want to take the chance. I wear safety goggles specifically designed to block the frequency of the lasers I use, and I would strongly suggest you do the same.
Covid update: I am more or less now symptom free. Almost. I am still testing positive however so there’s that. But I guess it’s normal to keep testing positive for a week or more even after symptoms have cleared up because virus fragments remain in the body that the test is picking up. I am probably no longer contagious but I’m still reluctant to go anywhere where I might come in contact with people while I’m still testing positive just in case.
Laser stuff
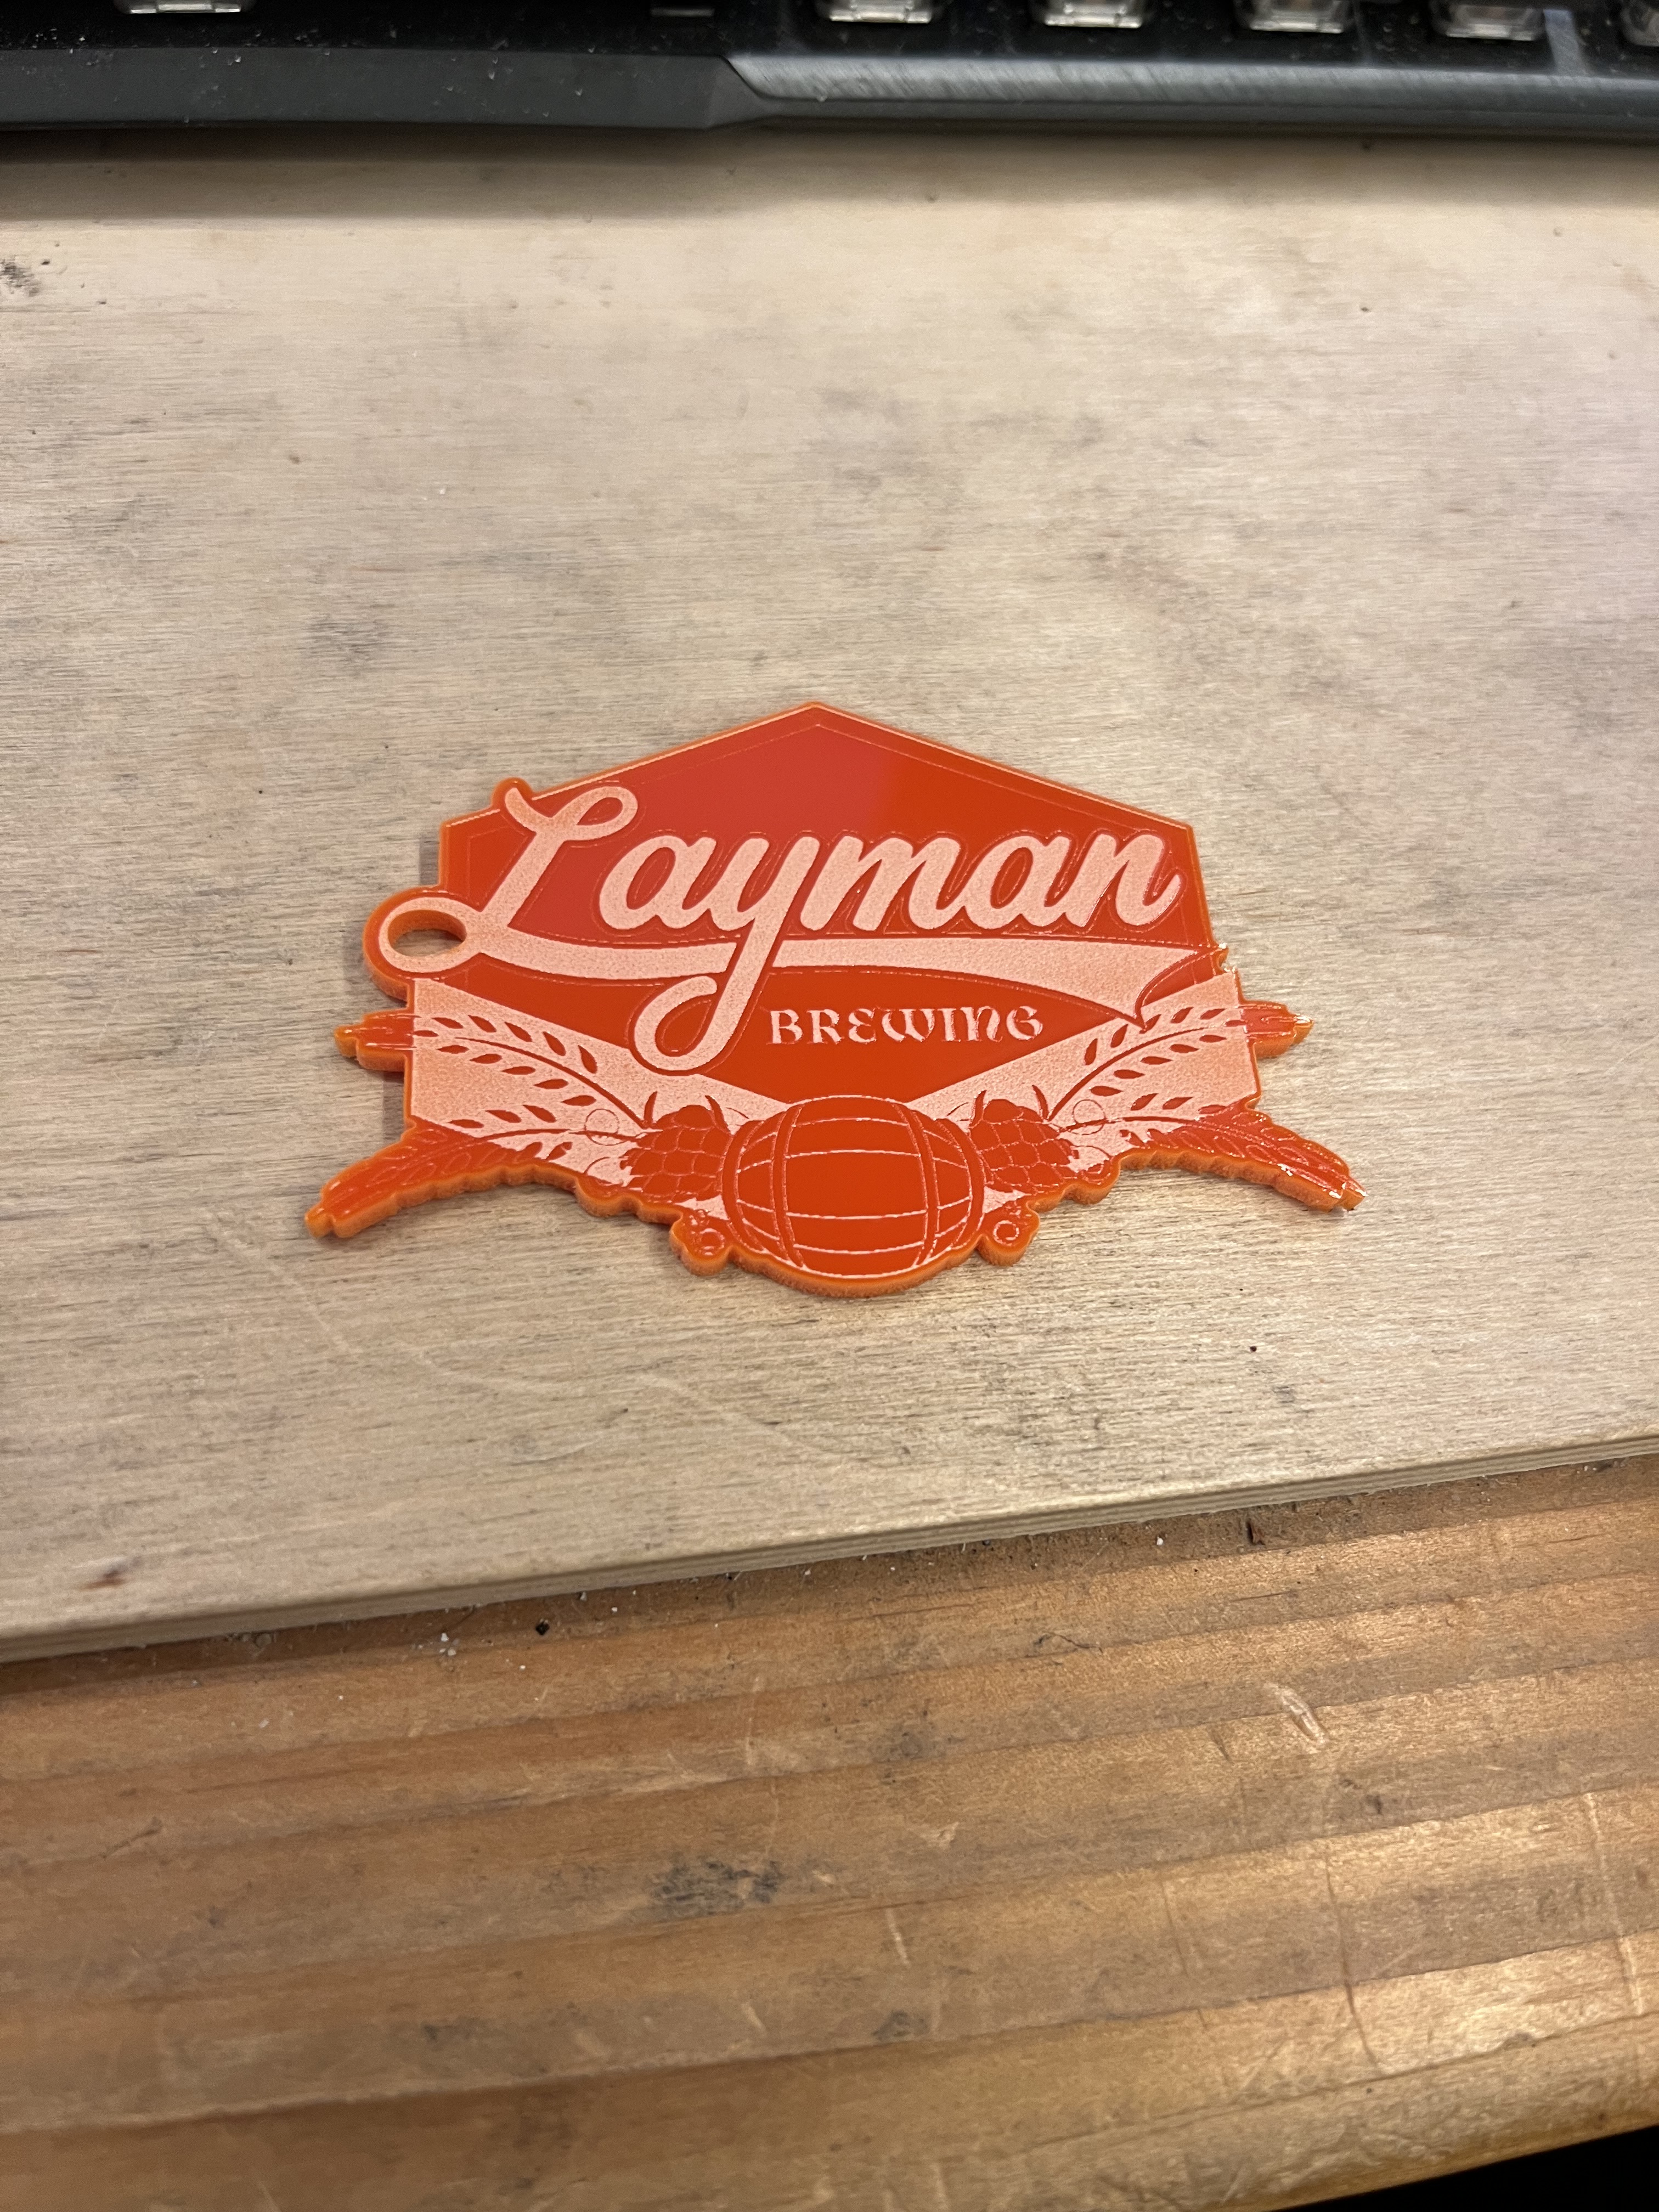
I’m having way too much fun with this laser stuff. I got bored the other day and found a project on the Crealty Falcon project collection that looked interesting so I loaded that up, ended up with a whole box full of misc. parts, sort of like a big 3D jigsaw puzzle, dug out a set of acrylic paints and glue and the next thing I knew I had this sitting on the table.
Considering this is the first time I’ve tried something like this I think it turned out rather well and I’m pleased with it. It’s simple and sort of abstract but I think it’s reasonably attractive for a first effort. My painting skills leave a great deal to be desired but then this is the first time I’ve done something like this.
It also reminded me how much I used to enjoy building models. Many, many years ago I had a model railroad layout in the basement. It had to be dismantled to make room for the woodshop when we started remodeling the house and I was never able to put it back up. But it reminded me of how much I enjoyed building models for the railroad. I had so much fun doing this that I’m going to be scouting for other projects like this and maybe even design some of my own.
But back to the laser thing. I’ve been enjoying using it so much that I’m seriously considering doing a significant upgrade in equipment here to replace the Falcon. Don’t get me wrong. I love the Falcon. It’s a great piece of equipment at an excellent price. But when it comes down to it, it is still just a 10W laser with some serious restrictions.
I’ve been looking at the 45W Vision Pro from WeCreat. the same company that makes my Lumos. My experience with the Lumos has been so positive that I’ve become interested in their other equipment. The Vision Pro can handle much, much thicker material. Instead of being limited to thin plywood it’s powerful enough to cut actual real boards among other things. It has autofocus and other goodies built into it that make it very attractive indeed.
What’s holding me back is the cost. Am I going to get enough use out of it to justify the cost? As MrsGF has pointed out I don’t do this as a business except for the promotional materials I crank out for the brewery and I am too lazy and unambitious to try to turn this into a business. So is it worth the money to upgrade the laser just for goofing around?
But on the other hand, when compared to what some people I know spend on their hobbies, what I’m thinking of spending isn’t all that bad. I know fellows who’ll drop more on a single engine for their model railroad than what I’d like to spend to upgrade my laser.
Materials
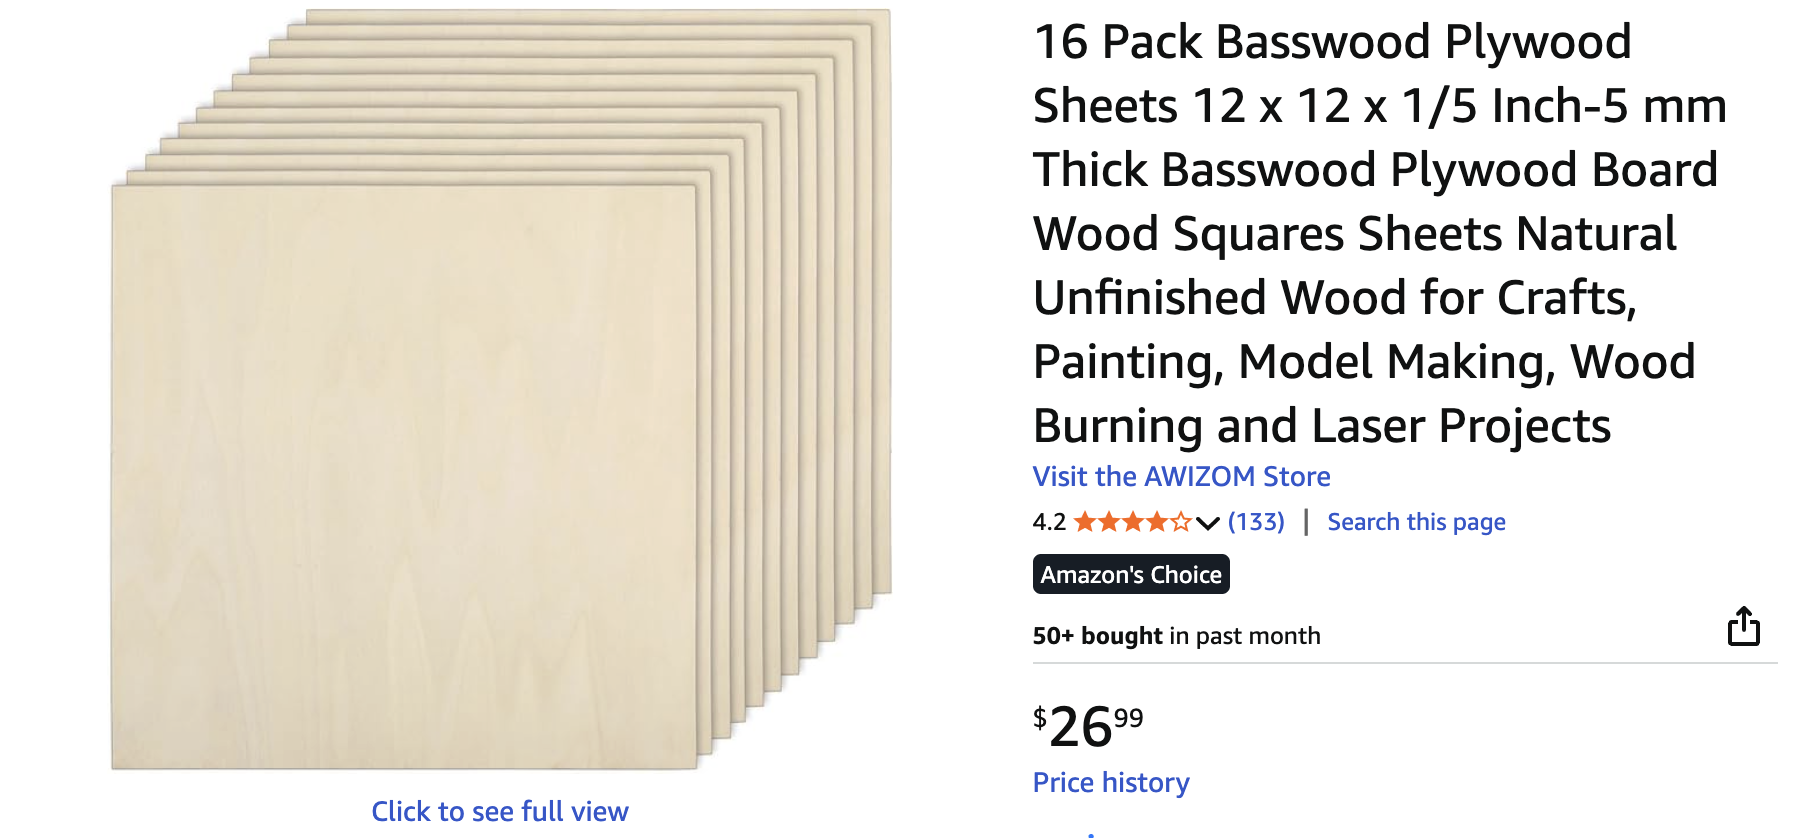
Speaking of costs, I want to talk about materials for a minute. Don’t make the same mistake I just did and make a bulk order of material without getting samples first. I needed some 5mm plywood and bought some of this stuff over there on the left and it is horrible. It looks fine in the photos but in reality it is not nice at all. The surface is rough and sandpapery. While it appears to not have a prominent grain in the images, in reality when engraved the grain becomes very visible and is so coarse it’s just downright nasty. Even worse is the charring. I’ve never run into a plywood that chars and smokes this badly when engraving. Huge billowing clouds of smoke that almost overwhelmed my extraction system and massive amounts of charring that left black dust everywhere. The stuff is completely unusable with the laser. And now I have 50 sheets of the stuff and it’s probably going to end up being used as firewood.
Anyway, be cautious when buying materials. You might be tempted to snag a great deal on a bulk purchase and end up with stuff that’s completely unusable as I did.
New Toy
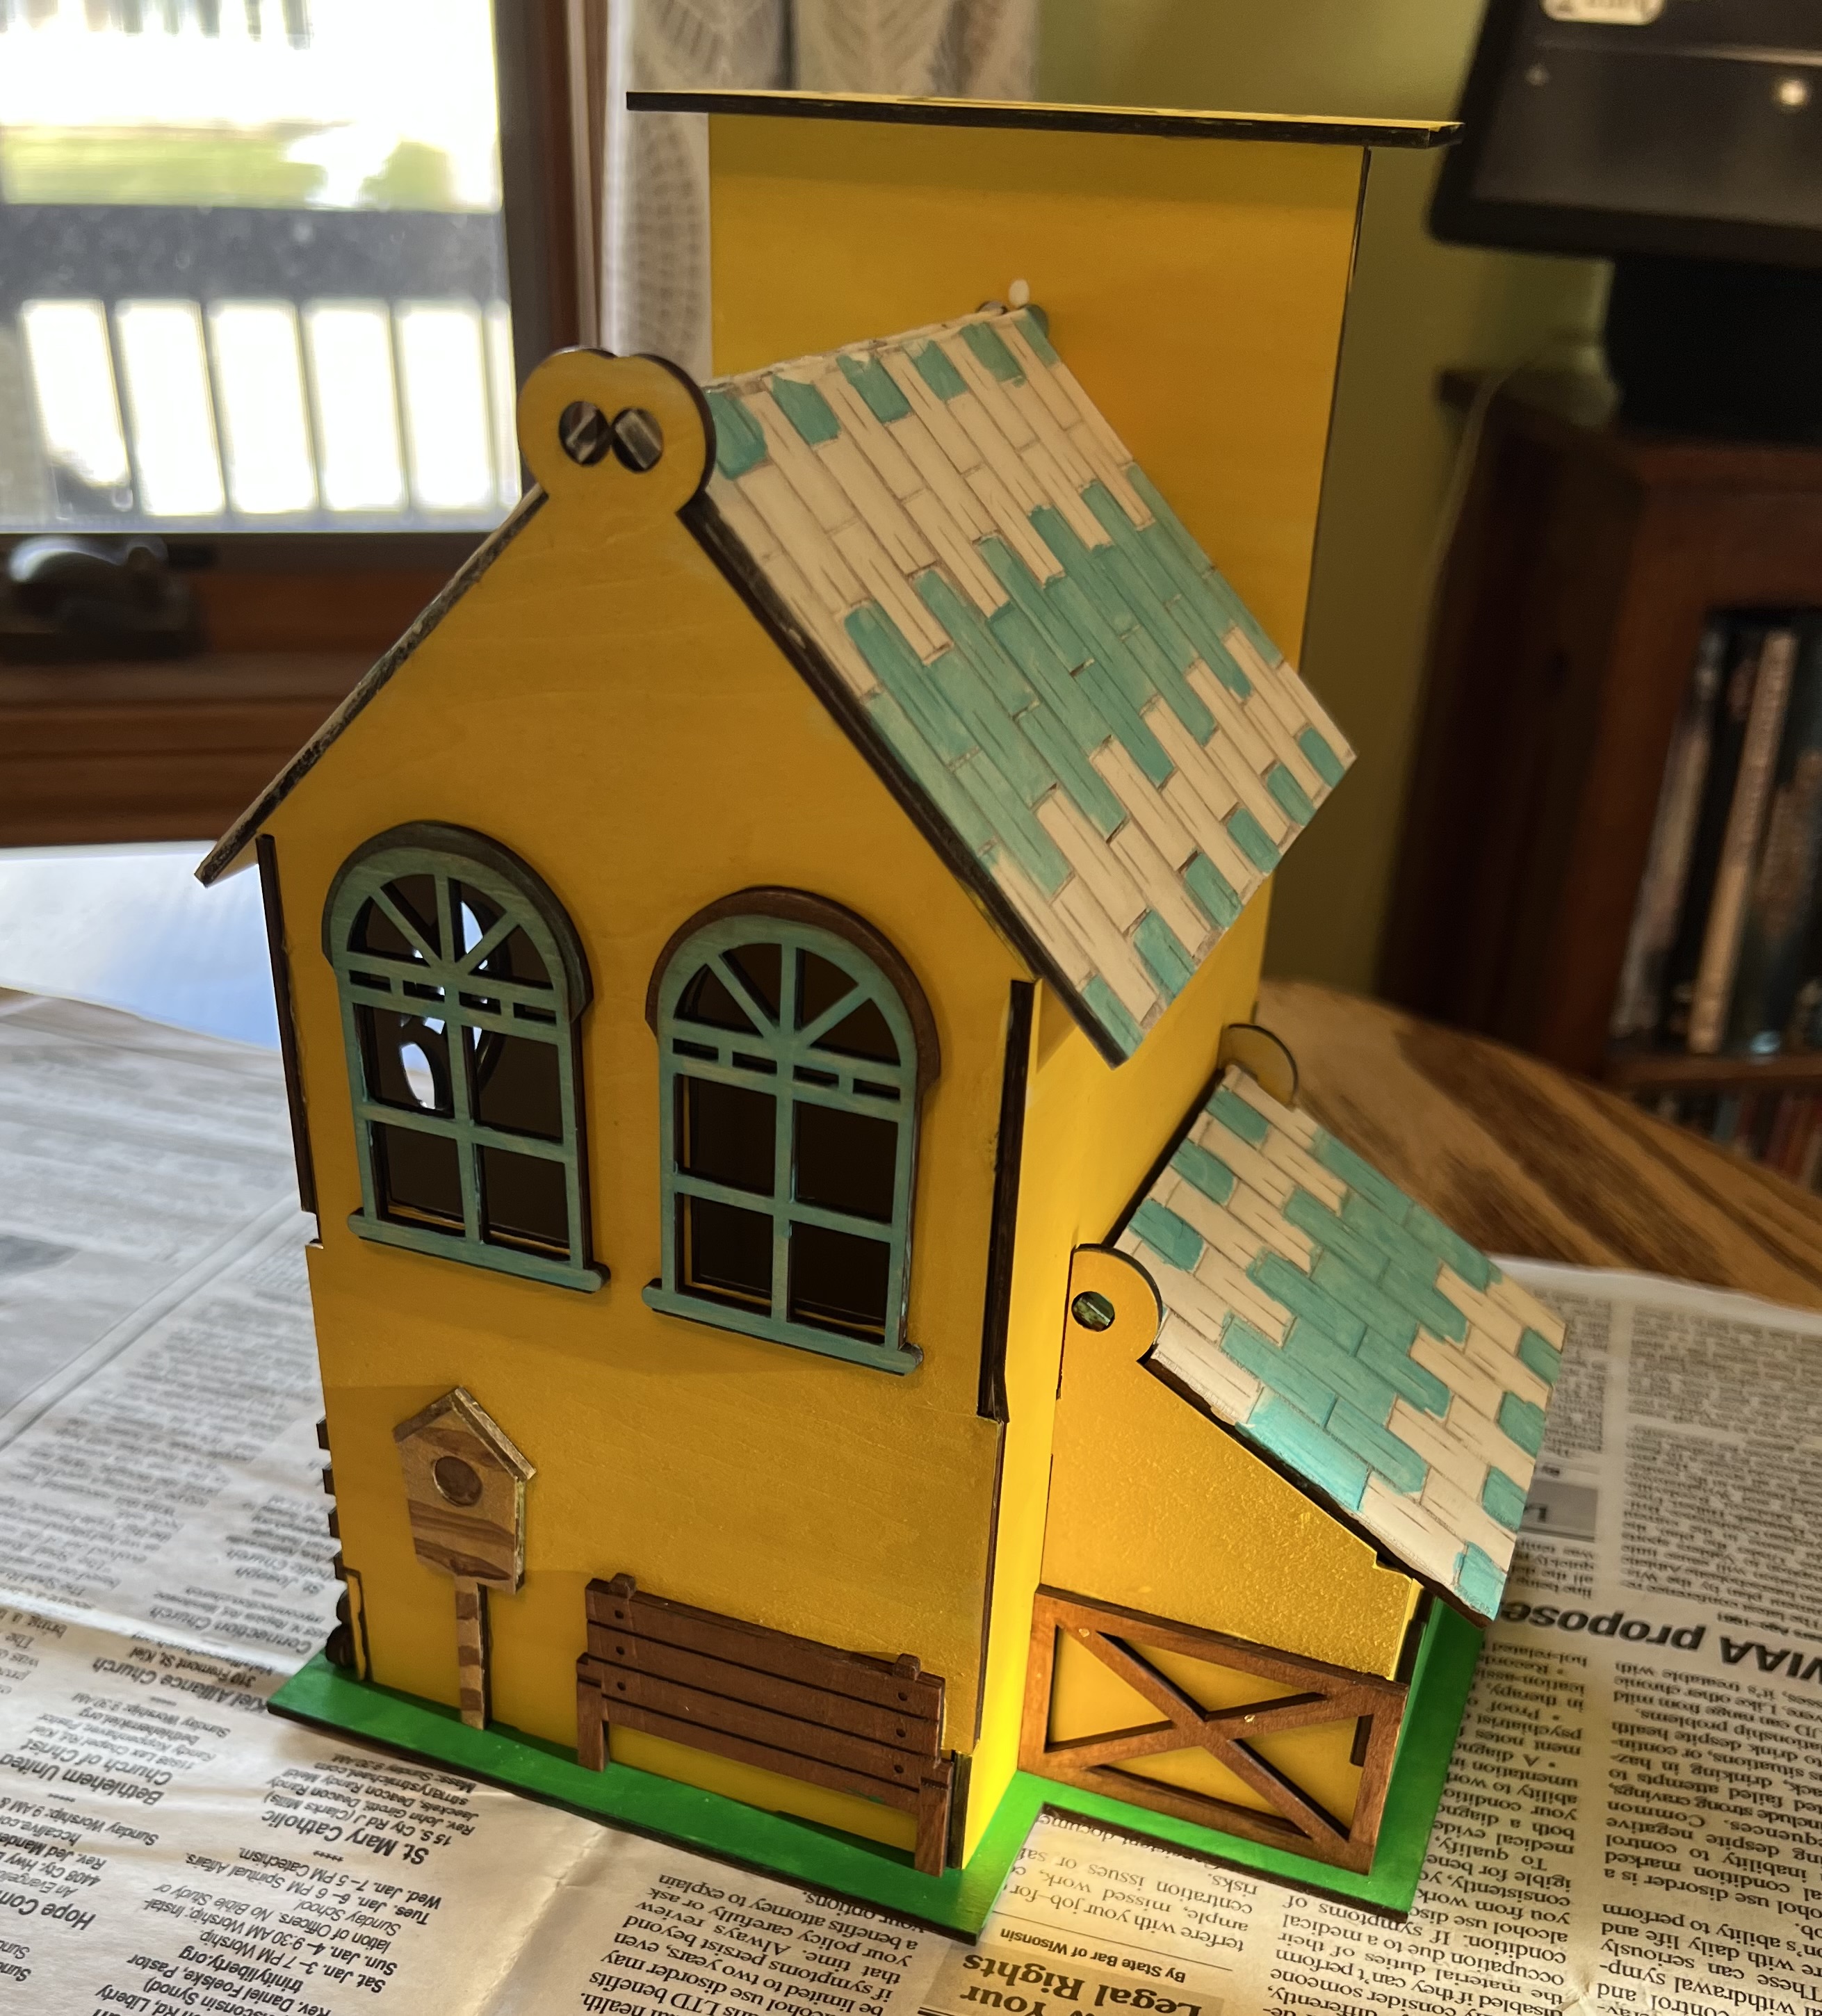
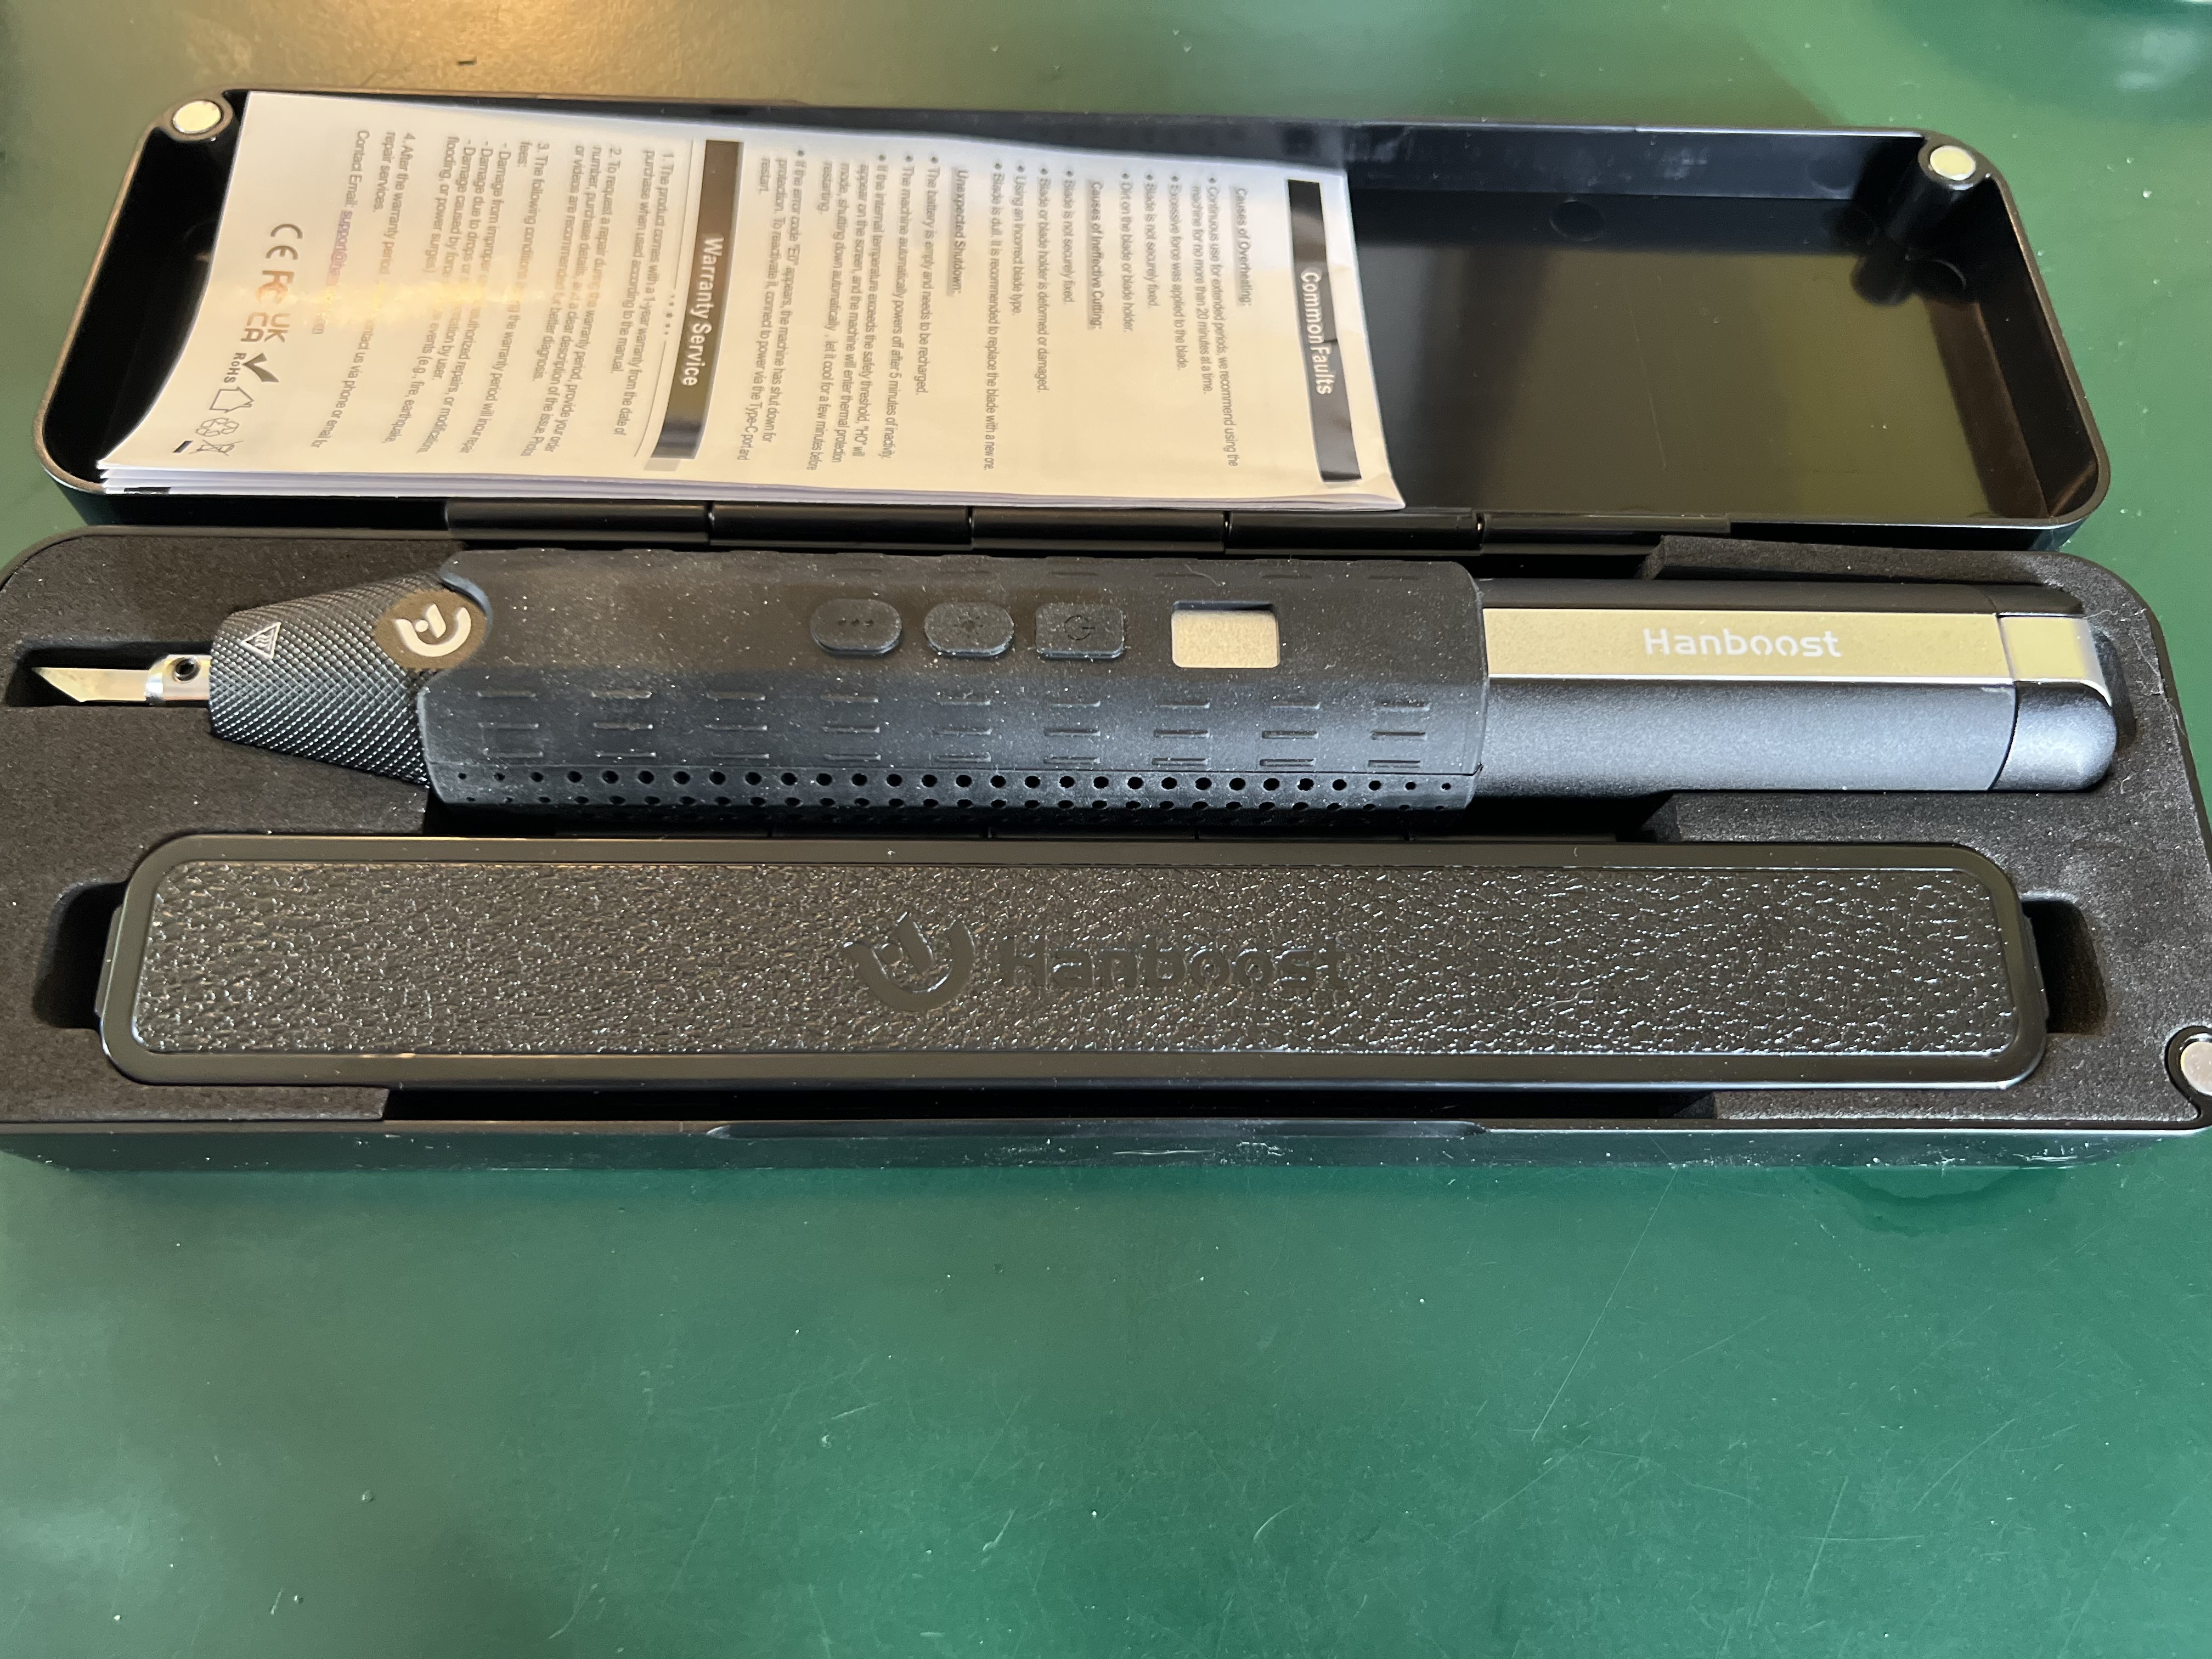
This is an ultrasonic knife from a company called Hanboost and I’m trying to decide if it’s something I’d recommend or not.
The way these things work is interesting. It takes a razor sharp titanium blade and vibrates it many thousands of times per second. The idea is that the extremely high vibration rate of the blade causes it to glide through material with virtually no effort at all on the part of the wielder. In theory. It seems these things are popular in the 3D printing world where they are used to clean up plastic prints. And someone told me that they work equally well for trimming wooden parts that are laser cut and don’t quite fit properly.
Some of the parts for that house I showed you earlier didn’t fit together properly and I used this thing to trim things to get them to fit and it did work, but results were inconsistent. There were times when it sliced through the plywood like a hot knife through butter. Other times it worked awkwardly and didn’t seem to work much better than a normal Xacto knife. I suspect that at least part of the problem there is my technique. There is a learning curve to developing the right technique to take advantage of this thing.
Overall I like it despite the problems I had. It seems extremely well made and has a nice feel to it and is easy to control. But there is the cost to consider as well. This thing ain’t cheap. It goes for about $190 on Amazon. You’re going to need to use it a lot to justify that kind of expense.
Note: You can reach me either by leaving comments here or by emailing me at theoldgrouch@grouchyfarmer.com
I’m not sure where the time has gone but it’s been almost three months since I acquired the Lumos that I reviewed last time so I thought it would be a good idea to talk about what it’s like to use it long term. Since I got it I’ve used it to engrave around 200 metal challenge coins, literally hundreds of drinks coasters, made Christmas ornaments, LED lighted acrylic plastic signs, and dozens and dozens of decorative engravings on various objects or parts cut out with my woodworking tools or the Falcon laser. I’ve used it a lot. That should give you an indication of how useful this little laser has been.
The Falcon still gets used a lot but for what I suppose you could call “heavy duty” jobs like cutting out parts or for doing engravings that are just too big for the Lumos. Because of the Lumos’ speed and higher resolution, it’s the one I turn to for doing anything that requires high resolution artwork or intricate engravings.
But I absolutely, positively do not want to try using it for cutting out parts even if the job would fit inside of the Lumos’ working area. Because it’s a galvo laser it lacks air assist, and that means much more charring and even fires starting when trying to cut flammable materials. But for everything else? If it will fit in the laser’s 120mm X 120mm working space, that’s the one I’ll turn to.
Does the Lumos have quirks and “issues”, as they say? Sure it does. There’s no such thing as a perfect machine. With the Lumos these are more irritations than deal breakers, though.
Even the software that comes with it is decent. The “Makeit” software that comes with the unit is how most people are going to use this laser and it is actually pretty good, especially if you register the Lumos and get the 6 month free “membership” that gives you access to the software’s built in AI functions. That opens up a whole new level of creativity and usefulness because once that’s activated you can use their AI to actually generate copyright free images in any style you like, from photographic quality to simple line drawings, that you are free to use any way you like.
That engraving on the side of that box over there on the left was generated with Wecreat’s AI. The prompt I wrote was something like “a black and white line drawing of a cute kitten chasing butterflies through a field of wild flowers” and that’s one of the images it came up with.
You don’t need to subscribe to use the laser or the Makeit software, only if you wish to continue to use the AI functions after the introductory period expires. If you’re doing this commercially and want to turn out a lot of different products for sale it might well be worthwhile, though.
But the Lumos’ software is at the same time the most irritating thing about the whole package, and the main problem with it is that it will only save projects in Wecreat’s proprietary file format. Any projects made in the Wecreat software cannot be exported for use elsewhere. So everything you make with the software is locked in to that hardware platform. At least with the current version of the software.
This isn’t a big deal for me because all of my artwork is made in Photoshop or Adobe Illustrator or some other tool and I only use the Lumos software mainly for the actual production run. But this is something you need to keep in mind if you’re considering buying one of these.
Lightburn
The other issue I have with the Lumos is that I have been completely unable to get it to work with what is probably the most popular laser engraving software currently in use by “professionals” out there, Lightburn.
Let me inject some caveats in here first. I do not currently own Lightburn and am working with the “free” 30 day trial version. I wasn’t about to drop $200 (I’d need the more expensive “Pro” version) on a piece of software that might not work with my equipment.
Wecreat doesn’t make getting the Lumos working with Lightburn easy. They claim that it will indeed work with it. But that doesn’t seem to be the case. Their gantry style lasers do, and Wecreat does provide guidance to get those working with the software. The Lumos? Nope. Nothing. Nowhere. There is a “.lbdev” file available for the Lumos buried deep in Wecreat’s website which was almost impossible to find. I am not going to direct you to it because as far as I can tell it just doesn’t work.
After many, many hours of fiddling around and extreme frustration, I finally got LB to at least “see” that the Lumos was connected. I even got it to connect to the camera. Somehow. Occasionally. Sometimes the camera shows up, sometimes it doesn’t.
I got it to actually “frame” an engraving in the build space. Good! Then I hit the start button to actually do the engraving and… And it will only work with the infrared laser, not the blue diode. And there seems to be no way to switch between the two. And even when using the IR laser the engraving process would stop with the progress bar in LB sitting at 99% and both the laser and the software apparently locked up and I had to restart both.
I’m giving up for the time being. I wasted way, way too much time on trying to get LB working with the Lumos. If I ever do get it going, I’ll let you know.
Materials
I got lots and lots of questions about what materials to use for projects. I don’t do this on a commercial basis. The only things I buy in bulk are drinks coasters for the brewpub, and generic 1/4 and 1/8 inch thick plywood to make misc. goodies.
I buy basswood plywood in bulk off Amazon. It’s far cheaper than buying it from places like Hobby Lobby or the crafts section at Walmart where you will pay a small fortune.
But before you start buying in bulk, buy a few sheets first if possible to test it because there can be huge differences between different brands. One brand will cut clean with very little char or other problems, while another will be utterly horrible. Take a look at this image below that compares then side by side.
This is the same wood as in the example on the left above. Look at all of the soot on my fingers just from handling it after I took it out of the laser. It’s absolutely filthy with the stuff. I’d have to completely wash this down in order to use it.
Those are two different brands of 3mm basswood plywood I got off Amazon, and both sell for about the same price. They were cut out using the Falcon A1 using exactly the same settings. The one on the right is a nice, clean cut, almost no visible charring on the surface. The one on the left… Oh, dear. Even though it’s the same thickness and I used the same power and speed, it left jagged edges, didn’t cut things out cleanly and there was a huge amount of charring on the edges. And the smoke! You can see the smoke residue all over the surface of the one on the left while the one on the right is almost completely clean.
So always get test samples of any material you want to use in your laser before you start making bulk purchases or you can end up having a complete mess on your hands. I bought 60 sheets of one brand of 3mm basswood plywood where every single sheet warped so badly as soon as I took it out of the package that it was pretty much useless for anything except firewood.
I’m not going to urge you to go out and buy this brand. There are others that are just as good. But what I use currently is over there on the left in case you’re interested. I have no relationship with this company, don’t get any compensation or anything from them. I just think it’s good quality material at a decent price. A pack of 48 sheets of 12″ x 12″, 3mm (1/8″) is currently going for $56.99 on Amazon and it’s a quality product. Very smooth, well sanded surface, very uniform color and grain on the exterior veneer, nice, light color that engraves well and I’ve only very rarely had problems with it warping.
I go through a lot of this stuff. 3mm plywood is the basis for a lot of the projects I crank out and gets used for everything from making little trinkets to some very elaborate art projects, model buildings, etc.
And that’s about it for now. I was hoping to include something about a new cheap CNC machine I picked up but the last few weeks have been so busy I haven’t had an opportunity to really play with it very much. Hopefully in the next couple of weeks I’ll have time to get into that and talk about the joys and frustrations of CNC.
Okay so this is like the third time I’ve started to write this review and each time I ended up with something I found entirely unsatisfactory so I’m going to start this all over again and keep going until I finish this sucker.
I’ve been having problems with this review not because of the Lumos itself, but because I don’t want this to be associated in any way, shape or form with the dozens and dozens of fake crap “reviews” I’ve seen for the Lumos since it was released a few months ago. I’ve sat through way too many of those so-called “reviews” and they are almost universally utterly horrible and completely and totally useless. I’m tempted to go off on a rant about these and maybe I will at the end of this or in a separate article. But I’m not going to waste your time with that now. You’re here to hopefully learn something useful about this thing.
I’m not going to do a typical review. I’m not going to repeat readily obtainable information about this thing. If you want to learn statistics and hear people gushing about how wonderful it is and all that just go look at the dozens of reviews on Youtube and elsewhere. Me? I’m going to talk about what it’s like actually using this thing in actual real world conditions.
So this is it down below. the Lumos from Wecreat (yes, that’s how they spell it) in all of its purple and orange glory. And for those of you who might be interested in actually buying one of these puppies, it sells for $1,200 or so. Ah, strike that. Looks like it’s down to $1,000 as of Nov. 12. That’s without accessories like the sliding table and the rotary tool which are extra cost options.
What makes this unit interesting is that it has two different lasers built into it. There is a more or less normal 10W blue diode laser for working with materials like wood, paper, some plastics, etc. But there is also a 3W infrared laser that lets it actually engrave metal. That’s the real reason I was interested in this purple beastie. I wanted to be able to engrave metal. And at the time I bought it, it was the only one on the market that had all of these features. X-Tool and a couple of others have brought out units that are comparable to this one now, though, so if you’re in the market for one of these do some shopping around.
Personally I think it’s a good looking little unit. Certainly the build quality and fit and finish seem to be excellent. The only visible plastic bit is the orange shield in the front. Everything else is solid, sturdy aluminium. The laser head is the circular unit with the handle attached at the top. It is packed separately and must be attached to the base unit but that takes only one bolt to accomplish and takes all of about 2 minutes. That’s the only assembly that is required. Basically you can put this thing together, plug in the power and USB cables, and be ready to go in about 5 minutes. Then just install the software from Wecreat’s website and you’re all set. You could be up and running with this unit in probably fifteen minutes from the time you open up the box and unpack it. This is a far cry from the first laser engraver I bought many years ago that arrived from China as a box of parts, with no instructions.
I won’t keep you in suspense. I’ve been using this thing for over a month now. And I’ve been using it hard. It’s cranked out about 150 challenge coins, several hundred drinks coasters, along with dozens of one-off specialty projects along with just goofing around with it, and it’s never missed a beat. I’m not your typical hobby craftsperson churning out the occasional birthday gift or Christmas ornament. I’ve been using this in a semi-production environment almost since the day I got it. There have been days where it’s been going non-stop for 6+ hours a day sometimes. And it’s worked pretty much exactly as advertised.
Does it have limitations? You bet. Does it have problems? Sure it does. And I’ll get to those. There is no such thing as the “perfect” laser engraver, after all. But this unit does exactly what it’s specified to do and it’s been doing it very well indeed.
First a bit of background. This is what is known as a galvo laser, and by its very nature that means it has both some very significant advantages as well as some equally significant limitations when it comes to functionality when compared to a gantry style laser like my Falcon.
The biggest advantage is speed. Galvo lasers are very, very fast when compared to gantry style lasers. Gantry lasers have the laser source itself mounted on a movable framework that is physically moved over the surface of the work material by belts, pulleys, stepper motors, etc. All of those mechanical gubbins having to move around seriously restricts the speed at which it can work.
Galvo lasers have a fixed laser source. It never moves. Instead there are tiny mirrors in the head that are moved to direct the path of the laser beam itself. Because the mirrors are very small and very low mass, they can be moved much, much faster. And that translates into getting projects done and out the door much, much faster as well. As anyone in business can tell you, time is money.
But that’s also the biggest problem with galvo lasers because that severely restricts the size of its working area. Where my Falcon has a working area of about 13 inches X 15 inches. the Lumos has a working area of only around 115 millimeters square, or about 4 inches.
The working area of the Lumos is only about 120mm x 120mm or around 4.5 or so inches square.
Now this isn’t as much of a problem as you might think. The vast majority of engraving jobs I do will fit quite comfortably into that working area. If I need to do something a lot bigger I can either use the sliding table, which expands the working area to around 120X420mm, or if I need to do something bigger still I can use the Falcon.
Speed is where this thing really shines. Let me show you with a short video if I can figure out how this upload thingie works…
Egads, it worked!
Now that engraving on a metal business card took about 30 seconds, all together. The exact same engraving using the Falcon took a good 3 minutes.
Since the video thingie seems to be working let me stick another one in here just for the heck of it. This one takes a little longer because it’s a more complex design but what the heck
I should perhaps point out that these videos are real time, not sped up. It’s really that fast.
(FYI: Those are black anodized aluminum business cards. They’re fun to mess with and they’re super cheap. I get 100 for about $9 on Amazon so I use them for experimenting and just messing around.)
This one above shows the infrared laser in action. Instead of just burning the black coating off the metal card it’s actually etching that design into the metal itself. It’s a bit hard to tell what it is because the video is shot through the shielding but that’s a cat watching Santa’s sleigh flying across the face of a full moon.
It’s that IR laser that made the Lumos interesting to me. That and its very high resolution. It’s the only laser in this price range that I know of that has dual laser sources built into it; a more or less standard 10W blue laser and a 3w IR laser. The standard laser works with the usual materials like wood, plastic, leather, etc. The IR laser has the ability to engrave metal.
If you saw the review I did of my Falcon laser you may remember that I used it to work with metal also. But that was different. The Falcon cannot actually engrave any kind of metal no matter what the hyped up advertising might make you think. It can discolor metal but it cannot actually engrave it. It can also be used for a kind of powder coating. A special material is applied to the metal and the laser’s heat causes the material to chemically bond with the metal to give a very durable result. But that’s not engraving as such. Engraving involves the actual removal of material from the surface of the metal.
I did about a dozen of these little metal Christmas gift boxes with various designs and wording. They’re just the right size for gift cards or small trinkets.
If you’re doing this laser engraving thing as a business, here’s a hint. You can pick up these boxes for about $0.50 each in quantity or even less if you shop around, and people will pay actual real money for these things with a nice bit of artwork engraved on ’em. Better still, take the whole show on the road, set up in a booth or table and do custom engraving on the spot for people. Takes only a minute or two to engrave a name or brief message on one of these.
That’s not just discolored metal, that’s actually engraved into the surface of the metal box.
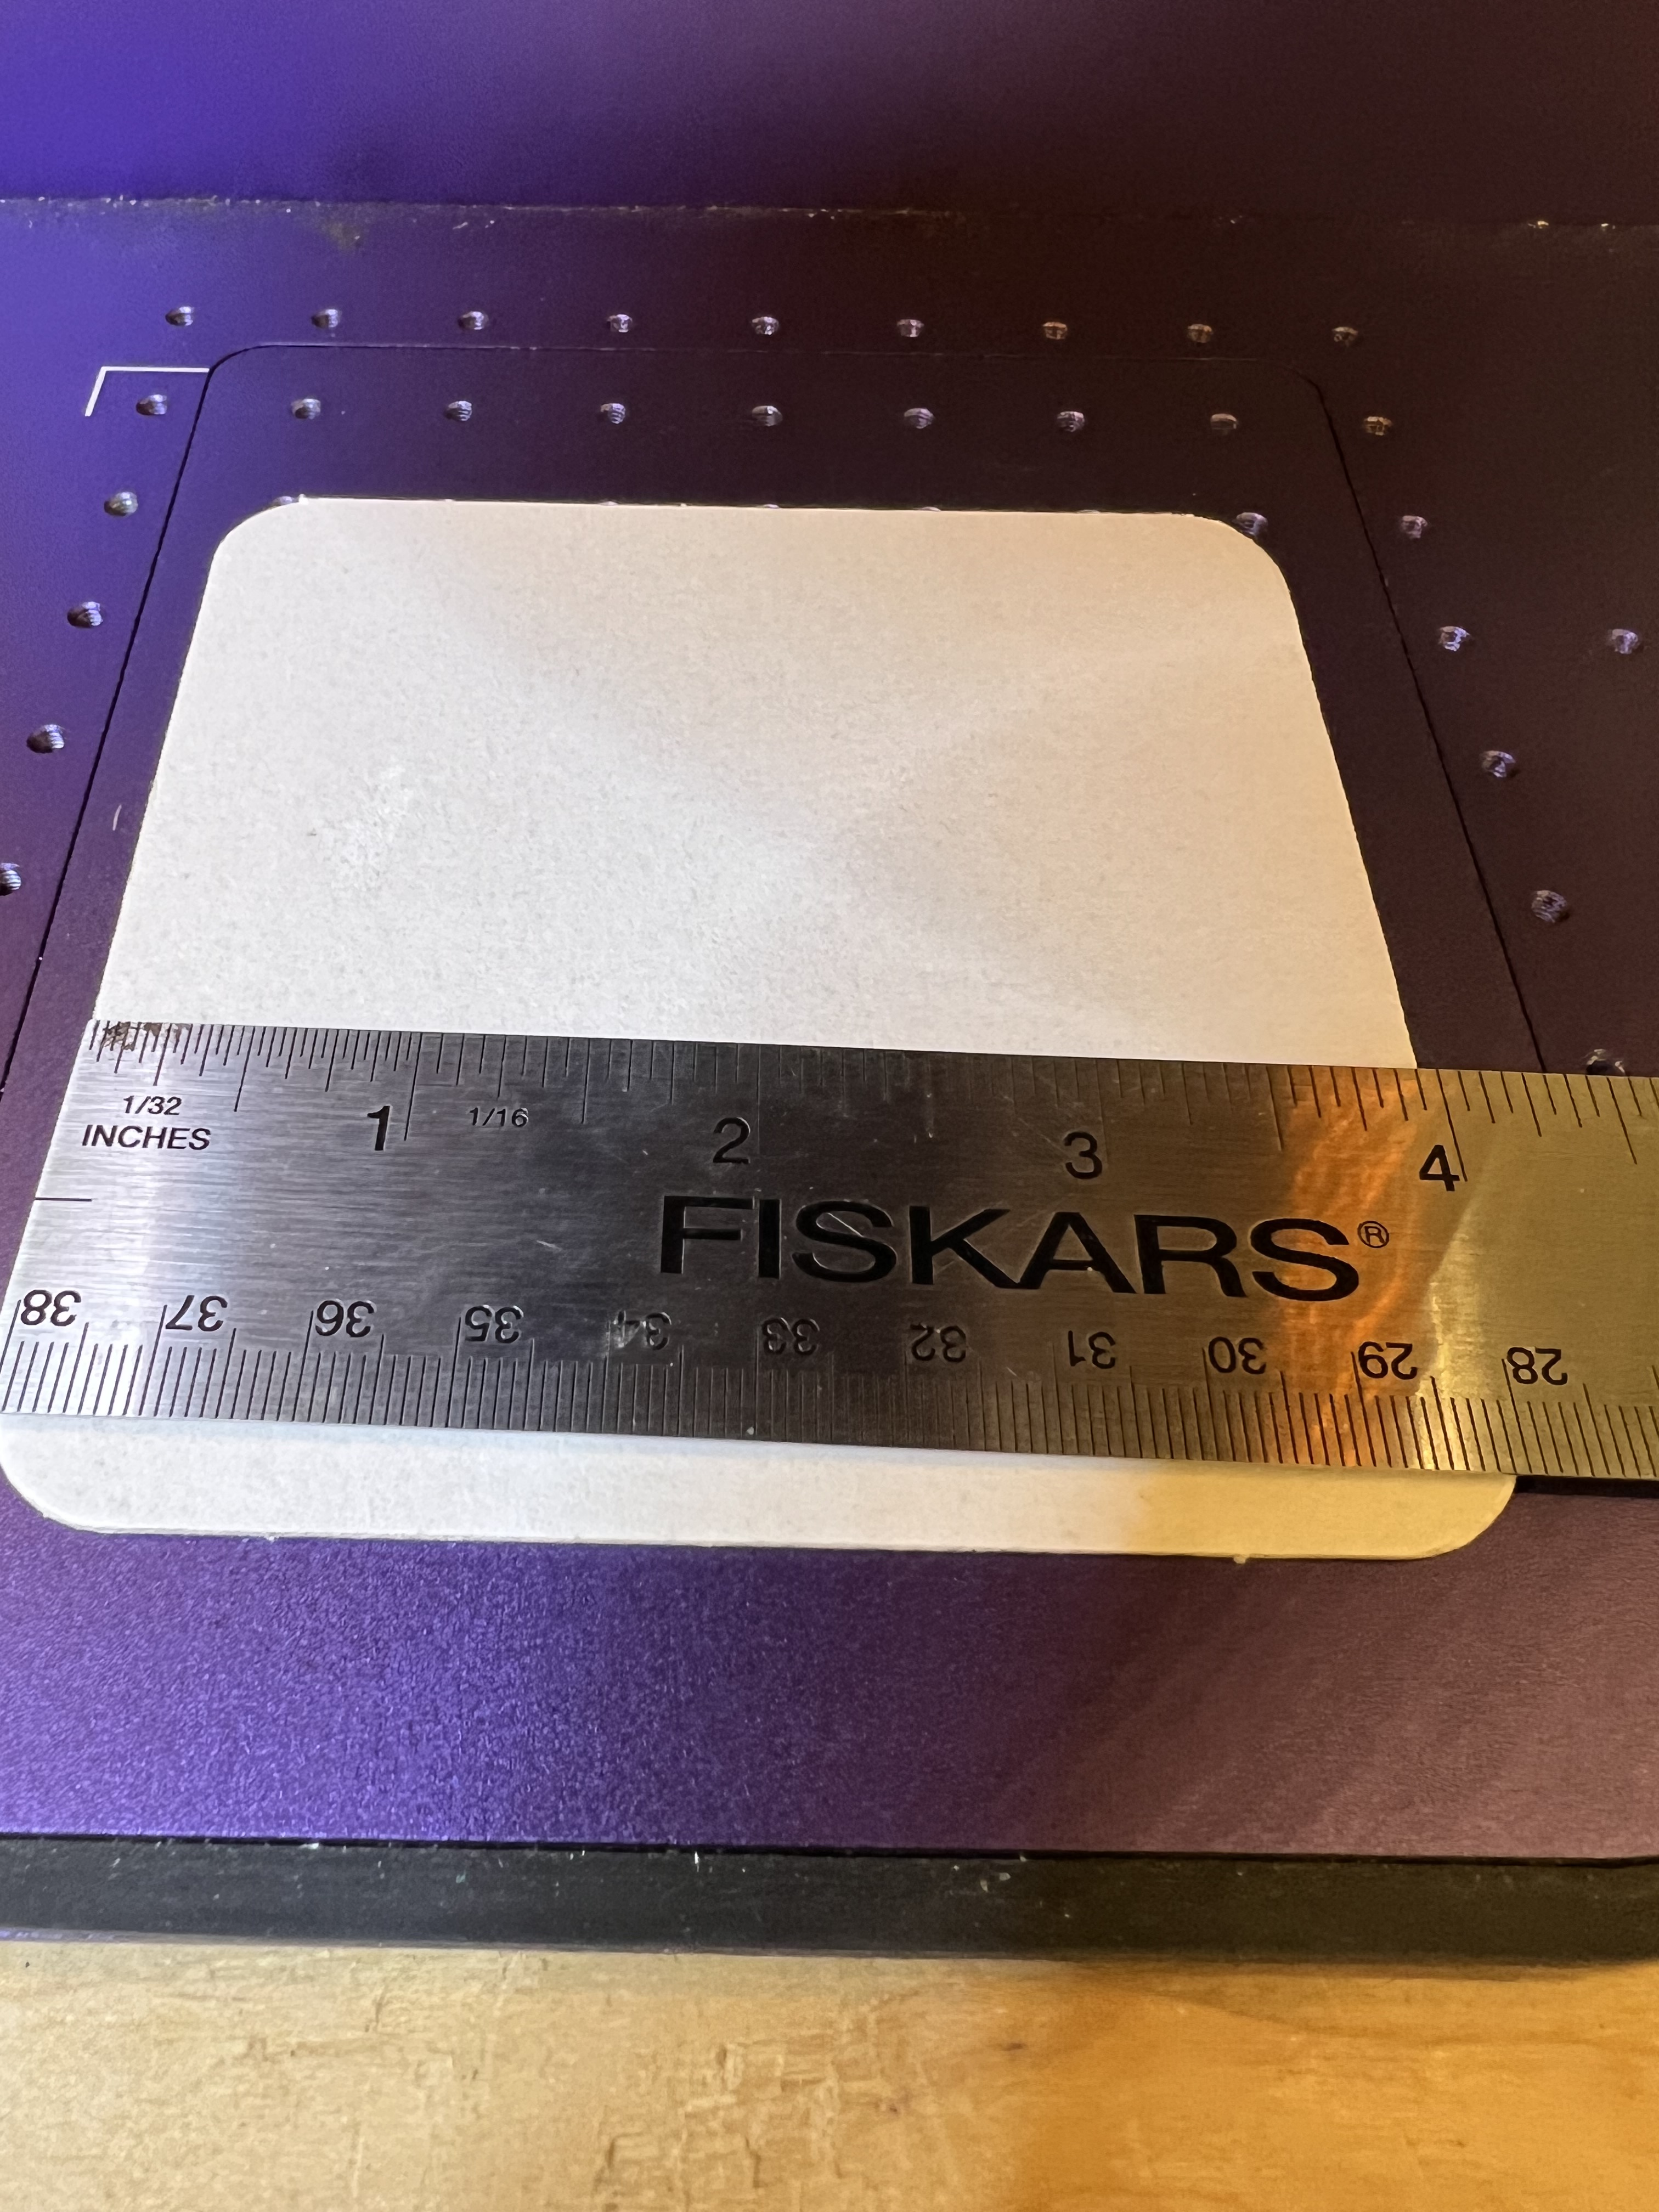
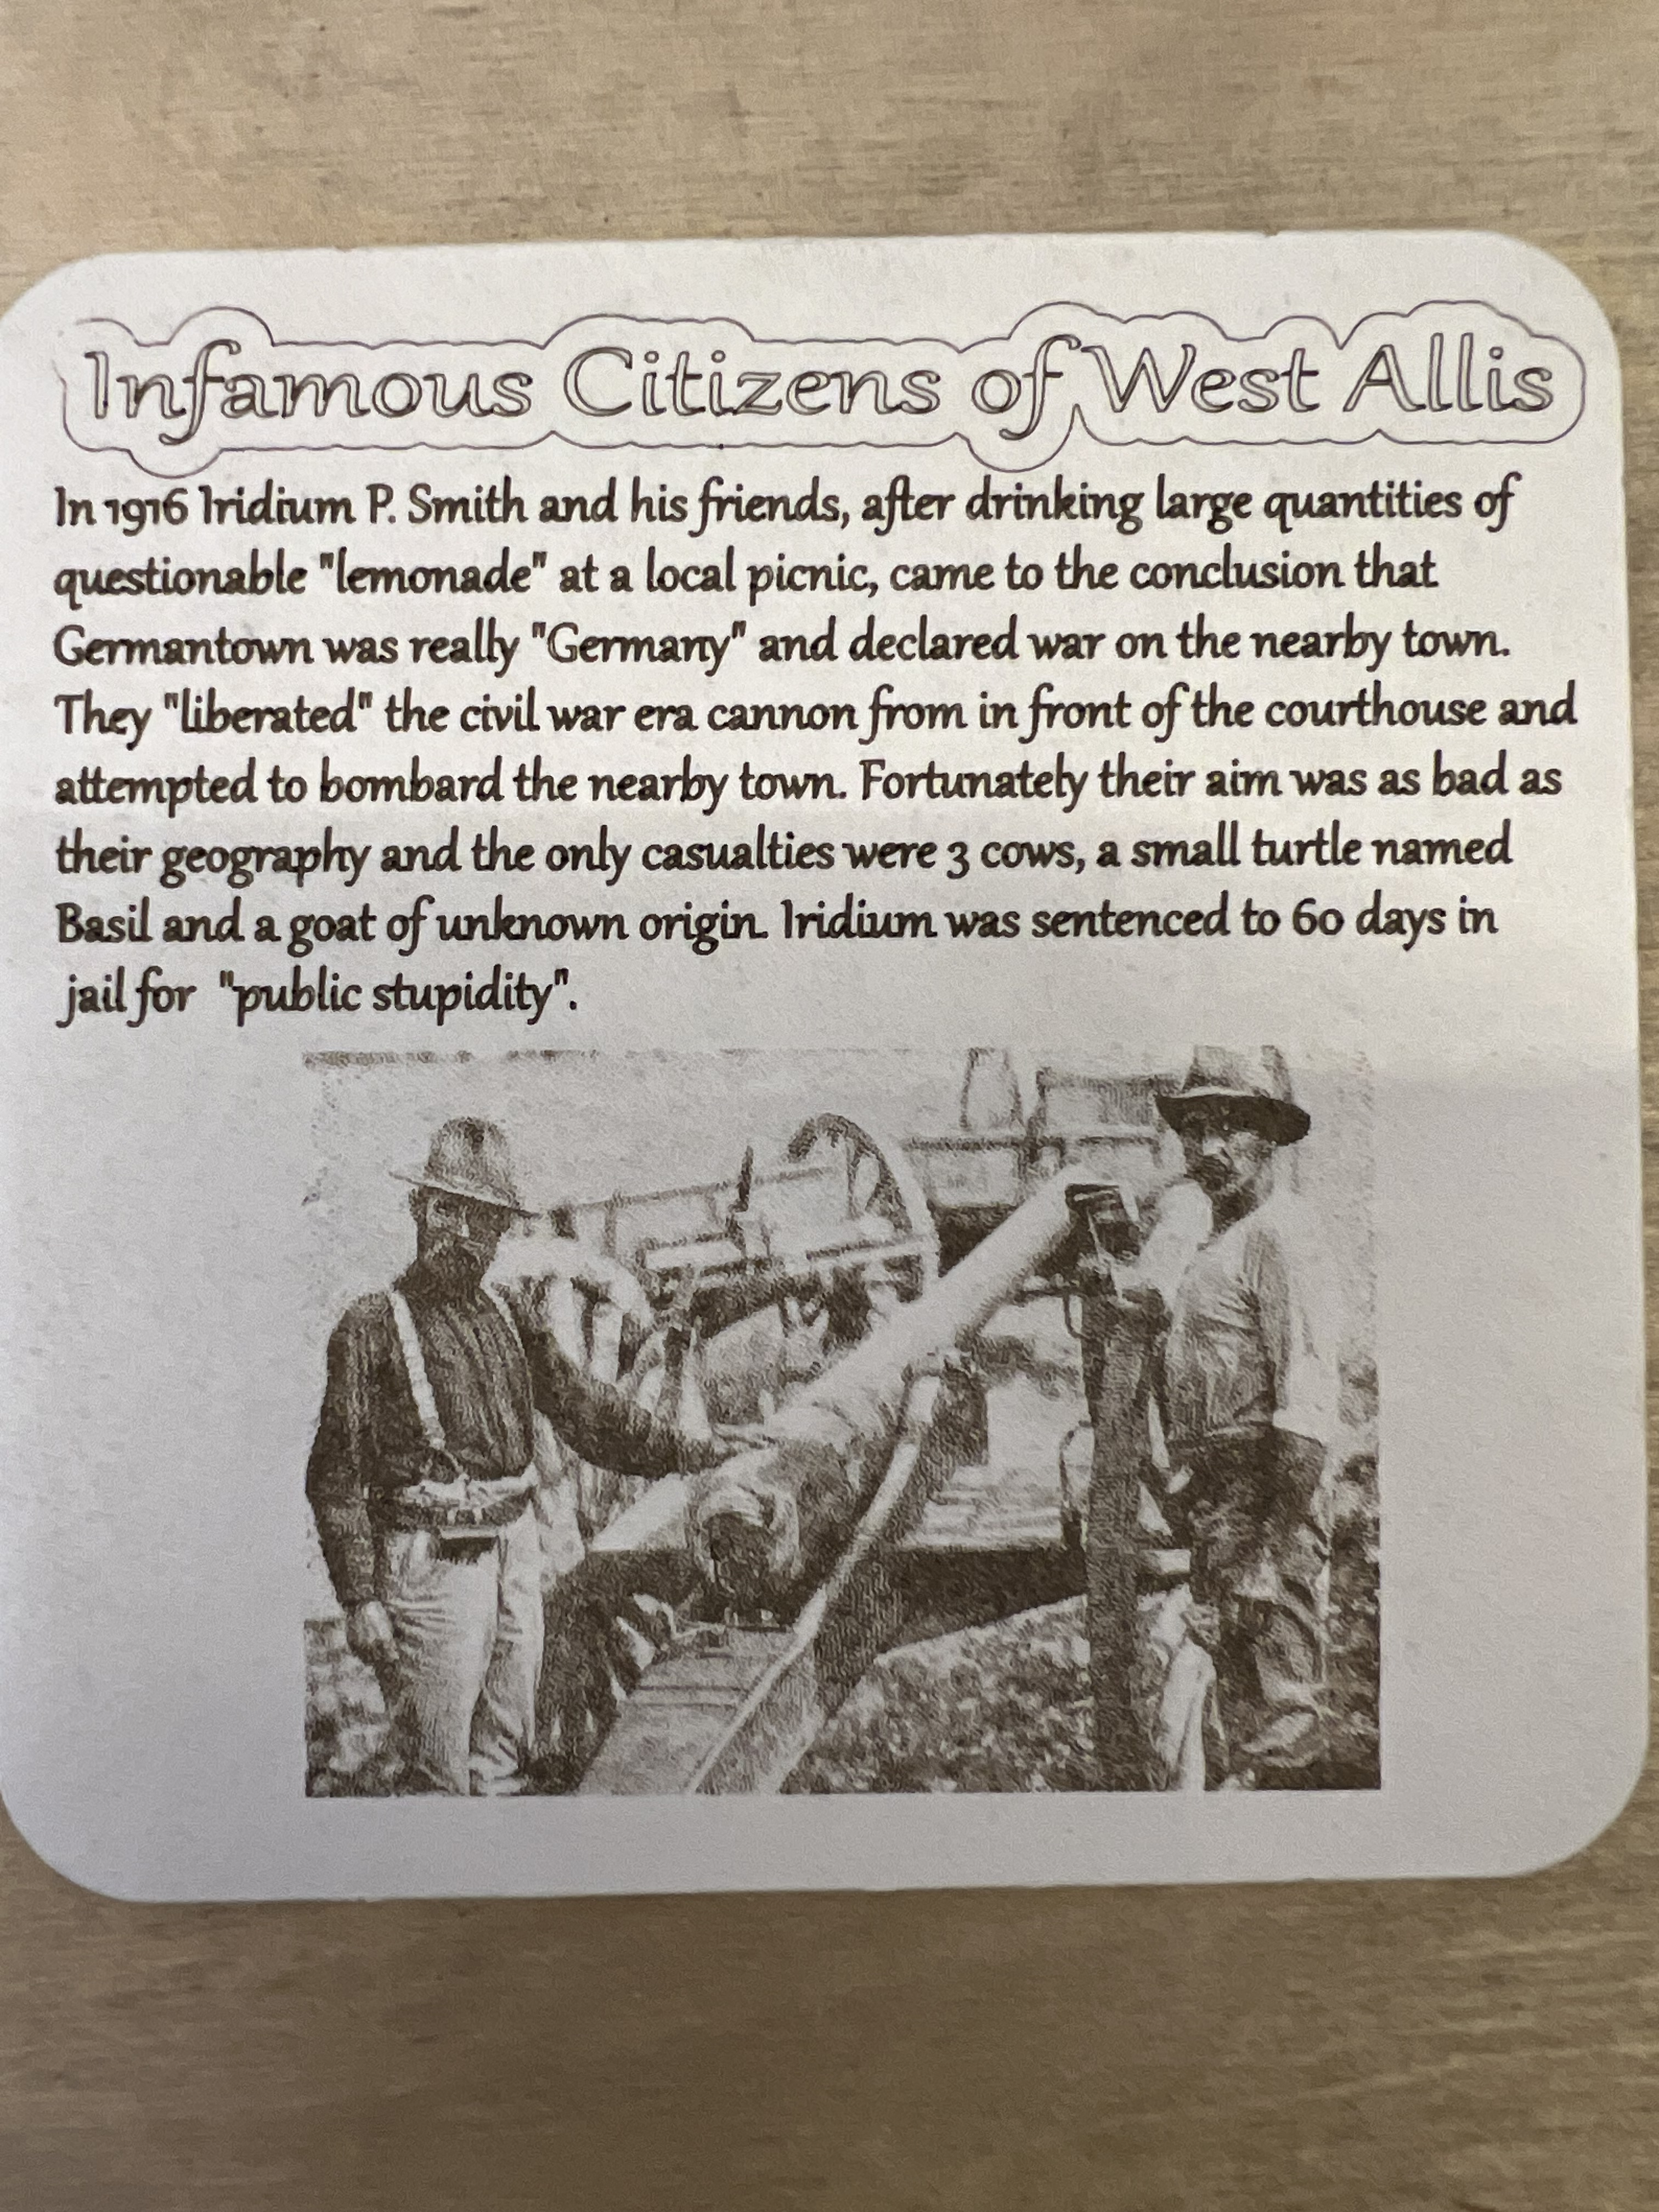
One thing I’ve been doing for years now is I make a whole line of custom drinks coasters for a brewpub in West Allis. One side has pub’s logo, the other has a (hopefully) humorous cartoon or satirical item. Those dopy things have become ridiculously popular and when I send a new batch down there they’re usually gone in a few hours because the customers steal them. Which is just fine with me because the customers hopefully show them to friends and family and helps get the pub’s name out there and attract new customers. So I do stuff like, well, this, for example:
Nope, I don’t read a lot of manga and even if I did I wouldn’t let it influence my drawings. Nope, no sir… Yeah, right…
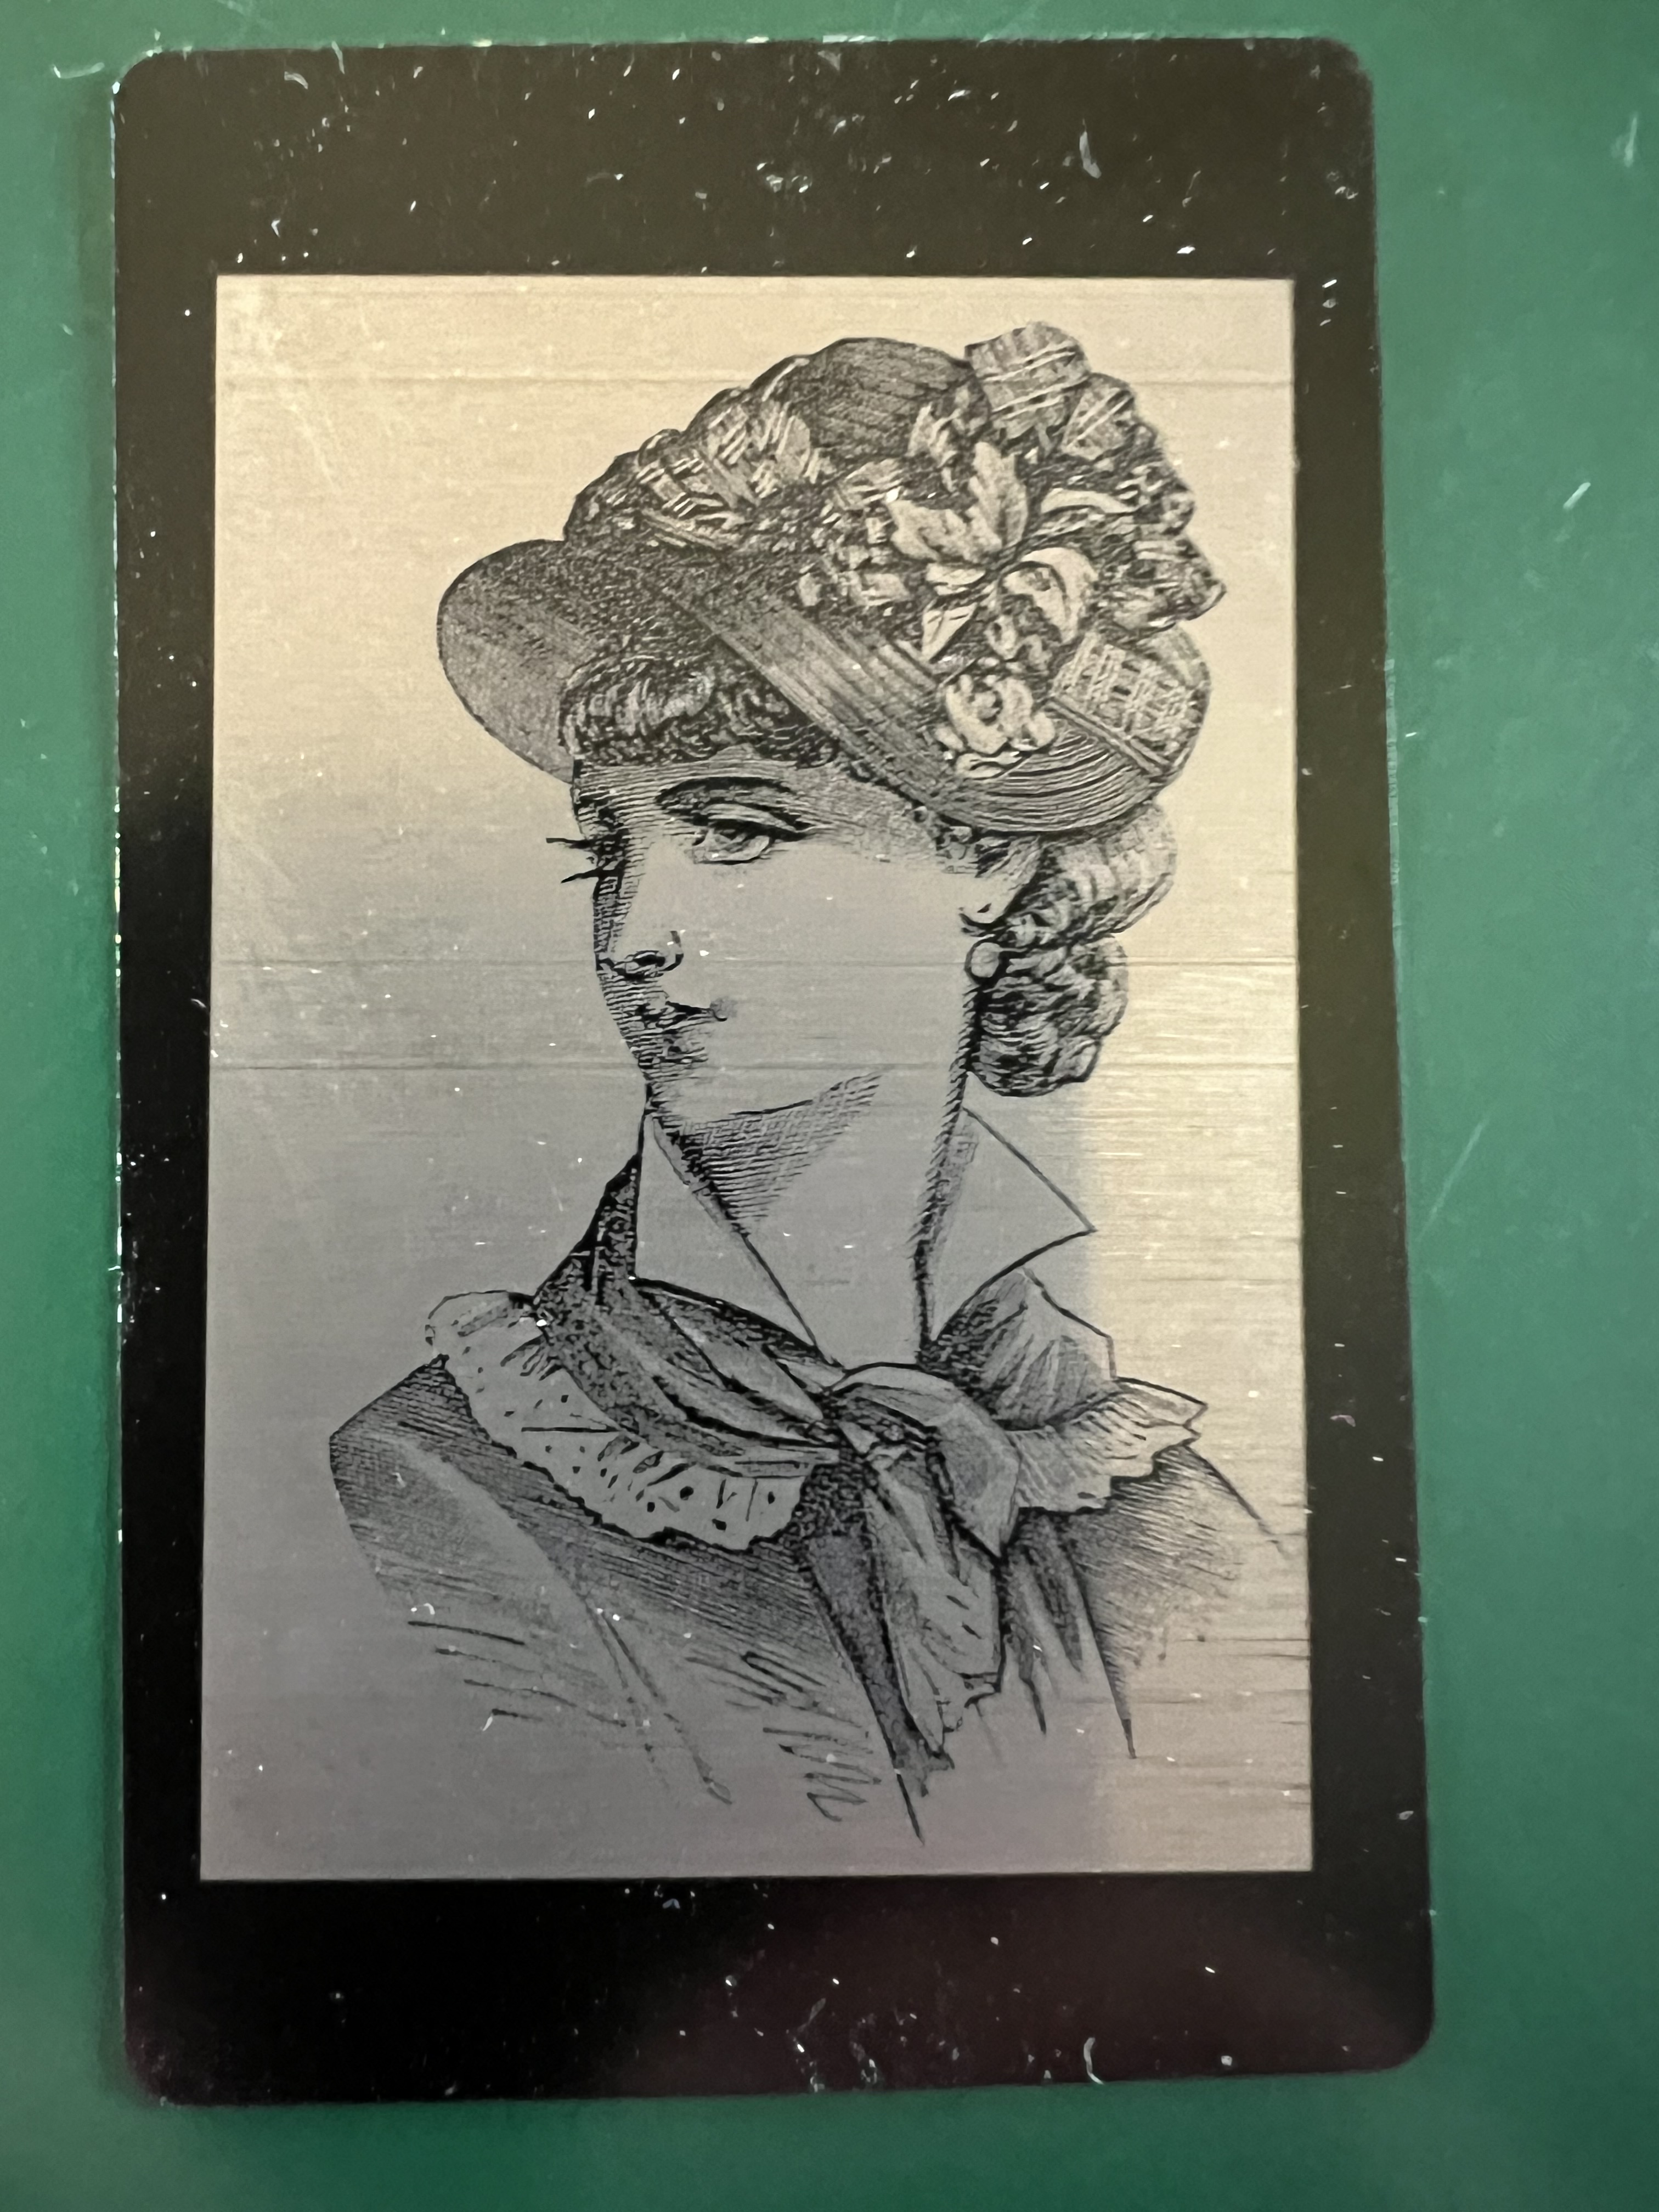
Yes, it’s an old joke. I used to steal borrow images from late 19th century and early 20th century public domain sources but I’ve been doing that less and less lately and doing my own because it’s hard to find appropriate images from copyright free sources to match a specific joke. They’re fun, easy to do, and the only difficult bit is the amount of time it takes. With the Falcon doing one of these would take 5 minutes or more. I could cut that down quite a bit but only by sacrificing the quality. With the Lumos it takes about 1/3 of the time or even less do do one of these.
I’m afraid that I’ve been picking on West Allis, the suburb of Milwaukee where the tavern is located, of late. I hope the town has a sense of humor because stuff like these pop up…
Yes, I am ashamed of myself. Anyway I’m showing you these because it would have been difficult or even impossible to do this with the Falcon. At least in any kind of reasonable amount of time. As nice as the Falcon is, it just isn’t fast enough, nor does it have high enough resolution to be able to do a decent job reproducing photos like these up there. Just for the heck of it I did the “vegetable queen” one on both the Falcon and the Lumos. On the Lumos it took about 3 minutes. On the Falcon? It took 10+ minutes. See why I’ve been using the Lumos so much since I got it?
The resolution of this laser is extremely impressive. Look at this test image I did on one of those black anodized business cards.
There’s no way the Falcon could achieve that high of a resolution. The width of its laser is just too wide.
Doing photos with this thing is a blast. It gives near photographic quality results on almost everything I’ve tried it with. Over there on the left is a photo of one of my cats that I took. I cut out the background and imported it into the Wecreat software. I found a bit of scrap cork laying around and lasered it onto that with the diode laser and you can see the results for yourself. The resolution of this thing, both the diode and the IR laser, continues to impress me.
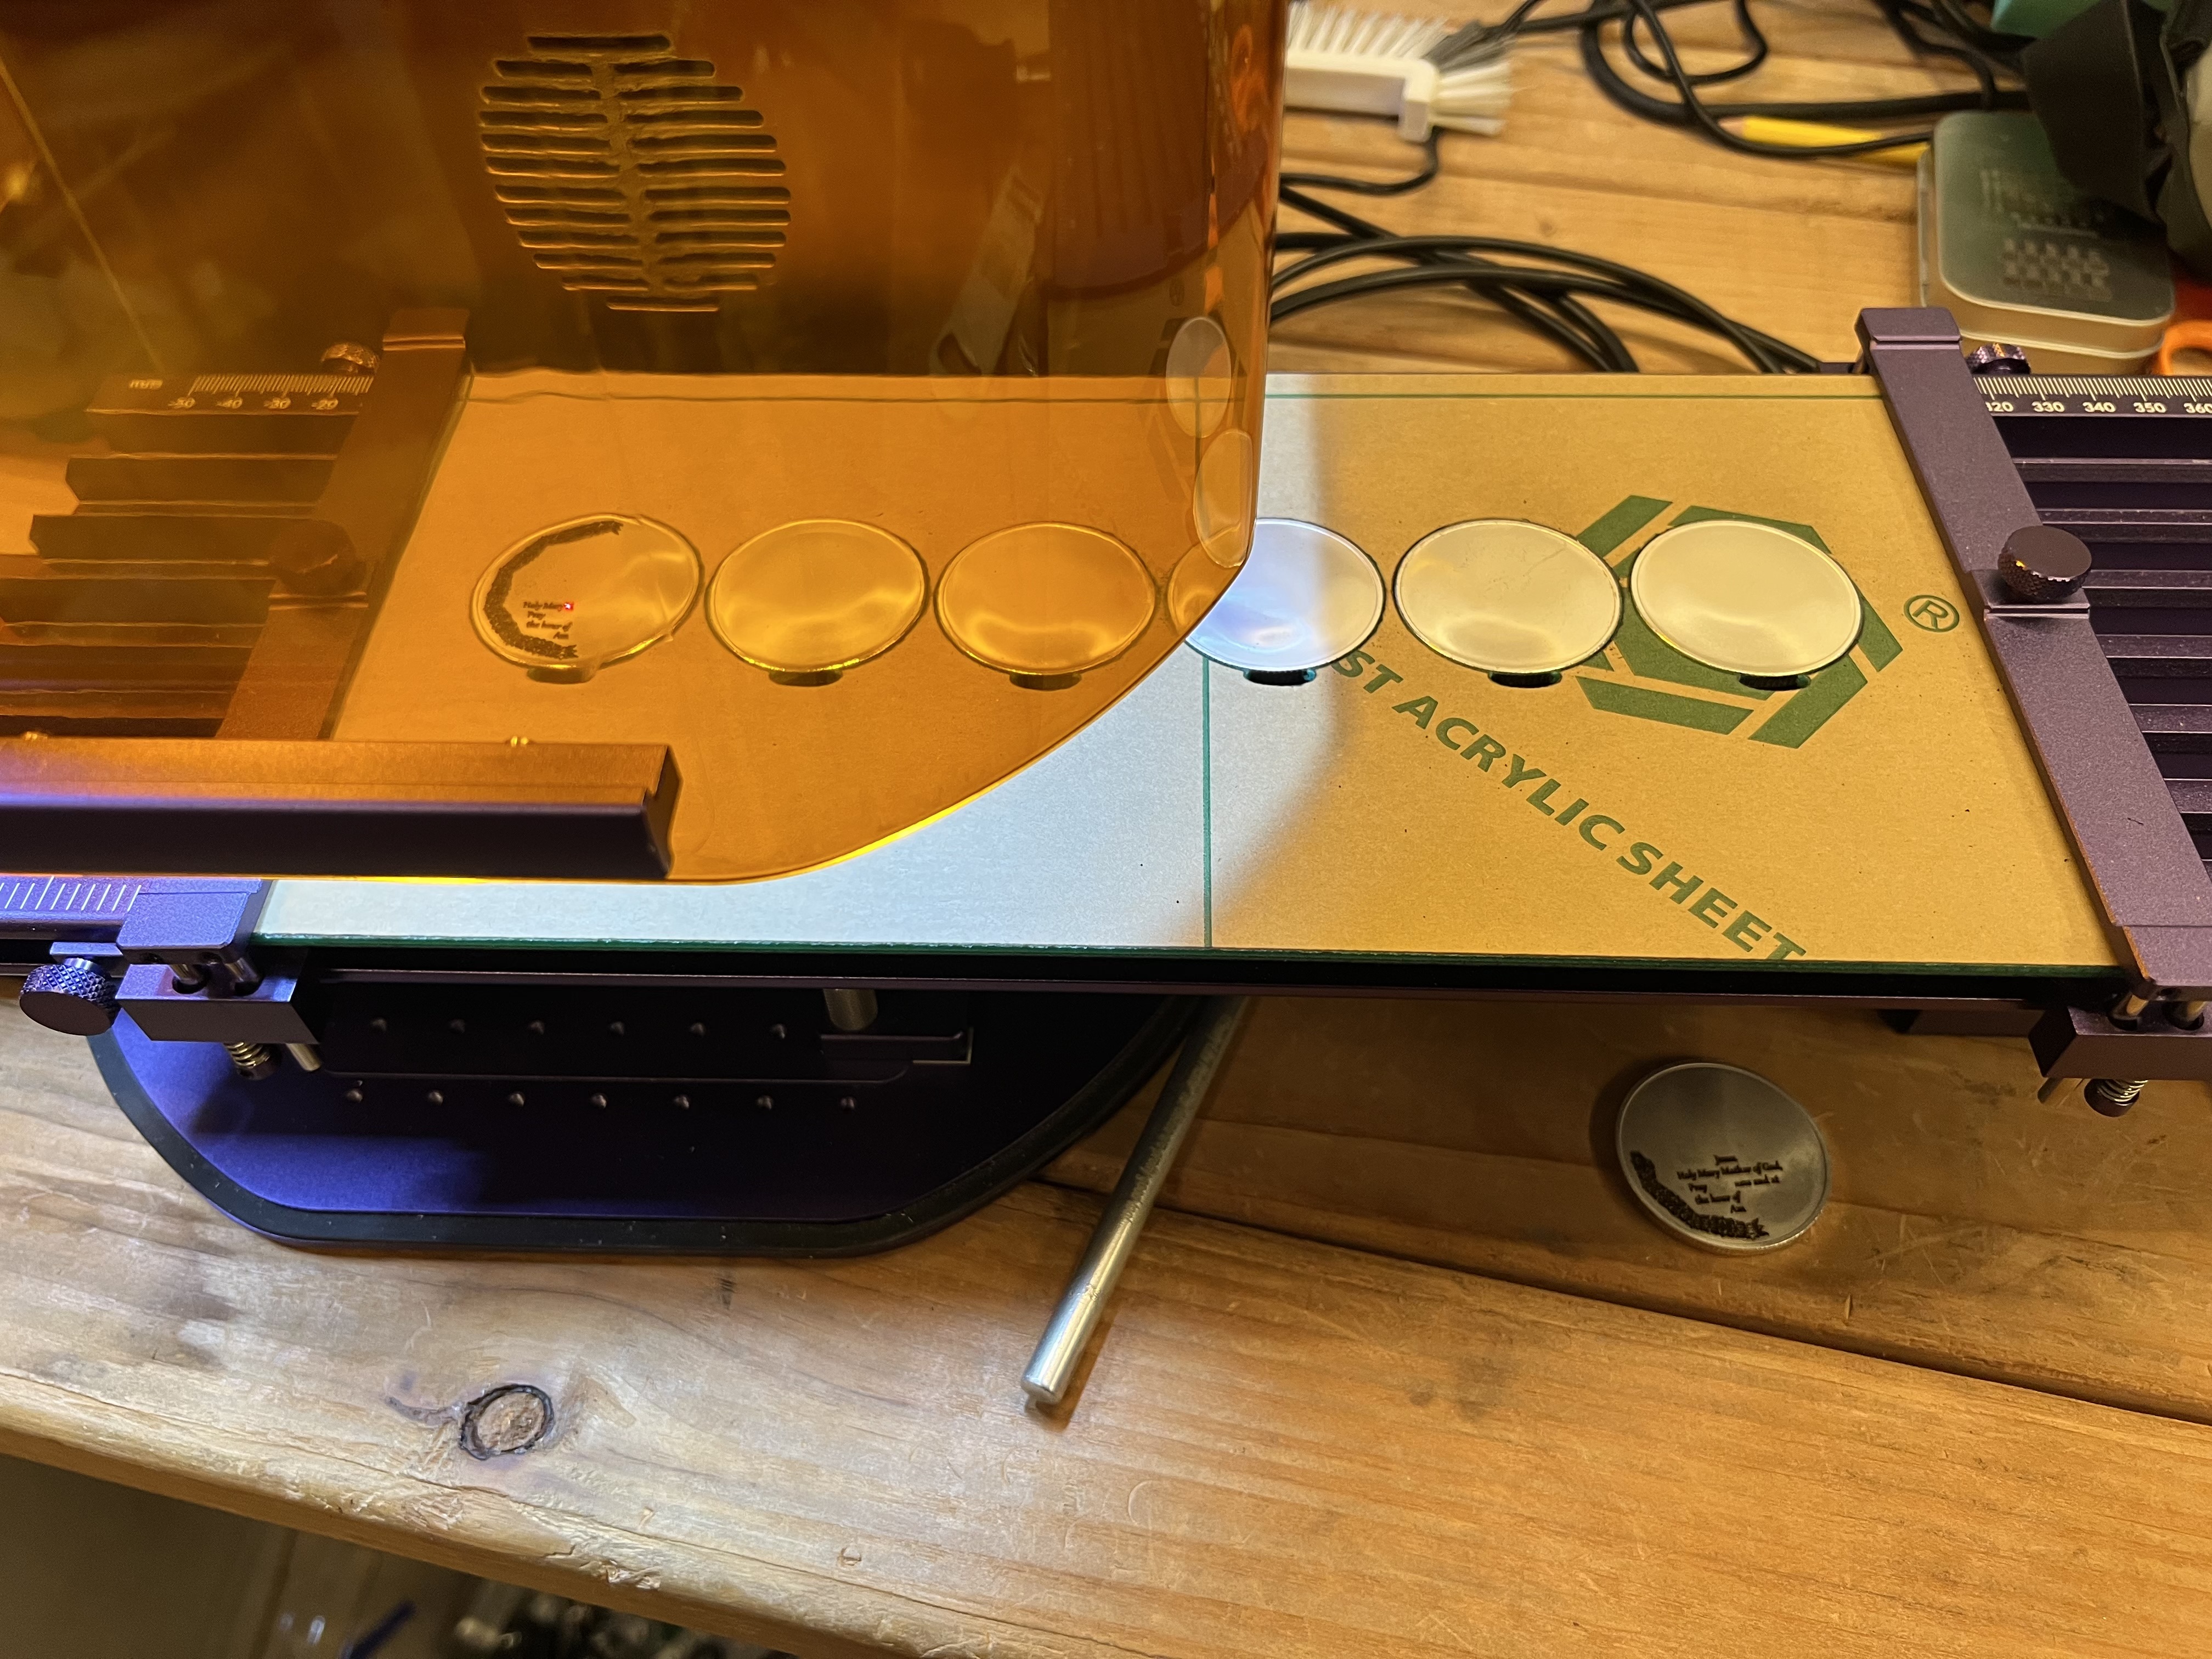
Let’s look briefly at the sliding table. I use the optional sliding table for batch runs all the time. Below it’s set up for doing 4 coasters at a time.
I put 4 blank coasters on the table, start it up and it merrily chugs along for about 10 – 15 minutes doing all 4 of them. Then I reload more blanks into it and start it all over again. While it’s chugging along doing the batch I’m usually working on artwork for the next batch of coasters or some other project.
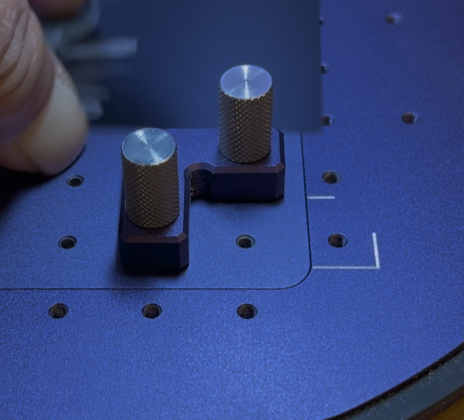
Installing it is about as simple as it gets. Over there on the left you see one of 2 “L” brackets that are included with the laser that screw down into the holes you see on the baseplate. Not only do they serve as makeshift guides to help place material on the bed, they are also used to anchor down the sliding table. The two brackets are screwed down to fit in the white painted line shown in the lower right corner, and in a second one in the upper left corner on the base. Then the sliding table has corresponding holes in its base. Just fit it down over the top of those knurled knobs, plug two cables into the back of the Lumos itself, and it’s ready to go. Takes all of two minutes to install it or remove it as needed.
I also use the sliding table with jigs I make myself (usually cutting them out of acrylic plastic or plywood on the Falcon) to hold small objects. or with guides clamped down to the edge of the table that I use for coasters. Below is a jig I cut from acrylic on the Falcon to do challenge coins 6 at a time.
I load 6 coins at a time into the jig, load the appropriate file and start it going. Engraving coins takes a long time though. Depending on how intricate the design is and how deep the engraving needs to be it can take well over an hour to do one side of all six coins. But since I’m working with non-flamable material I can just let it go while I do something else and I don’t need to actually be there the whole time.
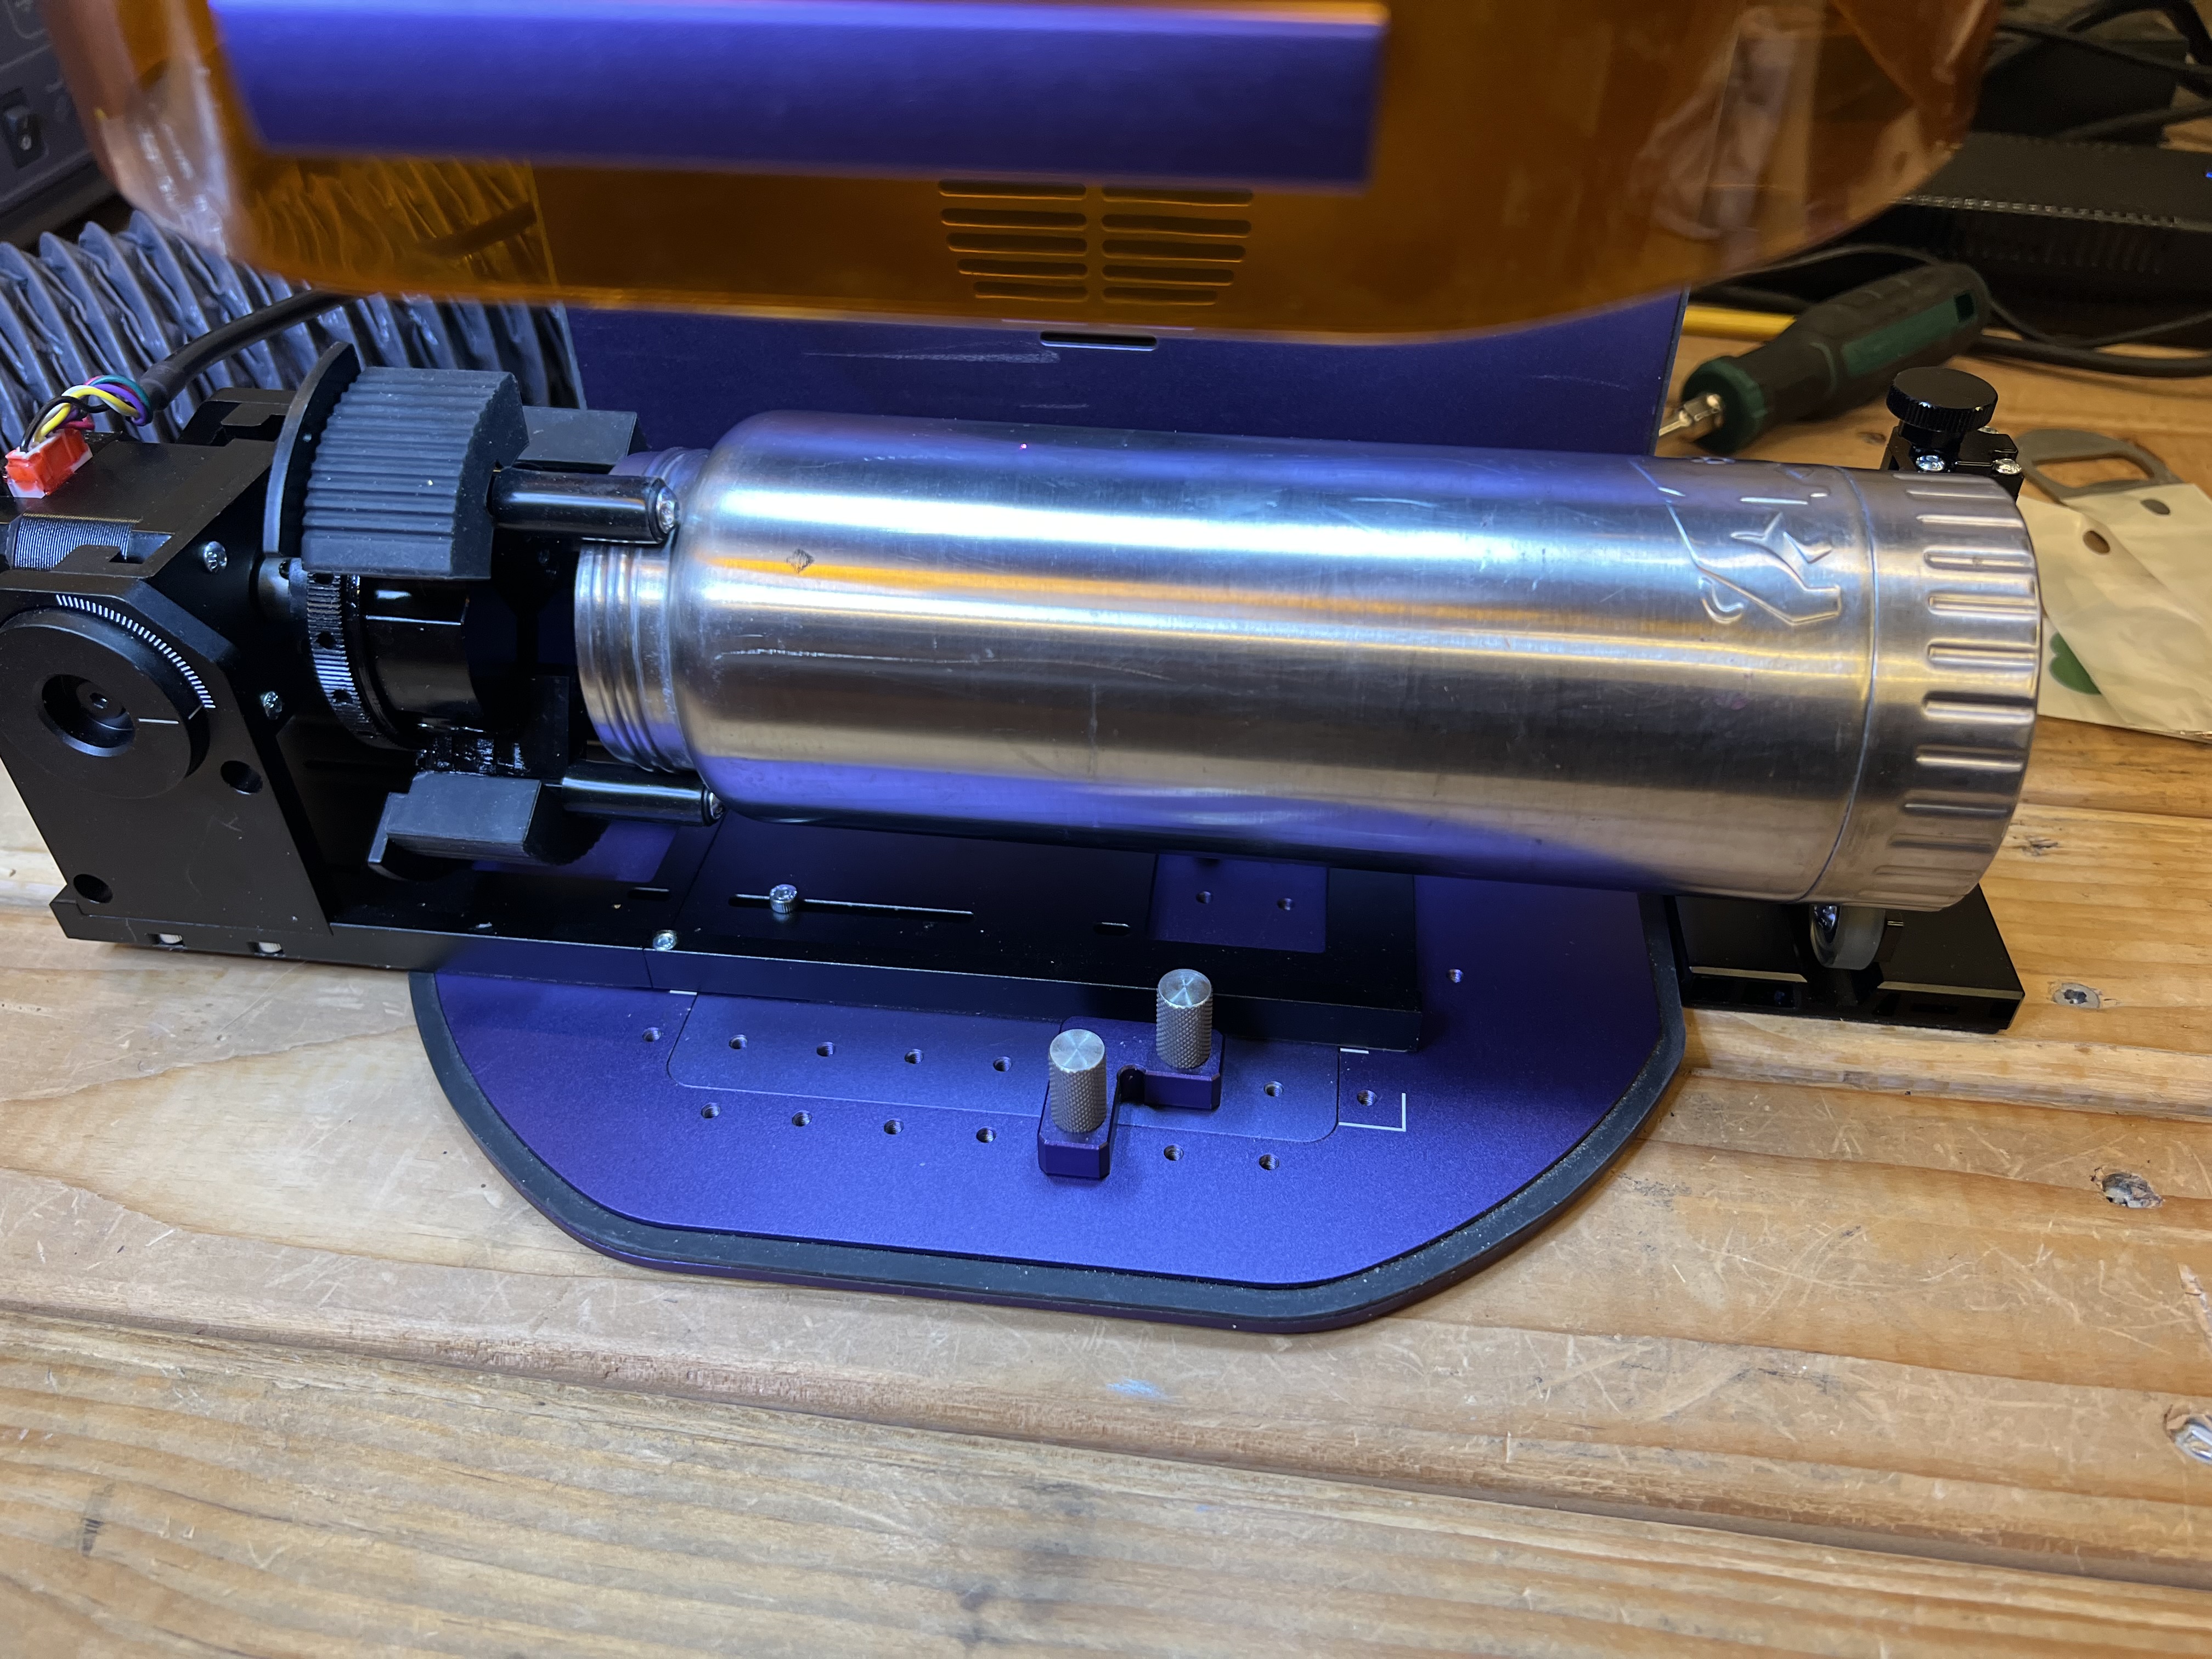
The other optional tool you can get for this thing is the rotary tool and I have that too although I’ve only used it a couple of times.
Engraving things like cups, glasses, water bottles, etc. isn’t something I really do but I wanted to do a few items just to make sure it actually worked as advertised.
Unfortunately, unlike the sliding table which is extremely easy to install and use, the rotary is a pain in the neck. It has to be physically bolted to the base of the Lumos with 3 very small screws which you will immediately lose. I did. Fortunately there were extras included.
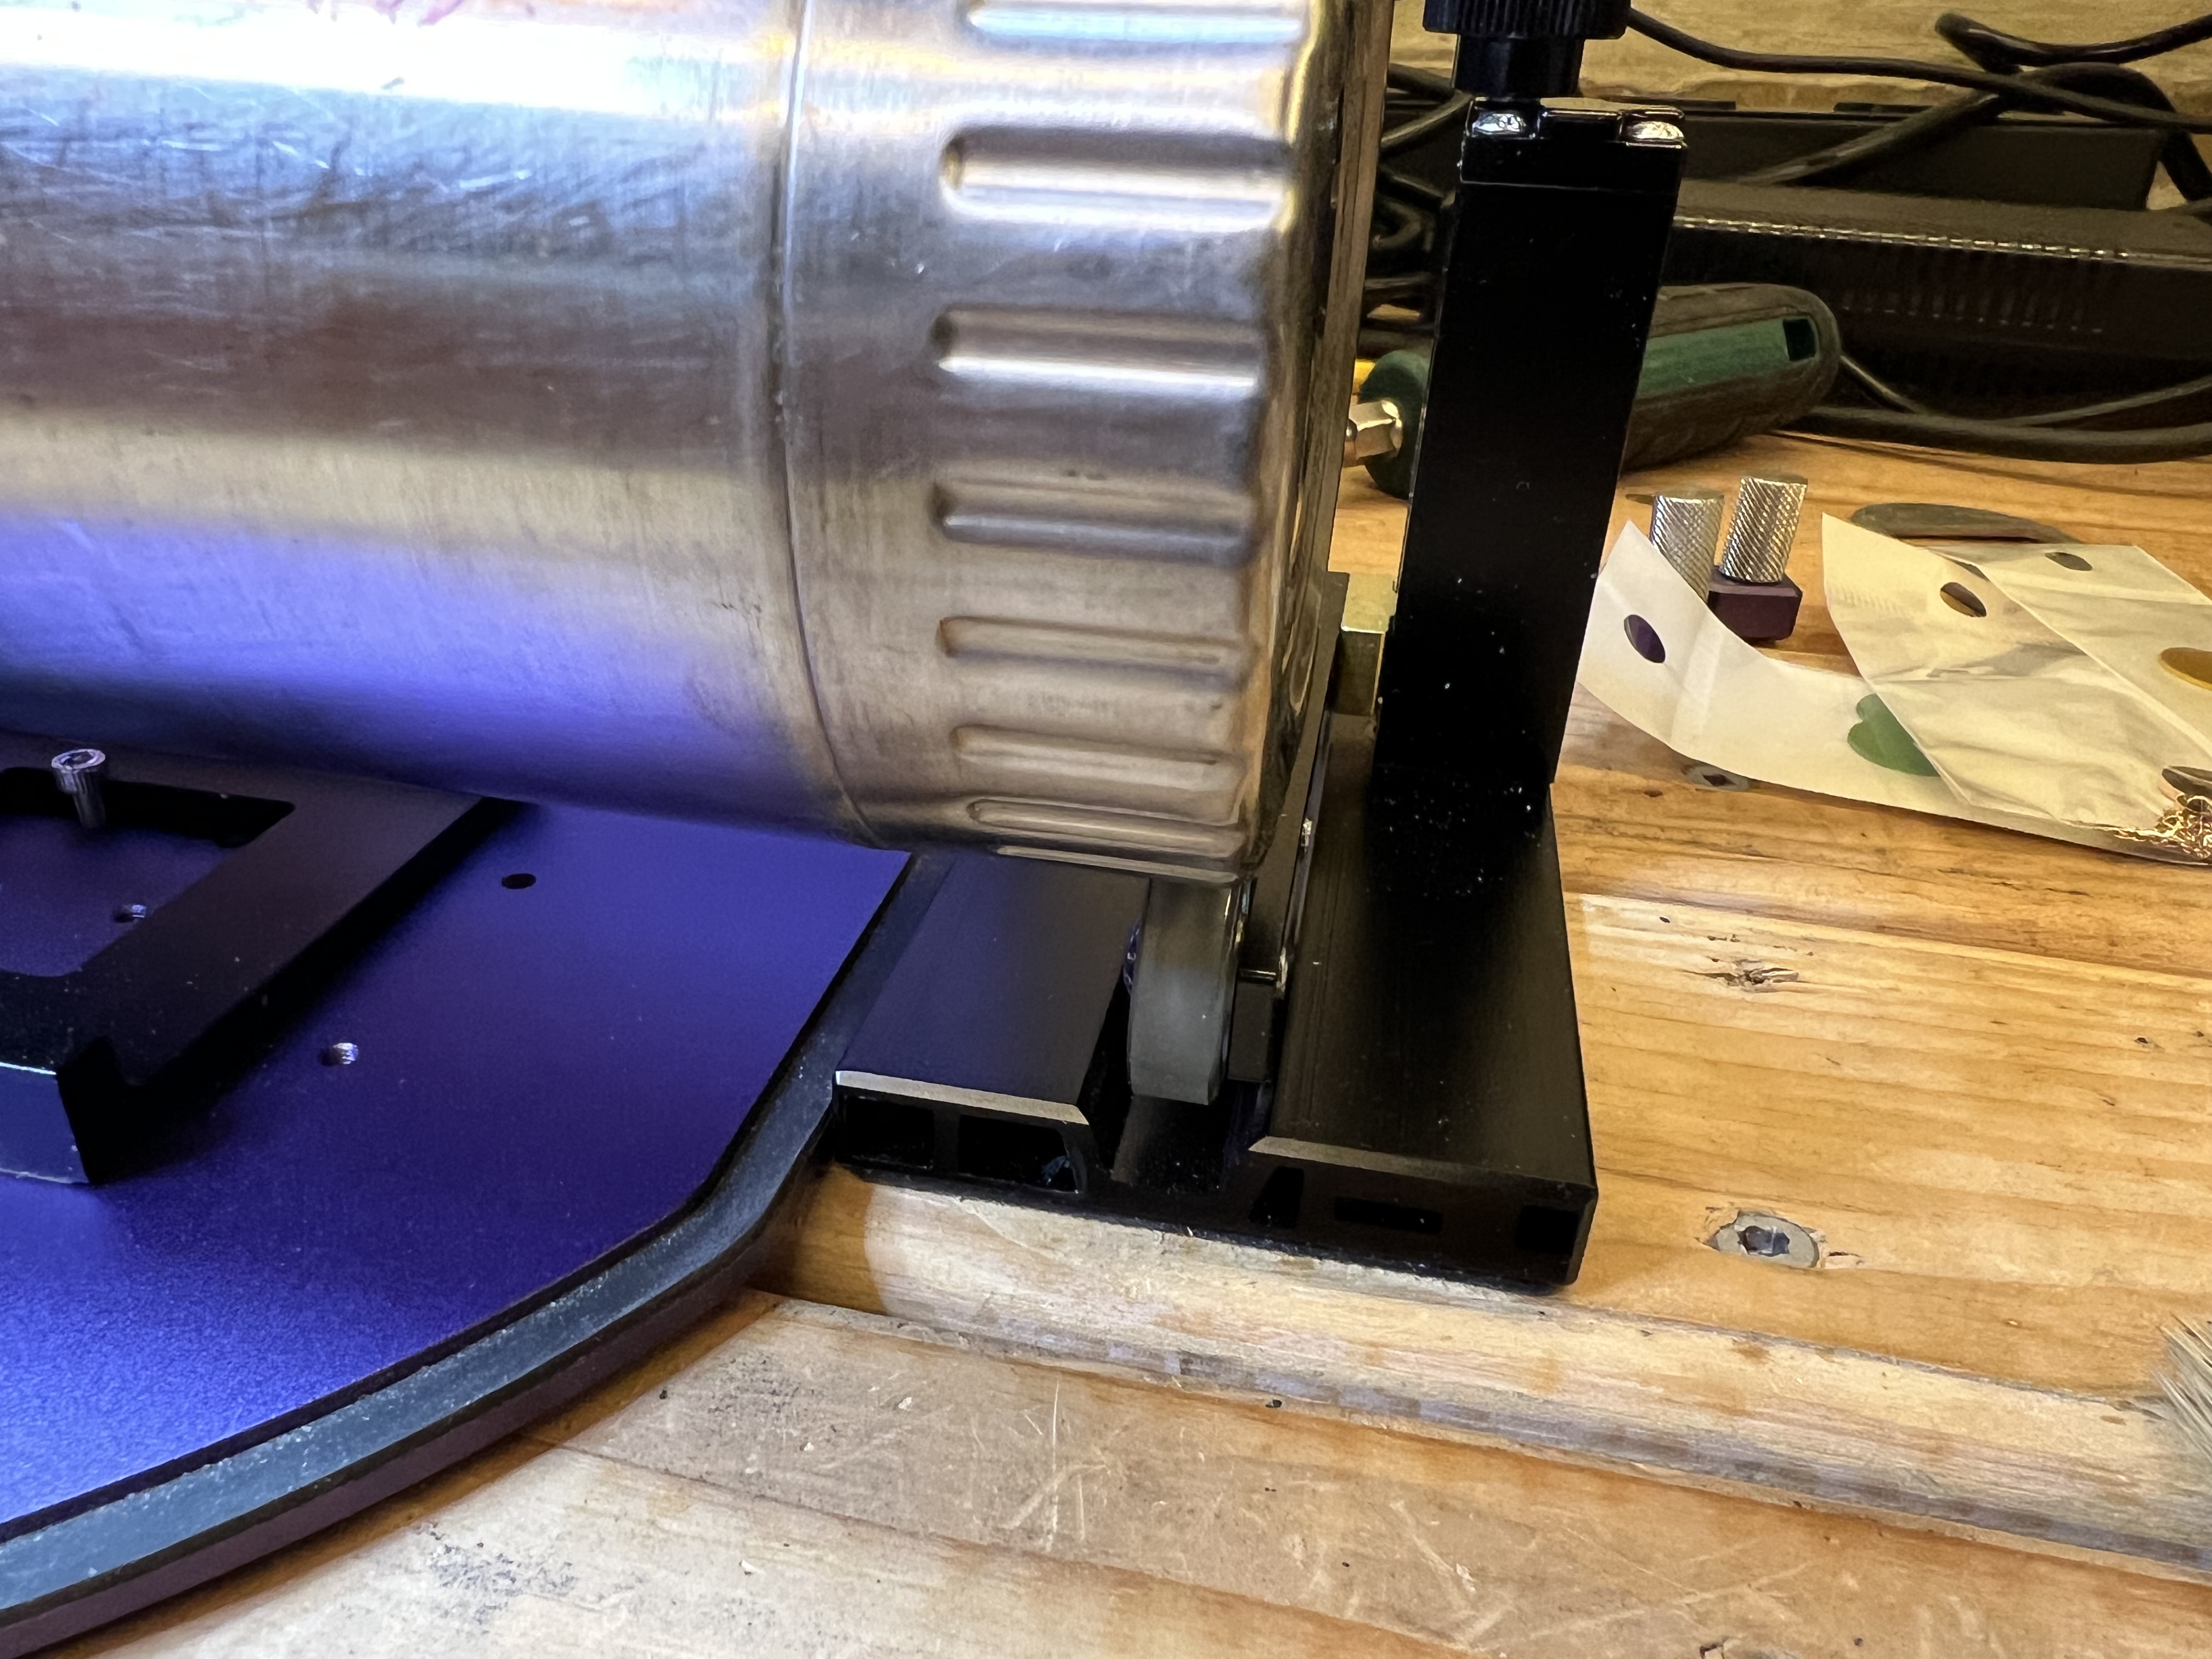
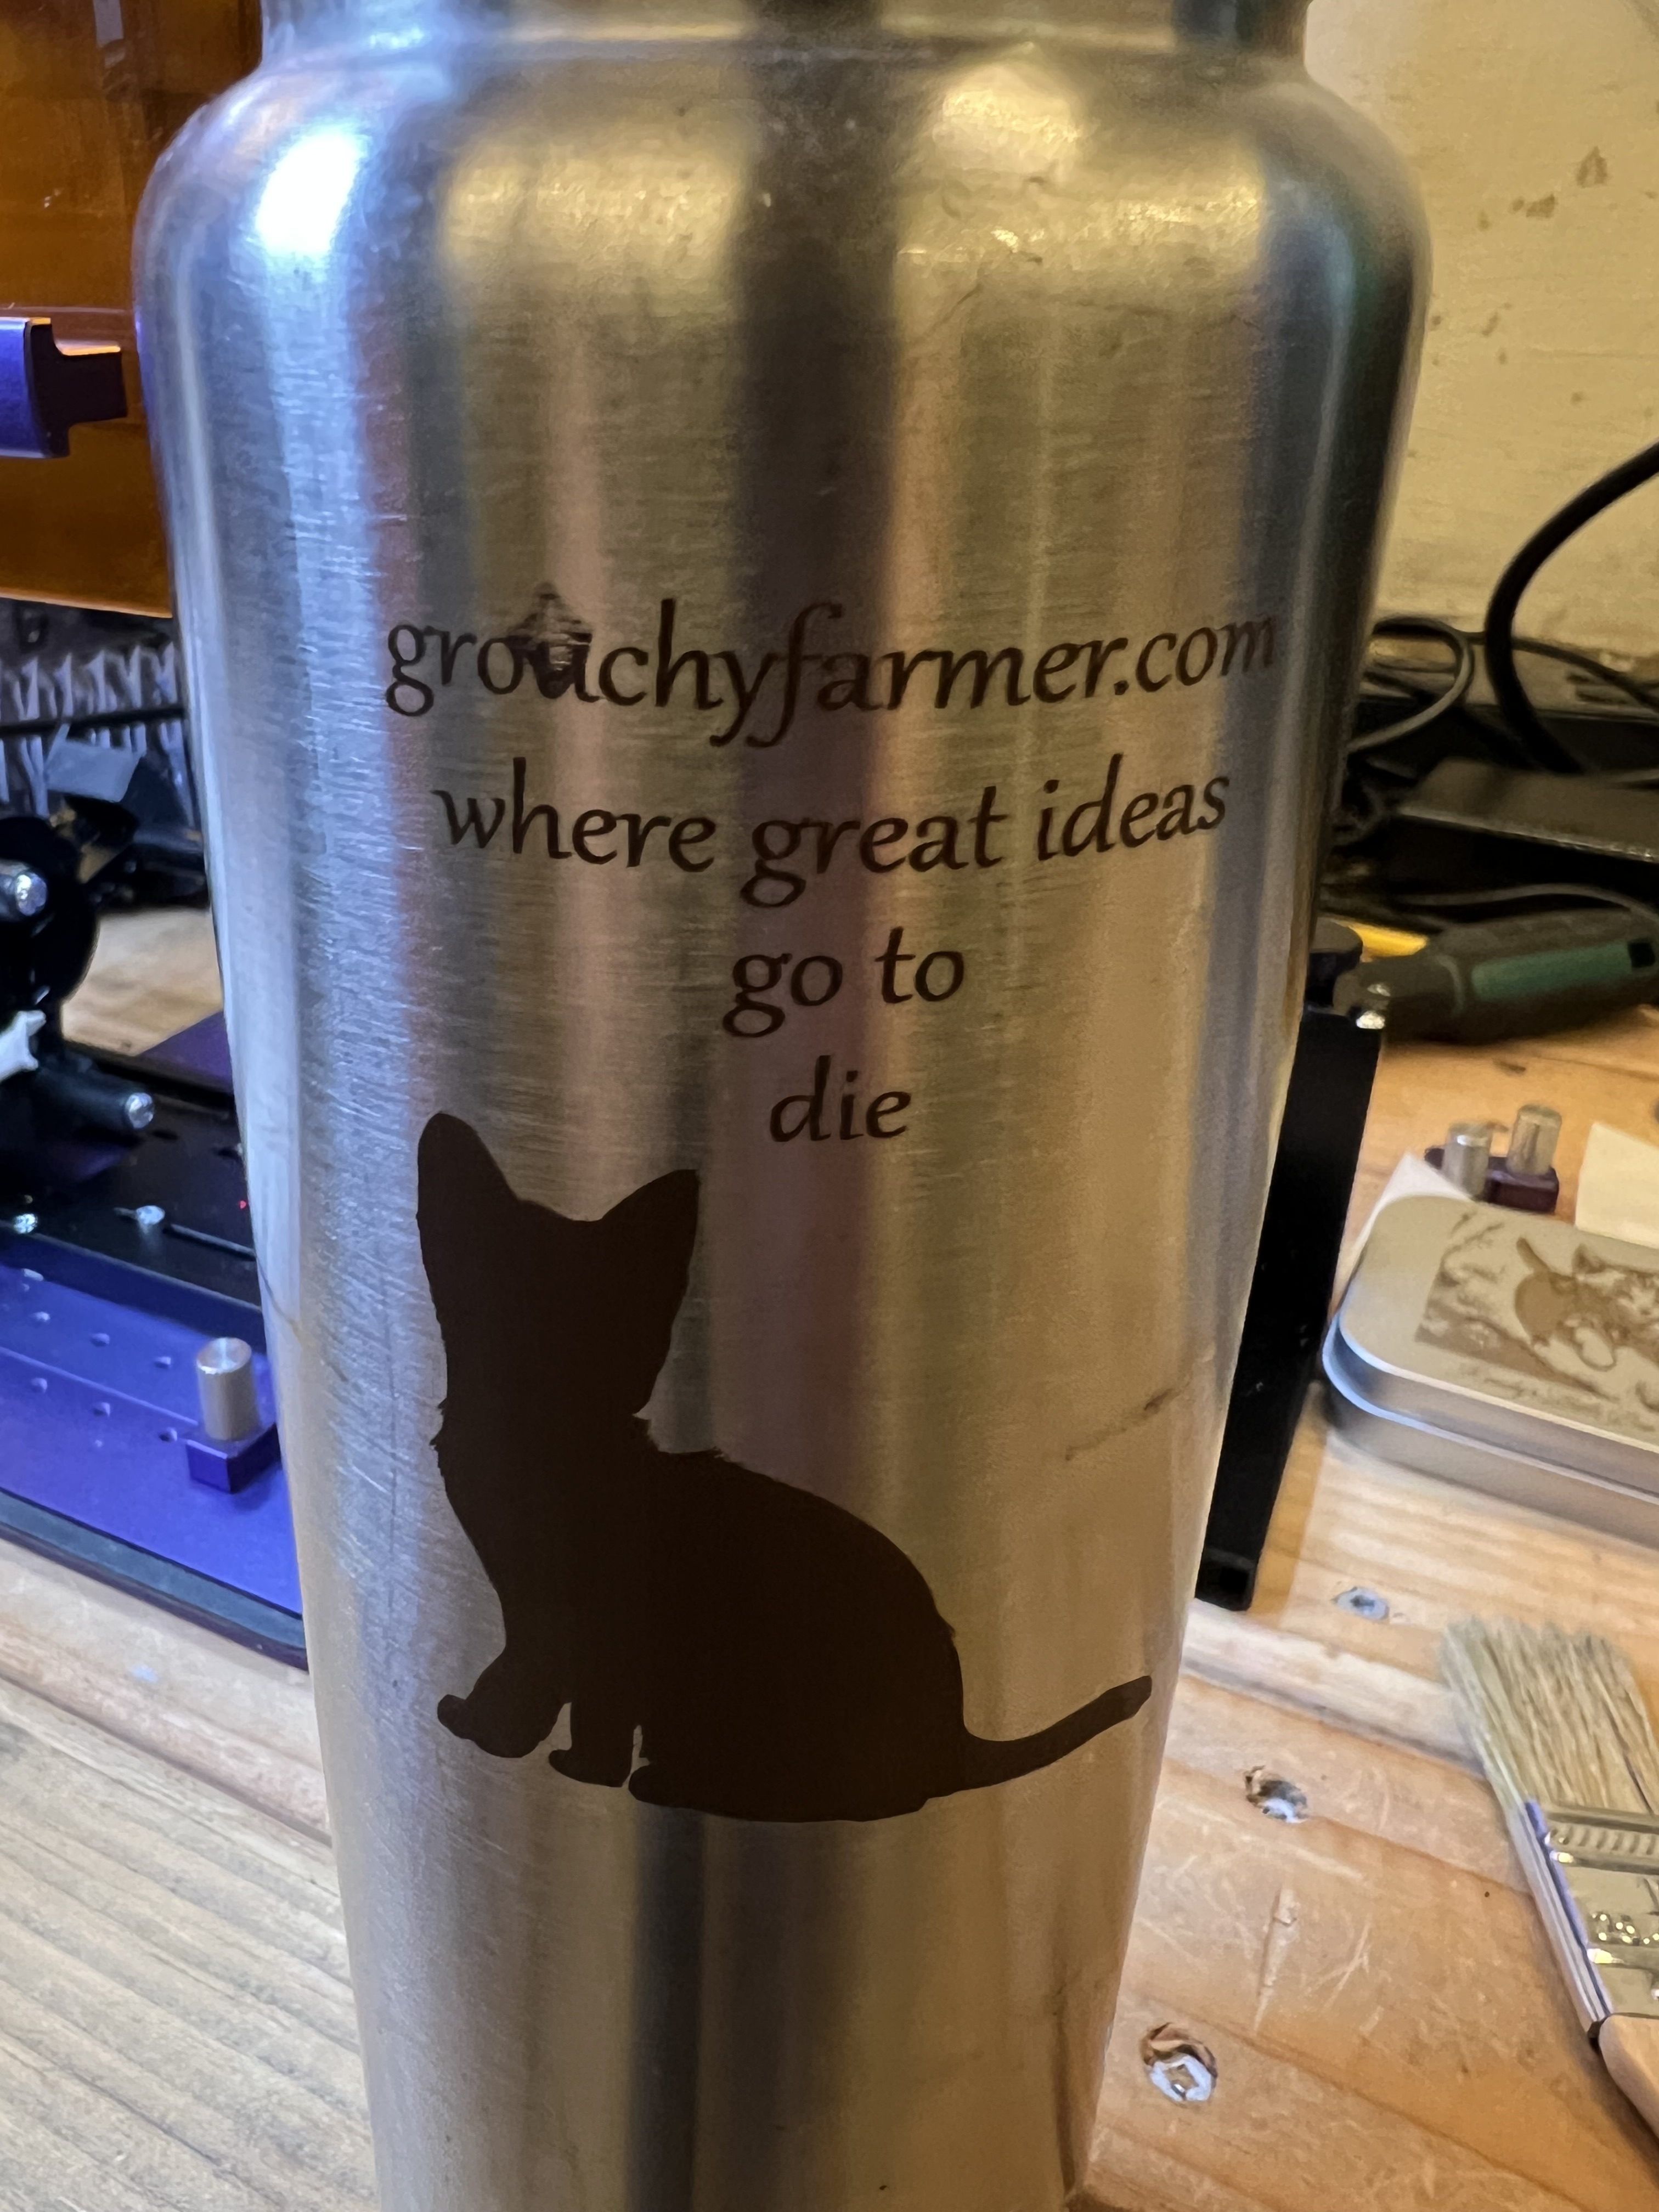
It does work well, however. I tried it just this afternoon using the old stainless steel water bottle I carry on the bike. The kit with the rotary tool includes a height adjustable rest with rollers to support the end of whatever it is you’re trying to laser which was absolutely necessary or the bottle slipped enough in the jaws of the tool to get out of position.
The blotch over the “u” in grouchy is from a defect in the surface of the bottle, not from some kind of glitch from the Lumos.
Once I had it set up it worked quite well. I had no issues with it. Basically it works just like any other rotary tool so if you’ve used one before with a different laser using this one isn’t going to be a big deal.
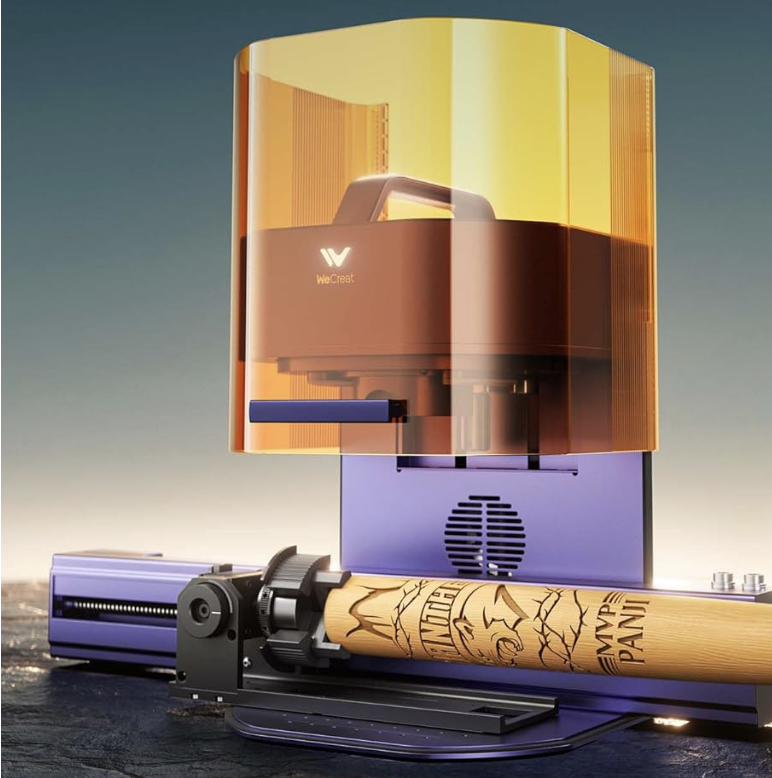
One thing you are supposed to be able to do is take the top off the sliding table, attach the rotary tool to it somehow, and then then clamp that whole conglomeration to the base of the Lumos and use it to making engravings up to 0ver 400mm long on lengthy round objects, with the rotary tool rotating as needed. and the sliding table moving the whole thing left to right as necessary. One of the advertising videos Wecreat has shows them engraving almost the entire length of the barrel of a baseball bat.
Now that’s a neat trick but me, being the 3rd laziest person in the state… Well I couldn’t work up enough ambition to go through all of the work of half dismantling the sliding table, attaching the rotary to it and then trying to test all of that. I’ll just take their word for it that it works and be done with it.
Overall the Lumos has been excellent. It does exactly what it’s advertised to do and it does it pretty darn well. I’m very pleased with it so far.
I want to talk specifically about metal engraving for a few minutes too. I’ve been using laser engravers for years, but I’ve only had diode lasers that couldn’t engrave metal before, so this was something entirely new to me.
Something like that metal box up there that I pictured doesn’t take very long, a few minutes at most. But if you want to do highly detailed, relatively deep engravings for an object that will have to endure a great deal of handling and wear, it is going to take a long, long time. Let me show you what I mean. Here’s a 30 second clip of it engraving a coin:
See what I mean? When I was doing those coins I’d load up 6 of them in the jig, start it going and then go do something else for an hour and a half or so. All those videos you see on Youtube of people doing deep, intricate engravings in just a few seconds? Sorry, just isn’t happening. Those videos are speeded up enormously. Until you get into lasers in the $4.000+ range you can plan on waiting a long, long time to do a deeply engraved, intricate design on something like a coin.
The other thing I want to talk about is that there has been a huge amount of hype with the Lumos and other IR laser engravers about being able to do color engravings on metal, usually showing you pictures like the one over there on the left. If you follow some of the “reviewers” and “creators” or whatever on Youtube, you’ve been led to believe it’s that it is wildly popular with customers, and that it is easy to do stuff like this. It isn’t. IMO it is mostly an interesting gimmick and I had a hell of a time trying to get it to work consistently.
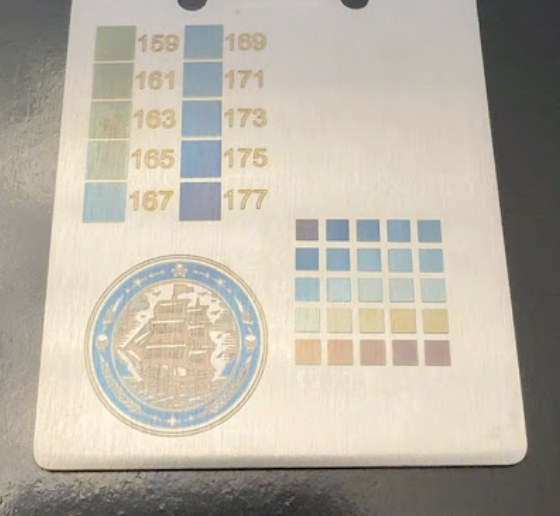
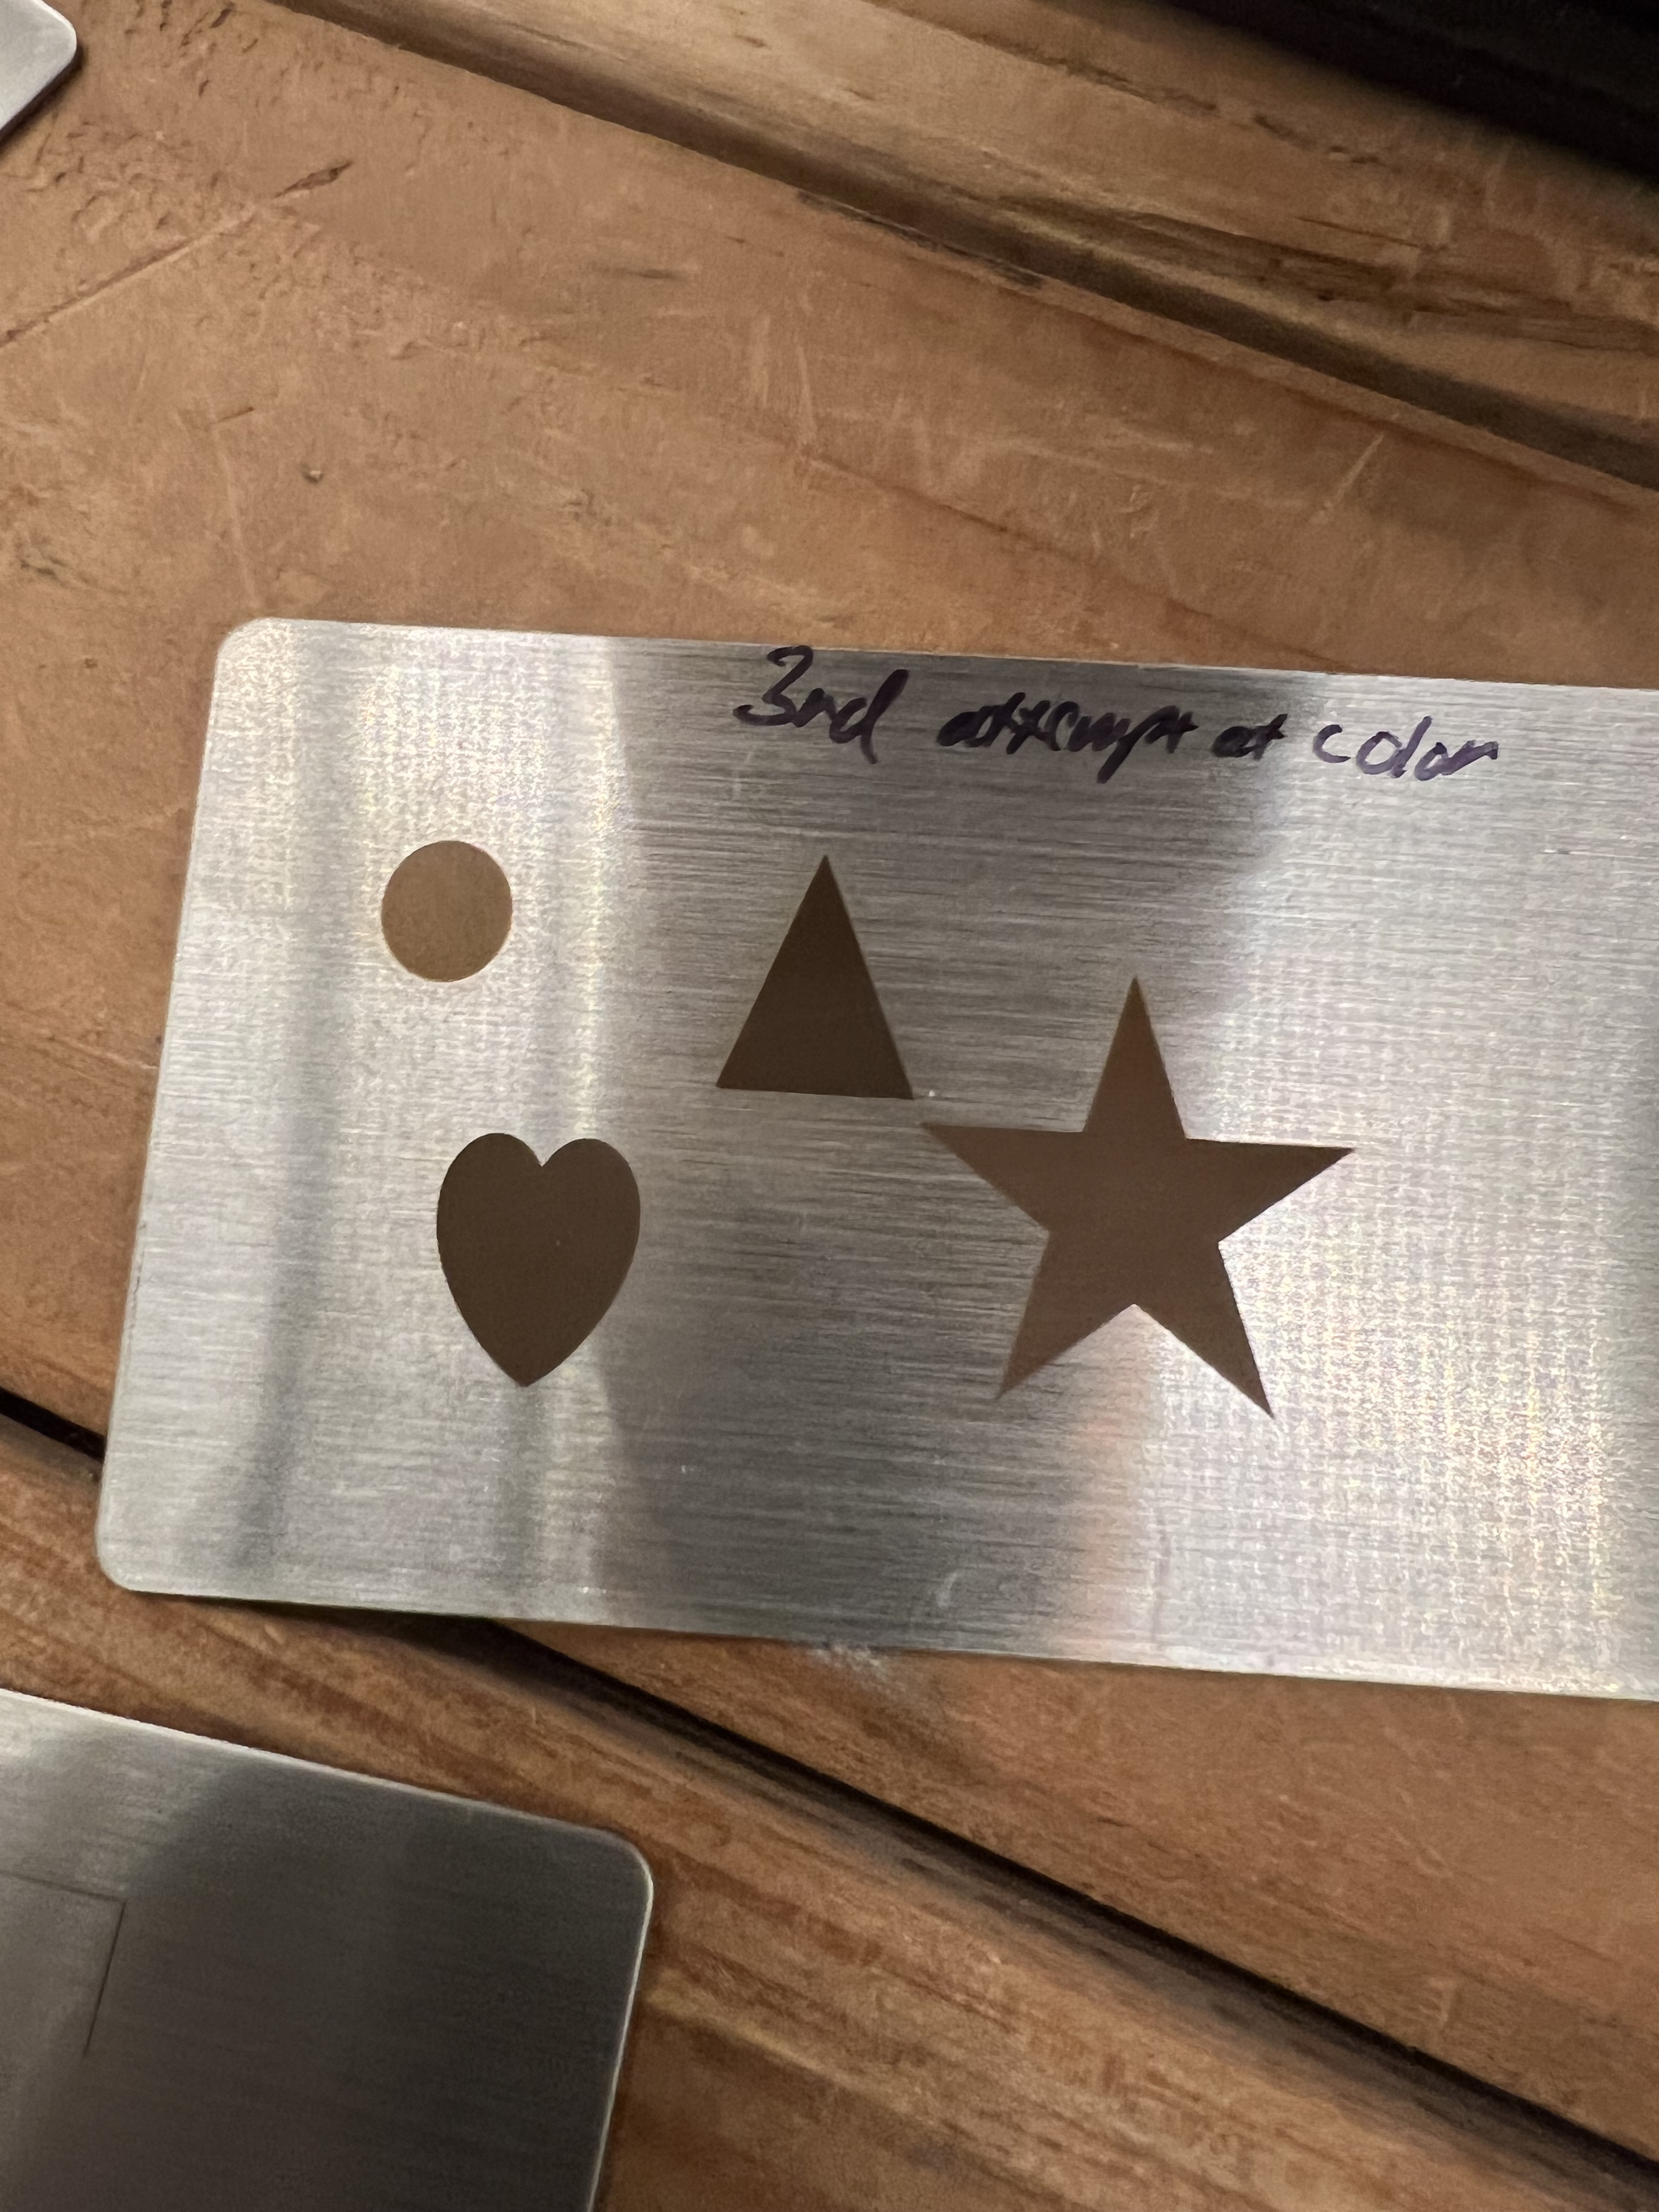
I have gotten this to work and one of my successful experiments is up above. But I burned through a dozen or more of those stainless steel cards before I got results like that. And even that simple design took something like 20 minutes to crank out. More often than not, my attempts to get color turned out looking more like the image over there on the left. Lots of dull browns and grays.
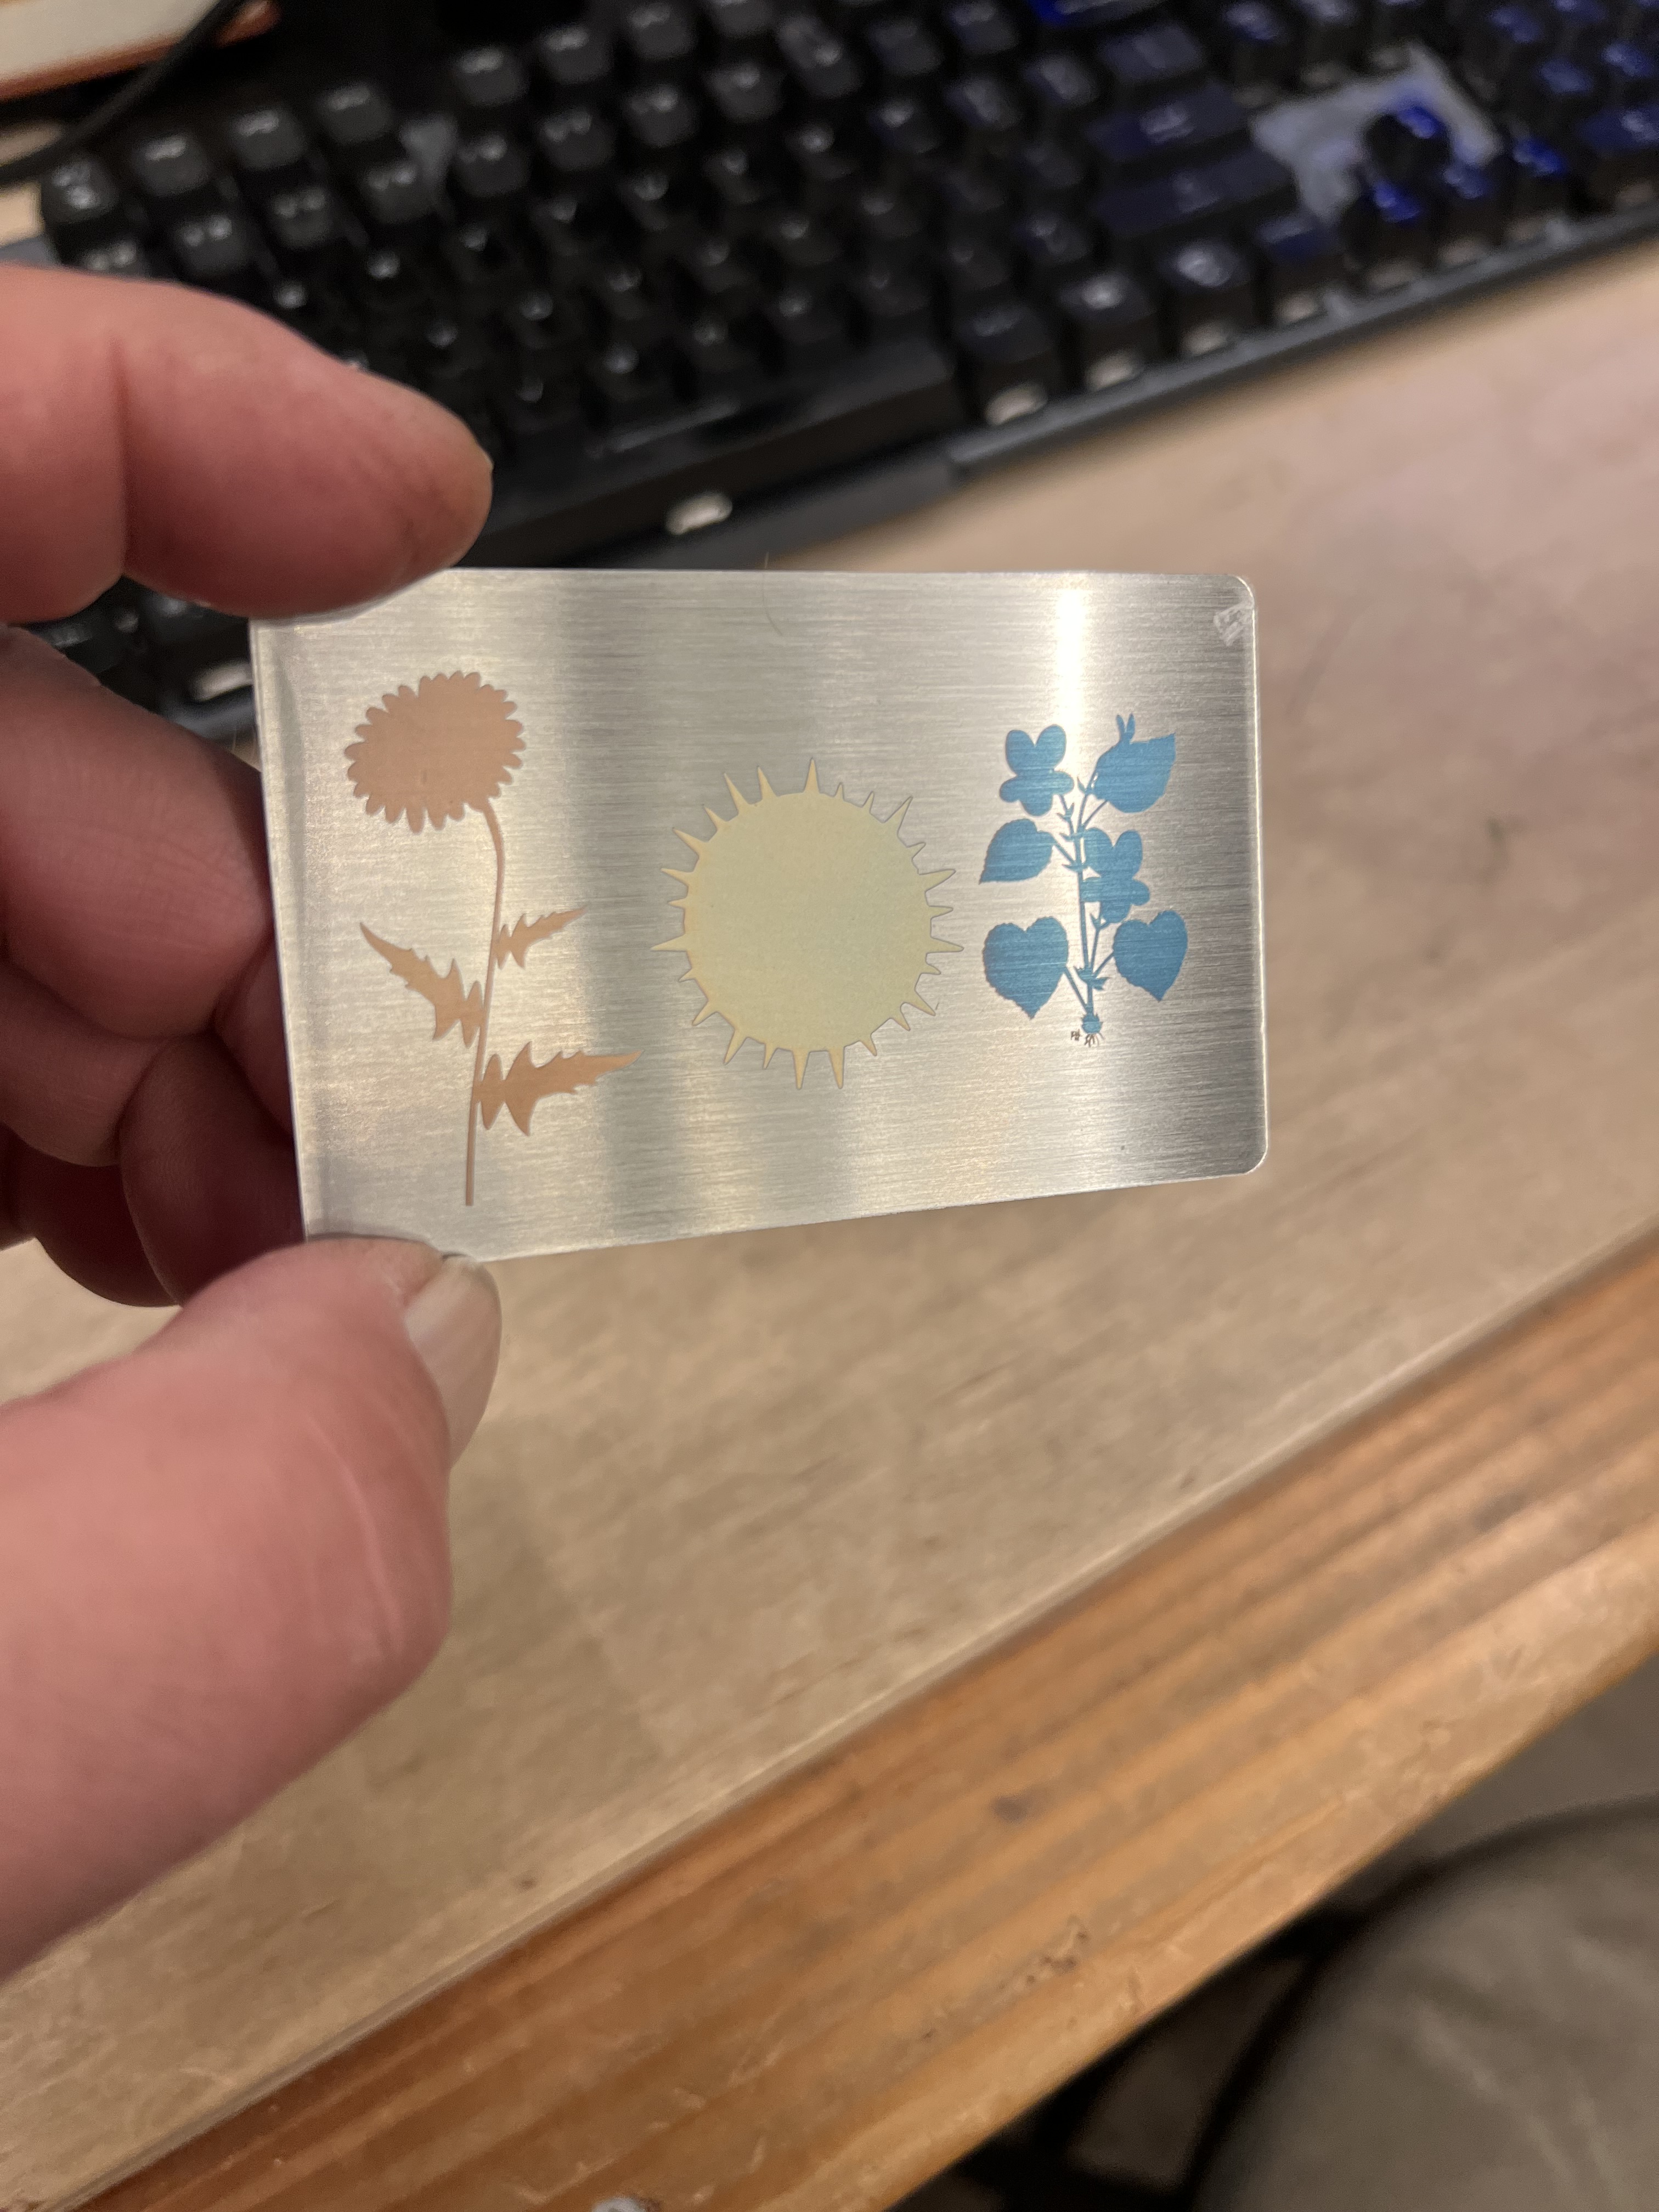
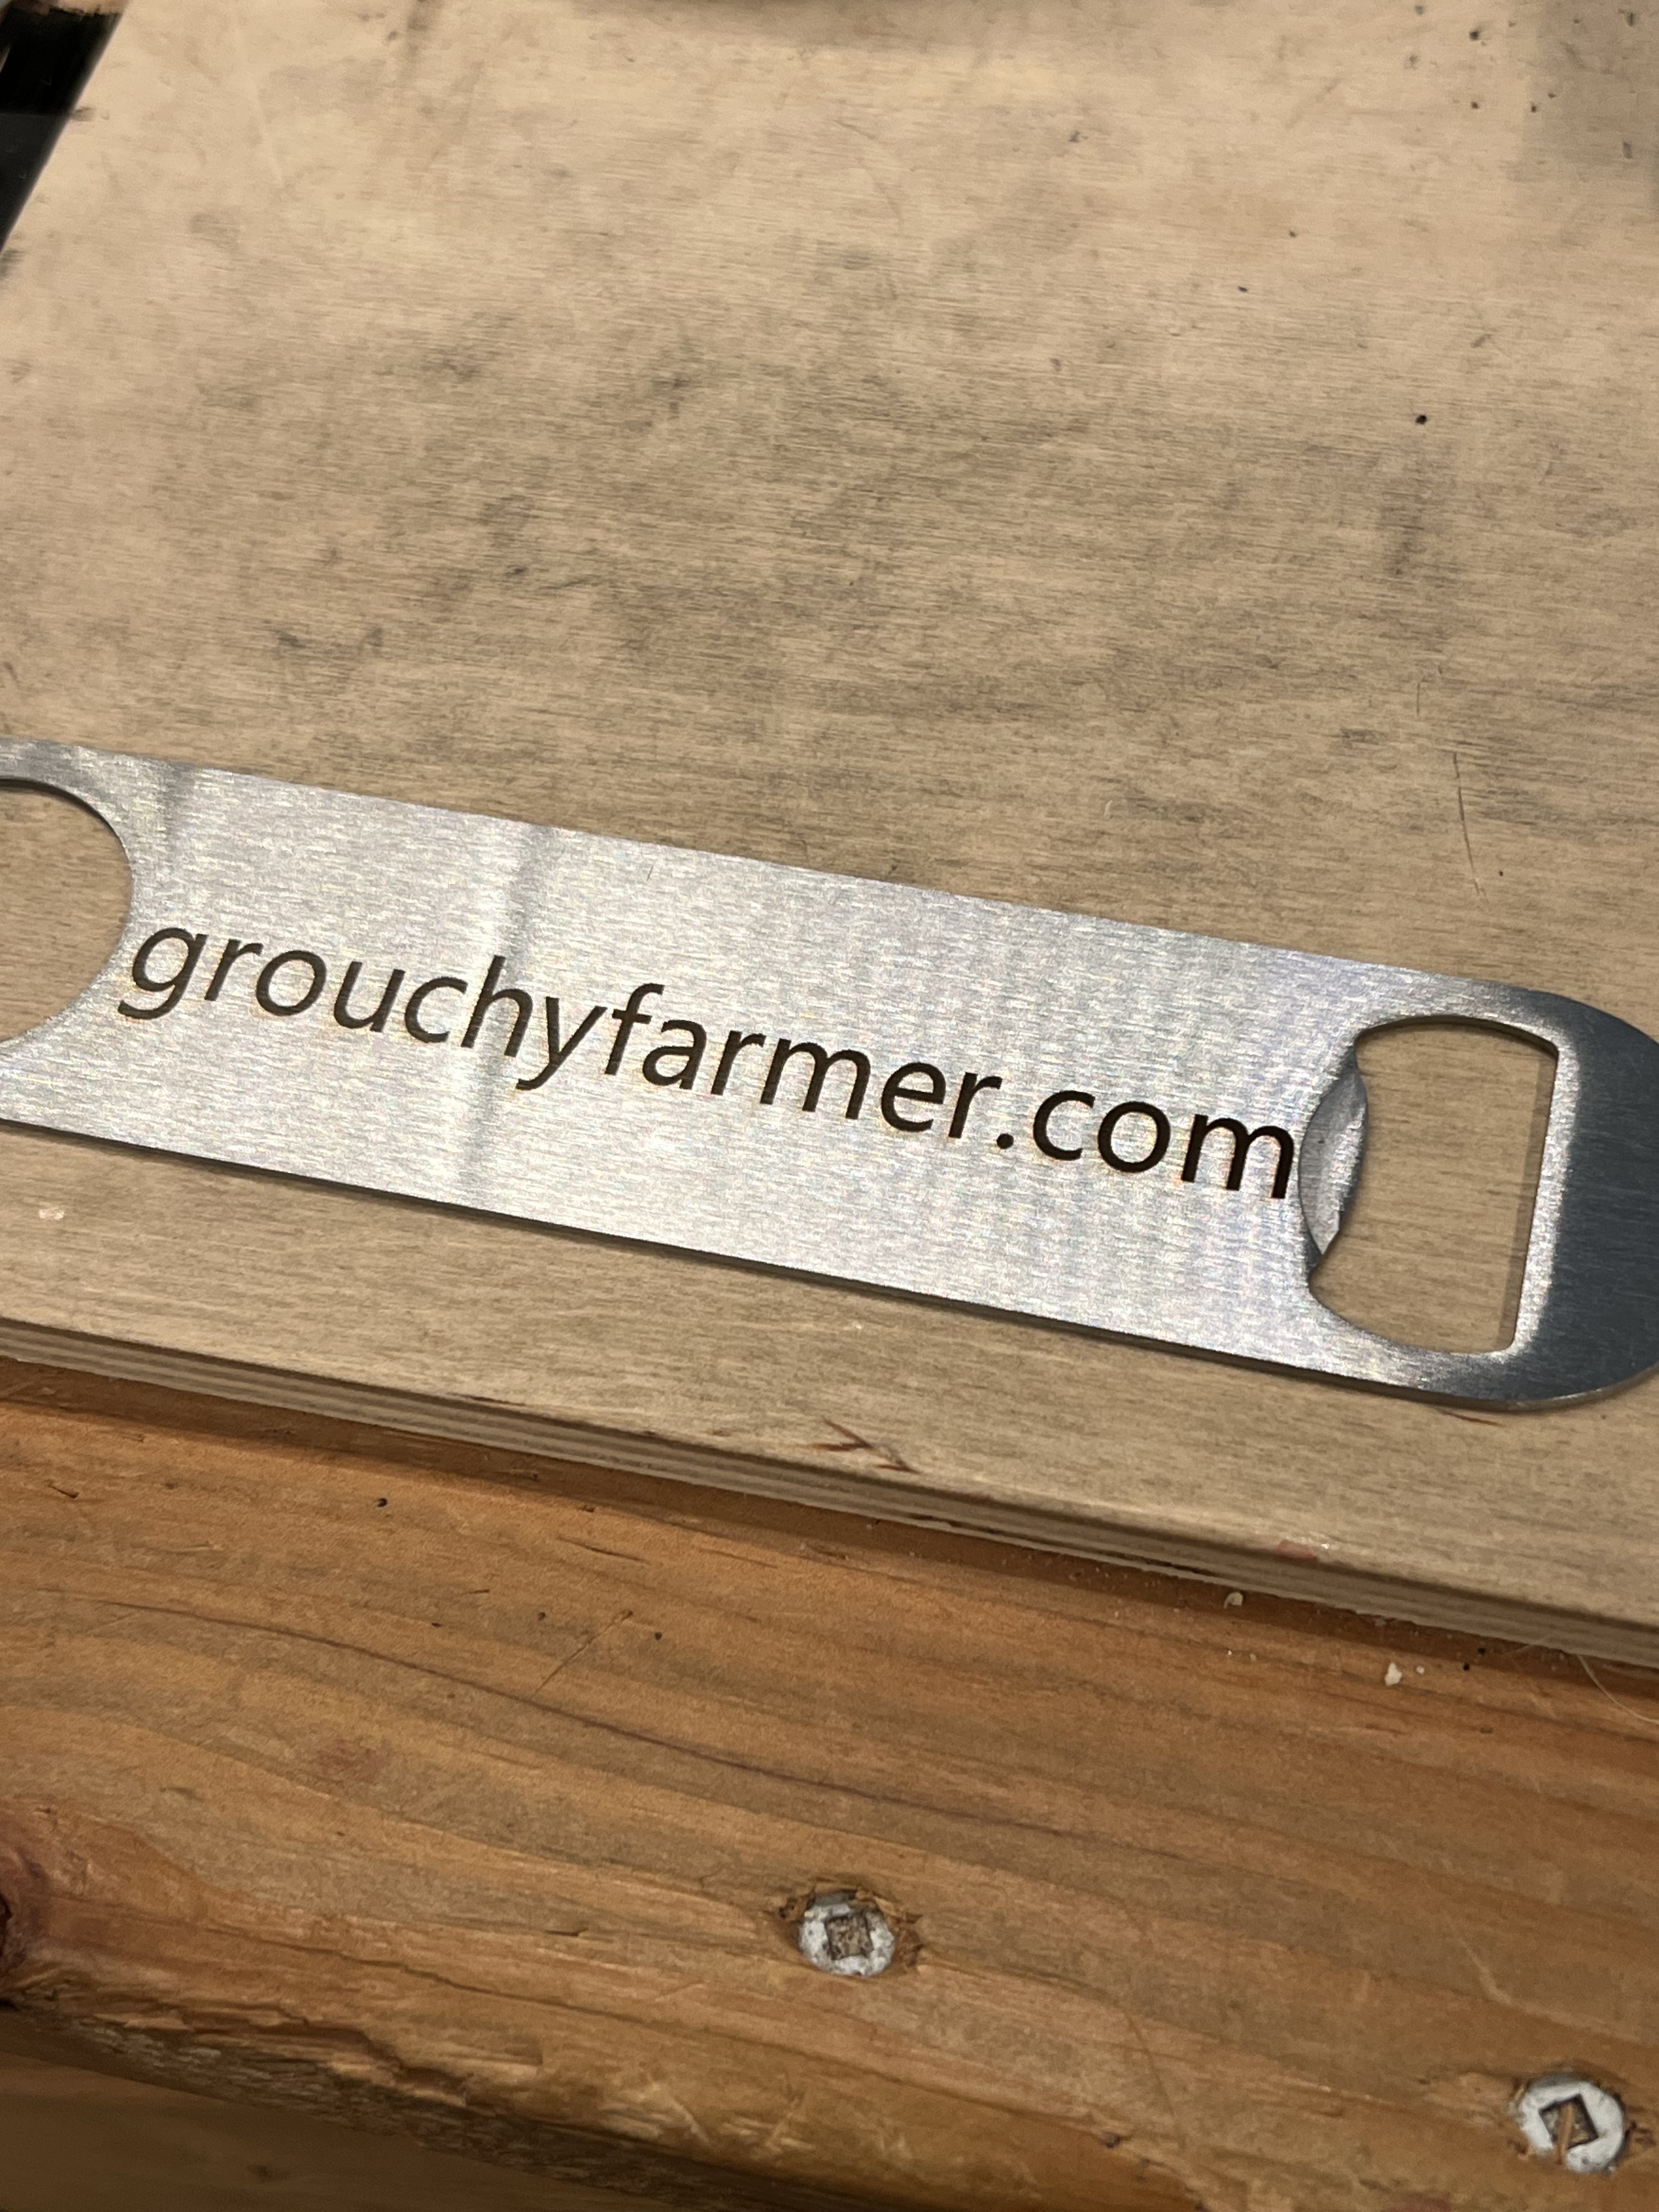
And even more interesting is that these brushed stainless steel cards and a brushed stainless steel bottle opener I had laying around from another job were the only pieces of metal I was able to do this with. Every other attempt using brass, aluminum, copper, and even other pieces of stainless steel were complete failures.
Perhaps I’m doing it wrong, perhaps I don’t really understand how it works well enough to get decent results, but my experiments with getting color have not been encouraging.
And when they have worked the results were never as brilliant as the ones I’ve seen in the ads and reviews, and the process took so long that it wasn’t worth the effort. If you’re doing this as a hobby and aren’t under any kind of time pressure, hey, it’s fun to play with. But if you’re trying to crank out products for sale? The color effects aren’t as brilliant in real life as they appear in the videos. You need to put some kind of clear coat over the top or it will start to fade and even corrode (yes, even stainless steel will corrode over time). And even worse it takes so long to do that I don’t see how this would be cost effective for commercial production.
So let me sum this up. The Lumos is a great little laser. It’s fast, compact, does a nice job. The resolution is excellent. It’s much, much faster than my Falcon. And the price isn’t bad at all. I just saw that it’s down to around $1,000 now, $200 less than mine cost me.
There are definitely disadvantages to lasers of this type, however. There is the small size of the working area, for example. There is the issue of fires to deal with if you’re going to try to cut material with it. I’ll come to that in a minute. When engraving metal it can be very slow. But otherwise I like it a lot and it gets used here constantly.
The Problems
Does it have “issues”, as they say? Definitely.
Let’s talk about fires. Yes, actual, real fire. Whenever you’re using a laser on flammable materials like wood, paper, fiberboard, etc. there is always a danger of fire. This is especially true with galvo style lasers which lack the air assist capabilities that most modern gantry style lasers have.
When trying to cut flammable materials the Lumos can and will start things on fire. It has a built in fire detection system that will shut down the laser, but that’s all it can do, shut off the laser. The burning material will continue to burn until you put it out.
This isn’t the really the fault of the Lumos, it’s just the nature of the beast, as they say. With the Falcon, because it has air assist, I can hit a piece of plywood at full power to cut through it without much risk because the air assist prevents charring and blows out any fires. But that’s not the case with the Lumos. The only way I’ve found to reduce the risk of fire is to use lower power and multiple passes. While it can cut thin wood, etc. this is not the kind of laser you want if you’re going to be cutting a lot of flammable materials.
Sidenote: Smoke and fumes are always an issue with lasers. The smoke and fumes generated from using lasers with almost any material is dangerous and can be highly toxic. Plus, of course, it will set off every smoke detector in your house. The Lumos has a very powerful extraction fan that blows into a large flexible pipe that you can either shove out a window or attach to an extraction fan, like I do. Or you can feed it into a filtration system of some sort. But you absolutely have to do something to deal with the fumes. Unlike other lasers I’ve worked with, the extraction fan on the Lumos is powerful enough that it does a reasonably good job even with the cover open.
As long as I’m on the subject of safety I need to talk about the dangers of laser light to your eyes. Exposure to laser light or radiation can and will damage your eyes. Most of these modern lasers come with some sort of enclosure that has plastics that block dangerous levels of laser radiation. But in the case of the Lumos it is necessary to operate it with the shield raised up in order to use the sliding table or the rotary tool. So you are absolutely going to need eye protection. And unlike every other laser I’ve bought, the Lumos doesn’t come with any. No glasses, no goggles, nothing.
Unless you already have safety glasses, you’re going to need to go buy some if you’re going to use the Lumos with the shield up.
Other things… As I said before I don’t like how the rotary tool attaches to the frame. It bolts not to the actual frame of the Lumos but to the small removable plate that’s inset into the base. That means the rotary tool can be tippy, which is something you absolutely do not want. It’s also very awkward to try to get those fiddly little screws attached to the base. They really need to come up with a better way of attaching it.
My biggest complaint about the Lumos isn’t the hardware, though, it’s the Wecreat software that comes with it. The software has a lot going for it, especially if you’re a “member” or whatever they call it and the AI functions become active. (I suspect that they’re going to demand I pay some kind of subscription fee once my initial membership expires to keep the AI functions working. At this point I’m not sure if that’s going to be worth the expense or not.)
The AI functions are actually quite good. It can generate complete images based on whatever you type in, and it does a reasonably good job of it. The AI can help to “process” imported photos to help get better results as well.
The software does everything it needs to do, pretty much, but it is unnecessarily awkward to work with. Different functions and settings that should all be gathered into one place are scattered all over in different pop up windows and menus for no rational reason I can come up with.
The font search for the text tool doesn’t seem to work at all. I could type in the exact name of a font exactly as listed in the list, and it couldn’t find it. I’d have to scroll through an apparently endless list of fonts to find the one I wanted.
The materials settings were even more frustrating. You can bring up a list of materials and when selected it’s supposed to change the engraving/cutting settings to the ideal settings for that material. This is a common feature with the software that comes with most of these lasers these days. Only absolutely none of the recommended settings actually worked. None of them. I found myself suspecting they just copy and pasted the settings from a different one of their engravers and never bothered to see if they actually worked.
I ended up wasting a hell of a lot of material just experimenting to try to figure out the ideal settings for the materials I was using. If I went with what the software recommended, I’d get results that were so light they were almost invisible or, even worse, that literally started the material on fire.
Copy/paste of objects between different work spaces doesn’t work at all. Select an object in your currently active work space. Create a new work space and click “paste” and… nothing.
The most irritating thing I found with the software is that it doesn’t let you save your designs in any format other than Wecreat’s own proprietary format. You can work for hours designing a nice engraving, and then you can’t save it in a format that will work with a different laser. Even the Falcon from Crealty lets me export a design in .SVG format so it could be used elsewhere.
I’m hoping that a future version of the software fixes this. But at the moment anything that I design in the Lumos software can only be used with one of Wecreat’s lasers, it seems. Be aware of that if you do your own designs. If you only work in the Lumos’ software, you’re locked in. If you get another brand of laser or Wecreat goes out of business, all of the work you put in designing those engravings is going to be lost.
This isn’t a big deal for me because I do almost all of my design work in Photoshop or Adobe Illustrator. Then I export it to a .PNG or .SVG file and import that into the Wecreat software for actual use. But a lot of people, especially hobbyists, don’t have access to those tools and depend on the software that the laser comes with. If you use the Wecreat software to design engravings, you’re locked to the company. If the company goes out of business or if you want to switch to a different brand of laser, at the moment there seems to be no way to move your work over to a different machine.
Supposedly the Lumos is compatible with Lightburn, which is more or less the software package that most professionals and serious hobbyists use these days. I don’t have Lightburn and I’ve never felt a need to get it. I’m quite comfortable using the tools I already have to do basic design work and then import it into whatever software the laser I’m using comes with. However, if you’re planning on doing laser engraving for actual production work for a business, it is something you should look into.
And that’s about it. If I come up with anything interesting in the future while I’m working with this laser I’ll keep you informed.
I know it’s been ages since I wrote anything here but that’s because it’s been crazy busy here at grouchyfarmer.com’s palatial headquarters. The gardens were spectacularly prolific this year and dealing with all of that has been a struggle for me and MrsGF. It’s October 4 as I write this, it is 91(F) degrees out there, and we’re still harvesting peppers and tomatoes. Plus the brussel sprouts are now starting to come on strong and we have something like 15 big butternut squash ready to pick that we’re going to need to deal with.
We’ve given up trying to process the stuff ourselves. We ran out of freezer space and canning jars long ago. We’ve been giving it to two or three of the local food pantries and they’ve been very grateful to get the stuff. The food pantries have been struggling to keep up with demand over the last few months as it is, and because of recent funding cuts the demand has only been increasing. We took about 40 lbs of tomatoes to one pantry and about 15 pounds of jalapeno and bell peppers and our friend who volunteers there said it was all gone within a couple of hours.
Still the end is here for both the tomatoes and peppers. We’re going to do one last picking of both and then the plants are going to get yanked. The tomatoes stopped blossoming some time ago and the existing fruit is almost done developing. The peppers are still flowering somehow but have slowed down to where there’s no point to keeping it going. We’re going to wait until the weather cools down a bit before we tackle all of that though.
Speaking of weather, it has been seriously strange. It’s the first week of October. It should be in the low 50s at the most, with temperatures getting down close to freezing or even a bit below that this time of year. Instead we’ve been locked in this streak of hot weather for weeks now with daytime highs pushing well into the 80s or more. Normally we might get a few days of warmer weather this time of year, but not this warm and not for this long.
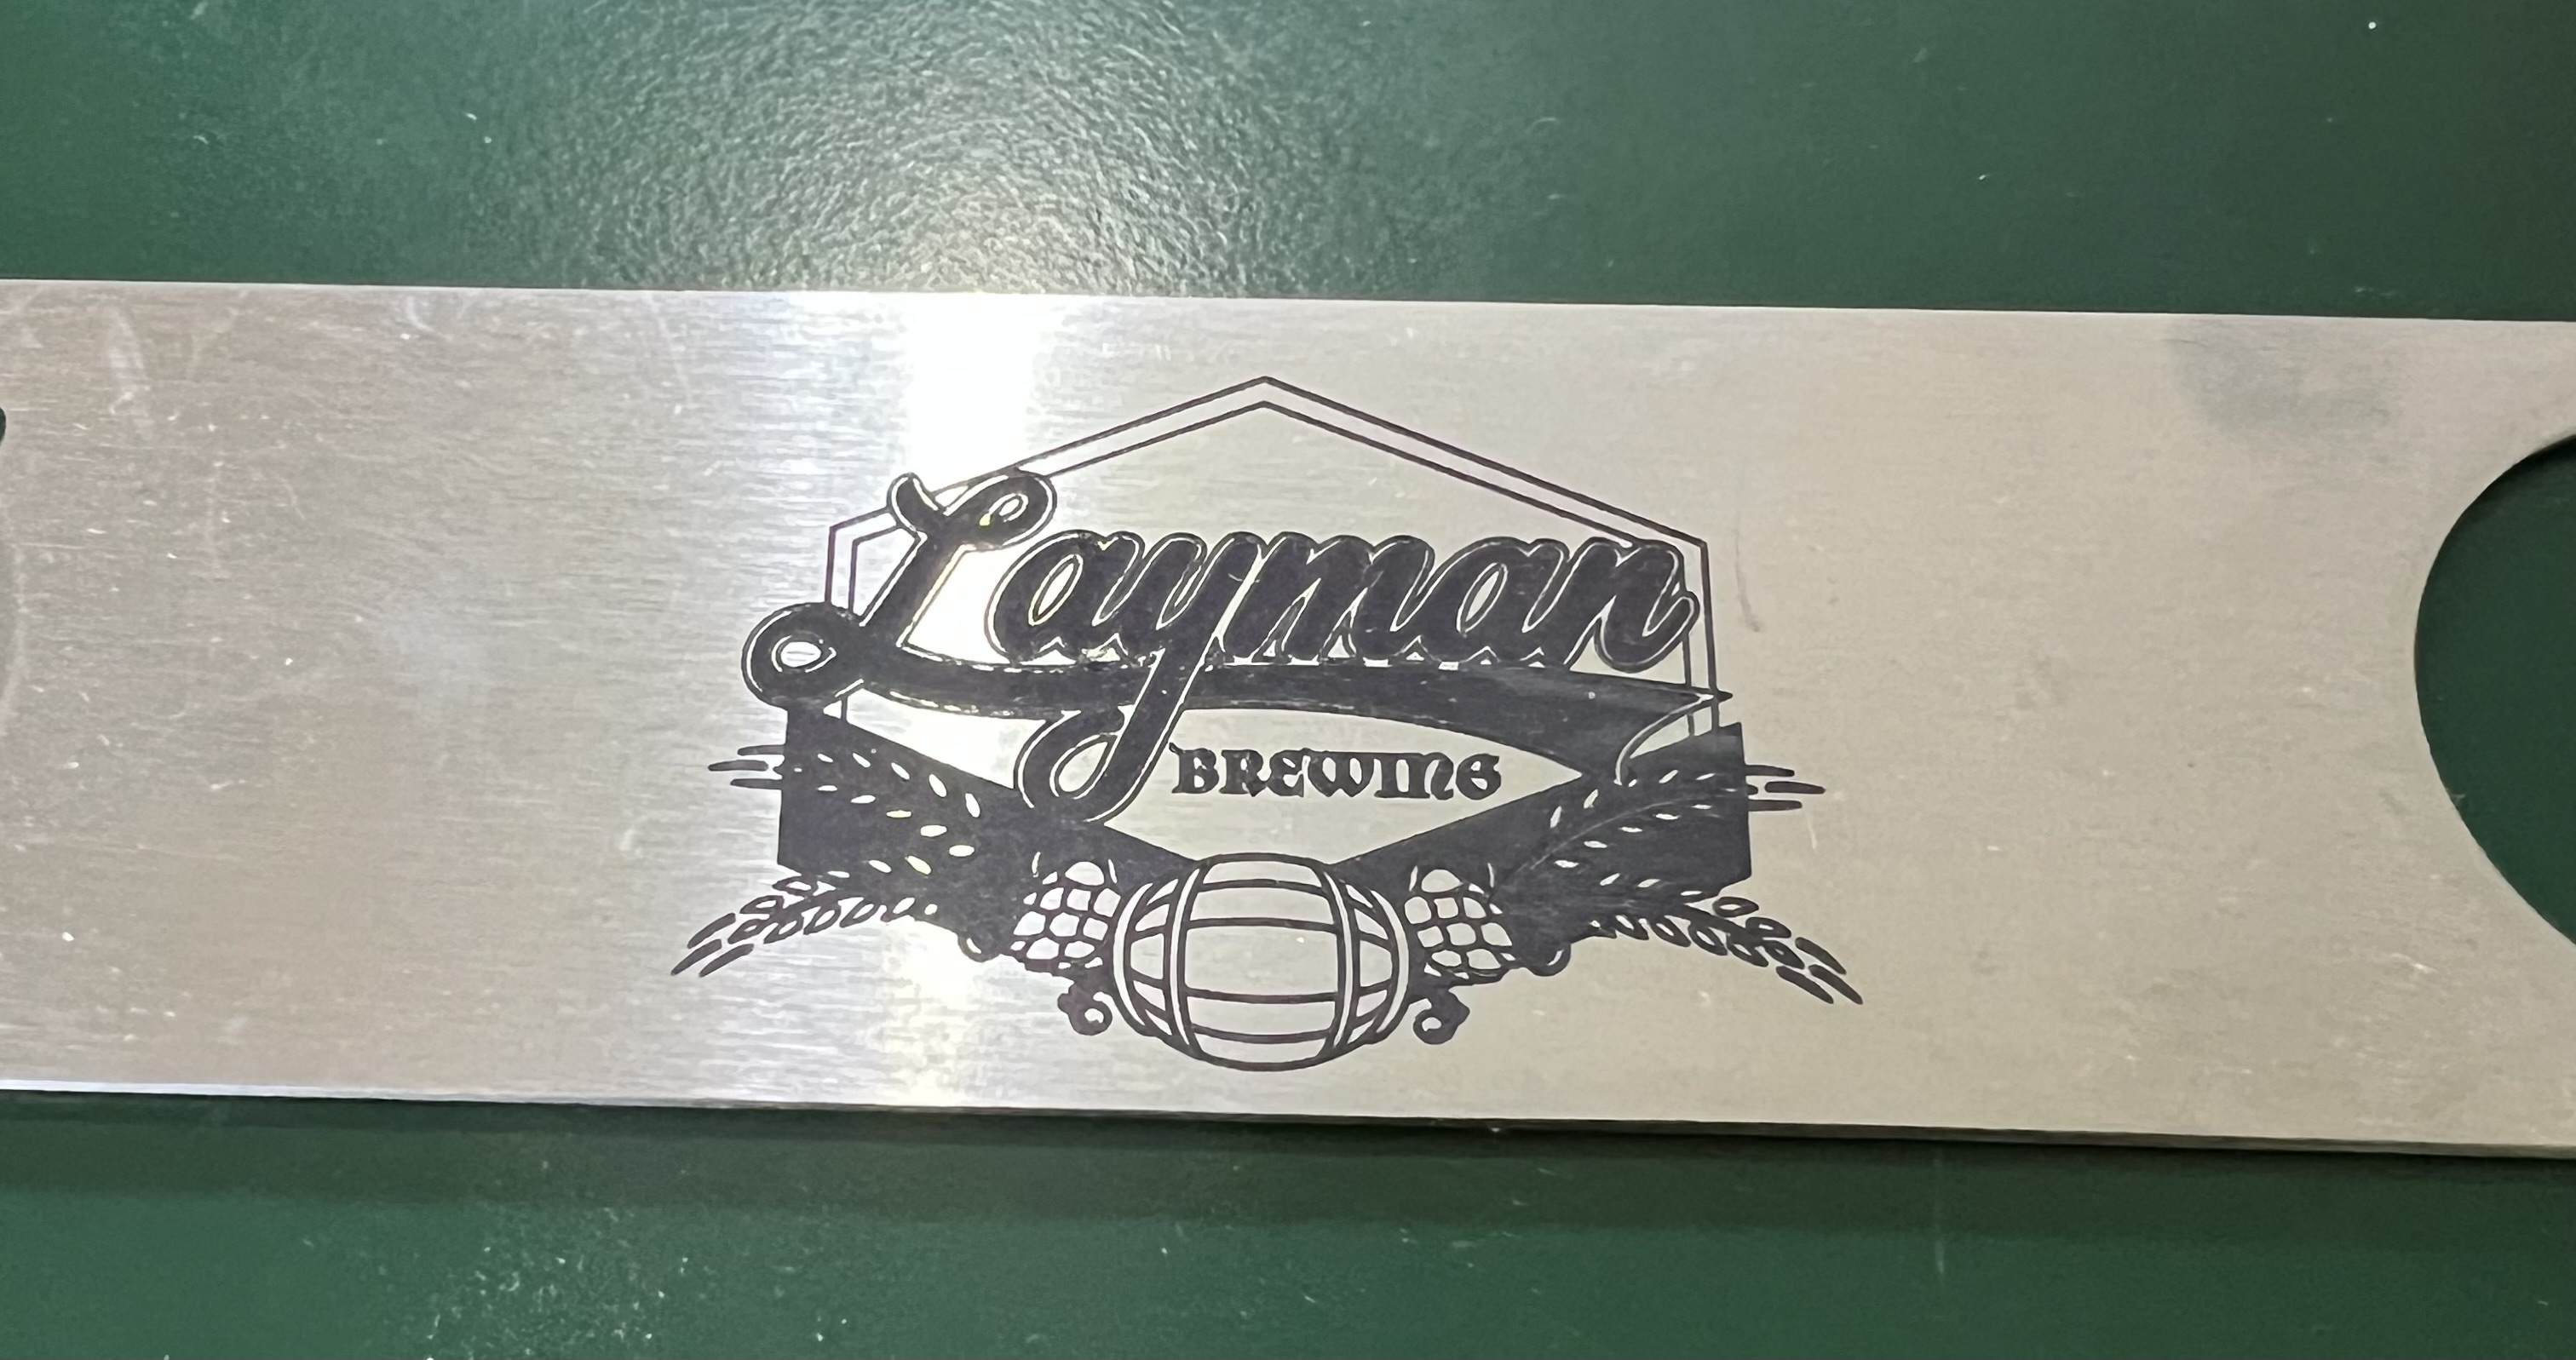
When I haven’t been puttering in the garden I’ve been busy cranking out a whole new line of hopefully amusing drinks coasters and re-drawing the artwork on the old ones to reprint some of those. Looking at the artwork on some of those first ones I made makes me wince today. So before re-printing any of those I’ve been cleaning up the artwork or even re-doing it entirely.
I also have other stuff in the works, like engraving coins, making specialty tokens and quite possibly custom glassware and other goodies. Thanks in part to a new acquisition, that weird looking thingie over there on the left.
That’s a Wecreat Lumos 3W infrared and 10W blue diode laser that comes with a flatbed conveyer thingie and a rotating thingie that I have yet to play with but will hopefully get set up yet this weekend.
Ooo, it’s got a rotating thingie! Cam’t wait to play with that.
It definitely is not going to be replacing the Falcon laser engraver/cutter. This one is entirely inappropriate for jobs I use the Falcon for. This one is going to be for specifically doing metal engraving and, hopefully glassware and jewelry.
Keep an eye out for a full blown review of the Lumos in the future. It is both enormously useful and great fun to use, and enormously frustrating at the same time. Which seems to be about par for the course for these things.
It’s main use here is for metal. Even as we speak it’s engraving “challenge coins” for a small scale production run. It’s not fast, true. I wouldn’t want to have to use this to try to crank out a significant number of items. But for a run of a dozen or so items it’s not too bad.
Anyway, more about that later as I said.
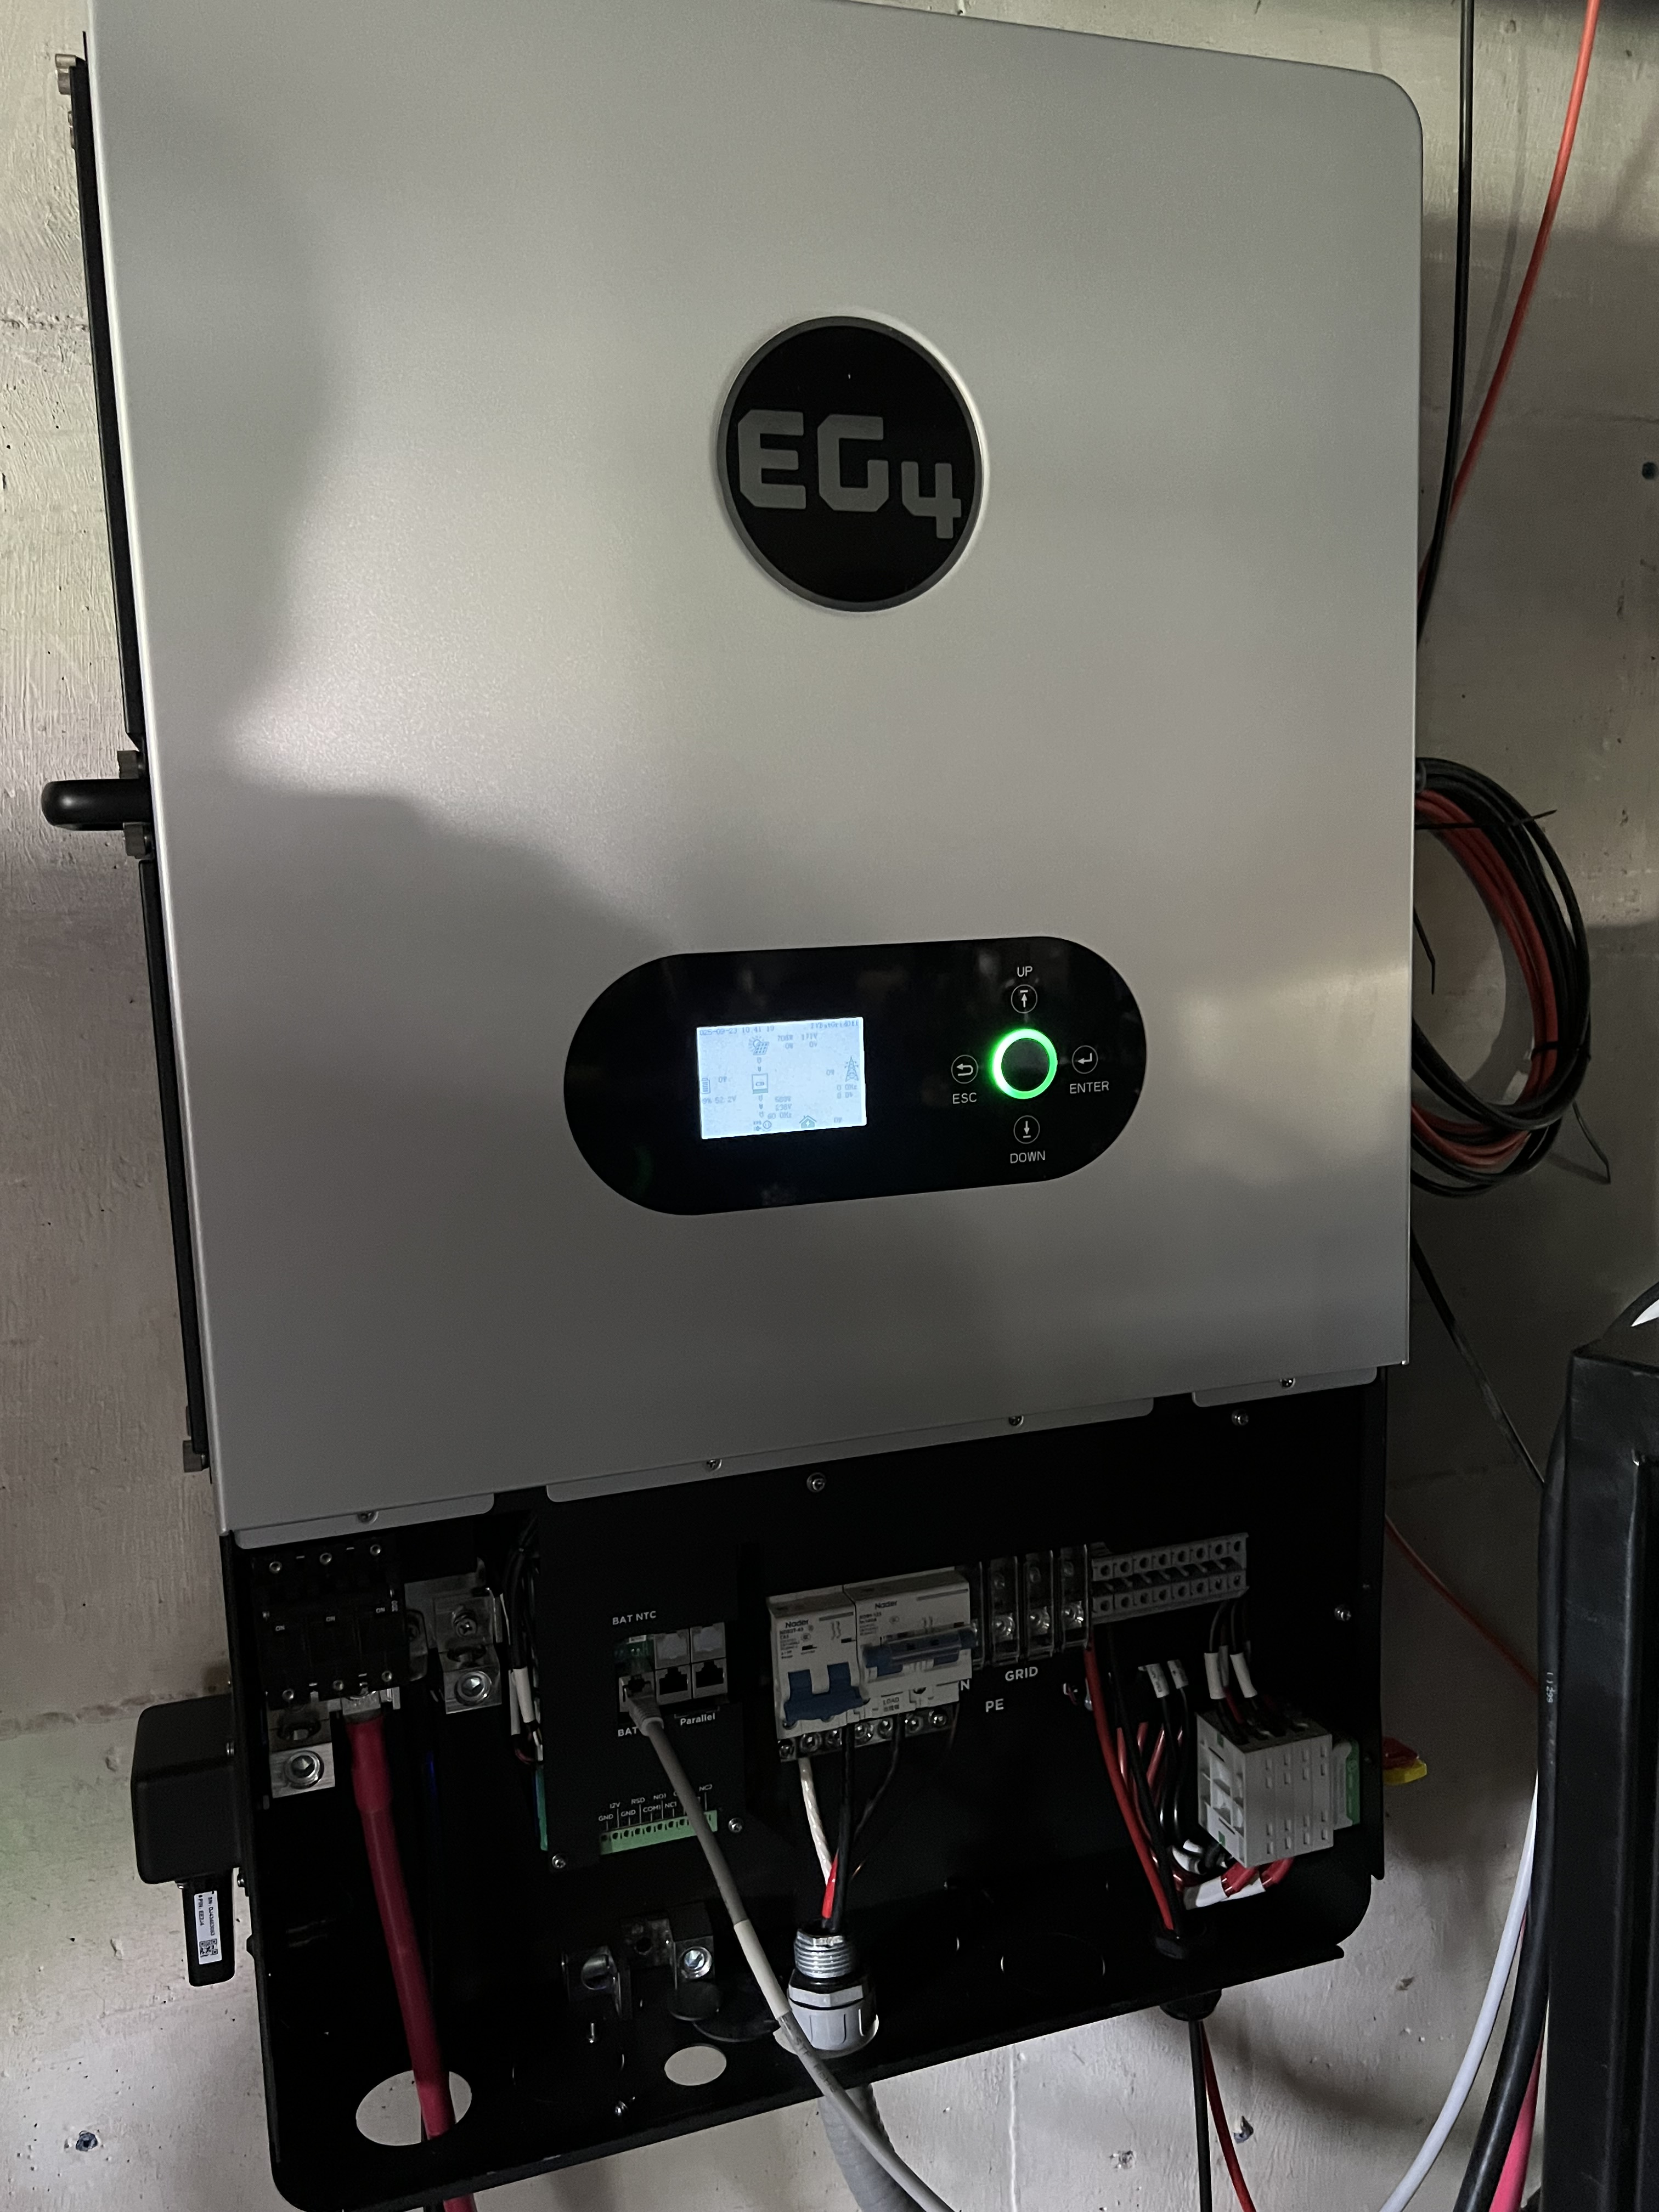
The new EG4 12000XP inverter is more or less installed and working just fine. It’s still in “testing mode” so to speak as you can see in the photo because we haven’t finalized the wiring. Those of you who are yelling at the screen about the wiring not meeting code and all of that, I probably know the NEC better than you do and I should point out that when that photo was taken we were still testing and hadn’t yet finalized the wiring. So before you launch into some kind of rant about it in the comments, just don’t.
There were some teething issues with the 12000XP, but they were minor. The first was it wasn’t “talking” to the batteries. That turned out to be a communications configuration error that was quickly corrected. The second was an odd glitch where the AC side would trip out with an overload error if there was power coming from the solar panels, and if the batteries were at 100% SOC an if there was an AC load of more than about 200W. And only if all three of those criteria were met. That turned out to require a software update and as soon as the firmware was updated it was working just fine indeed.
Now we just need to get the new solar panels up on the garage roof. They’ve been sitting in the garage since February waiting for eldest son to clear up some time on his calendar to work on it because MrsGF won’t let me do more than climb a step ladder after she caught up up that tree last spring stringing up an antenna.
And that’s about it for now. Thought I’d better post something to reassure the people who thought I was dead or something. Hopefully the Lumos review will be coming up in the near future.
If you look down towards the feed mill at the end of my street you’ll see all of the haze we’re dealing with at the moment. That’s smoke from the Canadian wildfires and it’s so bad at the moment that they’ve issued warnings that its unhealthy to even be outside. When I go outside it frankly stinks like a trash fire. Someone on television said that being outdoors right for a day would be the equivalent of smoking a whole pack of cigarettes. Judging from the way it looks, smells and feels out there, I would think that is not an exaggeration.
There’s not much we can do about it. We have the house closed up tight, with three room sized HEPA filters running full out and the furnace fans circulating the air in the house through its filters. I’d love to be outside at the moment. Temperature is around 72 degrees, ideal for things like gardening, riding the bike, etc. But I had a severe case of bronchitis and/or pneumonia (they never did figure out which it was, exactly) some time ago and ever since my lungs were never the same so when things get like this I stay in the house as much as I can.
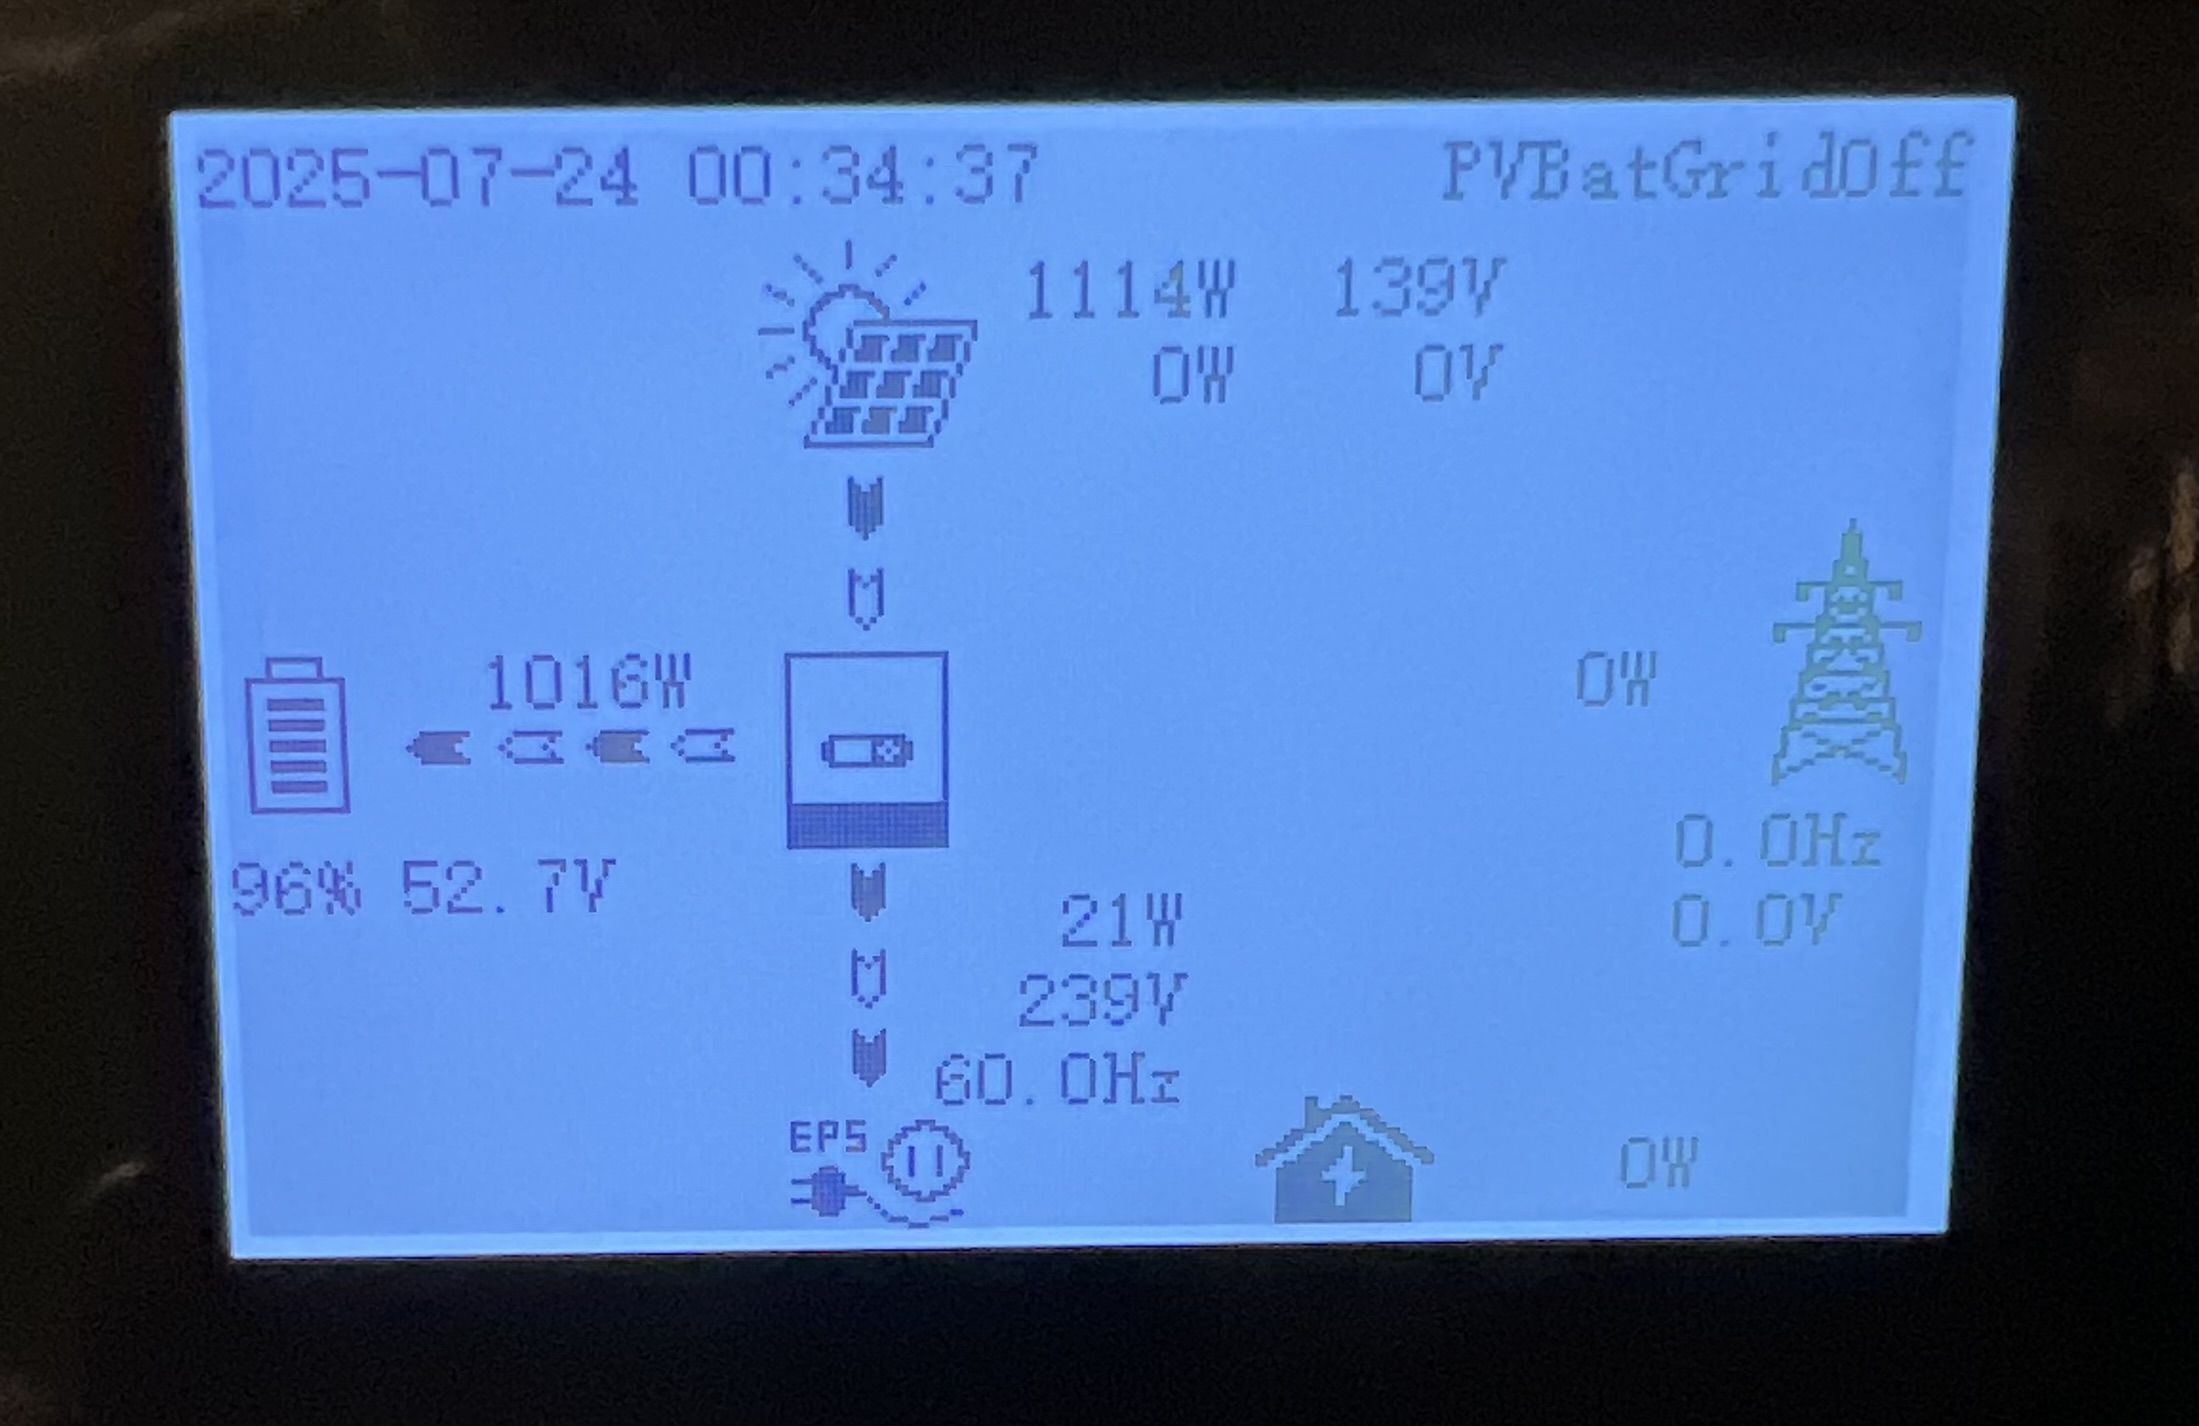
The EG4 12000XP is working nicely. Mostly. After getting the battery communications situation straightened out I have had a couple of curious issues with it that we’re working to resolve. More about that in a moment. Otherwise it’s been doing exactly what it’s supposed to do. In the photo above it’s hooked to a 2KW solar array. You’ll note that it’s only bringing in a little over 1 KW and that’s because of guess what? Yeah, the smoke. It’s amazing how the haze from the wildfire smoke causes solar production to plummet. Almost all of that power is going into the batteries in the photo up there because the house isn’t switched over to the inverter yet. The 21 W it’s currently showing is what the inverter itself uses.
I really like the display on this unit. It is so much easier to read and understand than the displays on the 6500EX units were. The 12000 shows pretty much everything I need to see right here on the main screen. With the 6500EX I had to scroll through a half dozen different screens to get the same information.
But the issues… Twice now I’ve had the inverter trip out with an “Overload” error message and my son and I are both scratching our heads over that because there was no overload of anything. At the time it tripped out the total load on it from the house was only around 2.5 KW total on both legs and this thing is supposed to be able to handle up to a 12KW load, 6KW on each leg. So what caused it to trip out?
I haven’t been able to do much experimenting with it because we’ve had so much cloudy weather of late. Hopefully I’ll be able to “exercise” it, so to speak, more fully once the weather clears up and we can track down what the problem is.
As you can see we’ve been harvesting onions and picking some of the young carrots. The onions are brought into the garage where they will be laid out on a screen for about two weeks to cure them. The curing process basically allows the outer layers of the onion to dry and harden which protects them from rot and mildew. They’re left to dry in a fairly warm, dry place for a couple of weeks to cure, then we pack them loosely into net bags and hang them from the ceiling in the basement for long term storage. If properly cured and then stored they can last for months.
We also just peel them, dice them up and freeze them for use later in sauces, chili, tacos, etc. The texture does break down and they get soft but the flavor is still there. We do the same thing with cilantro, freezing it in blocks in ice cube trays in either water or olive oil. That works out really well. When we’re making chili or tacos or something we just pull out a cube of cilantro and throw it in the pot with the rest of the ingredients.
My wife and I both love cone flowers. They’re in all their glory right now. They put on a double show for us. First when the come into flower like they are right now, and then in the fall after the flowers have faded and the finches go after the seeds. We’ll get dozens of goldfinches coming to feast on the seeds in the fall. And best of all, it takes us zero work and expense to grow them. enough seed falls to the ground that they re-seed themselves and they don’t require any work at all in the gardens. They’re even quite drought tolerant.
I’m very, very lucky to have a very nicely maintained trail network just a few miles from my house!
Someone asked if I was still going out on the bike and the answer is definitely yes. I just don’t bring it up much here because I figured people were getting bored with it. I try to put on 10 – 15 miles a day, three or four days a week, and about 5 miles the other three or four days.
I have one of those Garmin fitness tracker thingies with built in GPS. I tried one of those fitness tracker aps on my phone but most of them are worthless and the ones that actually worked reasonably well deluged me with non-stop spam trying to sell me subscriptions and I don’t know what all else. All I want is something that records milage, shows my route, and that’s about it.
It’s a Garmin Edge 130. It’s a tiny little thing that clips to the handlebars of the bike. It has a fairly small, black and white LCD screen that displays things like elapsed time, speed, etc. It’s handy little gadget if ridiculously pricy. I think the dopey thing goes for about $200 these days. That’s like twice what I paid for mine a couple of years ago. I’m not sure why the price has damn near doubled since then.
I am not recommending you get one. I honestly don’t think it’s worth $200. It pairs with an app on my iPhone that gives me all sorts of data that I really don’t give a fig about, to be honest. I don’t know why people obsess so much about things like calories burned, cadence, respiratory rates, hydration and all that guff. If I were in training for the tour de France yeah, I might care. But I’m just an old duffer who likes to know how far he’s gone and can show the wife a map of where I went so she doesn’t think I’m cheating and only getting as far as the local pub.
When I’m out in the country on the bike I might bop along at 10 – 14 MPH but it’ll take me two hours to do 10 miles because I’m constantly stopping to take photos. Every time I come across a cluster of flowers or some interesting looking plants or hear an unfamiliar bird call I’m stopping and looking and listening and photographing. When you run into clusters of flowers like those up there in that photo how can you not stop and look?
And I’m still experimenting with the Falcon laser. I’ve been fiddling around experimenting with doing inlay and other things. I was wondering if I could get a sort of stained glass effect by inlaying translucent acrylic into wooden outlines and that seems to actually work in the simple experiments I’ve tried. I’m also going to try combining it with another hobby of mine, making epoxy resin castings to make decorative panels. If anything comes of that I’ll let you know.
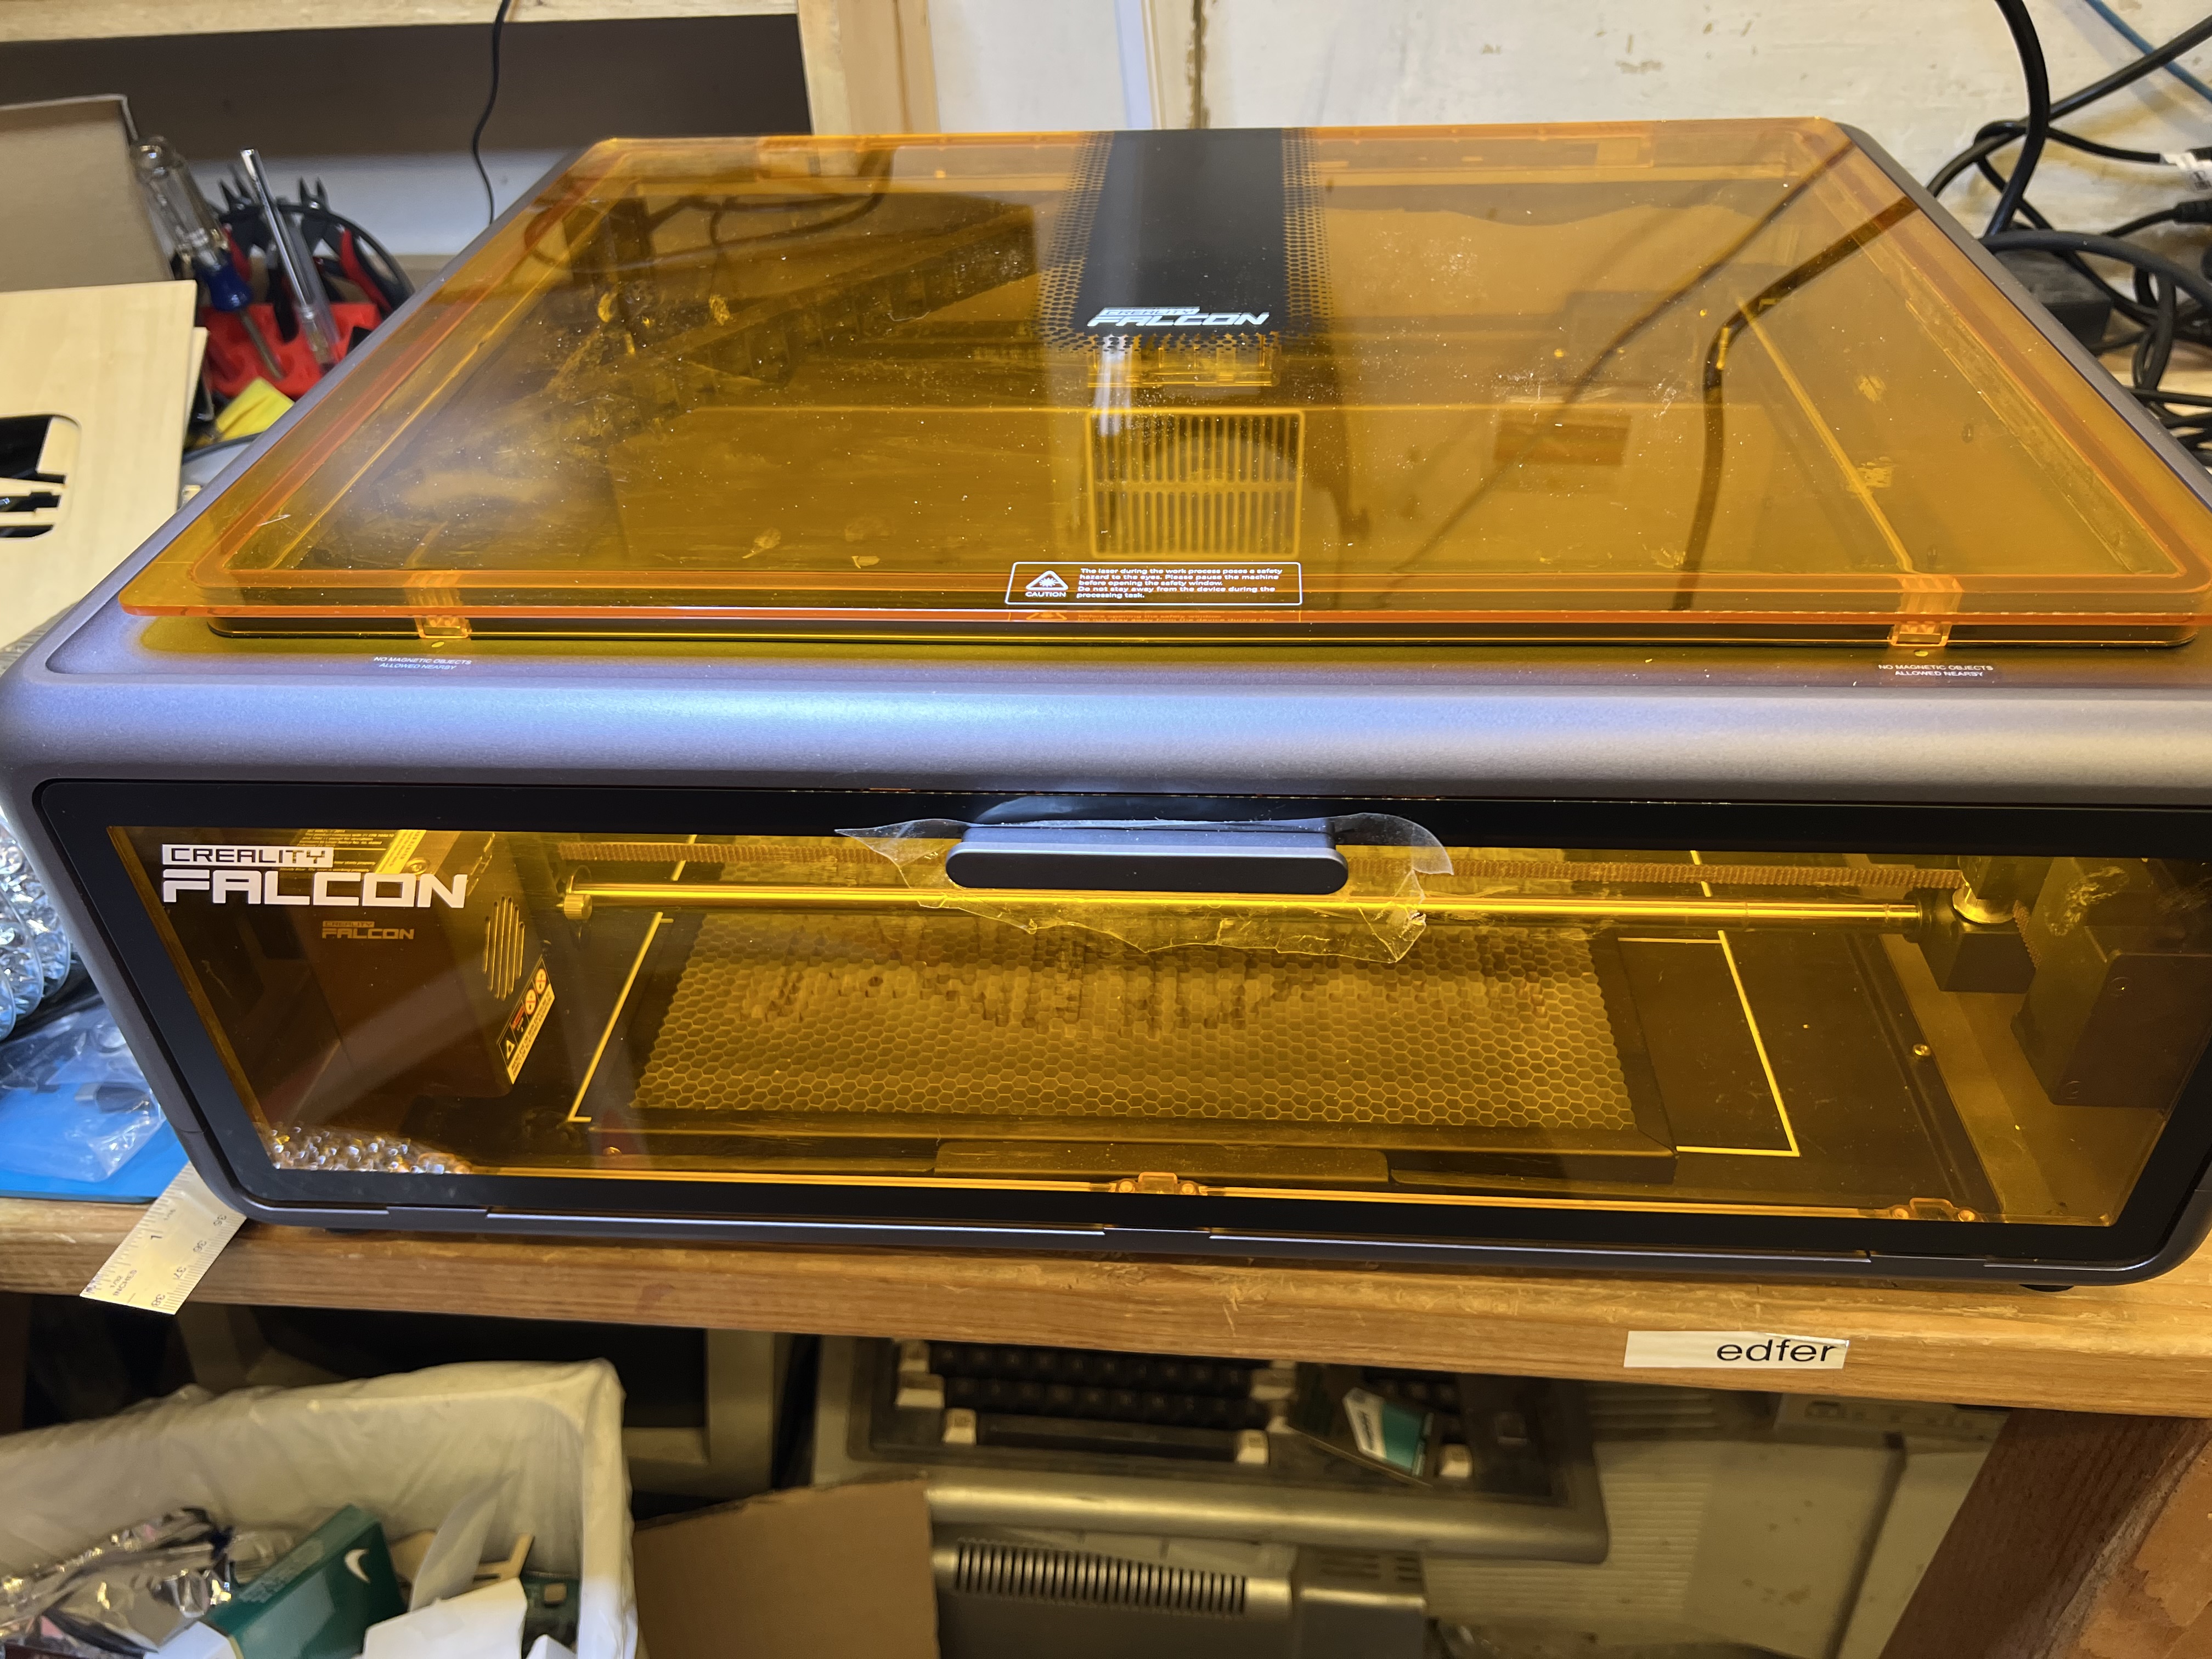
So I have this nifty new laser engraver, the Falcon A1. Let’s see what it can do and see if there are some interesting ways you could make money with one of these in the process.
Can I Laser a Rock?
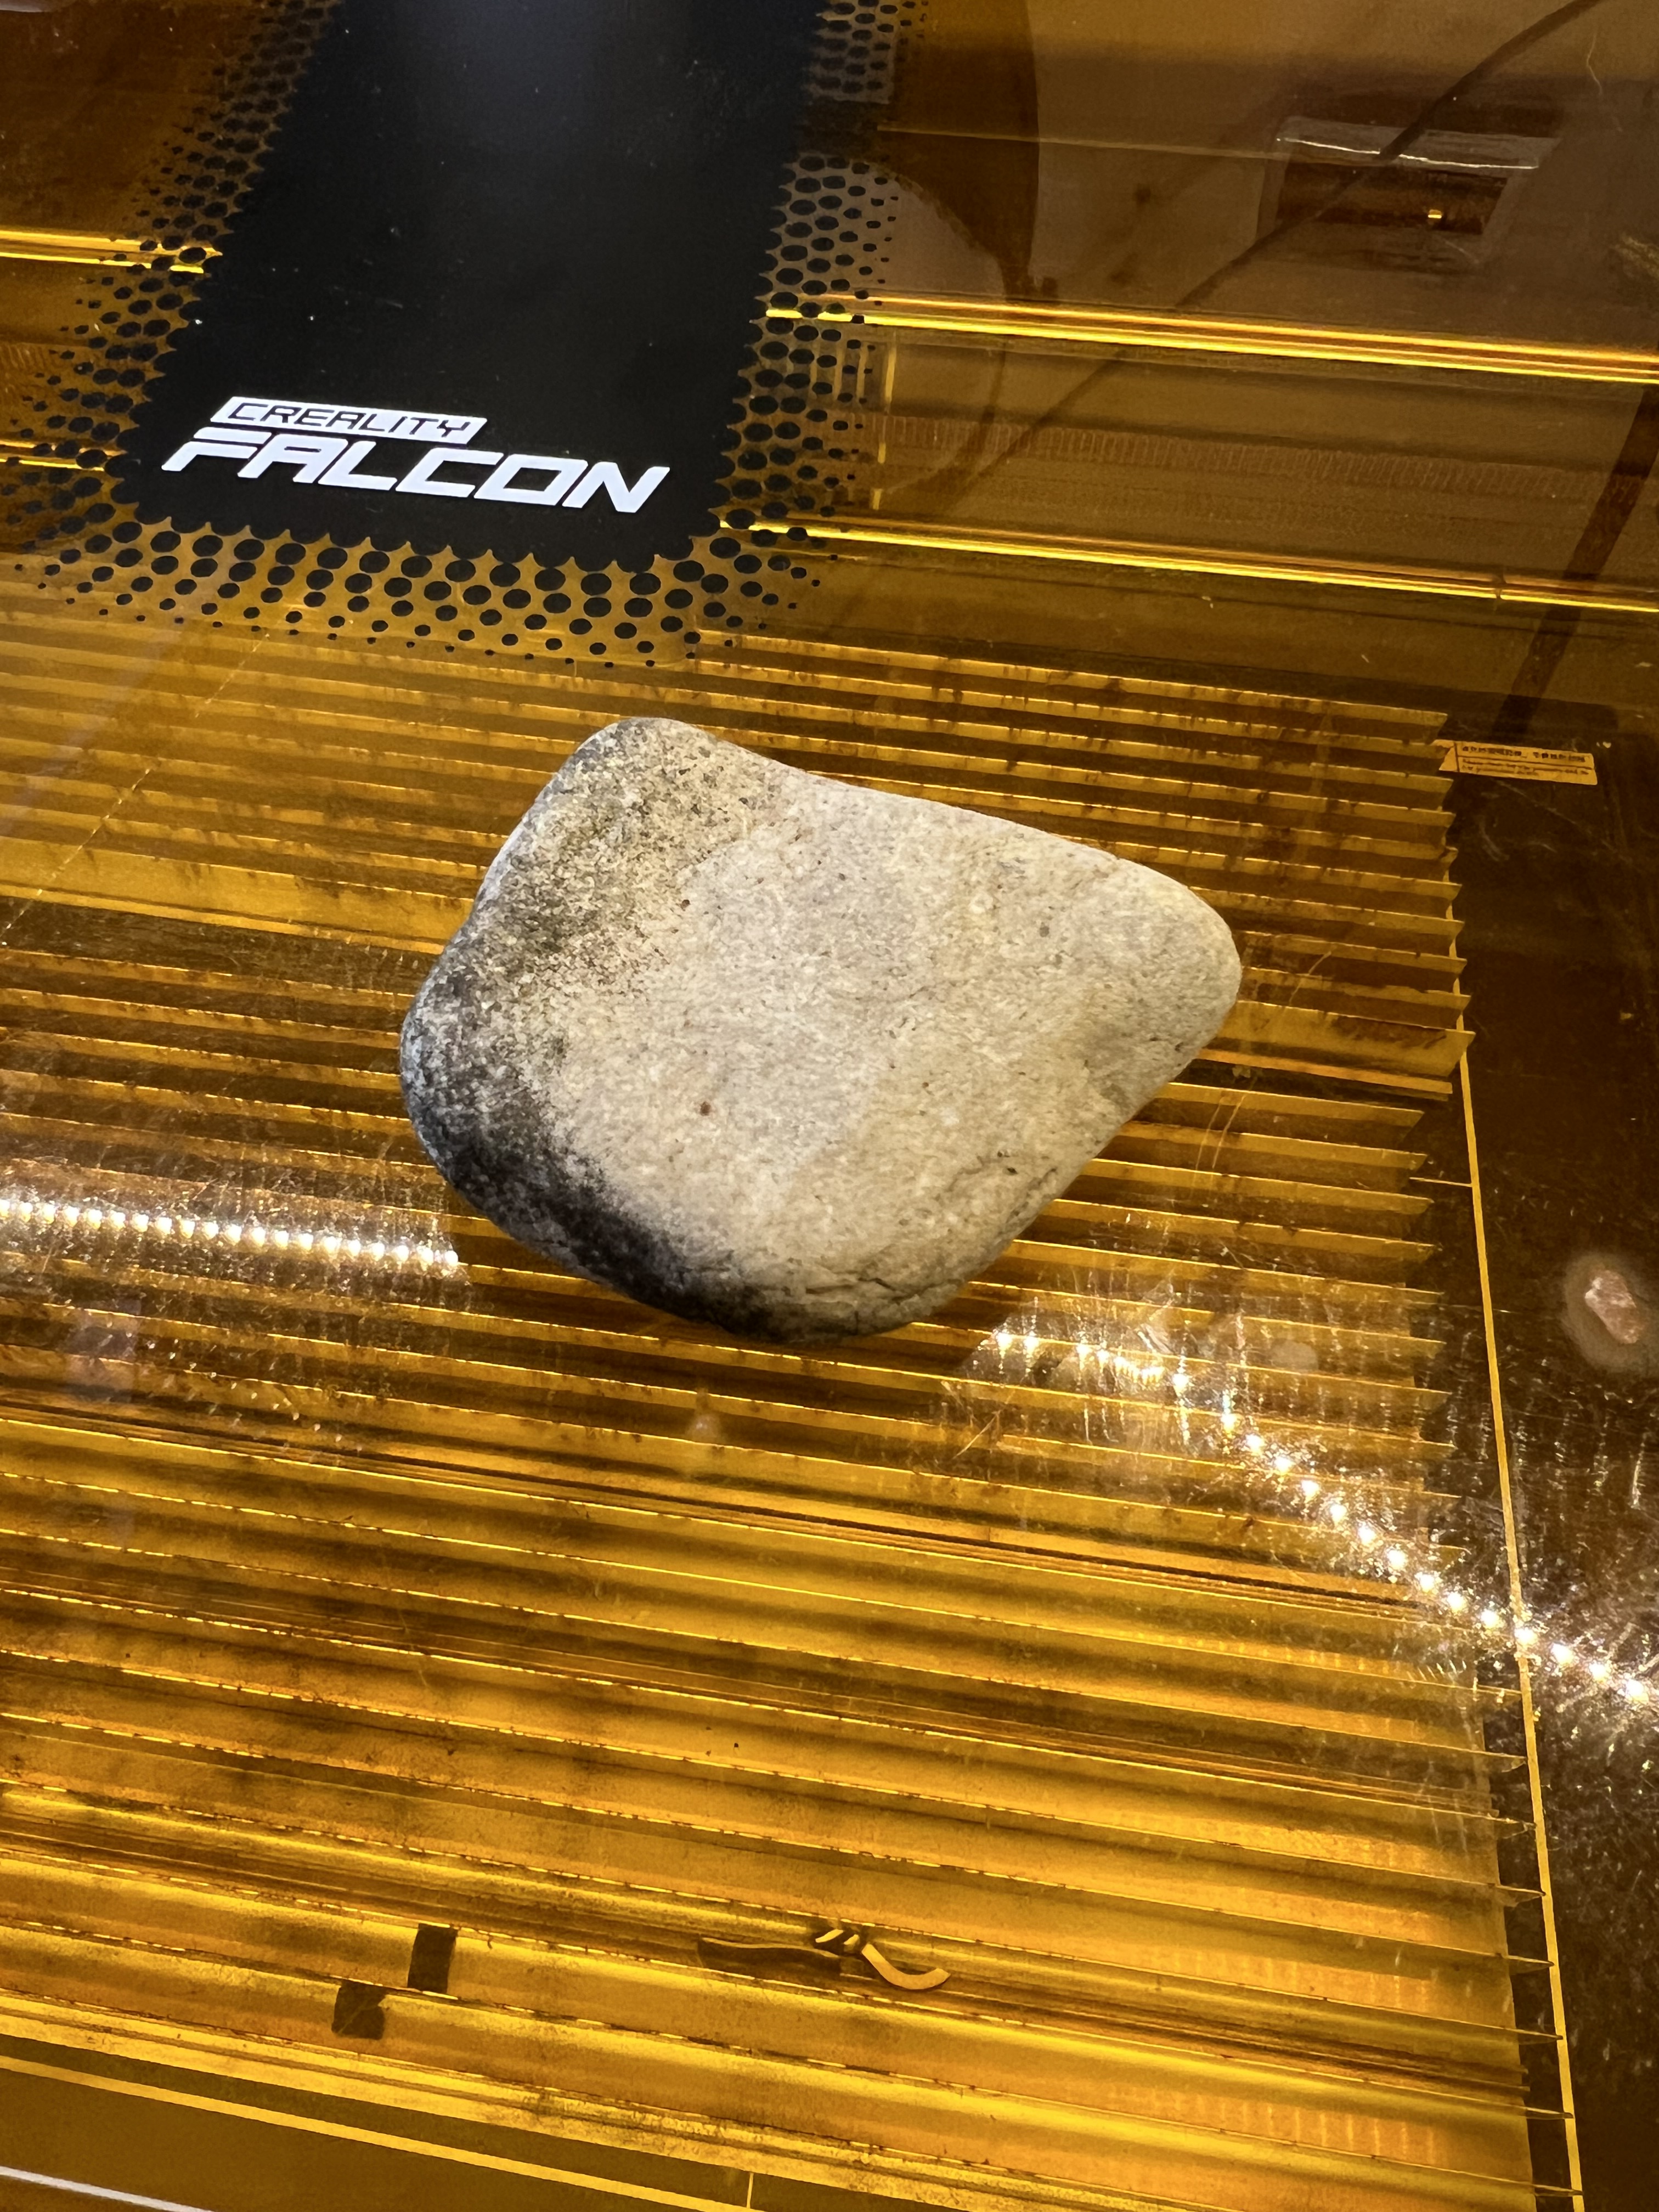
So I went outside and picked up a few rocks that would fit on the laser just to see what would happen. Let’s start with this one:
It’s not very big, about half in inch thick, maybe two inches wide and a bit longer. I think it’s basic limestone. Maybe? Can the Falcon engrave it? Let’s see what happens if I chuck it under the laser.
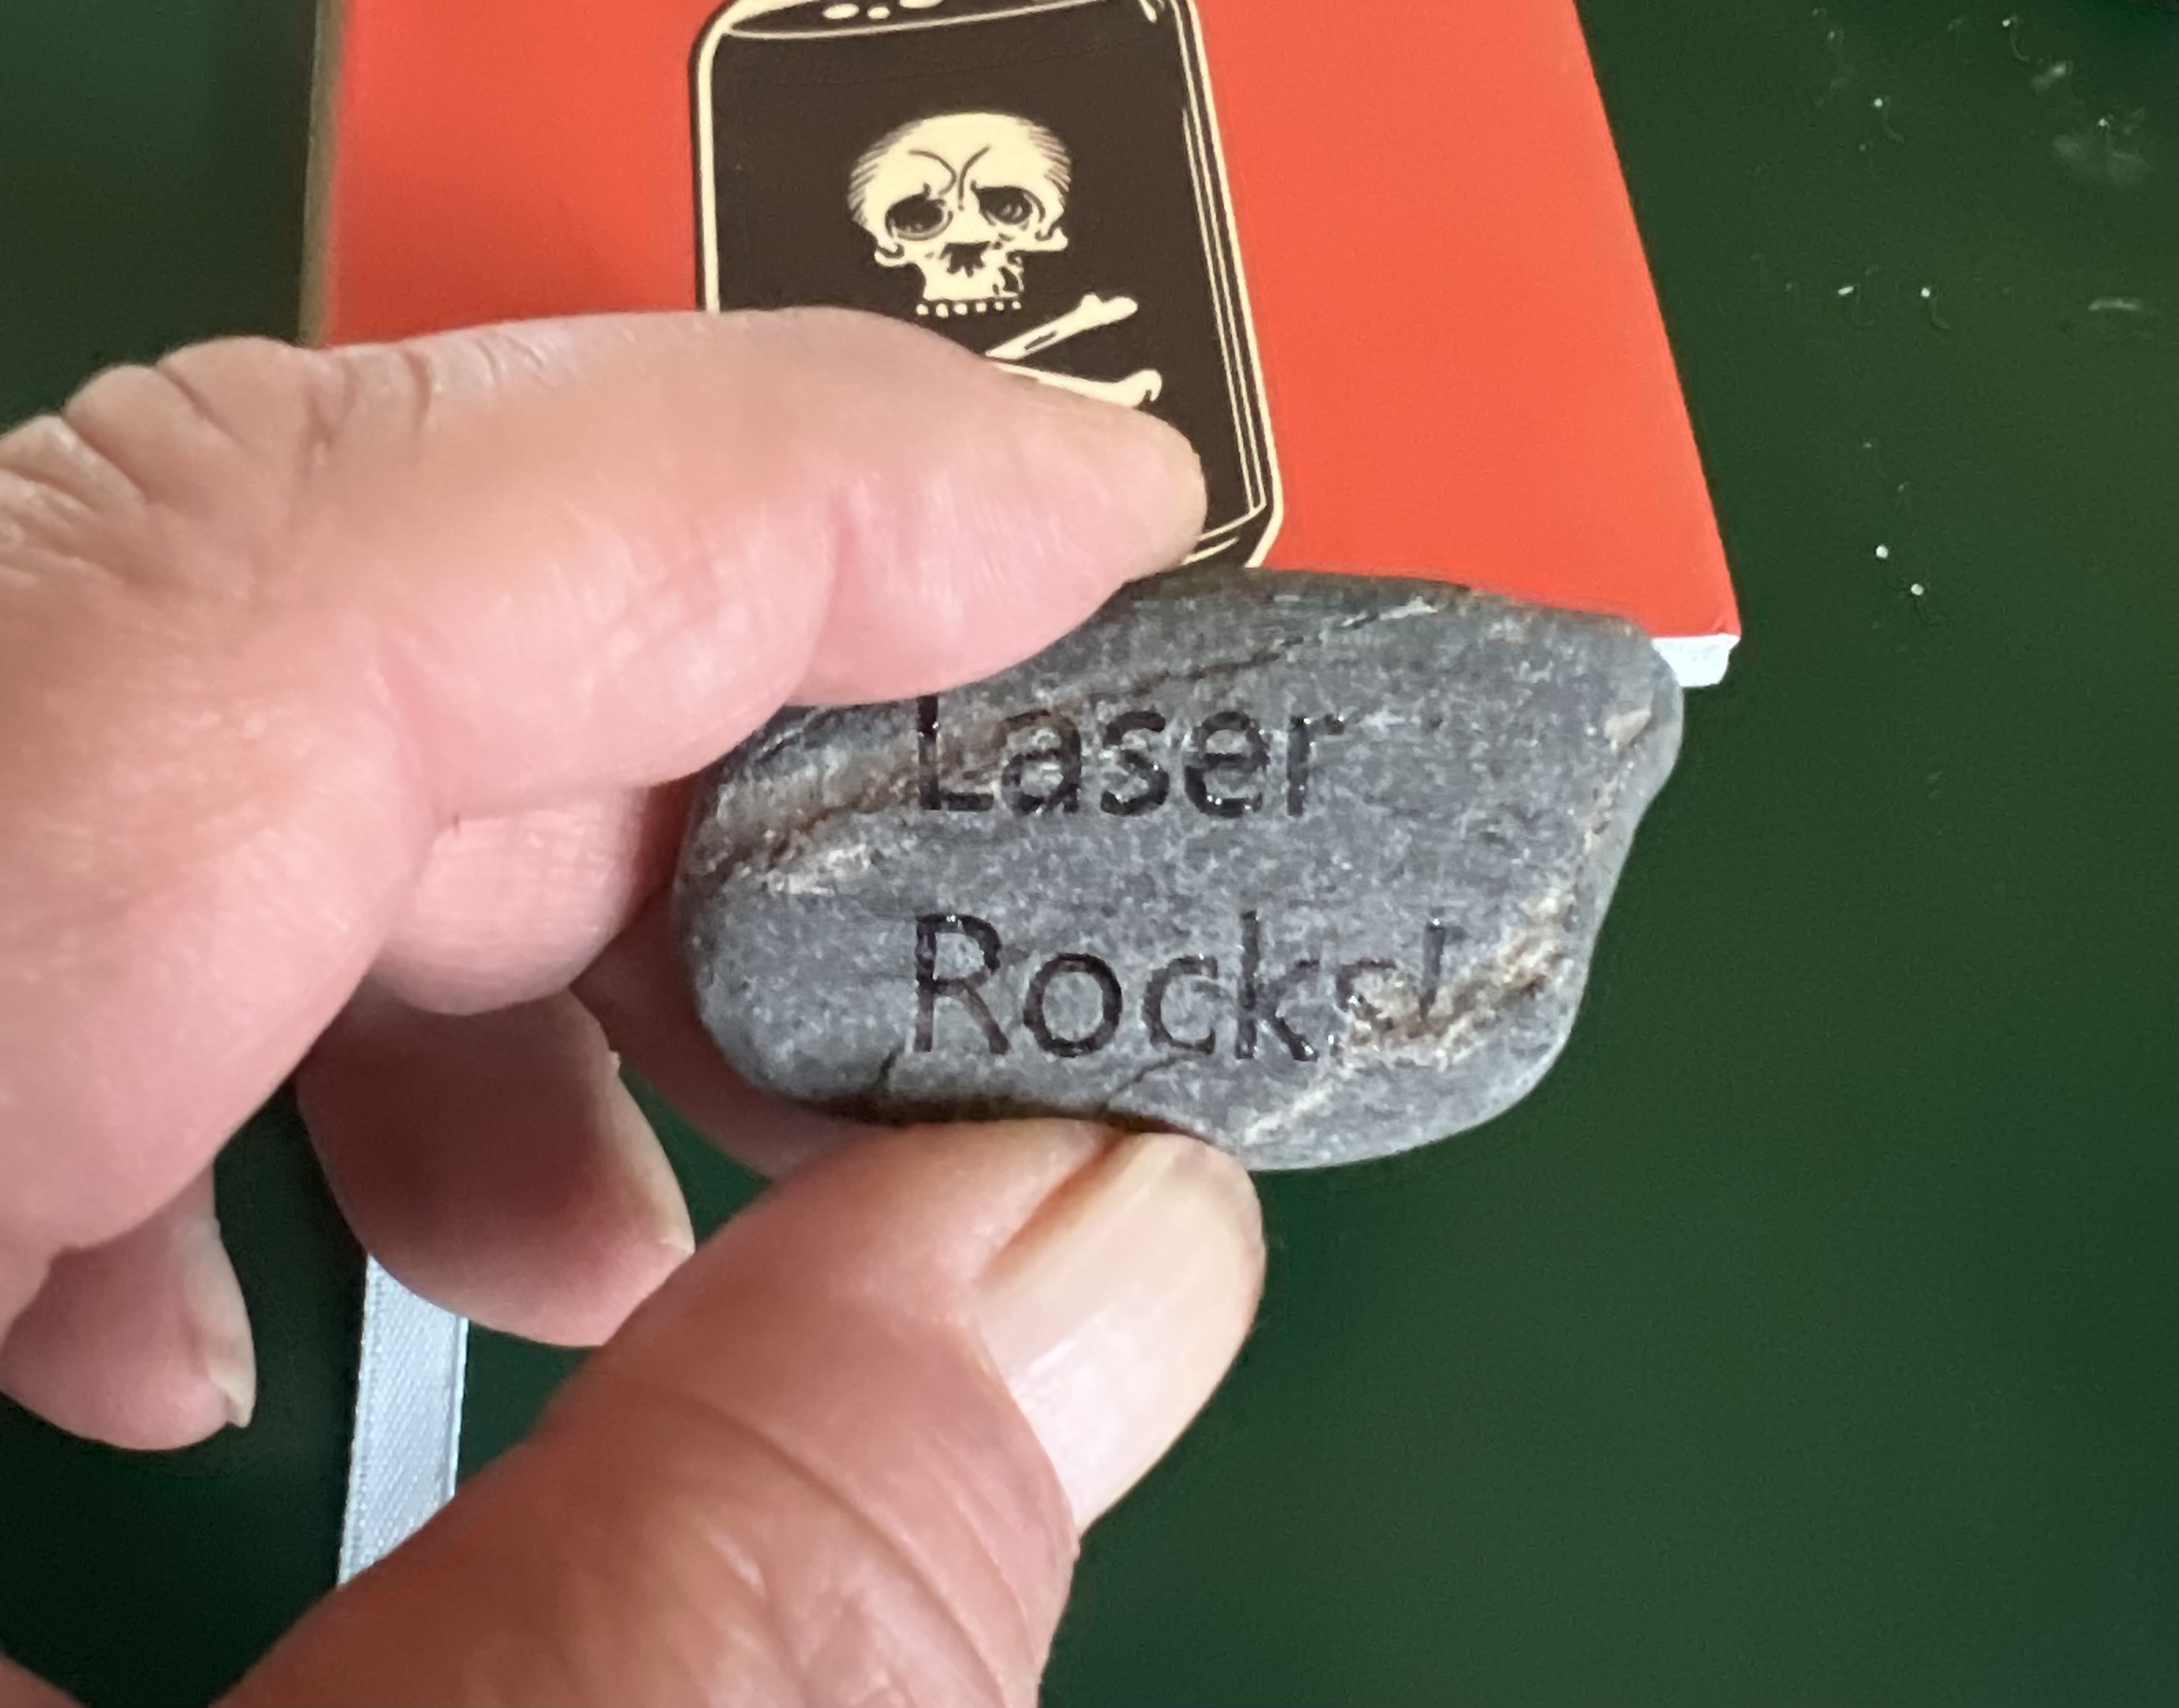
And the result is this below:
Well, okay, that’s cool. It will engrave rock. And it does a pretty nice job of it, too. It doesn’t just discolor the stone, it actually engraves it well below the surface.
I tried it with a different stone I found and got this:
If you absolutely have to have the settings I used on the Falcon A1, this was done at a speed of about 350mm at 100% power with air assist turned on.
So it absolutely will engrave stone (and presumably things like brick, cement, slate, etc.) The requirements are that it has to be thin enough to fit under the laser, and it has to have a relatively flat surface to focus the laser on. I’ve since tried it on other types of stone and got the same excellent results.
Judging from the crap I see for sale in the tourist trap shops up in Door County, engraved rocks are definitely sellable. Engrave a nice sized smooth rock of some attractive color with some pithy saying or meme or some touching image, maybe a cat licking it’s butt or something, and people will actually pay actual real money for a rock you picked up along the side of the road. Amazing, isn’t it?
Or you can do what I do which is start your own conspiracy theory. Engrave some rocks with mysterious symbols, odd latin phrases like “Anates titillare iucundum est” (tickling ducks is fun), etc. and leave them scattered around public places.
Will It Engrave Clear Acrylic Plastic?
Ah, well, technically no, but also yes. Sort of.
With your typical diode laser the frequency of the laser is such that it will pass directly through transparent materials like clear glass or clear acrylic plastic without doing anything at all to it.
But we’re dealing with energy here, and energy can be transformed and transferred. In the case of clear plastic we need some way to transform the energy of the laser beam into heat that will impact the clear material in the form of heat that will cause the plastic to melt, but only melt where we want it to melt.
Now if you go on Youtube or wherever you’ll see people offering up all kinds of odd tricks to get a diode laser to engrave clear plastic, ranging from special expensive films you adhere to it, special paints or coatings, etc.
Forget about all of that nonsense. All you need is a piece of black card stock.
I’ve been picking up this stuff below:
A 50 sheet tablet of about 8 X 11 inch black card stock for $5 from Walmart.
Seriously. This is all you need to ‘engrave’ clear acrylic. Forget about all those expensive sprays or ‘laser films’ or any of that crap. I’ve tried them all and while they sometimes will sort of work, maybe, they’re not worth the effort or the money. The easiest to use and the best and most consistent results I’ve gotten are using plain black cardstock.
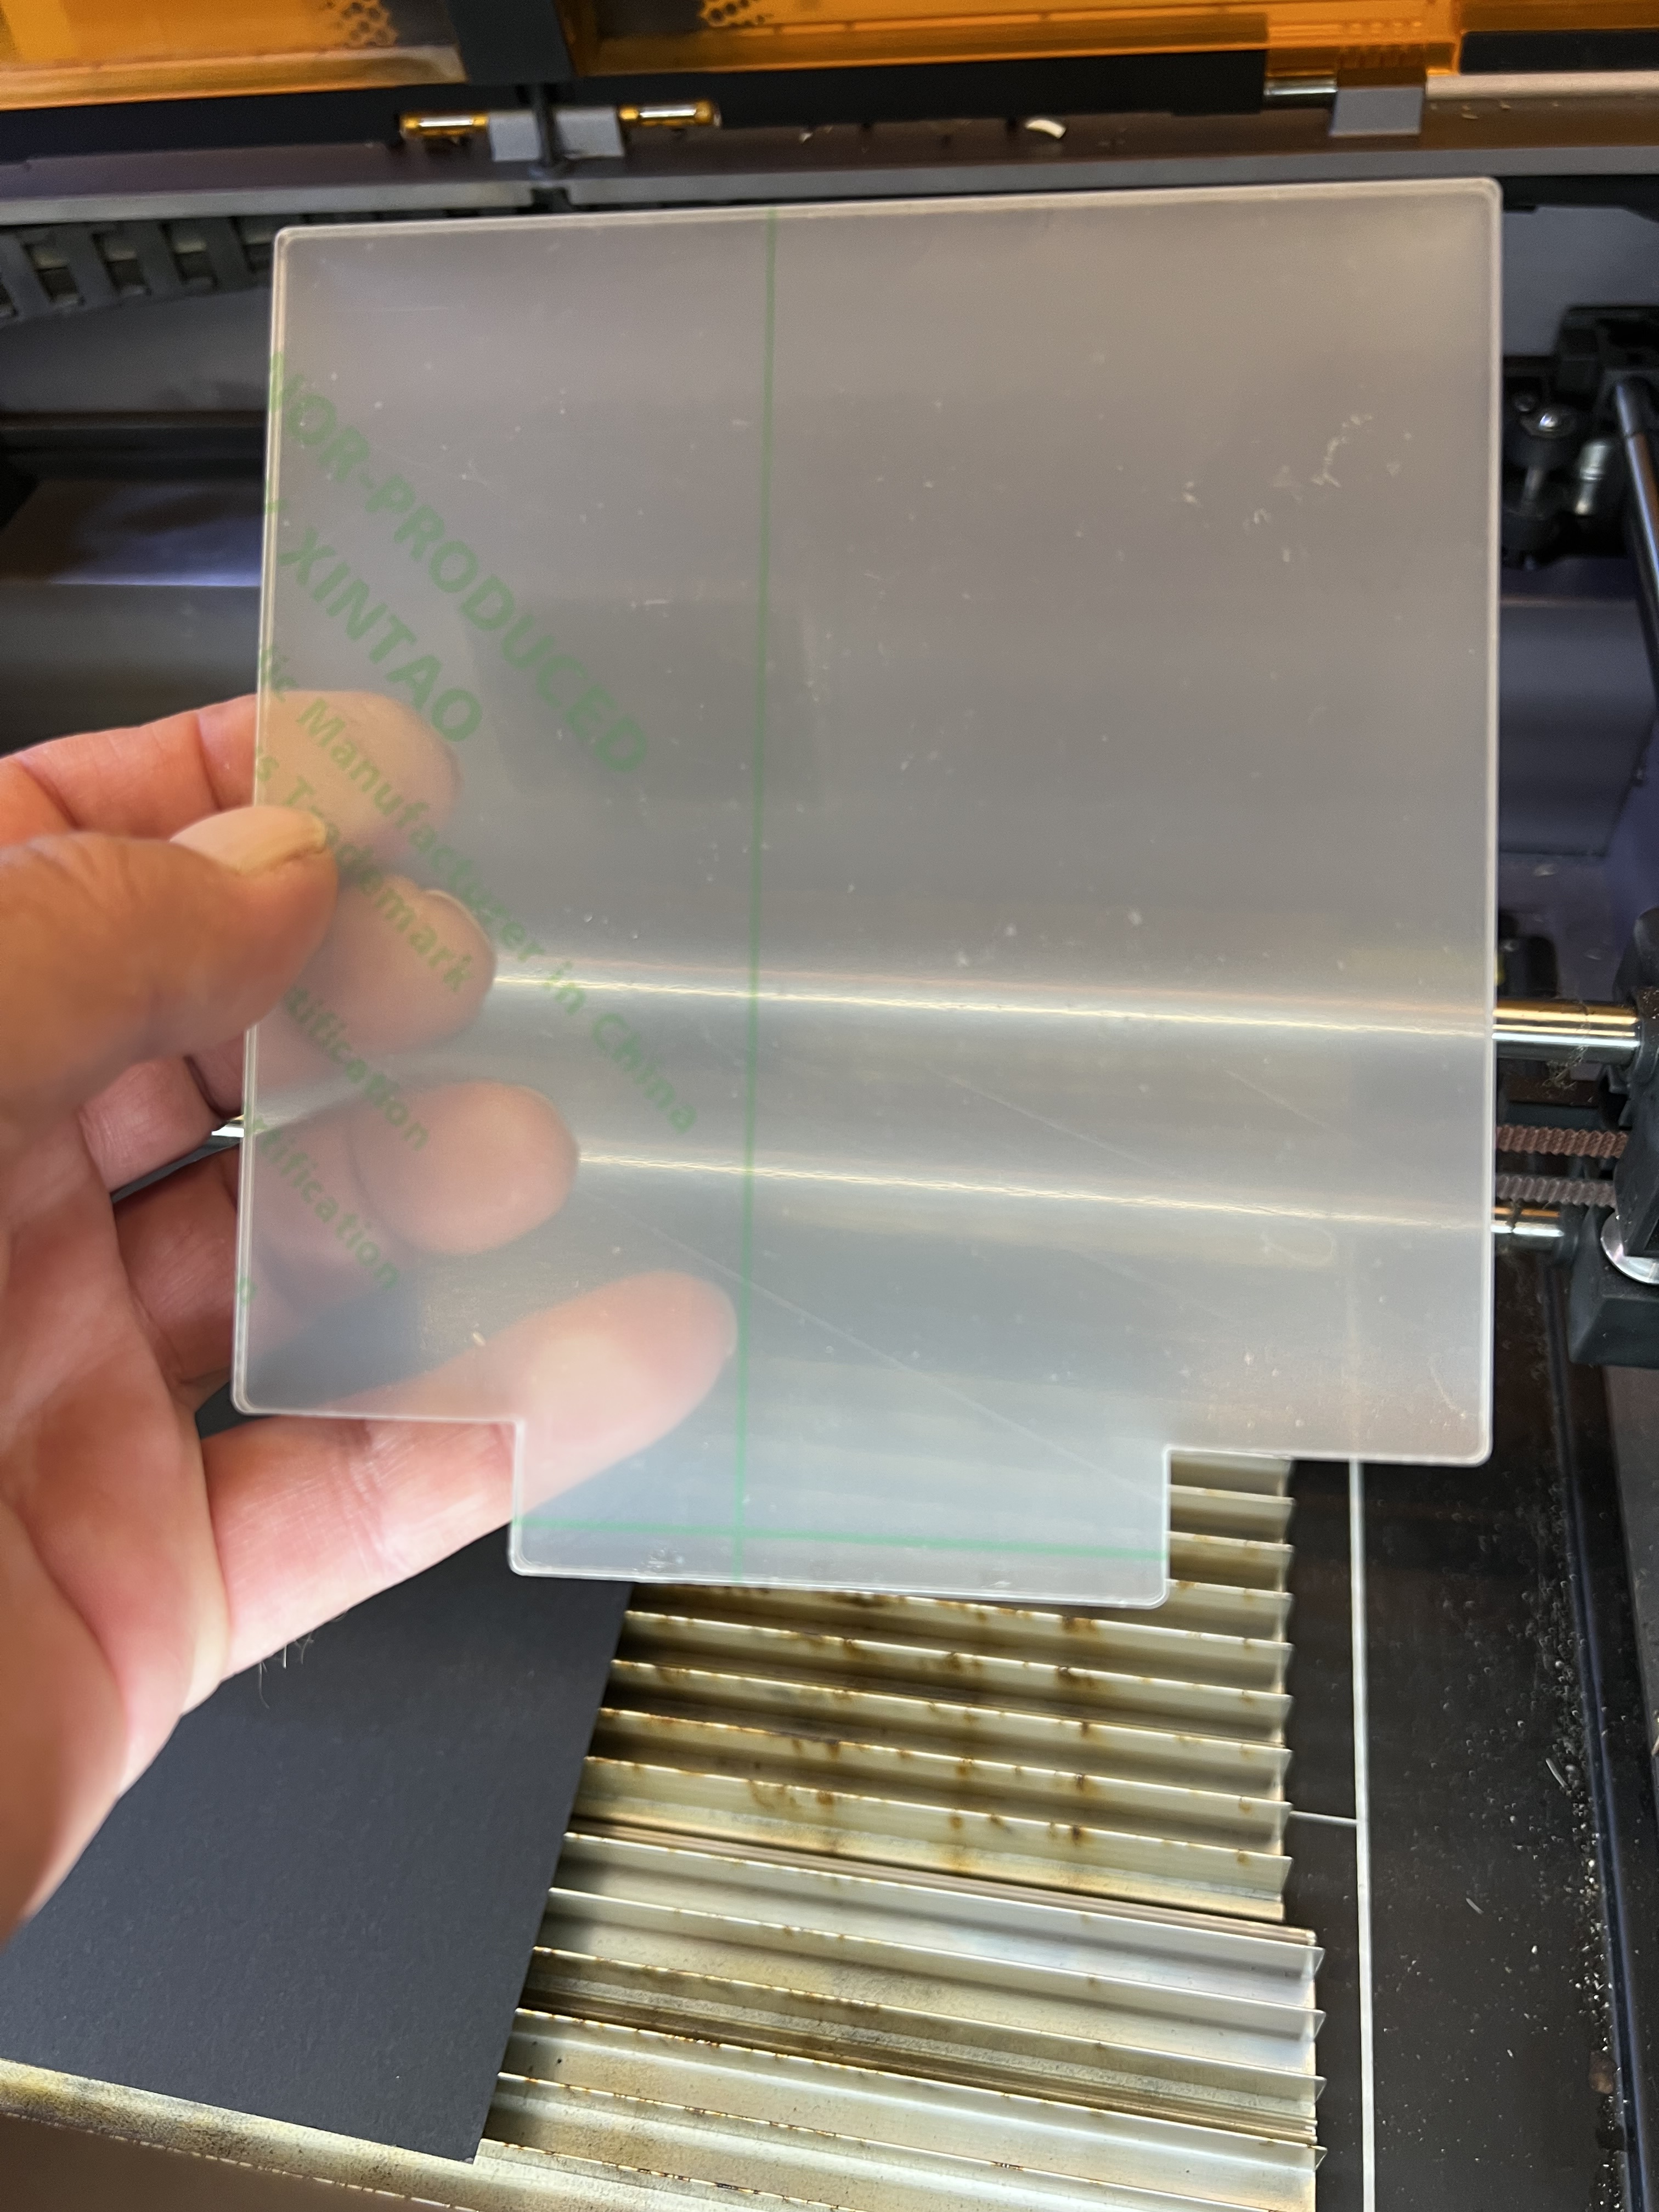
First lay the paper down on the bed of your laser like it is up there in that photo.
Then take your acrylic sheet and peel the protective plastic film off both sides of it.
Be careful with this stuff when handling it once you peel the protective film off it. It can scratch very, very easily and you can very easily ruin a relatively expensive piece of acrylic if you aren’t careful!
Focus your laser on the paper not on the plastic. Then lay the plastic sheet on top of the paper. We aren’t engraving the plastic, we’re going to be directing the energy from the laser onto the paper. The laser will pass straight through the plastic and that energy is going to be transferred to the paper to generate heat which in turn will melt the backside of the plastic.
Yes, the paper will char and smoke. That’s normal. The heat from the paper absorbing the energy of the laser will cause the plastic to melt and we end up with an effect that looks like etching. You’re going to have to experiment to find that out the settings for your particular unit. Every laser is different. But for the record the settings I used on the Falcon A1 for clear acrylic were a speed 0f 1800mm at 30% power.
You are absolutely going to need to experiment to get the settings right. Every laser engraver is different. Heck, for that matter acrylic sometimes isn’t that consistent either. So you’re going to need to experiment with the speed and power levels.
I’ll warn you right away that when it’s done it is going to look horrible. Something like this, probably.
Ewww, nasty!
Don’t worry! All it takes to clean that up is put it under running water and scrub with a soft sponge or clean, microfiber towel. Don’t use paper towels! The particular plastic I’m using here is relatively tough but a lot of these plastics are pretty soft and even a paper towel will scratch them.
What I ended up with was this:
Ah, I didn’t tell you about the lighted sign thing yet, did I? I found these cheap edge lighted sign thingies when I was scrounging around on Amazon one day and stumbled across this:
They were cheap, looked interesting, and I decided to buy ’em and see what I could do with them. I’m a sucker for anything I can turn into a bad joke, and these had huge potential. I mean at worst I’m out twenty bucks. You get four of ’em, the lighted base with multicolored LEDs in it, a remote control, and four blank acrylic sheets, two oval, two square for $23. So a bit over $5 each. I mean heck, I can’t even get lunch at McDonalds for five bucks. And I’ve seen these dopy things in the tourist trap shops up in Door County going for $12 – $20 and people actually buy them. Seriously.
Can It Engrave Glass
Sure. Sort of. Kinda. But it’s the same thing with glass as it is with clear acrylic. the frequency of the laser in this thing is such that it passes straight through clear glass.
I think I showed you that plate over there on the left before. If not, well, there it is, glass engraved, sort of, with the Falcon A1.
Now I should point out that the laser isn’t actually engraving anything in the sense that it is cutting or gouging out a layer of glass. Nor is it melting anything as it does with acrylic.
What’s happening with glass is something I’ve been told is called micro-fracturing. The trick is to get a very small area of the glass to absorb the energy of the laser and convert it to heat. The intense heat in that tiny spot causes that small area of glass to rapidly expand and fracture causing the glass to basically shatter and fall away from the main body of the object you’re working with.
Now I don’t have video or photos of me actually doing that because this was an early experiment, but I’ll tell you how I did it.
Once again if you go to the (cough cough) experts on Youtube they’ll tell you about all sorts of exotic and ridiculously expensive products you need to buy to do this. And as was the case with using clear acrylic plastic, forget about all of that crap. You don’t need expensive films, special paints or sprays or anything. All you need is this:
That up there is all you need, dirt cheap, 84 cent black tempura paint from Walmart or Hobby Lobby or the dollar store or wherever you buy school supplies. That and one of those disposable foam brushes.
Unlike the case with acrylic where we’re actually working with the backside of the plastic, with glass we’re going to be working with the top surface, so you’d focus your laser on the top of the glass.
Squeeze some of the paint out onto the surface of the glass and smooth it out with the foam brush. You want to get a thin but opaque layer of paint over the entire area where you’re going to be engraving. Try to avoid getting ridges or thick and thin spots. Try to be consistent. If the paint is too thick in places you won’t get that nice frosted effect. If it’s too thin it won’t look good either. If you think it’s too thick after it dries, no problem, just wash it off and try it again.
Once it’s dried chuck it under the laser and go have fun.
Again, you’re going to have to experiment with the settings to get it right. You can get some ball park figures about speed and power by looking up your own particular laser on-line and see what’s recommended. But remember you’re almost certainly going to have to tweak the settings. What I used on the Falcon A1 for this plate was a speed of 800 and a power level of 80%.
Safety First!!!
One very serious word of advice here. When you clean that piece of glass after you’re done, do not rub the etched surface with your fingers!!! It absolutely can shred your fingers! This works by literally shattering the glass and flaking of small pieces, so that surface there is covered with razor sharp pieces of glass. I scrub this vigorously under running water with a Scotchbrite pad to remove any remaining shards of glass and to knock down the sharp edges.
Here’s another thing you might want to think of as well when it comes to safety. As I said this works by fracturing the glass. breaking it away from the surface of the object. That means you’re going to have tiny, even microscopic shards of glass inside of your laser engraver during and after this process. I would very strongly urge you to have one heck of a good extraction fan on your engraver during this process and to vacuum out the interior of the engraver with a vacuum equipped with a HEPA filter. That is perhaps being a bit on the paranoid side, but I personally do not want to be breathing in microscopic shards of glass.
One other thing. The best types of glass to use for this seems to be the cheapest, crappiest glassware you can get your hands on. That’s given me the best results. For just messing around and experimenting I head for the nearest thrift shop. They generally have tons of glassware on the shelves for next to nothing. Avoid crystal, borosilicate glass, thin, delicate glasses, etc. Thin glass absolutely will shatter if you’re not careful.
Can It Engrave Steel?
Um, well, kind of? Maybe?
I did a batch of custom stainless steel bottle openers not long after I first got the laser using a type of powder coating that worked extremely well. That’s the result over there on the left. The coating is a sort of spray on powder and when it’s hit with the laser it turns a rich black color and bonds remarkably well to the surface of the metal. Not even scrubbing with a Scotchbrite pad made a dent in it.
But what about just plain, bare steel? Let’s see, shall we? But I already know that it isn’t going to work because there’s no way a 10W diode laser is going to be able to engrave…
Uh, okay, wait a minute. It worked? Seriously? It ended up looking like this:
Remember I said that a 10W diode laser can’t engrave steel. That is absolutely true. It just doesn’t have enough energy to engrave steel. Yes, I got a result, but that’s not engraved. What happened is that the heat from the laser discolored the steel, it didn’t actually engrave it. So it sort of worked, but kind of didn’t, at the same time. And it doesn’t seem to be permanent, either. After vigorous scrubbing with a Scotchbrite pad under running water, the black marking began to fade significantly. So while it will sort of discolor steel, it won’t engrave it and the discoloration fades. So if you want to “engrave” steel and get good, long lasting results, you’re going to need to resort to using the powder coating method I talked about earlier.
Can It Engrave Colored Acrylic?
Oh, yeah. No problem there at all. Remember laser engraving is all about the transfer of energy from the laser beam to the object being engraved. Transparent acyrlic and glass don’t work without resorting to some tricks because the laser will pass right through it. But colored acrylic is is opaque, more or less, and will indeed absorb the energy from the laser.
Here I’m using a sheet of orange acrylic.
The laser is going much slower than it really needed to in that video up there but I wa just starting to experiment and I hadn’t figured out the proper feed rates yet. It will cut colored acrylic much, much faster than that.
But basically yes, it works just fine with colored acrylic with no special coatings or prep work needed. Just peel off the protective paper from the plastic and go.
But there are some “gotchas”. Working with colored acrylics can be a bit tricky because different colors will absorb the energy of the laser at different rates. The settings that cut one color just fine may not work well with a different color. You’re going to have to experiment ti figure out the settings for each color you’re working with and for your particular laser.
Well it’s spring, or so they tell me. And judging from the lack of posts here it seems I’ve been hibernating most of the winter, doesn’t it?
After a ridiculously warm winter we’ve had a ridiculously cold spring. It isn’t until now, early May, that we’ve gotten reasonably warm temperatures during the day, although it’s still plunging down to near freezing at night. Anyway, the daffodils are in full bloom, even some of the irises are popping open which is always delightful to see.
MrsGF has had her seedling operation going in the basement for some time already. We have tomatoes, brussel sprouts, peppers and I don’t know what all else popping up in the little greenhouse down there. We have onion sets ready to go out as soon as the weather improves. The garlic she planted seems to be thriving. She only put in about a dozen garlic cloves and somehow all of them seem to have survived the winter and are now about 8 inches tall out behind the garage near the solar panels.
If you’ve been following this blog for a while you know I love bicycling, and by this time of year I should have been going out almost every day. But thanks to the cold weather that hasn’t been happening. I’ve managed to get out exactly twice since mid-April. It is very frustrating.
Solar Stuff
I think I mentioned that I picked up a bunch of solar panels with the intention of getting them up on the roof of the garage to supplement my rather pathetic 2KW of panels leaning up against the back of the house. Alas, that hasn’t happened either because of the poor weather. Hopefully soon. MrsGF has a fit when she sees me up on a ladder or on a roof, so getting those mounted is going to have to depend on when my sons can get over here to work on it. And I suppose I better actually order the mounting hardware, shouldn’t I?
I just got done completely rewiring the entire AC side of the solar power system to bring it up to snuff so it will pass an inspection. It’s configured a bit differently this time. The inverters struggled to keep the central air conditioning running, to the point where we couldn’t run on solar if we had to use the AC. That meant that whenever the weather got hot, we were entirely on the grid, which was not a good thing. The system has been rewired now so that both the AC and the electric clothes dryer are always connected to the grid while the rest of the house can be switched over to the solar system. So we’ll be able to keep cool and do laundry while running the rest of the house off solar.
Also this brings the system into compliance with electrical codes and it’s passed inspection.
Laser Stuff
This is one of the reasons why I’ve been so busy that blog posts have been neglected. If you’ve been following grouchyfarmer for a while, you know that I’m sort of an artist/electronics geek/computer geek/maker/… Well, you get the idea I suppose. Years ago I got a deal on a cheap, flat bed laser engraver. While it was fun to play with, it was also woefully slow, cranky, fiddly, annoying, had zero safety equipment, zero smoke control, inaccurate, but fun.
And it sparked some ideas as well. Commercial ideas that eventually developed into actual products. I eventually got a much better, much faster, much more accurate and much more useful laser, and I started cranking out things like company logos, art projects, things like that. I didn’t do a lot of it because despite what you may see on YouTube, there really isn’t any actual money in doing this kind of thing unless you’re willing to invest the time, money, and especially the equipment, into going into it almost at an industrial scale. What mattered to me was that I was enjoying it, it gave me an outlet for this need I had for artistic expression and all that high minded guff, and it gave me an excuse to play with a lot of high tech equipment.
I thought that part of my life was pretty much done with, though. I was getting a bit tired of it. Technology was moving on, if I was going to continue doing it I was going to have to get serious about learning Photoshop and Adobe Illustrator at a level that was deeper than I really wanted to get involved with. And to top it off my laser engravers were starting to show their age.
And then stuff started happening. People I’d made things for before started asking about doing more, the brewing company told me that all of the joke coasters I’d done for them had been stolen and they wanted more and oh, could I look into doing a few promotional items for them like maybe branded keyfobs or bottle openers. And then I was getting the urge to make “art” again…
Okay, to make a long story short, i got a new laser engraver/cutter and I’m back in the business again. And yes I’m going to bore you with all of the details, but not in this post. I’ll reserve that for a different time because to cover everything I want to talk about is going to take some space.
That’s about it for now. It’s actually nice out today, so I’m heading out to put a few miles on the bike.
Covid For Christmas – The Great Pi Famine -Lettuce In December – Weather – Dreams
Covid
So on Dec. 23 MrsGF got an unwelcome Christmas present, Covid. Don’t worry, she’s doing fine. She still has a nasty cough but she’s feeling much better and has been testing negative for two days now so we’re hoping it’s all over. Somehow I avoided coming down with it. I took precautions, staying in the basement most of the time, eating our meals separately, wearing N-95 mask whenever I was upstairs, etc. But even so I figured I’d come down with it too. Well, I still might. She’s been testing negative for 2 days now. They say that the incubation time for the current strain is about 2 – 4 days, so I’m not going to be able to relax much for another couple of days.
And me… I’m a hypochondriac. All through the pandemic, every time I coughed or sneezed or my head got stuffed up, I was convinced I had Covid myself. And I have some pretty nasty upper respiratory allergies on top of it, so I pretty much have mild symptoms that could be mistaken for the early stages of Covid all the time.
The Great Pi Famine
RaspberryPi 4. I’m still amazed that they can squeeze a complete quad core computer with 8 gig of RAM, hdmi video, sound, 4 usb ports and WiFi into a package this small. Storage on this one is a 128 gig micro-SD card.
If you’ve been following this blog for a while you know I like to fiddle around with electronic gadgets and gizmos and tinker and build stuff. One of the mainstays of the electronic tinkerers out there as a controller of electronic equipment of all types has been a tiny little single board computer called a Raspberry Pi. They’re available in a variety of types ranging from tiny little units that are used as controllers for a variety of gizmos, to a full blown Linux computer that’s smaller than a deck of cards, the Raspberry Pi 4 and now the new, more powerful Pi 5. There are four things that make them attractive. They’re small. Very small. They are designed to make it easy to interface them to the outside world in order to use them to control robots, motors, actuators of various types, collect data from sensors, etc. And three, they’re relatively easy to use, easy to program and enormously powerful for their size.
And the fourth thing, they were cheap. Like really cheap. The Pi 4 which is basically a full blown Linux (using a variation of Debian) computer with up to 8 gig of RAM, built in WiFi, HDMI video, USB 2 and USB3 ports sold for about $40 or even less. If you ever wanted to play around with Linux to see if it could be a viable replacement for the ever increasing horror that is Microsoft Windows, a Pi 4 is an easy and cheap way to do it. Just plug in a monitor, keyboard and mouse, get yourself a good introductory book on the Pi computers, and away you go.
Sidenote: I was just reading an article the other day that illustrated just how much computing technology had advanced in the last few decades. Someone pointed out that the Raspberry Pi 4 is six times more powerful than the original Cray 1 “super computer”.
Note that I used the past tense there. They werecheap. Then the pandemic hit, supply chain problems hit, demand for Pis increased because people were stuck at home and were looking for things to do, and, perhaps most importantly, the profiteers struck. Scalpers, profiteers, scammers and the like snapped up every Pi they could get their hands on, and then turned around and re-sold them for three, four times their original cost. I saw Pi 4s, a computer that sold for about $35 – $40 originally, being sold for $250 or more.
Pre pandemic I had a half dozen or more of the things laying around the house. But I gave them to a friend who was an electronics experimenter and solar power experimenter before the drought hit. Get them back from him? Yeah, well, he lives in Barcelona half the year so that ain’t gonna happen.
After the pandemic, when I couldn’t get them for a reasonable price any more, I switched to using Arduinos for the fiddling around I was doing. But while they and other microcontrollers are extremely useful and fun to play with, they aren’t computers.
But now prices have finally started to settle down. They’re still over priced when compared to what they were before the pandemic, about $75. But that’s cheap enough that I’m willing to get one and start playing around with it.
To make a long story short the nice fellow from UPS dropped one off here (two, actually) and I spent a couple of hours setting it up, updating the software and fiddling around with it last night. So you might be seeing some more stuff pop up here concerning Linux and the Pi in the future.
If you want to fiddle around with one of these yourself and you’re new to the Pi I’d recommend you get something like this from a company like CannaKit in the photo below.
No, I don’t get a kickback from CanaKit or anything like that. There are a lot of disreputable vendors out there, but I’ve bought stuff from CanaKit several times now and they provide exactly what they advertise, ship quickly and their prices, while a bit high, aren’t horrible.
It includes everything needed to get the thing up and running. The Pi 4, a power supply for it, HDMI cables to connect a monitor, a case for it along with a tiny cooling fan, heat sinks for the CPU and two other chips on the board, and a micro-SD card with the operating system pre-installed. It’s more expensive than buying a bare bones Pi but it has everything needed to get it operational. Just plug in a keyboard and mouse, and a monitor.
Lettuce In December
From about the end of may through September we had fresh greens whenever we wanted them out in the garden. All we had to do was go outside, clip off some of the lettuce mix we’d planted, and graze to our heart’s content. I really missed that. And then I was in the basement doing stuff and saw the little portable green house we used to start seedlings in the early spring with the grow lights and heater and thought why the hell aren’t we using that to grow some fresh greens? So we did. And this is what we ended up with.
We didn’t put in a lot because we weren’t sure it was going to work, but as you can see it worked very well indeed. We got more than enough for a couple of good sized salads plus a bit more. And yes, it tasted very, very good. 😊
Other Stuff
The PreciseRF magloop antenna continues to work surprisingly well for me. I was concerned about it’s survivability when set up out in the weather but it’s been holding up well despite the rain, snow and colder weather we’ve had. But the real test is yet to come when it gets really cold here. It’s been abnormally warm here all through December. Even now, on Jan. 3 at 4:30 AM, it’s 35 degrees out there. We’ll see what happens when it’s -30 and blizzard like conditions.
Weather
If we ever get cold weather, that is. Temperatures have been running well above normal here. I vividly remember one New Year’s Eve before MrsGF and I got married. When we got out of the pub where we’d spent the evening it was -34F with a stiff wind and everything, including the car, was frozen solid. We spent the night at a friend’s house and managed to get the car started the next morning, somehow.
It was brutally cold for weeks that January. On Jan 1 after I got back to the farm I had to put a new alternator on one of the tractors. It was so cold that the insulation on the wires the old alternator shattered when I bent them. I managed to get the tractor running well enough to pull it into the heifer barn and then close everything up. 30 or so young heifers put out a lot of heat and it was warm enough in there that I could get the job done. The heifers thought it was great fun. They were all crowded around watching me.
What’s Coming Up
I got a woodworking project going. This is a joint project by ES (Eldest Son) and myself. One of his hobbies is doing stained glass so I’m making a backlighted frame for a piece he did. That promises to turn out to be pretty interesting. More about that when it gets closer to completion. That’s still in the planning stage.
One thing, though, dear sweet lord has good quality lumber gotten expensive! I’ve been spoiled. Years and years ago I bought a whole pickup truck load of very good quality, kiln dried, white oak about 1 1/4 inches thick, 6 feet long and of various widths that ranged from 6″ up to 13″. That’s pretty much run out now so I had to actually go out and buy wood and prices of good quality, furniture grade hardwood are absolutely nuts.
I don’t really have plans for the Raspberry Pi. It’s something I wanted just to be able to play around with Linux and mess around with. If something develops from that I’ll let you know.
Dreams
Dreams are weird. At least mine are. I was up at 3 AM this morning and just couldn’t get back to sleep so I came out here dealt with my email and then started writing this up. I do vividly remember the dream I was having when I woke up. I rarely remember my dreams, but when I do they are often extremely vivid and detailed. This one was like that.
MrsGF and I were having dinner at a rather fancy restaurant with a very nice young couple from India. I have absolutely no idea who they were or why they were in this dream. Nice people, though.
When MrsGF and I left we went out into the parking lot and the car, my Buick, was gone. We thought we mis-remembered where we’d parked it so I pulled out my phone to use the app that tracks my car. And my phone didn’t work. It had been infected with some kind of malware that just kept cycling through obnoxious ads over and over again.
There was a strip mall nearby and a T-Mobile store was there so we walked over there. They were about the close but a nice young woman kept the place open. She got me a replacement phone right away, restored all my stuff and got the phone working. We went back to the parking lot and activated the tracking app and yeah, the car was gone. We called the police and they found it, and the thief, rather quickly.
Elon Musk had stolen it. He’d been at the table behind us and had overheard me making disparaging comments about how utterly hideous his “cybertruck” looked so he’d gotten huffy, hacked the electronic systems in my car and took it.
Still, it’s better than the vivid, realistic dream I had about painting the garage. That was the entire dream, painting the garage. That was it. It was so boring that I bored myself awake.