Photos of the stuff I’ve completed over the last few months in no particular order because I’m bored and don’t have anything else to do.
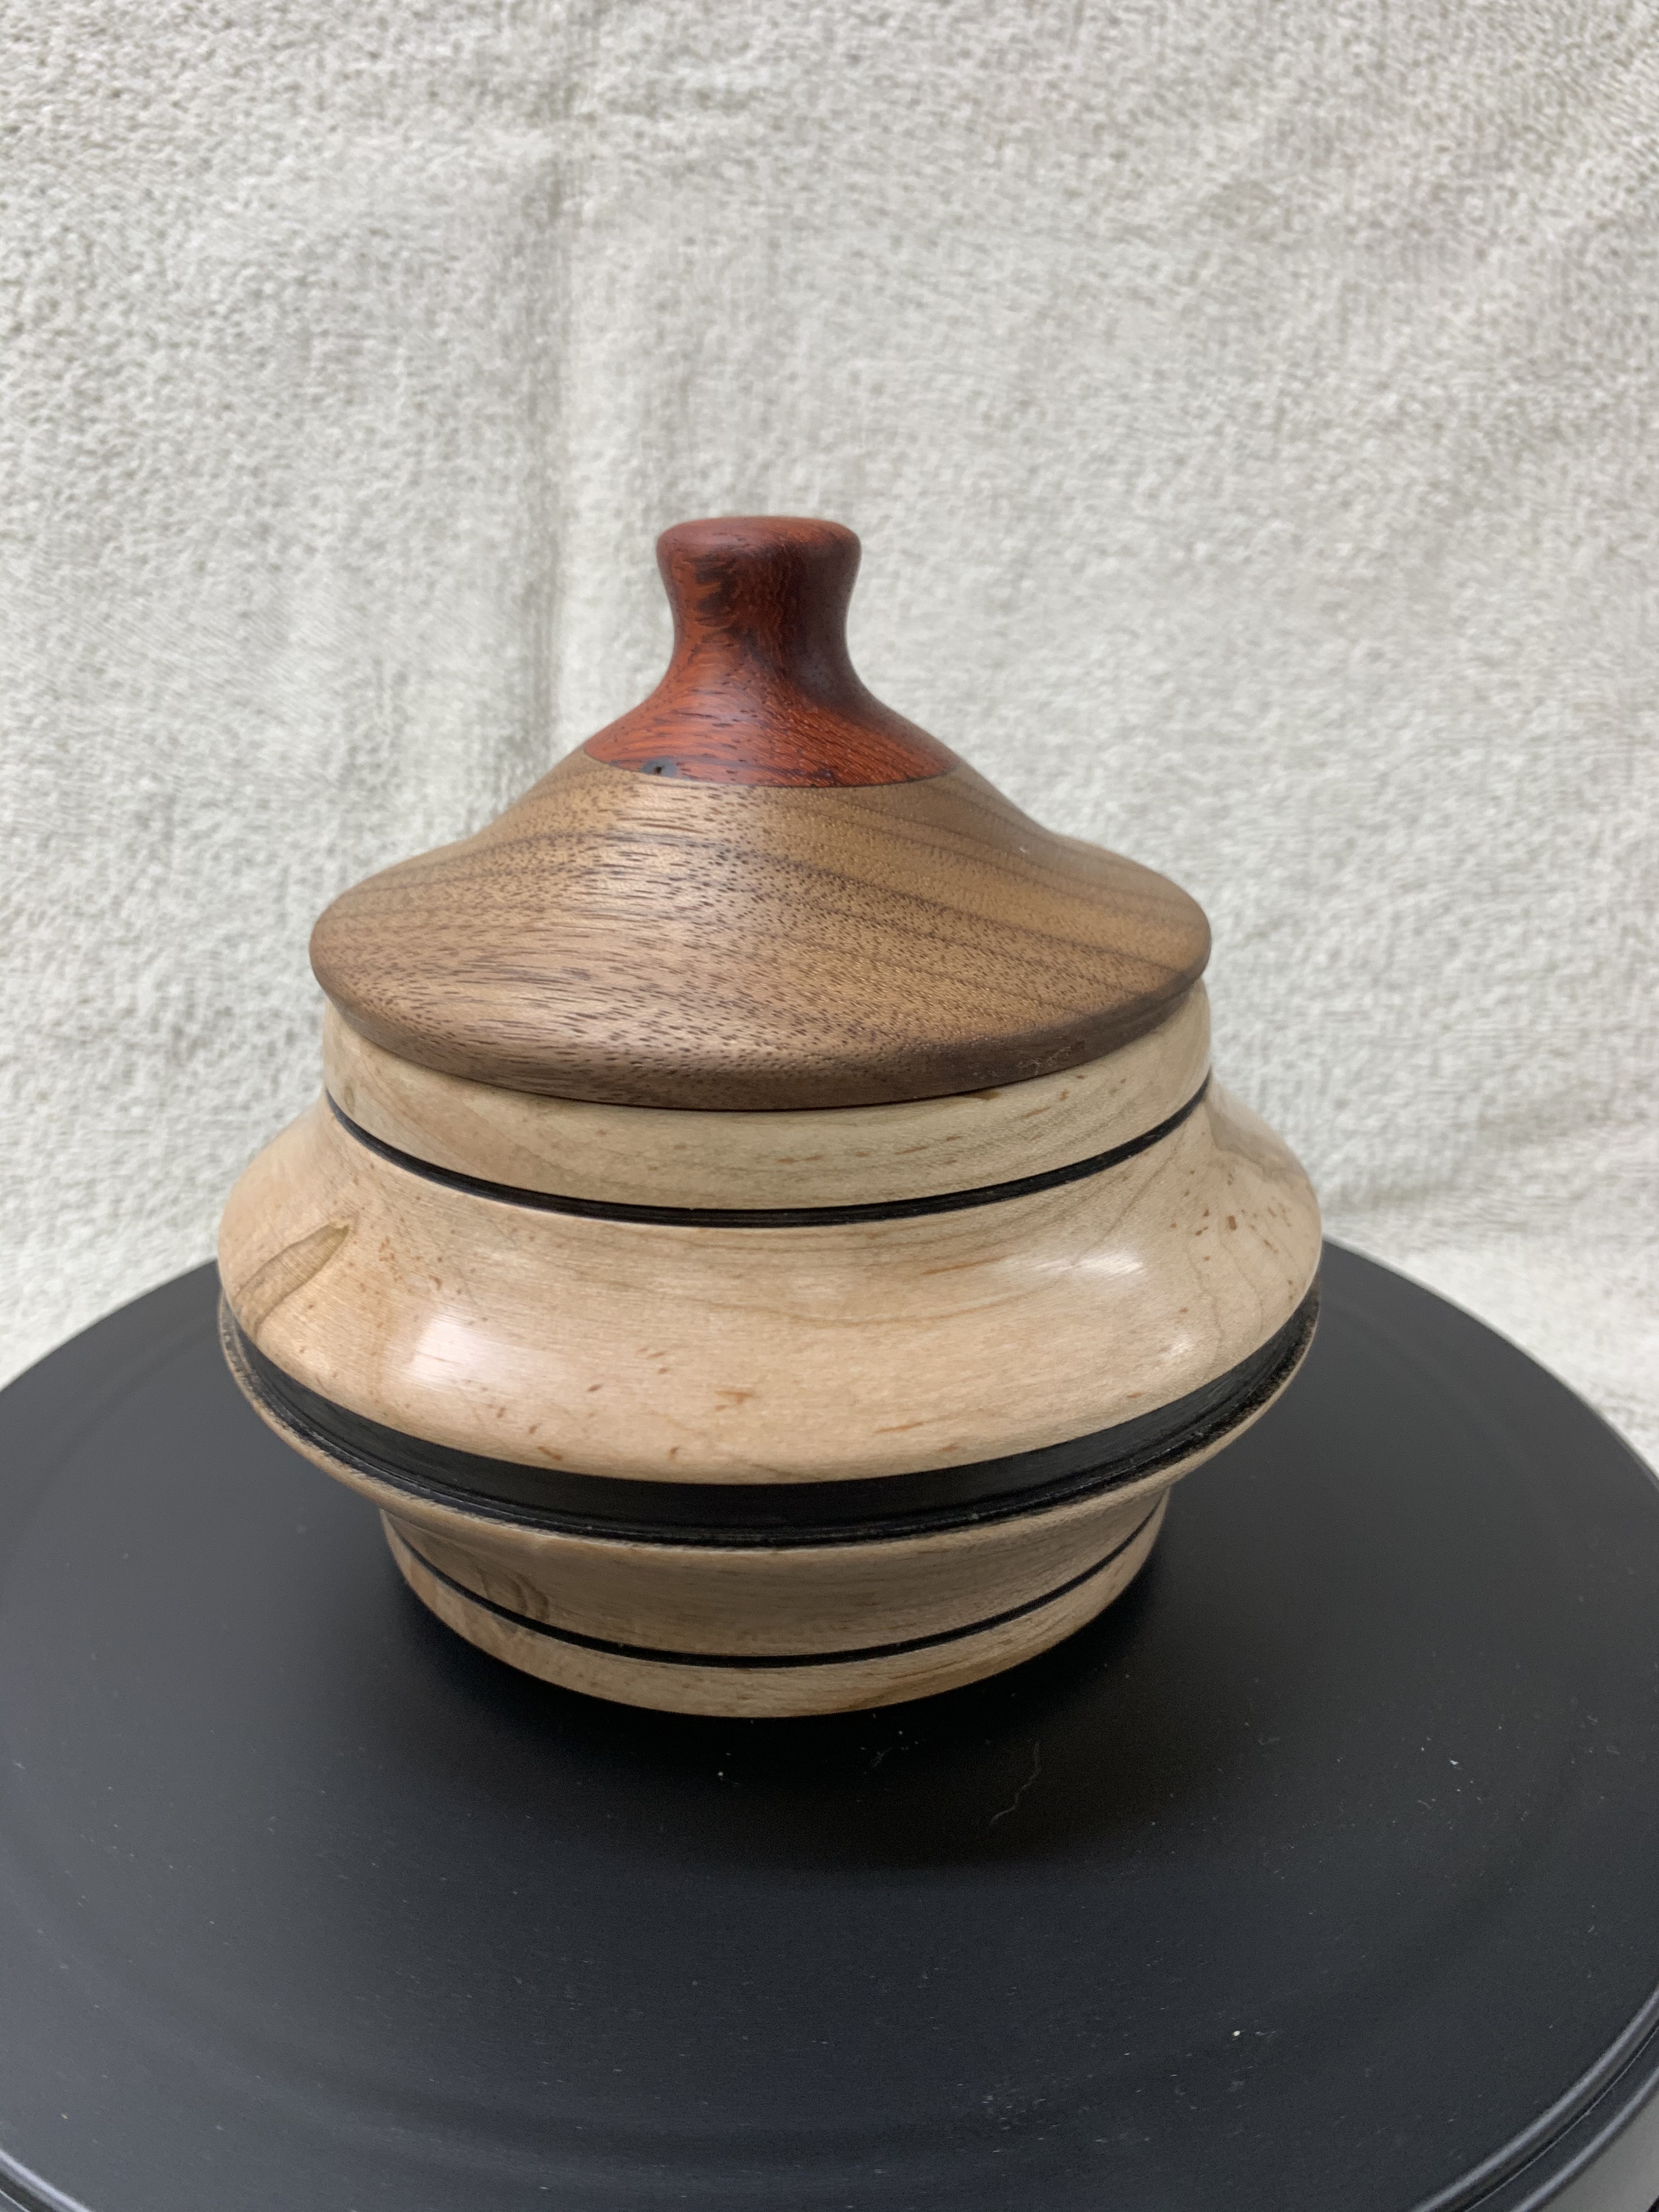

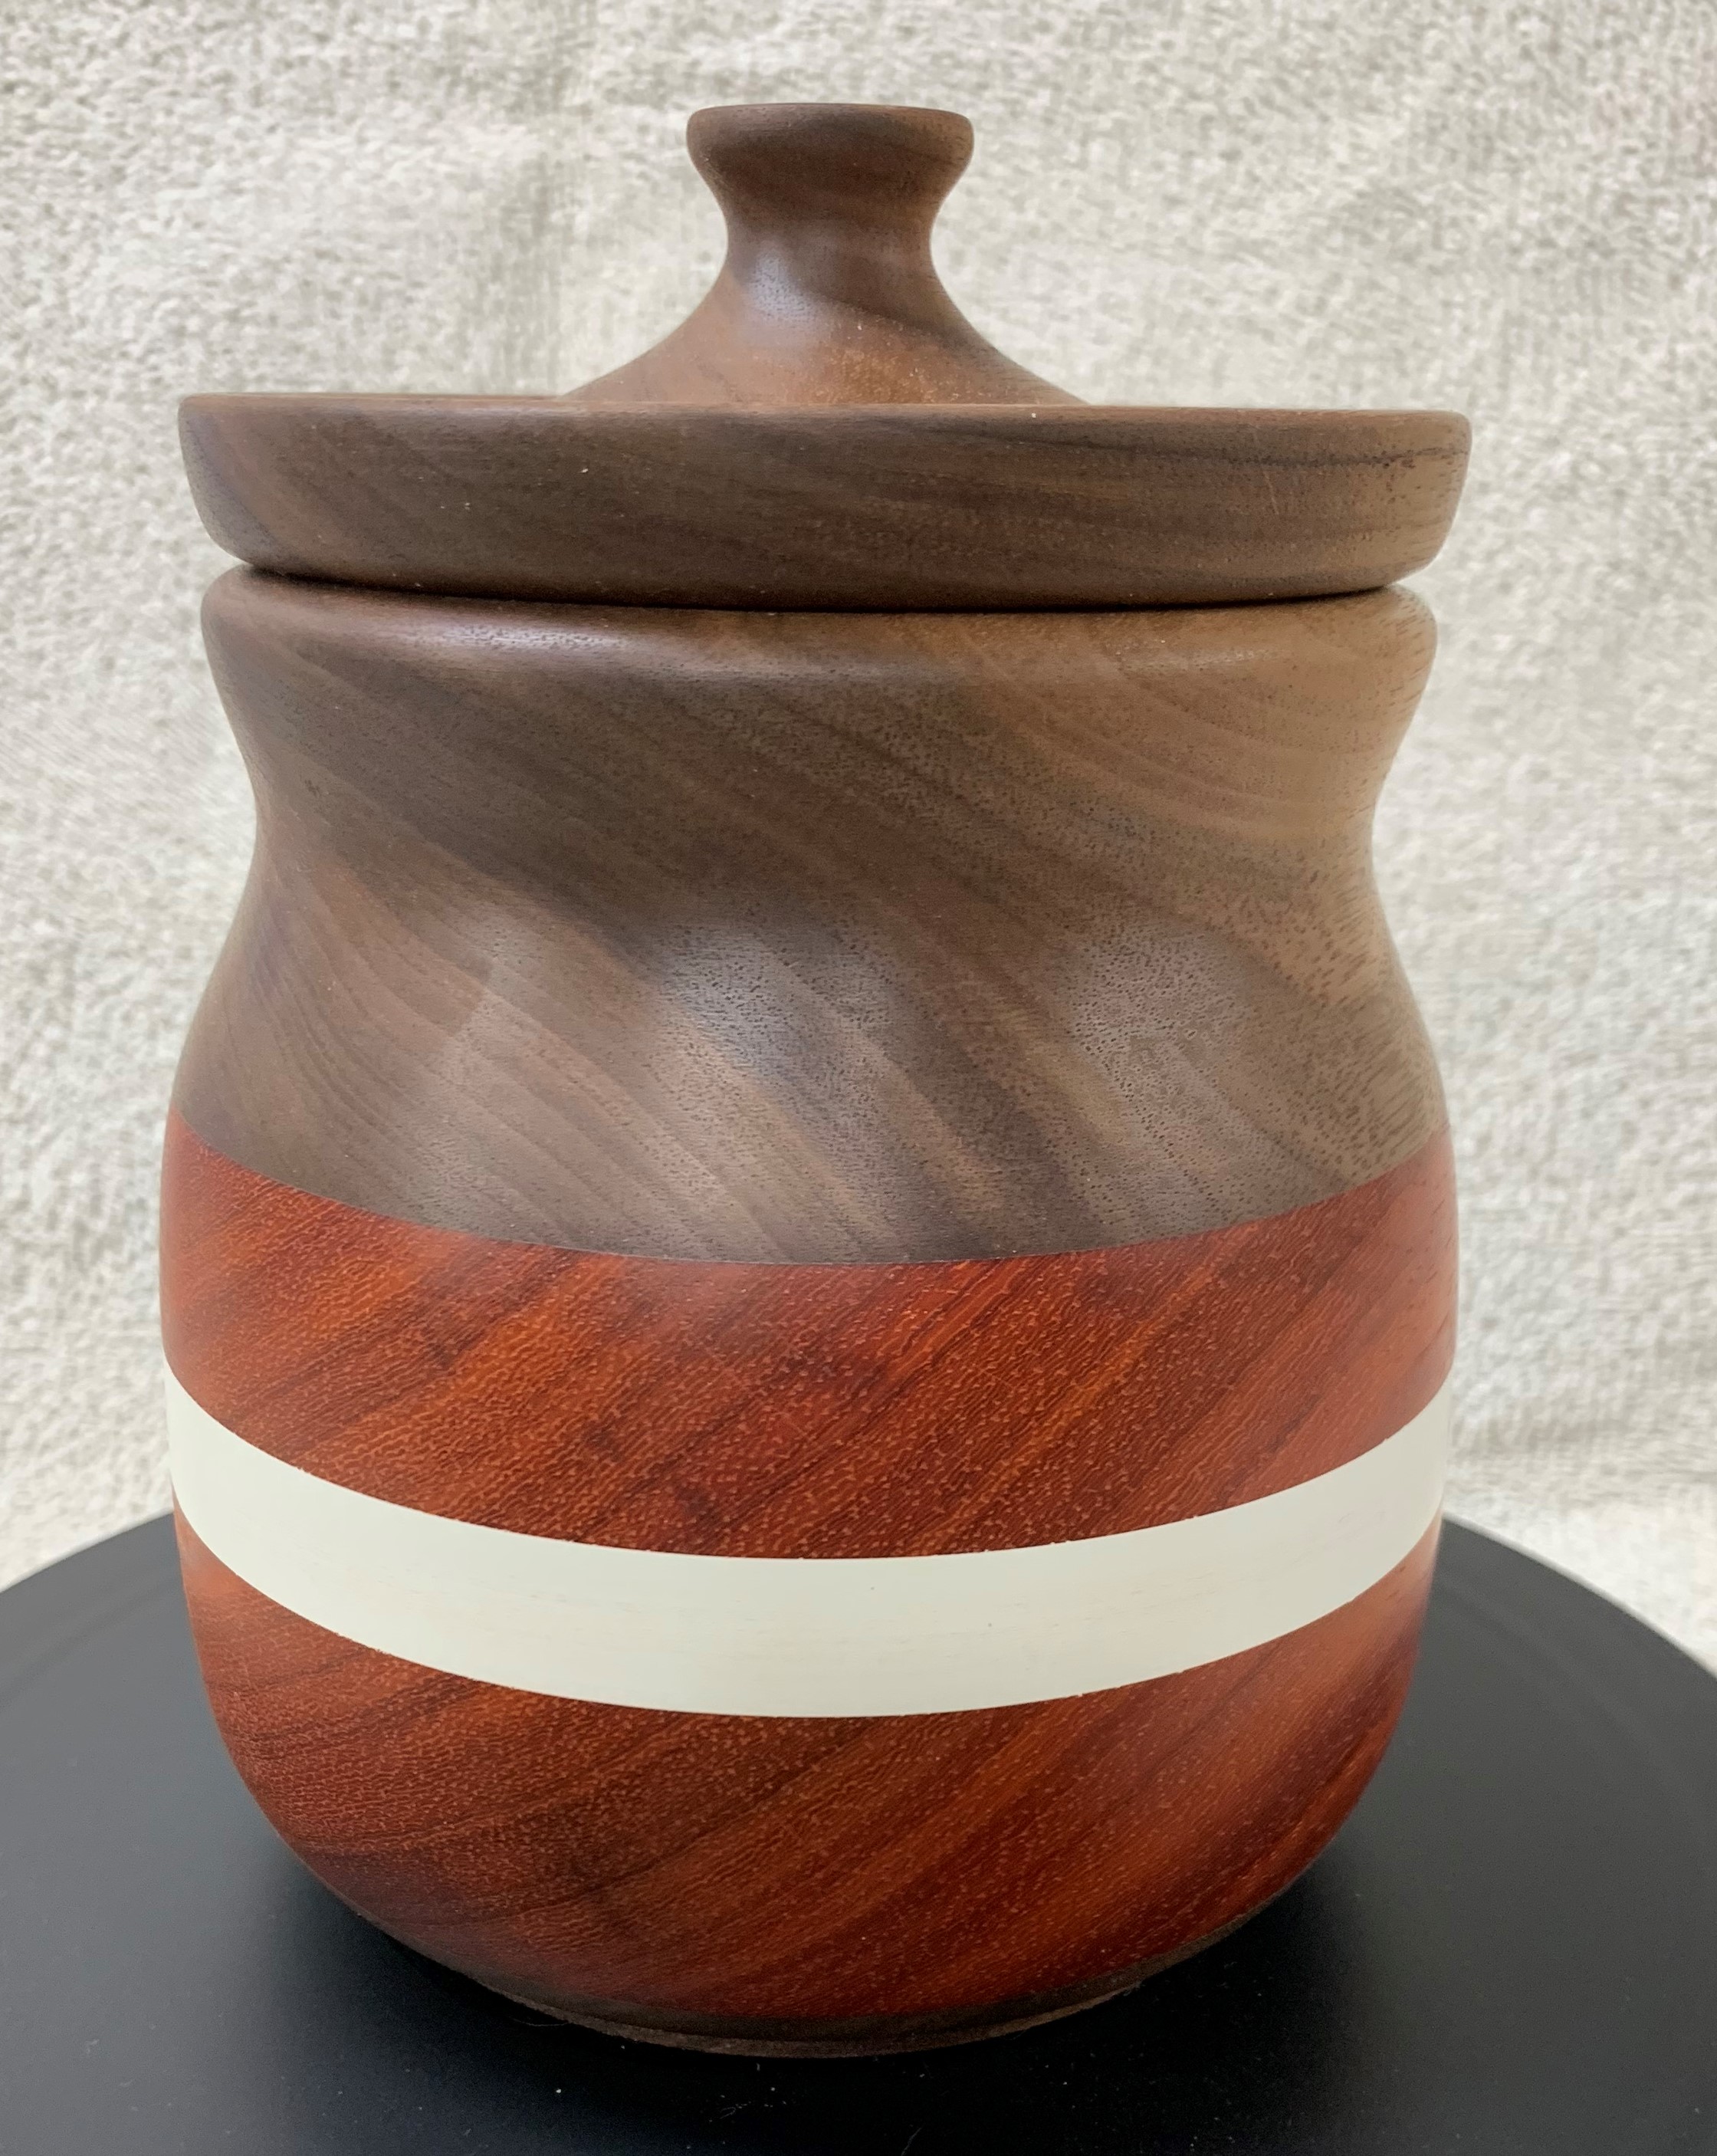


Photos of the stuff I’ve completed over the last few months in no particular order because I’m bored and don’t have anything else to do.

I forgot one item when I looked at the tools I’d picked up during 2020, and that’s the Oneida “Dust Deputy” in the photo over there on the left. It helps to deal with an ever present problem for anyone who works with wood, the dust and debris generated by woodworking.
In an ideal world we’d all have professional quality dust collection systems. But those things are big, expensive, etc. Not all of us have the space or the money to set one of these up, so a lot of us end up using a good old fashioned shop vac as our primary dust/debris collection system. Modern, good quality shop vacs can be almost as efficient at removing dust and debris as a traditional dust collection system, although they don’t have the capacity to keep up with some tools like planers and jointers. It all depends on the power of the motor, the CFM (cubic feet per minute air movement) and the filtration system the vac uses. The biggest drawbacks are that the vacs are (usually) very loud, have to be moved around the shop to be hooked up to individual pieces of equipment, and have to be emptied very frequently. Lugging my big 16 gallon sized shop vac up and down a flight of stairs to get it in and out of the house in order to empty it is not fun.
This Dirt Deputy gadget and similar devices have been around for a long time, but I’ve never been that interested in them before because A) I wasn’t making that much dust and debris before now, and B) I figured that like a lot of things that sounded too good to be true, it was, well, too good to be true. But wood turning generates massive amounts of dust and wood shavings, far more than making furniture did. So not only was I lugging that big vac up and down the stairs all the time, I was going through filters like crazy. No matter how good of a job you may do blowing out or cleaning that filter, you can’t get it completely clean and eventually it will get plugged up to the point it won’t pass enough air to permit the vac to work. So I decided to try this thing.
The basic idea behind these things has been around for a long time. You hook the shop vac up to the outlet on top, hook your hose to the lower outlet, slap it on top of a standard 5 gallon bucket, and that’s it. As the air (and dirt) whirls around inside of the funnel shaped thing, the dust and shavings and other debris end up falling down into the bucket instead of getting sucked into your vac.

As I said I was skeptical of this thing, but the darned thing actually works, and works pretty well. Even fine dust seems to settle into the bucket instead of ending up in the vacuum. Instead of having to lug the whole vac up the stairs and out to the garage I can just carry the bucket. But the biggest hope I had was that this would save me money. Those big cartridge filters on my shop vac are expensive. About three of those filters would pay for this whole Dust Deputy thing, so it could potentially save me a lot of $$. And it does. This thing has already paid for itself in the two months or so I’ve had it. I’m really quite pleased with it.

Are there drawbacks to it? Sure. There always are with things like this. The biggest drawback in this case is a reduction in suction power, which makes sense. You’re adding several feet of air hose, the Deputy itself, possible air leaks, etc, into the system. So that all restricts air flow and reduces the amount of vacuum power. In my case, my big vac, which could keep up with my thickness planer without the Deputy installed, can no longer handle my DeWalt planer with the Deputy. That’s not a big deal, though. I don’t use the planer all that often these days and when I do need it I simply hook the vac up to it direct and bypass the Deputy.
So, what’s this thing cost? Oneida will gleefully sell you a whole “kit” for about $100+ which includes the Deputy wind tunnel swirly thingie, the bucket lid it attaches to, a short hose to hook to your vac, some hose clamps, a 2nd bucket that the first bucket nests into, and little wheels to bolt to the outer bucket to make it easier to lug around and the instructions tell you to drill holes through the side of your vacuum and bolt the 2nd bucket to your vac for some reason and, well, don’t. You don’t need the 2nd bucket, you don’t need the wheels, you don’t need the hose clamps (if your existing hoses don’t fit perfectly, you can always resort to duct tape, that’s what I did), you don’t need any of that stuff. Basically they’re charging you $50 for a couple of buckets you can probably get free and $10 of hardware. If you want to try one of these, get the “basic” kit.
The basic kit goes for about $50 without the wheels, the buckets and all the other guff, and that’s all you need. It comes with the cyclone thing, some bolts and a gasket. That’s it. You get your own 5 gallon bucket with a lid (probably free). Cut a hole in the lid, screw the cyclone thing to it, and use your own hoses and clamps. If you need more hose or clamps you can get everything you need at the local home improvement store.
The way things look right now, this thing is going to save me easily going to save me money on filters.
Rosewood
I found a vendor on Amazon that was selling large blocks of Indian rosewood. It was actually not all that expensive and I’d never worked with it before so i got a couple of blocks just to see what it was like. I picked up two pieces, about 6 inches square and 3 inches thick. I think I paid about $30 each for the two pieces. That may seem like a lot but that’s actually pretty reasonable for this stuff on the commercial market. If you want good quality imported woods, you’re going to pay for it. Rosewood is really popular with the pen turning people. I see a lot of places selling rosewood blanks sized for pen makers, but almost never see large pieces big enough to make bowls.
As you can (hopefully) see in that photo over there the wood is absolutely beautiful once it’s sanded and finished. And it just feels nice to the touch. Whenever I walk past that bowl I find myself running my fingers over it. I can see why pen turners like this stuff. It is a bit messy, though. I don’t know if it was just the pieces I got or if it is normal, but the stuff seemed really oily, with the dust clinging to my tools (and me). It machined beautifully, though. No problems with catches or snags or weird tear outs or anything like that, and it even sanded down beautifully. And it polishes up to a beautiful luster.
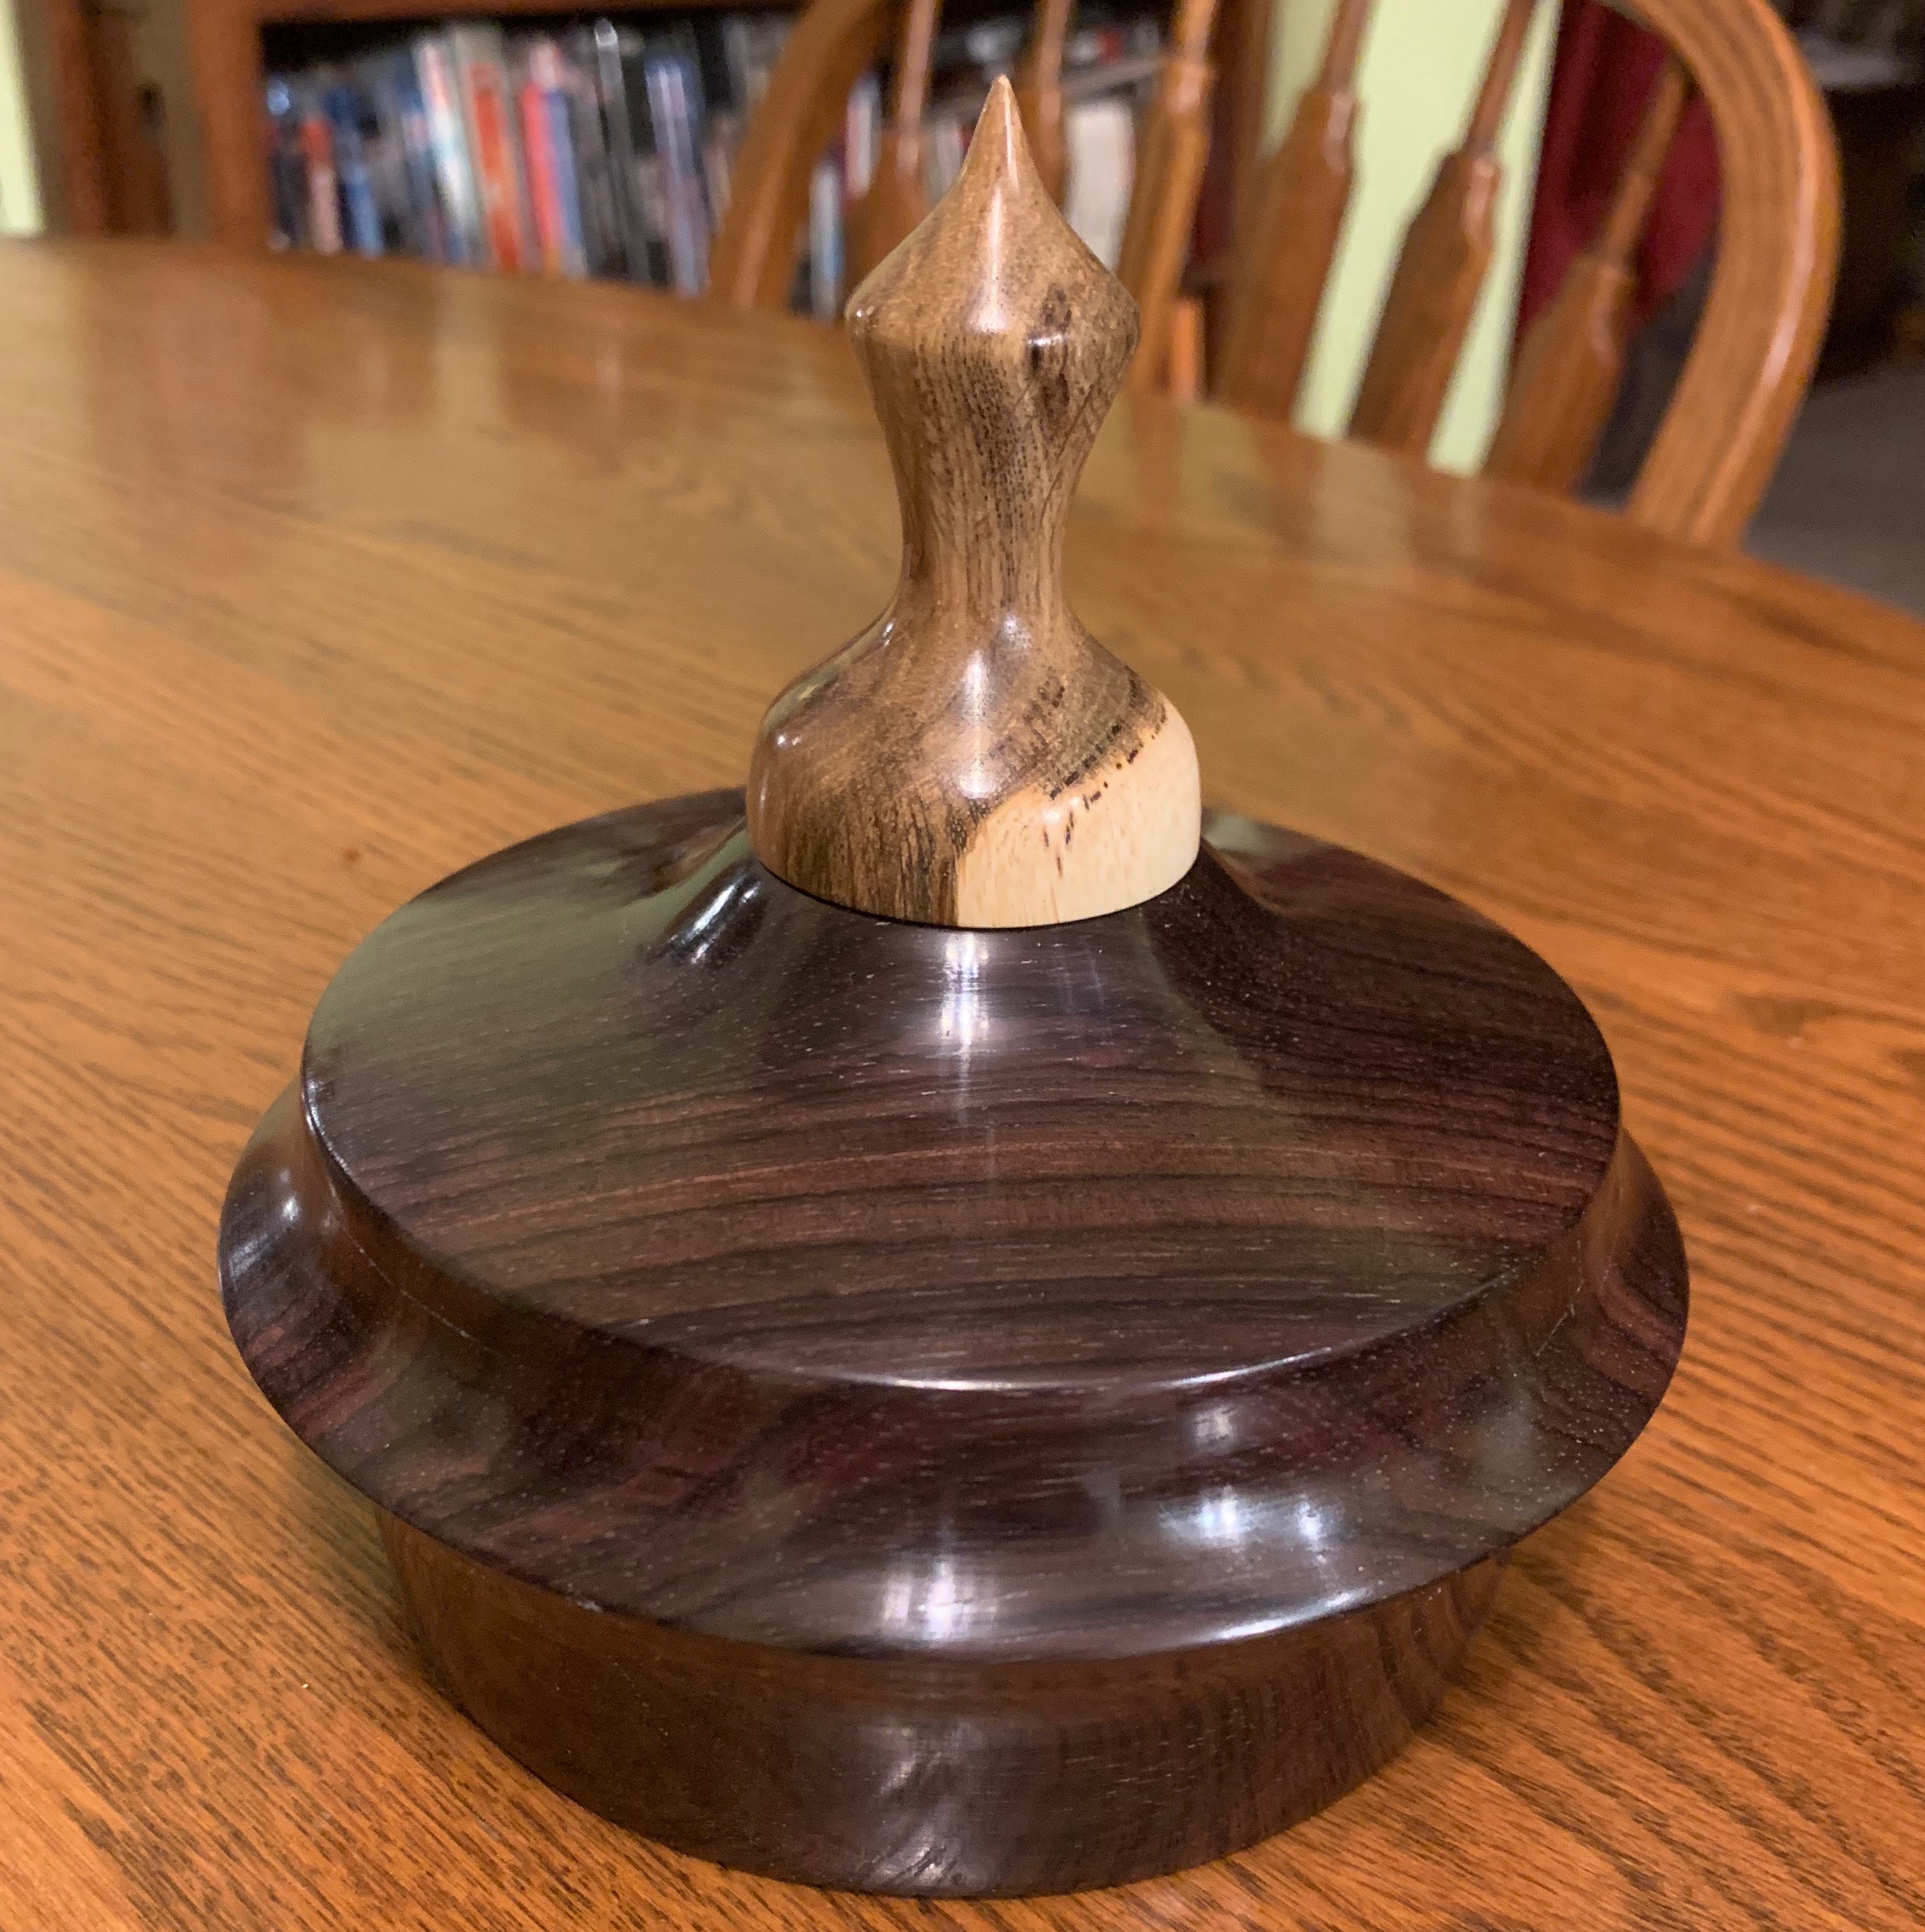
But the smell… Now I’m one of those weird people who are classified as a “super smeller”. I have a ridiculously sensitive sense of smell (and taste, for that matter). To me this stuff has a very distinctive aroma that vaguely resembles, well, poo, to be blunt. MrsGF can’t smell it at all. After putting a finish on the bowl the smell diminished greatly, but I can still smell it when I get within a couple of feet of it. I wondered if maybe it was just that one block of wood, but the second one smelled just like the first.
I like this rosewood stuff, but… There are problems. I’m seeing what I suppose you could call micro-cracks in the wood, very fine, almost invisible cracks that I can’t see unless I get within a foot or two of the bowls. I’m rather concerned about that because I have no idea why they are there. I need to take a closer look at this and figure out what happened. Wood is, well, wood. It moves, absorbs and gives off moisture, swells, contracts. It’s all part of the challenges of working with the stuff. I generally know what happened when a piece of wood cracks or warps, but I’m not sure what’s going on here. MrsGF is encouraging me to start trying to sell some of this stuff, but I don’t want to end up with people complaining about something like this so I want to figure out what went wrong before I turn out more stuff in rosewood.
Let’s see, what else…
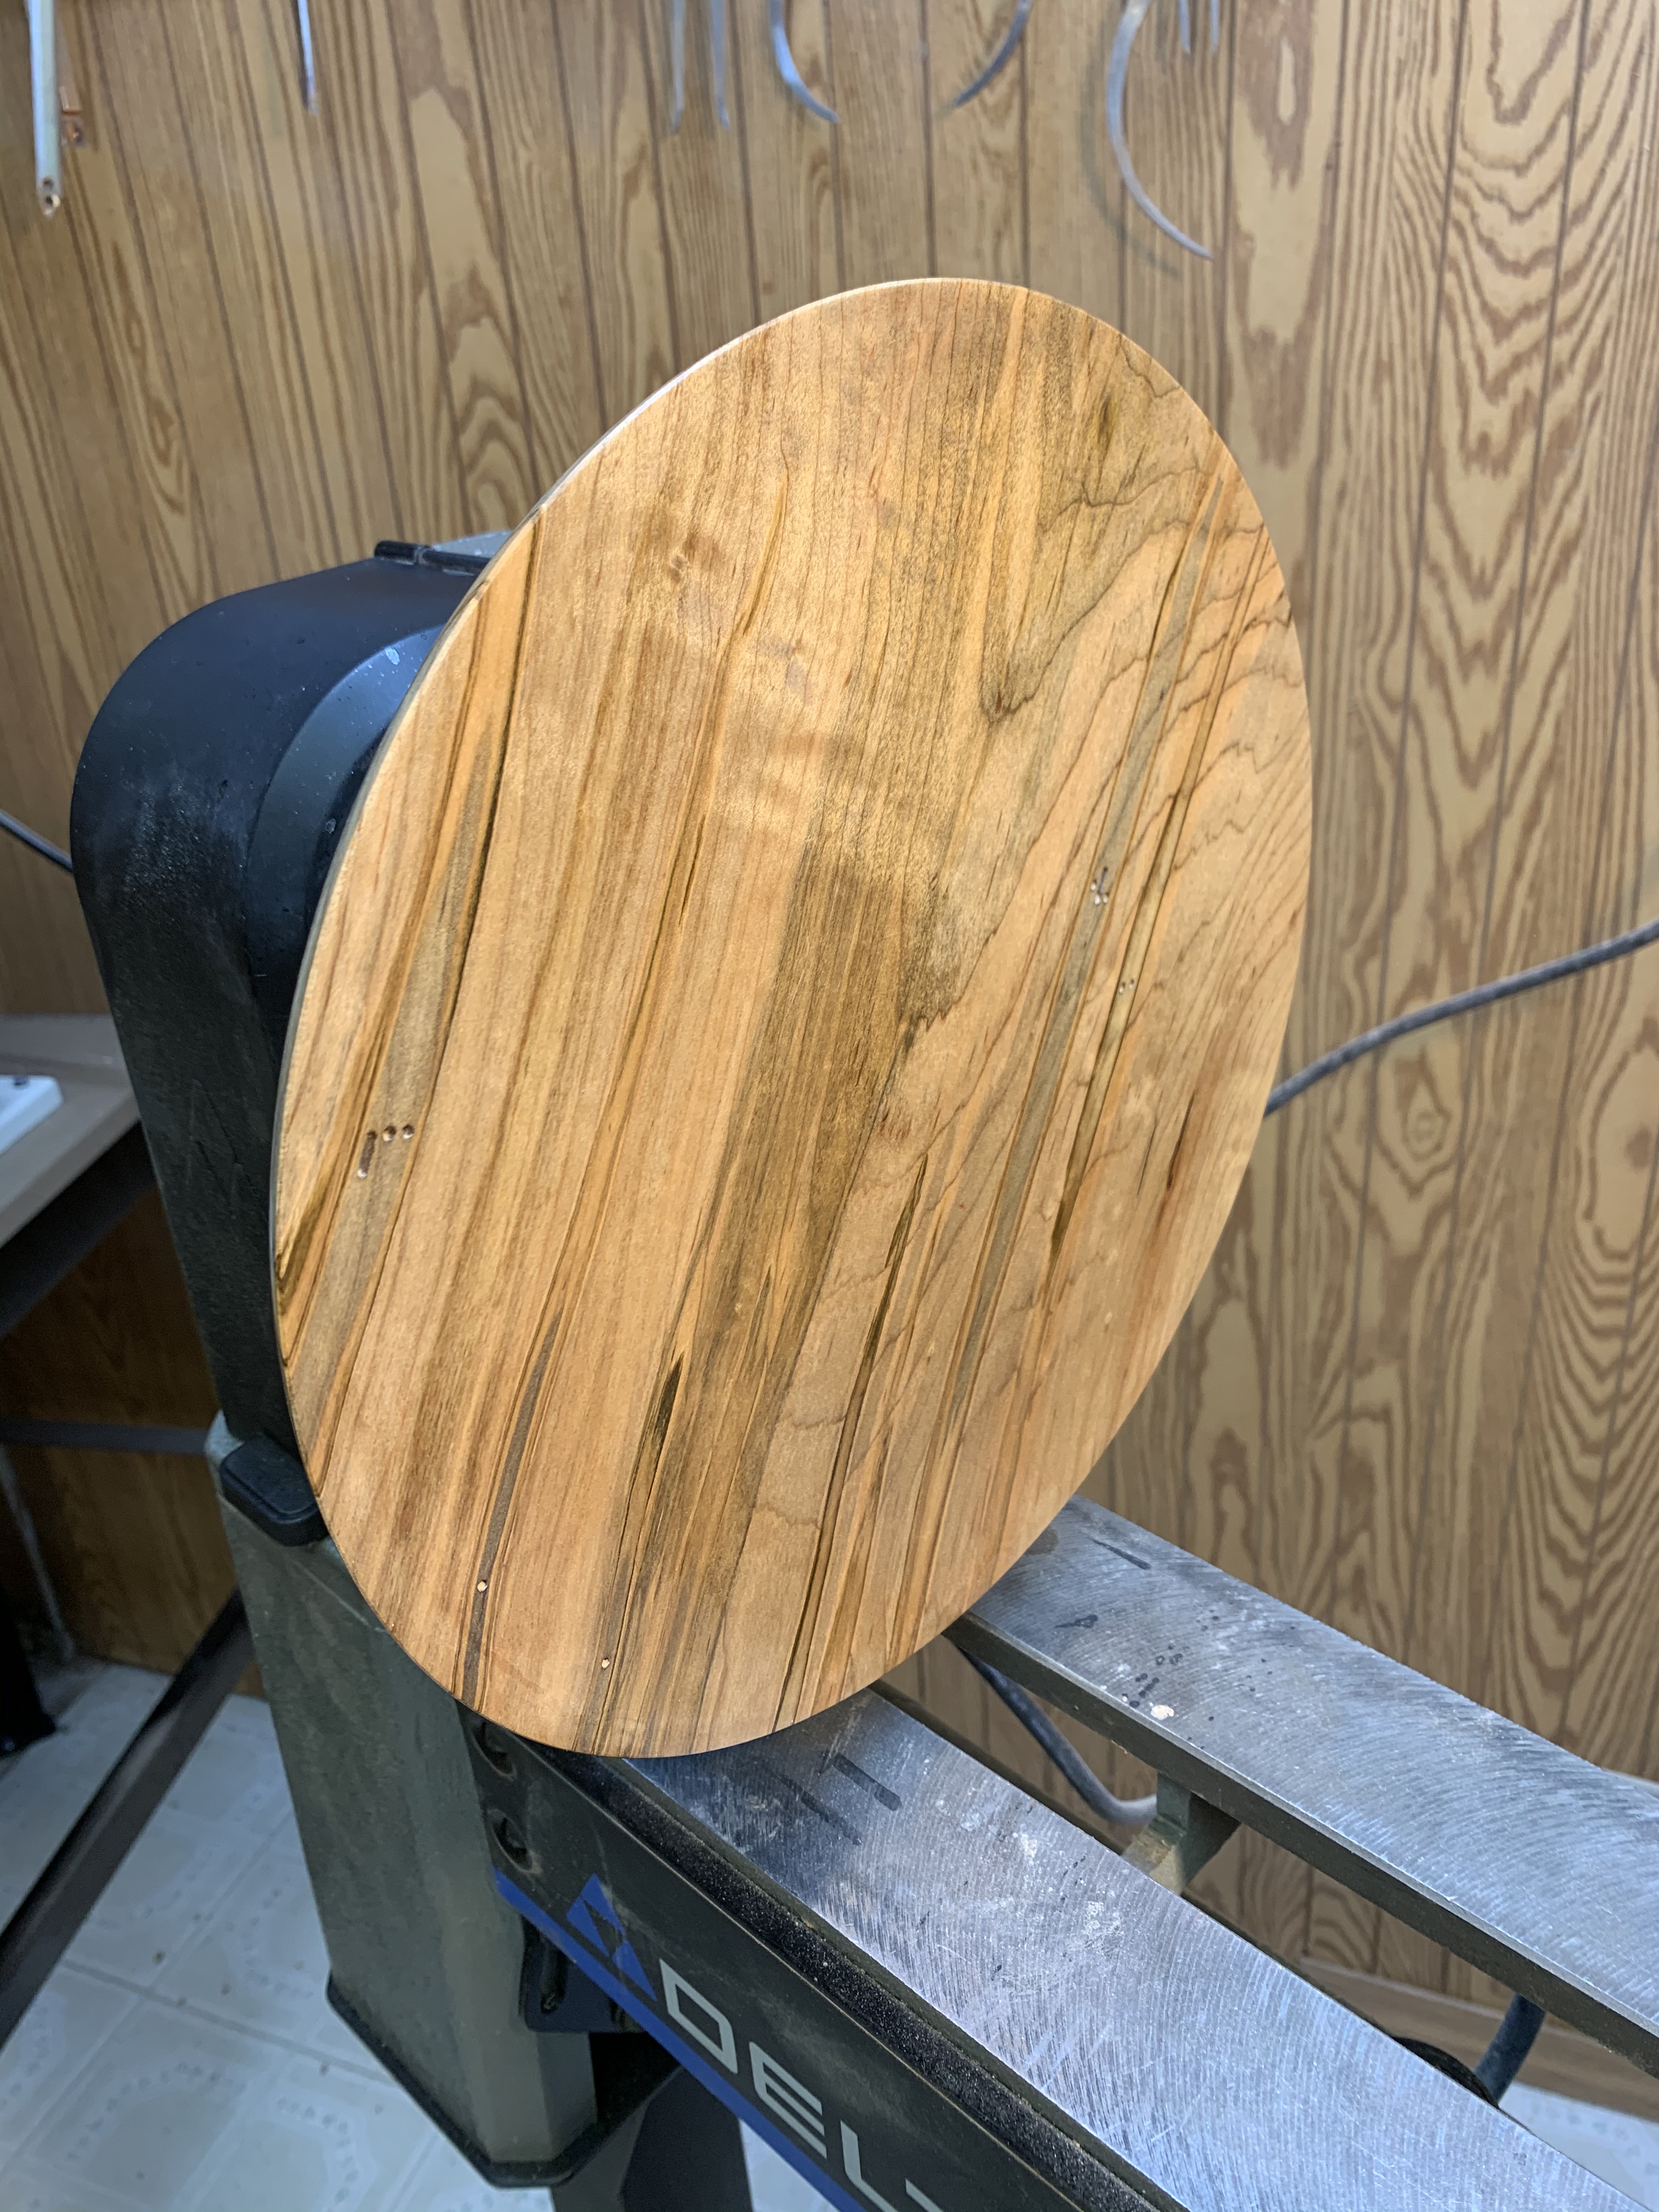
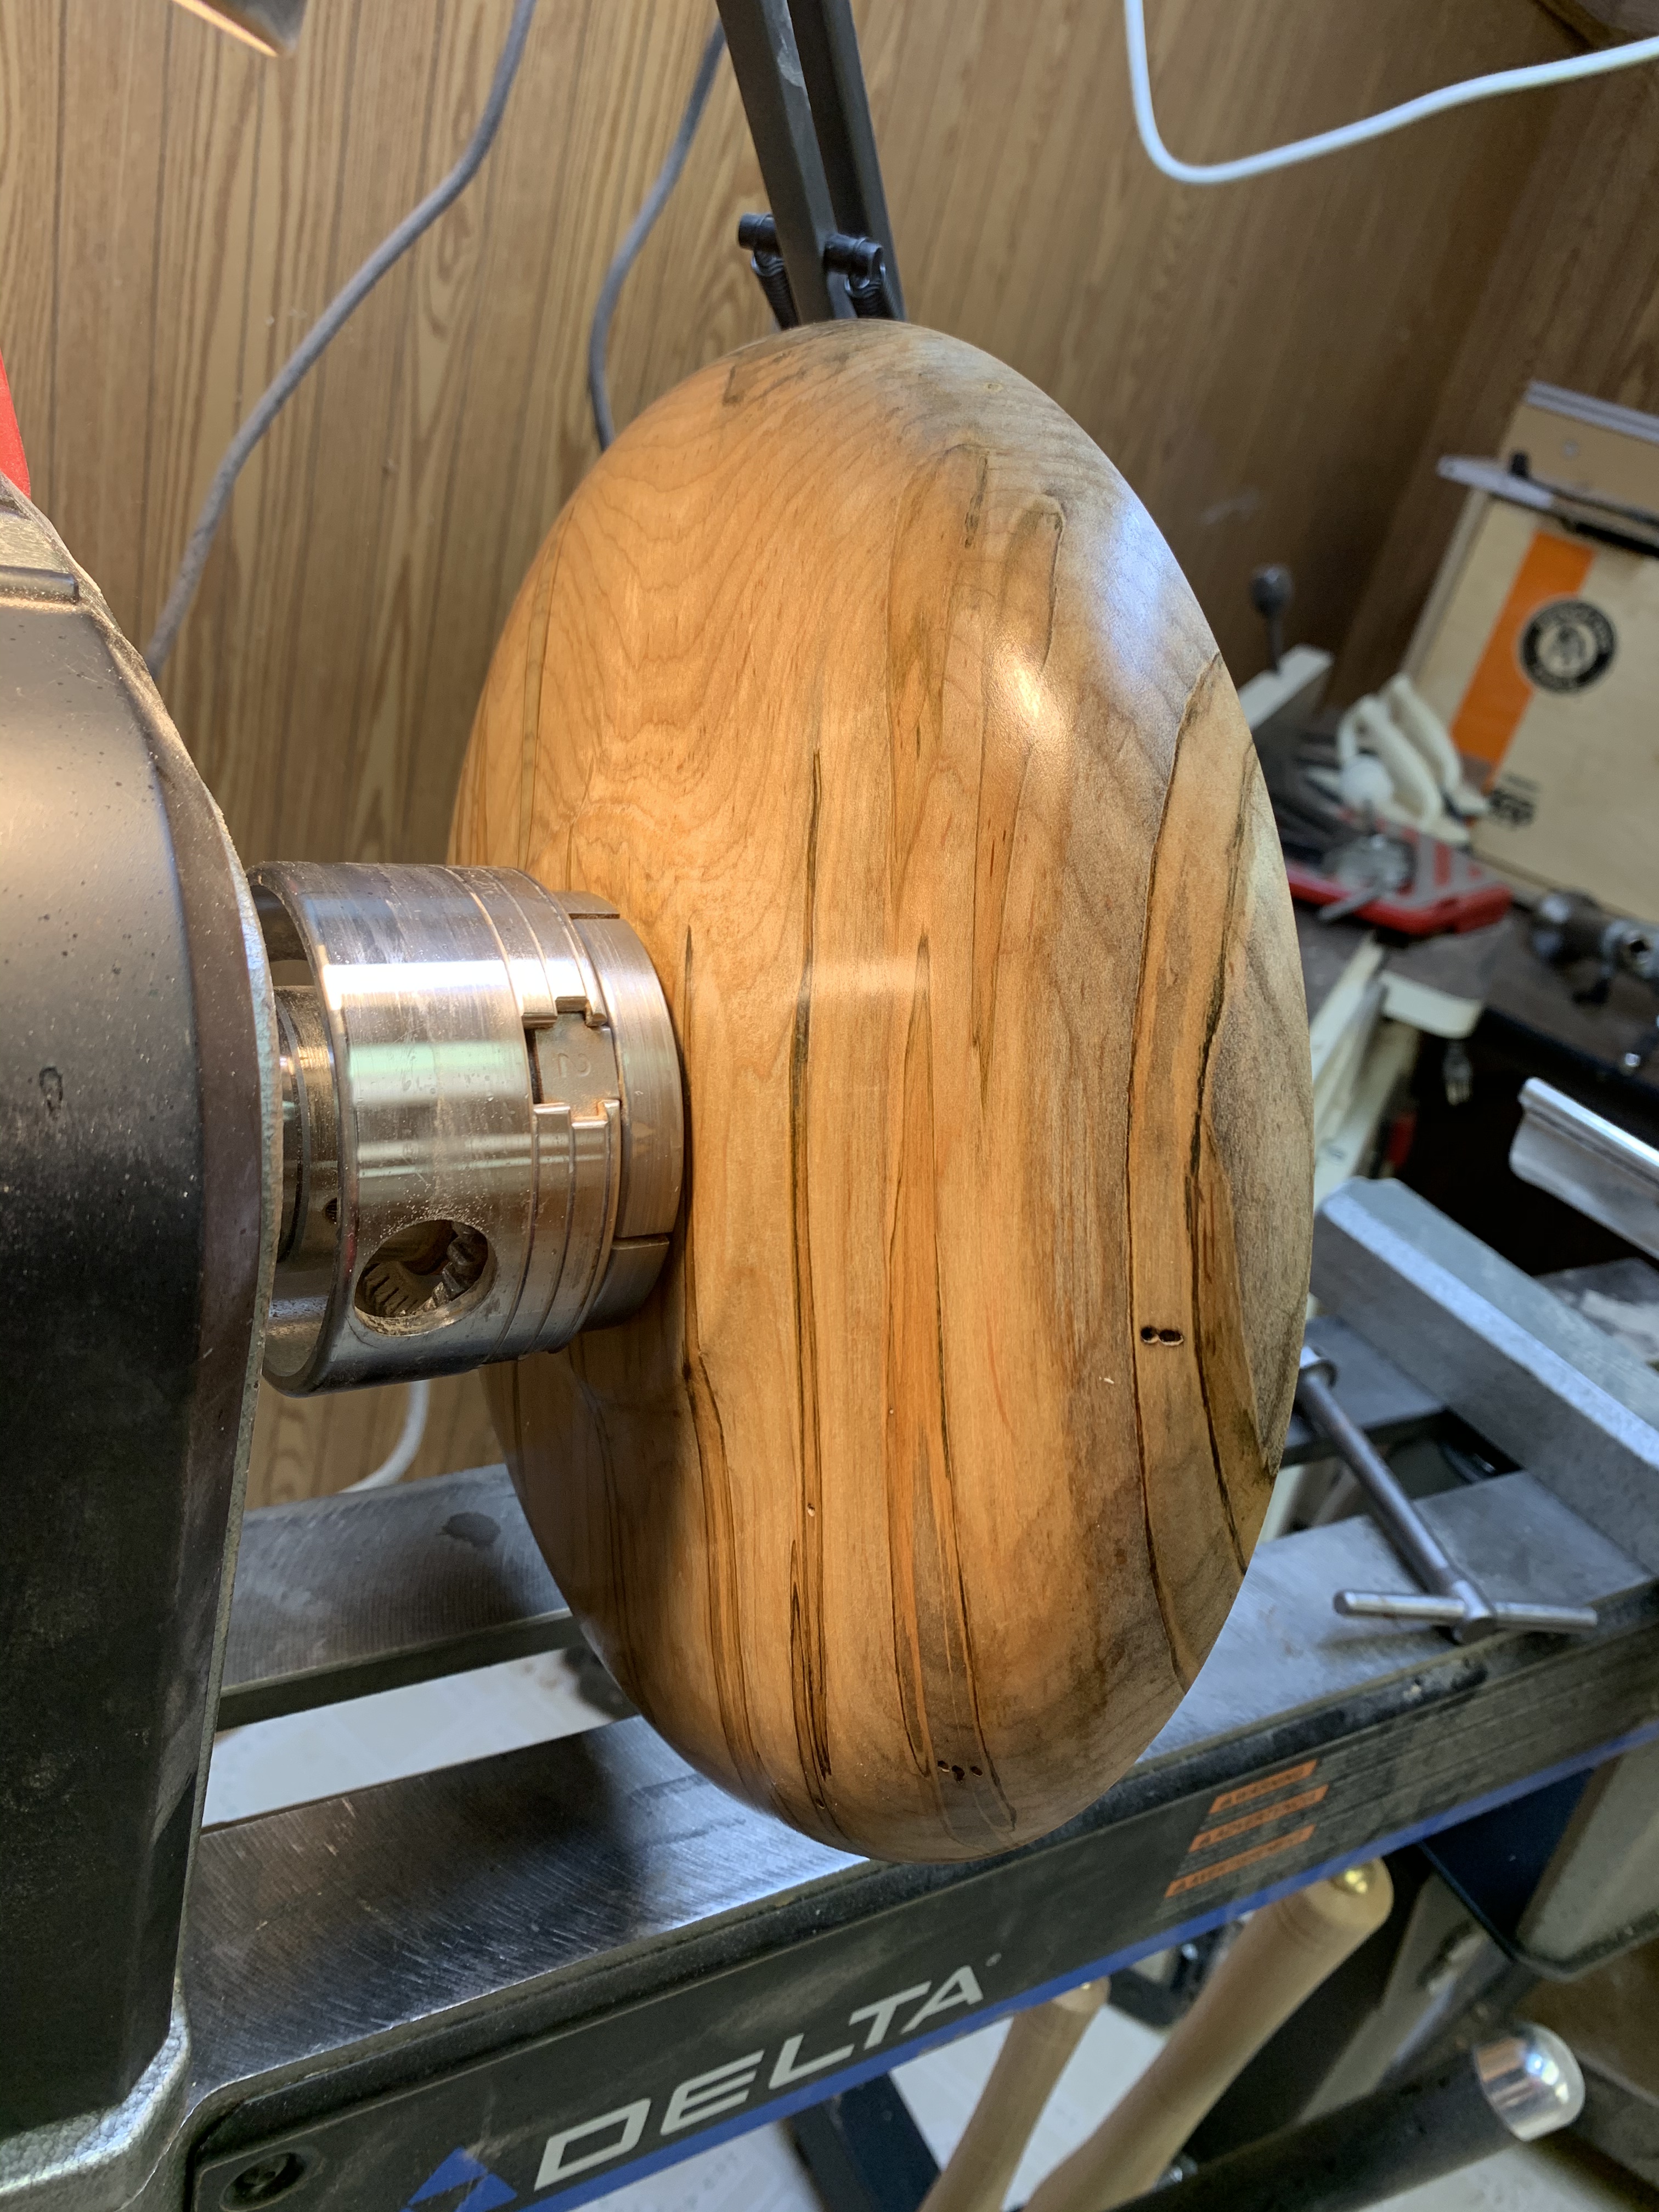
Oh, the pear tree – I saved a lot of the wood from the pear tree when we took it down last year after it collapsed with the intention of possibly using it for various projects. I got curious about how it would look and work so I grabbed a bit that seemed reasonably dry and ended up with this small vase.

The stuff machines nicely, sands well and looks fairly good once it’s finished. It seems to be prone to cracking. You can’t see it in this photo but on the backside of that thing there is a vertical crack running almost the entire length of the vase that’s sealed up with epoxy. Still the results are encouraging and I’m going to keep fiddling with this stuff as I get time.
As I said, MrsGF and a few other people are telling me I need to try selling some of the stuff I’ve been cranking out so they’re pushing me to set up a shop on Etsy. Sigh… I don’t really want to get involved in all of that guff, but I do see their point. If I keep this up much longer I’ll have to rent a storage unit somewhere just to store the projects I’ve been cranking out.
And that’s about it for now.

Yes, a Christmas rose! It was a beautiful sunny Christmas morning here, if a bit cold out, I walked over to the window and saw this. One of two new budding roses on that goofy little rose bush that started out life as a $5 teacup rose I bought on impulse for MrsGF a few years ago. Roses blooming in Wisconsin on Dec. 25? Hey, I’m not going to complain. It was an unexpected and amazingly beautiful Christmas gift.

Her Christmas cactus is being equally fruitful. It has been in full blossom since October and is still going.
Anyway, let’s get on with this…
Wow people must be bored out there because people have actually been emailing questions to me (old.grouchyfarmer@gmail.com is how you can get in touch with me but be warned I do not check this email account more than once a week or two. If you want a fast response the best way is to just leave a comment). So I’m going to talk about some of the questions I’ve received over the last few weeks.
First someone told me they heard that KFC was coming out with its own gaming console. Yeah, right, I thought. Sure it is… Only, yeah, they are.

There it is, folks, the Kentucky Fried Chicken’s gaming console. KFC is supposedly coming out with its very own video game console, completely with a special warming unit to keep your chicken warm while you, oh, blow up aliens or something. And yes, it’s real. At least according to Snopes. Supposedly there is a special rack inside of this thing that uses the heat generated from the electronics to keep your nuggets or whatever warm.
At first I thought this was the stupidest thing I’d ever heard of, but then I thought, well, why the heck not? Yes, it’s silly and utterly ridiculous, but we need something that’s ridiculous and fun and silly to take our minds off what’s going on out in the real world right now. So go for it. Heck, if it isn’t too expensive when (if) it comes out I might buy one.
Sanding
So let’s talk about sanding next. A couple of writers mentioned in emails to me there are some people out there, especially woodturners, who get a bit, well, weird shall we say, when it comes to sanding. Both of them turned my attention to YouTube videos showing woodturners going to extraordinary, even ridiculous lengths, like sanding a bit of wood to 1,000 grit or even higher, in one case wet sanding at 4,000 grit. Then using all kinds of exotic polishing abrasive pastes and, well, it’s just ridiculous. Yes, I understand they want a lovely, high gloss finish on their finished product. But a lot of what they’re doing is a complete waste of time and money.
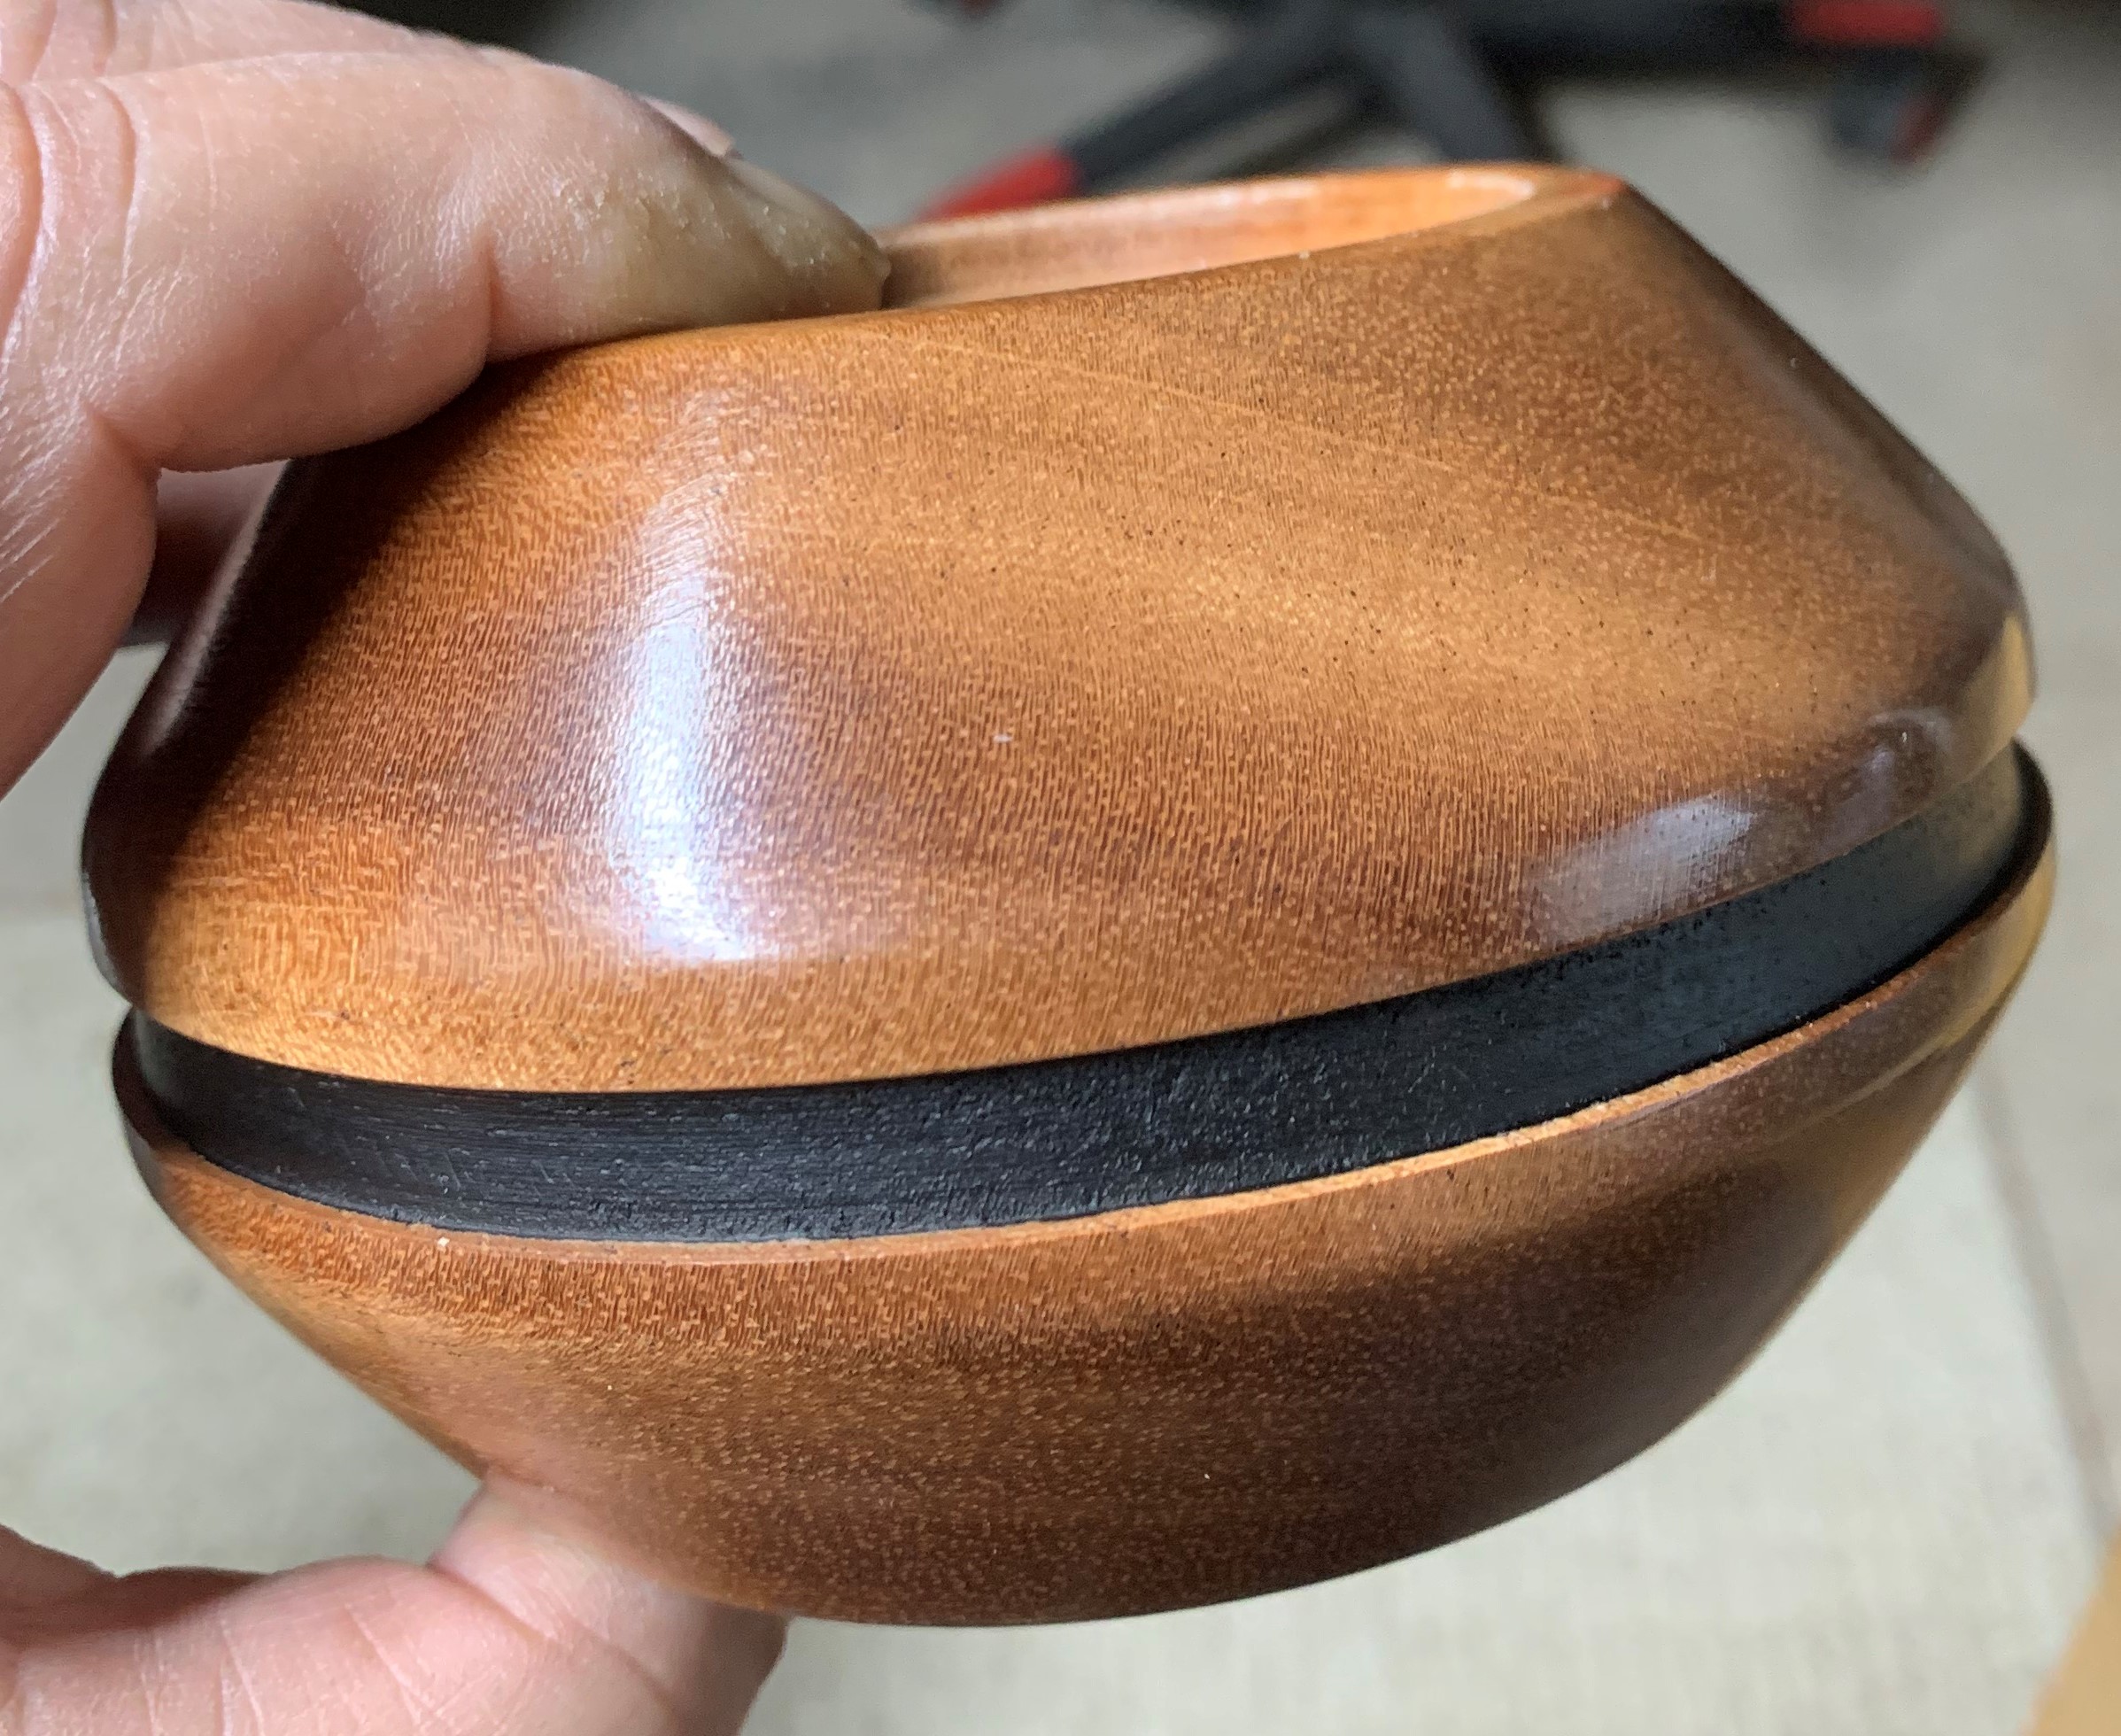

Look at these two bowls. Both of these have a beautiful, very high gloss shine on them. And if you could run your fingers over them you’d feel that both are as smooth as glass. Even the one on the left with all of it’s bark inclusions and peculiar grain structure is like that. Both of those bowls were only sanded up to 240 grit. That’s it. No special expensive and exotic polishing abrasives, no wet sanding at 1,000 grit. No fancy tools or anything else. Just plain old sandpaper starting at 80 grit and working up to 240. And no fancy, expensive, difficult to apply finishes, either. One has nothing but OB shine juice on it and the other is carnauba wax over the top of shellac sealer.
Yes, I might have gotten a bit better finish if I’d gone up to 400 grit when I was sanding, but after a while you reach the point of diminishing returns. The effort and expense doesn’t justify the end result. I look at this the same way I look at sharpening tools. There is such a thing as “good enough”. Yes my chisels might cut slightly better if I went to the trouble of putting a mirror finish on them, but not that much better. And that slight improvement is going to be lost after making a few cuts anyway. I know that from experience. So what’s the point? I feel the same way about sanding. Yes, if someone examines one of those bowls up close with a magnifier they’ll probably see some very fine scratches. But so what? People aren’t going to be taking out a jeweler’s loupe or magnifying glass to look for every defect they can find. They’re going to be looking at that bowl from a distance of several feet. Even if they pick it up they aren’t going to see a problem. So why go to the additional work and expense of carrying things farther?

Of course there are exceptions. There always are. I’ve been talking about wood. When it comes to resin things are different. Resin is great fun to work with, but it presents its own unique challenges. One of my first resin experiments is over there on the left. The end result doesn’t look too bad, but lordy did I have problems getting it to that point because, frankly, I had no idea what the heck I was doing when I started messing with this stuff. I had to do considerably more work to get this little lamp smooth and scratch free, but in the end I still didn’t have to go to the extremes I’ve seen people go to on YouTube. This one was sanded to much higher grit than my wood projects, but only to 600 grit. And I did use a final abrasive paste/polish before putting a finish on it. But that’s it. I didn’t sand it up to 1,000 grit or more, didn’t wet sand it, didn’t do anything extraordinary. The wood parts were treated with my usual sealer, and the whole thing was topped off with a buffed coat of carnauba wax.

All of this only applies to woodturning, of course. If you’re working with flat surfaces like furniture you may want to go with an entirely different approach, which is to not do sanding at all. I rarely resort to sandpaper with my furniture. I use cabinet scrapers. Once I learned about these and how to properly use them, I found out that if used properly you can often get away with not needing to sand a flat wooden surface at all before applying the finish. These things have saved me hours of sanding, and it’s well worth the effort to learn how to use and sharpen them. Here’s a short video explaining what they are and how to use them.
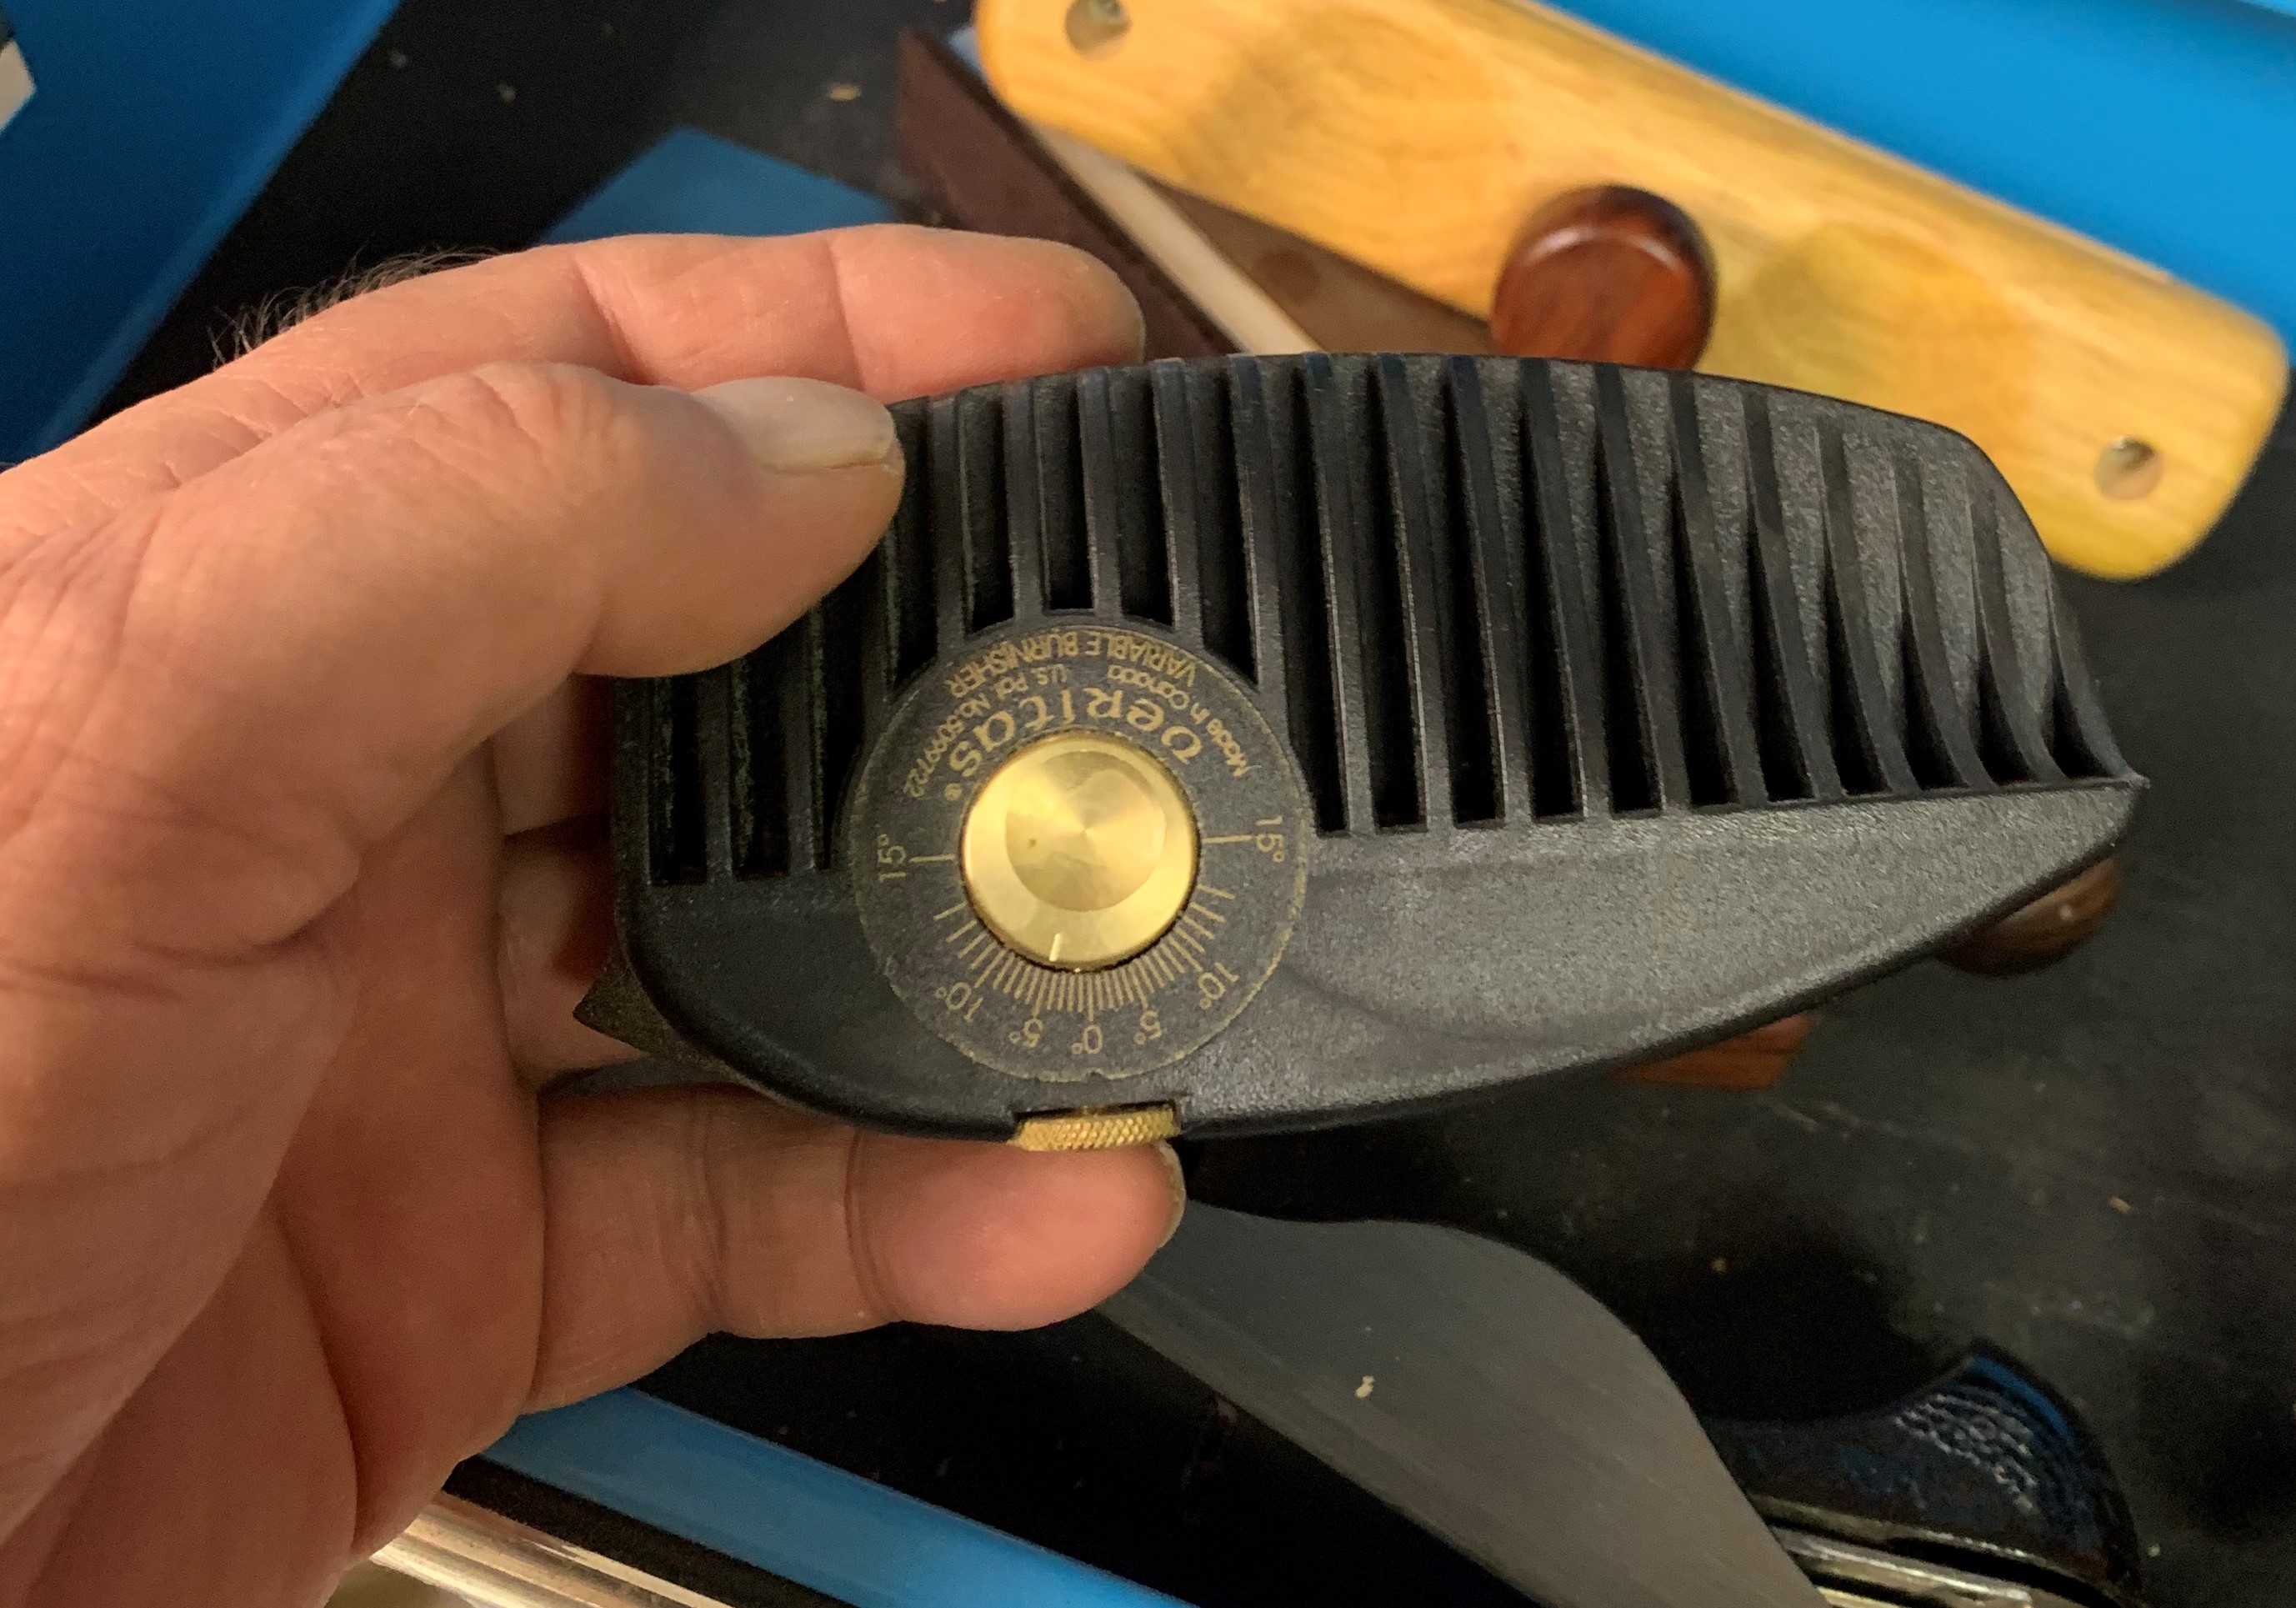
Getting the proper burr on the edge isn’t a big deal, either. You can do it by hand but I use one of these things over there on the right. It’s from Veritas and it will put the proper burr on a scraper in just a few seconds.
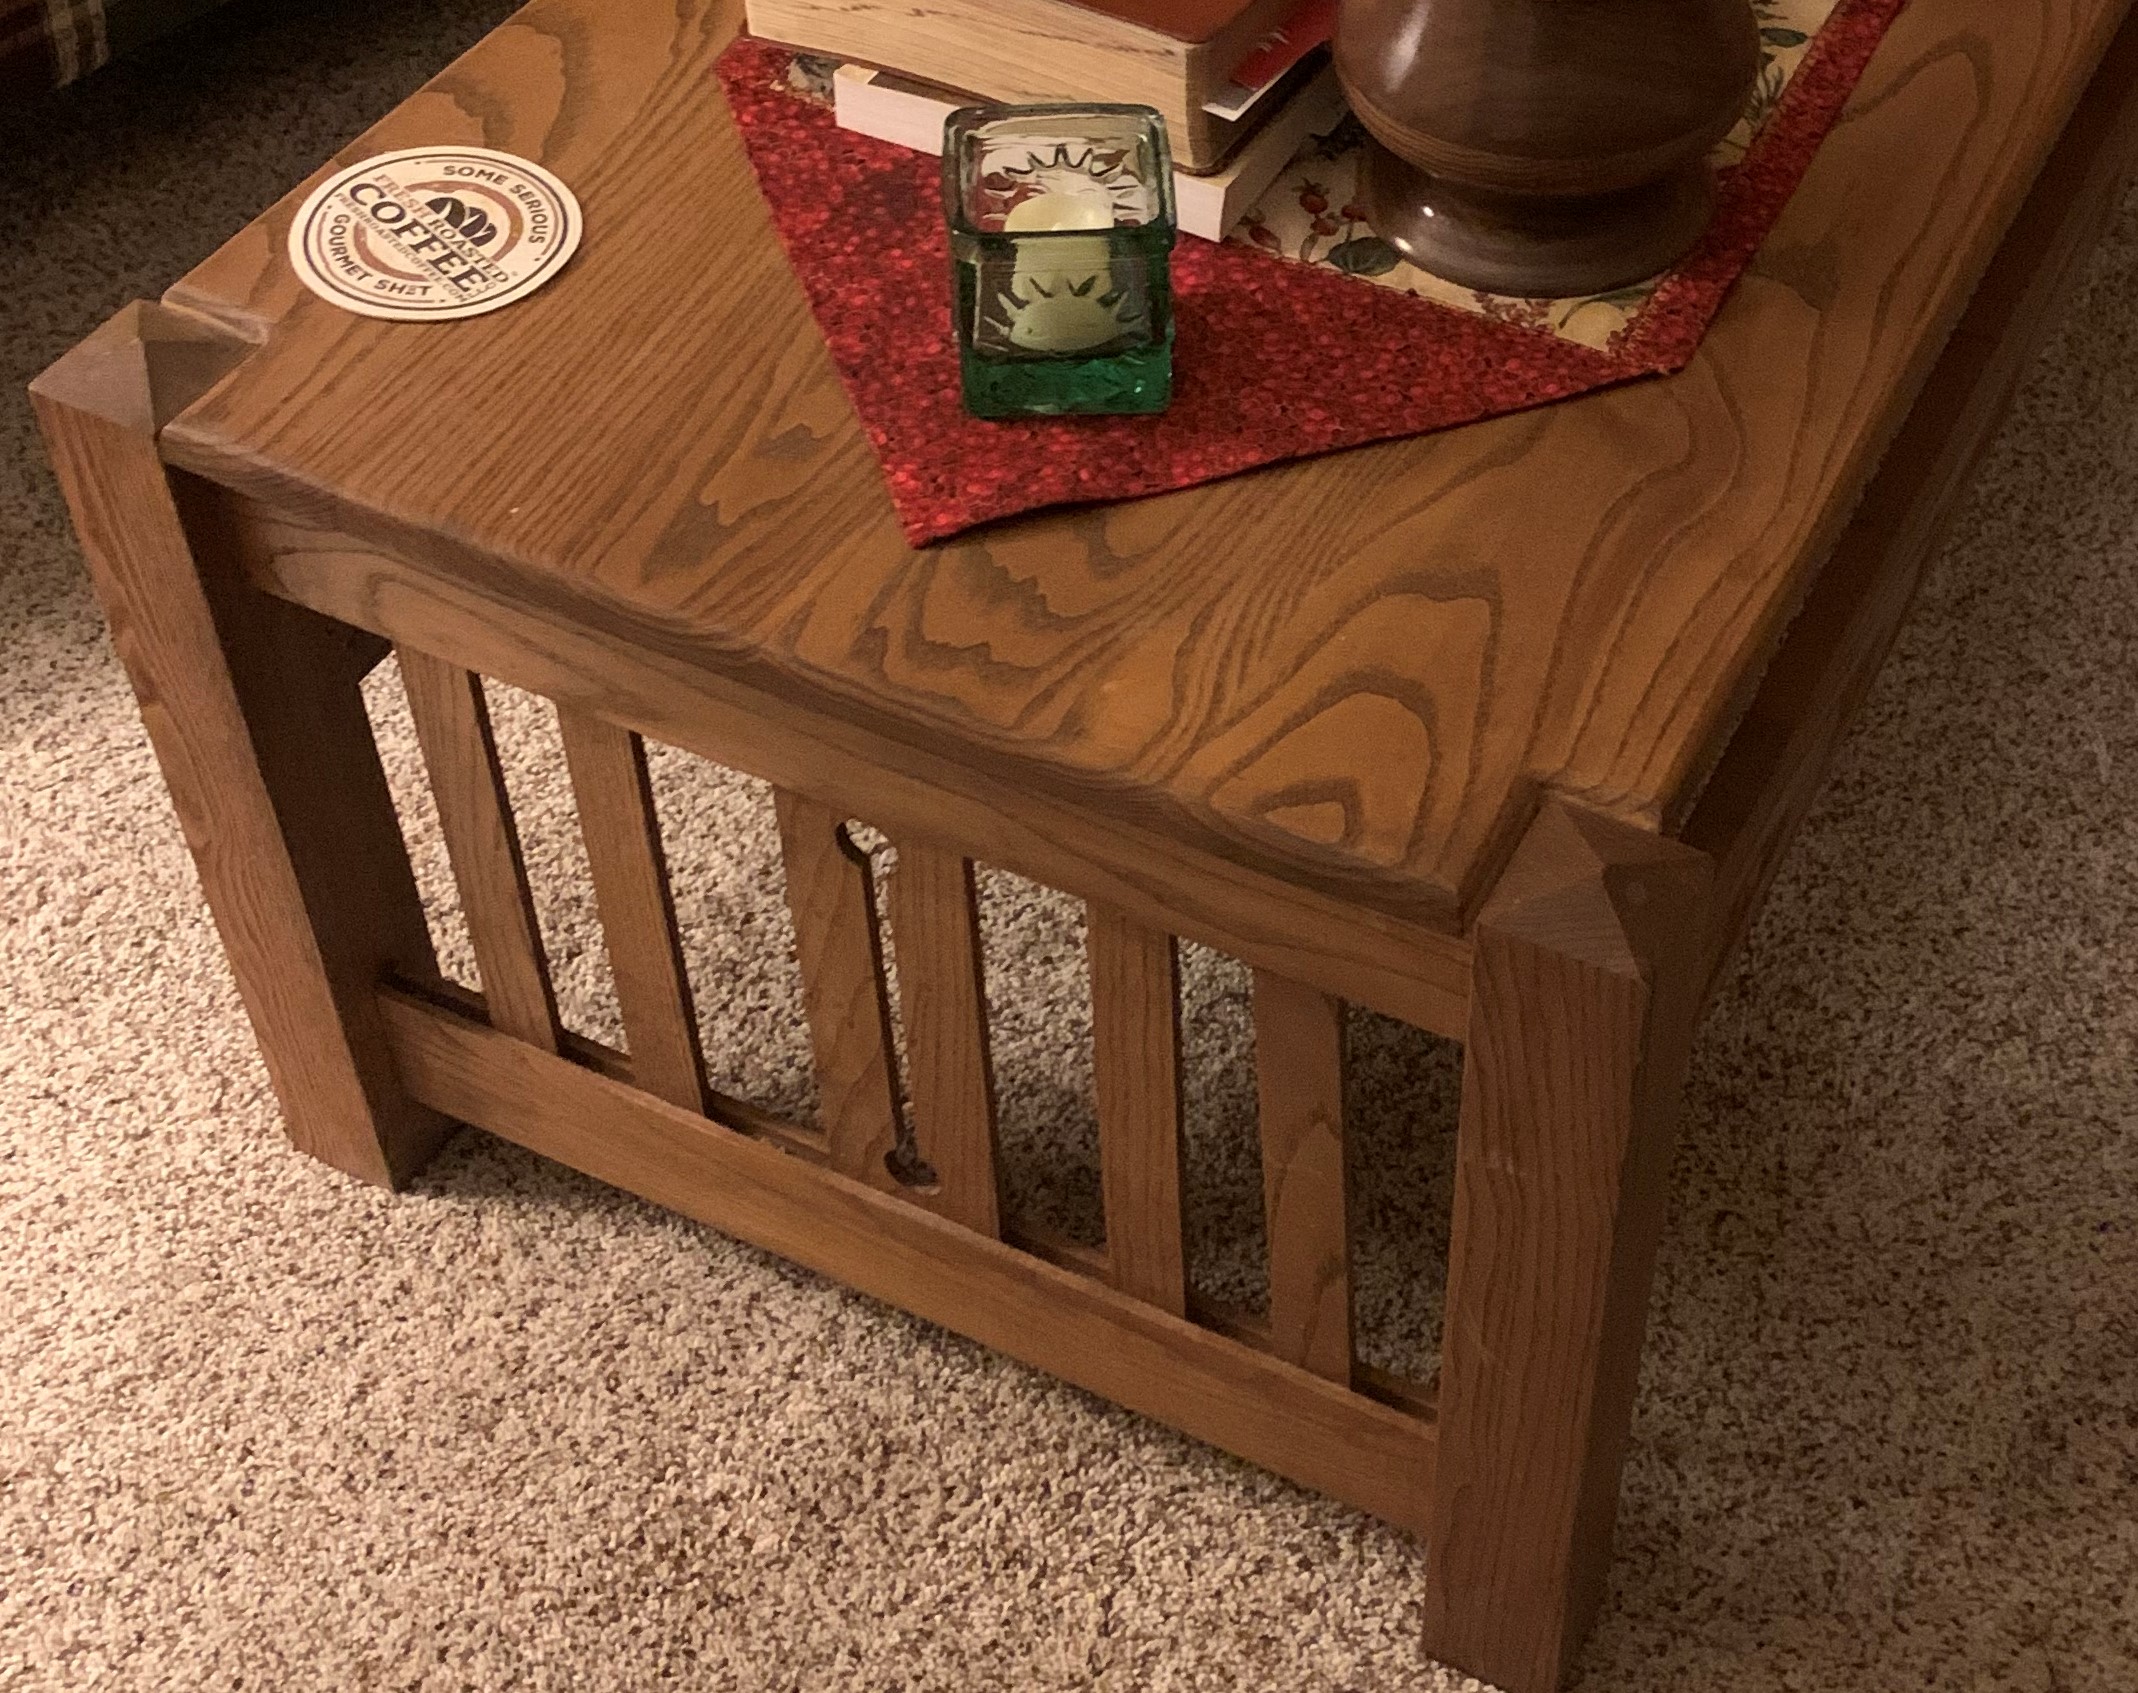
How well do they work? Well look at that table down below. I made that, oh, must be 20 years ago now. It could probably use some refinishing about now, but considering how old it is and that it has survived two teenaged boys and their friends, a rambunctious golden retriever and several crazed pussy cats, it’s held up pretty well. And except for the curved edges, none of that wood was touched by sandpaper. It was prepped for finish with just cabinet scrapers.
Of course it all depends on the “look” you’re trying to achieve. Personally I like wood that looks and feels like wood. I think wood is beautiful all on its own and doesn’t need much to make it look better. And on my furniture I want people to not just see that beautiful grain, but to feel it, too. My stuff is made to be used, to be touched, and to be lived with. I don’t like these high gloss, glass smooth finishes that a lot of people put on furniture. I think it makes it look like plastic, not real.
Anyway, that’s my two cents on that. Remember that there is such a thing as “good enough”, and once you reach that point, seriously think about whether it is worth the effort to go farther.
And to wrap this up, here’s a violet in the early Christmas morning sun.

We’re rapidly approaching the end of 2020 or, as some of us call it, “the year from hell”, so this is a good time to look back at some of the tools and products I’ve bought and used over the past year and see just how well they actually worked. I’ll use a scale of 1 – 10. A 1 means it is utterly miserable and a complete waste of money. A 10 means the tool is outstanding and exceeded my expectations in every way. Anything above a 5 means I feel it’s worth the money. All of the comments are based on my actual observations while using the tool in actual working conditions over a period of weeks or longer.
Rikon 10-3061 Bandsaw: Score – 8

The Rikon saw was one of the more expensive purchases I made this year, and one of the best. I’d wanted a bandsaw for many years but always managed to talk myself out of buying one until this year. Now that I have it, I don’t know how I got along without it. It’s become the 2nd most frequently used power saw in the shop, behind only my table saw.
The saw is nice all the way around. It’s well made, the fit and finish is good, it’s easy to adjust the blade guide bearings, the fence is decent. It has done everything I’ve wanted it to do, and has done it pretty darn well. I really like this saw.
There are a three issues that keep it from getting a 10, and all of them are relatively minor.
The dust collection system is pretty much worthless. Oh, it sucks dust out of the lower wheel housing, but that’s all it does. The table will quickly become thickly covered with dust, the lower guide bearings will become caked with the stuff. I need to get under there with a brush to clean the guides off every time I use it. Minor, but annoying.
I also think the saw is underpowered. The motor is certainly adequate for most things, but if you try to do anything challenging like trying to cut a four inch thick piece of ash it will quickly start to bog down and even stall. Of course the blade could be the issue there. I’m still using the blade it came with and it is not very good. I probably should have bought a good blade for it right off the bat. They aren’t that expensive.
Finally there’s the table. There’s nothing wrong with the table itself. The problem is the tilt system underneath it. It’s fiddly, flimsy and frankly not very well made or designed. I keep it locked at 90 degrees so it hasn’t been an issue for me, but for someone who needs to change the angle this could be a problem.
Delta 46-460 Midi-Lathe: Score – 4

The other really expensive tool I bought this year is the Delta 460 lathe. At first I was thrilled with the thing. But that was because my previous lathe was an absolute piece of junk that was the most badly made piece of equipment I’d ever seen. But the longer I’ve used the Delta, the more disappointed I’ve become. I really expected better from Delta, especially on a piece of equipment that costs $700. Oh, it works, but…
The tool rest was a piece of junk. Seriously. I literally threw it away. It was a rough cast piece of iron that hadn’t even been properly machined or finished. It was impossible to slid a gouge along it without it catching. The metal it was made from was so weak that the main support rod where it fits into the tool rest banjo actually bent the first time I hit a catch when I was turning. When you buy a $700 lathe you shouldn’t have to throw away the tool rest it comes with and spend even more money on a decent aftermarket one, but that’s exactly what I had to do.
The tailstock handwheel is seriously, almost laughingly sloppy. There is an utterly ridiculous amount of play in the threads in that thing.
The bed is nicely machined and flat, but only on the top side. On the underside it varies in thickness so badly that if I adjust the tool rest banjo to lock down so it’s tight on the one end of the bed, it will be so loose on the other end of the bed it won’t lock in place. I have to reach under and loosen or tighten the adjustment nut underneath the lock down whenever I move it from one end to the other. Same with the tailstock lockdown.
The forward/reverse motor switch is wired backwards. This apparently is a long standing issue with this lathe.
It has a variable speed control, which is very nice, of course. Or would be if the control would stay at the speed I set it at. It doesn’t. Any slight vibration in the lathe causes the speed control dial to move by itself. This isn’t just inconvenient it could be downright dangerous.
I really expected better from Delta.
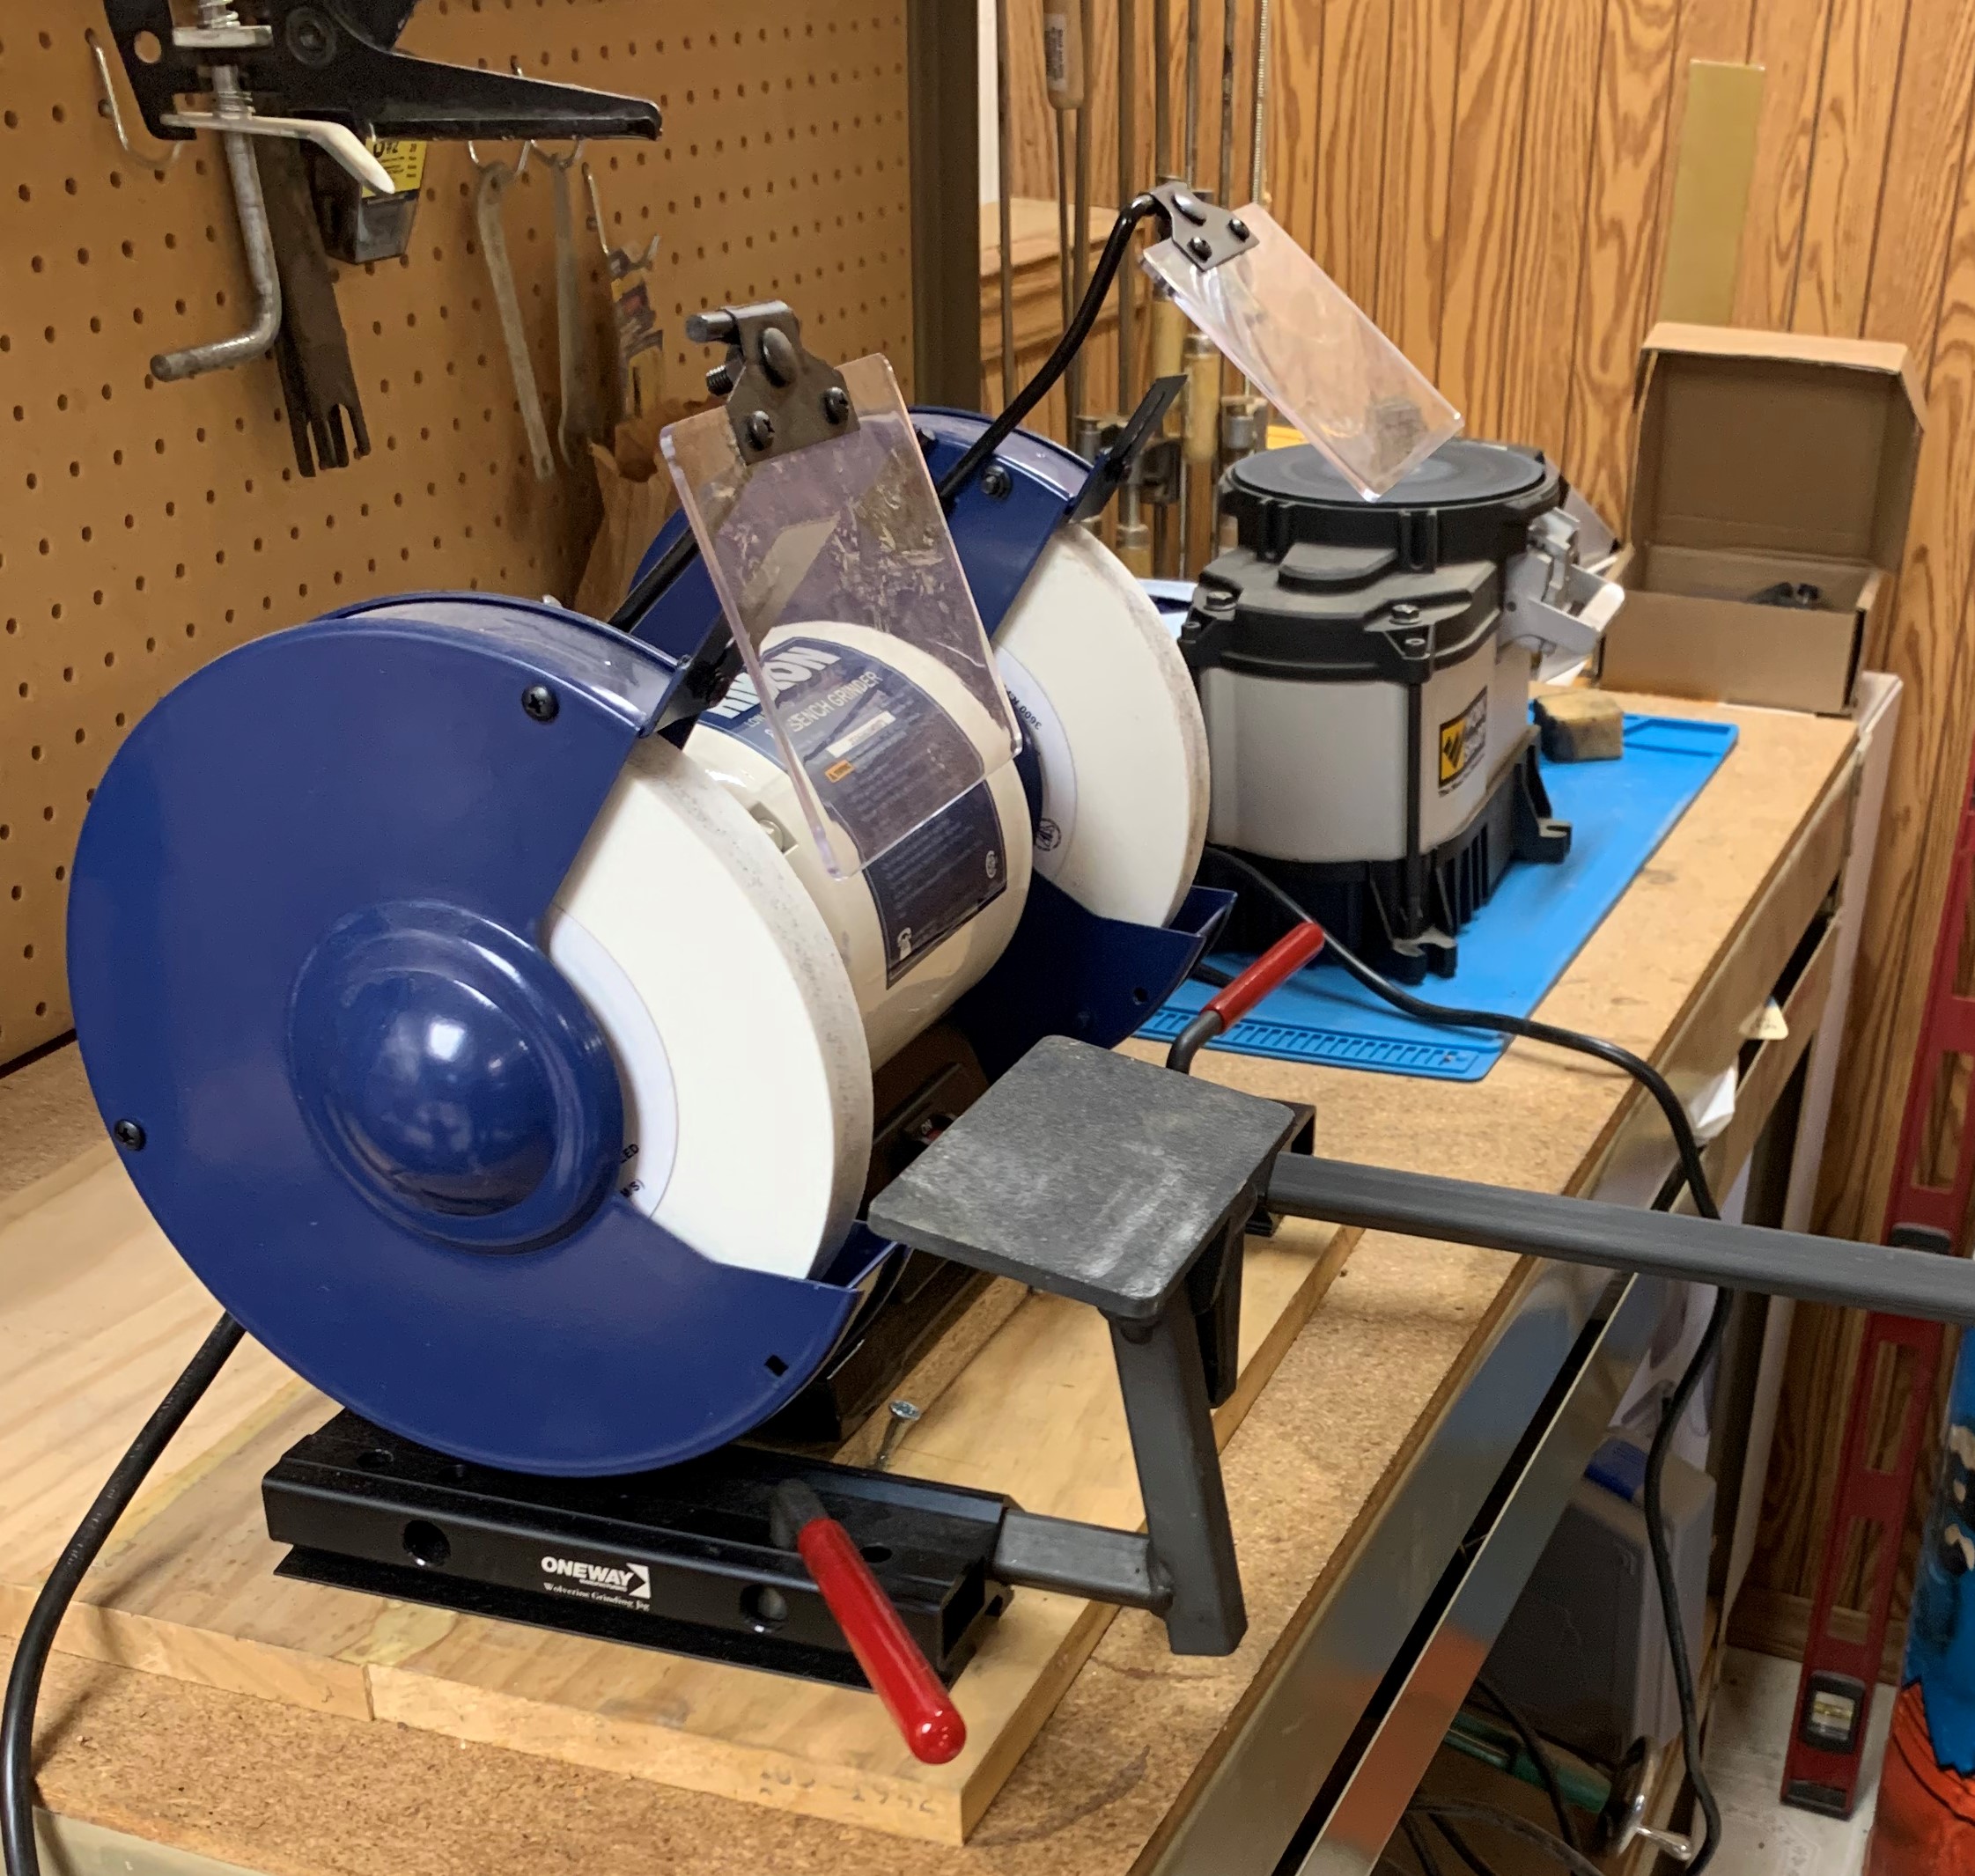
Rikon 8″ Low Speed Grinder: Score – 9
Let’s see, what can I say about this thing…
Well, it’s a grinder. It works. Any grinder like this is little more than an electric motor with some grinding wheels attached. This one just works. It’s quiet, almost no vibration. No problems at all with it. (Why a low speed grinder instead of a standard one? Because a standard speed grinder spins the wheels so fast it will quickly heat up the metal you’re grinding to the point where it will turn blue and wreck the tool you’re trying to sharpen.) This one does exactly what it’s supposed to do. The price is relatively reasonable. Even the stock grinding wheels it comes with are pretty nice.
Wolverine Grinding Jig with Vari-Grind: Score – 8

While I’m on the subject of sharpening I need to mention the Wolverine grinding jig and vari-grind attachment. Doing just about any kind of wood working means you need sharp tools. And that means you’re going to have to have the equipment and skills necessary to sharpen those tools. In the case of some tools like bowl gouges, it isn’t a matter of just slapping a tool onto a sharpening stone or grinder. Bowl gouges and a lot of other tools don’t have straight cutting surfaces, they’re curved, and often have compound curves. So unless you’re very, very good at sharpening things like that free hand (I most definitely am not) you need some kind of help. In my case that’s the Wolverine grinding jig. It isn’t super expensive, it goes for around $90, and for sharpening some tools like bowl gouges you’ll also need the Veri-Grind attachment which goes for about $45, so the whole thing sells for about $135 or so.
And once I got it properly installed and set up, it works beautifully for sharpening my lathe tools. There’s no way I could get along without it, or at least without something similar. Once I got it set properly and figured out how to use it, it takes me probably less than a minute to sharpen a bowl gouge or scraper or skew chisel.
A word of warning, though. It is a bit fiddly to get set up properly. It requires everything, including your grinder, to be securely bolted together on a wood platform, and may require some disassembly of your grinder in some cases. But once it is set up and you learn how to adjust everything, it works really well.
Nova 4 Jaw Chuck: Score – 9
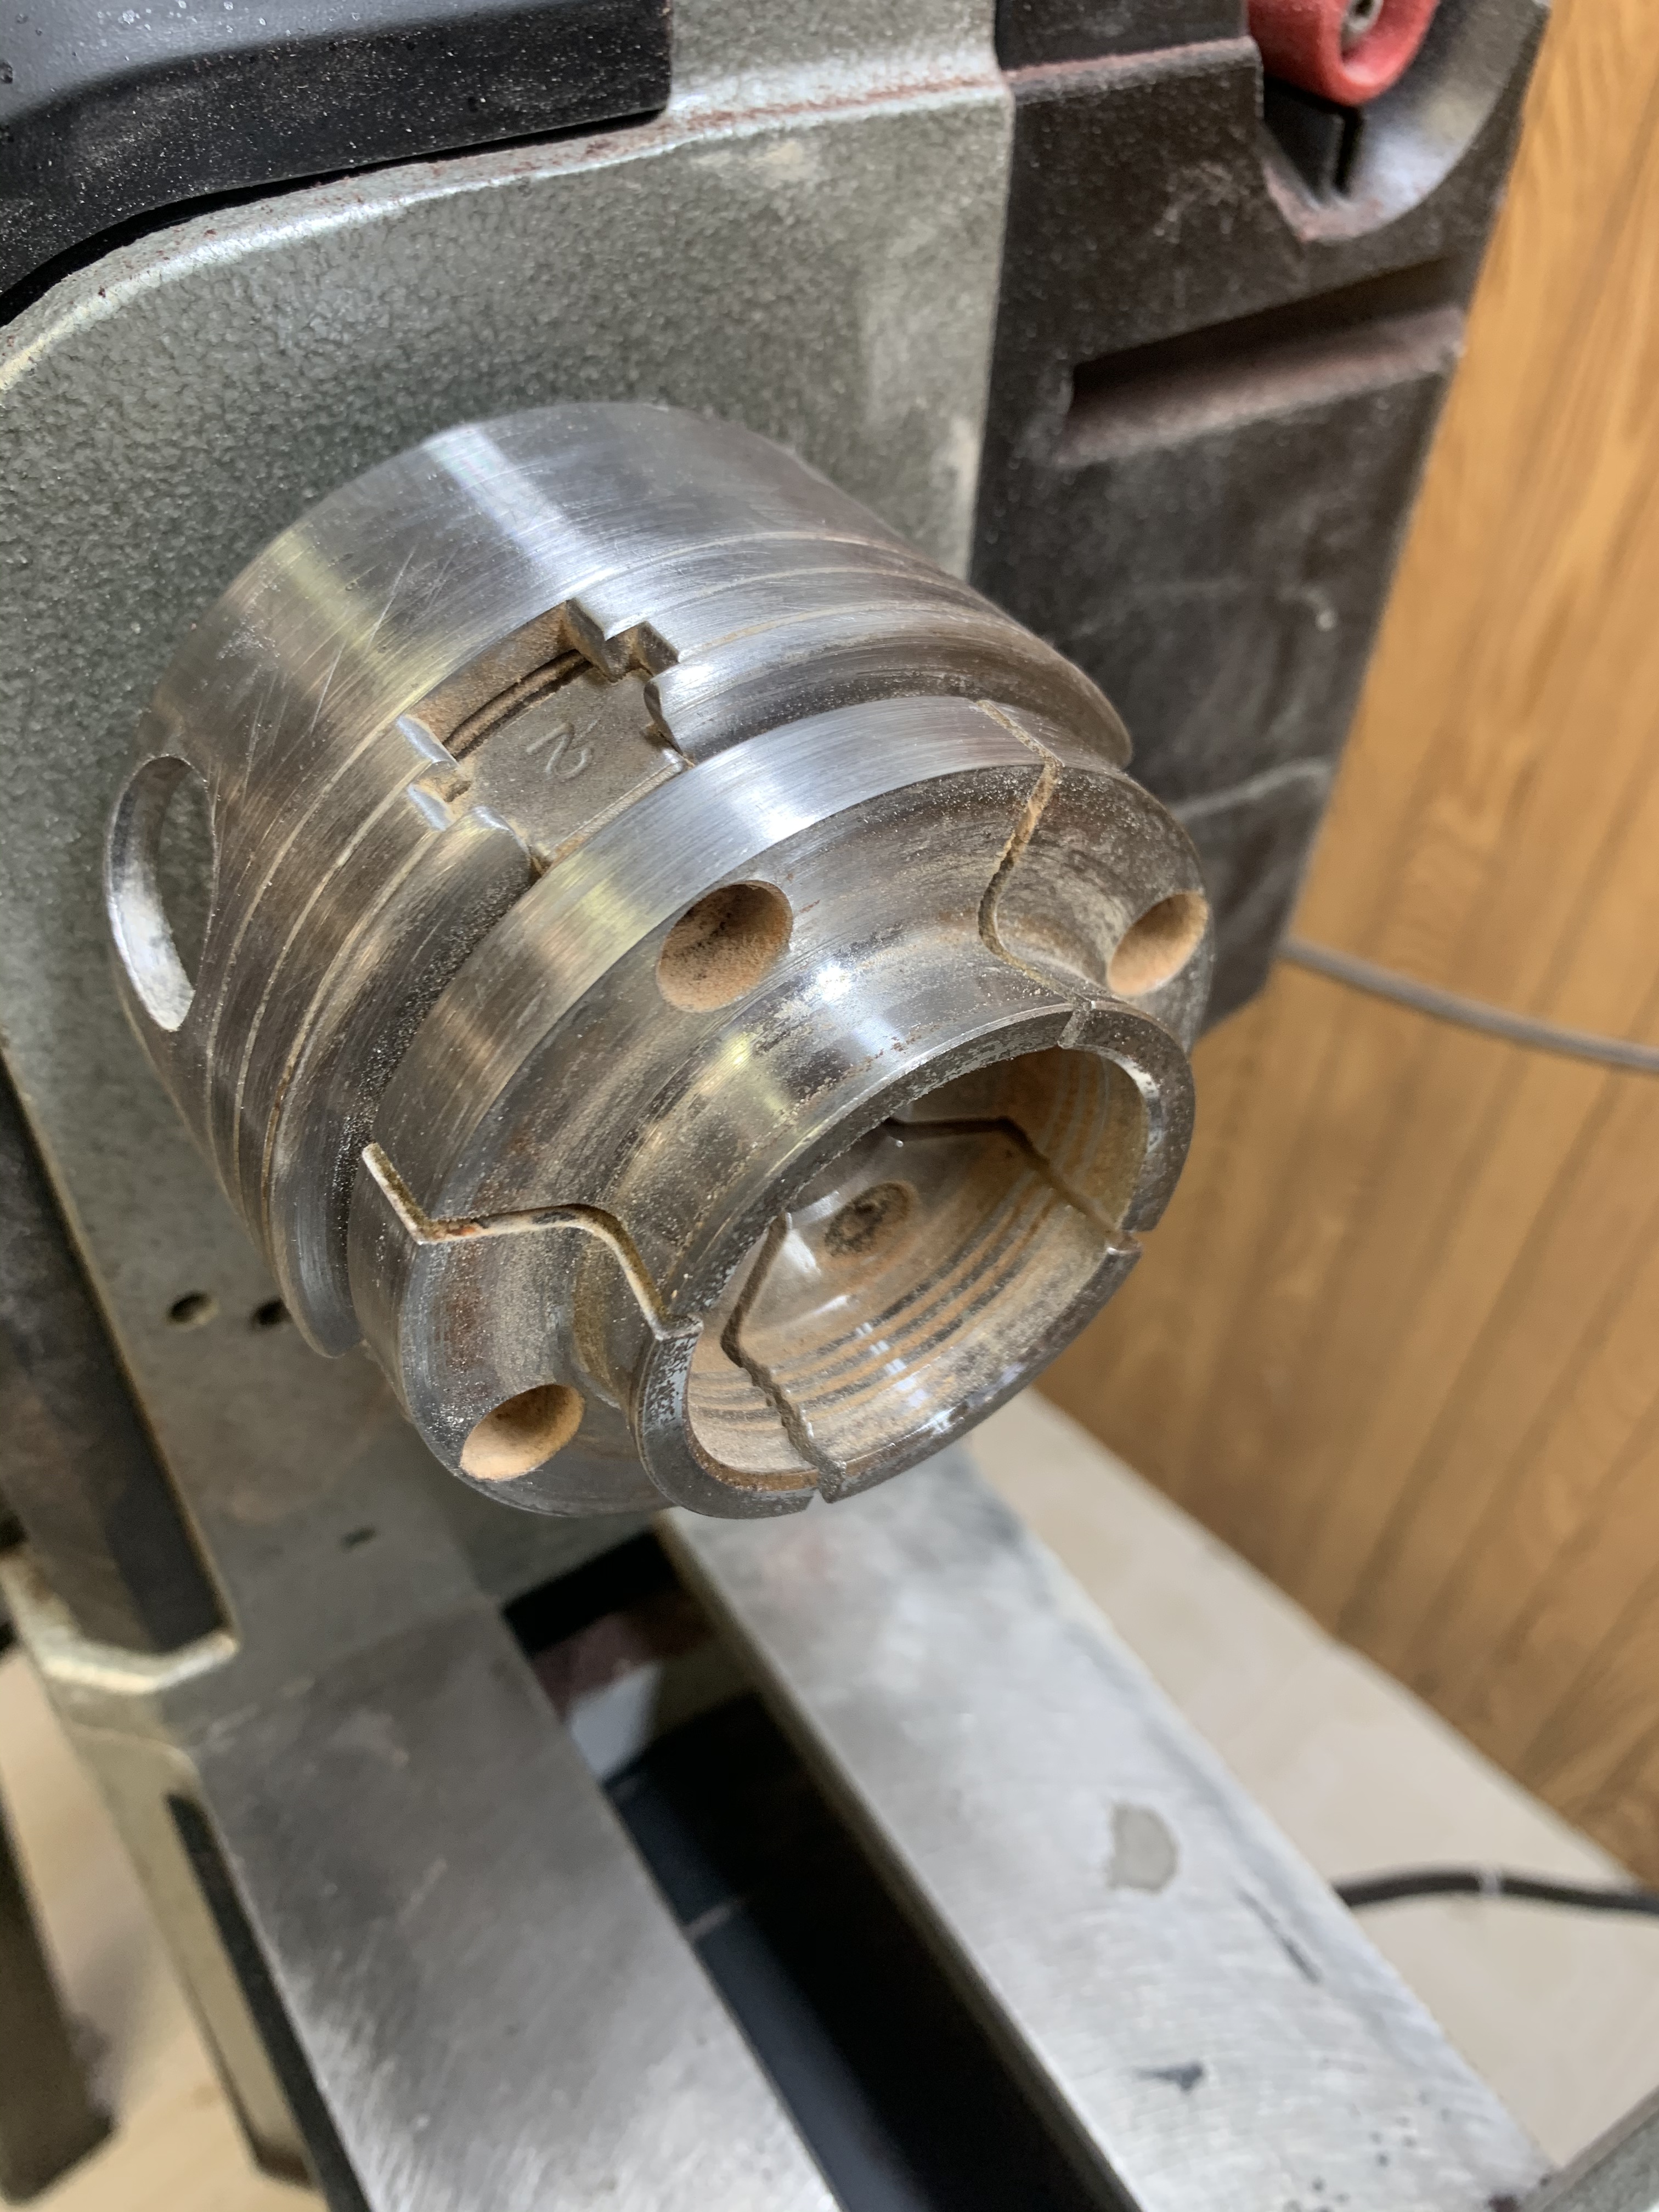
Now I suppose you could get along without a chuck to mount stuff to a lathe, but I don’t know how I’d get along without one. I use this thing on almost every single lathe project I’ve worked on since I got it. I have to admit that this is the only one I’ve ever owned, so I don’t really have anything to compare it to. But in the months I’ve been using it I’ve had absolutely zero problems with it. Once a piece of wood is locked down in it, it has never, ever come loose. It just plain works as advertised. I’m very pleased with it.

ShopFox Air Filtration System: Score – 8
I have absolutely no complaints about this thing either. It’s relatively quite, moves a lot of air through the filters, and does a decent job. It has a timer so I can let it run for 1 – 3 hours after I leave the shop to keep cleaning the air and it’ll turn itself off. I’ve noticed a considerable reduction in the amount of dust I’m seeing in rooms adjacent to the shop since I started using it. It works.

Starbond CA Adhesives: Score – 5
Now I don’t use a lot of CA type adhesives (so-called “superglue”). I don’t like them very much to begin with. The fumes they give off are highly toxic and extremely irritating to the eyes, and they really aren’t very good glues despite all of the hype. It’s also been my experience that CA type glues just don’t work very well on wood. Starbond is a decent CA glue. Period. You’ll find people on YouTube and elsewhere on the internet who rave about this stuff. Don’t believe them. This isn’t some kind of miraculous product. It’s a decent CA adhesive. But there’s nothing special about it. It works no better or worse than any other CA adhesive I’ve tried over the years.

Naked Fusion Deep Pour Resin: Score – 9
I like this stuff a lot. I’ve gone through about 2 gallons of Naked Fusion in six or seven different projects and it’s worked well every single time. It releases bubbles very well, is easy to mix, takes coloring agents nicely, and I’ve had no problems with it at all. It has no VOCs, has almost no odor, and works very well for making large castings. Using it does require some patience though because it can take up to 72 hours for a casting to completely cure depending on the depth of the pour and ambient temperatures.
“OB Shine Juice”: Score – 3
I debated with myself as to whether or not to include this because it isn’t a commercial product. You have to make it yourself. But it shows up a lot, especially on YouTube, where it is proclaimed to be the best thing ever when it comes to wood finishes for lathe projects. It isn’t. Not even close.
As I said you have to make this muck yourself. It’s equal parts of alcohol, shellac and boiled linseed oil. Usually they recommend Zinsser brand shellac. But not because it’s all that good. That’s because Zinsser seems to be the only company that makes pre-mixed shellac. You’re better off making your own. Home made shellac is so much better than the canned stuff, and so easy to make, I don’t know why anyone would bother buying it off the shelf. More about Zinsser in a moment.
Anyway, OB Shine Juice is supposed to be easy and fast to apply, and give you a very nice, shiny finish on a lathe project. I’ve tried different variations of this stuff, following the instructions to the letter both in making it and applying it. Yes, it will, eventually, give you a nice shine after you’ve practiced and gotten the formula right. (Hint – don’t use Zinsser’s canned shellac, make your own. A 2 pound cut seems to work best, maybe a 3 lb cut.) But it isn’t as easy as they claim, the shine dulls with time, probably as the linseed oil oxidizes, and there are better, faster and easier ways of doing it. Just about any of the commercial finishing products on the market will do a better job than this stuff. Even just slapping on a seal coat of thin shellac and then topping it off with nothing but carnauba wax is faster and will give you a better looking finish that is more durable and will give better protection to the wood.
And I should add that linseed oil is a serious fire hazard. This stuff can, and will, spontaneously combust.
Zinsser Shellac: Score – 1
Let’s talk about this stuff while I’m on the subject of wood finishes. You know I make my own shellac for sanding sealers and finishes. It’s simple, just dissolve shellac flakes in alcohol. That’s it. So I had never tried Zinsser Shellac until I started to experiment with OB shine juice. I used it because most of the recipes for the muck specifically call for Zinsser brand shellac. I eventually bought three different cans of this stuff at three different stores, all of them turning out to be bad, before I figured out what was going on and learned how to read the cryptic date codes.
Shellac has a limited shelf life. There is some disagreement about what its shelf life is, but I’d guess it is perhaps six months, maybe a year under ideal conditions. The problem is that acids in the shellac react chemically with the alcohol it is dissolved in, and the older it gets, the slower it is to dry and the less water resistant and easier to damage the final finish becomes. That’s one of the reasons I and a lot of other people who fiddle with wood recommend you make your own in small batches.
Now, Zinsser – I had to do some research. The company decided several things many years ago. First, it decided it was no longer going to put a shelf life on its cans. It used to have a recommended shelf life of 3 years. It also decided it was no longer going to put actual date stamps on its cans so now you can’t easily tell how old the stuff actually is. It also stopped putting the “cut” information on the cans. The “cut” tells you how much shellac is mixed with how much alcohol. The company used to print that what was in the can was a 3 pound cut, along with instructions on how to properly dilute it to make lighter cuts for other purposes. So what, exactly, is the cut of this stuff? I have no idea because they decided I didn’t need to know.
Now there is a code printed on the can, and if you can decipher it (Popular Woodworking’s website has an article about this here) you can figure out when it was made. Turns out that every single can I bought when I was experimenting turned out to be more than 5 years old. In one case the code indicated it had been made in 2012.
So for removing easy to read dates from its cans, removing shelf life recommendations on a perishable product, and removing information about how concentrated its product actually is, i.e. the cut info, Zinsser Shellac gets rated a 1 out of 10.
Make your own shellac. It is incredibly easy and relatively inexpensive.
And – well, I have a short attention span. I’m getting bored, so I’m going to wrap this up for now.
I hope you find this stuff useful. Questions and comments are always welcome.
Every once in a while something irritates me so badly I have to vent. So here goes. A week or so ago VP Pence and NASA announced the names of astronauts who will be part of the team which will land on the moon in 2024.
Oh, dear…

NASA and the White House are still claiming they’re going to return people to the moon in 2024, even though everyone, including most of the people at NASA, know that the chances of that actually happening in 2024 are pretty close to zero.
The breathtakingly, mind numbingly expensive SLS launch system (the last cost estimate I heard was that an SLS launch will cost $2 billion. Billion. Per launch.)that’s supposed to be used for this hasn’t even been fully tested yet. They might, might have a test launch of the SLS “sometime” in 2021, perhaps November. I should point out that it is already more than 3 years behind schedule. It was supposed to fly in 2017. And now it looks like it quite possibly won’t fly until well into 2022. And perhaps not even then.
The Orion space craft that’s supposed to carry people… It’s been under development for 15 years now. Fifteen years. And it has flown into space once and preliminary testing is still turning up significant problems, especially with the software and electronic systems. The latest on that is that an electronic component failed in the PDU, and it could take up to a full year just to replace that single component.
And then there is Gateway. This is a bare bones orbital platform in orbit around the Moon. Eventually astronauts will not go directly to the moon, but instead dock at Gateway, which is going to be a sort of mini space station. From Gateway they will use a lunar lander to make the actual descent to the surface of the moon. The first flight to the moon apparently won’t require Gateway, which is good because Gateway, like large parts of this entire system, doesn’t actually exist.
The first flight or two will be stand alone missions, not requiring Gateway. They’ll descend in a lunar lander they’ll bring with them…
Oh, wait a minute, and they don’t actually have a lunar lander, either, do they?. Three different companies are working to develop three entirely different landers. And none of them actually have built an actual lander. Well, okay, they have a mock up of one, which is something. I guess.
So here we are just a few days away from 2021. NASA and the White House claim that we’re going to land people on the Moon before the end of 2024. Using a launch system that is already years behind schedule, 60% over budget, and hasn’t even test flown yet, with human beings in a spacecraft that hasn’t been successfully tested yet, using a lunar lander that doesn’t exist yet. And the first test flight isn’t scheduled until late 2021 and, more probably mid 2022. And which will cost $2 billion per launch.
And they’re going to do all of this before the end of 2024.
Now if they pull this off, I will be thrilled. I skipped school several times to watch the original moon landings. I’m a SF fan. I’m an amateur astronomer. I love anything to do with space exploration. But please excuse me for being just a wee bit skeptical here.
Egads, it’s been a while since I did one of these, isn’t it? This time of year as the weather gets colder it’s tempting to just hunker down in my warm radio room and play with radios and computers and stuff instead of doing something useful. But stuff has been getting done, things have been going on and, well, let’s start at the beginning.
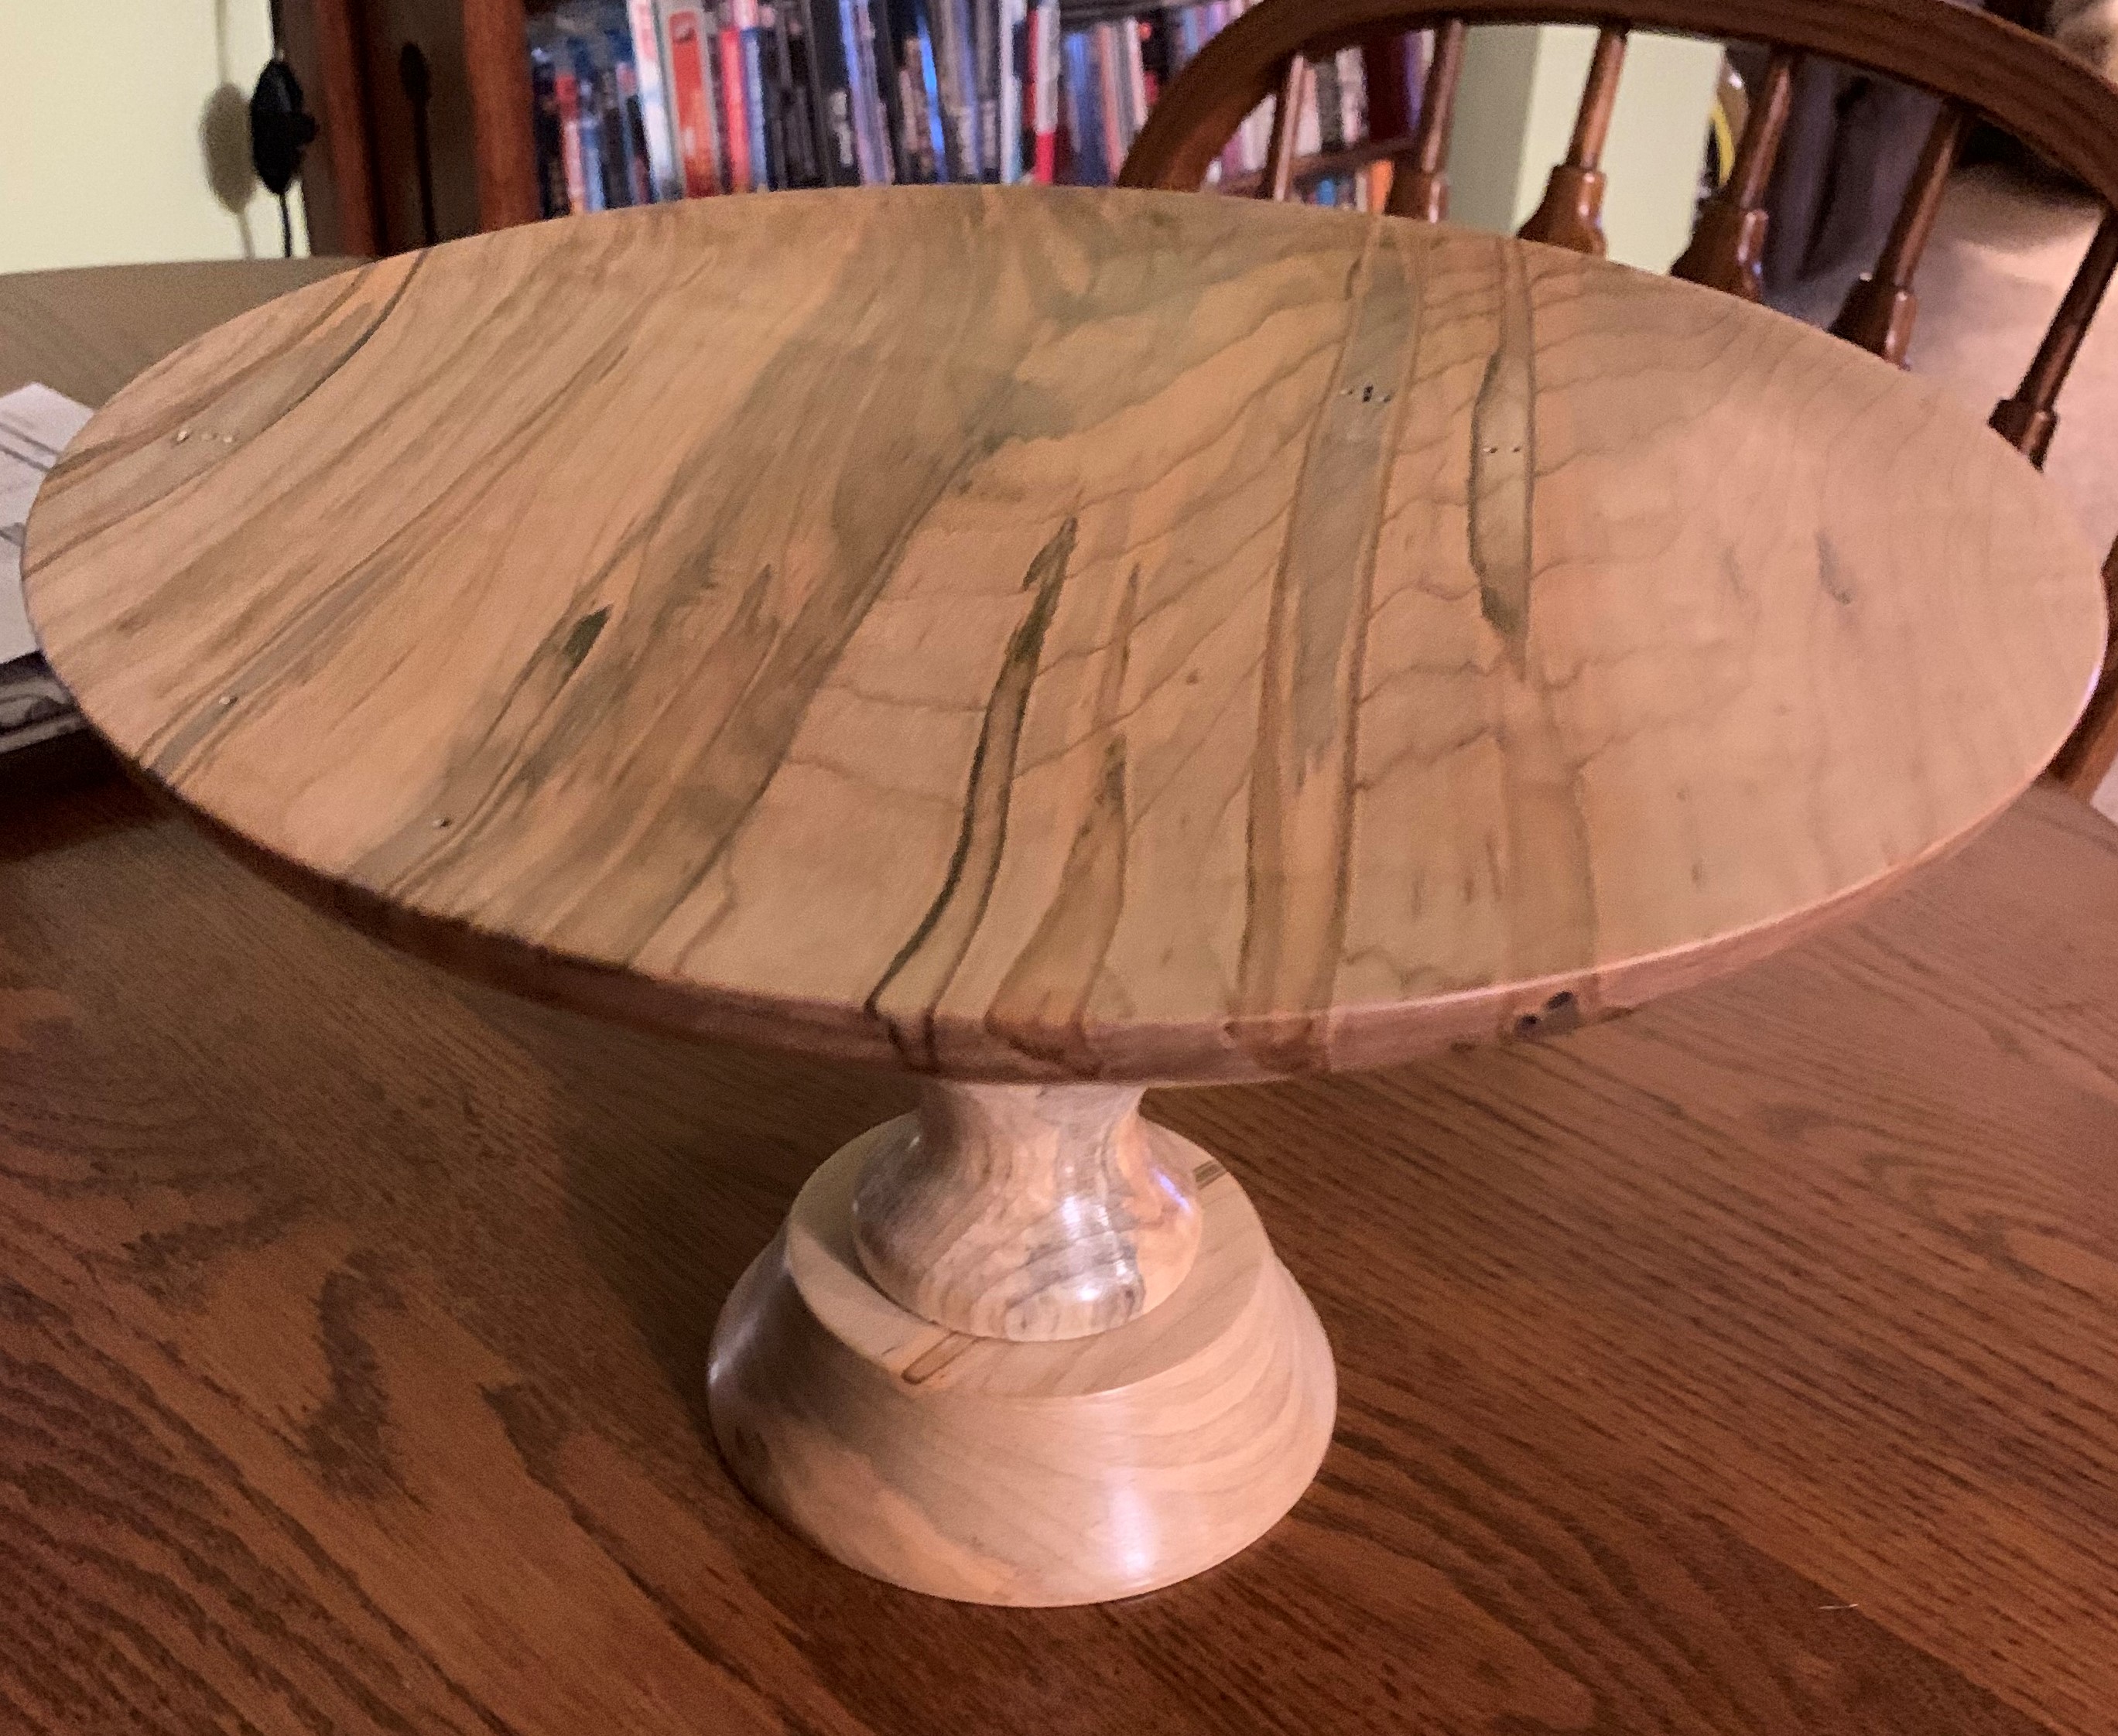
I don’t know if I mentioned the plate before, and I’m too lazy to go back through the archives to check, but I got MrsGF’s cake plate done finally. It’s hard to judge size in these photos so to give you an idea of size the top plate is about 11″ across and it stands about 5″ high. It’s made of ambrosia maple, finished with shellac and carnauba wax so it’s a food safe surface. I think it turned out reasonably well.
The base and spindle are made out of packing material. I ordered a bunch of wood from a company called Green Valley Wood Products and the wood didn’t quite fit into the box so they chucked in some rough cut pieces of wood as packing material that turned out to be some rather nice ambrosia maple once I cleaned it up. The stuff didn’t look like it was very good at first but I trimmed it up on the bandsaw and discovered there was enough there to make the base and spindle.
I should probably have mentioned Green Valley before. I’ve bought several hundred bucks worth of wood from these guys over the past few months and it has all been excellent quality and the prices are reasonable. Anyway, here’s a shameless plug – If you’re looking for wood, check out Green Valley Wood Products, Brazil IN. I don’t get free wood or get paid by them or anything like that, I just like the quality of their wood, shipping times are reasonable and the prices are fair.
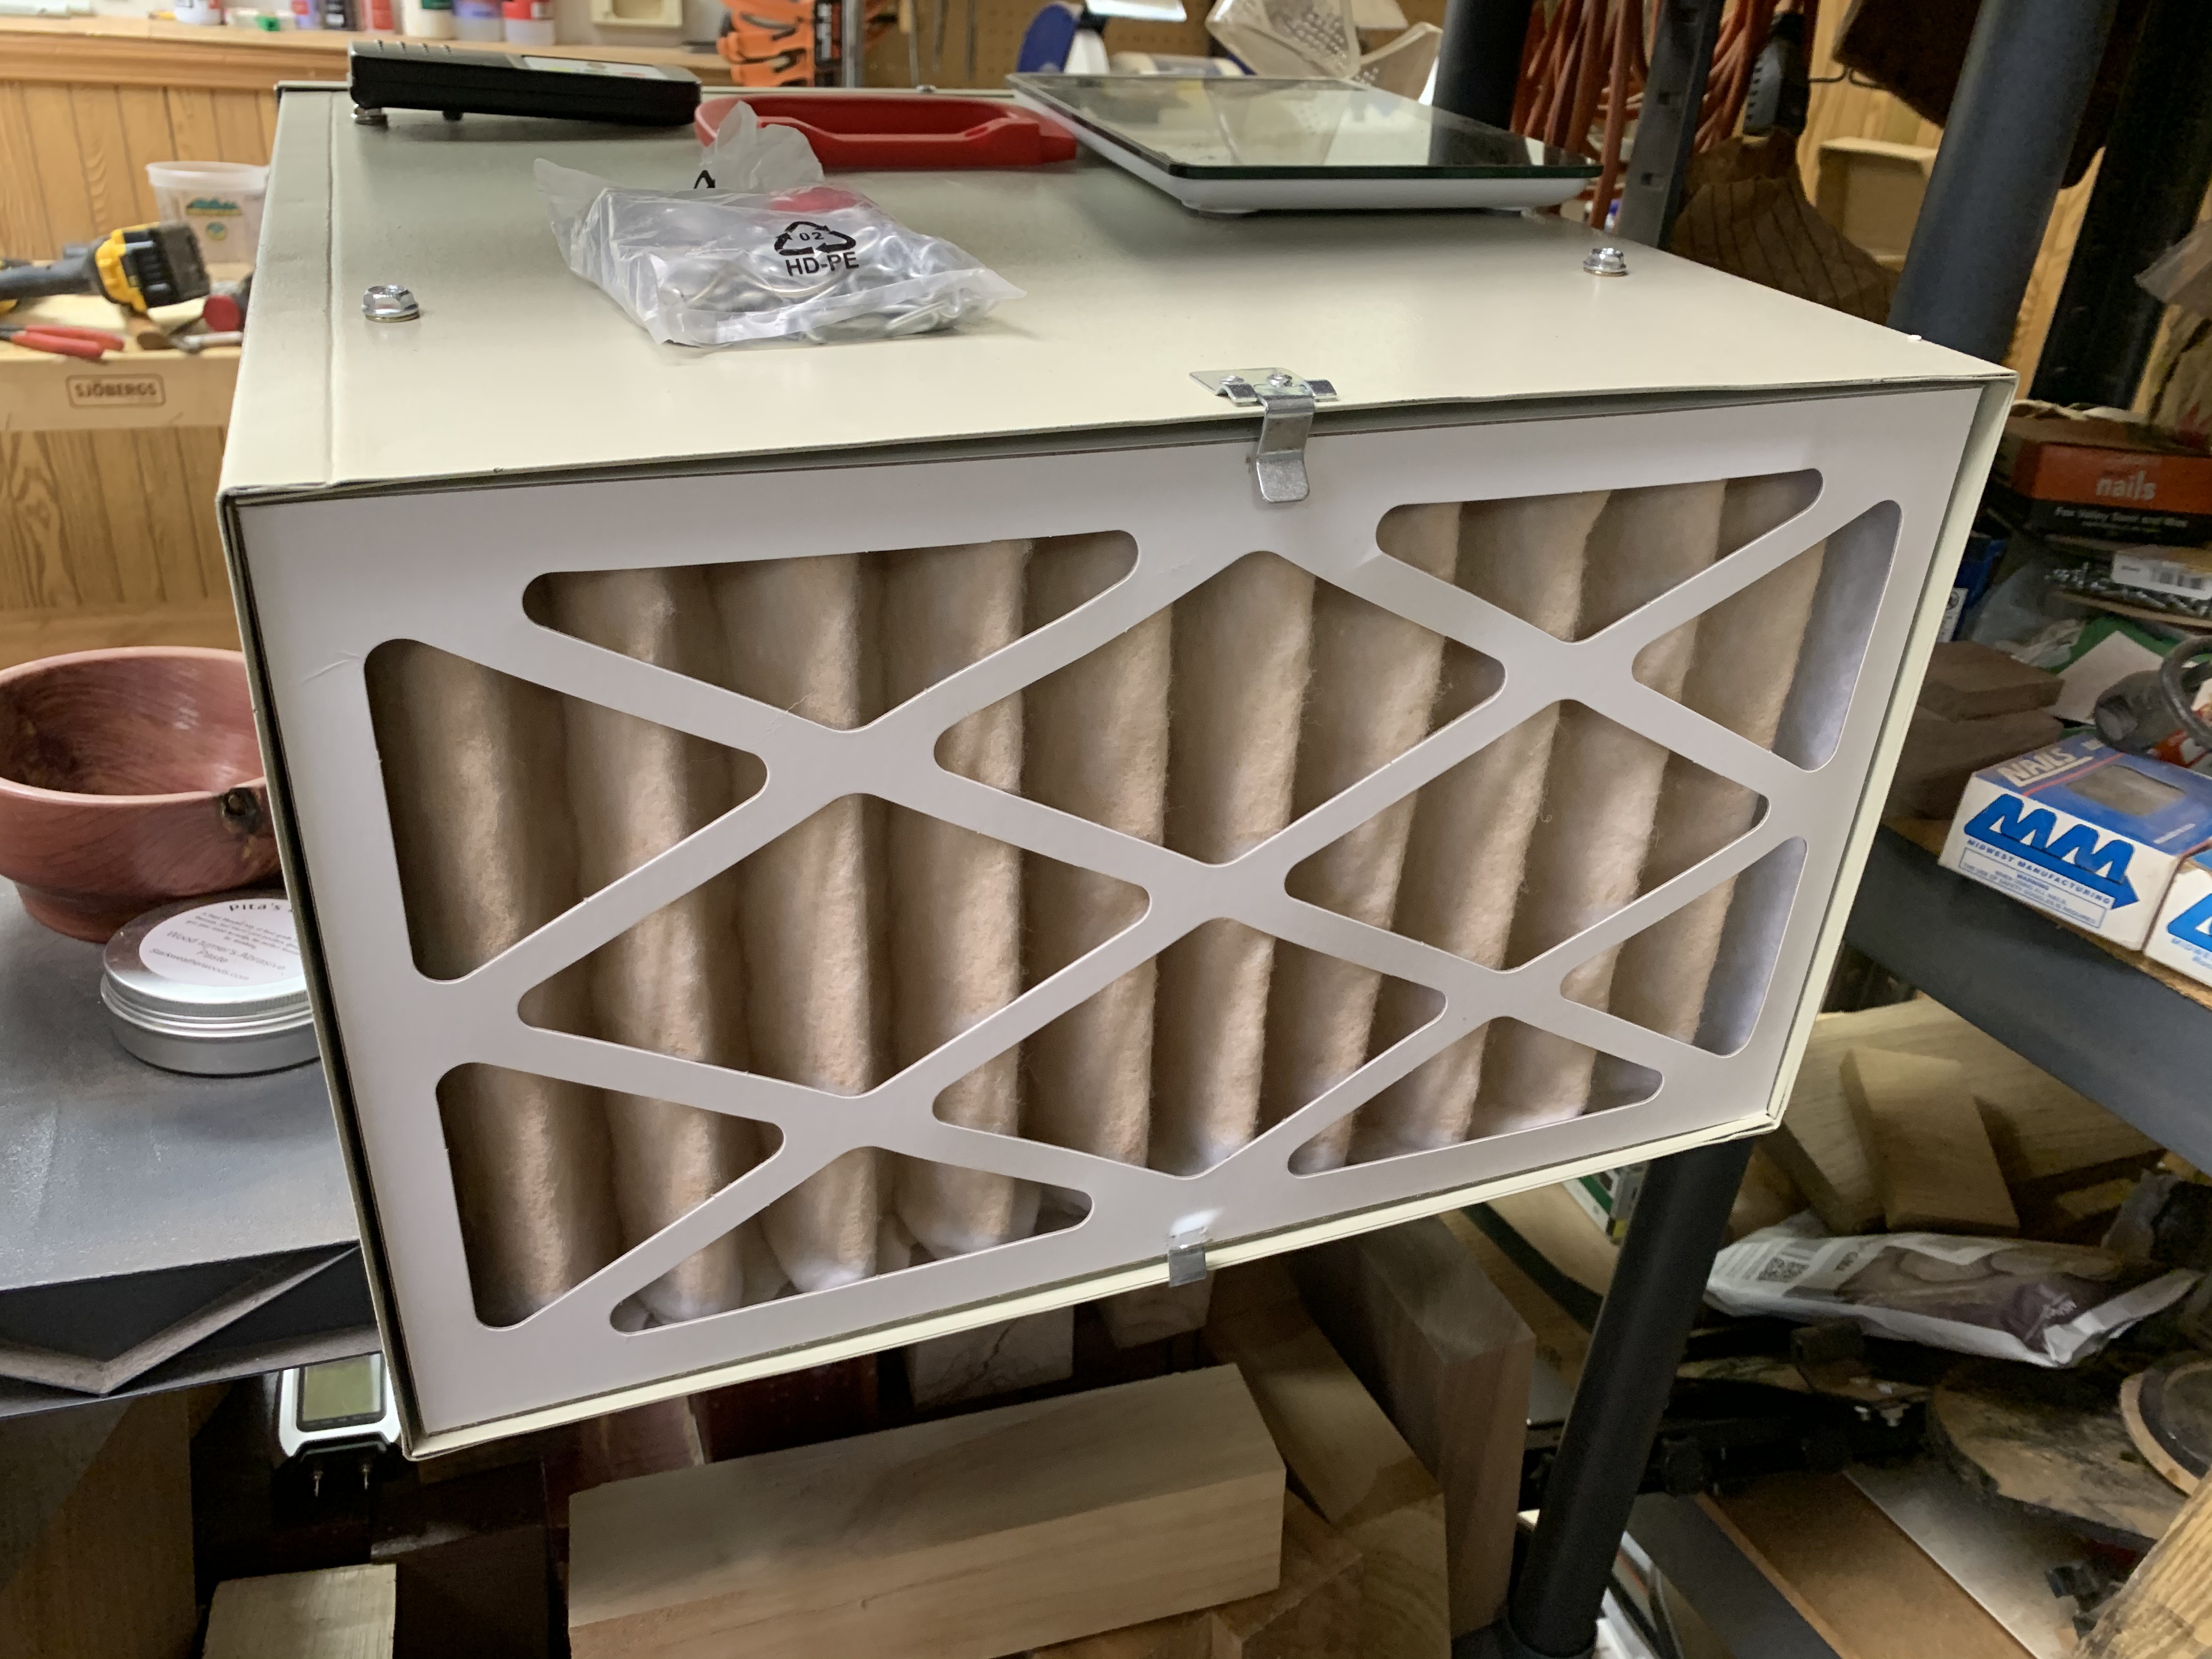
The new air filtration system seems to be doing it’s job quite well. As you can see from the dirt on the filter up there it’s pulling stuff out of the air. It’s hard for me to tell exactly how well it’s working because I don’t have any way of testing particulate content in the air around here, but it seems there is a lot less dust through the whole house since I started using it.
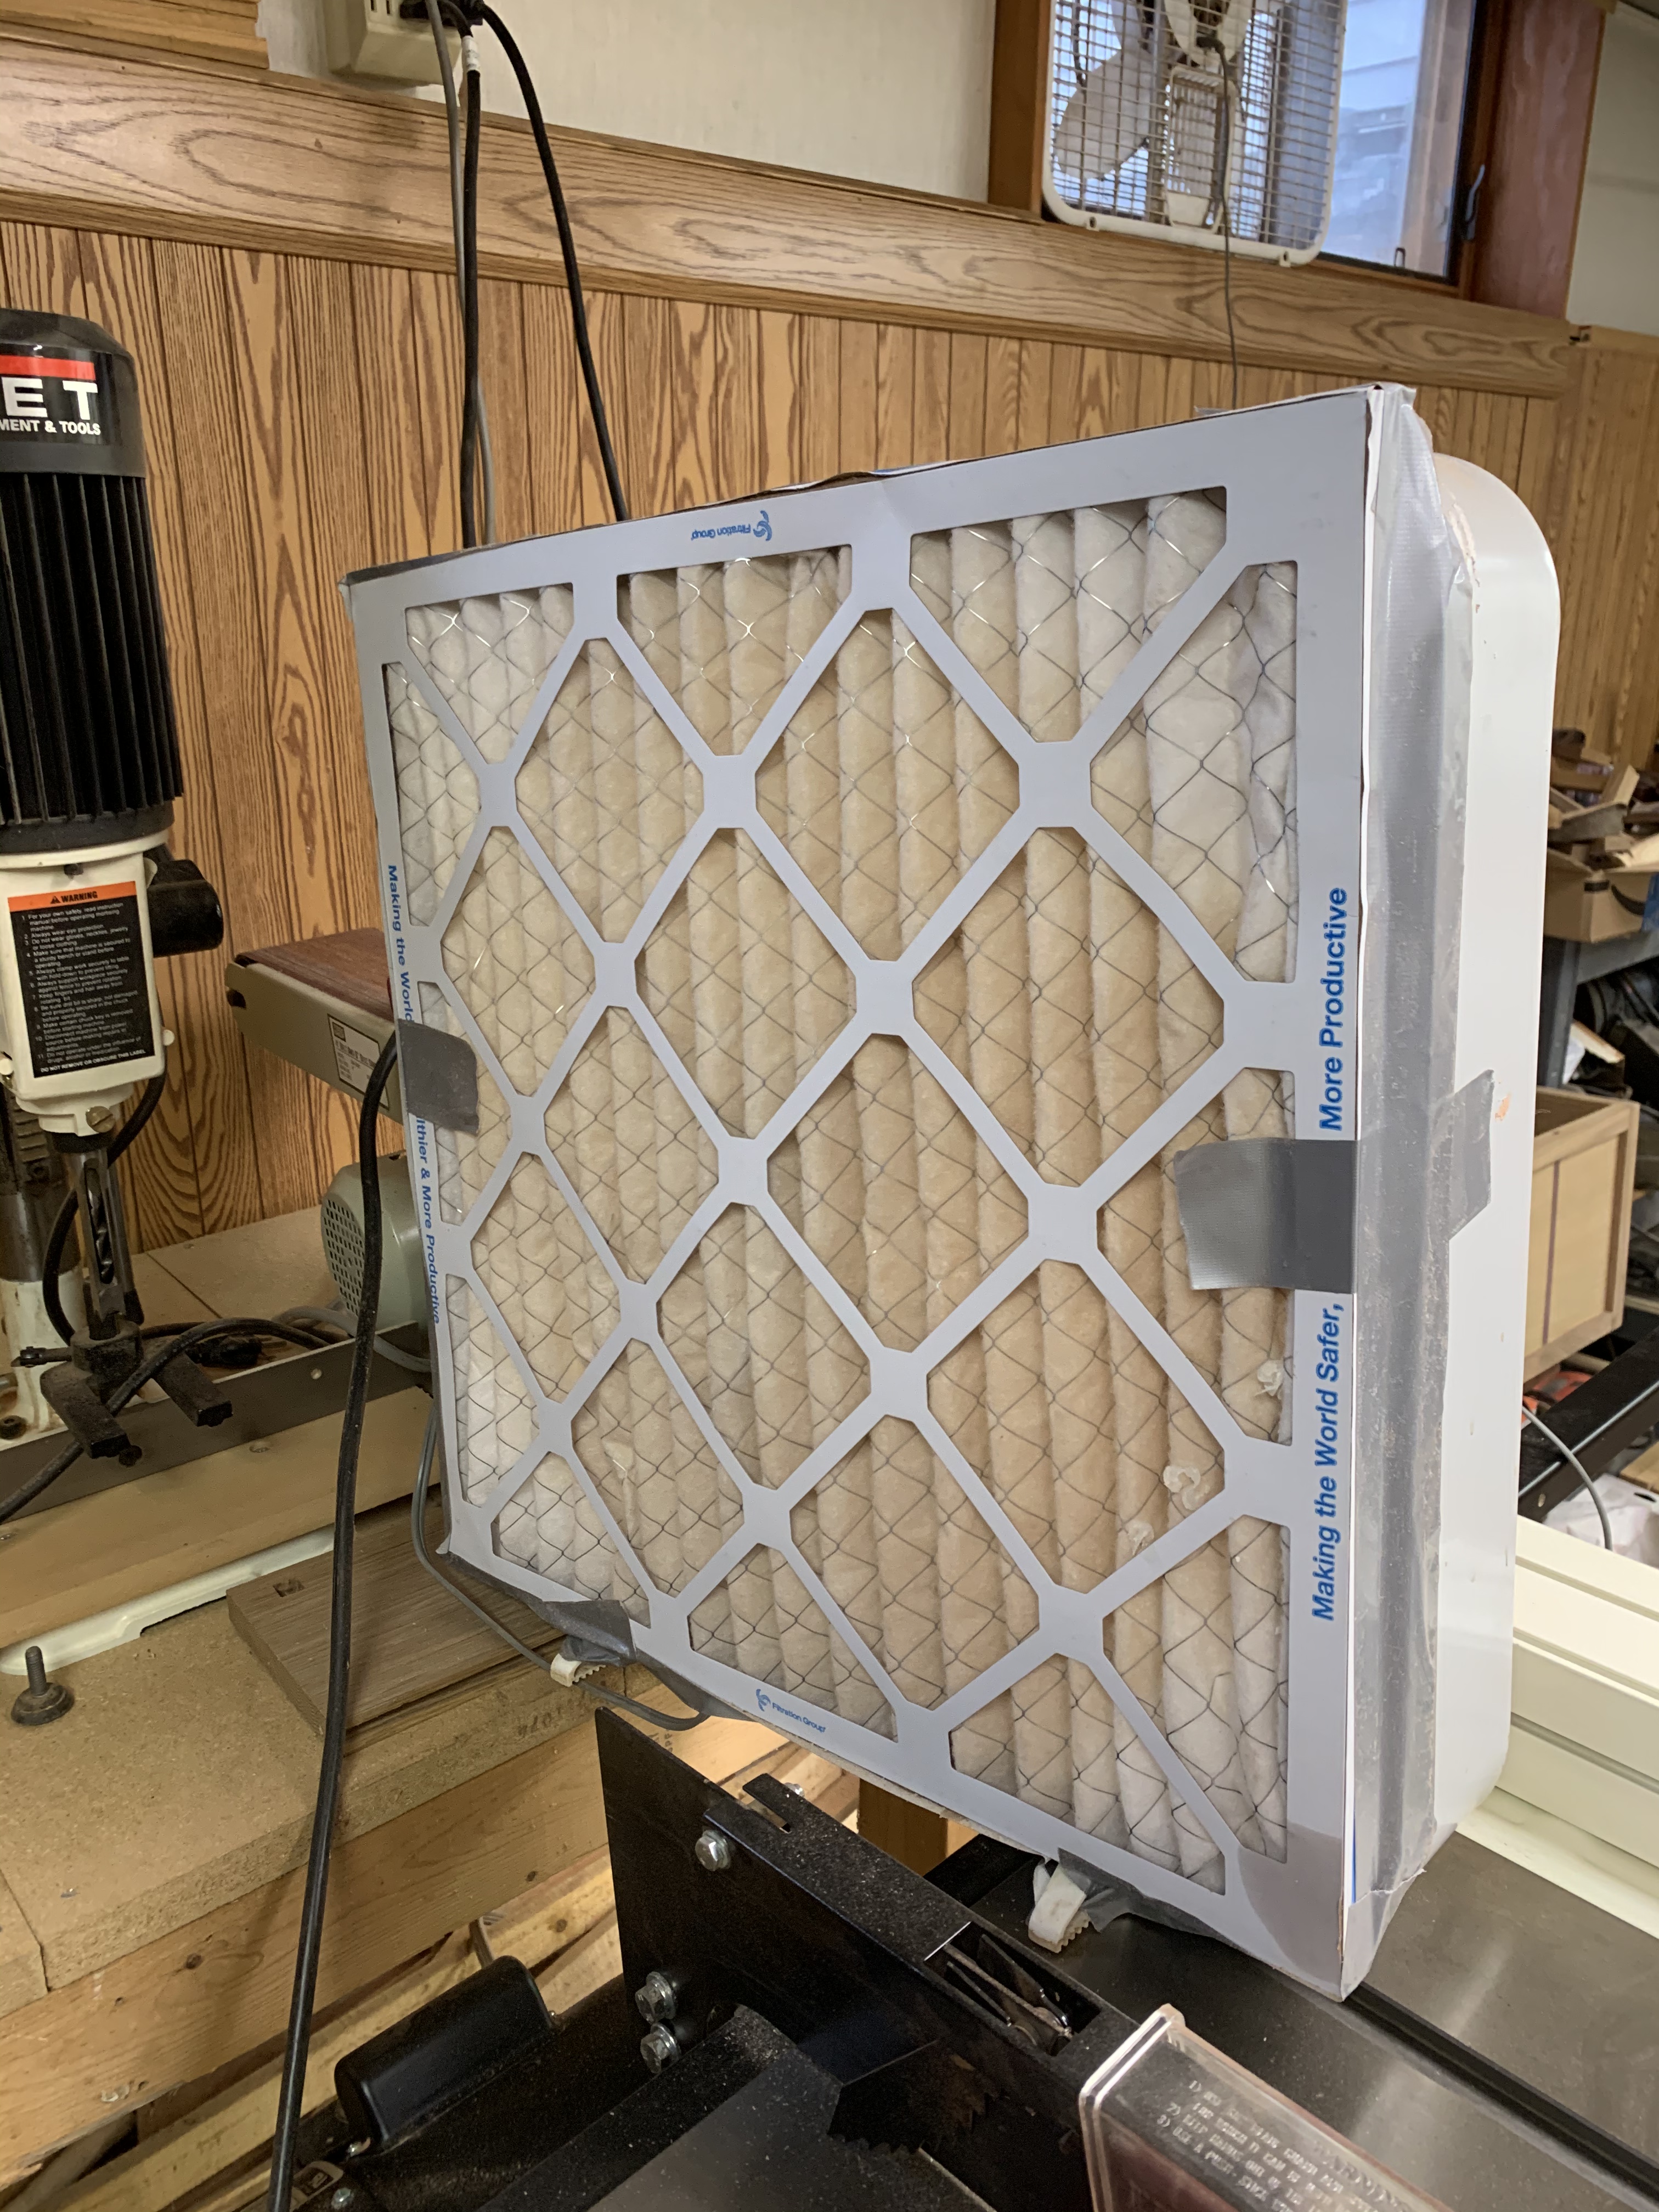
Is it any better than something like this Rube Goldberg thing over there on the left? Heck, I don’t know. Taping a furnace filter to a box fan does help pull stuff out of the air, but how effective it really is… Well, judging from the amount of dust I saw in the rest of the basement when I was doing things like this, it doesn’t work all that well. The volume of air being moved through this thing isn’t anywhere near as great as what the Shopfox thing pulls through its system. At a rough guess I’d say the Shopfox moves 5 times as much air through its filters as the box fan does. That’s just a rough guess, of course, based on the air movement I feel. I don’t have any way to actually measure CFM.
Let’s see, what else? Ah, how could I forget about the Schrodinger’s microwave fiasco? I call it Schrodinger’s microwave because it seems to both exist and not exist, at the same time.

So, let’s start at the beginning. Last year we had to buy a new microwave oven. We ended up getting a Maytag, the one in the photo over there on the right. And it’s a very nice microwave. A bit pricey, but it’s well made and works very well indeed. We really like the thing. The problem is that this model doesn’t seem to actually exist.
We needed to replace the filters in this thing. MrsGF went out on the internet and started scrounging around looking for replacement filters. And couldn’t find any. In fact, she couldn’t even find this oven.
You’re kidding, said I. You must have typed the model number in wrong or overlooked something. Ah, said she, if you’re so smart, you go try to find it. Okay, said I, I will.
She was right. None of the parts vendors on Amazon list this model. None of the parts vendors outside of Amazon list this model. I went directly to Maytag. Maytag itself didn’t have this model in its database. Apparently we bought a microwave that doesn’t actually exist???
I took a closer look at the tag with the manufacturing data on it, including the date it was made and…
Well, that was interesting. Apparently this oven was manufactured three months after we bought it. Okay… Well, I ruled out the possibility that somehow this thing slipped through some crack in the spacetime continuum from some alternate universe or that the guy who actually installed it was Dr. Who or that it was some kind of quantum oven that both existed and didn’t exist at the same time. So what was going on? Some kind of counterfeit perhaps? It does happen. There are companies out there that gleefully rip off name brand manufacturers all the time. But that didn’t make sense. This thing is extremely good quality. Everything about it is rock solid, made to perfect tolerances, made of high quality materials, the fit and finish is flawless, it works beautifully. If this thing is a counterfeit they’re making products of better quality than most of the name brand stuff out there. So that didn’t make any sense.
Anyway, eventually I did find a filter, but by searching on the filter dimensions instead of models or brands. The one I found was actually for a Whirlpool. Of course it is entirely possible that this is a Whirlpool, or, rather, made by some OEM in China that makes ovens for two or more different companies and the only difference between them is the brand name. That kind of thing happens all the time in most industries. The name you see on the product isn’t the company that actually made it. Heck, the Ford truck I had many years ago was actually made in Canada by Mazda.
Farmers Getting Screwed Again?
Yeah, it seems so. Here’s the deal – Farmers who sold their milk to the now bankrupt Dean Foods are getting letters from lawyers demanding the farmers repay the money they were paid for milk they shipped to Dean during the “preference period” of the bankruptcy. Supposedly these parasites can go back 90 days and demand the farmers repay the money Dean paid them. Will the farmers then get their milk back or something? Of course not. Is it ethical? Good lord no! Ethically speaking this is flat out extortion. Is this legal? Apparently it is. It’s called a Trustee Avoidance Claim. But in actual fact most, if not all of the farmers who dealt with Dean who are receiving demands like this qualify for an exemption and can avoid having to repay anything. But the trustees, of course, hope the farmers don’t know this and will just cough up the money. As Roger McEowen of Washburn University said, “These are extortion letters, there’s no other way to put it. They’re seeing what they can get.”
But if you get one of these letters, you’re going to have to get your own lawyer to respond properly, so you’re going to have to foot the bill for that. Still, hiring a lawyer is going to cost a lot less than having to potentially repay tens of thousands of dollars to these parasites.
And on that rant, let’s wrap this up.
I mentioned that I needed to do something about the dust getting into the rest of the house and ordered an air filtration system made by ShopFox. It arrived on Saturday and I have it set up in the shop now. So far it looks pretty good, but I haven’t done any serious sanding or wood turning yet, so we’ll see just how well it actually works once I get a new project started.
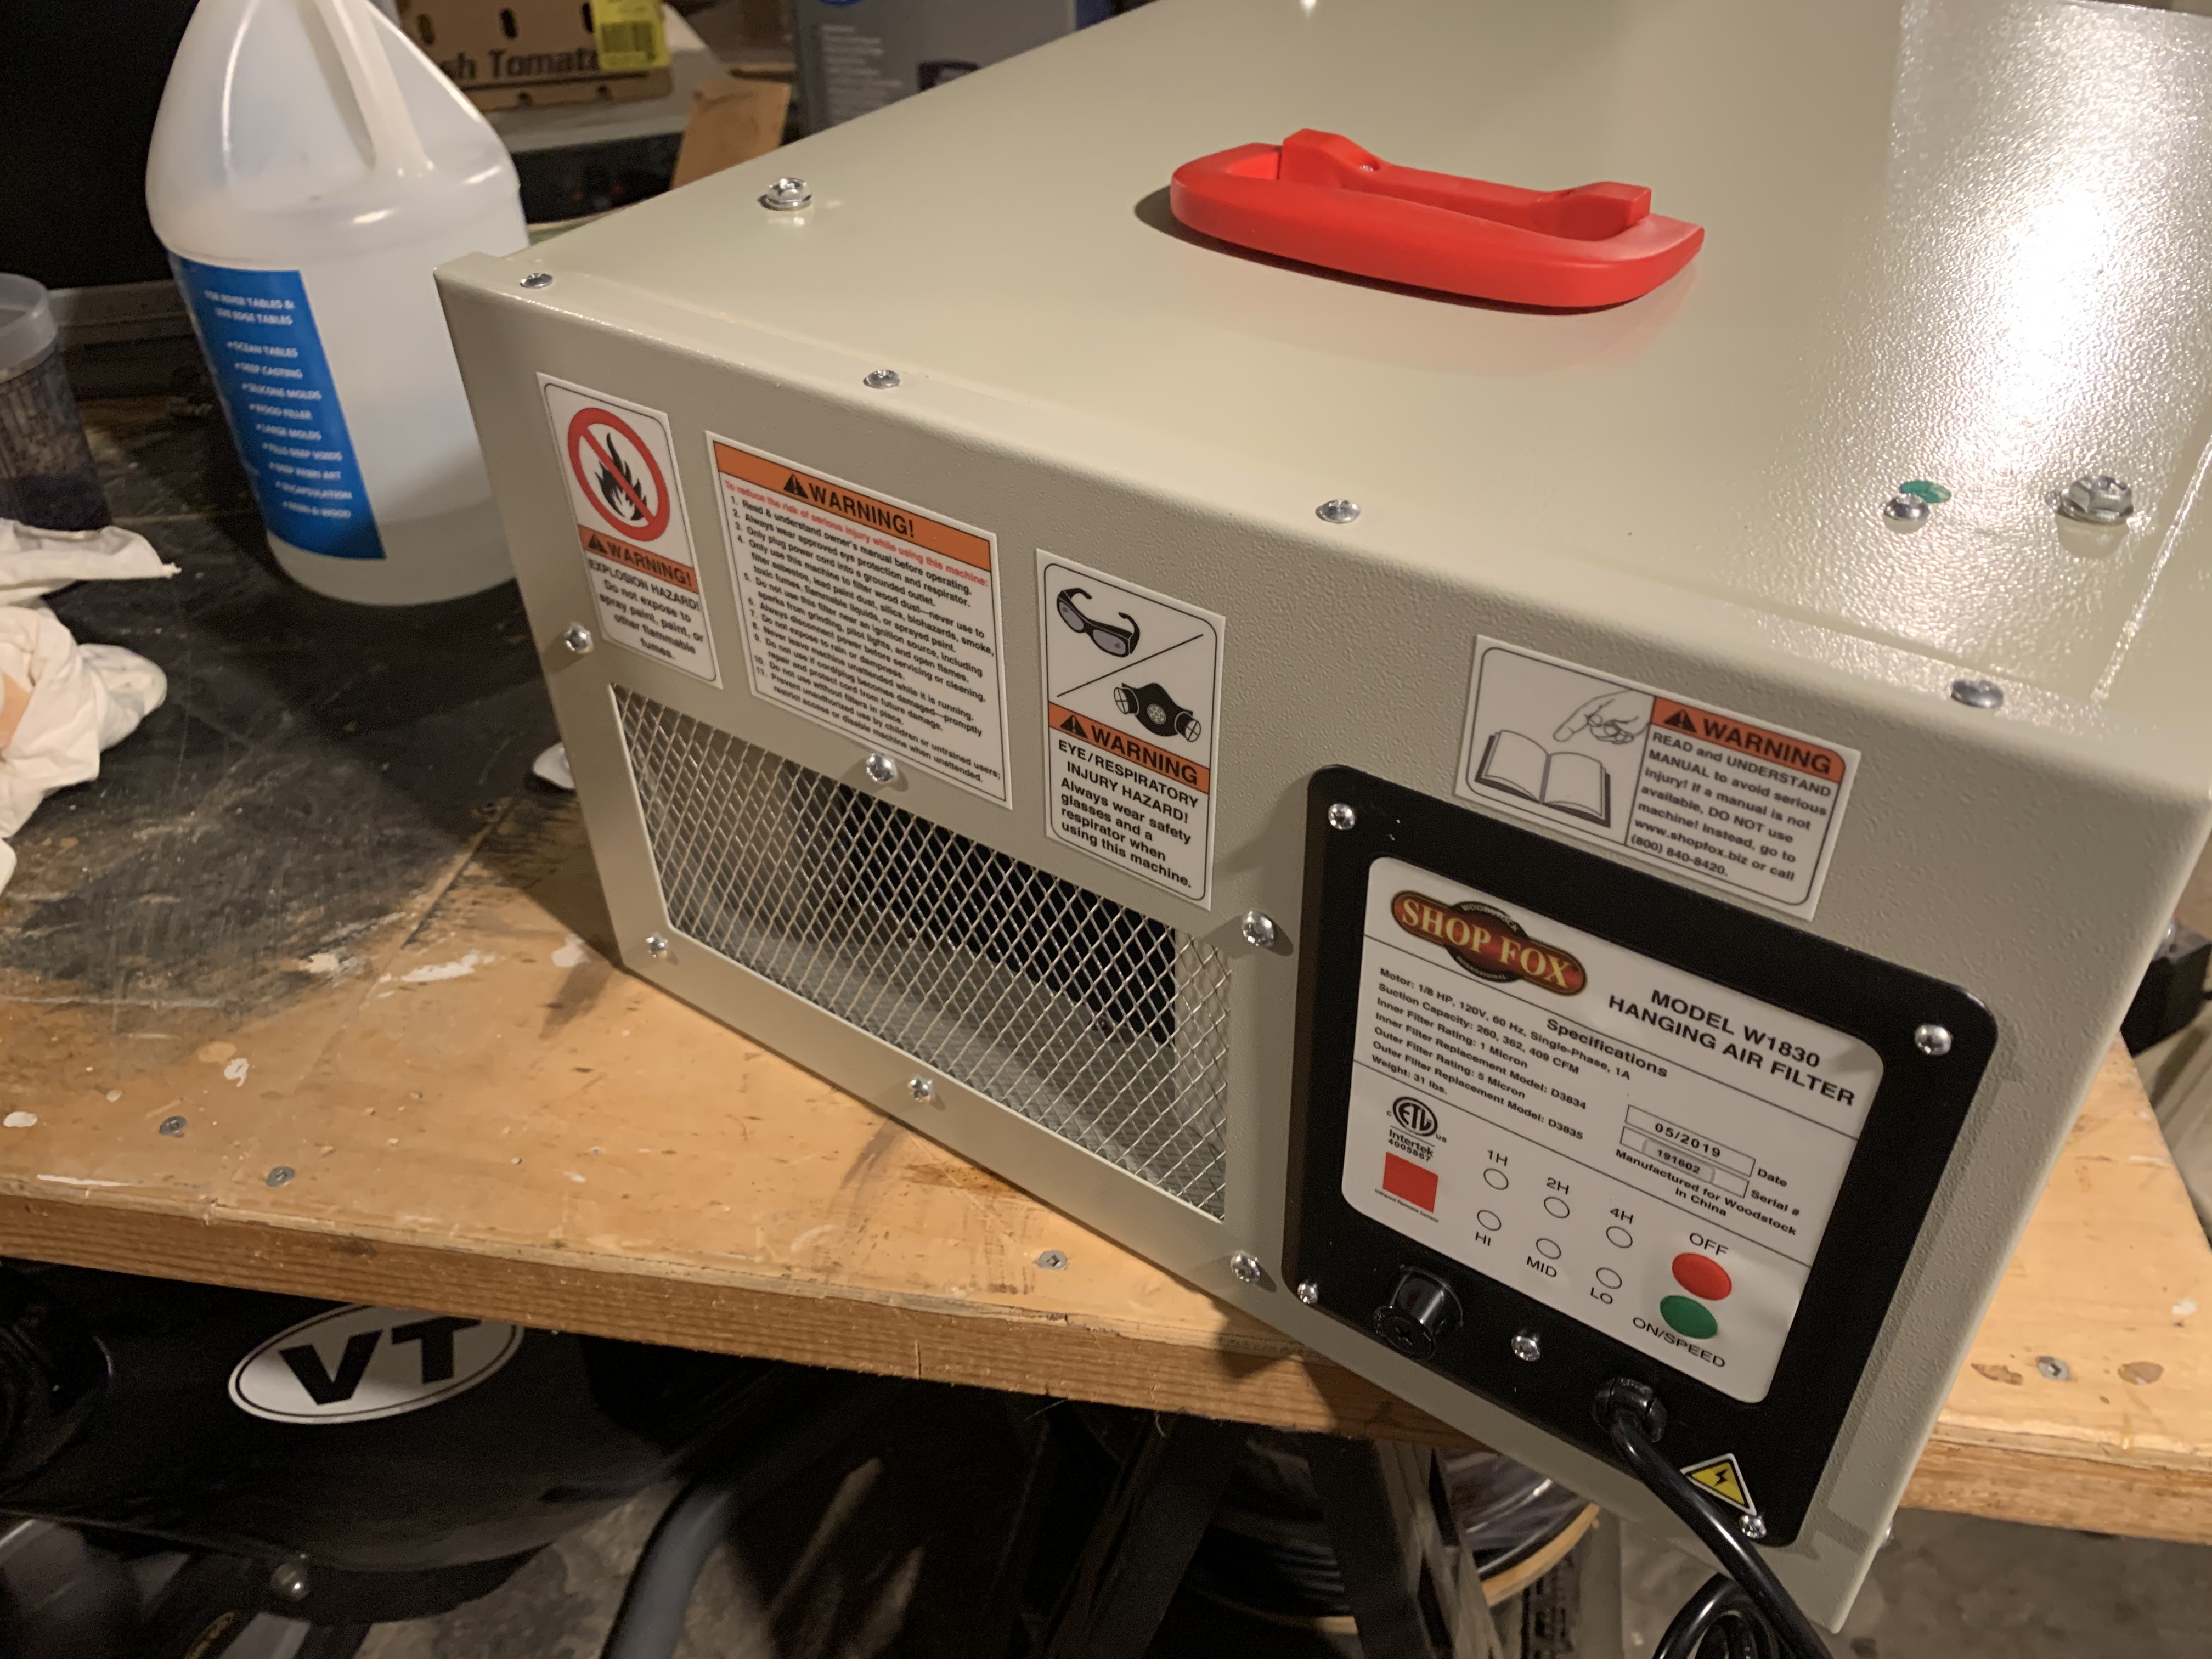
If you go shopping for one of these don’t let the hype in the advertising fool you. All these things are is a box with a fan and motor, with one or more filters in it. How well these things work is entirely dependent on the filters used and how much air the fans pull through the filters. And that’s it. Everything else is just fluff and nonsense you don’t need.
This one looks fairly robust. The outer case is sheet steel, looks well made, nice fit and finish to it. It has a 3 speed fan that looks like it should be more than capable of handling the size room it will be in. The only other control is a timer so you can set it to turn itself off after 1, 2 or 3 hours. It came fully assembled, with the filters already installed. I just took it out of the packing material, took it out of the plastic bag and turned it on. And supposedly the filters are cleanable/washable and can be reused. So we’ll see about that.
Anyway, I’ll keep you updated about how well it works and if it does a better job than the makeshift furnace filter taped to a box fan trick. Considering how much dust I generate when I’m sanding I may end up using both the Shopfox filter and the box fan trick.
A New Finish Experiment
I’m always looking for ways to finish wood that improves its appearance and that is easy to use. I’m also addicted to Youtube (sigh… the hours I’ve wasted there…) and learned about something called “OB Shine Juice”, some kind of miraculous, easy to use, virtually instant finish you just slap on and buff out and…
But like most of these “tricks”, it turns out that in real life, no, it’s not that easy to use, at least not any easier than most of the other methods I’ve used. And while it might be useful for somethings it isn’t some kind of miraculous super finish. And it has some serious drawbacks including the fact that it is potentially dangerous. The danger is slight, true, but it’s still there, and I’ll talk about that at the end of this segment. Is it useful? In some cases, yes. But it isn’t going to replace my usual finishing methods.

You can’t buy this stuff, you have to make it, but there are only 3 ingredients and all are easily available and fairly cheap. Boiled linseed oil, shellac (most of the recipes call specifically for Zinsser shellac apparently because Zinsser seems to be the only company that still makes the stuff) and denatured alcohol. Just chuck equal parts of each into a bottle, shake it up, and there you go.
I didn’t have Zinsser’s on the shelf because I make my own shellac. I could have used my own but most of the recipes for this stuff called for Zinsser specifically, and I wanted to stick with the instructions exactly for this test. I ran down to the local hardware store and found some and scurried home with my prize.

Right off the bat I started to have doubts about all of this because as soon as I opened that can I began frowning.
Now the shellac I make is in that photo over there on the left, almost completely clear, no cloudiness, a nice golden amber color that dries clear and almost colorless, and the only thing you can smell when you open that jar is the alcohol. I’ve said before that I really, really like shellac. It’s a great sealer, sanding sealer, and even makes a pretty darn good final finish if you use one of the thicker cuts. So I figured the commercial stuff would look pretty much like what’s in that jar.

I was wrong. When I opened that can of Zinsser’s… Oh dear. This stuff was just nasty. I mean seriously nasty. Thick, cloudy, even muddy looking. And it smelled just as nasty as it looked. First thing I thought was that somehow I’d got a bad batch or something. So the next day I went to a different hardware store and bought another one. I popped it open and it was exactly the same. How old was this stuff, anyway? Shellac has a limited shelf life. I looked all over the can and I couldn’t find a manufacturing date or an expiration date or anything that might indicate when it was made. So for all I knew this stuff had been sitting on the shelf for years.
Well, I wanted to follow the instructions exactly so I mixed the stuff up using the Zinsser’s anyway. I mixed 4 oz of each of the three products and, frankly, it didn’t look very good. Or smell very good. But let’s try it and see what happens.
I had a small, simple ambrosia maple bowl on the lathe that I’d just finished sanding and decided to try it on that. The instructions for using the stuff are pretty simple. Just slather the stuff on using a paper towel until the wood doesn’t absorb it any more. Then spin up the lathe and start applying very, very light coats until the wood doesn’t seem to be absorbing anything and then start to slowly buff it out. So that’s what I did.
I didn’t have high hopes for this stuff, but I have to admit that it turned out fairly nice.


But to be honest, it isn’t as nice as I’d hoped it would be, and certainly isn’t as nice as the proponents of this stuff claim. Nor is it as easy to use as they claim. In fact it is considerably more time consuming and difficult to use properly than my usual method of just putting several seal coats of thin shellac on a piece of wood followed by carnauba wax and buffing it out.
First thing I discovered is dear lord do not use paper towels, which is what a lot of these guys recommend. Paper towels began to disintegrate almost immediately, leaving shreds of paper all over the wood. I ended up having to go over the whole thing with OOOO steel wool to remove the tiny paper shreds and start over using a piece of lint free fabric.
Second, this is not a fast process. They make it seem so fast and easy in the videos. It isn’t. It takes a considerable amount of time, and many, many coats of this stuff before it starts to get even close to glossy. And it took me quite a while before I began to figure out just how much pressure and how much ‘juice’ to use to get it to start to buff out properly.
Does it work, though? Sort of. The end result looks pretty good. I can see this being useful for projects that have a lot of detail and odd shapes where it would be difficult to get waxes or other finishes into all of the little nooks and crannies. But is it something I’ll use frequently? Probably not.
Now, the dangerous bit. I’m not joking around here – linseed oil is a serious fire hazard. It generates heat as it dries, a lot of heat. Enough to cause rags, paper towels, etc. to spontaneously combust. I like to think I am not a paranoid person, but linseed oil scares me because I’ve seen this happen in real life. This stuff can and will cause fires if you don’t handle it properly.
Is OB shine juice a potential fire hazard then? It is only one third linseed oil so the risk is probably minimal. But do you want to take the chance? I don’t. The rags I used for this project were soaked in a material that contains alcohol, which is highly flammable, plus linseed oil which can spontaneously combust. Do you think I’m going to keep that in the house? I may be crazy but I’m not stupid (I hope). They were immediately dumped into a container of water and taken outside and they’ll end up in the firepit. Am I being paranoid? Maybe. Don’t care. I’m not going to take the chance.

Cleaning – ah, yes, cleaning… I was getting tired of not being able to find stuff and having to dig through all of the clutter in the shop. And finding piles of dust, dead spiders, cobwebs, bits of sandpaper, pieces of wood piled all over, etc. whenever I moved something. So I started cleaning up the shop and trying to organize things better.
And what do I do with some of this stuff? I have a $200 biscuit joiner that I used exactly once about 15 years ago that’s been gathering dust ever since. I have jigs that cost some serious money and were used once before I figured out that setting the damned jig up and doing test cuts to fine tune it took three times longer than just doing the job by hand. A half dozen plastic carrying cases for tools I don’t have any more (why didn’t I toss those years ago???). There’s an ancient Skil router with a bad collet that I can’t get parts for. I found three (three??? How did I end up with three???) scroll saws. A couple of dozen paper bags filled with screws and nails of every imaginable size. But of course none of them are ever the size I actually need for a specific project so I have to buy more. And then there are the bits and pieces that obviously came off of some tool, somewhere, but what tool? What were they used for? Should I just throw it away? Of course if I throw it away I’ll almost immediately remember that I really needed it…

And wood stuck away everywhere… Sheesh. But then is there even such a thing as having too much wood?
Anyway, it’s cleaning time!
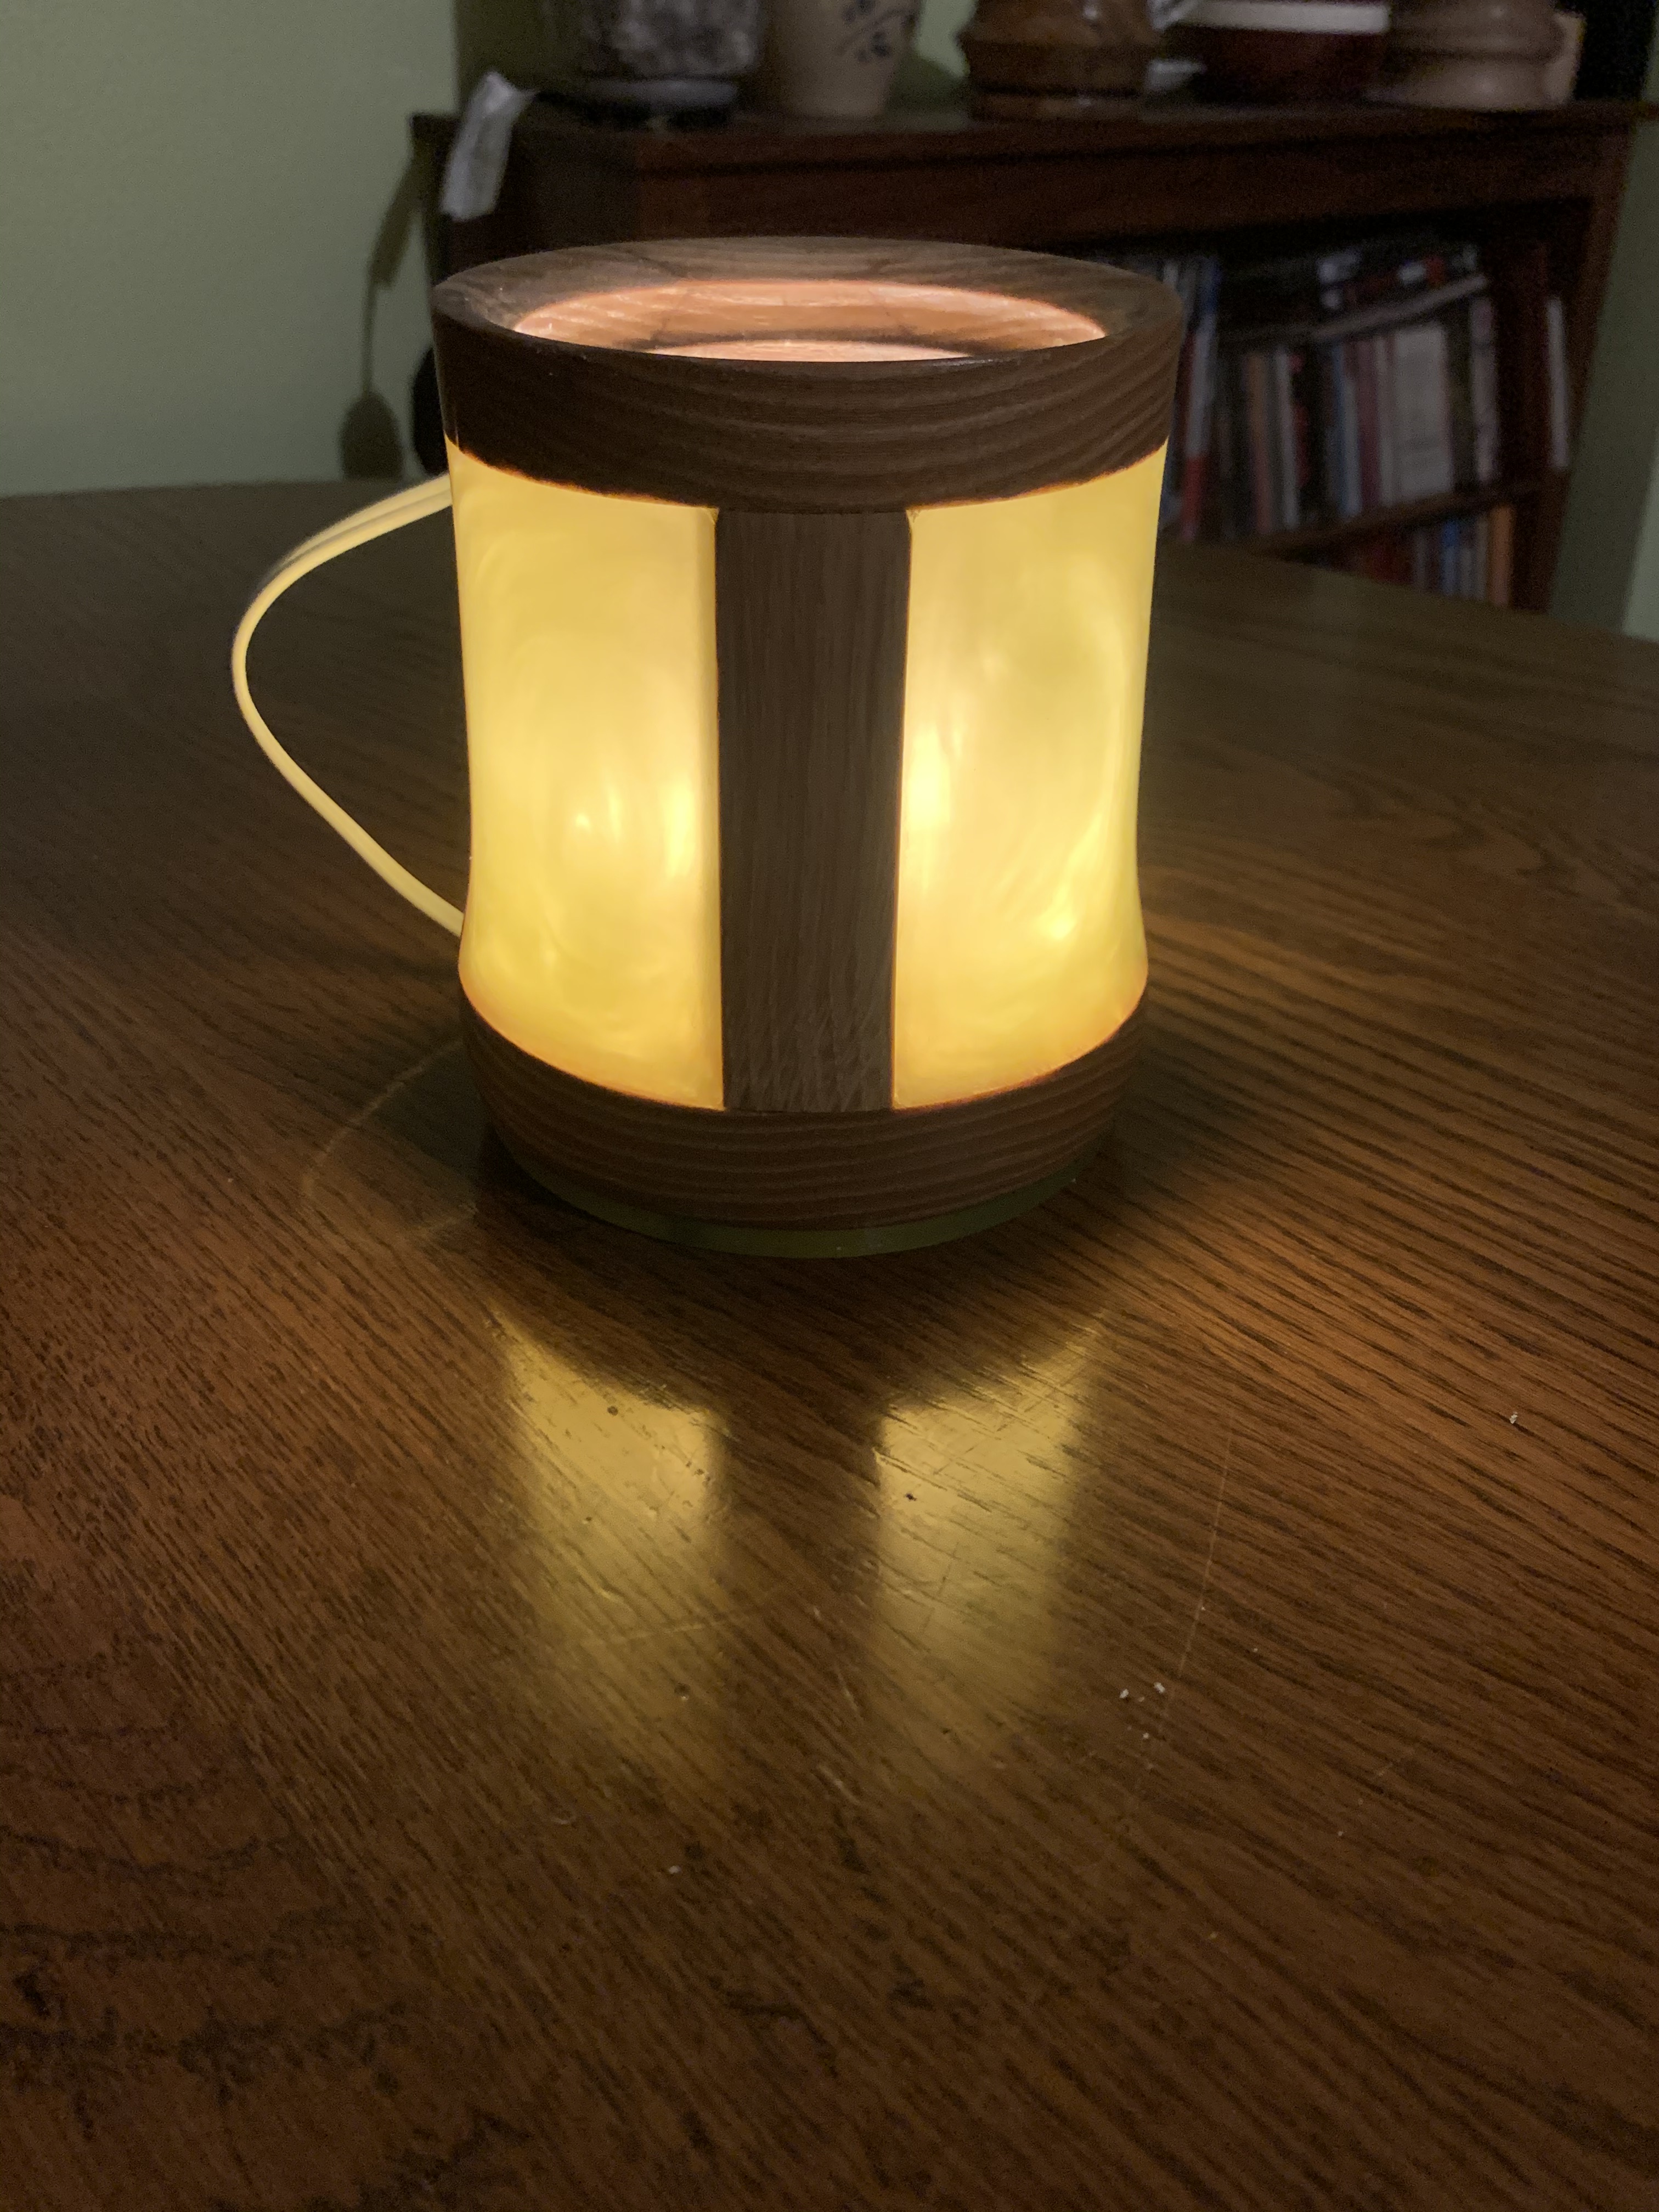
That sort of arts & crafts style decorative light is finally completely finished. I made a matching lid for it, permanently installed an 120V LED lamp inside of it and I’m actually pretty pleased with it.
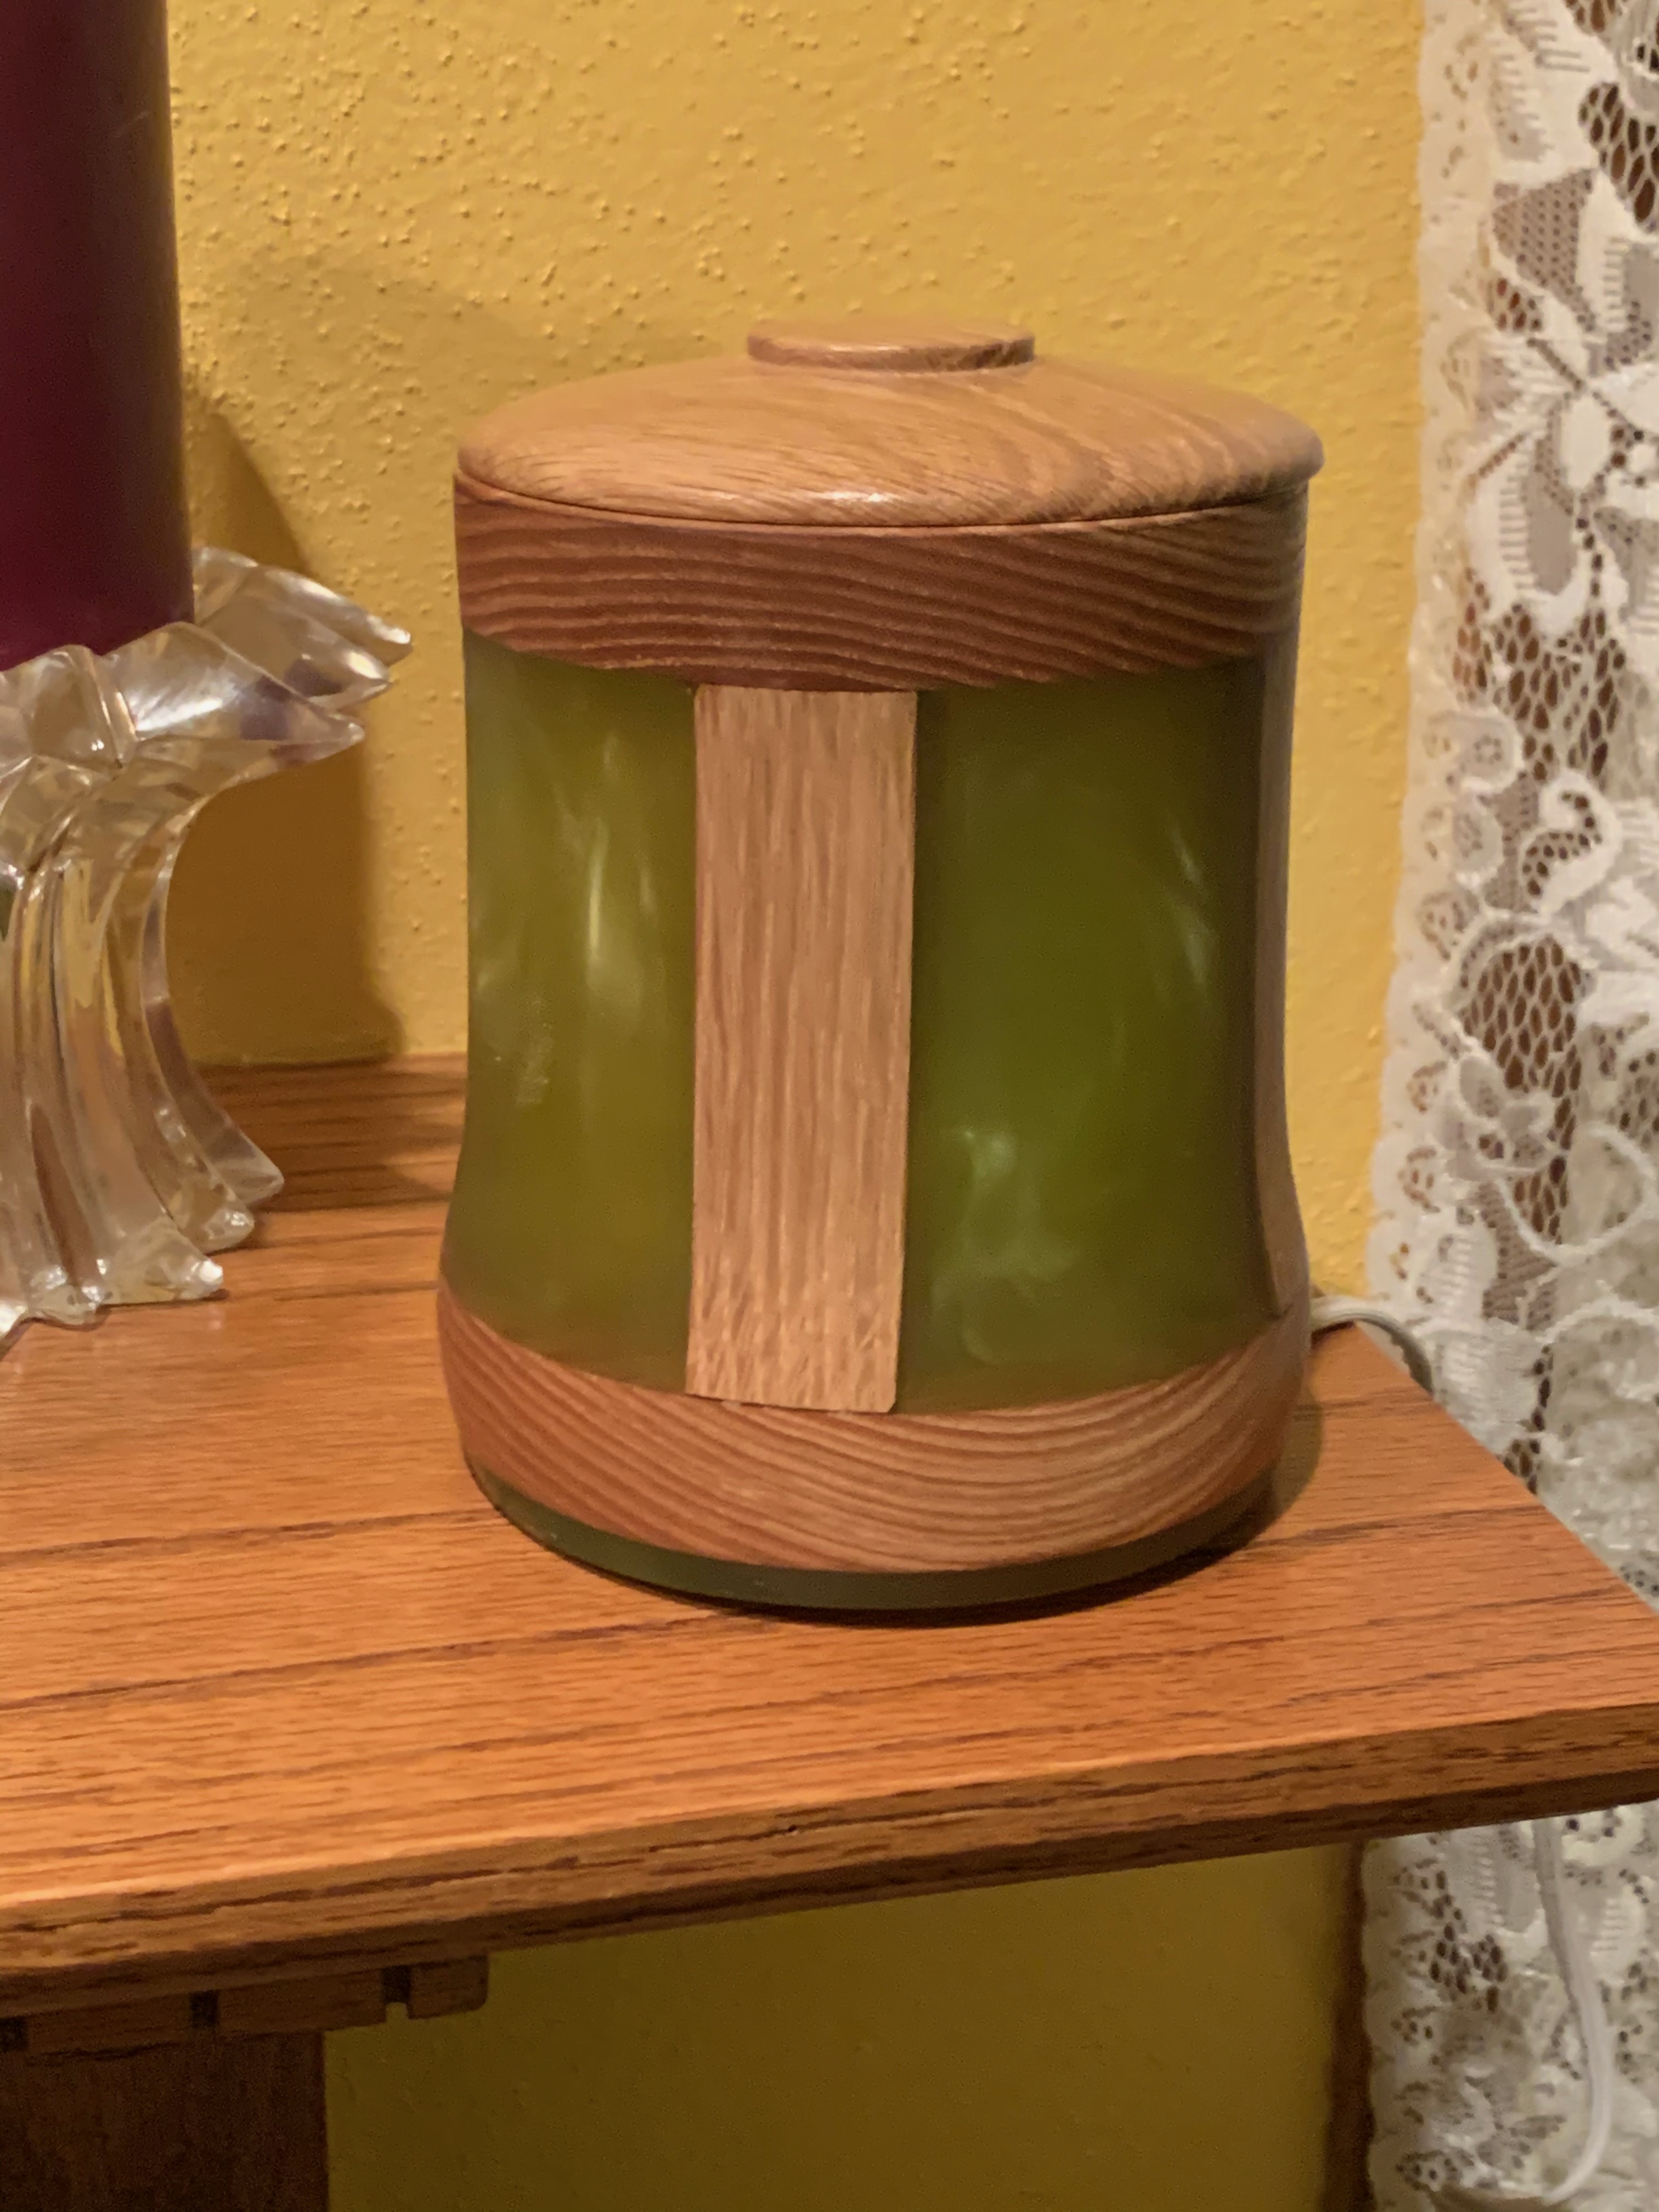

I think it turned out well. The only real issue is that the lid is a bit loose fitting and slides around about 1/8 of an inch or so. as you can see in the photo. The dopey camera in my iPhone simply cannot take a decent photo of lighted objects, but here’s one anyway. There’s no way to adjust the exposure or defeat the metering algorithms used in the iPhone camera, and I was too lazy to dig out the real camera to take a photo just for this, so this is what I’m stuck with. Oh, well. Anyway, I’m really pleased with this one.
The purple thing I showed you after I pulled it out of the pressure tank, that one – meh… I hate to call it a complete failure because it was an experiment and experiments often do fail for a variety of reasons. So if nothing else it was a learning experience. The resin turned out way, way too intensely colored, and the addition of the wood shavings didn’t help things at all. I’d hoped it would be useful as a lamp, but the resin was way too dark and there was too much wood shavings in the mix to permit it to be translucent.

It actually looked pretty promising when I first pulled it out of the mold and put it on the lathe. The color looked pretty nice on the surface. But once I got it going… If you’re interested in what a project like this looks like while in progress, here’s what it looks like after I started to work with it on the lathe and was roughing it out to shape.

Not exactly impressive looking, is it? Downright ugly, in fact. But that’s the case with almost all projects like this, the intermediate stages don’t look anything at all like the finished product that’s been sanded and polished. What it finally turned out to be was this.
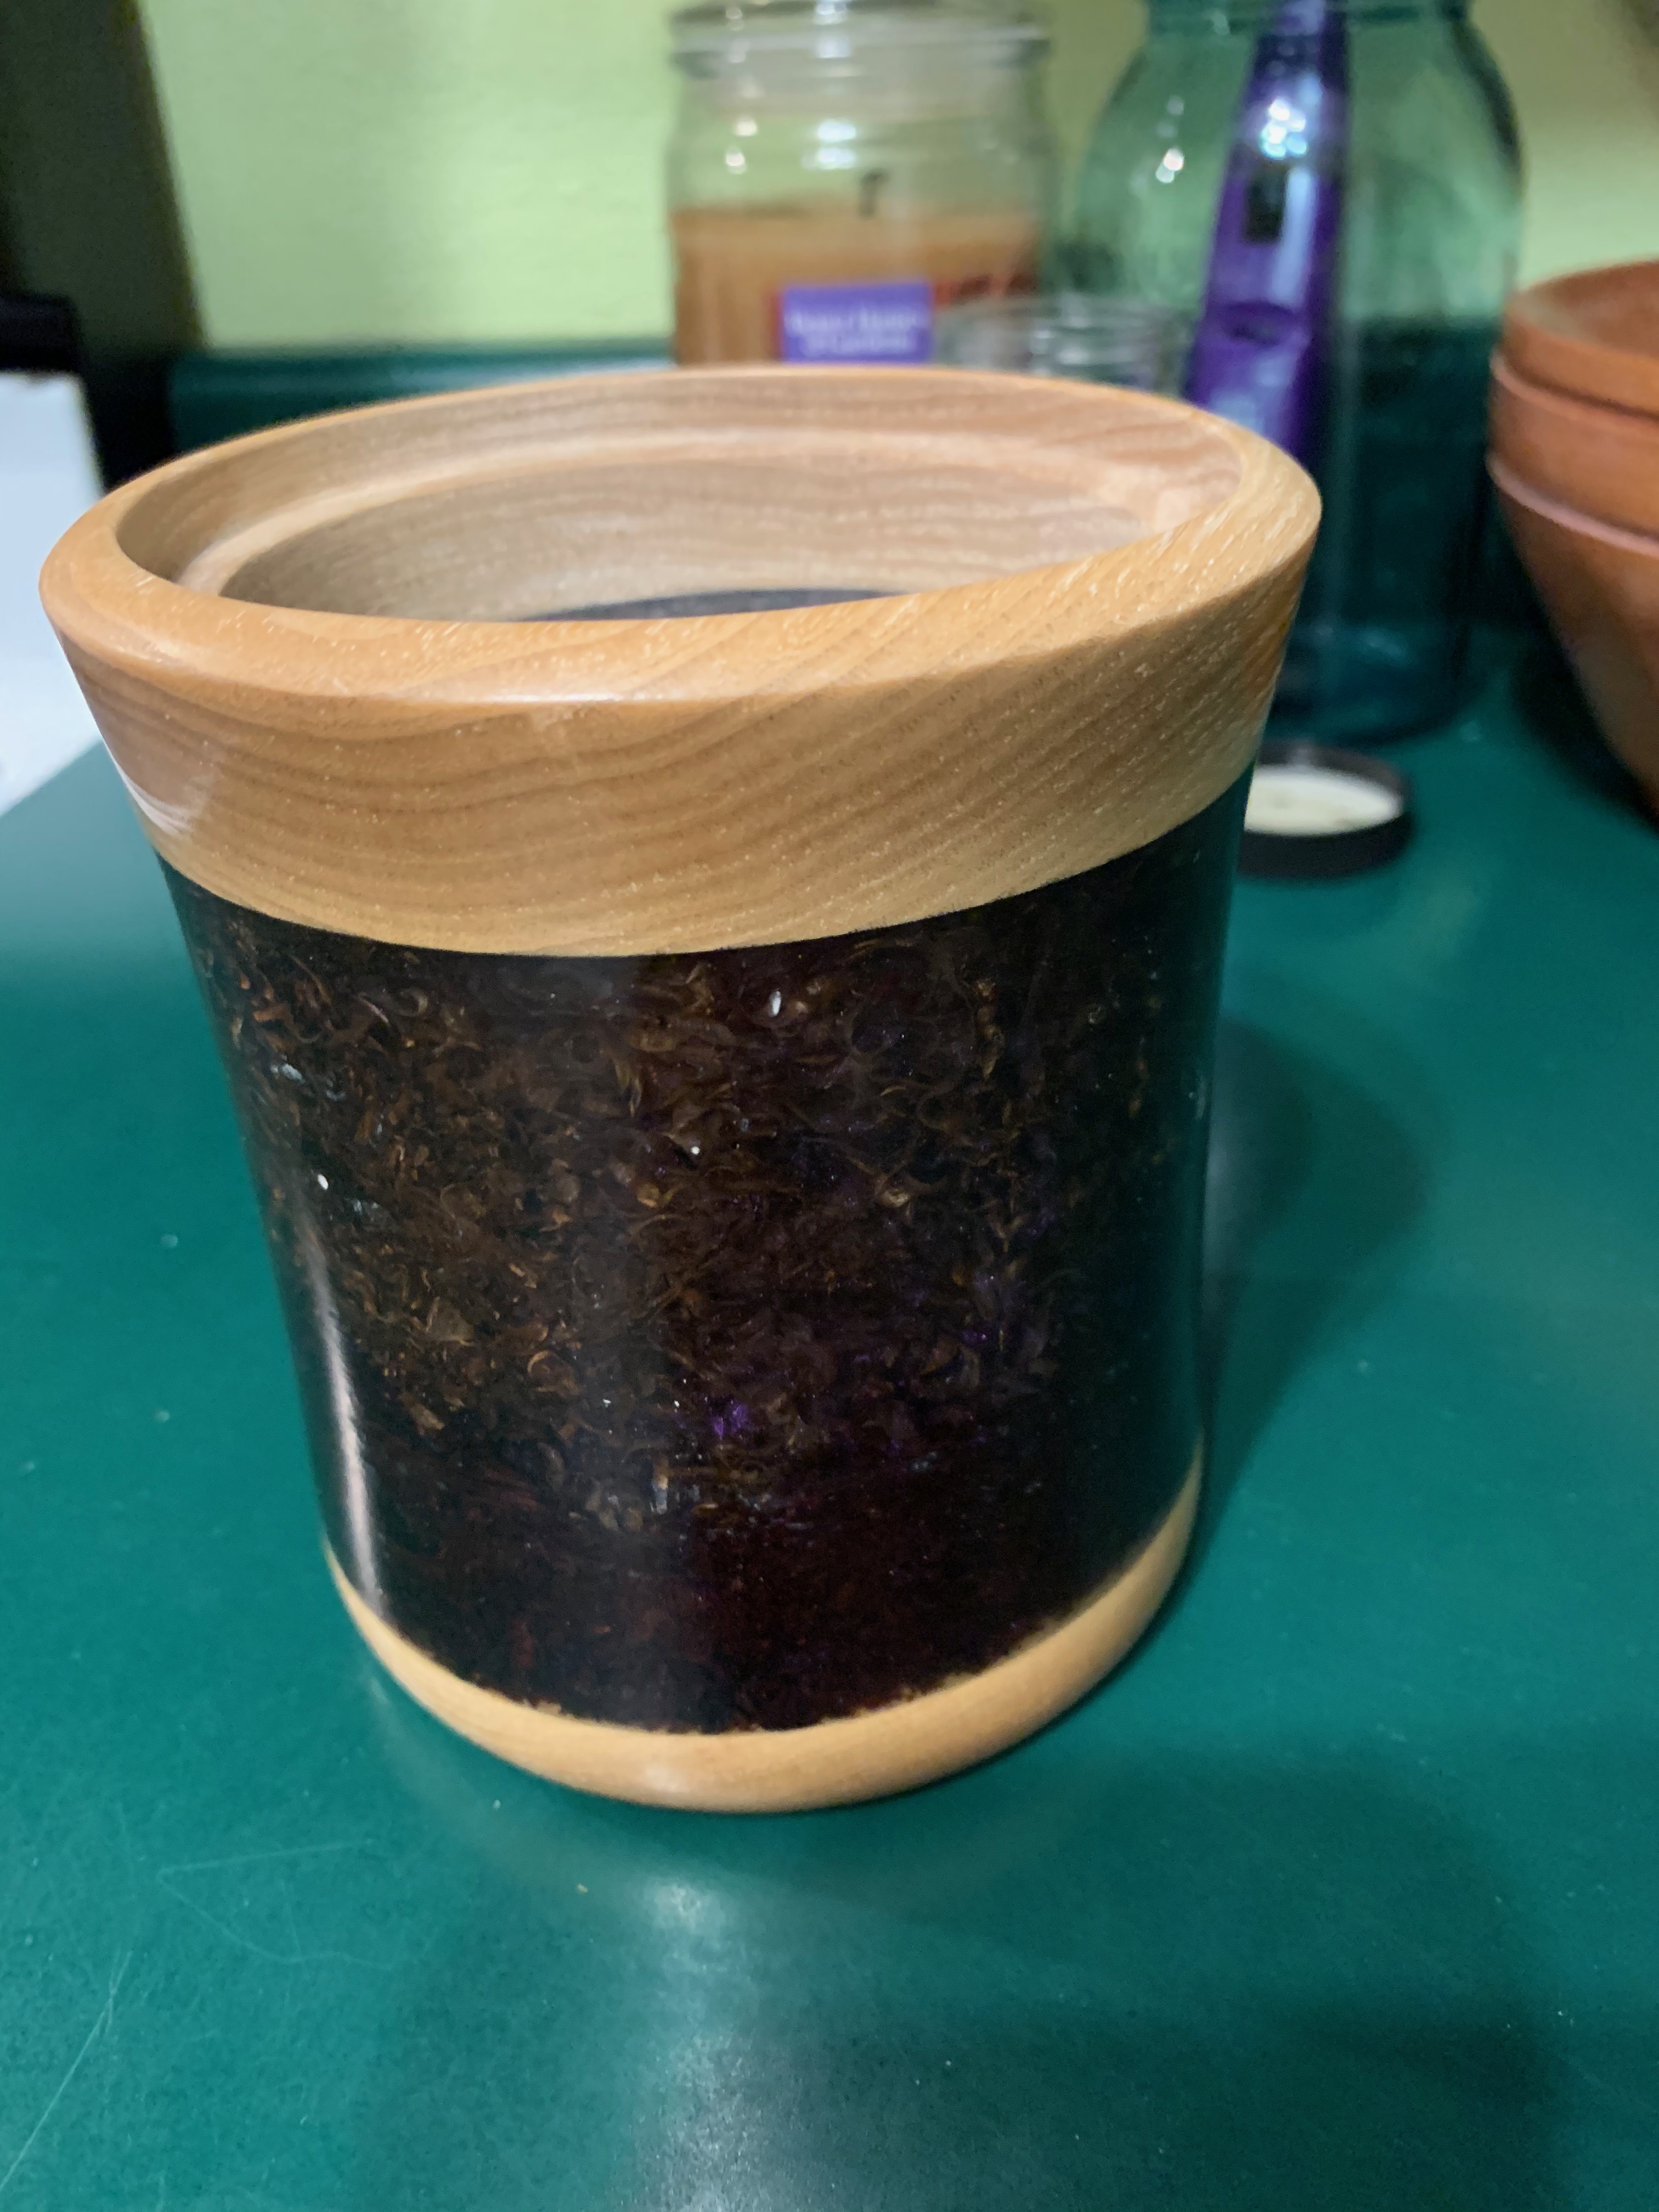
Not exactly impressive, but not utterly horrible, I suppose. You can sort of see the wood shavings there in the resin, but overall it would have been better if they hadn’t been in there at all. And I used way too much coloring as well. I have to admit that there is a very good chance this one is going to end up in the trash. The only reason I finished it was because I wanted to see what the final result would be like.
But this is, after all, a learning process. I learn more from my mistakes than I do from anything else, so even this wasn’t a waste of time.
One interesting thing I’ve learned is that when you throw something like this into a pressure tank and let it sit at about 60 PSI it does some interesting things to the wood that I hadn’t noticed before. The wood parts looked completely normal, but they weren’t really, well, wood any more. It has been so thoroughly saturated with the resin that the wood behaved more like resin when I was machining this thing. I hadn’t noticed that before, so I imagine that the species of wood, its moisture content and other things may have something to do with that.
Oh, in case you’re interested, this is what it looks like when I’m actually working on a resin project on the lathe.

Holy cow it gets messy! If you’re using sharp tools, the resin, which is essentially just plastic, peels off in long, long thin strings that fly all over the place and cover me pretty much from head to foot.
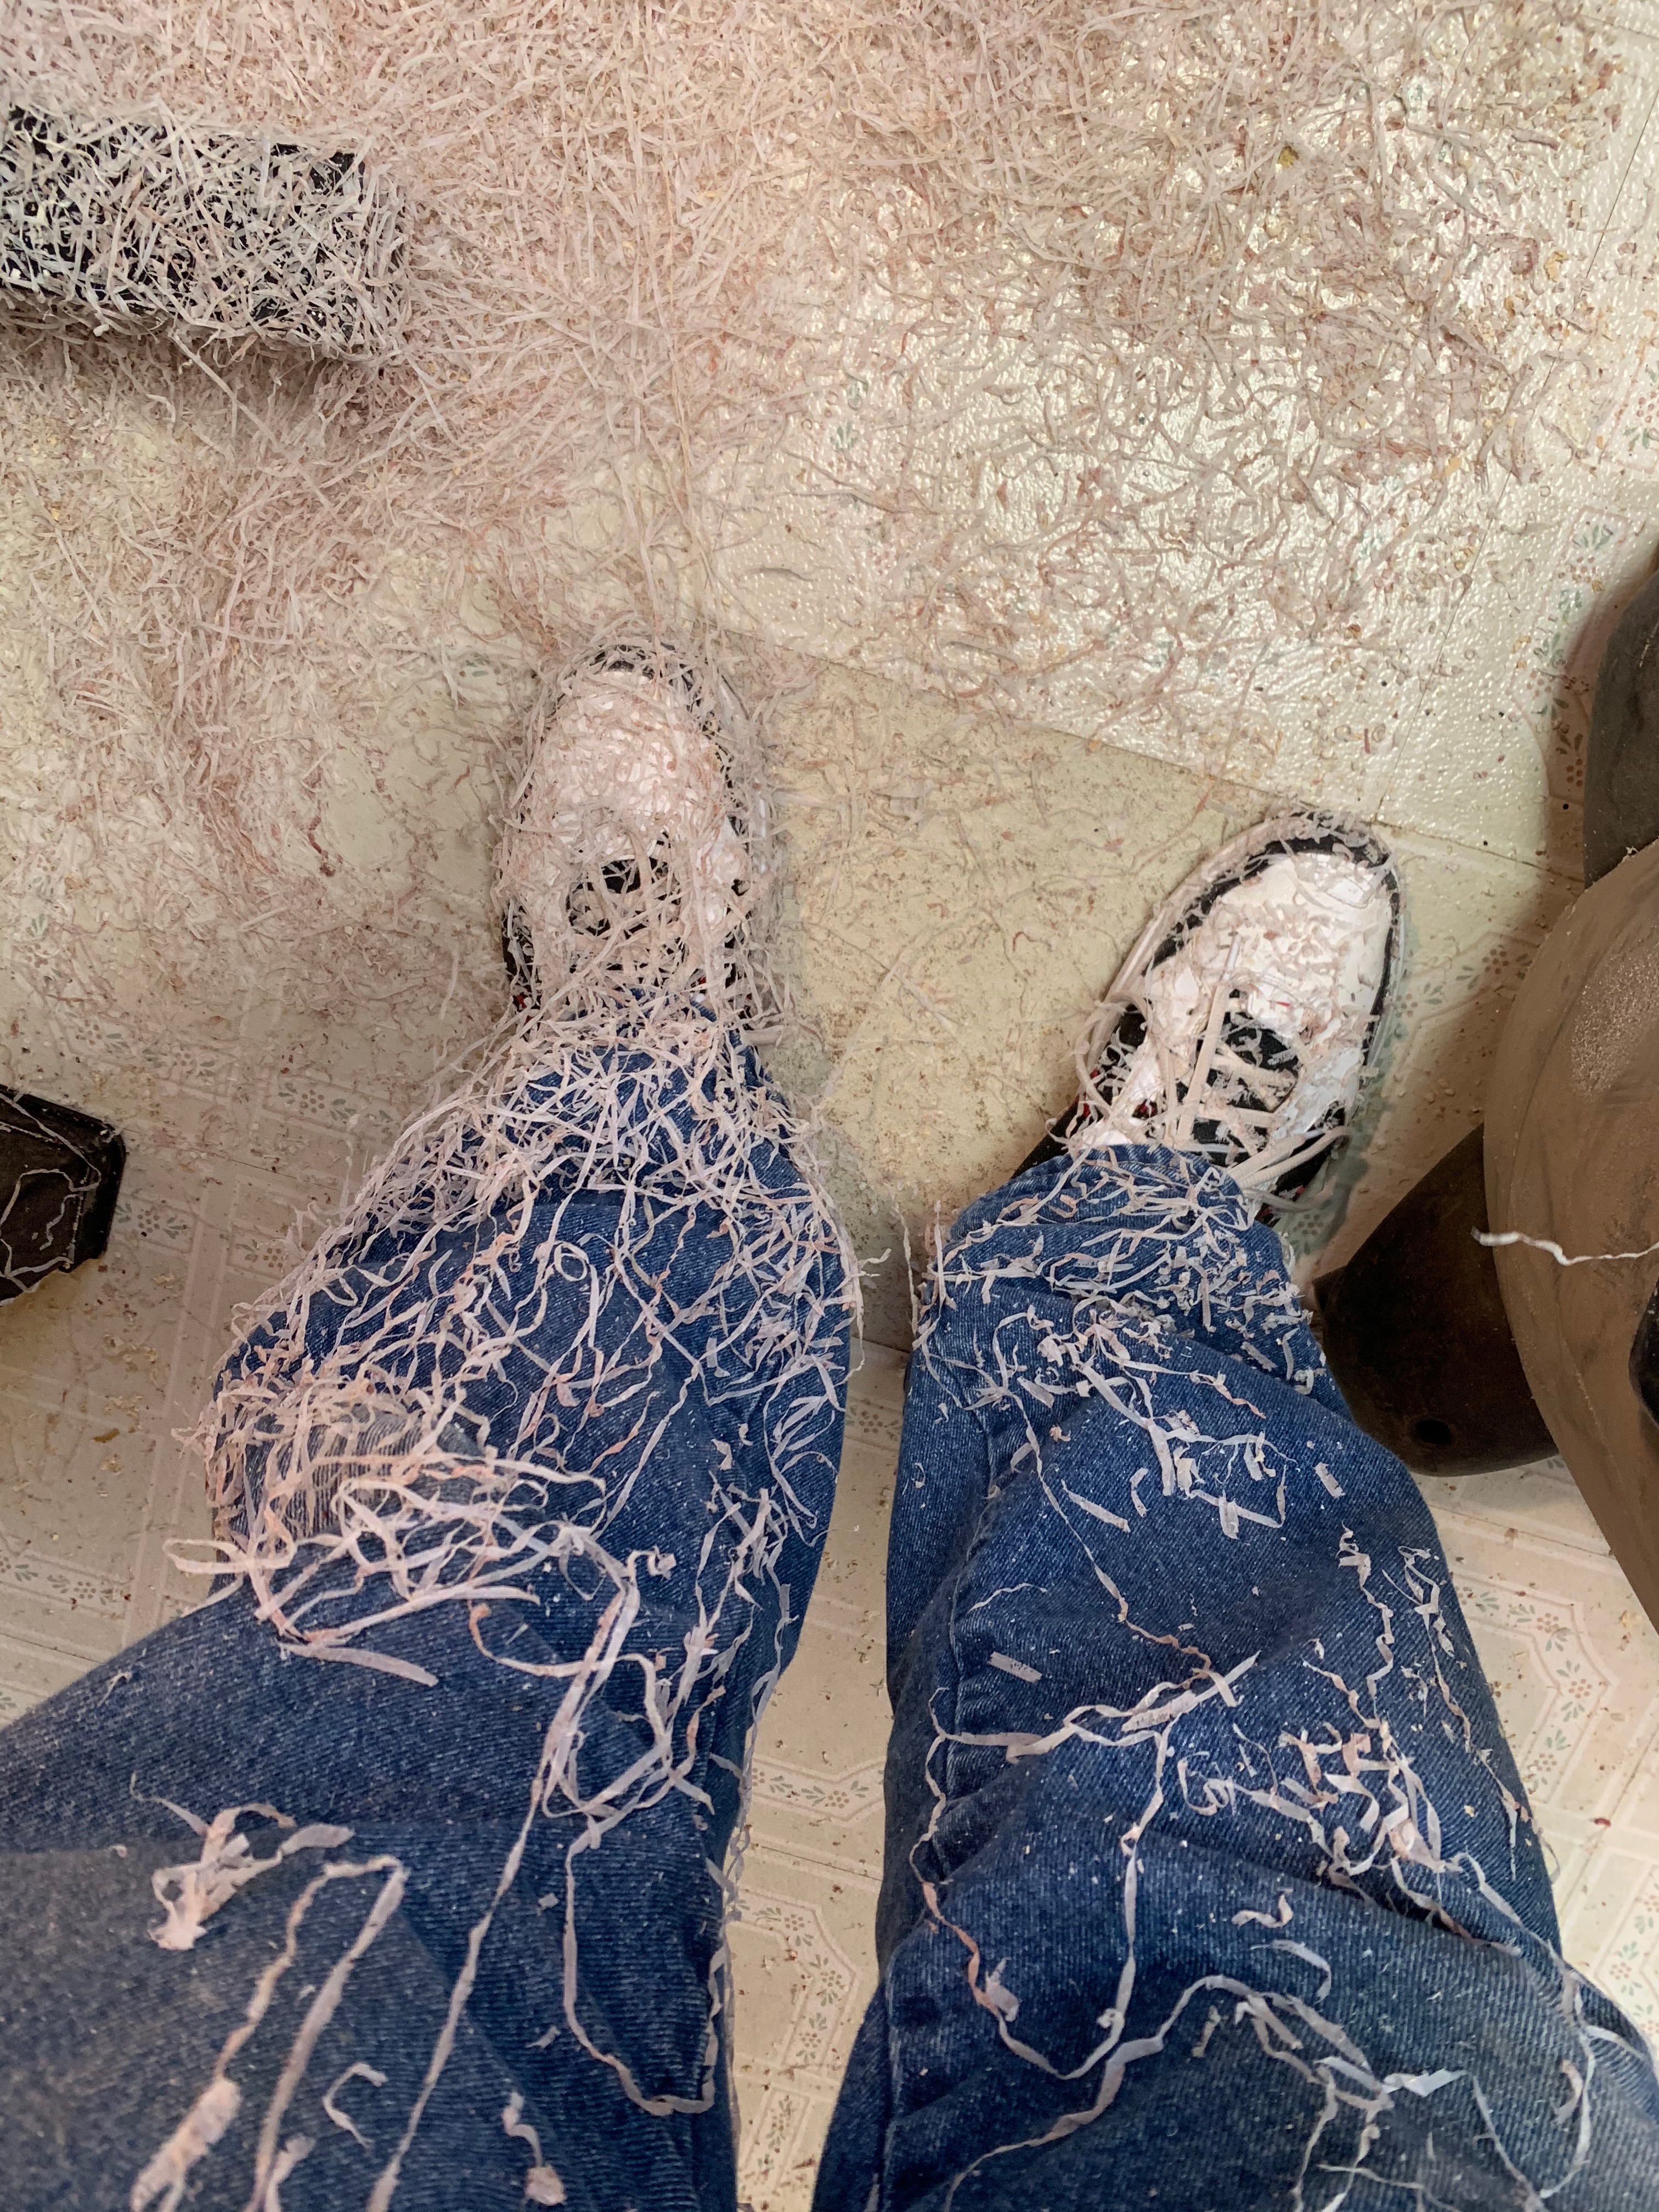
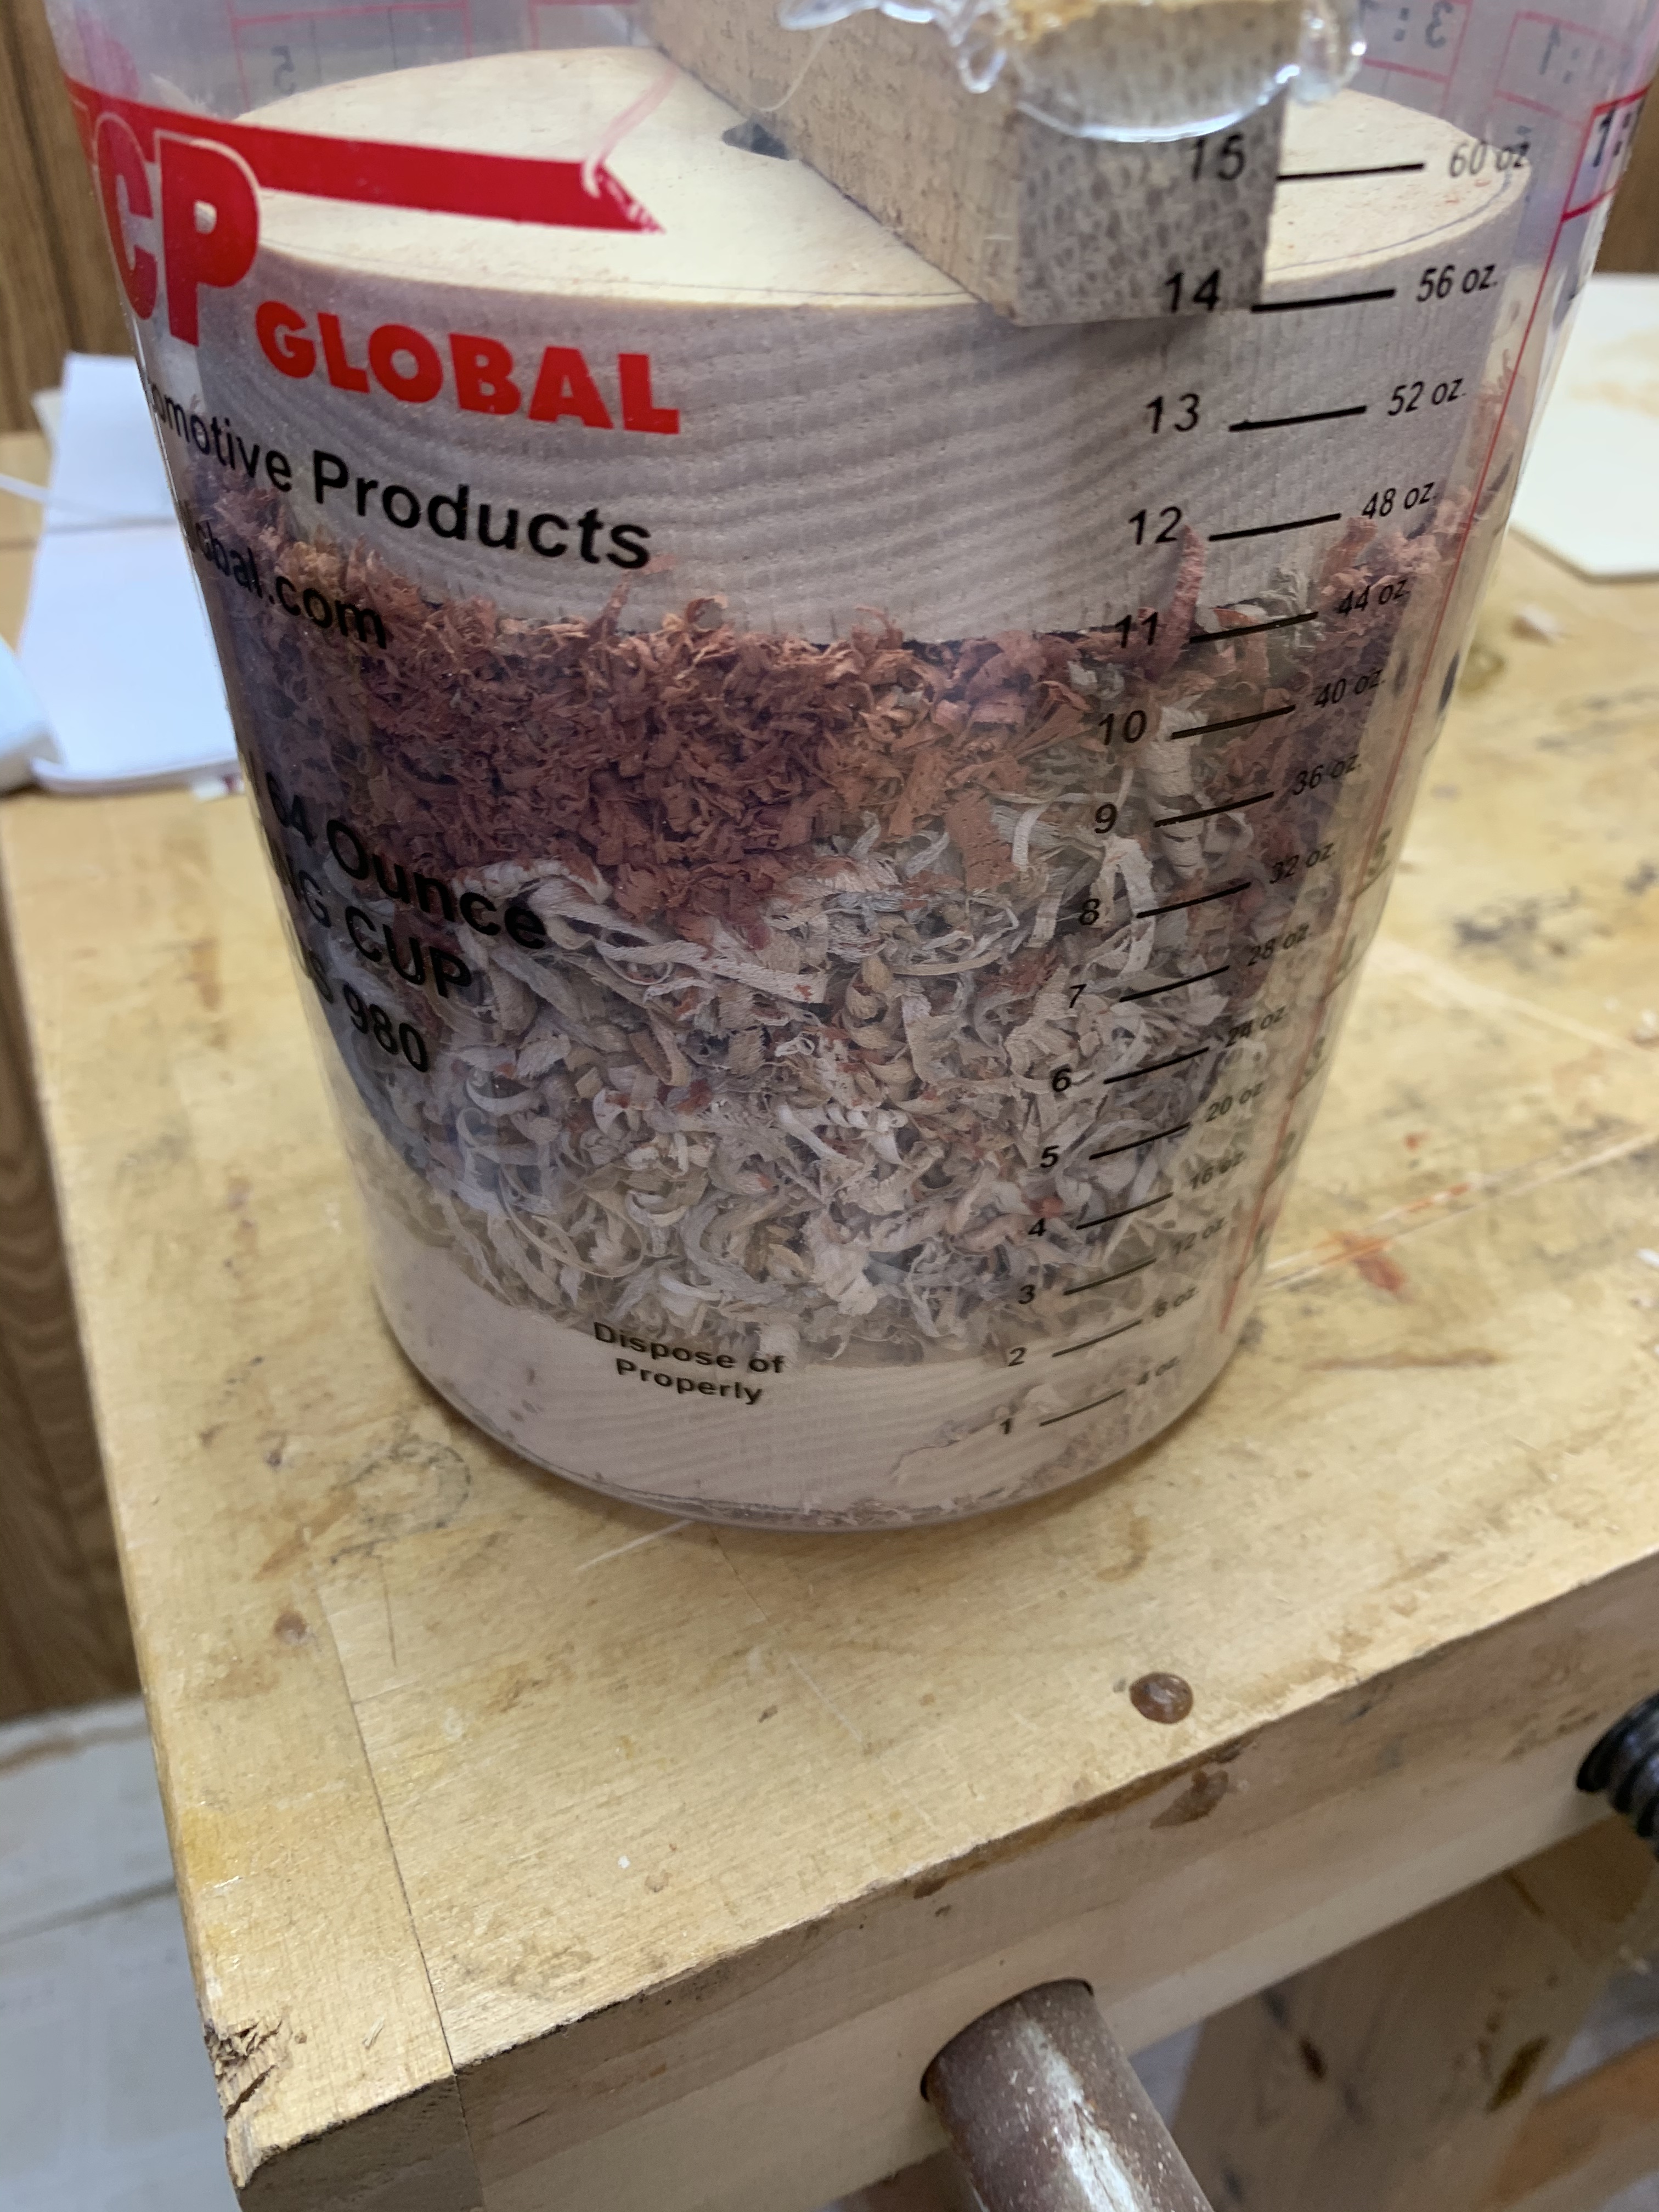
Generally when I’m done working with the lathe I have to go over my whole body with the shop vac to get all of the dust and debris off me. Including vacuuming my hair.
Dust, dust everywhere.
I’ve been doing a lot of fiddling around with wood of late, and because my shop is located in the basement dust has become a significant issue, especially now that the weather has turned cold. I’m not talking about wood shavings and the like, that stuff is fairly easy to deal with. I mean the fine particulates that get into the air and can float around for a long time. During the warmer months it’s not a real problem. I stick exhaust fans in the windows and all the dust gets sucked outside. But now that the house is closed up, the dust is a real problem.

One cheap and easy to implement method of dust control that I’ve resorted to is the good old fashioned duct tape a furnace filter to a box fan trick. And that’s what I’ve done in the past. It really does work. Judging from how fast the filters get dirty, it pulls a lot of crap out of the air before it gets into the rest of the house. But judging from how often I’m having to change the furnace filters and the amount of dust still getting into the rest of the house, it isn’t adequate to deal with the situation any longer. So I went and bought an actual real air filtration system in the hopes it will deal with the problem better than my existing methods. That is supposed to be arriving Saturday. This one costs about $200 which I suppose isn’t ridiculously expensive. It’s supposed to filter down to 3 microns, whatever that means, but I’m told that’s pretty good. Once I get this thing set up and running I’ll let you know how it works out.


The christmas cactus is now in full bloom and looking spectacular! I don’t know how MrsGF does it, but this cactus of hers puts on these amazing shows of color at least twice a year. But she also brings in an outdoor rose bush and somehow keeps it blossoming most of the winter as well, and I don’t know how she does that, either.

I haven’t had to get up early in the morning for a long time but I still have this silly habit of waking up ridiculously early in the morning, usually just before sunrise. It’s worth it, though. The sunrise this morning was absolutely beautiful. Seeing the silhouette of the trees against those pinks and oranges and reds was a gentle reminder of just how beautiful this world can be if you take the time to just sit back and see what’s around you.
I’ve been puttering along with the cake plate project and I finally finished the top platter the other day. The final shaping is done and I spent way, way too long sanding and smoothing it down, then sealing it and putting several coats of wax on it. Even the bottom of it looks pretty good.
Yes, your eyes are not deceiving you, there are holes in that wood, worm/insect holes. This is “ambrosia” maple. These striking colors and patterns are caused by a fungus carried by the ambrosia beetle. It’s beautiful stuff but you have to deal with the holes left in the wood as well sometimes. I’ll be sealing those up with epoxy. It will eventually be perched on a short pedestal made of the same wood.
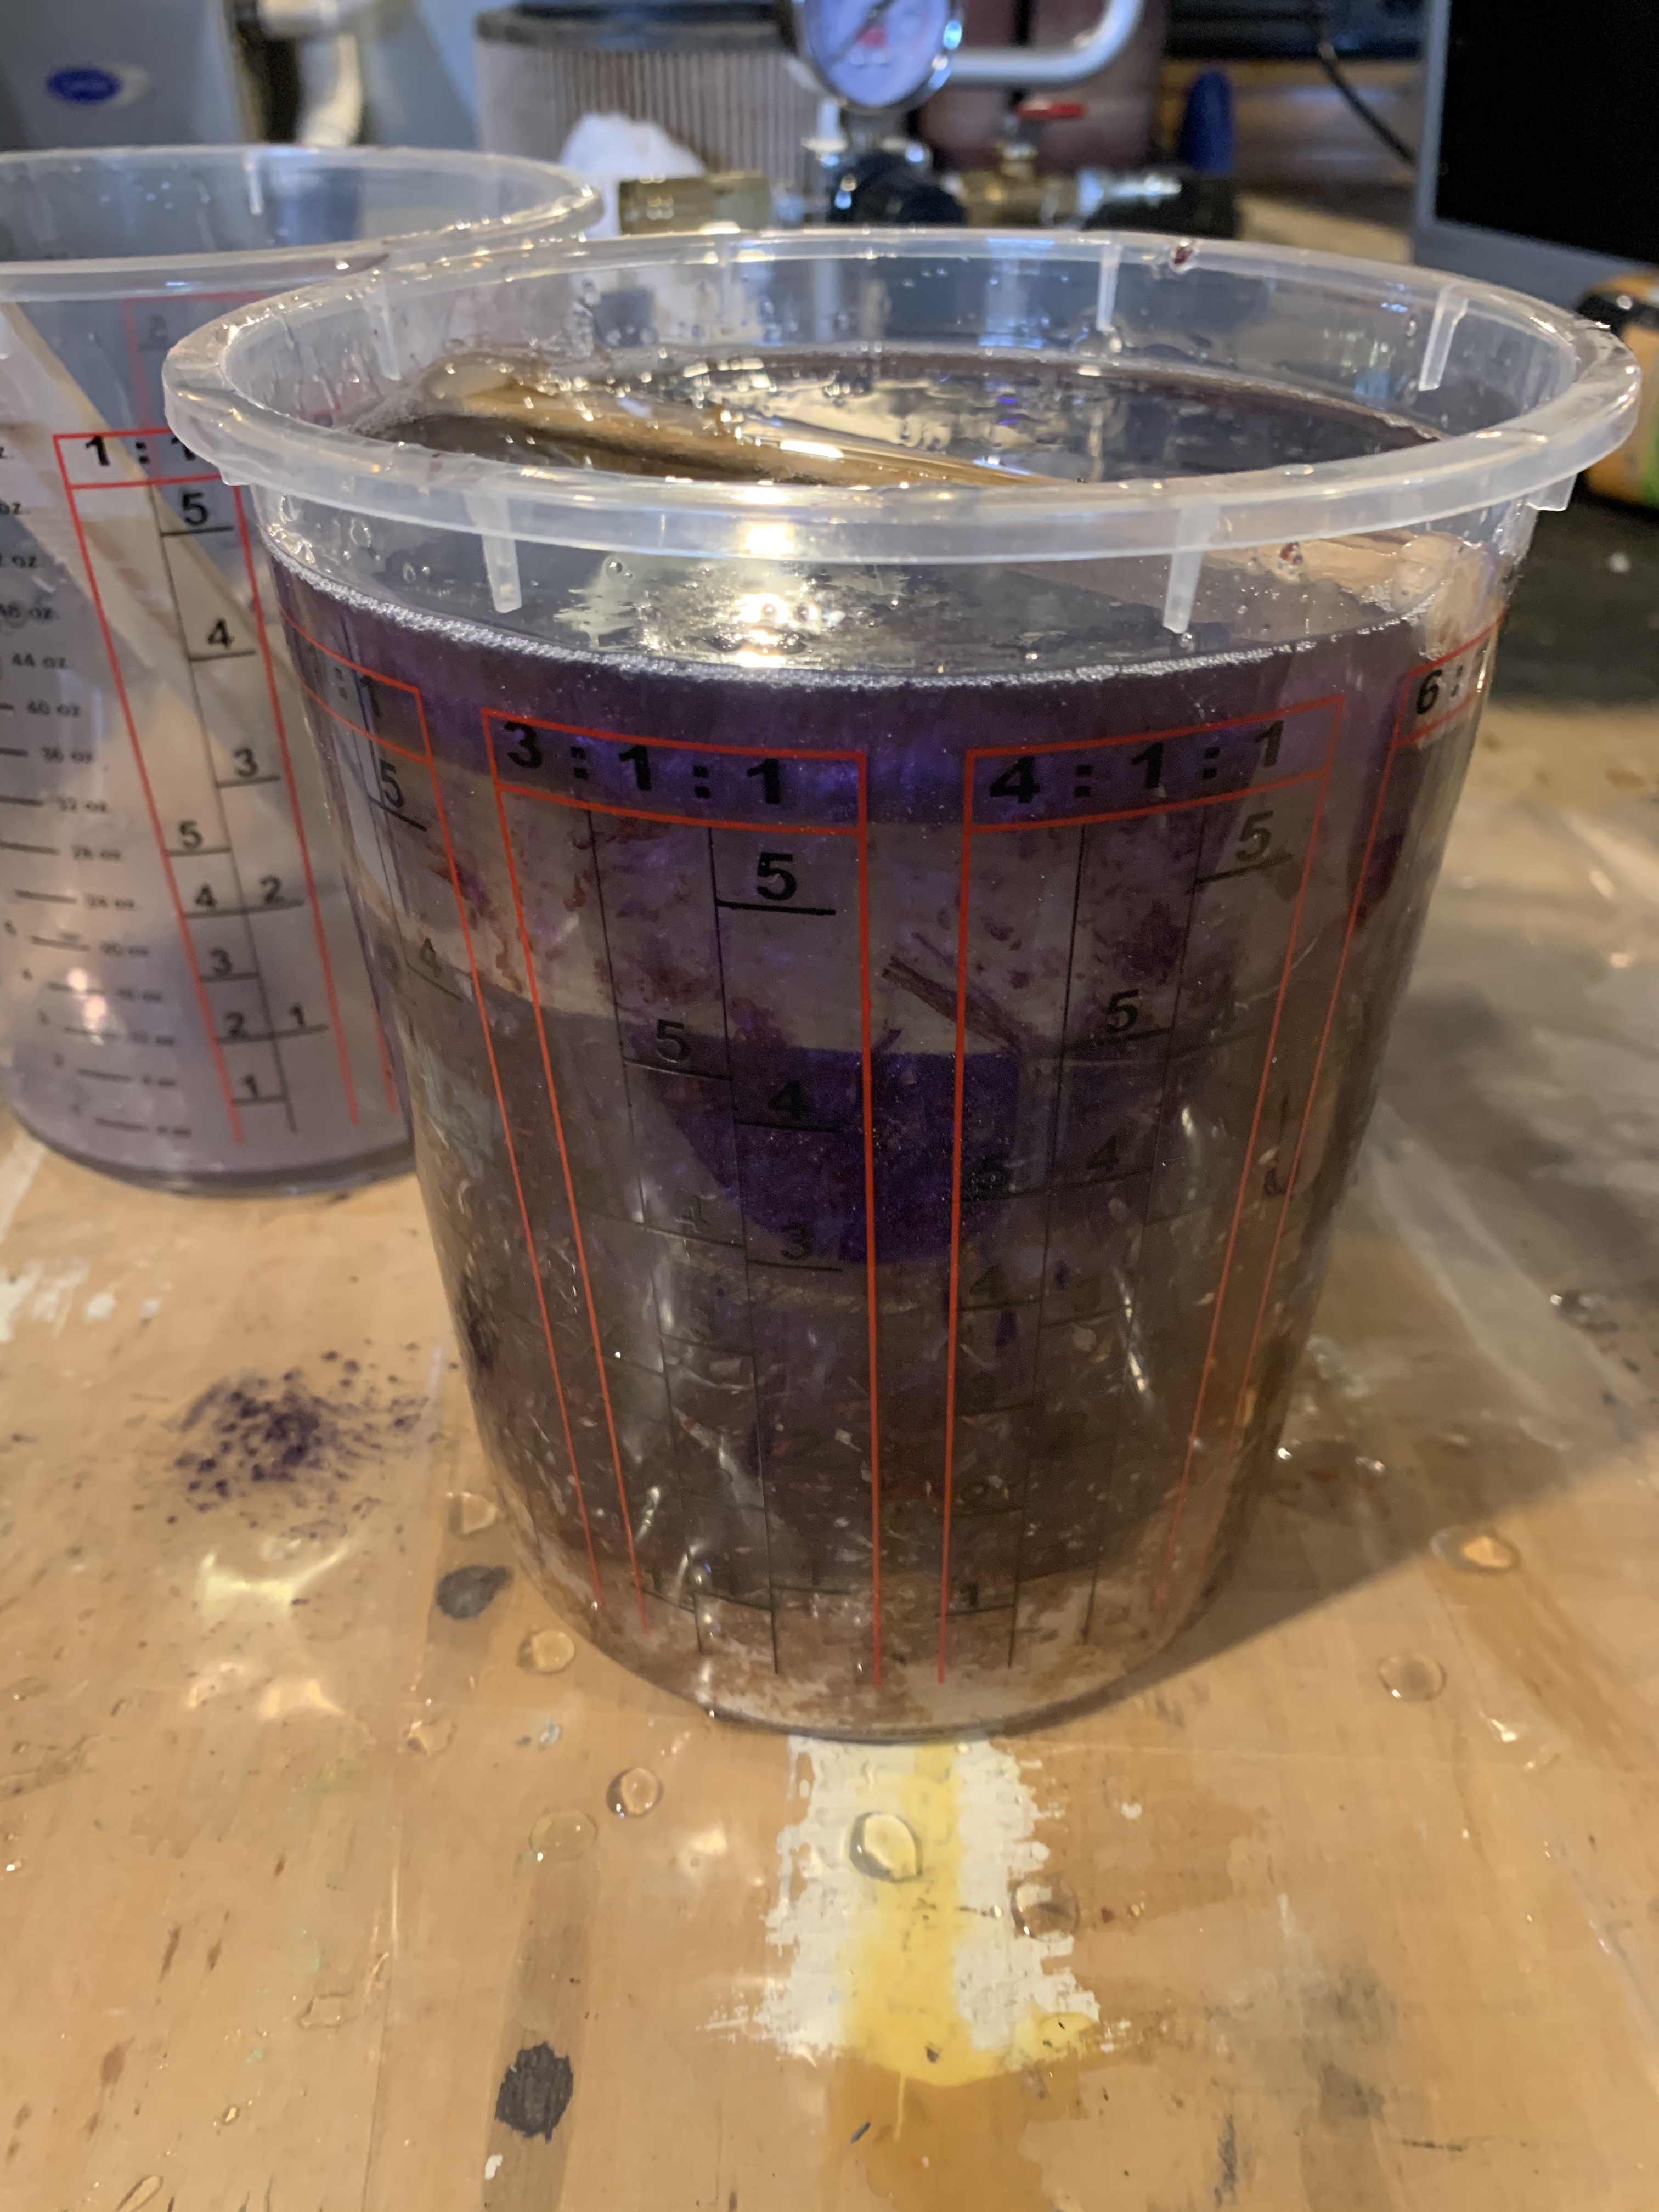
So, I have lots and lots of wood shavings. I have a bunch of ‘free’ resin left. So, I thought, what happens if you shove a whole bunch of random wood shavings into a plastic tub and fill it with violet resin? That’s the question that absolutely, well, that absolutely no one has been asking. So, of course, I decided to try it because hey, why not?
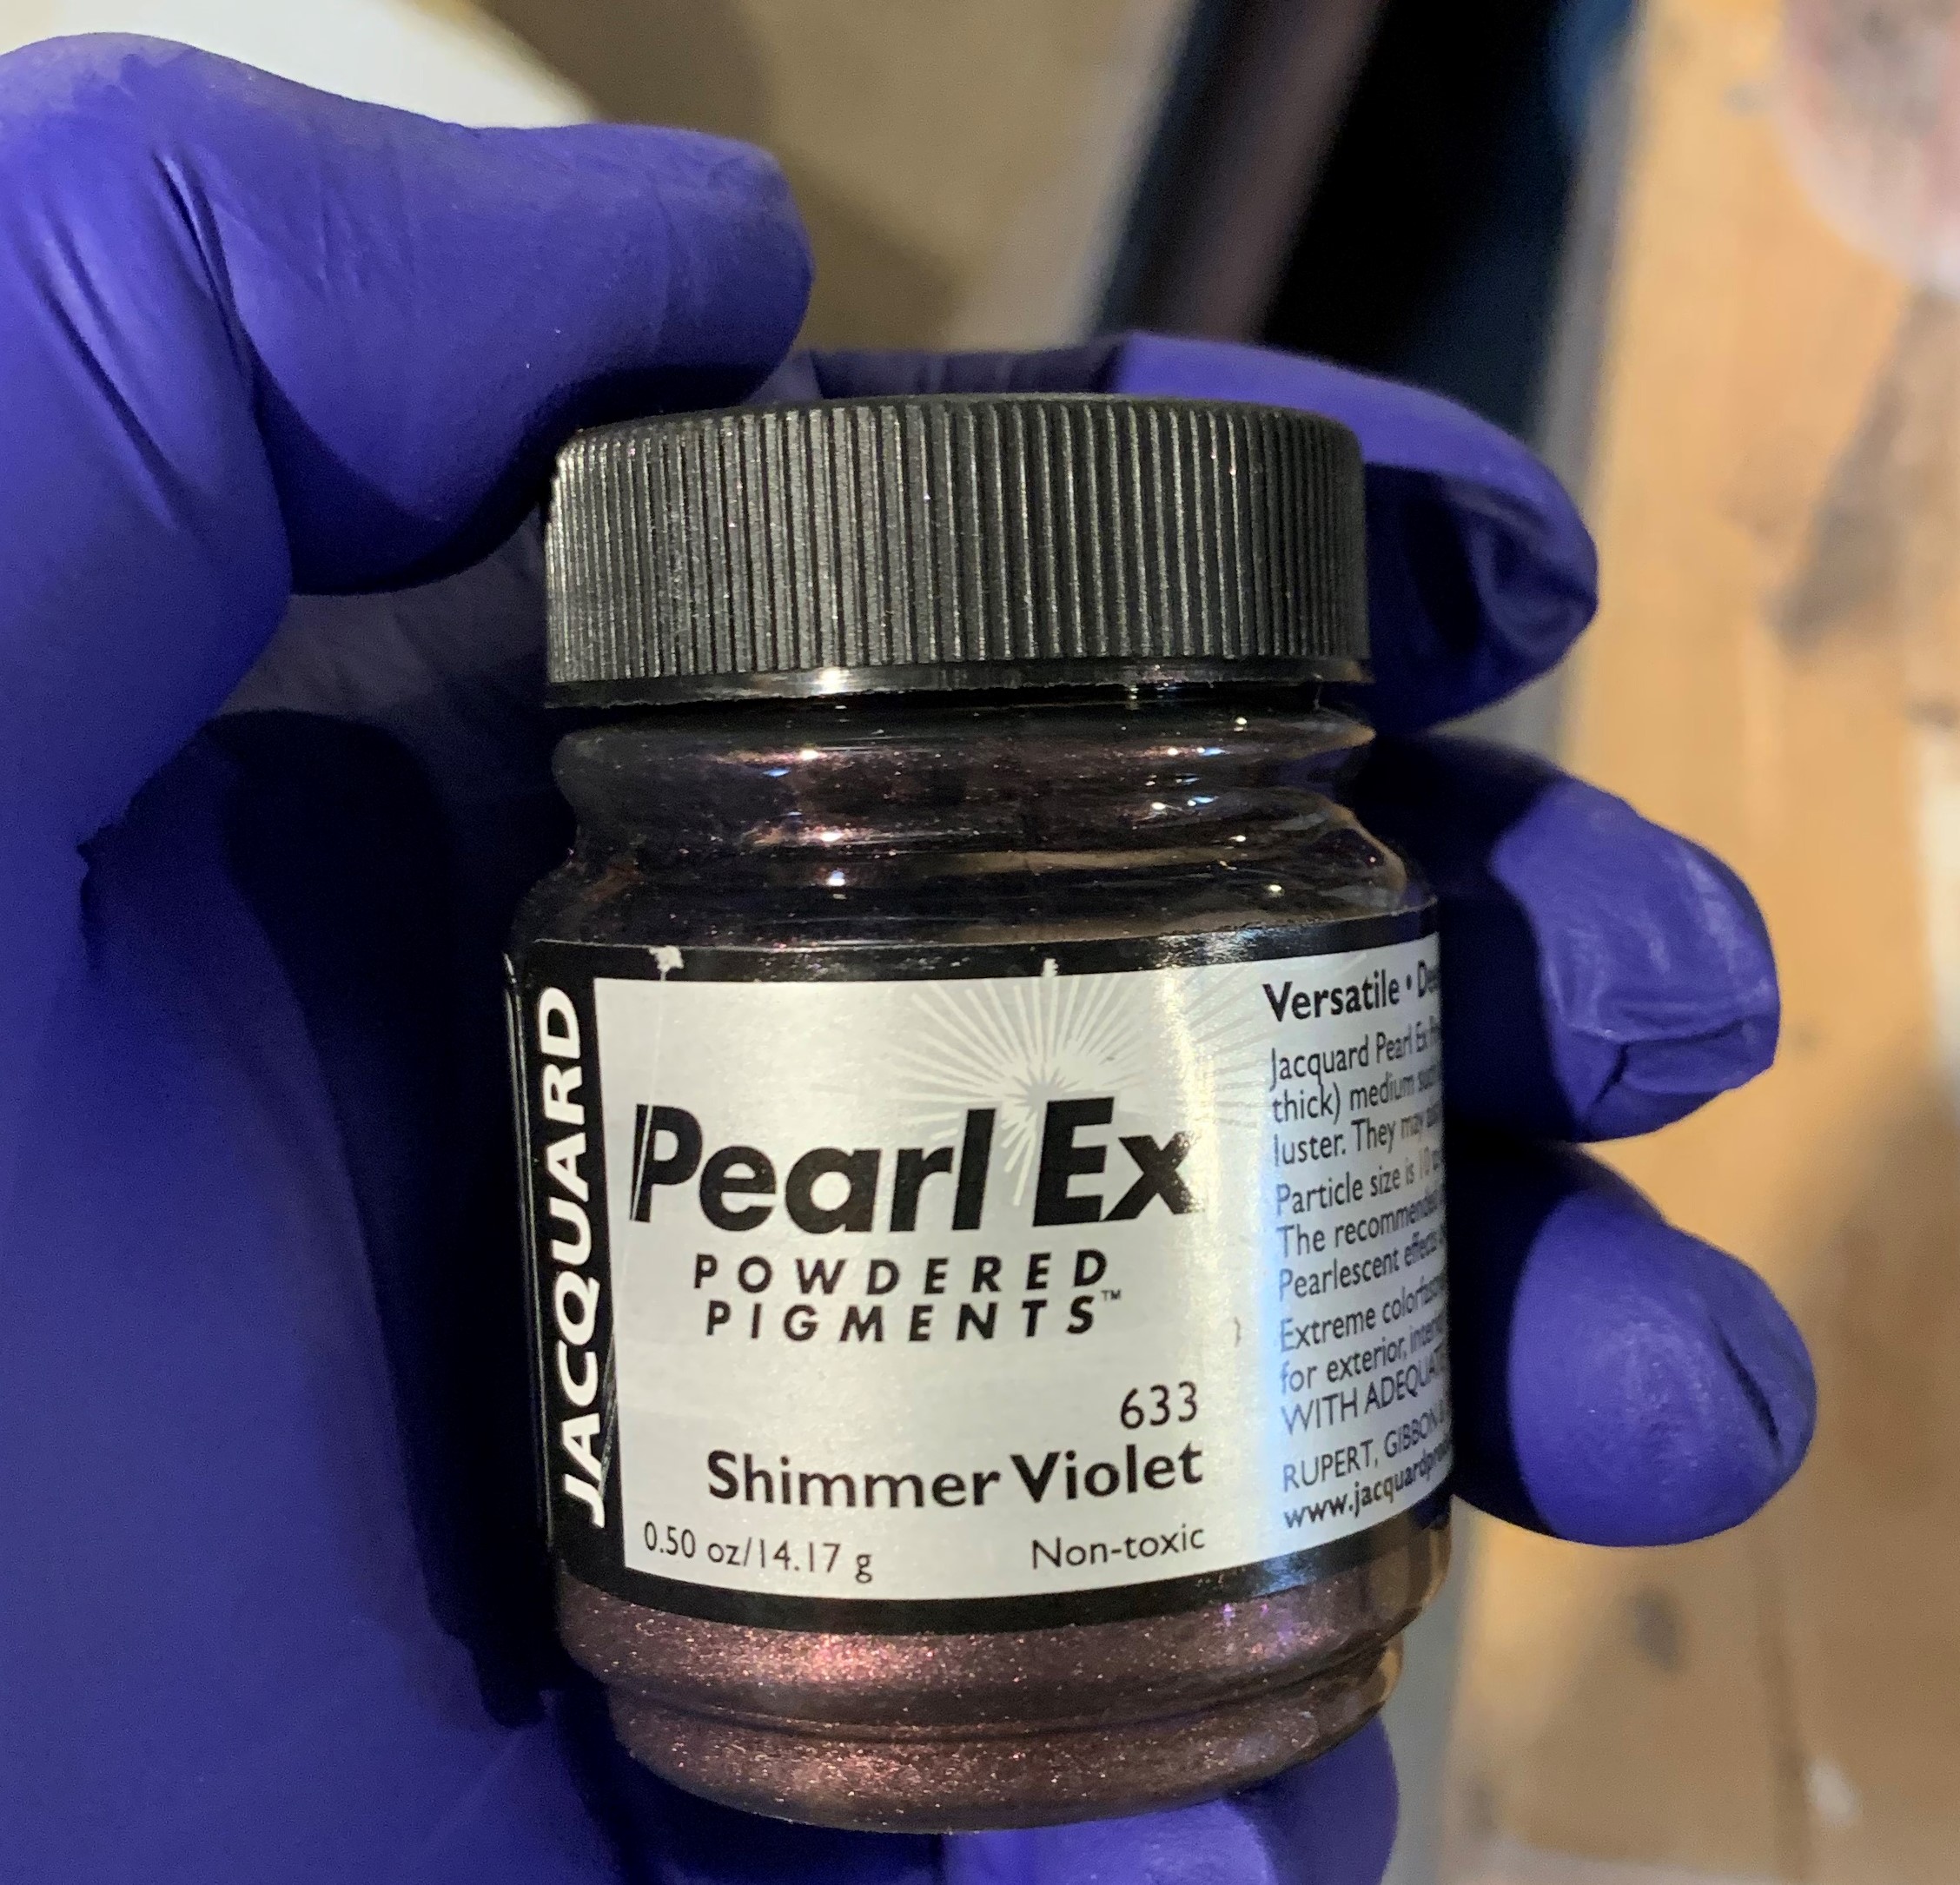
So I stuffed a plastic tub full of random wood shavings from various turning projects, glued some wood discs on the top and bottom to hold everything in place, then got out the last of my ‘free’ resin and mixed it up, dumped in a bunch of “Shimmer Violet” iridescent coloring, and almost immediately regretted it because holy cow it’s weird looking.
It’s a good thing this Naked Fusion “Deep Pour” has a long pot life because took a long time to pour this, with lots of banging, tamping and poking around with sticks to try to get all the air out of that mess.
I suspect this is going to be a complete failure, but, what the heck. I don’t think I’ve ever written about the projects I’ve tried that have been utter failures. Fortunately I’ve had very few complete failures over the years. But this one looks like it’s going to be one where I’ll look back on it and say “what the hell was I even thinking?” Well, it’s in the pressure tank right now so I’ll see in about two days. If you don’t see anything here about it in the near future it’s because it was so ugly I couldn’t figure out what the heck to do with it.

I got very impatient to see how the green blob over there on the left would turn out so I set aside the cake plate project for the time being to work on this new one. It didn’t look all that promising when I started out, and I had some issues with the thing as I started to work with it. But finally I ended up with something with a relatively pleasing shape and look to it, fitted the lamp into the thing, and the end result is below.


I still need to make a top for it. Rather than go for a high polish I left the translucent parts a mat finish. I think it looks better that way.
And it has some problems. If you look at the middle photo you’ll see some cracks in the top wooden ring. I don’t know if those were in the wood to begin with and I didn’t notice them, or if they developed as I worked on the piece.
All things considered, it’s not too bad for my third attempt at this. I’ve made quite a few mistakes but at least I’ve ended up with three projects that weren’t too bad for a beginning. And I’ve learned a lot.
I really need to do more experimenting with color mixing. I’m not at all satisfied with how some of the colors turn out.
