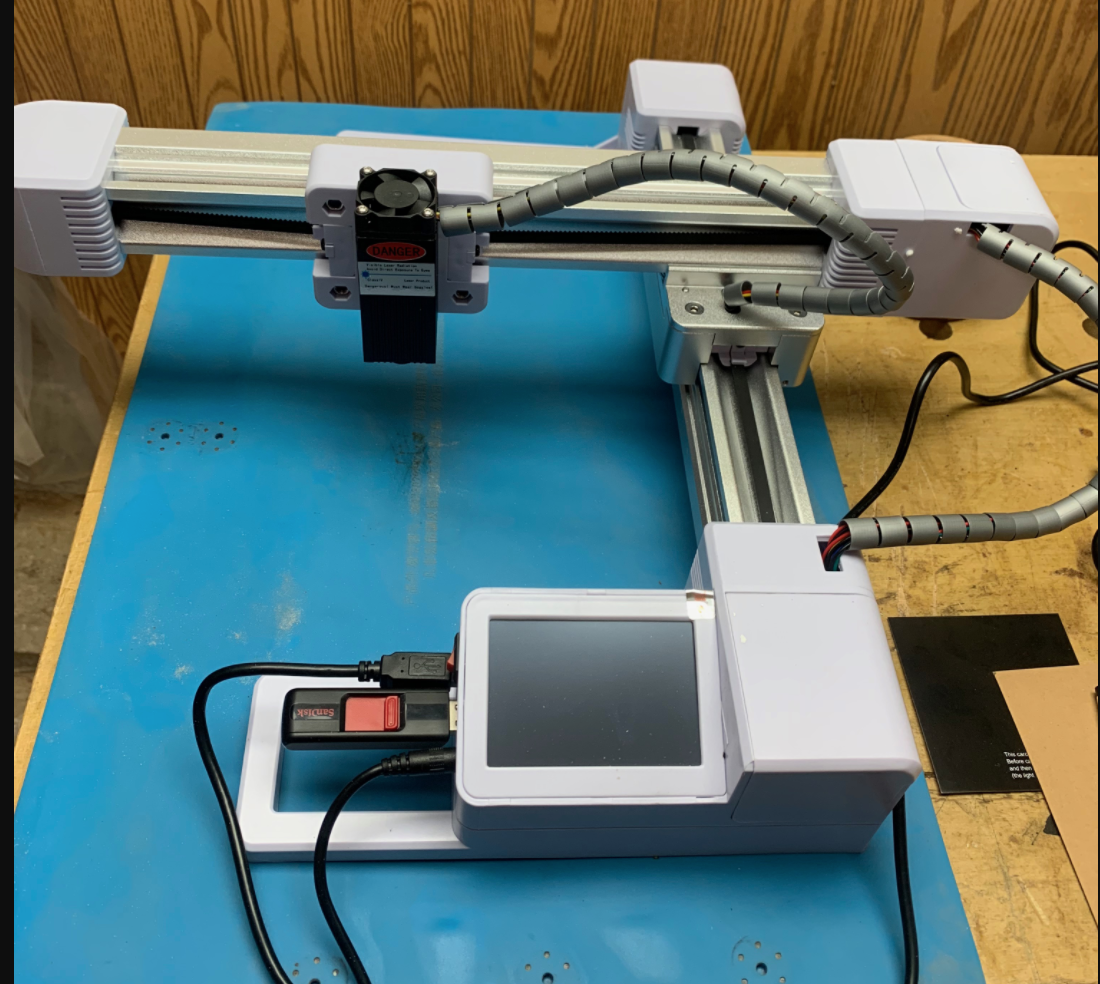
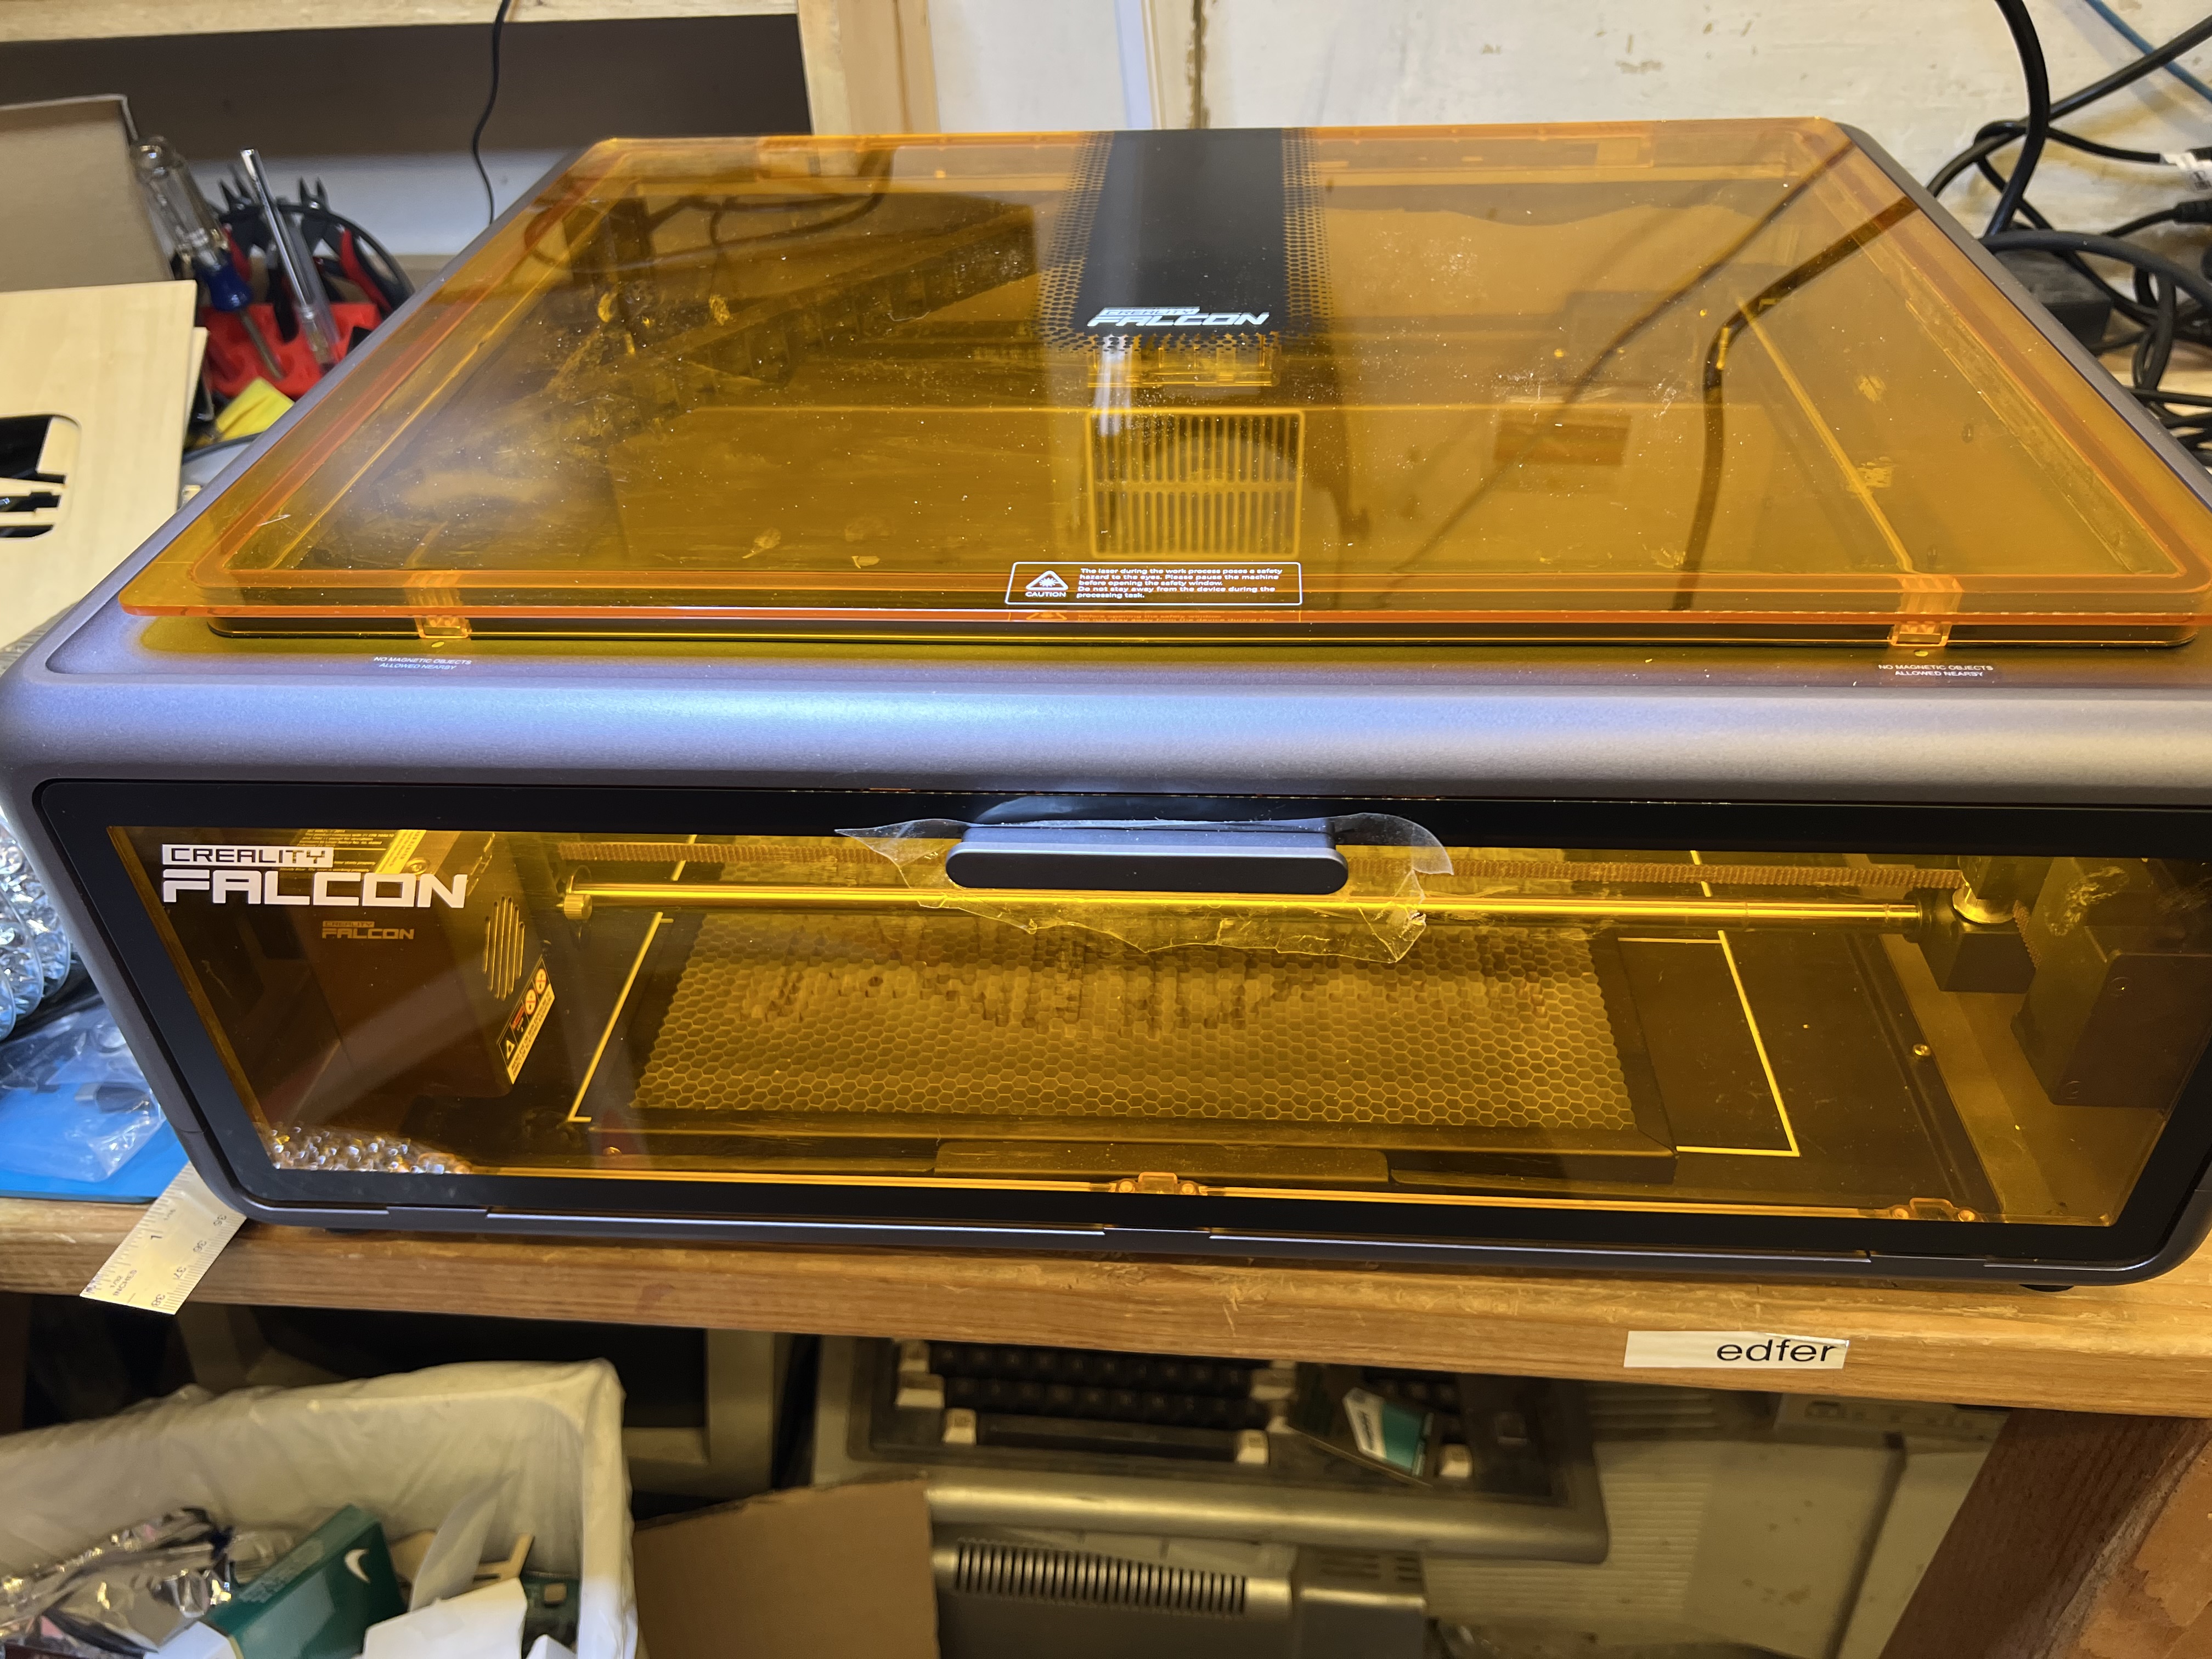
So I want to talk about laser engravers, specifically this beastie down below, the Creality Falcon A1 10W diode laser engraver/cutter. It’s fairly new to the market and hasn’t been on general sale for very long, and except for a few “influencers” on Youtube who got pre-production models for testing or were given one of them for free right after they came out, there haven’t been any real, honest reviews of this thing by people who have actually bought one with their own money and are actually using it, and using it hard, in real world conditions. A lot of you who read this are hobbyists, crafters, woodworkers and the like who tag along here for the rare article that pops up about this kind of stuff, so let’s take a look at this thing.
If you’ve been reading grouchyfarmer for a while, you know I dabble in a lot of things like wood working, wood turning, photography, drawing and sketching, and, yes, laser engraving. The last time I talked about it was some time ago when I was running the LaserPecker. I was using it to crank out little novelty things and it was fun, but it was seriously limited in both size and power and eventually the jobs I had for it dwindled, I lost interest in it and put it up on the shelf.
But recently some people got in touch with me and wanted some stuff done; misc. artwork and some novelty items, and being a sucker, I said I’d look into it. I dug out the old Laserpecker and immediately realized that it was going to be woefully inadequate. I needed something that could handle engravings that were much larger than what the LP could do, and more importantly, I needed something that could actually cut material, which the LP couldn’t do at all. On top of that, the LP was getting tired. It was obvious that the laser’s power was diminishing from the few test runs I did. And even worse, it was slow. Dear lord it was slow. I’d forgotten just how painfully slow it could be. There are much newer, improved versions of the Lasterpecker on the market now, and I briefly looked at the newer versions of the LP and nearly had a heart attack when I saw the prices. The one model that did come close to doing what I needed to do was pushing $3,000 for heaven’s sake!
To make a long and boring story a bit less long (but still just as boring) I ended up with that gadget up there. And by my standards at least, it looked very nice indeed.
It had a generous working size of about 15″ by 12″, which was exactly what I needed. It also looked like it was reasonably fast, simple to use, and the previews I saw were pretty good. And the price wasn’t bad either, about $600. So I bought one and so far it’s been handling everything I’ve been throwing at it and I’m quite satisfied with it so far.
A big plus is that it comes completely assembled. A lot of these lasers, even some of the expensive ones, come basically as little more than a bunch of bags full of parts and screws, and you have to spend hours putting the stupid thing together. No. Just no. With the Falcon I just took it out of the box, removed the packing material, plugged in the computer, the power supply and the air pump, installed the software on the computer, and it was ready to go. I did the first engraving with it literally in less than half an hour after taking it out of the box.
It is fully enclosed, with large, see-thru plastic panels made of material that shield the user from the laser so you don’t have to wear those stupid safety goggles whenever it’s working. There are safety switches on the door that shuts down the laser immediately if they are opened. There’s even a key lock to let you lock it down in case you have kids or others who like to fiddle with things they shouldn’t.

And because it’s fully enclosed, with it’s own fume extraction fan, it means you don’t have to buy or build your own enclosure to keep it from setting off every smoke detector in the house. Which it will definitely do because laser = burning. You’re firing a high energy laser beam at wood, plastic, etc. It burns stuff. And burning makes smoke and toxic fumes. A lot of it. So you absolutely, positively must have some kind of vent system to get that stuff out of the house. I have mine connected to a high speed turbine fan with 4″ ducts to pull the smoke and fumes out of the Falcon and blow them outside. Unless you can place the unit directly in front of a window or some kind of vent you can run the included hose through, you’re going to need some kind of powered fume extraction system similar to what I have because the hose it comes with is only about 4 feet long when fully extended and the fan really isn’t powerful enough to push the fumes and smoke out when using it hard for burning through something like 7mm wood.
It has a generous working area, as noted above. It can work with material up to about 15″ X 12″. But at the same time it can do extremely accurate, extremely tiny engravings with no loss of detail as well.
Fourth plus, it’s reasonably fast. Much, much faster than the old Laser Pecker was. Let me give you an example. Here’s a video of the LP at work.
That disk it’s engraving is small, only about an inch and a half across. So yeah, that’s slow. Painfully slow. When I got the LP originally I was fairly new to this and didn’t realize just how slow it was. I know better now.
For comparison, here’s the Falcon A1 at work doing a fairly intricate engraving.
As you can see it is much faster. What it’s engraving up there is more than twice the size of what the LP is doing, and it is much, much more detailed. I didn’t sit down with a stopwatch and time things, but at a guess the Falcon could do three of those very fine, intricate designs in the time it would take the LP to do a relatively low resolution, simple design on that little disk.
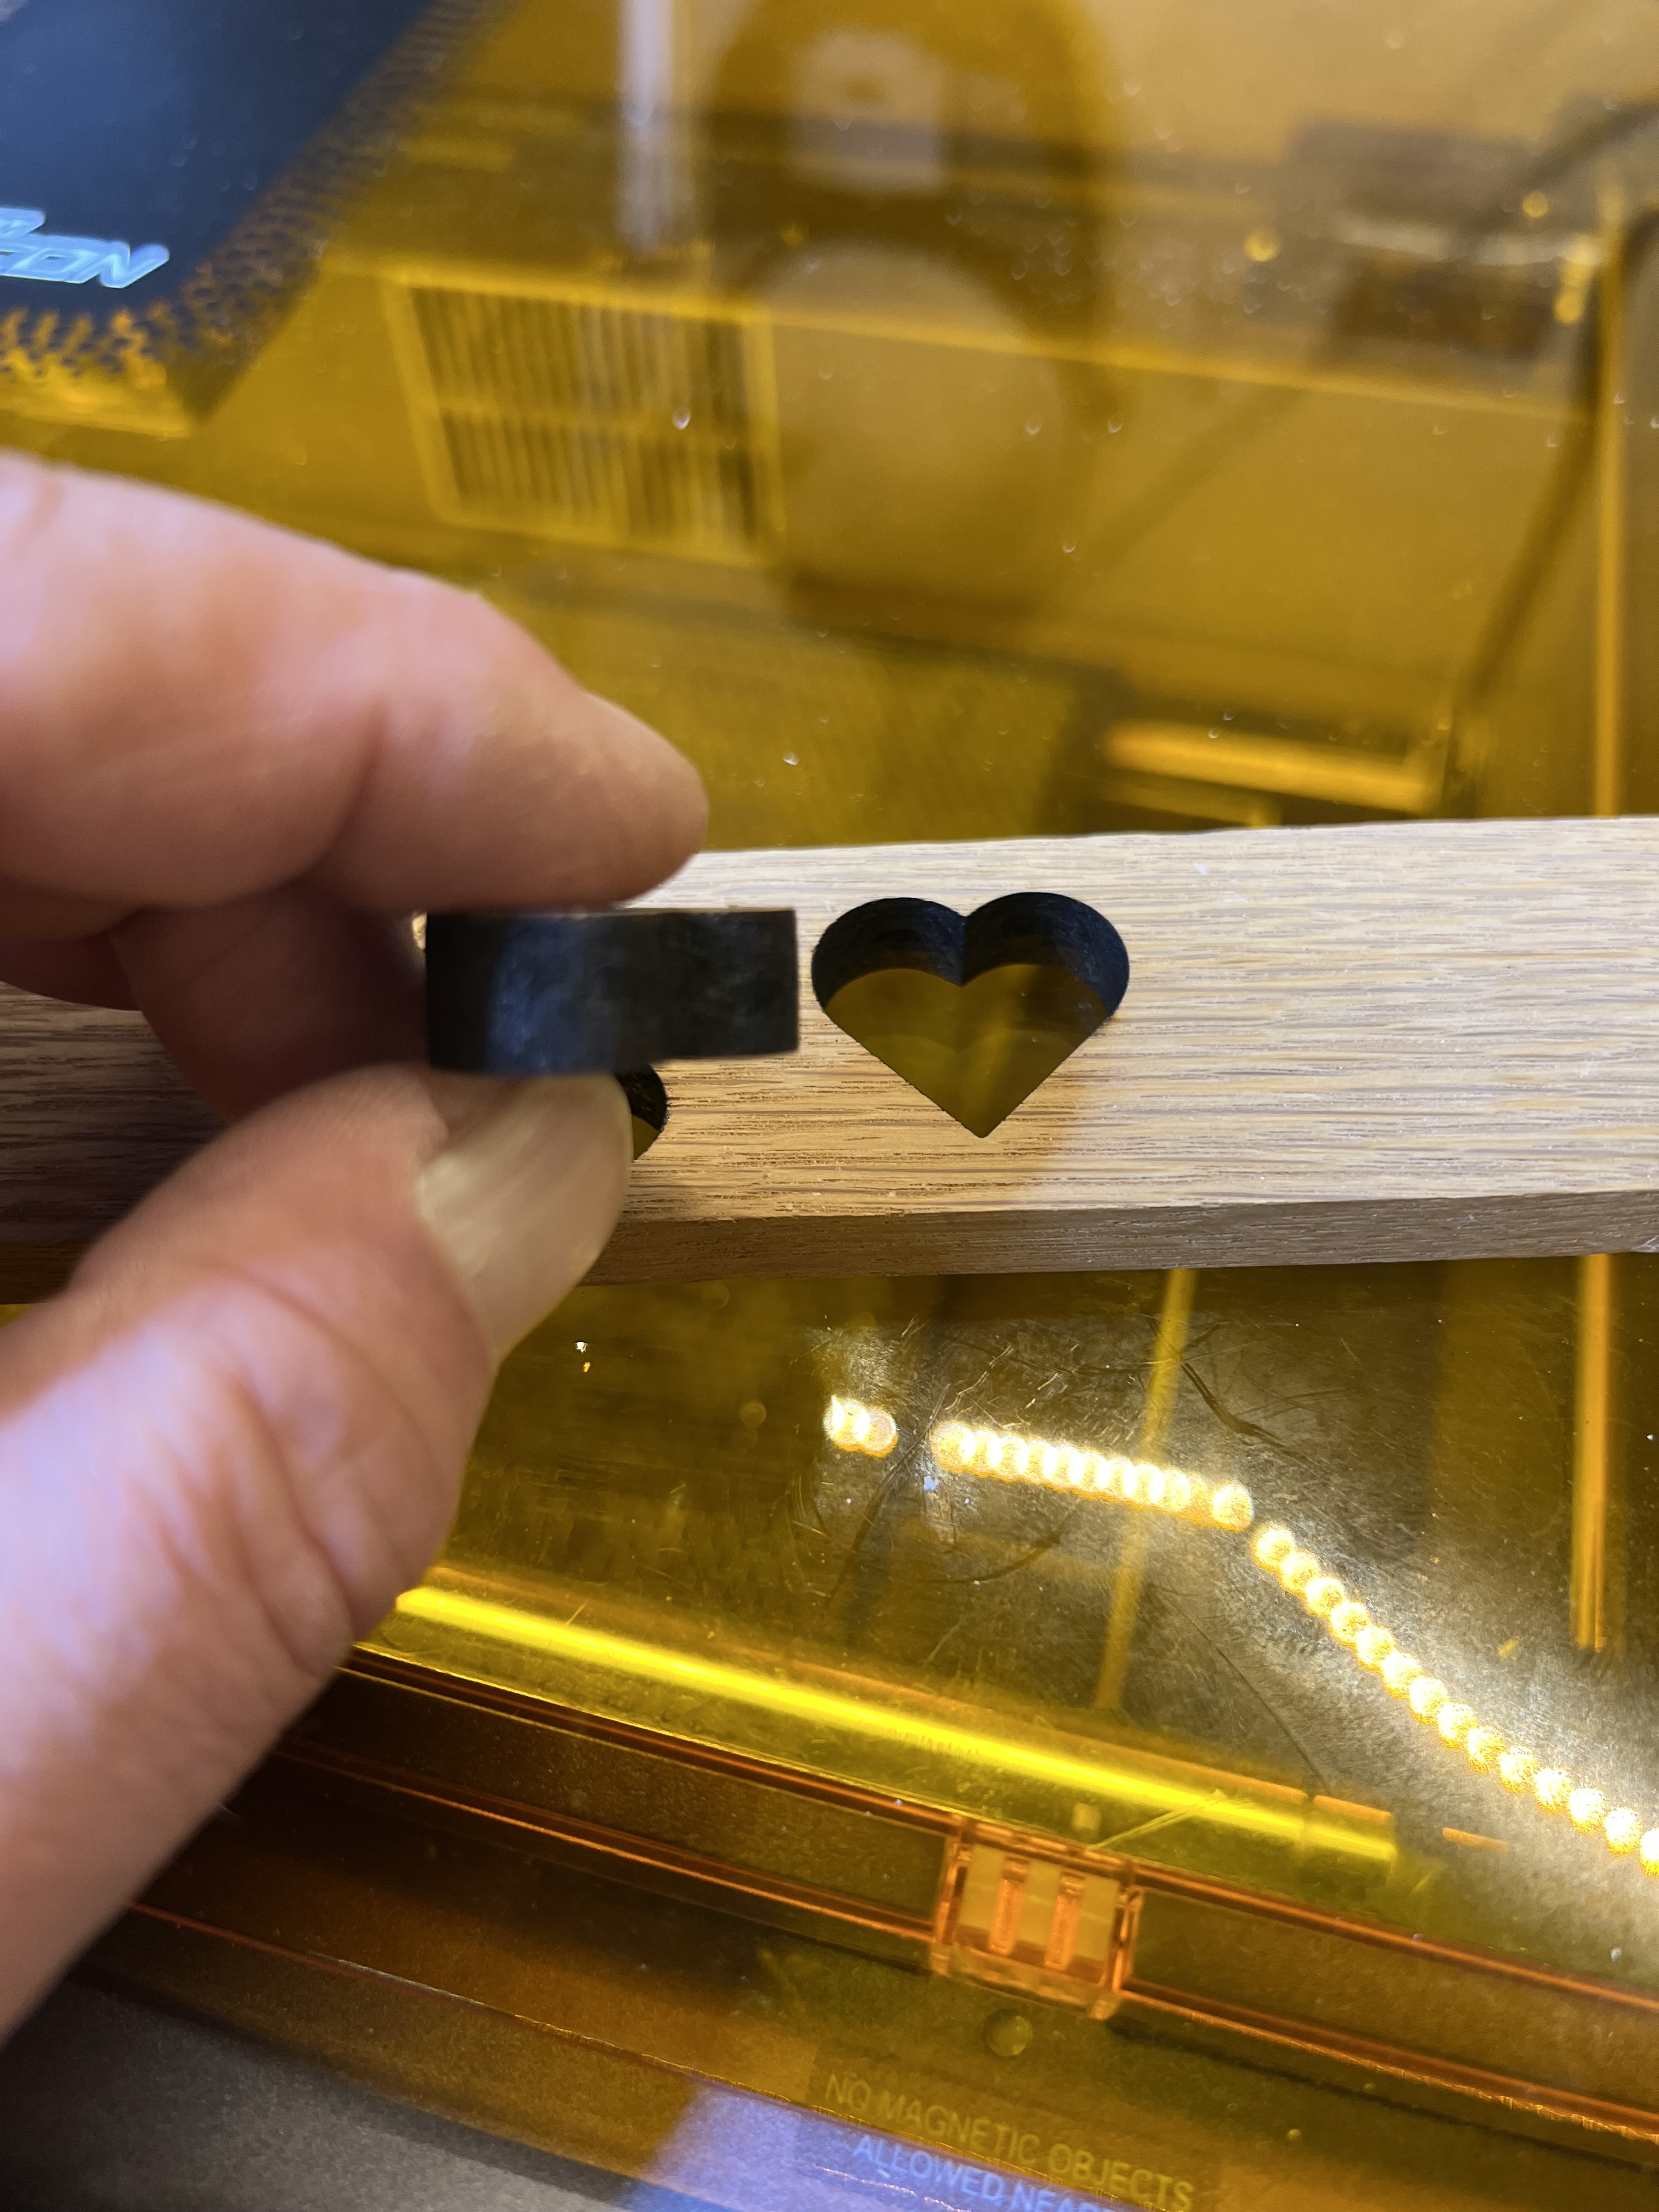
It even cuts wood reasonably fast, faster than the old LaserPecker did engraving alone. Here’s another video showing it in action cutting. It just finished the engraving job in the first video up there, 12 key fobs for the brewery, and now it’s cutting them out.

Pretty slick. That’s not very thick wood, true, that’s only about 1/8″ thick plywood in this case, but it slices through it with no problem at all. Oh, and in case you’re interested, over there on the right is one of the key tags after it came out of the laser, before finishing. I just hang ’em up on some wire in the garage and put a couple of coats of a clear polyurethane. I get 12 of those out of a single sheet of 1/8 inch thick, 12″ x 12″ pre-sanded plywood.
I started wondering just how thick it could go and threw in a piece of white oak scrap 3/8″ thick for the heck of it, and it did that over there on the left. I admit that it struggled a bit to do it. I had to slow the feed rate way down, but it still did it. Most of the time. Depending on the density of the wood I sometimes had to do two passes, but it cut it. I didn’t think a 10W diode laser could do that.
It can’t perform miracles, of course. Wood much thicker than that piece over there on the left is going to be just about impossible to cut no matter how slow you go or how many passes you make.
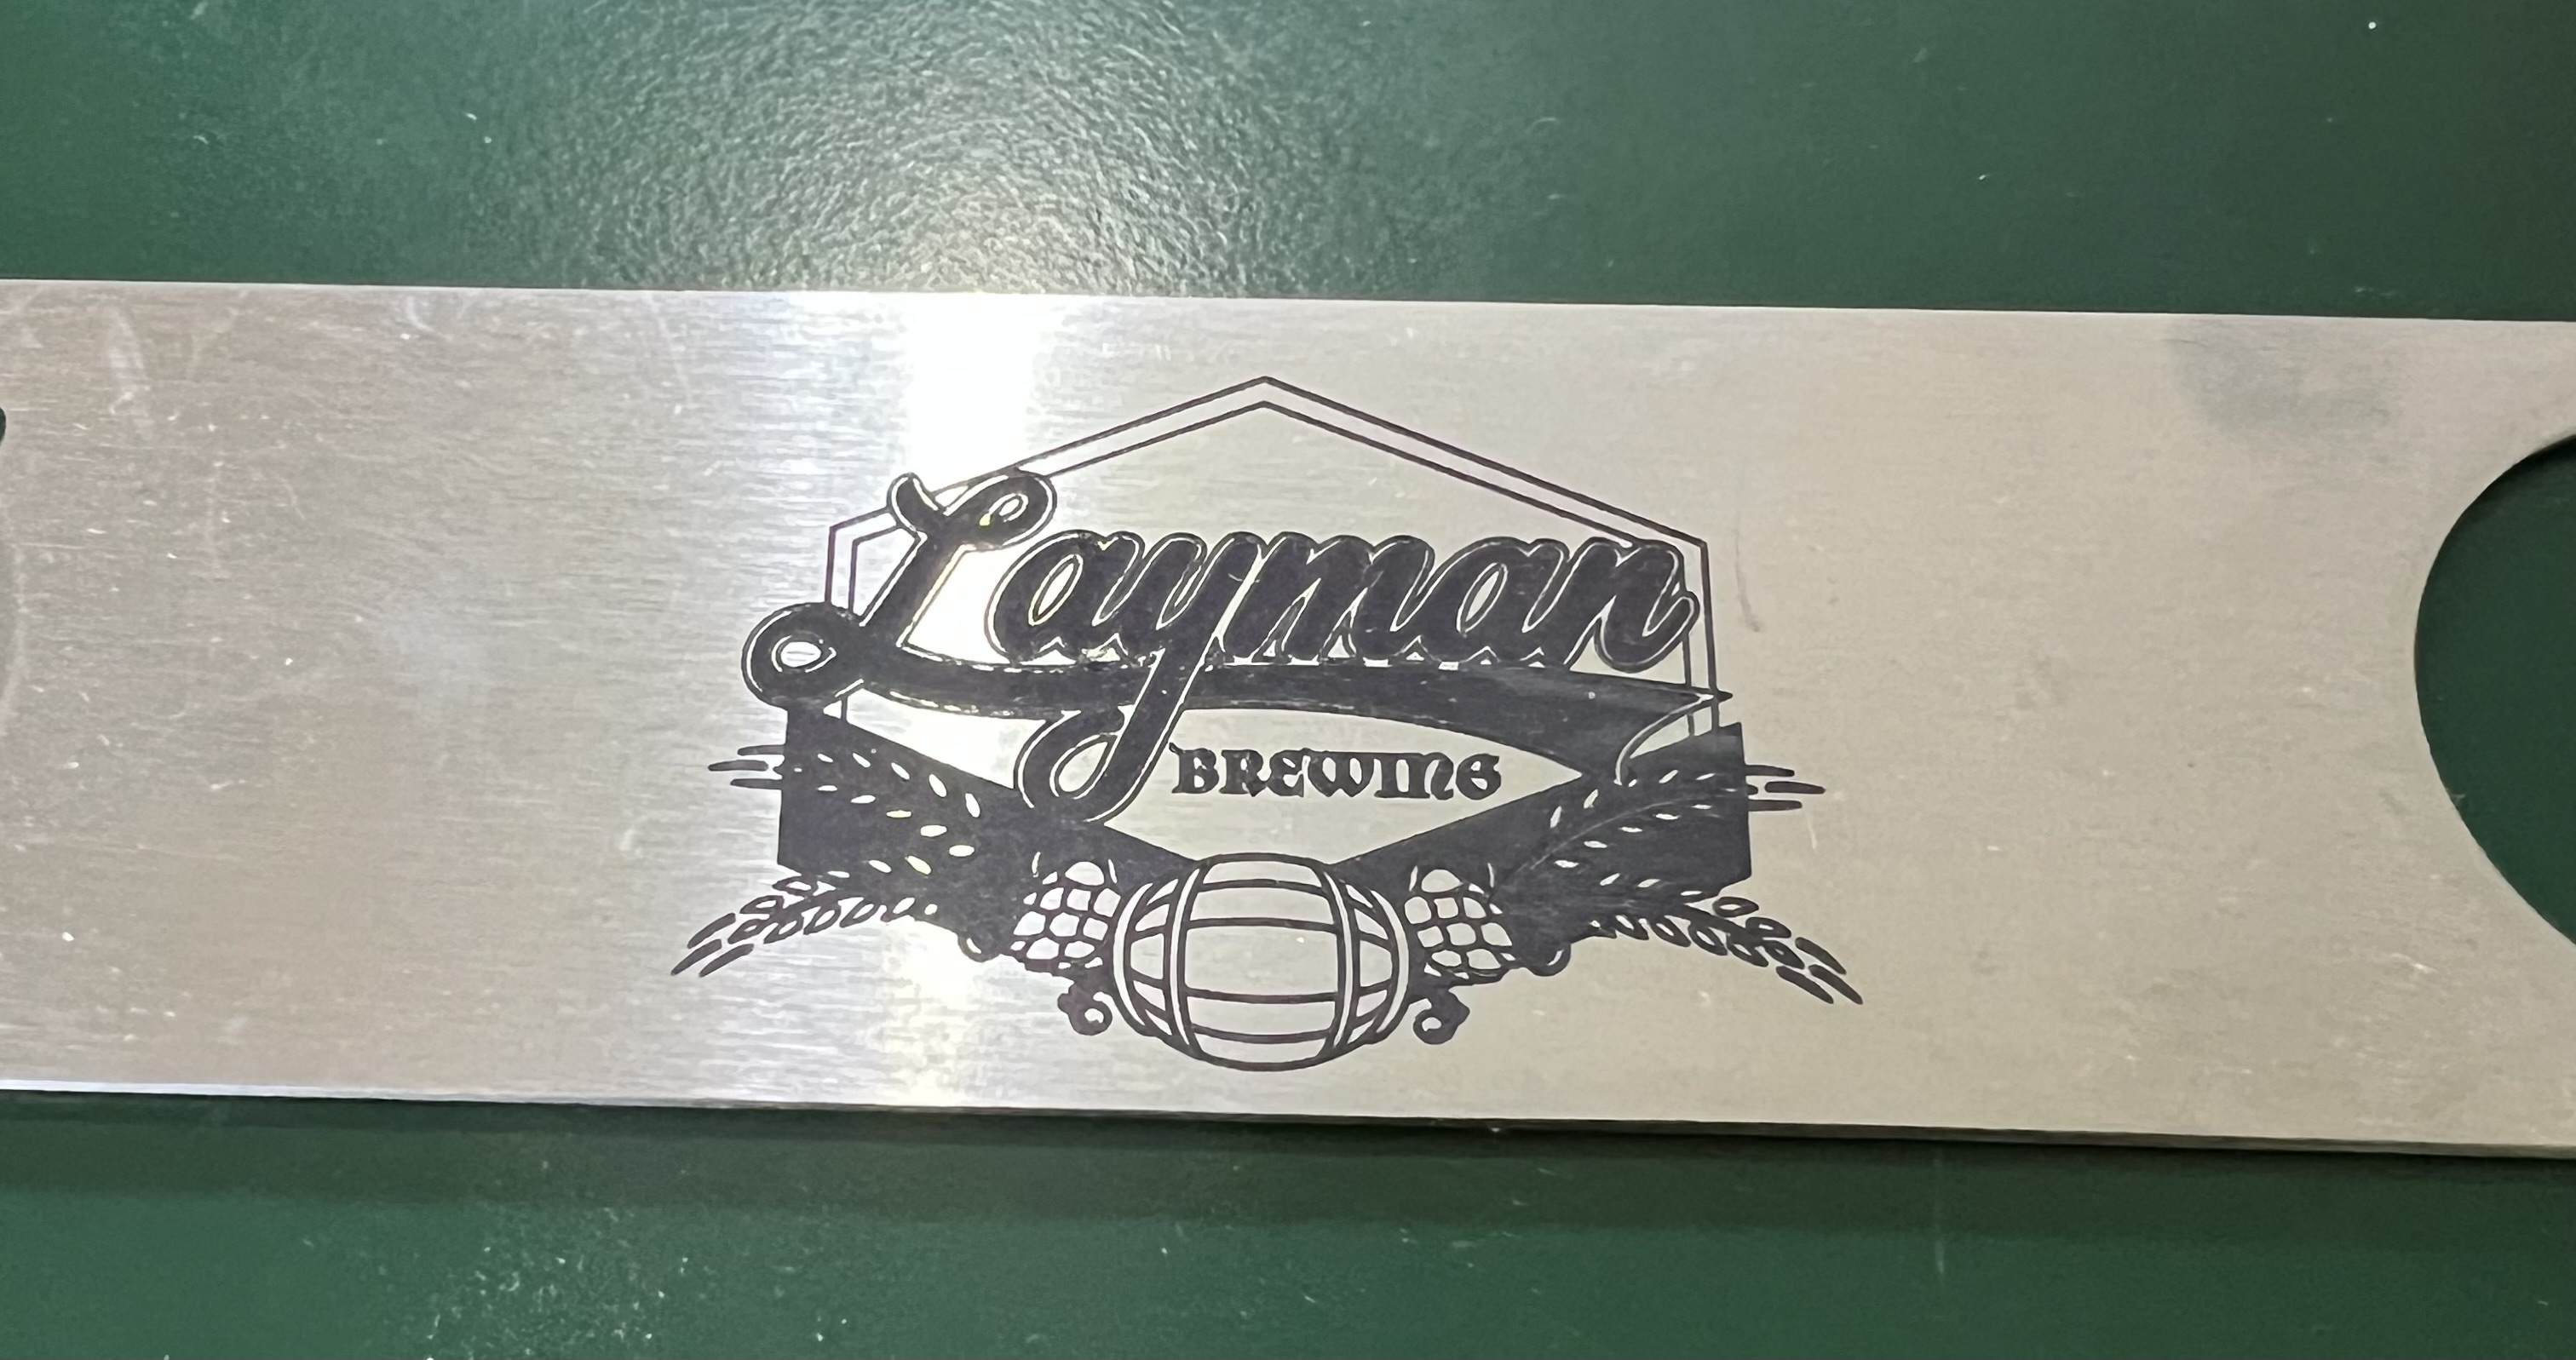
It can’t engrave metal. No low power, 10W diode laser can do that no matter what the advertisements may claim. It can’t cut even thin metal foil. You can use special coatings to get results like that over there on the left. That’s a stainless steel bottle opener. I did some of those as promotional items for the brewery down in Milwaukee. Yes, it was done with the Falcon, but that’s not engraved. It’s a type of powder coating. A special coating is applied to the steel, then the laser is run over it to melt and fuse the ceramic particles with the steel underneath. It is an extremely tough coating, too. Even scrubbing that with one of those abrasive “Scotch” pads won’t hurt it. It works way better than it has any right to, but it is not “engraving” as such.
The software that comes with it is reasonably decent, but could be much better. It can handle the basics of controlling the laser, but as a design environment it leaves a great deal to be desired. That’s fine for me because I use PhotoShop or Adobe Illustrator for all my design work anyway. You can do simple drawings, text, etc, import images and vector graphics, with the software it comes with, but it’s pretty basic stuff. You’re probably going to want to have an actual, real drawing program, something like Illustrator or something similar, to design/edit your graphics and then import them into the Falcon’s software to do the engraving/cutting.
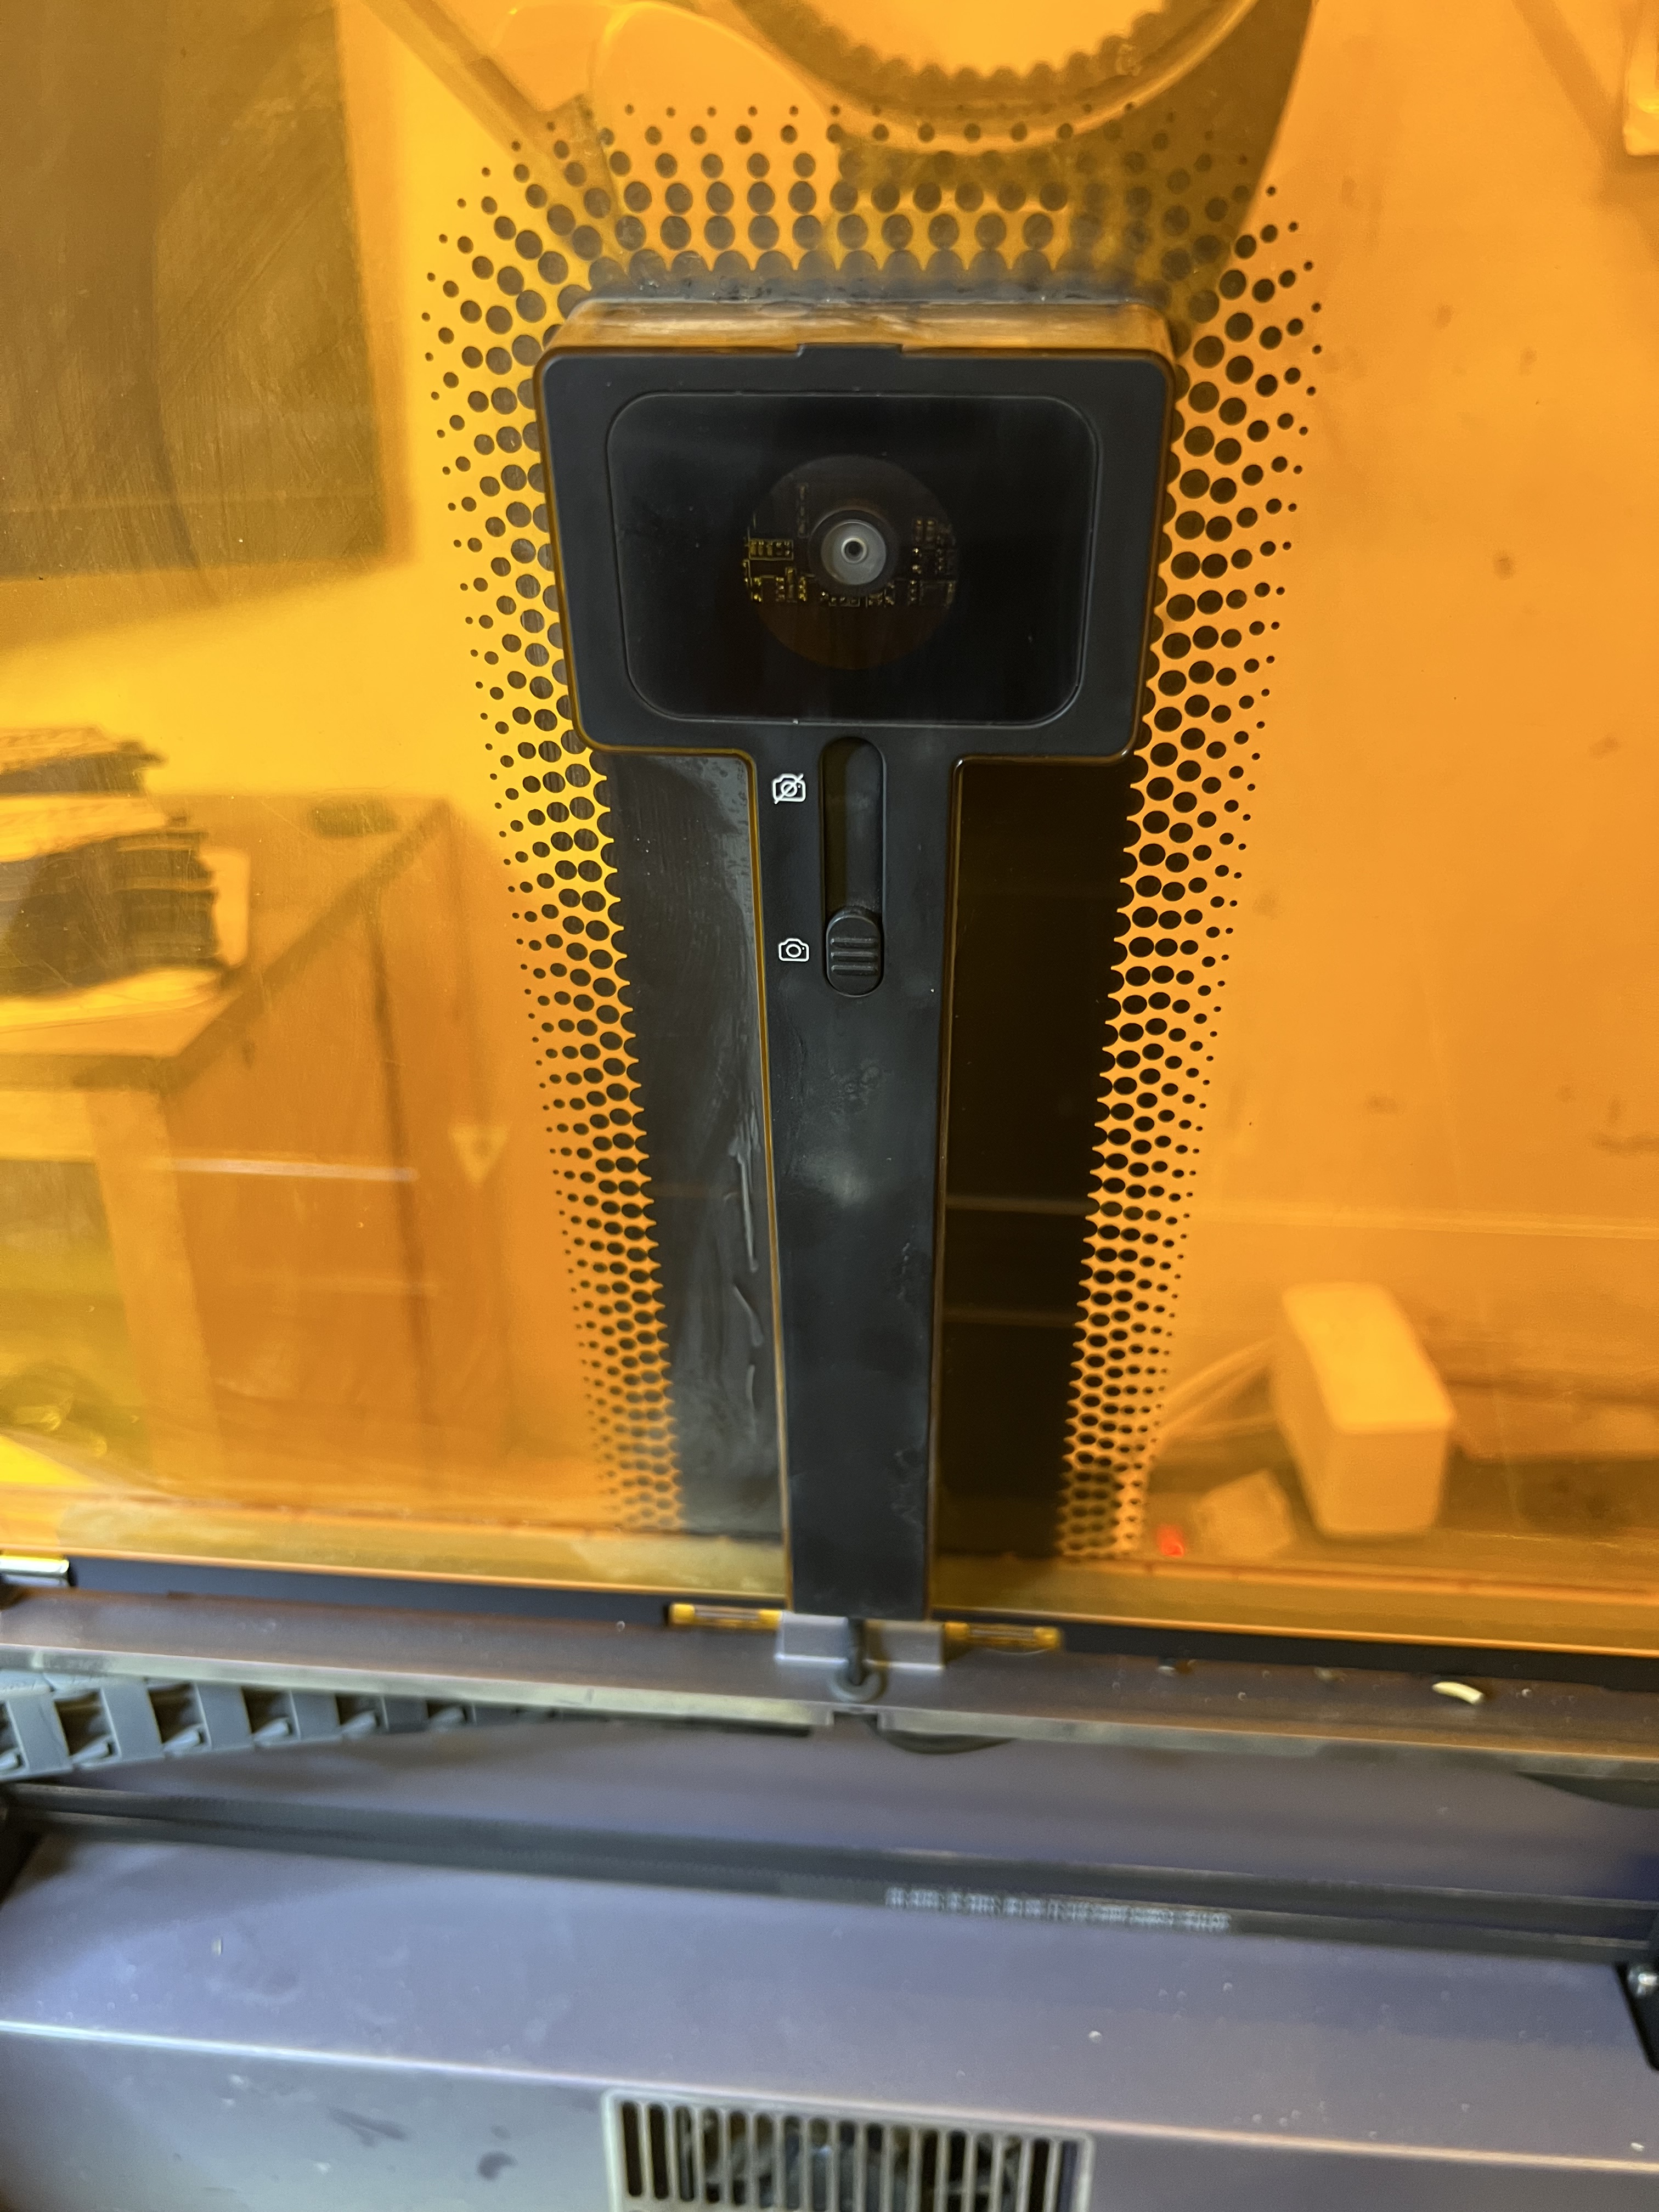
There is a camera built into the lid of the machine which… Oh, heck, I was going to say it was a gimmick but it can be useful for aligning your drawing with the material you’re using. Sort of. You still want to use the good old fashioned “frame” function to have the laser head physically outline the engraving area before you actually start the engraving to check the alignment because the camera isn’t exactly the most accurate one I’ve ever seen. Even after going through the camera alignment procedure several times, it is still not 100% accurate, especially when close to the edges of the working area. So even when the camera is being used, you’re still going to want to use “frame” to check the alignment before starting a burn.
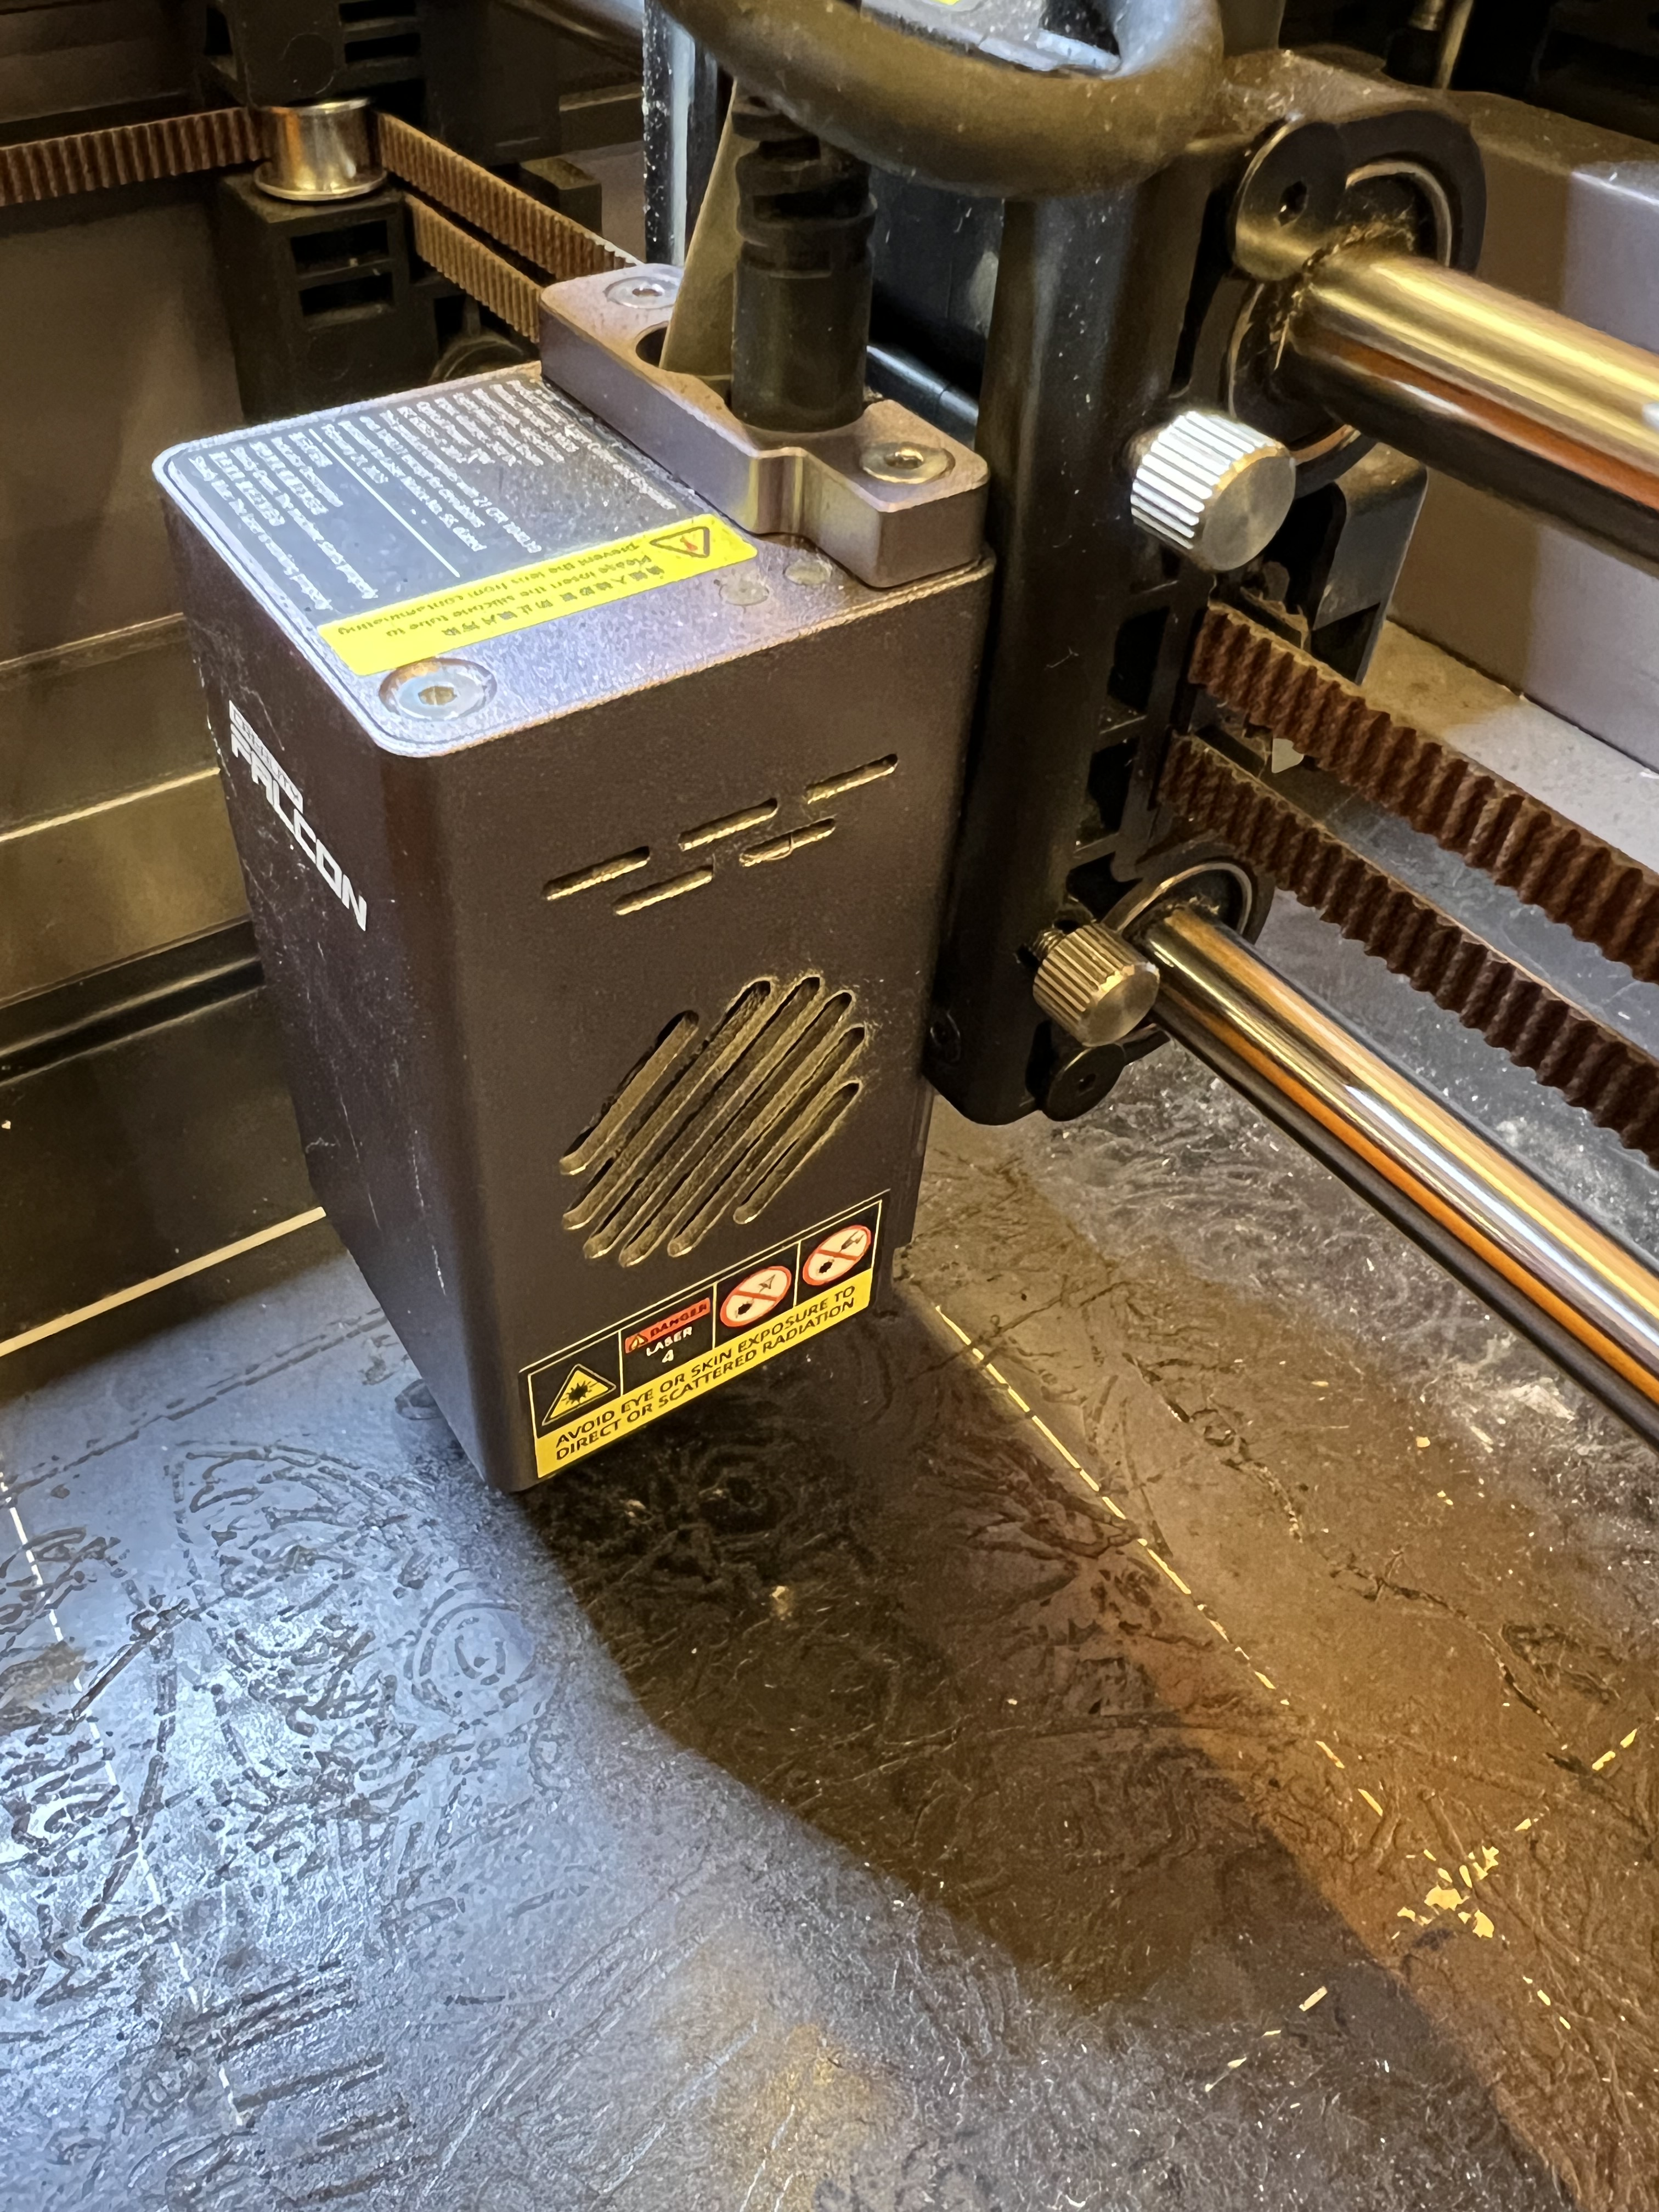
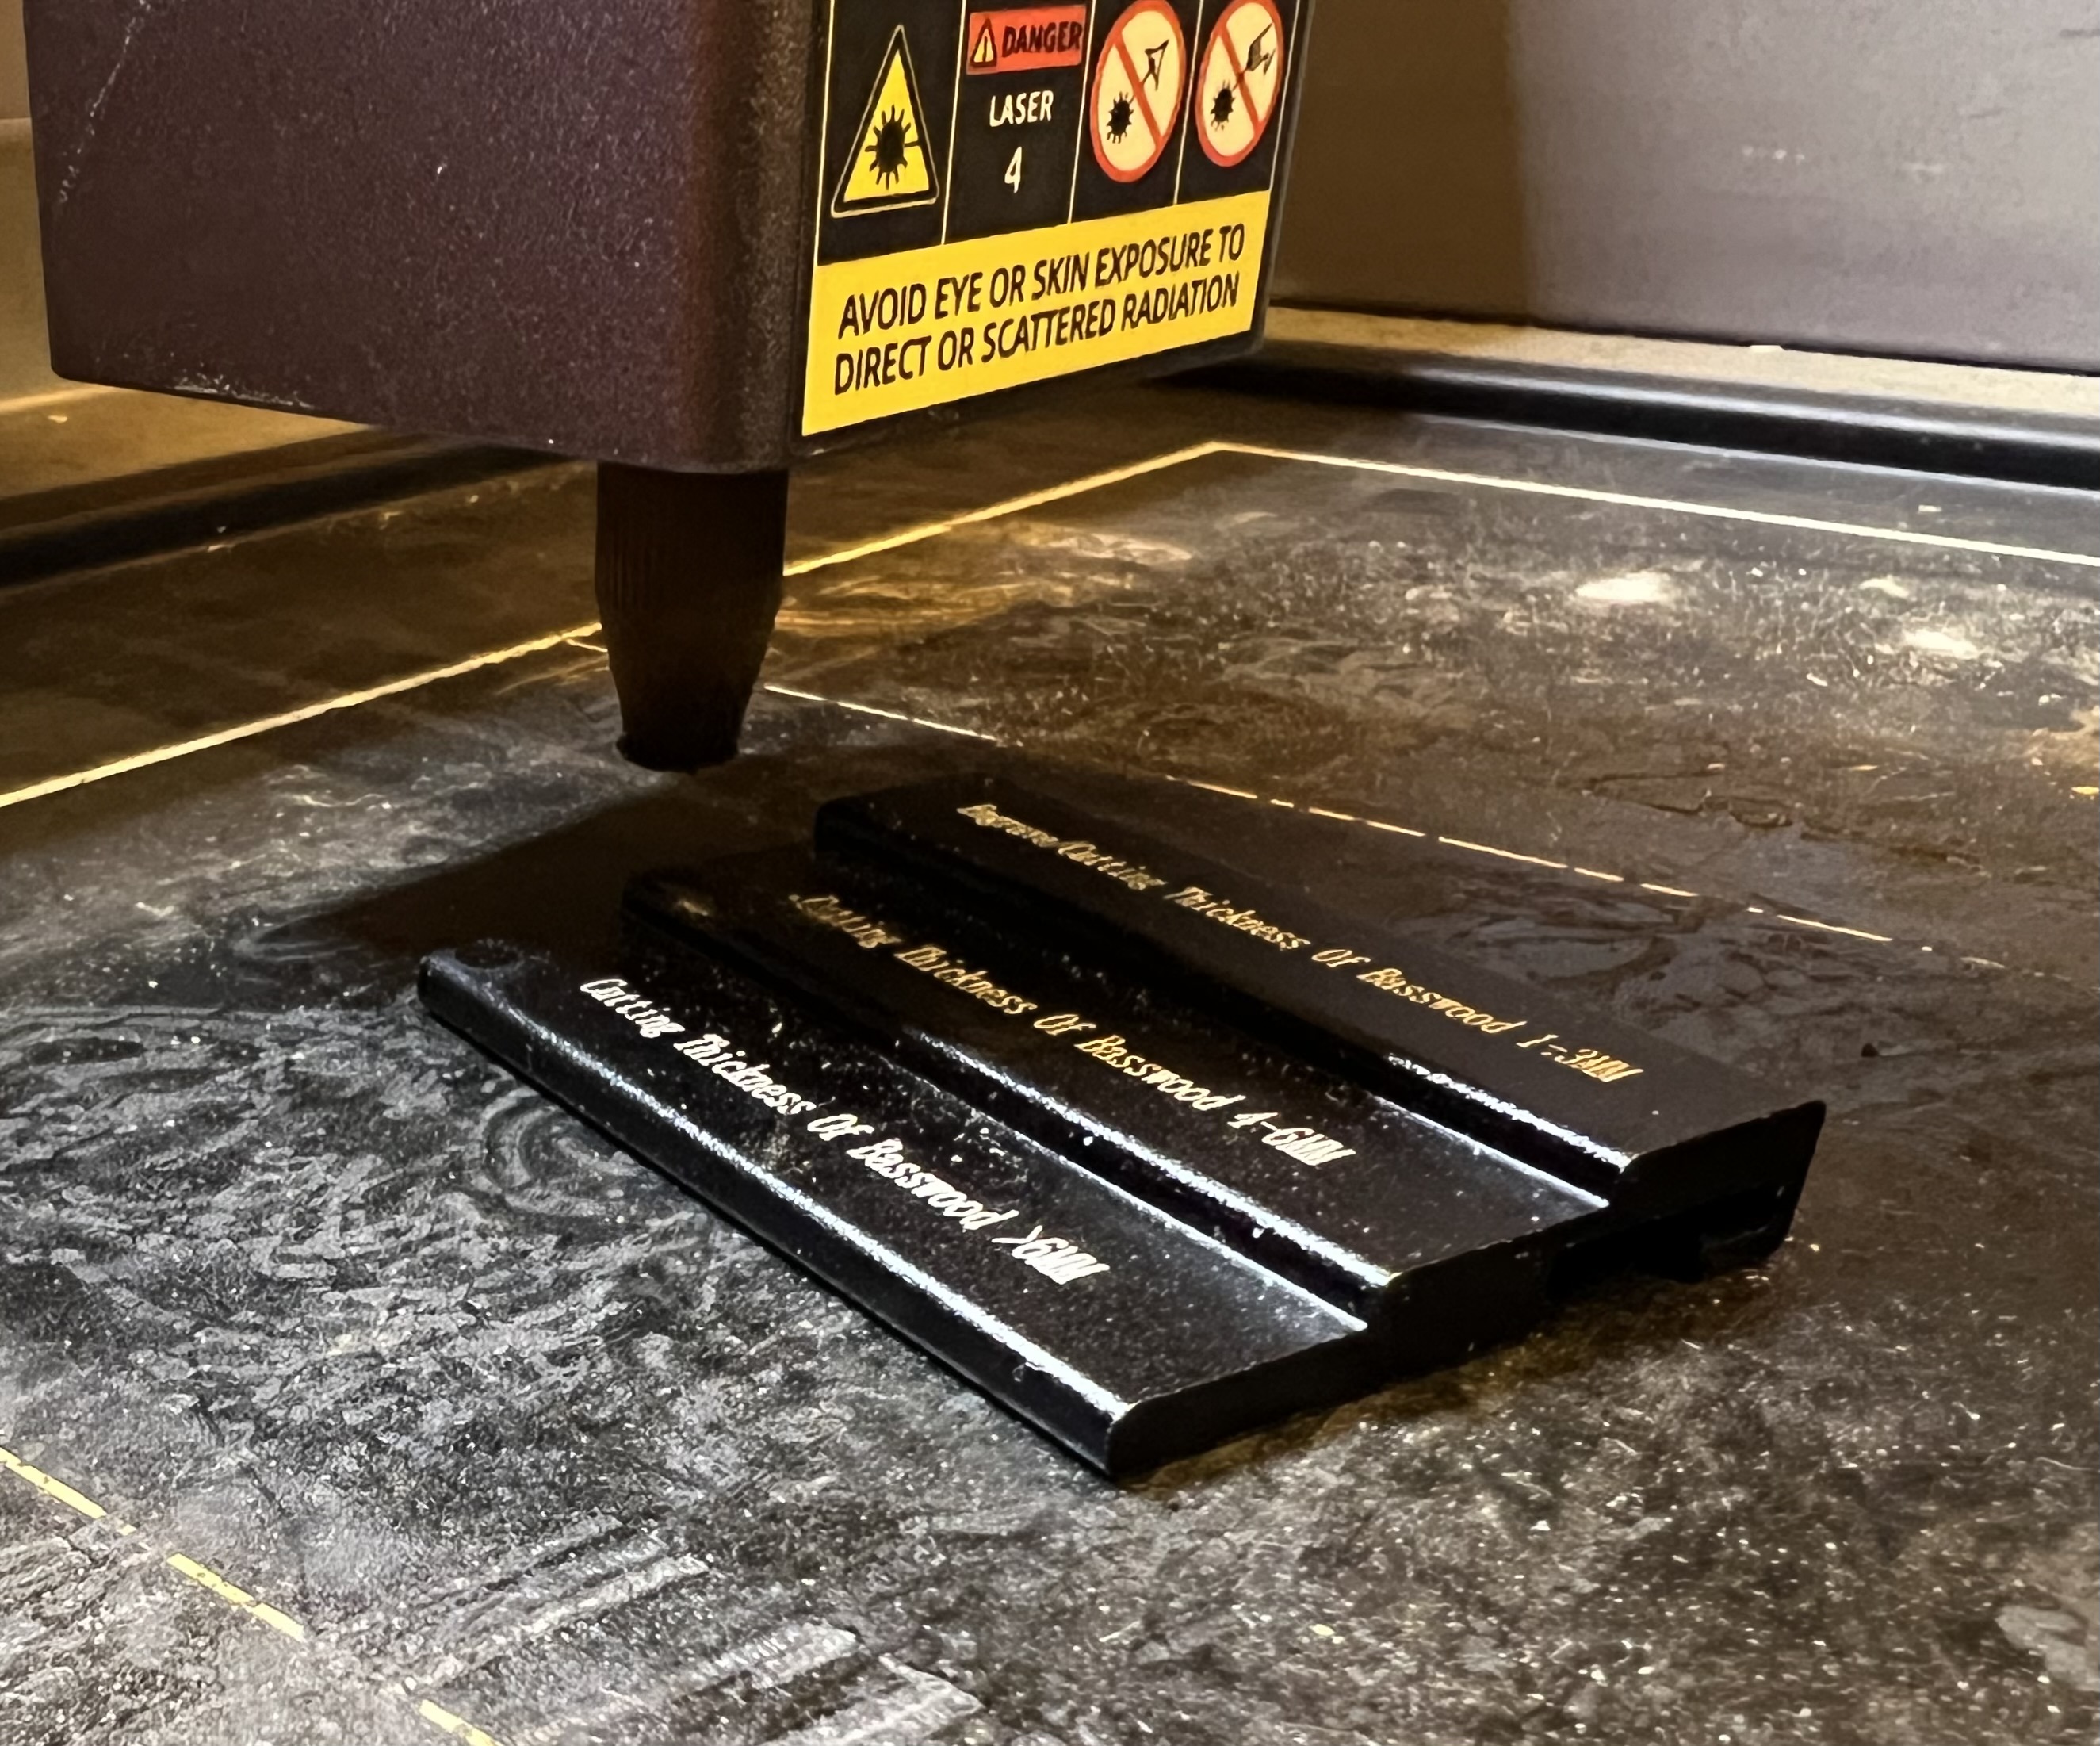
In order to work efficiently lasers need to be focused. The height of the laser above the item being engraved or cut needs to be set so the maximum amount of energy is delivered to the smallest possible area. As is the case with most of the lower priced laser engravers, this is done on this one by loosening those knurled knobs there on the right and manually raising or lowering the entire laser head up or down. Creality includes a little stepped alumium block specifically to help with the focus. Just lift the head up, lower it down until the nozzle touches the desired step on the block and tighten the knobs. Takes only a few seconds.

Let’s talk about that baseplate for a moment. Some people call it a “crumb tray” and I suppose it is, in a way. It catches bits of whatever it is that you’re cutting. It is also there to protect the table you have the engraver sitting on from the laser, and to help contain smoke and fumes to make it easier to extract them before they get into your house/shop. Even though the base plate is screwed down when it comes from the factory, you’re going to want to remove the 4 screws that hold it down so you can remove the tray easily for cleaning. You’ll also need to remove it and install risers on the base of the machine if you want to use the rotary attachment.
If you take a close look at that base plate or crumb tray, you can’t help but notice how beat up it looks. It’s charred, burned, covered in cooked on carbon and tar from burning wood and is just plain nasty. The reason why is because when cutting wood, that laser beam burns straight through the material and directly impacts that plate. One thing I ding Creality for is not including a honeycomb work platform like the one below with the A1.
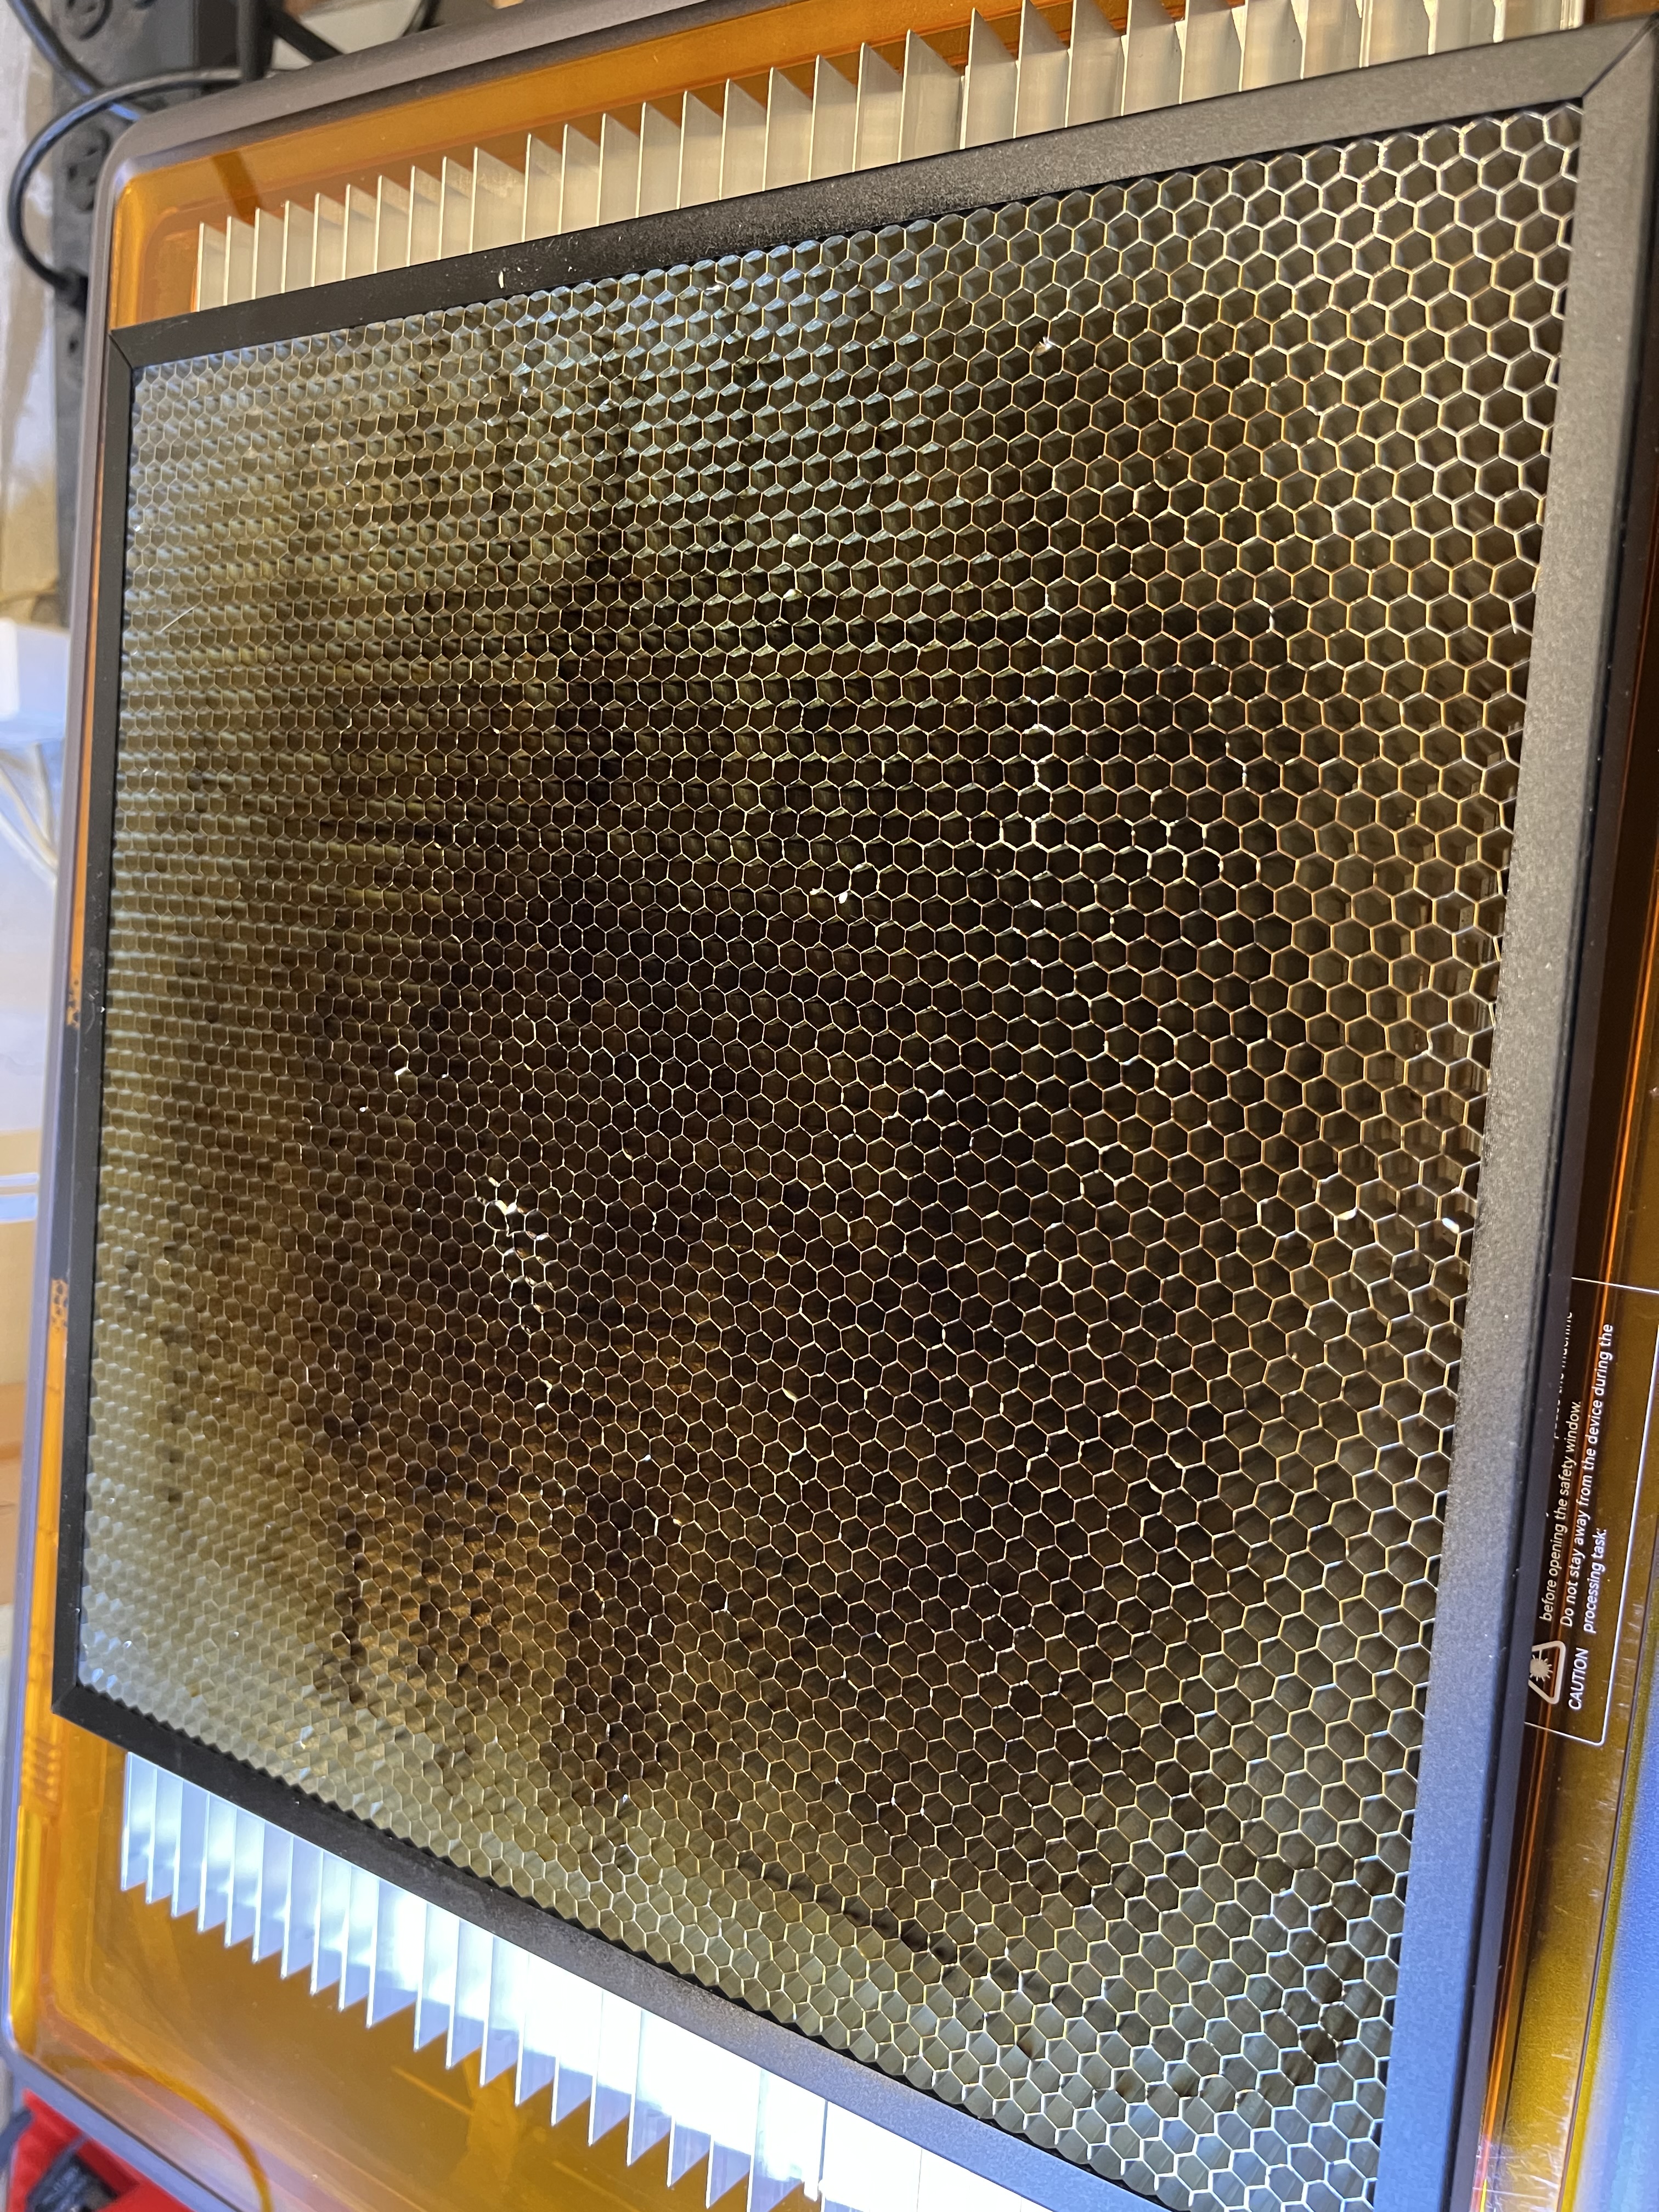
If you’re going to be cutting anything with a laser, you absolutely need something like this, or something like this extruded aluminum one below that is what I’ve come to favor more.
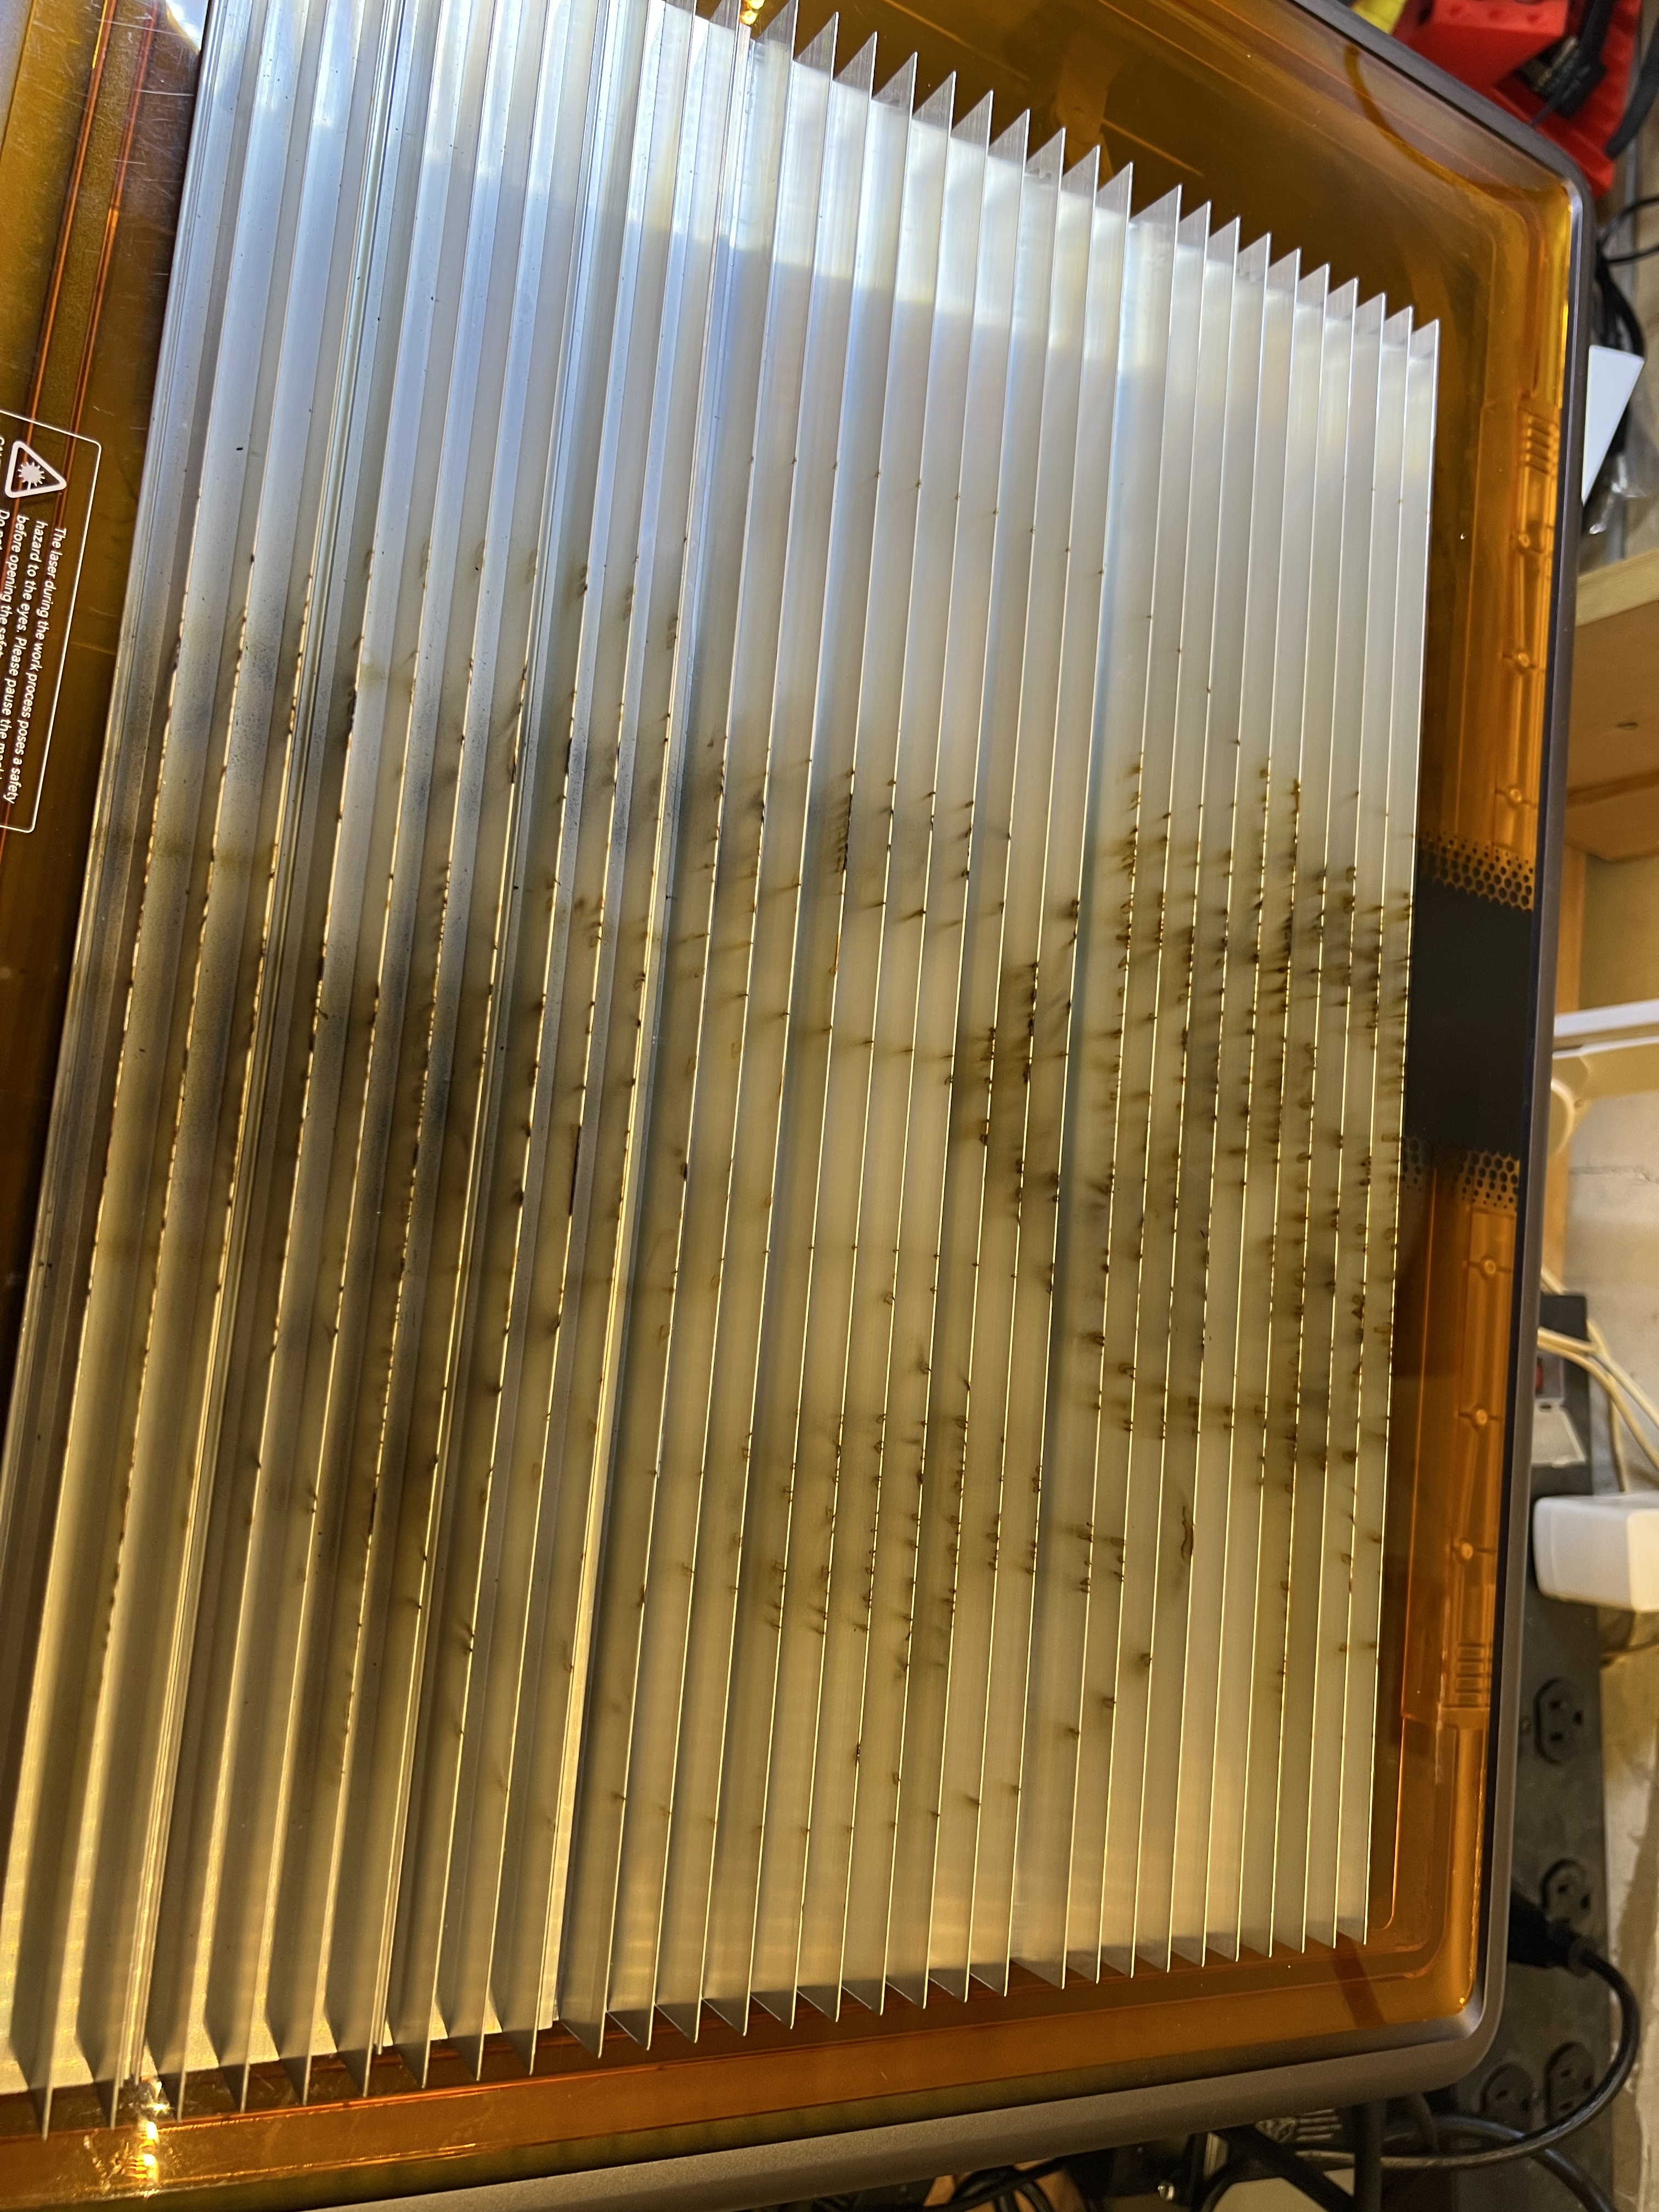
Notice the scorch marks, carbon build up and even outright damage that’s already been done to that aluminum grid up there from just a few hours of use with only a 10 watt laser.
And you absolutely need something like this if you’re cutting material with a laser. It helps to prevent flashback that can damage your material, helps with fume/smoke extraction, helps dissipate heat that might cause your material to warp, etc. Especially flashback. This is where the laser burns through the material, hits the underlying surface, and reflects back up to damage the backside of the material you’re working with.
IMO every laser that is capable of cutting material should come with one of these. I’ve come to prefer the extruded aluminum one but the honeycomb version works just as well.
Okay, let’s wrap this review up. You have probably realized that I really like this unit. I’ve been using it and using it hard since I got it. It’s got dozens of hours on it already in just the few weeks I’ve had it, and it’s handled everything I’ve thrown at it.
The good:
- It come fully assembled, nothing to bolt together. Just unpack it, connect the wires and tube for the air pump and go.
- It’s simple to operate. Even a novice should be able to get it up and running within an hour or so of unpacking it and setting it up.
- Build quality is excellent. Fit and finish is superb. It’s made of quality materials and is very sturdy and well designed. No squeaks, no rattles, nothing. Everything was square and level right out of the box.
- While it’s rated at 10W of power, it works far better than its wattage would indicate. It easily handles cutting dense plywood up to 1/4″ thick and was able to cut through 3/8″ thick solid white oak for heavens sake. I have to slow the feed rate way down, of course, but that it cuts material that thick cleanly is impressive for a 10W laser. Of course the air pump helps enormously with that. It makes a huge difference. But a 10W laser cutting thick wood that easily is still impressive.
- It is fully enclosed which makes both fume/smoke extraction and eye safety far easier. Safety switches prevent the laser from operating if either of the covers are open, so you don’t have to wear eye protection when it’s in operation.
- It is reasonably fast, at least as fast as any other laser in its price range.
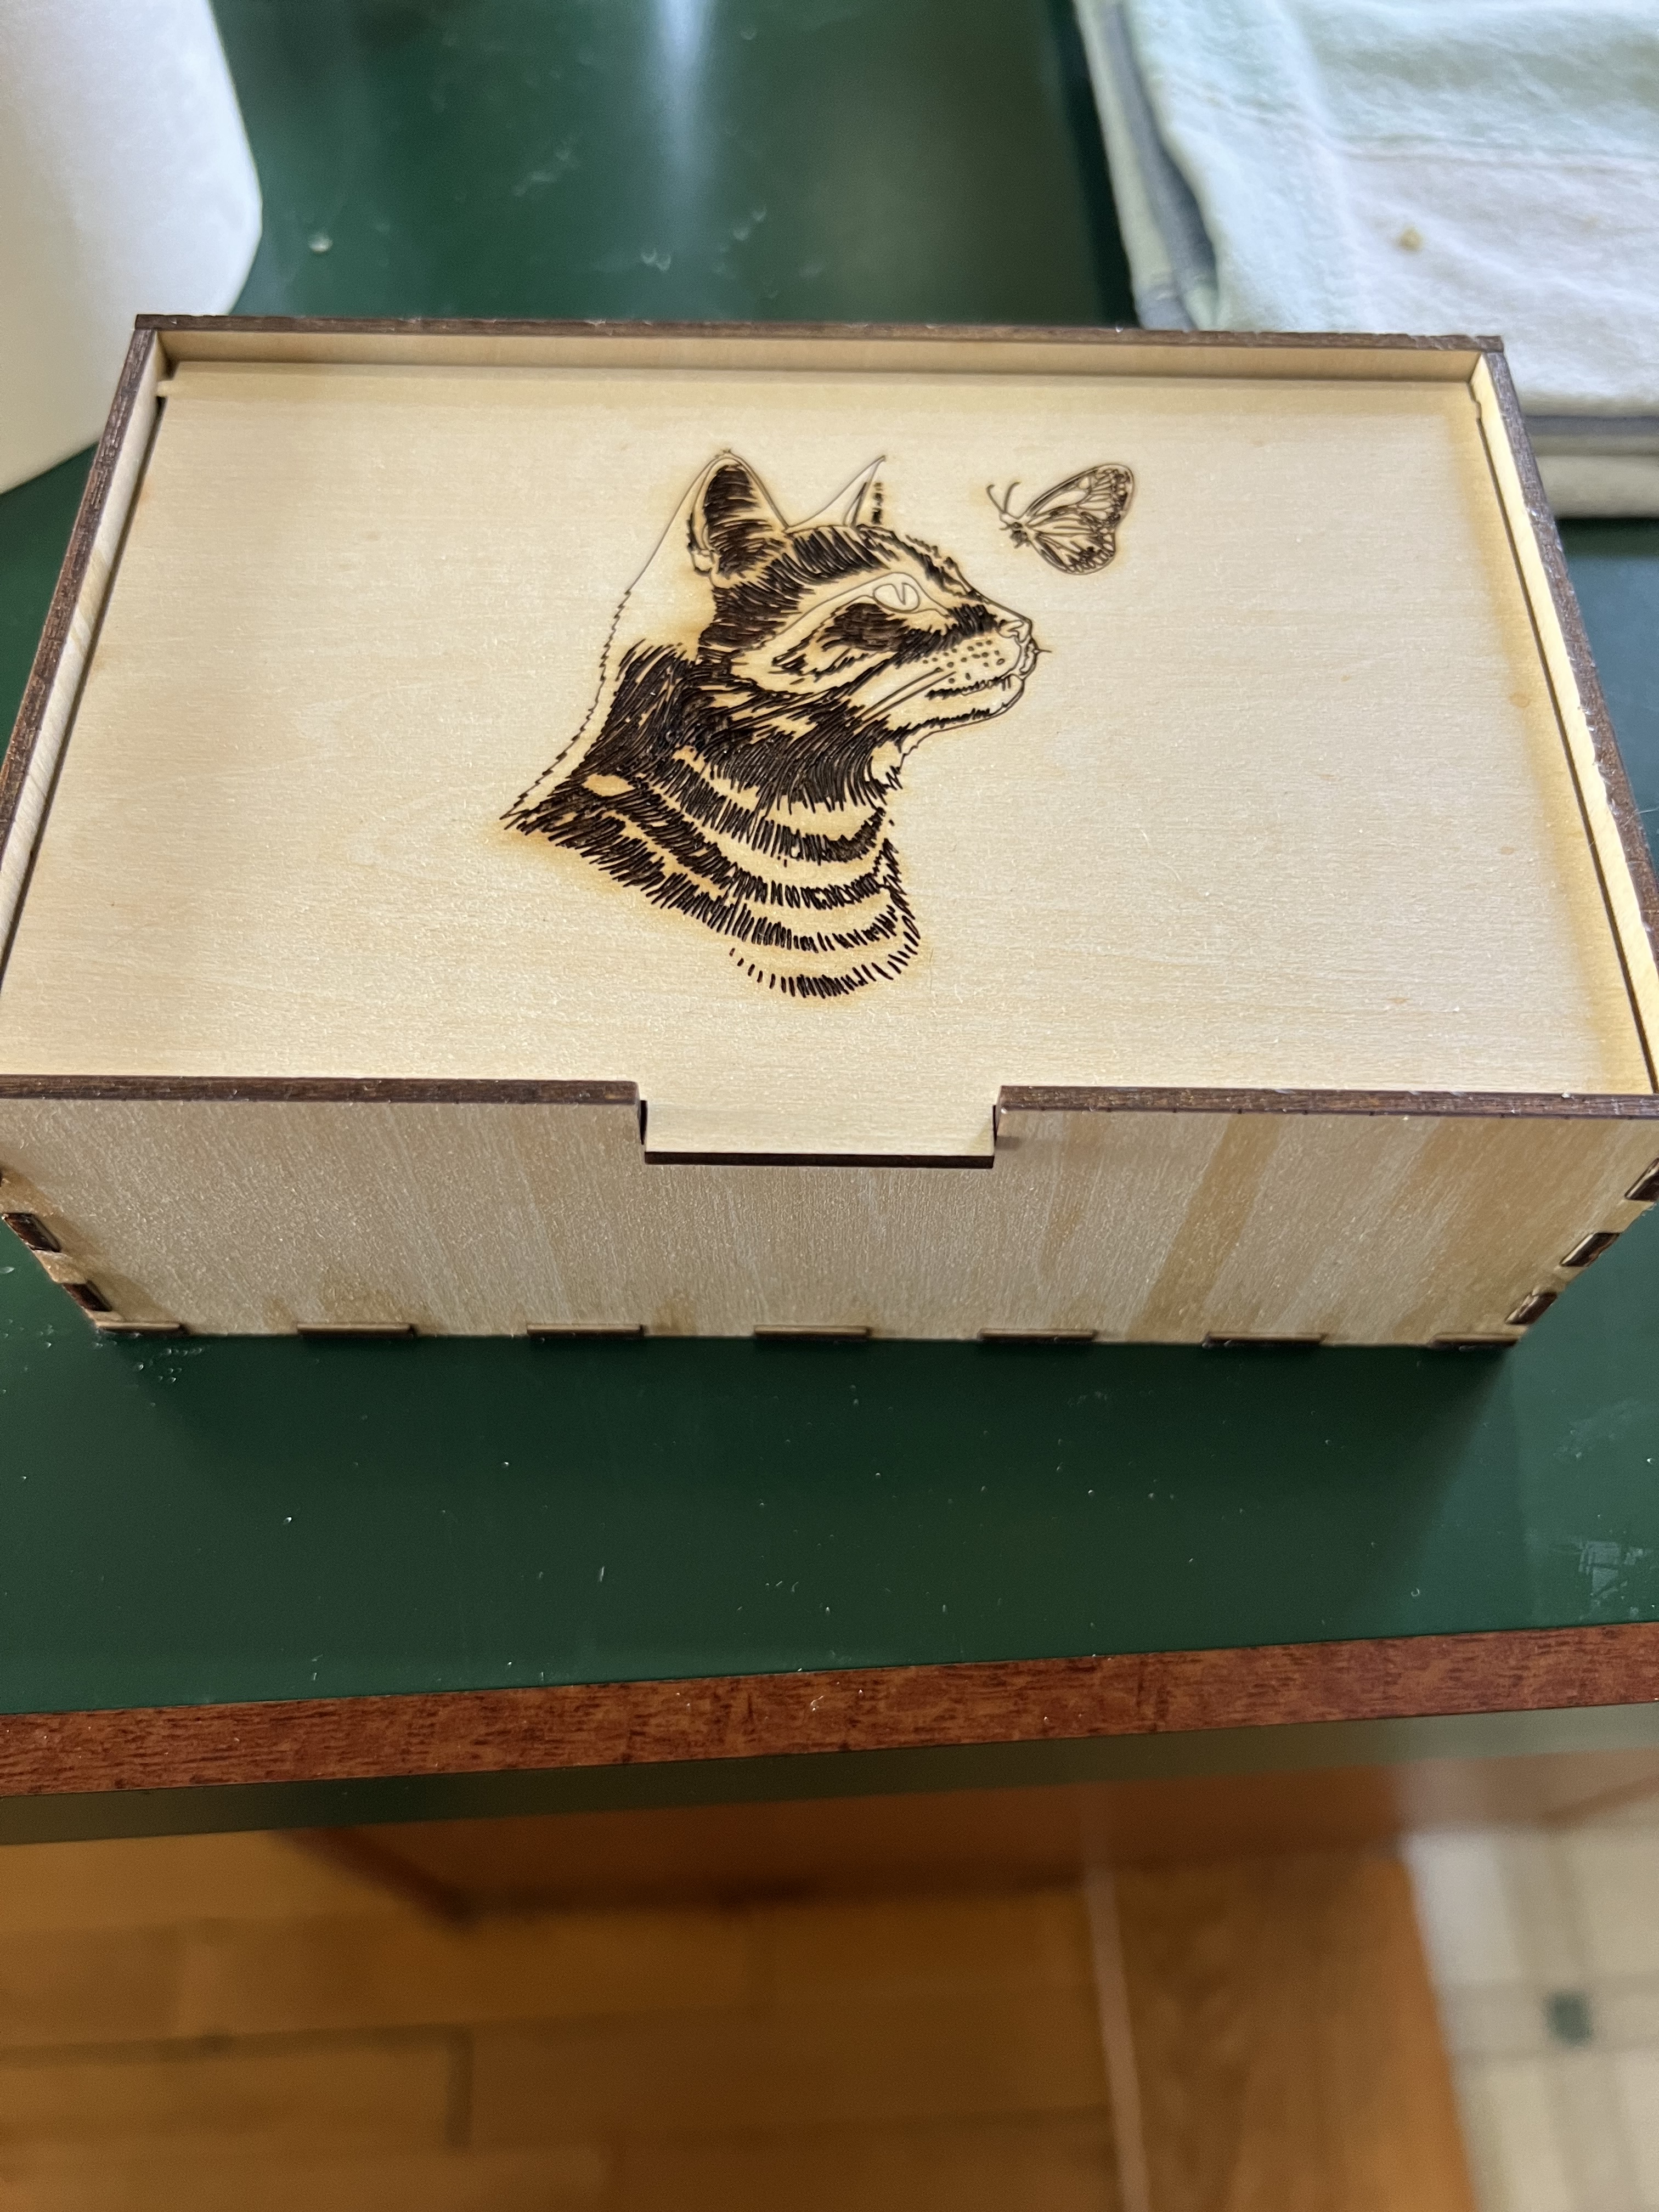
- Laser positioning is extremely accurate and the thickness of the kerf (the amount of material actually removed when cutting) is so tiny that finger joints when making boxes were so tight the box up there on the right didn’t need glue to hold it together. This also results in extremely fine engraving lines.
- It is LightBurn compatible. LightBurn is the software that most professionals use to run laser engravers/cutters. Some makers, for reasons I’ve never understood, try to make their equipment as proprietary as possible, locking you into using their software and their’s alone. I don’t use it myself, the basic functions of the software it comes with are just fine for me and will be for most people. But being compatible with Lightburn is a big plus.
- So far it has been absolutely rock solid dependable. I got this thing back on April 10. It is now May 23 as I write this and the Falcon has been running 4 – 7 hours a day, almost every day, since I got it, without missing a beat. That’s probably far more usage than it would get from the usual crafter or hobbyist user. It’s been a real work horse so far.
The bad, and yes, there are a few things.
**Last Minute Edit**
I said that there is no manual for the software originally. That’s recently changed. They now have a manual for the software online at: https://wiki.creality.com/en/laser-engraver/software-manual Even better it isn’t actualy horrible. Mostly. It’s at least good enough that you’ll get the basics down before you start using it. You’ll still need to do some experimenting I suspect.
- The lack of error reporting, either via a display on the unit itself or at least via the software, is troubling. There is basically no way to figure out what’s wrong if something does glitch. About four times now the unit has not responded when trying to engrave something. it just sat there beeping. I have absolutely no idea why. In each case turning it off, waiting a couple of minutes, then turning it back on, cleared whatever the problem was.
- while I give them credit a built in fan and a vent hose to provide some fume extraction, the fan built into the unit really isn’t strong enough and the provided hose isn’t long enough to do you much good unless you have the unit parked right in front of a window. If you can’t put it in front of a window, you’re going to absolutely need some kind of supplementary fume extraction method to get the smoke and toxic fumes out of your workspace.
- It absolutely should come with a honeycomb bed for cutting. This is, IMO, an essential item and it should come with one out of the box, it shouldn’t be an extra cost option.
- Calibrating the camera is a pain in the neck, and requires you to waste an entire 12X12 sheet of wood or cardboard. Even worse, even after following the instructions explicitly multiple times, the camera positioning still is not accurate, especially when you get farther away from the center of the workspace.
Conclusion – I’m sort of nitpicking here with the “con” listing. None of those things are really a deal killer. Creality got a lot right with this thing. The price point and capability of this aims it squarely at people who are at the point where they’ve outgrown the cheap, slow, open frame beginner’s engravers that are really not good for much except for messing around, and who are ready to move up to something that is a serious tool that can do serious work, but who can’t afford or who aren’t ready yet to drop a couple of thousand dollars on a professional level laser. I don’t know how well the Falcon A1 would hold up in a professional production situation, but I’ve been using this thing hard since I got it, working it far harder than the average hobbyist would, and it’s handled everything I’ve thrown at it.
The Usual Disclaimer: I get no financial compensation from Creality or any other company. I purchased the Falcon A1 at full retail price with my own money. I’ve had no contact with the company at all.