Note: You can reach me either by leaving comments here or by emailing me at theoldgrouch@grouchyfarmer.com
I’m not sure where the time has gone but it’s been almost three months since I acquired the Lumos that I reviewed last time so I thought it would be a good idea to talk about what it’s like to use it long term. Since I got it I’ve used it to engrave around 200 metal challenge coins, literally hundreds of drinks coasters, made Christmas ornaments, LED lighted acrylic plastic signs, and dozens and dozens of decorative engravings on various objects or parts cut out with my woodworking tools or the Falcon laser. I’ve used it a lot. That should give you an indication of how useful this little laser has been.
The Falcon still gets used a lot but for what I suppose you could call “heavy duty” jobs like cutting out parts or for doing engravings that are just too big for the Lumos. Because of the Lumos’ speed and higher resolution, it’s the one I turn to for doing anything that requires high resolution artwork or intricate engravings.
But I absolutely, positively do not want to try using it for cutting out parts even if the job would fit inside of the Lumos’ working area. Because it’s a galvo laser it lacks air assist, and that means much more charring and even fires starting when trying to cut flammable materials. But for everything else? If it will fit in the laser’s 120mm X 120mm working space, that’s the one I’ll turn to.
Does the Lumos have quirks and “issues”, as they say? Sure it does. There’s no such thing as a perfect machine. With the Lumos these are more irritations than deal breakers, though.
Even the software that comes with it is decent. The “Makeit” software that comes with the unit is how most people are going to use this laser and it is actually pretty good, especially if you register the Lumos and get the 6 month free “membership” that gives you access to the software’s built in AI functions. That opens up a whole new level of creativity and usefulness because once that’s activated you can use their AI to actually generate copyright free images in any style you like, from photographic quality to simple line drawings, that you are free to use any way you like.
That engraving on the side of that box over there on the left was generated with Wecreat’s AI. The prompt I wrote was something like “a black and white line drawing of a cute kitten chasing butterflies through a field of wild flowers” and that’s one of the images it came up with.
You don’t need to subscribe to use the laser or the Makeit software, only if you wish to continue to use the AI functions after the introductory period expires. If you’re doing this commercially and want to turn out a lot of different products for sale it might well be worthwhile, though.
But the Lumos’ software is at the same time the most irritating thing about the whole package, and the main problem with it is that it will only save projects in Wecreat’s proprietary file format. Any projects made in the Wecreat software cannot be exported for use elsewhere. So everything you make with the software is locked in to that hardware platform. At least with the current version of the software.
This isn’t a big deal for me because all of my artwork is made in Photoshop or Adobe Illustrator or some other tool and I only use the Lumos software mainly for the actual production run. But this is something you need to keep in mind if you’re considering buying one of these.
Lightburn
The other issue I have with the Lumos is that I have been completely unable to get it to work with what is probably the most popular laser engraving software currently in use by “professionals” out there, Lightburn.
Let me inject some caveats in here first. I do not currently own Lightburn and am working with the “free” 30 day trial version. I wasn’t about to drop $200 (I’d need the more expensive “Pro” version) on a piece of software that might not work with my equipment.
Wecreat doesn’t make getting the Lumos working with Lightburn easy. They claim that it will indeed work with it. But that doesn’t seem to be the case. Their gantry style lasers do, and Wecreat does provide guidance to get those working with the software. The Lumos? Nope. Nothing. Nowhere. There is a “.lbdev” file available for the Lumos buried deep in Wecreat’s website which was almost impossible to find. I am not going to direct you to it because as far as I can tell it just doesn’t work.
After many, many hours of fiddling around and extreme frustration, I finally got LB to at least “see” that the Lumos was connected. I even got it to connect to the camera. Somehow. Occasionally. Sometimes the camera shows up, sometimes it doesn’t.
I got it to actually “frame” an engraving in the build space. Good! Then I hit the start button to actually do the engraving and… And it will only work with the infrared laser, not the blue diode. And there seems to be no way to switch between the two. And even when using the IR laser the engraving process would stop with the progress bar in LB sitting at 99% and both the laser and the software apparently locked up and I had to restart both.
I’m giving up for the time being. I wasted way, way too much time on trying to get LB working with the Lumos. If I ever do get it going, I’ll let you know.
Materials
I got lots and lots of questions about what materials to use for projects. I don’t do this on a commercial basis. The only things I buy in bulk are drinks coasters for the brewpub, and generic 1/4 and 1/8 inch thick plywood to make misc. goodies.
I buy basswood plywood in bulk off Amazon. It’s far cheaper than buying it from places like Hobby Lobby or the crafts section at Walmart where you will pay a small fortune.
But before you start buying in bulk, buy a few sheets first if possible to test it because there can be huge differences between different brands. One brand will cut clean with very little char or other problems, while another will be utterly horrible. Take a look at this image below that compares then side by side.
This is the same wood as in the example on the left above. Look at all of the soot on my fingers just from handling it after I took it out of the laser. It’s absolutely filthy with the stuff. I’d have to completely wash this down in order to use it.
Those are two different brands of 3mm basswood plywood I got off Amazon, and both sell for about the same price. They were cut out using the Falcon A1 using exactly the same settings. The one on the right is a nice, clean cut, almost no visible charring on the surface. The one on the left… Oh, dear. Even though it’s the same thickness and I used the same power and speed, it left jagged edges, didn’t cut things out cleanly and there was a huge amount of charring on the edges. And the smoke! You can see the smoke residue all over the surface of the one on the left while the one on the right is almost completely clean.
So always get test samples of any material you want to use in your laser before you start making bulk purchases or you can end up having a complete mess on your hands. I bought 60 sheets of one brand of 3mm basswood plywood where every single sheet warped so badly as soon as I took it out of the package that it was pretty much useless for anything except firewood.
I’m not going to urge you to go out and buy this brand. There are others that are just as good. But what I use currently is over there on the left in case you’re interested. I have no relationship with this company, don’t get any compensation or anything from them. I just think it’s good quality material at a decent price. A pack of 48 sheets of 12″ x 12″, 3mm (1/8″) is currently going for $56.99 on Amazon and it’s a quality product. Very smooth, well sanded surface, very uniform color and grain on the exterior veneer, nice, light color that engraves well and I’ve only very rarely had problems with it warping.
I go through a lot of this stuff. 3mm plywood is the basis for a lot of the projects I crank out and gets used for everything from making little trinkets to some very elaborate art projects, model buildings, etc.
And that’s about it for now. I was hoping to include something about a new cheap CNC machine I picked up but the last few weeks have been so busy I haven’t had an opportunity to really play with it very much. Hopefully in the next couple of weeks I’ll have time to get into that and talk about the joys and frustrations of CNC.
Okay so this is like the third time I’ve started to write this review and each time I ended up with something I found entirely unsatisfactory so I’m going to start this all over again and keep going until I finish this sucker.
I’ve been having problems with this review not because of the Lumos itself, but because I don’t want this to be associated in any way, shape or form with the dozens and dozens of fake crap “reviews” I’ve seen for the Lumos since it was released a few months ago. I’ve sat through way too many of those so-called “reviews” and they are almost universally utterly horrible and completely and totally useless. I’m tempted to go off on a rant about these and maybe I will at the end of this or in a separate article. But I’m not going to waste your time with that now. You’re here to hopefully learn something useful about this thing.
I’m not going to do a typical review. I’m not going to repeat readily obtainable information about this thing. If you want to learn statistics and hear people gushing about how wonderful it is and all that just go look at the dozens of reviews on Youtube and elsewhere. Me? I’m going to talk about what it’s like actually using this thing in actual real world conditions.
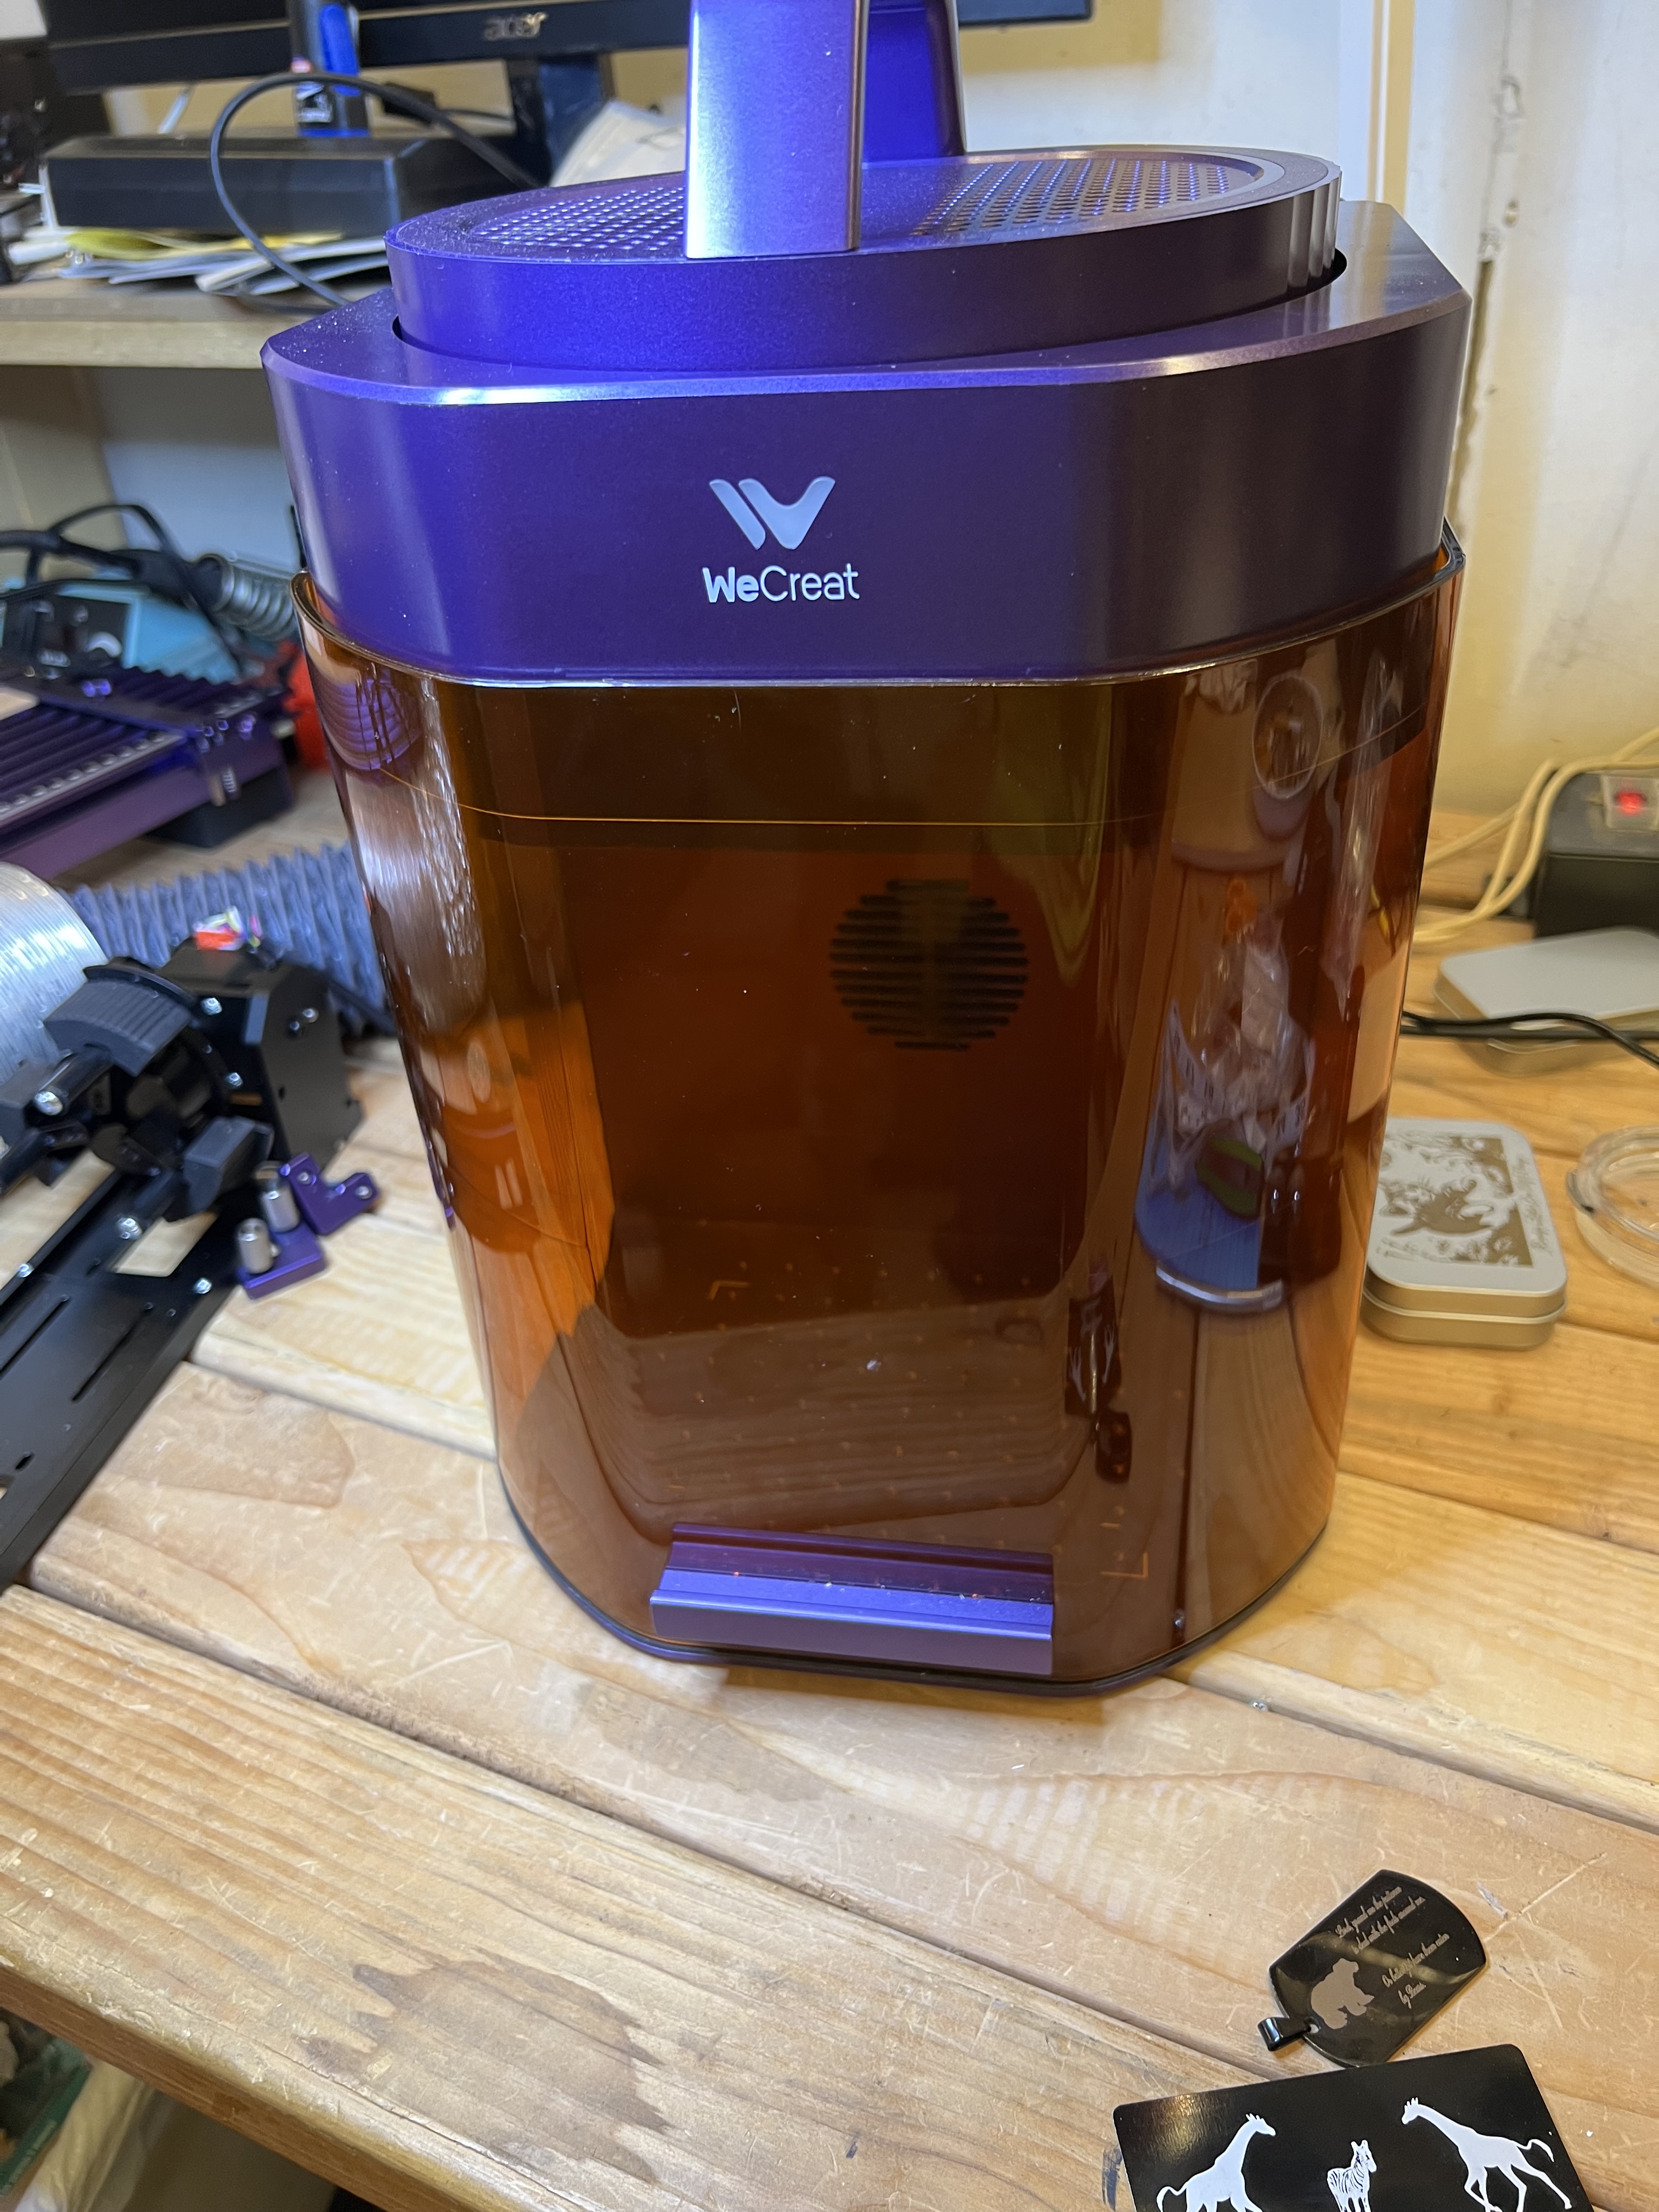
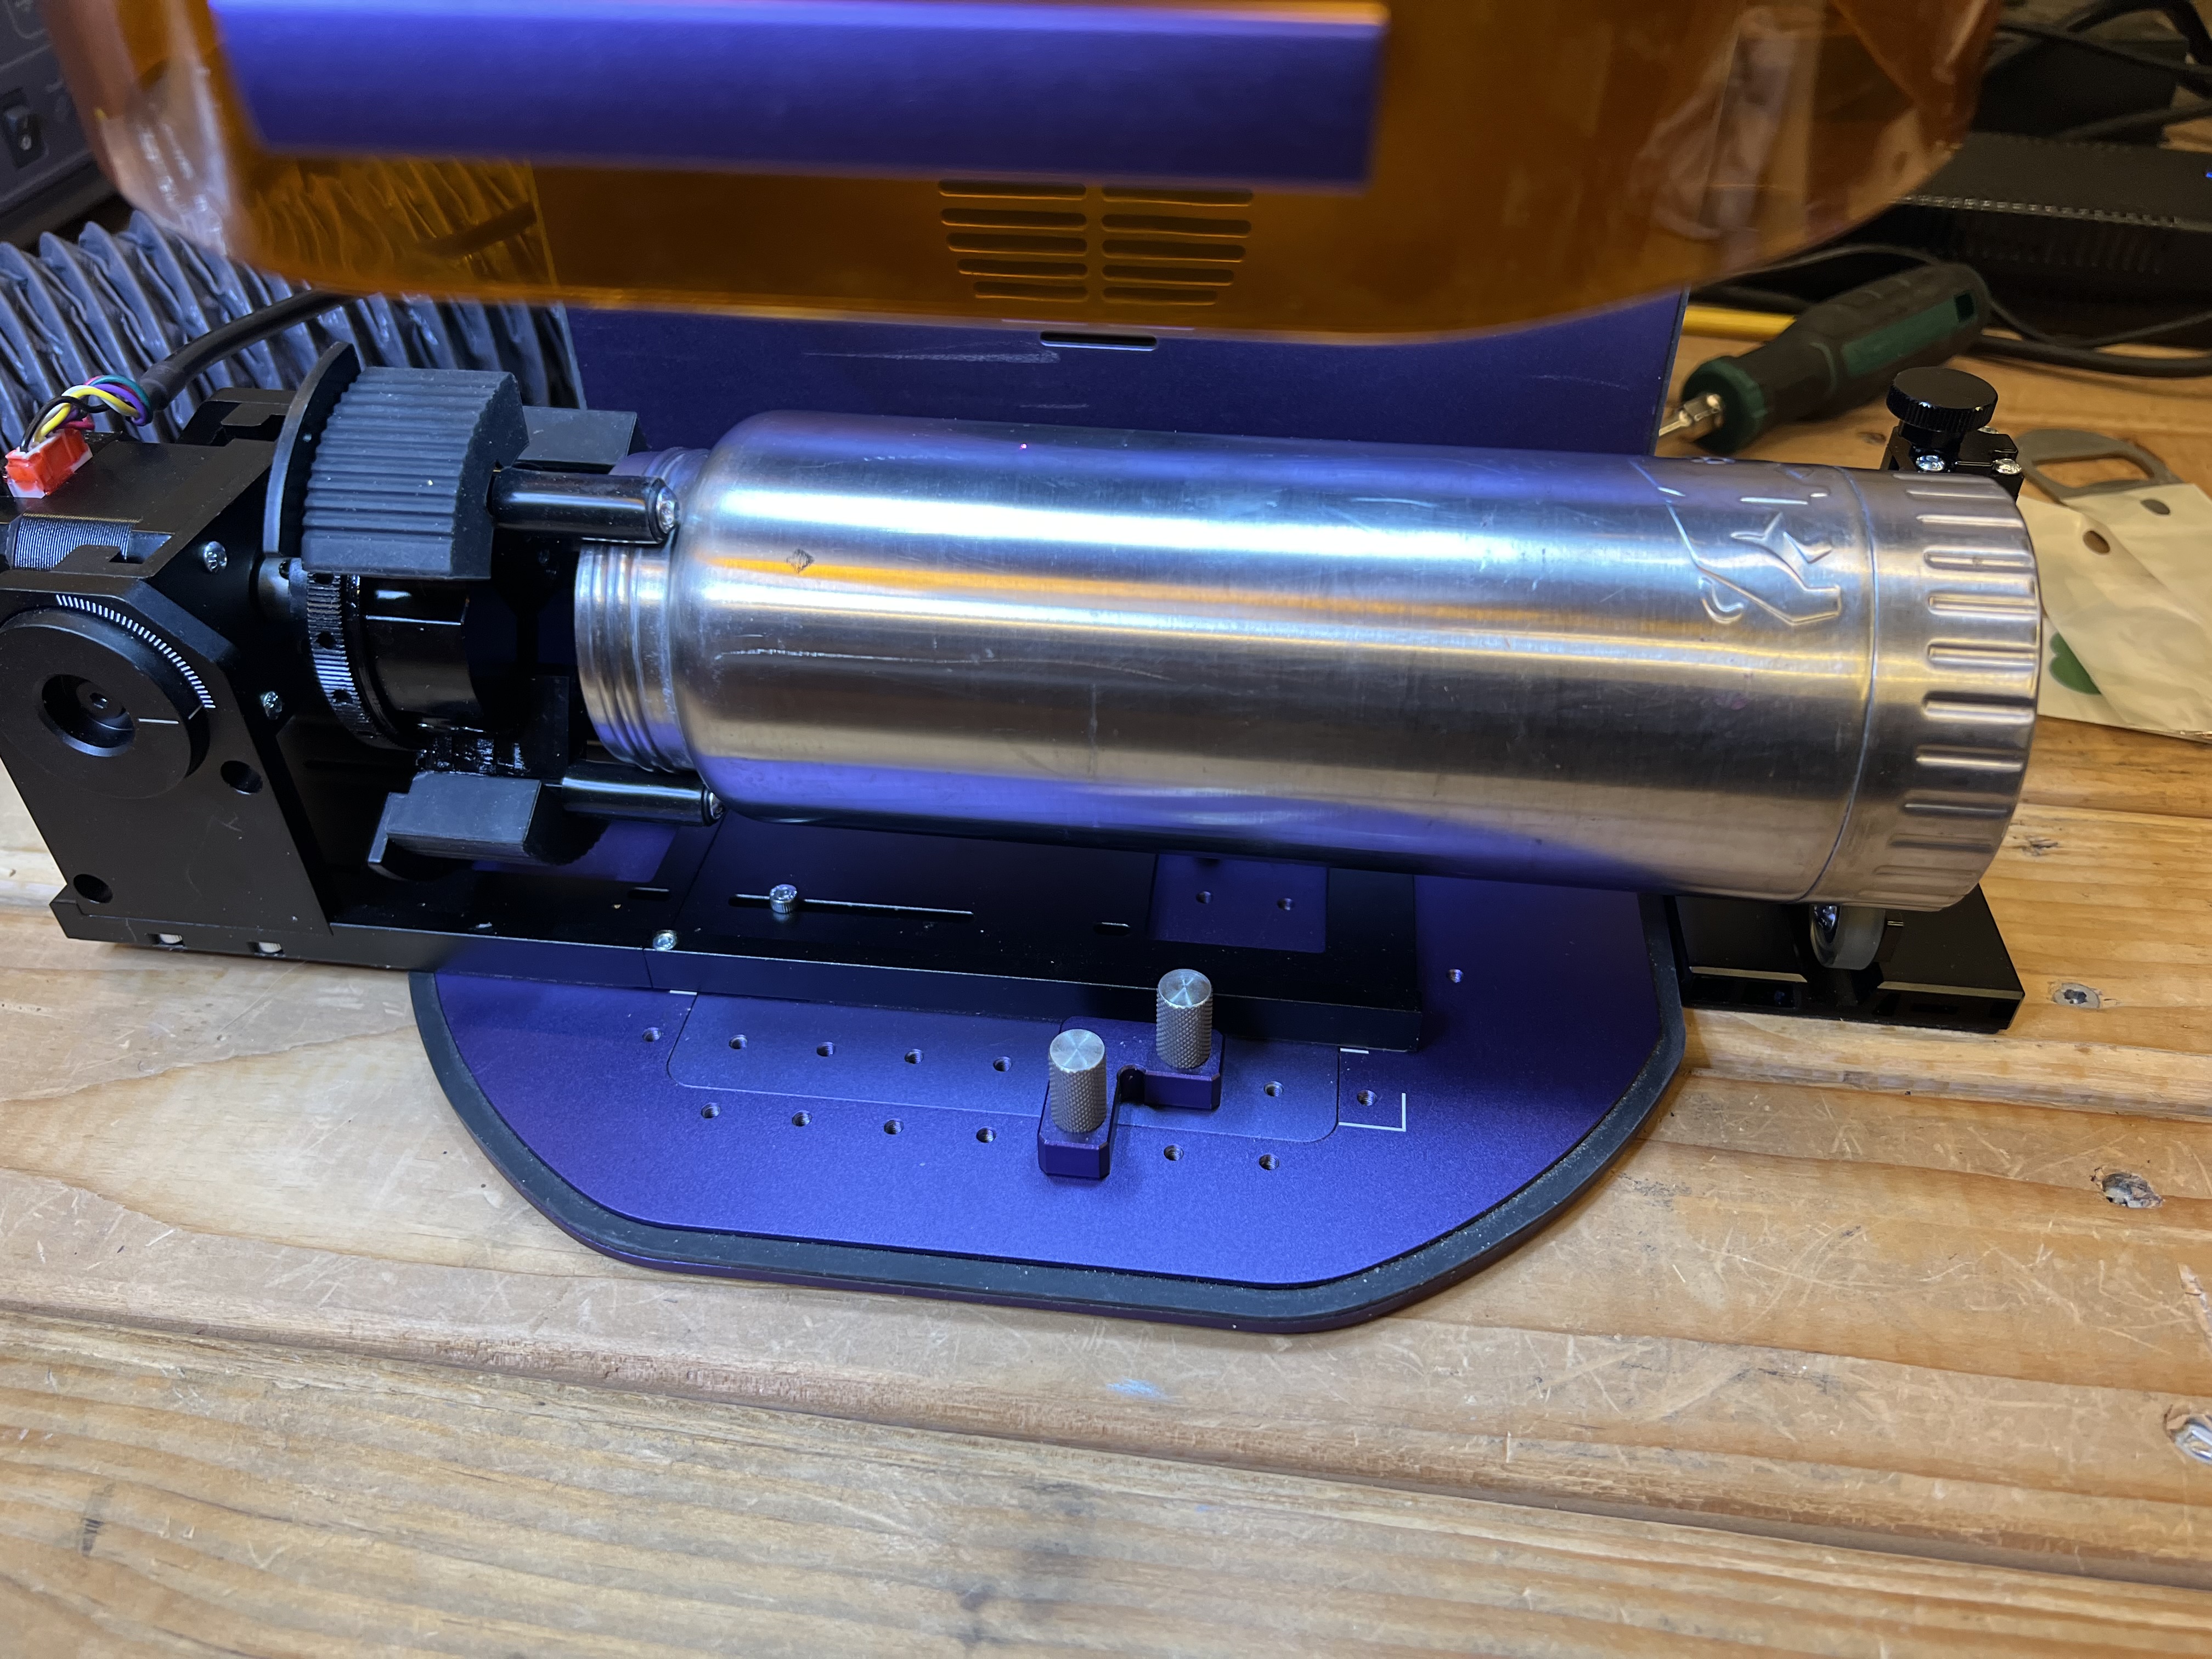
So this is it down below. the Lumos from Wecreat (yes, that’s how they spell it) in all of its purple and orange glory. And for those of you who might be interested in actually buying one of these puppies, it sells for $1,200 or so. Ah, strike that. Looks like it’s down to $1,000 as of Nov. 12. That’s without accessories like the sliding table and the rotary tool which are extra cost options.
What makes this unit interesting is that it has two different lasers built into it. There is a more or less normal 10W blue diode laser for working with materials like wood, paper, some plastics, etc. But there is also a 3W infrared laser that lets it actually engrave metal. That’s the real reason I was interested in this purple beastie. I wanted to be able to engrave metal. And at the time I bought it, it was the only one on the market that had all of these features. X-Tool and a couple of others have brought out units that are comparable to this one now, though, so if you’re in the market for one of these do some shopping around.
Personally I think it’s a good looking little unit. Certainly the build quality and fit and finish seem to be excellent. The only visible plastic bit is the orange shield in the front. Everything else is solid, sturdy aluminium. The laser head is the circular unit with the handle attached at the top. It is packed separately and must be attached to the base unit but that takes only one bolt to accomplish and takes all of about 2 minutes. That’s the only assembly that is required. Basically you can put this thing together, plug in the power and USB cables, and be ready to go in about 5 minutes. Then just install the software from Wecreat’s website and you’re all set. You could be up and running with this unit in probably fifteen minutes from the time you open up the box and unpack it. This is a far cry from the first laser engraver I bought many years ago that arrived from China as a box of parts, with no instructions.
I won’t keep you in suspense. I’ve been using this thing for over a month now. And I’ve been using it hard. It’s cranked out about 150 challenge coins, several hundred drinks coasters, along with dozens of one-off specialty projects along with just goofing around with it, and it’s never missed a beat. I’m not your typical hobby craftsperson churning out the occasional birthday gift or Christmas ornament. I’ve been using this in a semi-production environment almost since the day I got it. There have been days where it’s been going non-stop for 6+ hours a day sometimes. And it’s worked pretty much exactly as advertised.
Does it have limitations? You bet. Does it have problems? Sure it does. And I’ll get to those. There is no such thing as the “perfect” laser engraver, after all. But this unit does exactly what it’s specified to do and it’s been doing it very well indeed.
First a bit of background. This is what is known as a galvo laser, and by its very nature that means it has both some very significant advantages as well as some equally significant limitations when it comes to functionality when compared to a gantry style laser like my Falcon.
The biggest advantage is speed. Galvo lasers are very, very fast when compared to gantry style lasers. Gantry lasers have the laser source itself mounted on a movable framework that is physically moved over the surface of the work material by belts, pulleys, stepper motors, etc. All of those mechanical gubbins having to move around seriously restricts the speed at which it can work.
Galvo lasers have a fixed laser source. It never moves. Instead there are tiny mirrors in the head that are moved to direct the path of the laser beam itself. Because the mirrors are very small and very low mass, they can be moved much, much faster. And that translates into getting projects done and out the door much, much faster as well. As anyone in business can tell you, time is money.
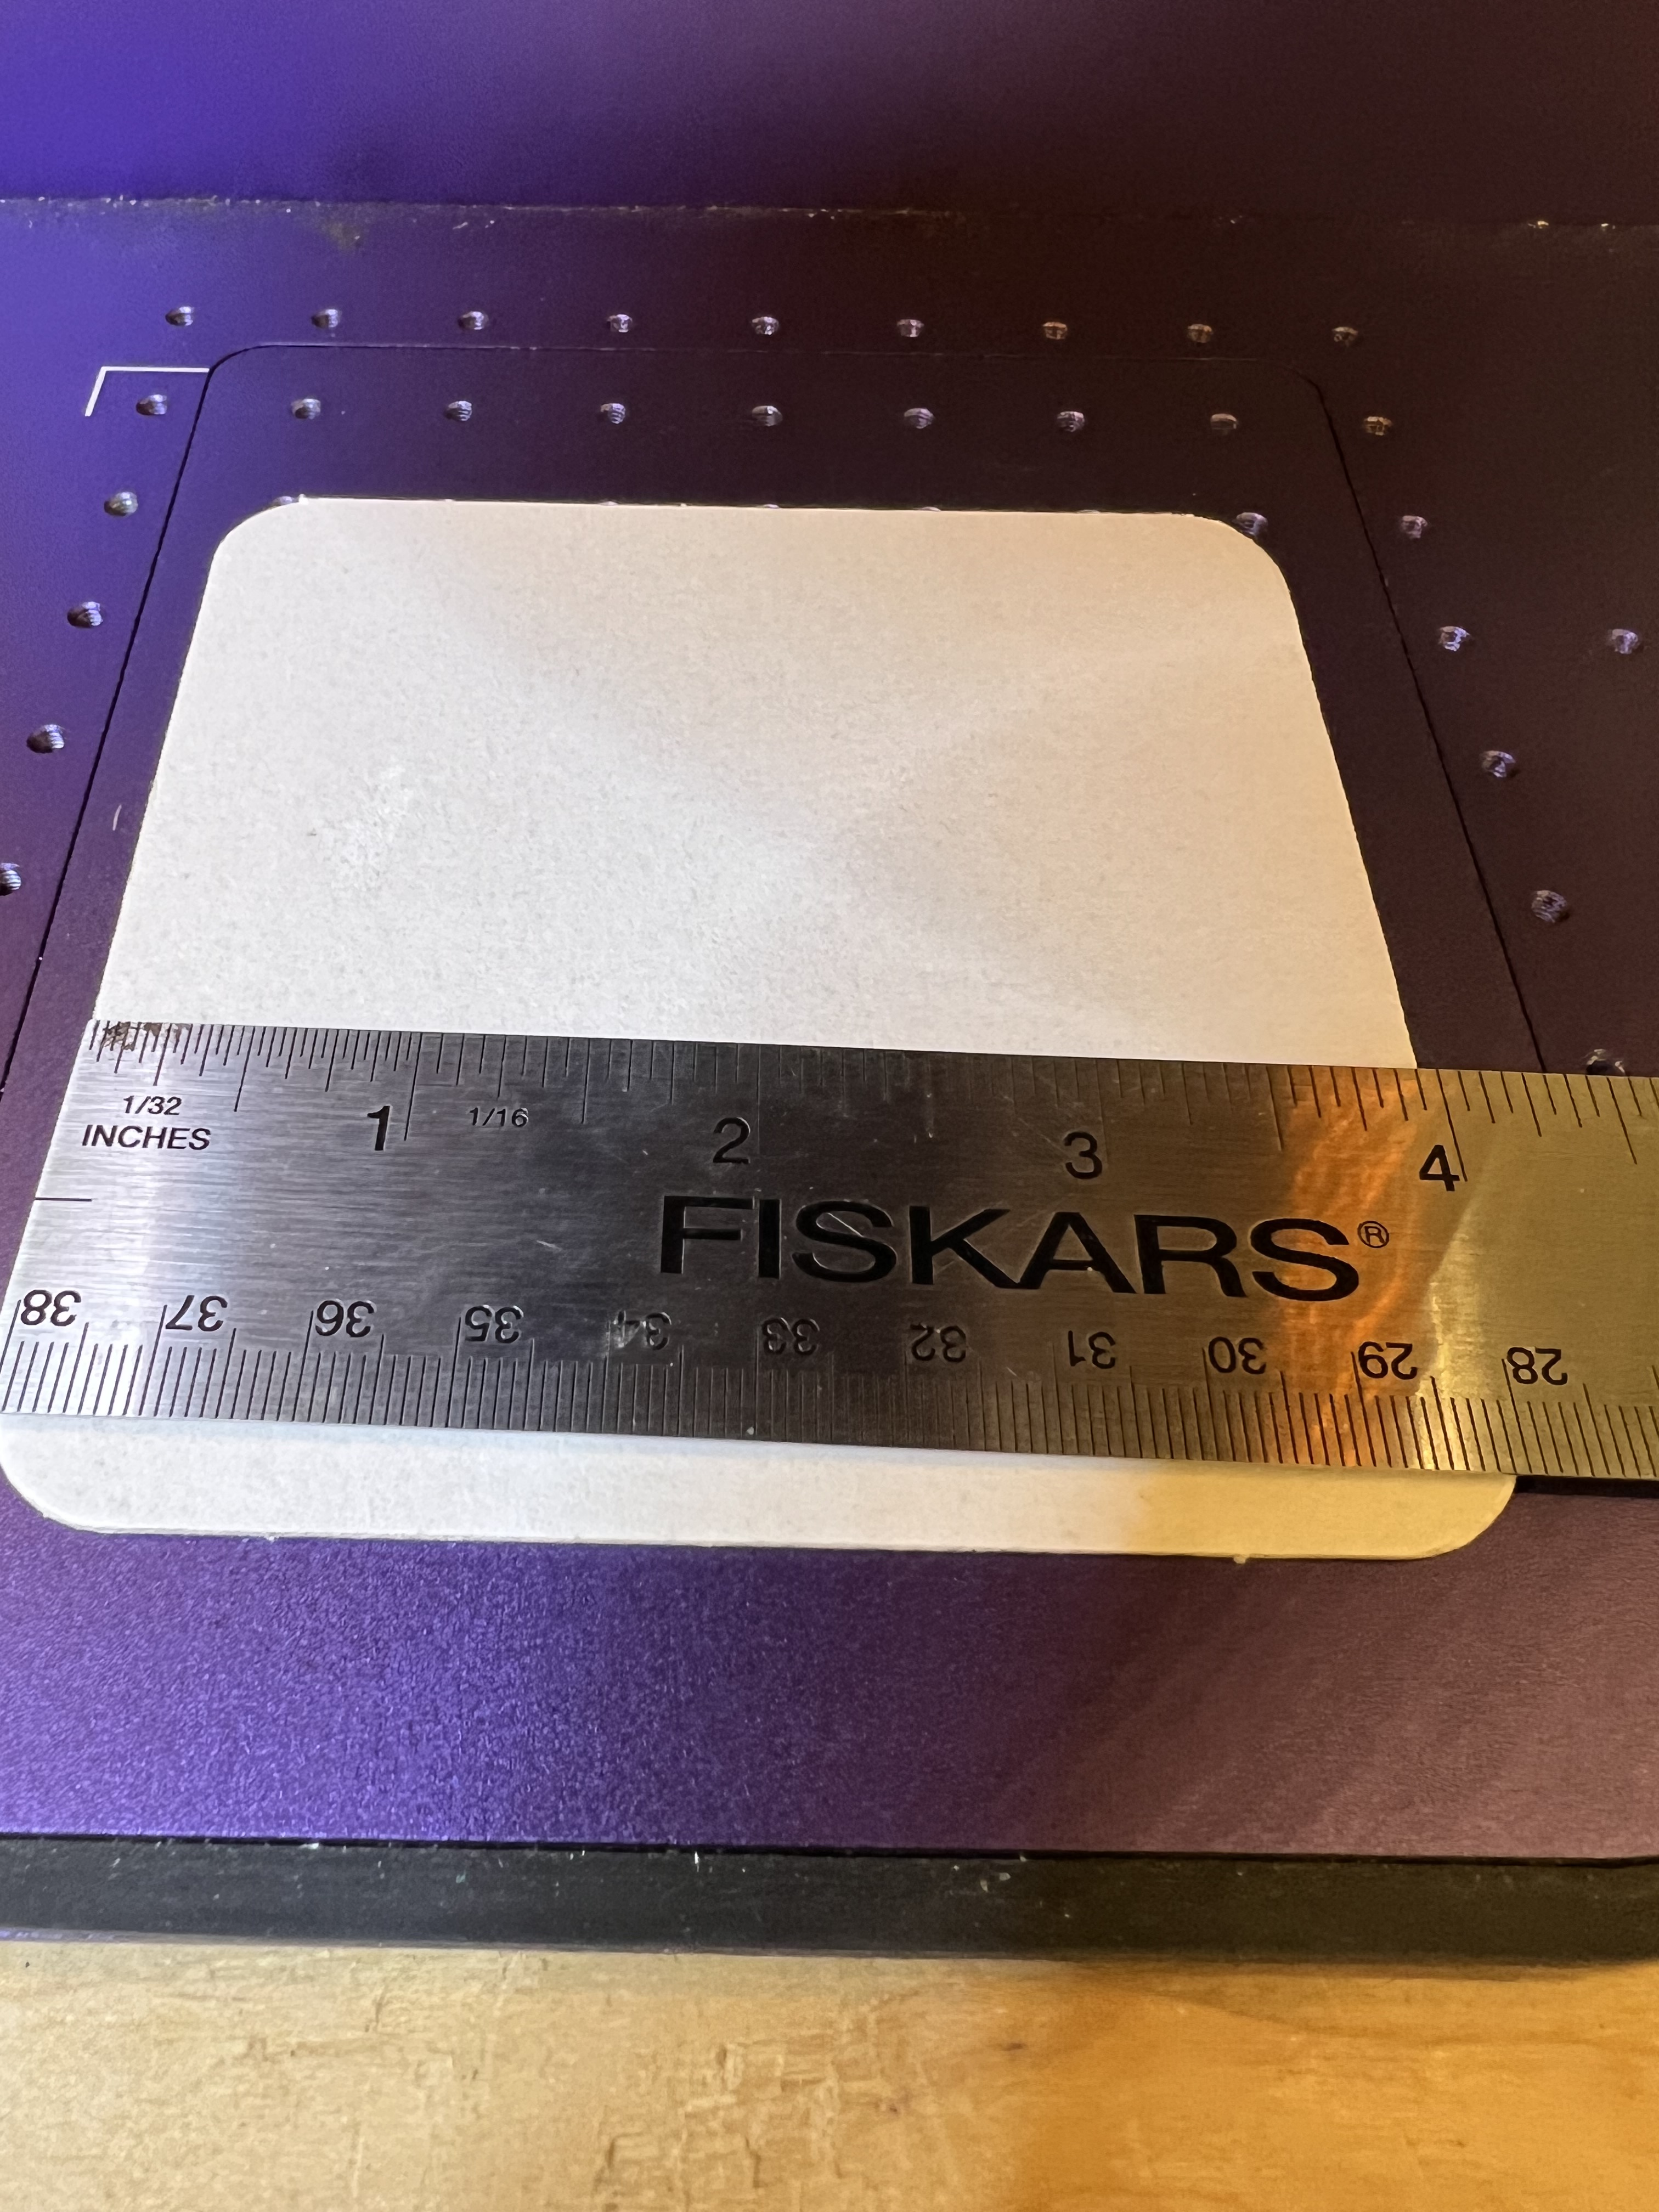
But that’s also the biggest problem with galvo lasers because that severely restricts the size of its working area. Where my Falcon has a working area of about 13 inches X 15 inches. the Lumos has a working area of only around 115 millimeters square, or about 4 inches.
The working area of the Lumos is only about 120mm x 120mm or around 4.5 or so inches square.
Now this isn’t as much of a problem as you might think. The vast majority of engraving jobs I do will fit quite comfortably into that working area. If I need to do something a lot bigger I can either use the sliding table, which expands the working area to around 120X420mm, or if I need to do something bigger still I can use the Falcon.
Speed is where this thing really shines. Let me show you with a short video if I can figure out how this upload thingie works…
Egads, it worked!
Now that engraving on a metal business card took about 30 seconds, all together. The exact same engraving using the Falcon took a good 3 minutes.
Since the video thingie seems to be working let me stick another one in here just for the heck of it. This one takes a little longer because it’s a more complex design but what the heck
I should perhaps point out that these videos are real time, not sped up. It’s really that fast.
(FYI: Those are black anodized aluminum business cards. They’re fun to mess with and they’re super cheap. I get 100 for about $9 on Amazon so I use them for experimenting and just messing around.)
This one above shows the infrared laser in action. Instead of just burning the black coating off the metal card it’s actually etching that design into the metal itself. It’s a bit hard to tell what it is because the video is shot through the shielding but that’s a cat watching Santa’s sleigh flying across the face of a full moon.
It’s that IR laser that made the Lumos interesting to me. That and its very high resolution. It’s the only laser in this price range that I know of that has dual laser sources built into it; a more or less standard 10W blue laser and a 3w IR laser. The standard laser works with the usual materials like wood, plastic, leather, etc. The IR laser has the ability to engrave metal.
If you saw the review I did of my Falcon laser you may remember that I used it to work with metal also. But that was different. The Falcon cannot actually engrave any kind of metal no matter what the hyped up advertising might make you think. It can discolor metal but it cannot actually engrave it. It can also be used for a kind of powder coating. A special material is applied to the metal and the laser’s heat causes the material to chemically bond with the metal to give a very durable result. But that’s not engraving as such. Engraving involves the actual removal of material from the surface of the metal.
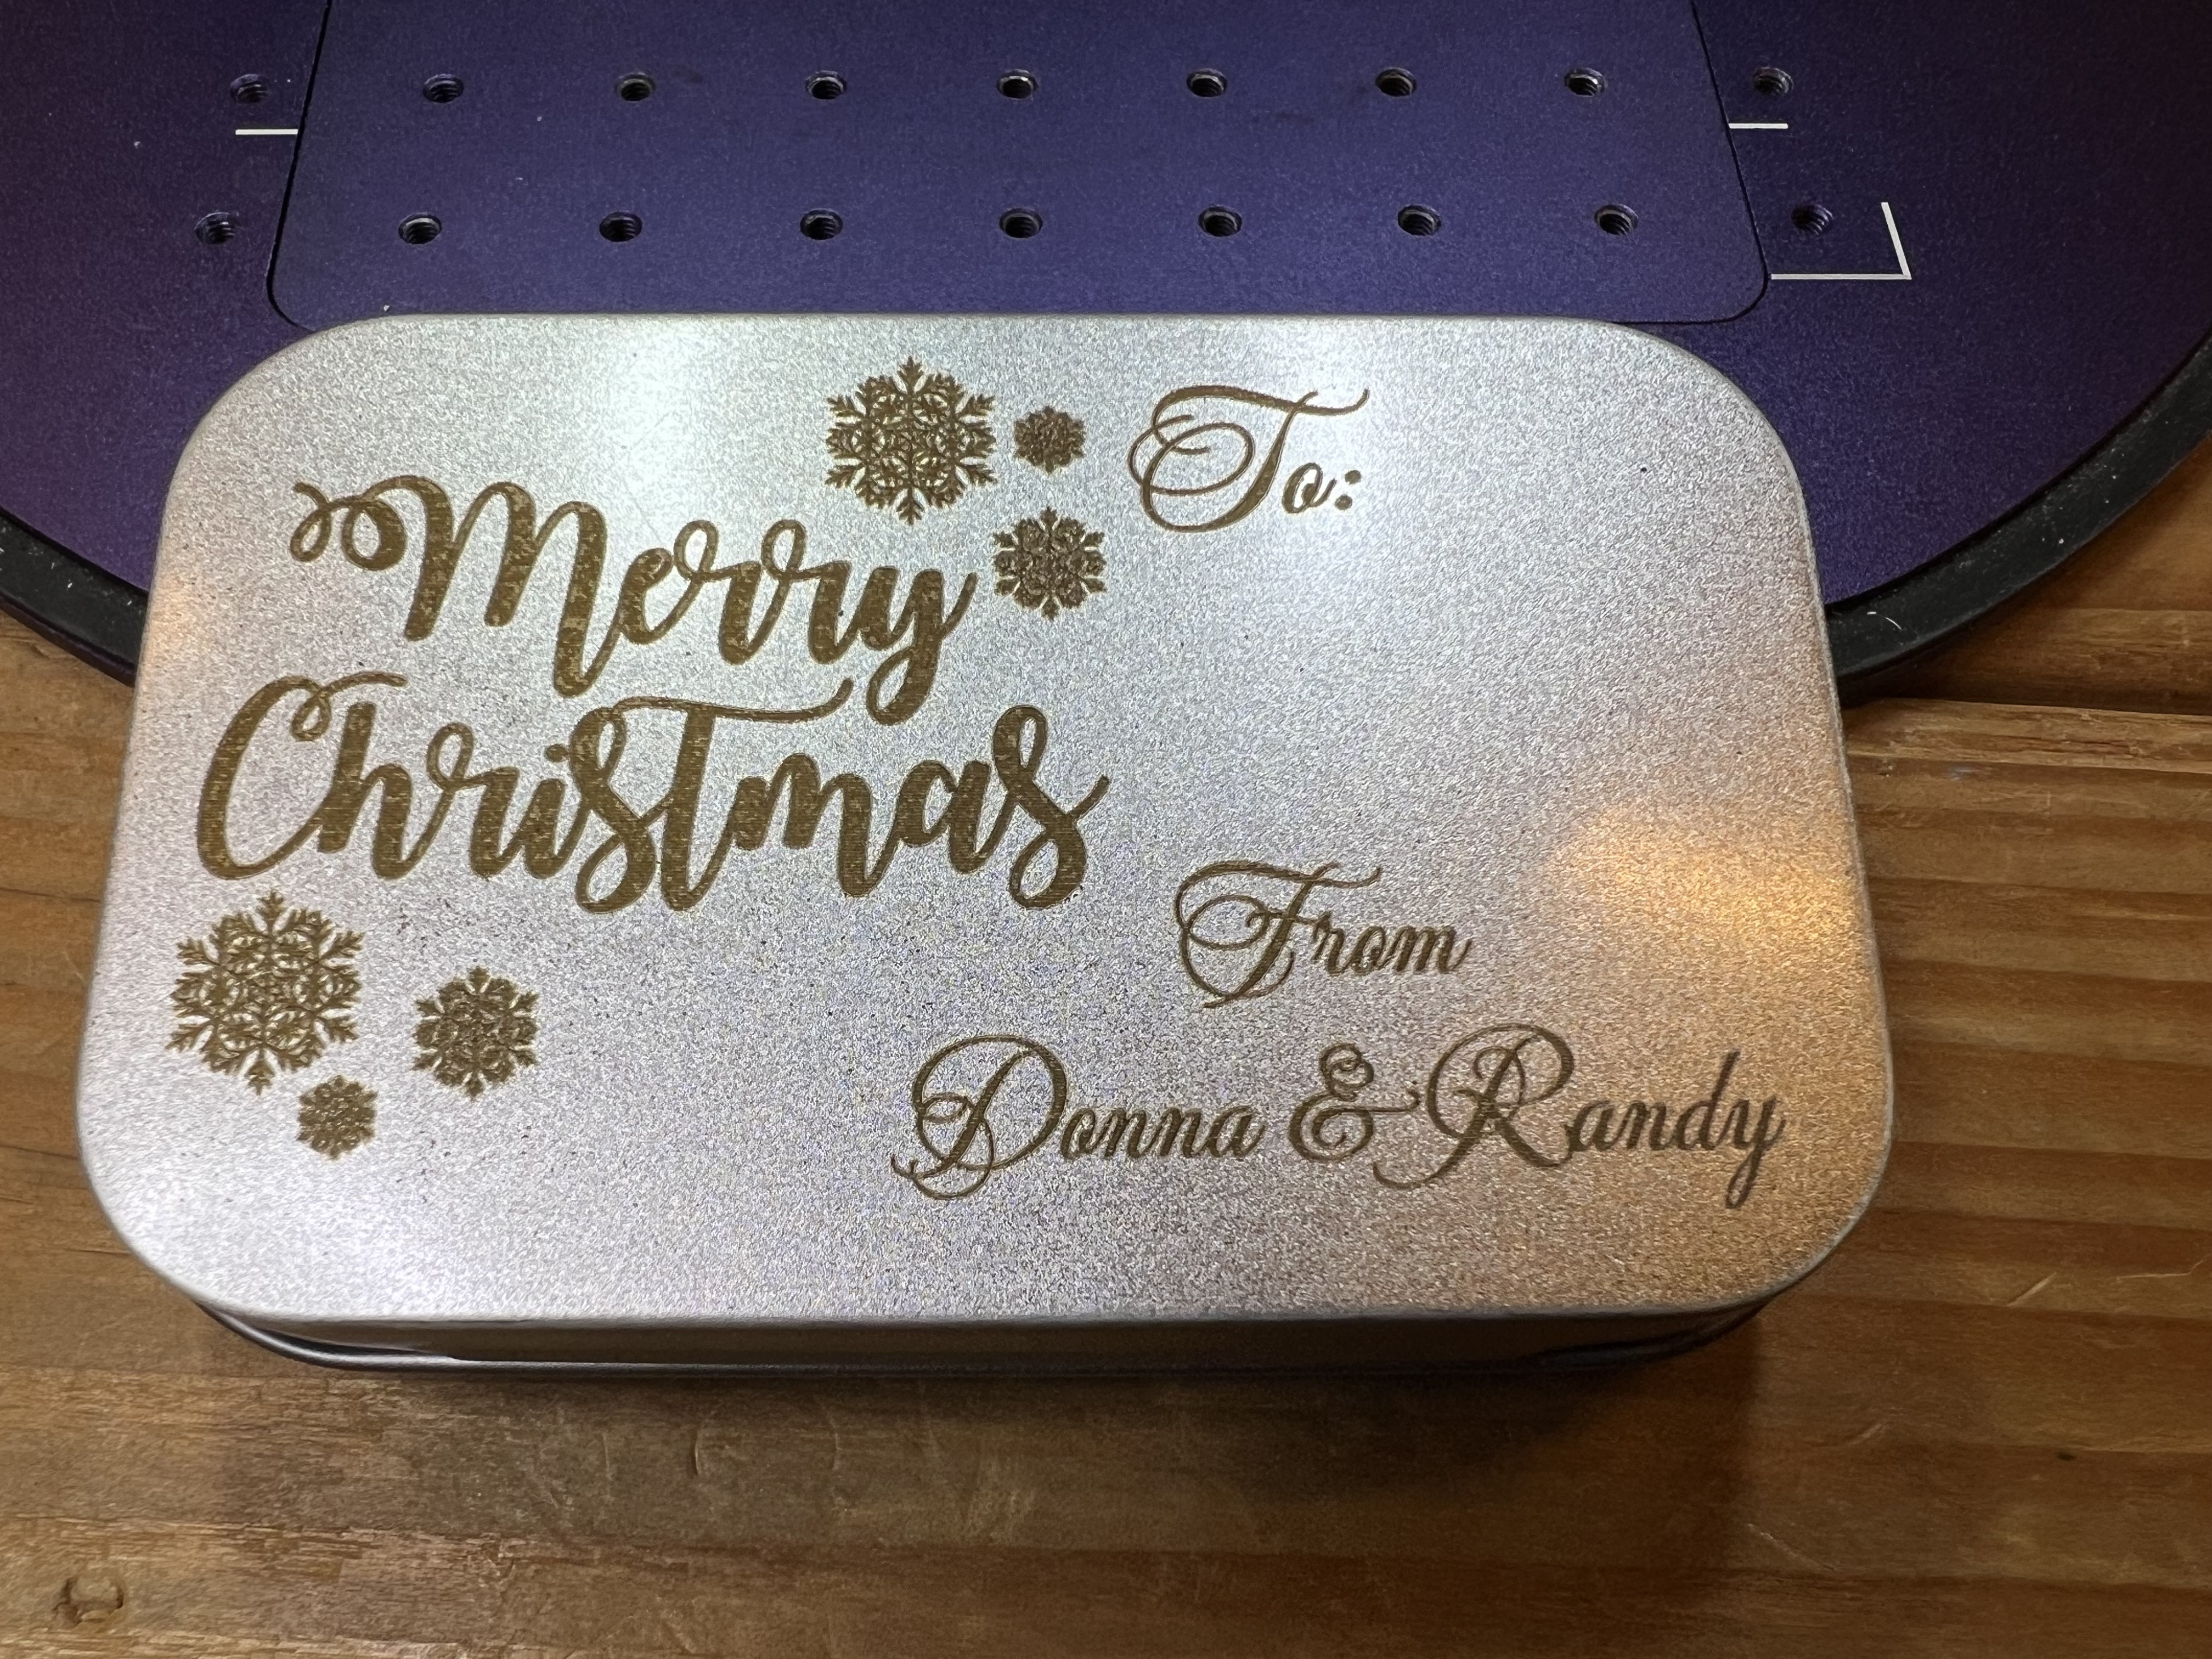
I did about a dozen of these little metal Christmas gift boxes with various designs and wording. They’re just the right size for gift cards or small trinkets.
If you’re doing this laser engraving thing as a business, here’s a hint. You can pick up these boxes for about $0.50 each in quantity or even less if you shop around, and people will pay actual real money for these things with a nice bit of artwork engraved on ’em. Better still, take the whole show on the road, set up in a booth or table and do custom engraving on the spot for people. Takes only a minute or two to engrave a name or brief message on one of these.
That’s not just discolored metal, that’s actually engraved into the surface of the metal box.
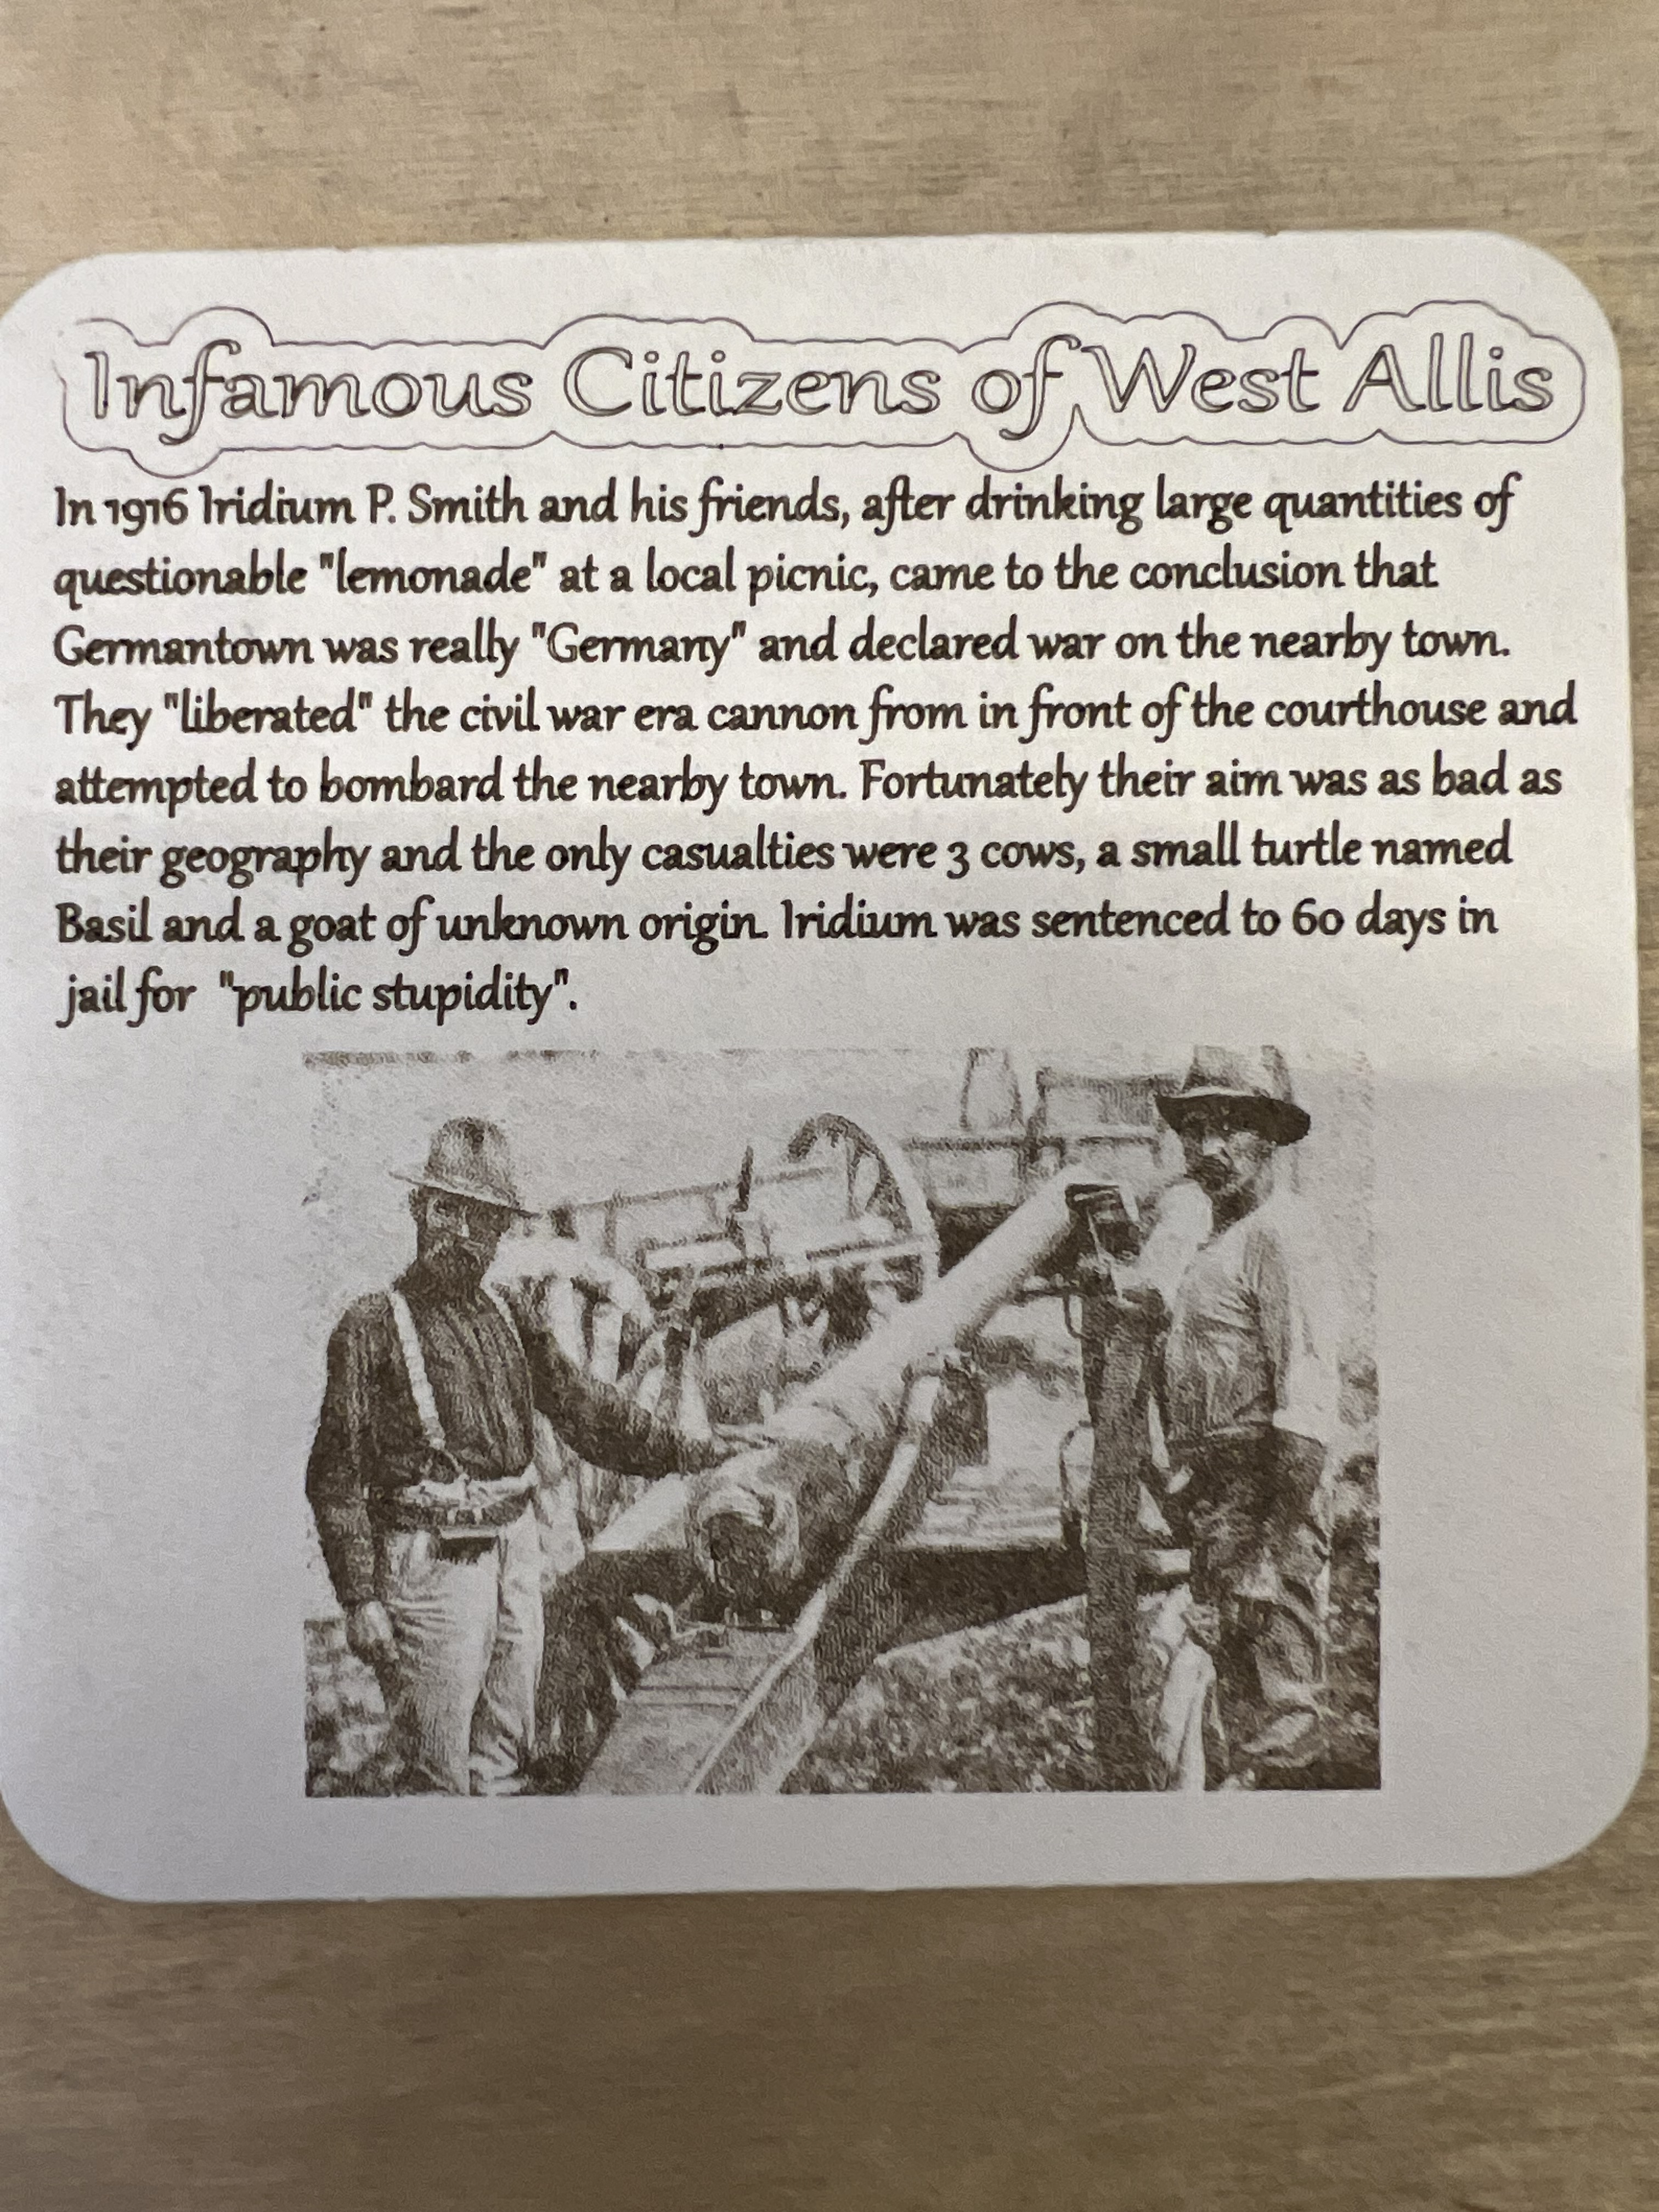
One thing I’ve been doing for years now is I make a whole line of custom drinks coasters for a brewpub in West Allis. One side has pub’s logo, the other has a (hopefully) humorous cartoon or satirical item. Those dopy things have become ridiculously popular and when I send a new batch down there they’re usually gone in a few hours because the customers steal them. Which is just fine with me because the customers hopefully show them to friends and family and helps get the pub’s name out there and attract new customers. So I do stuff like, well, this, for example:
Nope, I don’t read a lot of manga and even if I did I wouldn’t let it influence my drawings. Nope, no sir… Yeah, right…
Yes, it’s an old joke. I used to steal borrow images from late 19th century and early 20th century public domain sources but I’ve been doing that less and less lately and doing my own because it’s hard to find appropriate images from copyright free sources to match a specific joke. They’re fun, easy to do, and the only difficult bit is the amount of time it takes. With the Falcon doing one of these would take 5 minutes or more. I could cut that down quite a bit but only by sacrificing the quality. With the Lumos it takes about 1/3 of the time or even less do do one of these.
I’m afraid that I’ve been picking on West Allis, the suburb of Milwaukee where the tavern is located, of late. I hope the town has a sense of humor because stuff like these pop up…
Yes, I am ashamed of myself. Anyway I’m showing you these because it would have been difficult or even impossible to do this with the Falcon. At least in any kind of reasonable amount of time. As nice as the Falcon is, it just isn’t fast enough, nor does it have high enough resolution to be able to do a decent job reproducing photos like these up there. Just for the heck of it I did the “vegetable queen” one on both the Falcon and the Lumos. On the Lumos it took about 3 minutes. On the Falcon? It took 10+ minutes. See why I’ve been using the Lumos so much since I got it?
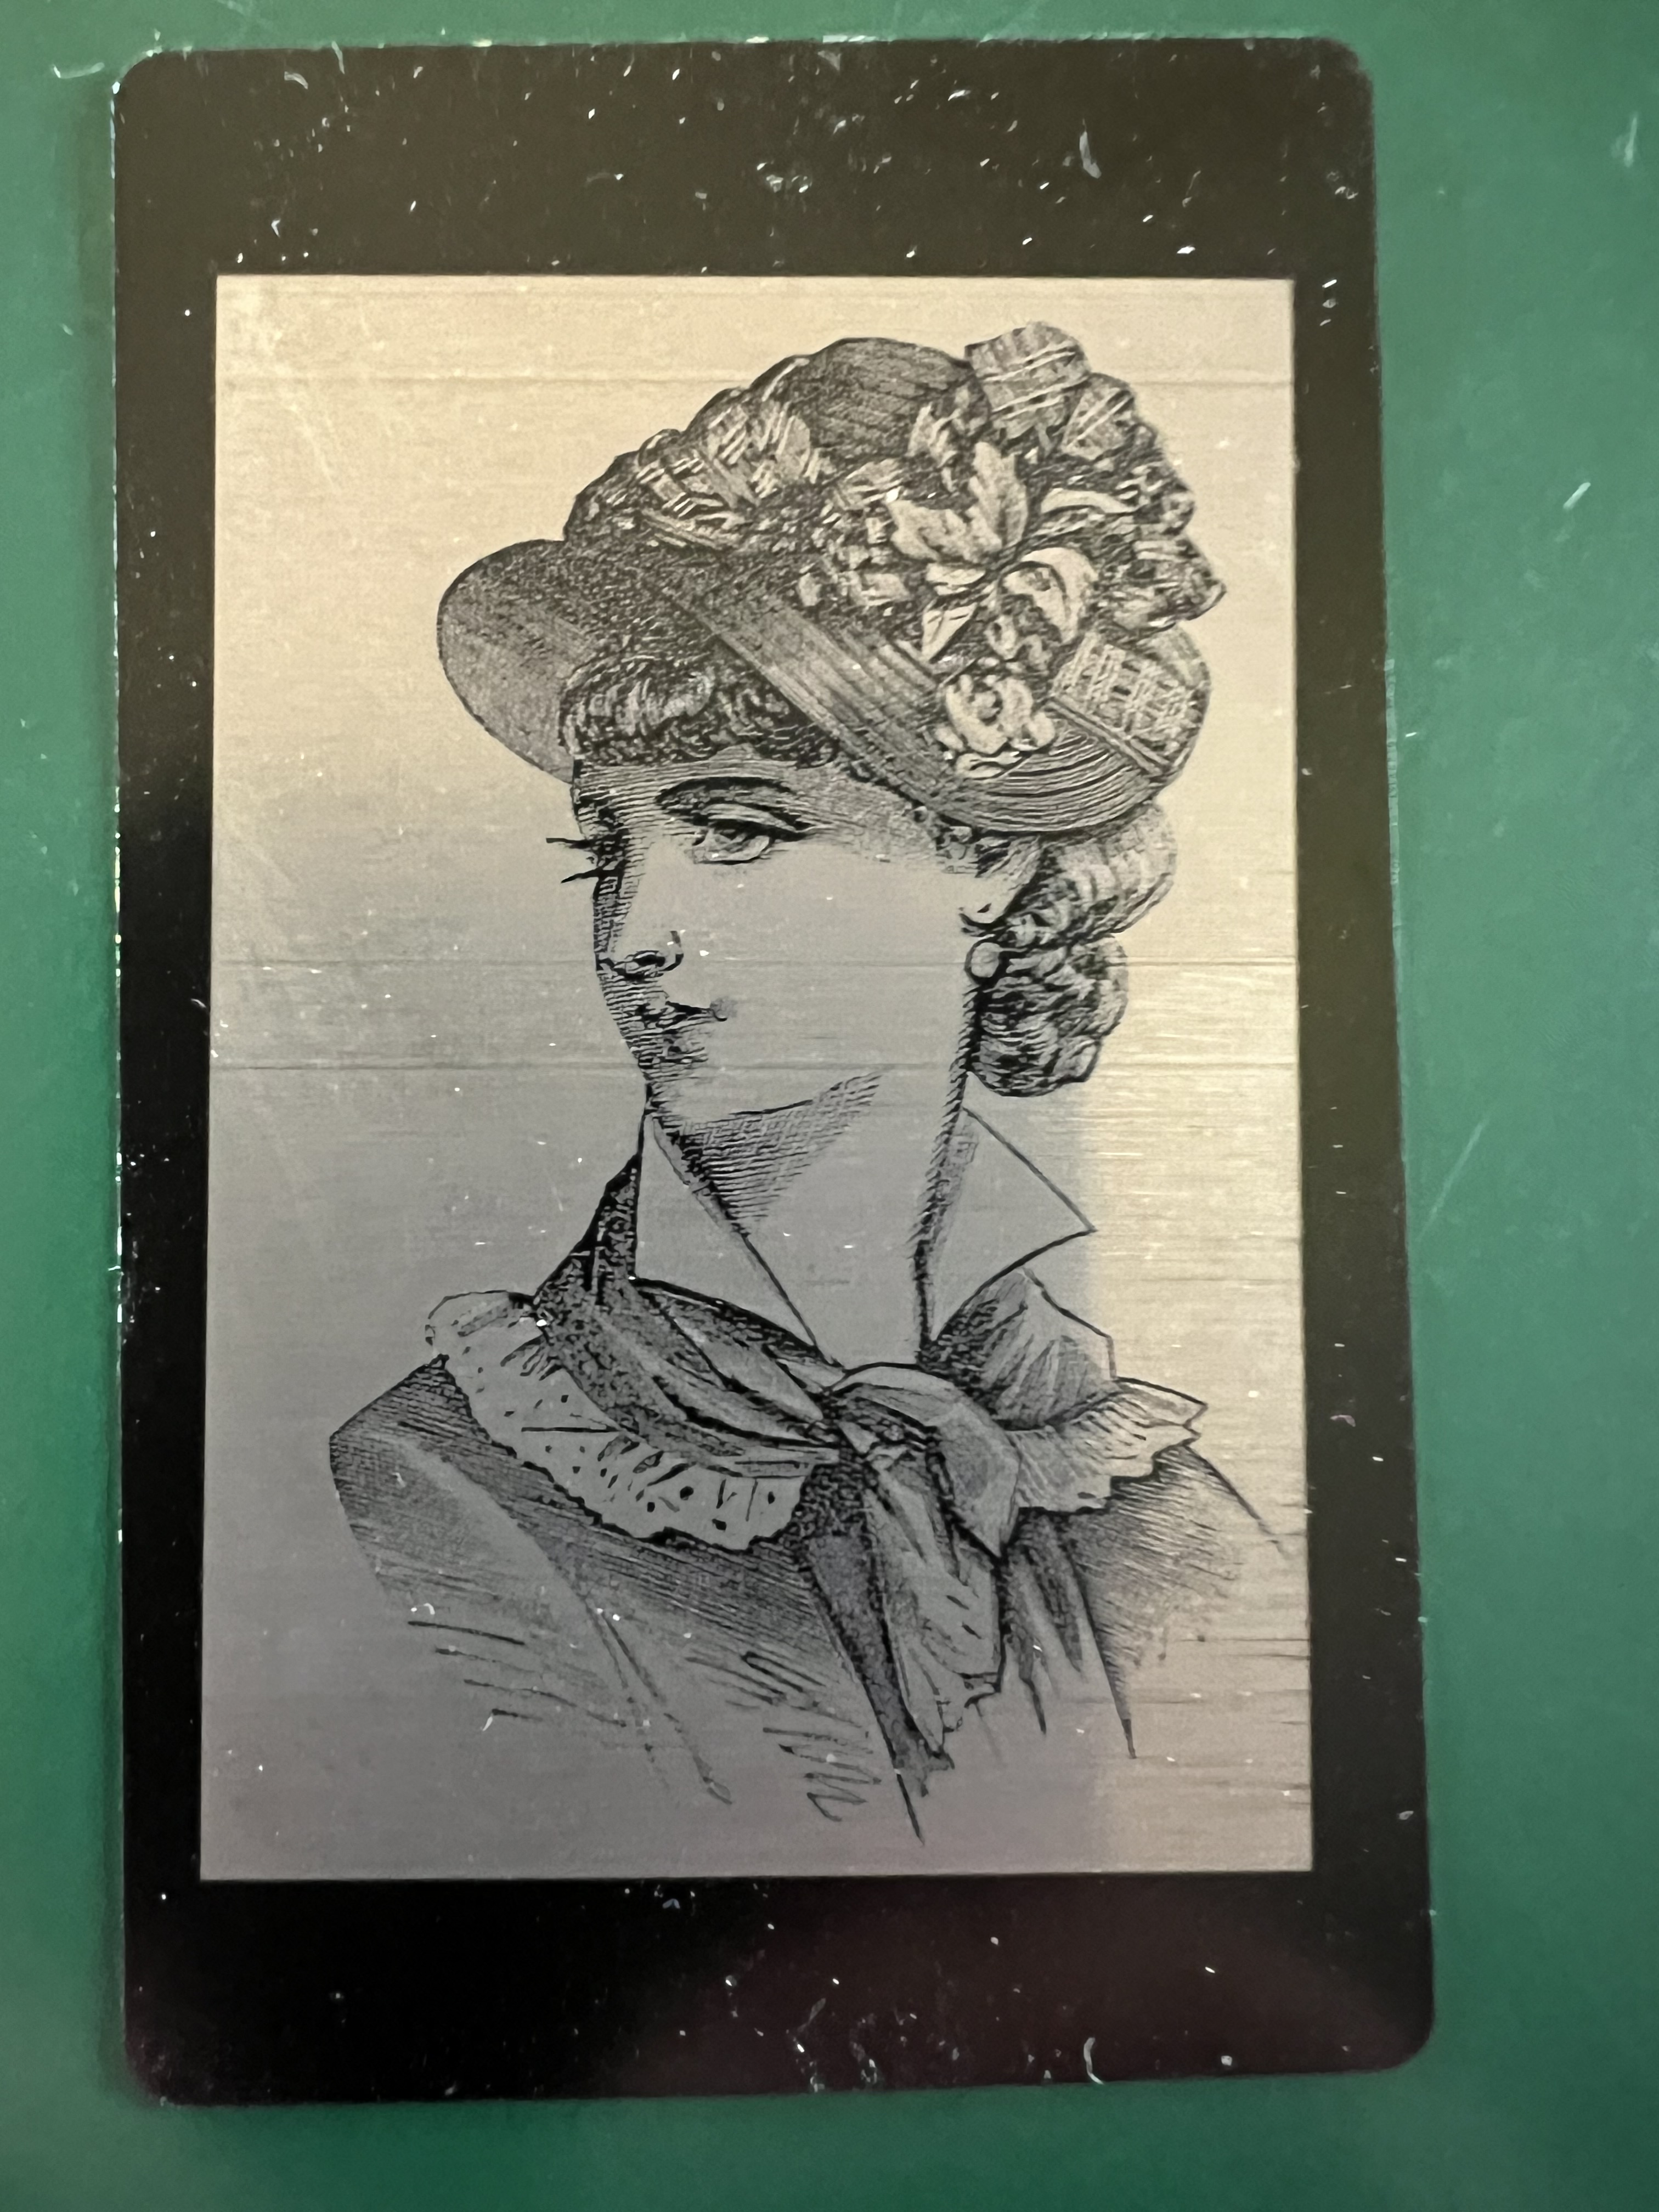
The resolution of this laser is extremely impressive. Look at this test image I did on one of those black anodized business cards.
There’s no way the Falcon could achieve that high of a resolution. The width of its laser is just too wide.
Doing photos with this thing is a blast. It gives near photographic quality results on almost everything I’ve tried it with. Over there on the left is a photo of one of my cats that I took. I cut out the background and imported it into the Wecreat software. I found a bit of scrap cork laying around and lasered it onto that with the diode laser and you can see the results for yourself. The resolution of this thing, both the diode and the IR laser, continues to impress me.
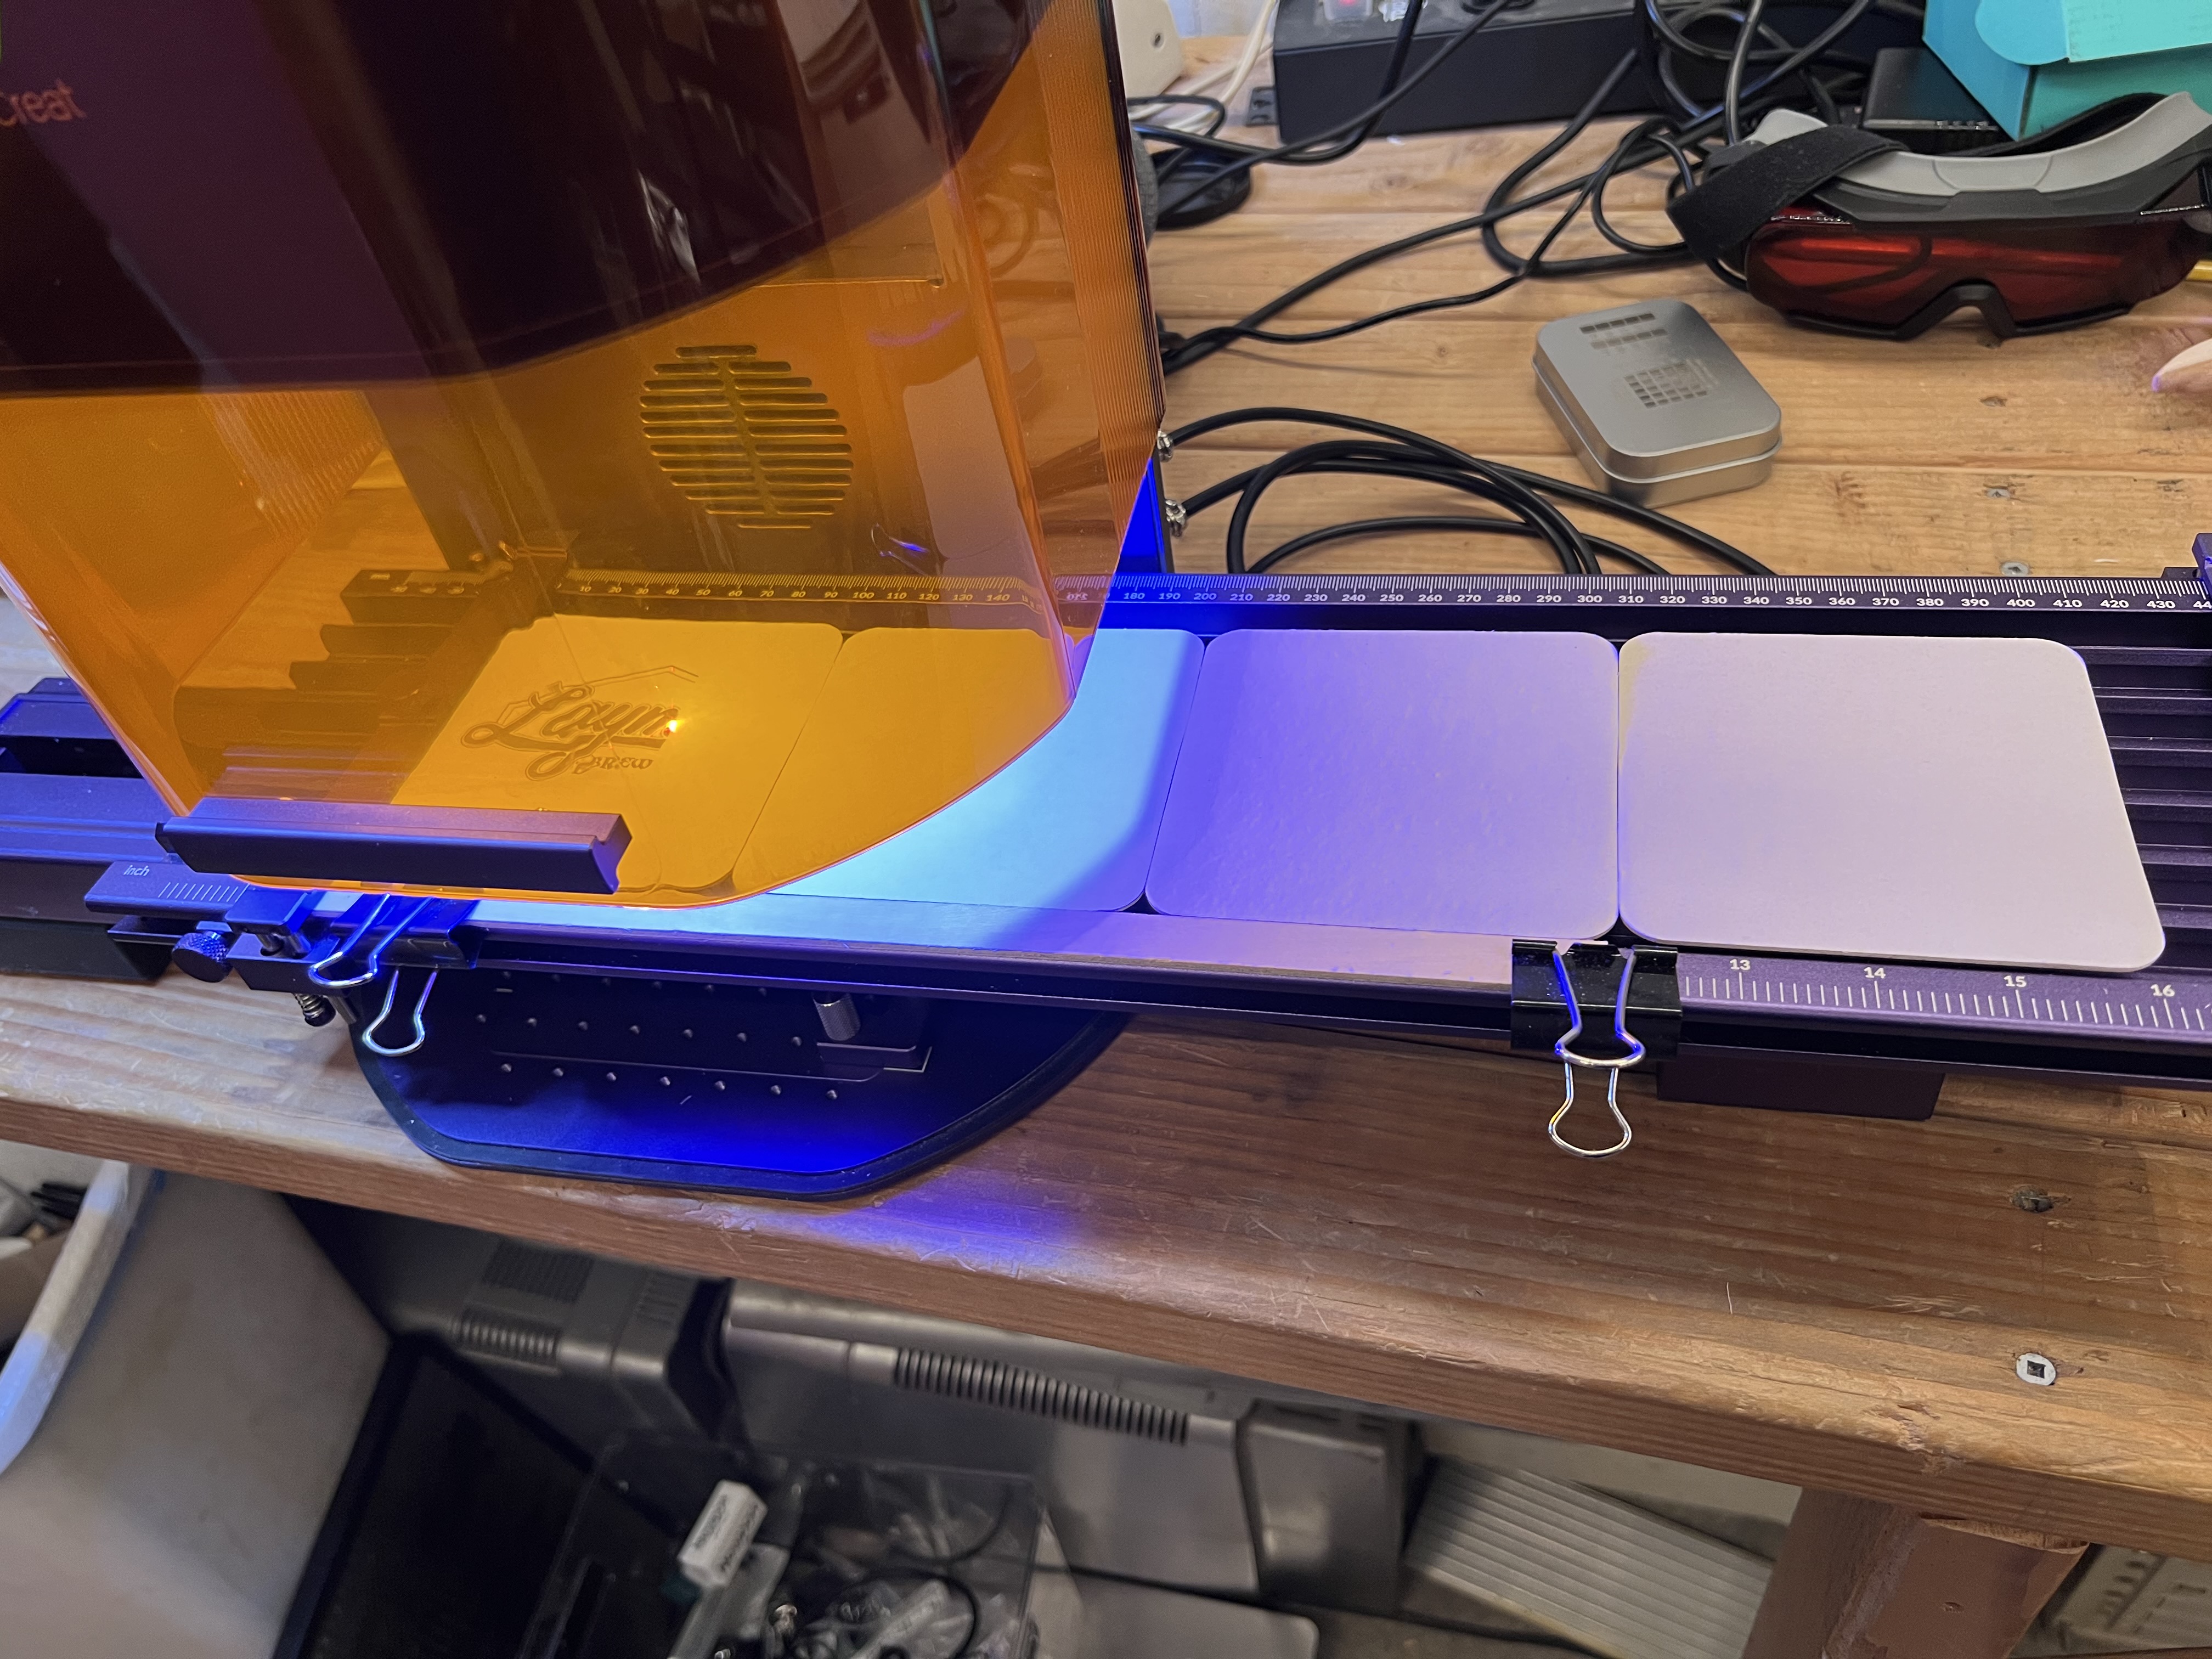
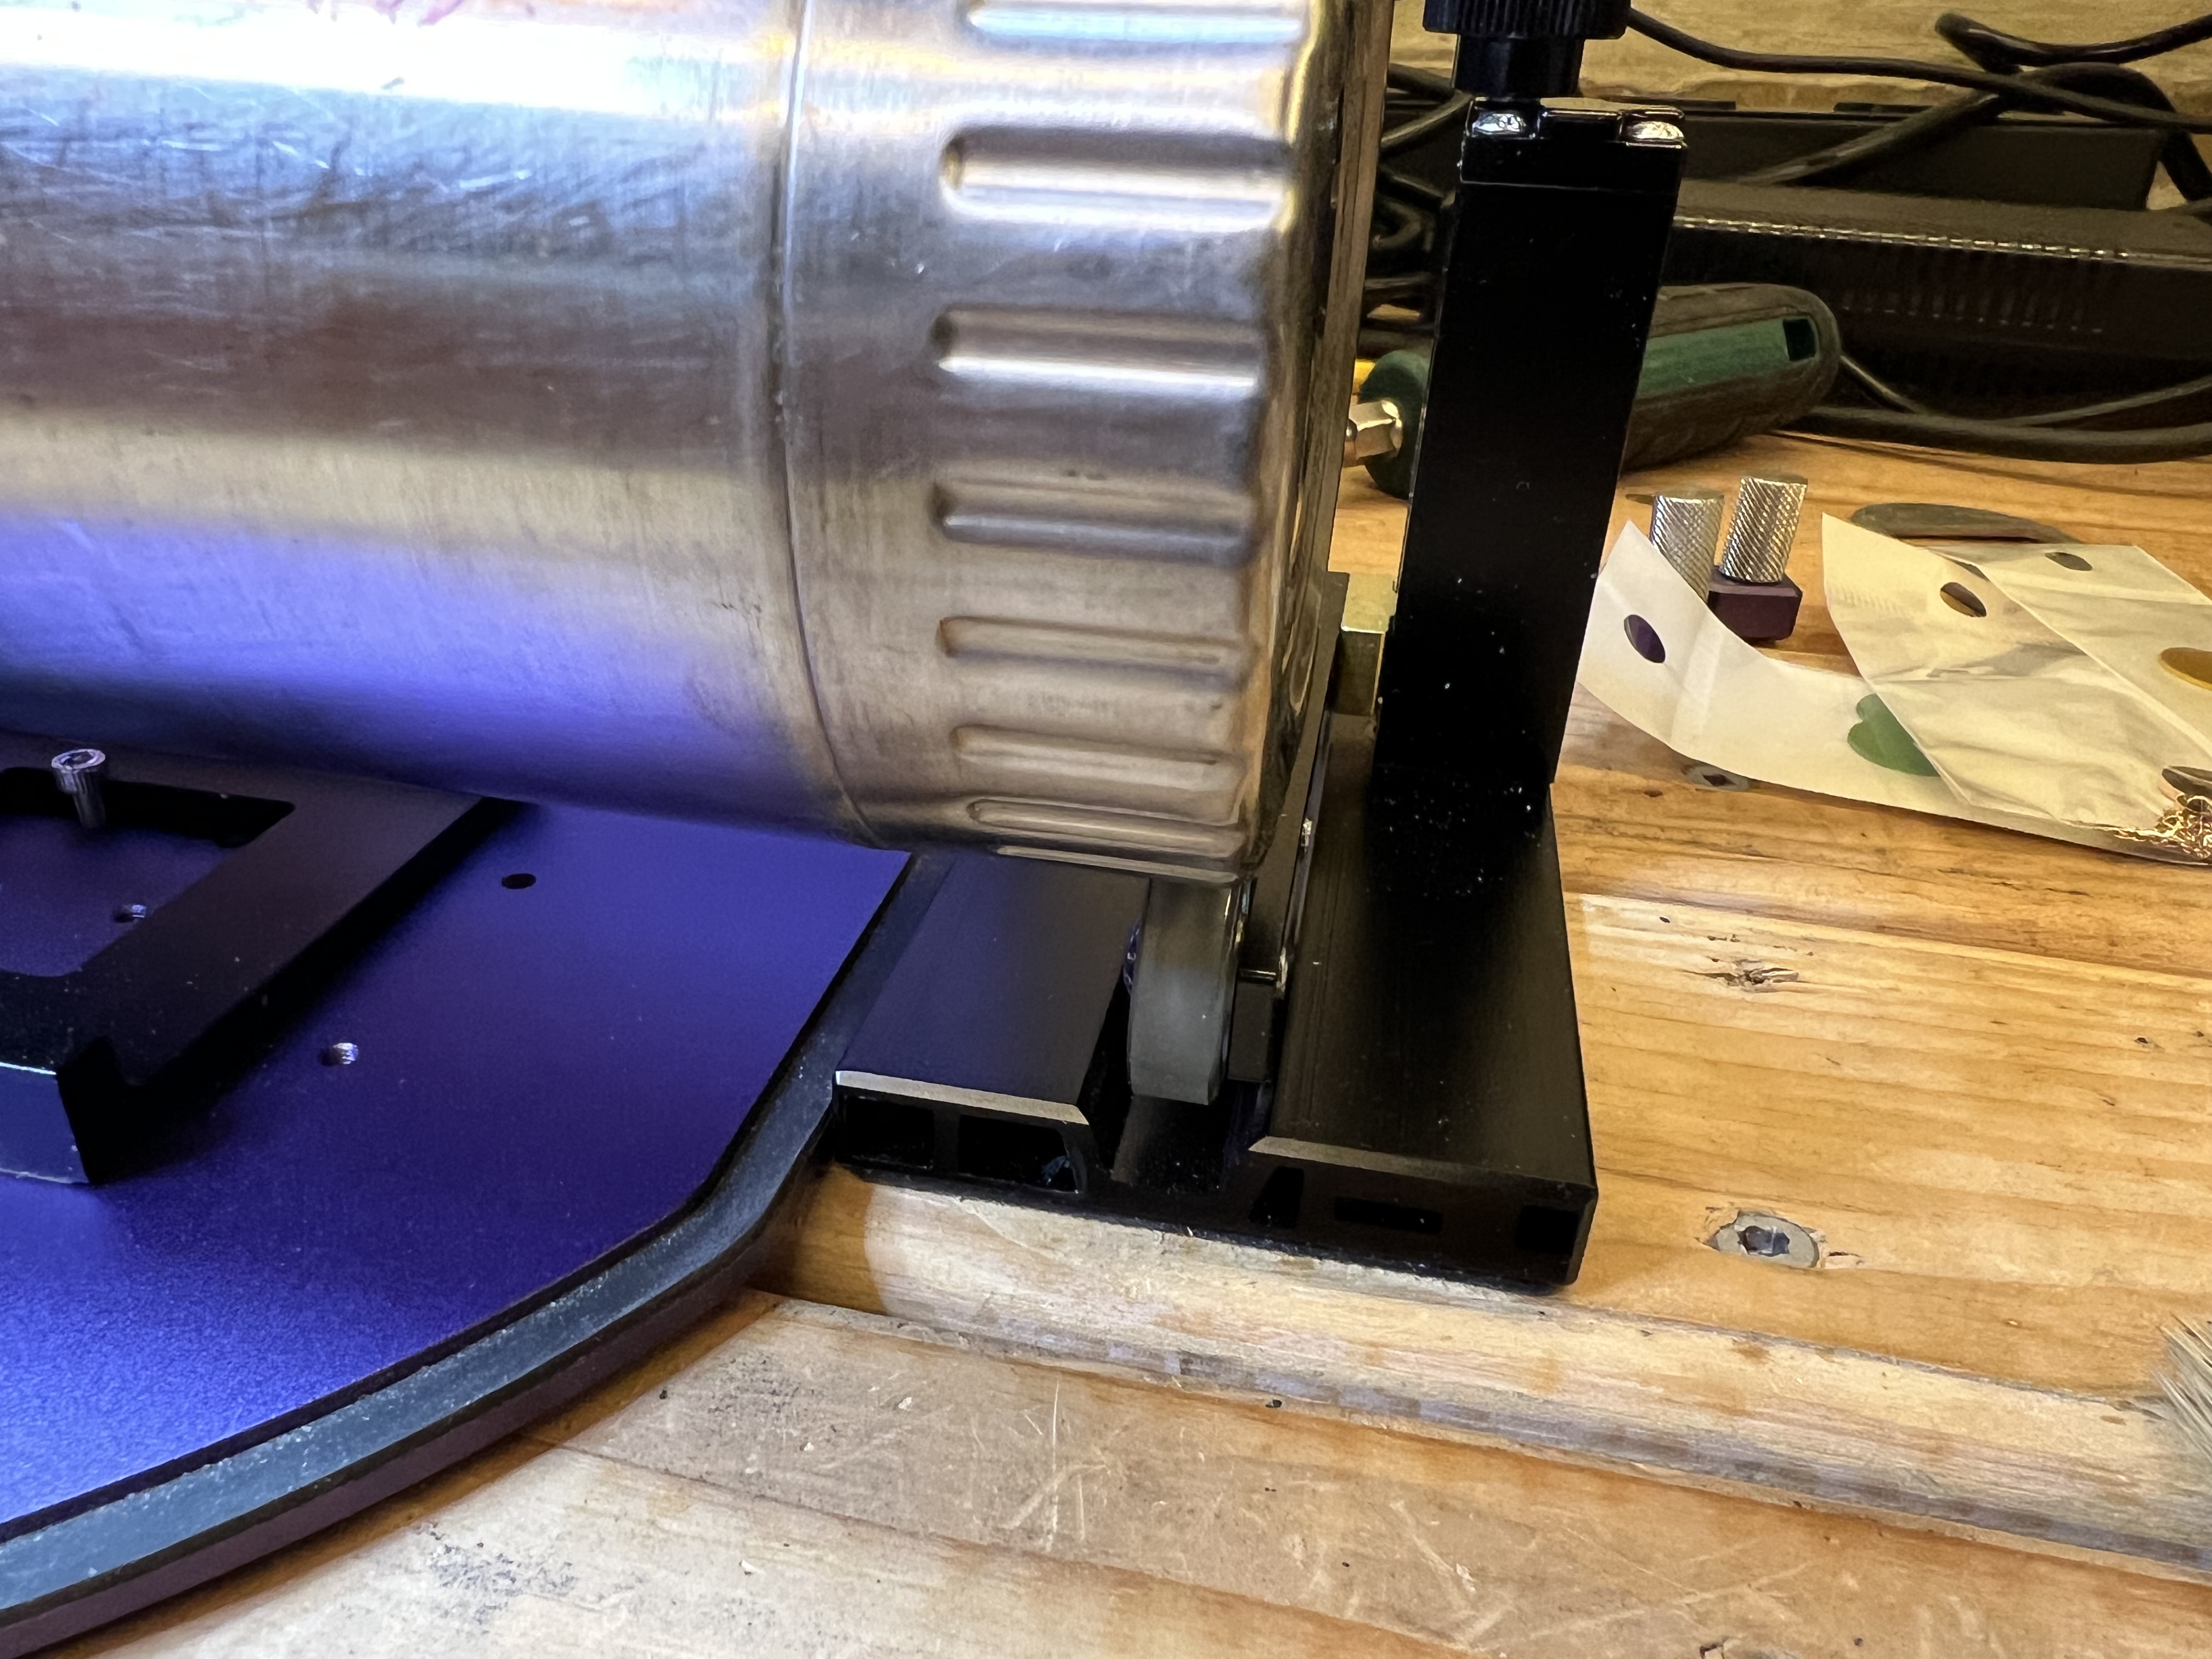
Let’s look briefly at the sliding table. I use the optional sliding table for batch runs all the time. Below it’s set up for doing 4 coasters at a time.
I put 4 blank coasters on the table, start it up and it merrily chugs along for about 10 – 15 minutes doing all 4 of them. Then I reload more blanks into it and start it all over again. While it’s chugging along doing the batch I’m usually working on artwork for the next batch of coasters or some other project.
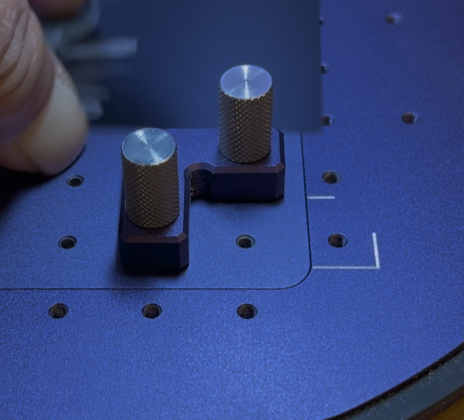
Installing it is about as simple as it gets. Over there on the left you see one of 2 “L” brackets that are included with the laser that screw down into the holes you see on the baseplate. Not only do they serve as makeshift guides to help place material on the bed, they are also used to anchor down the sliding table. The two brackets are screwed down to fit in the white painted line shown in the lower right corner, and in a second one in the upper left corner on the base. Then the sliding table has corresponding holes in its base. Just fit it down over the top of those knurled knobs, plug two cables into the back of the Lumos itself, and it’s ready to go. Takes all of two minutes to install it or remove it as needed.
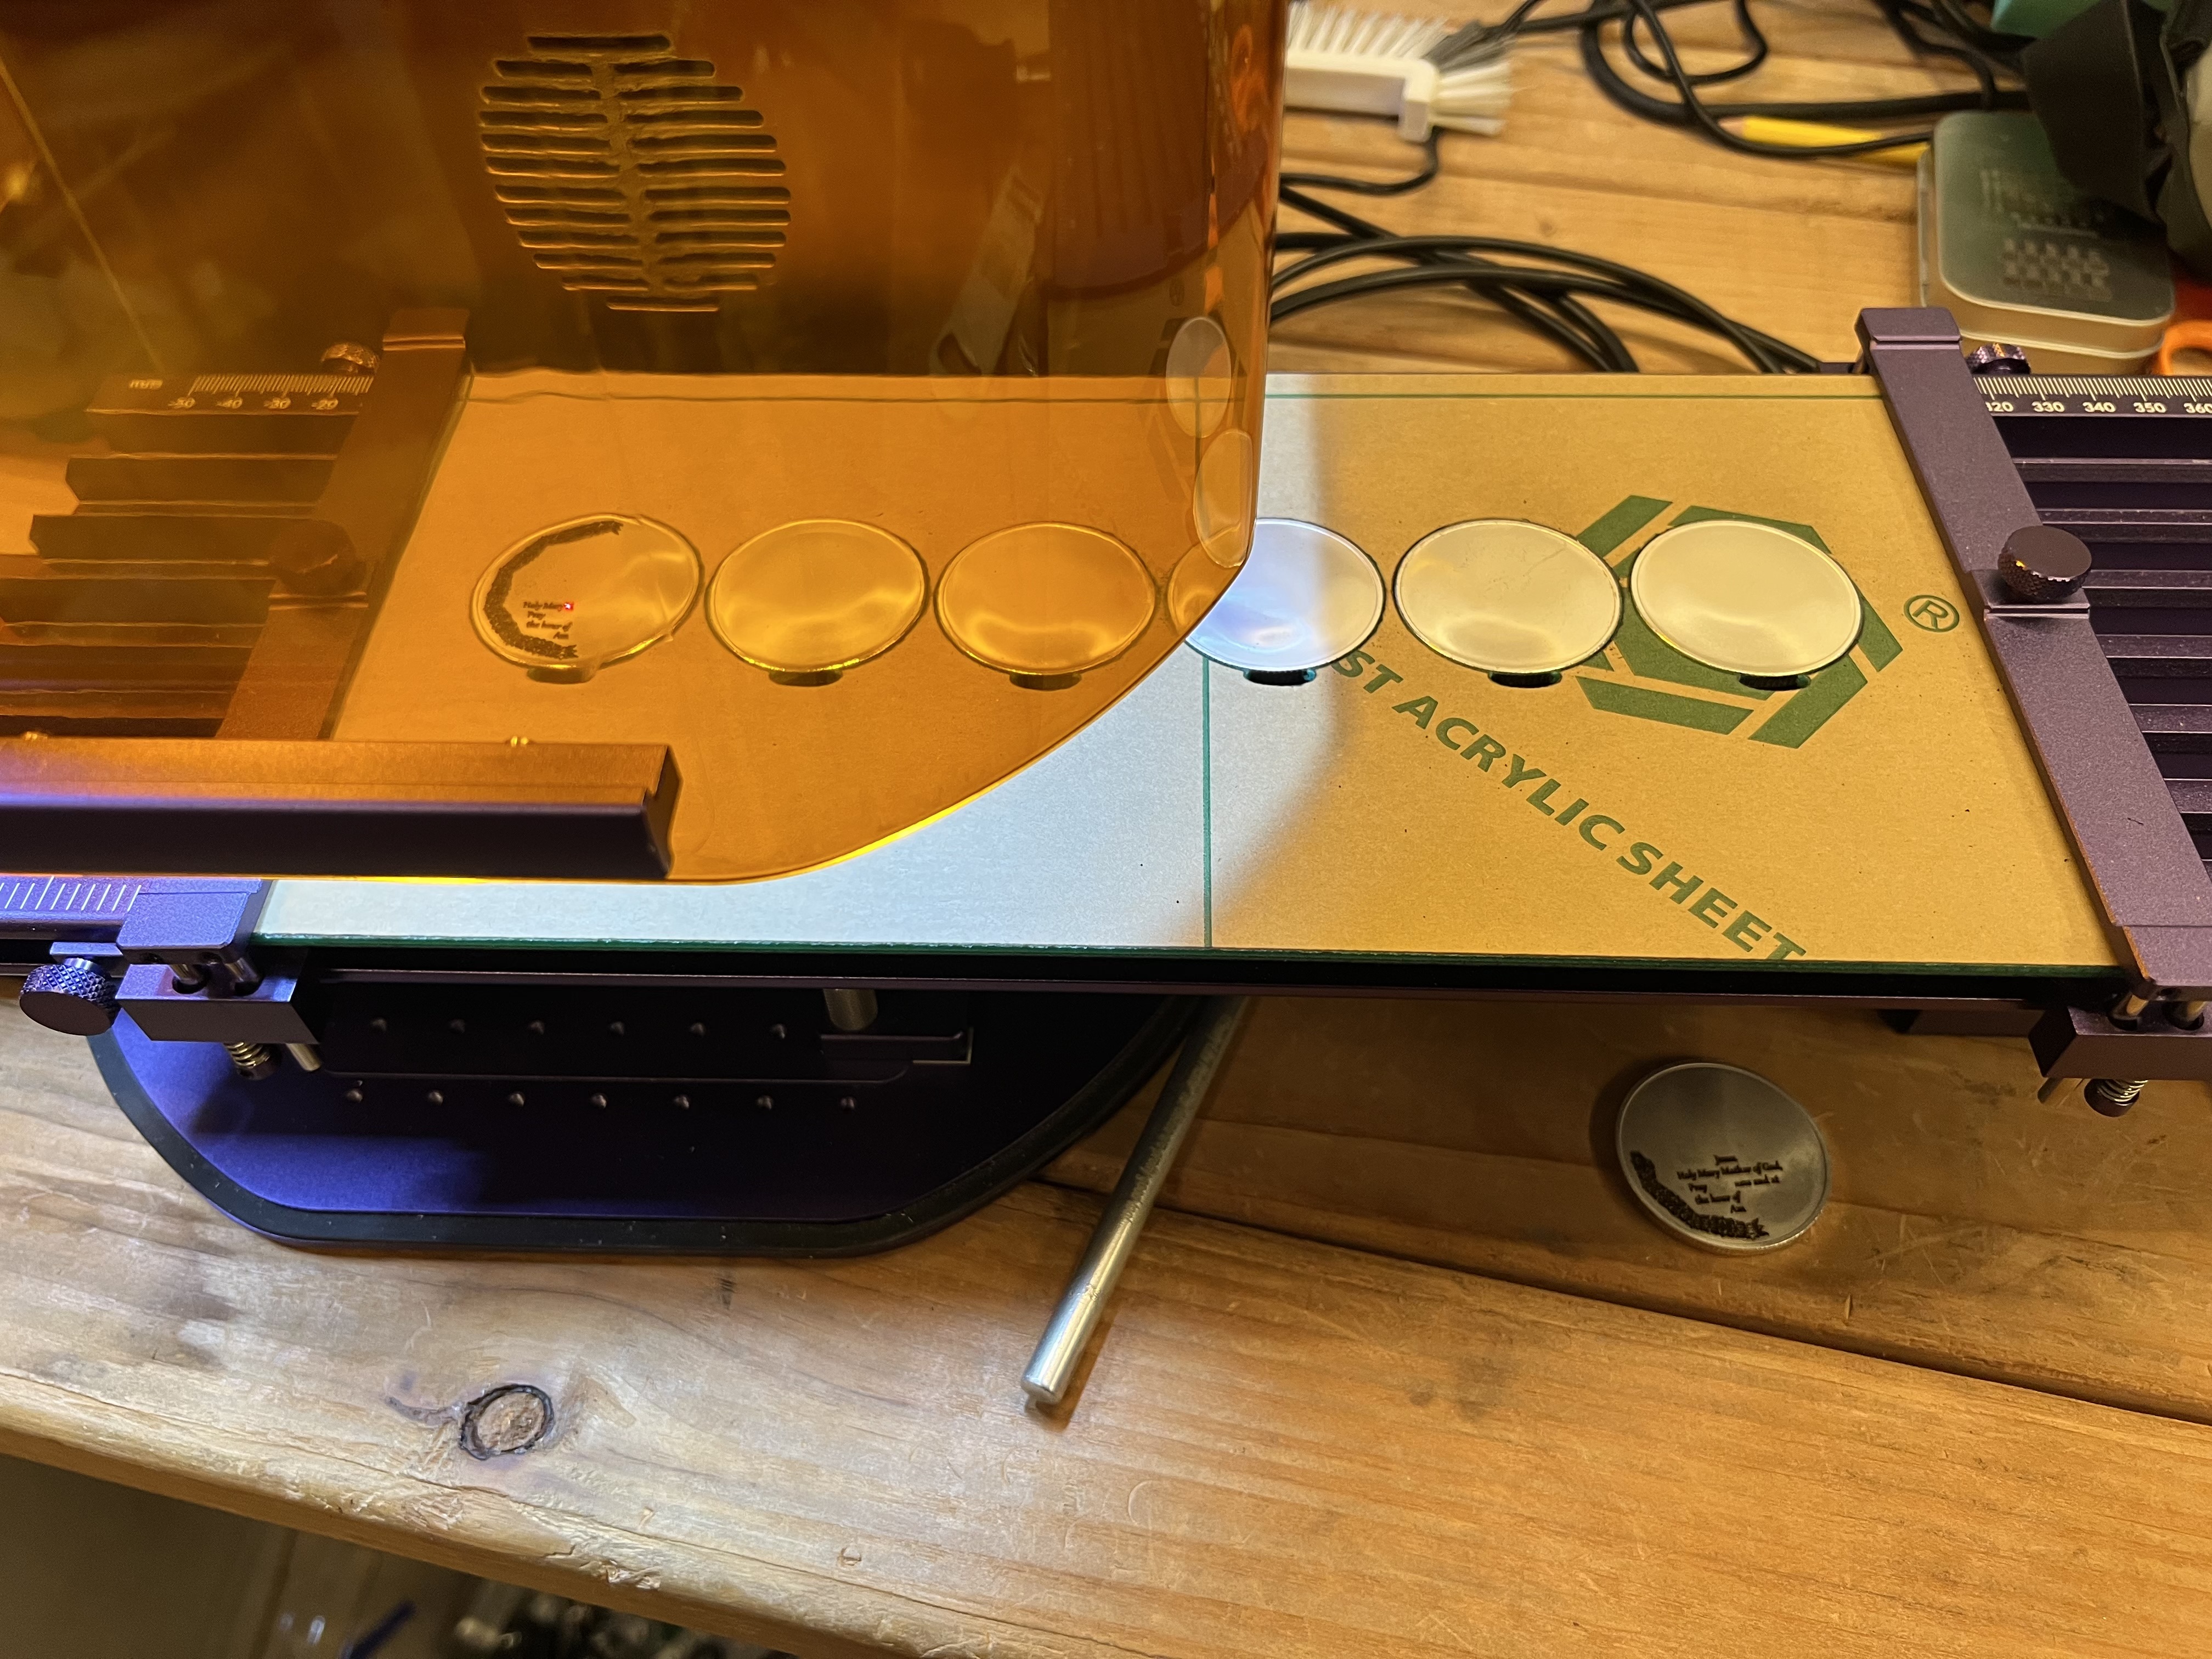
I also use the sliding table with jigs I make myself (usually cutting them out of acrylic plastic or plywood on the Falcon) to hold small objects. or with guides clamped down to the edge of the table that I use for coasters. Below is a jig I cut from acrylic on the Falcon to do challenge coins 6 at a time.
I load 6 coins at a time into the jig, load the appropriate file and start it going. Engraving coins takes a long time though. Depending on how intricate the design is and how deep the engraving needs to be it can take well over an hour to do one side of all six coins. But since I’m working with non-flamable material I can just let it go while I do something else and I don’t need to actually be there the whole time.
The other optional tool you can get for this thing is the rotary tool and I have that too although I’ve only used it a couple of times.
Engraving things like cups, glasses, water bottles, etc. isn’t something I really do but I wanted to do a few items just to make sure it actually worked as advertised.
Unfortunately, unlike the sliding table which is extremely easy to install and use, the rotary is a pain in the neck. It has to be physically bolted to the base of the Lumos with 3 very small screws which you will immediately lose. I did. Fortunately there were extras included.
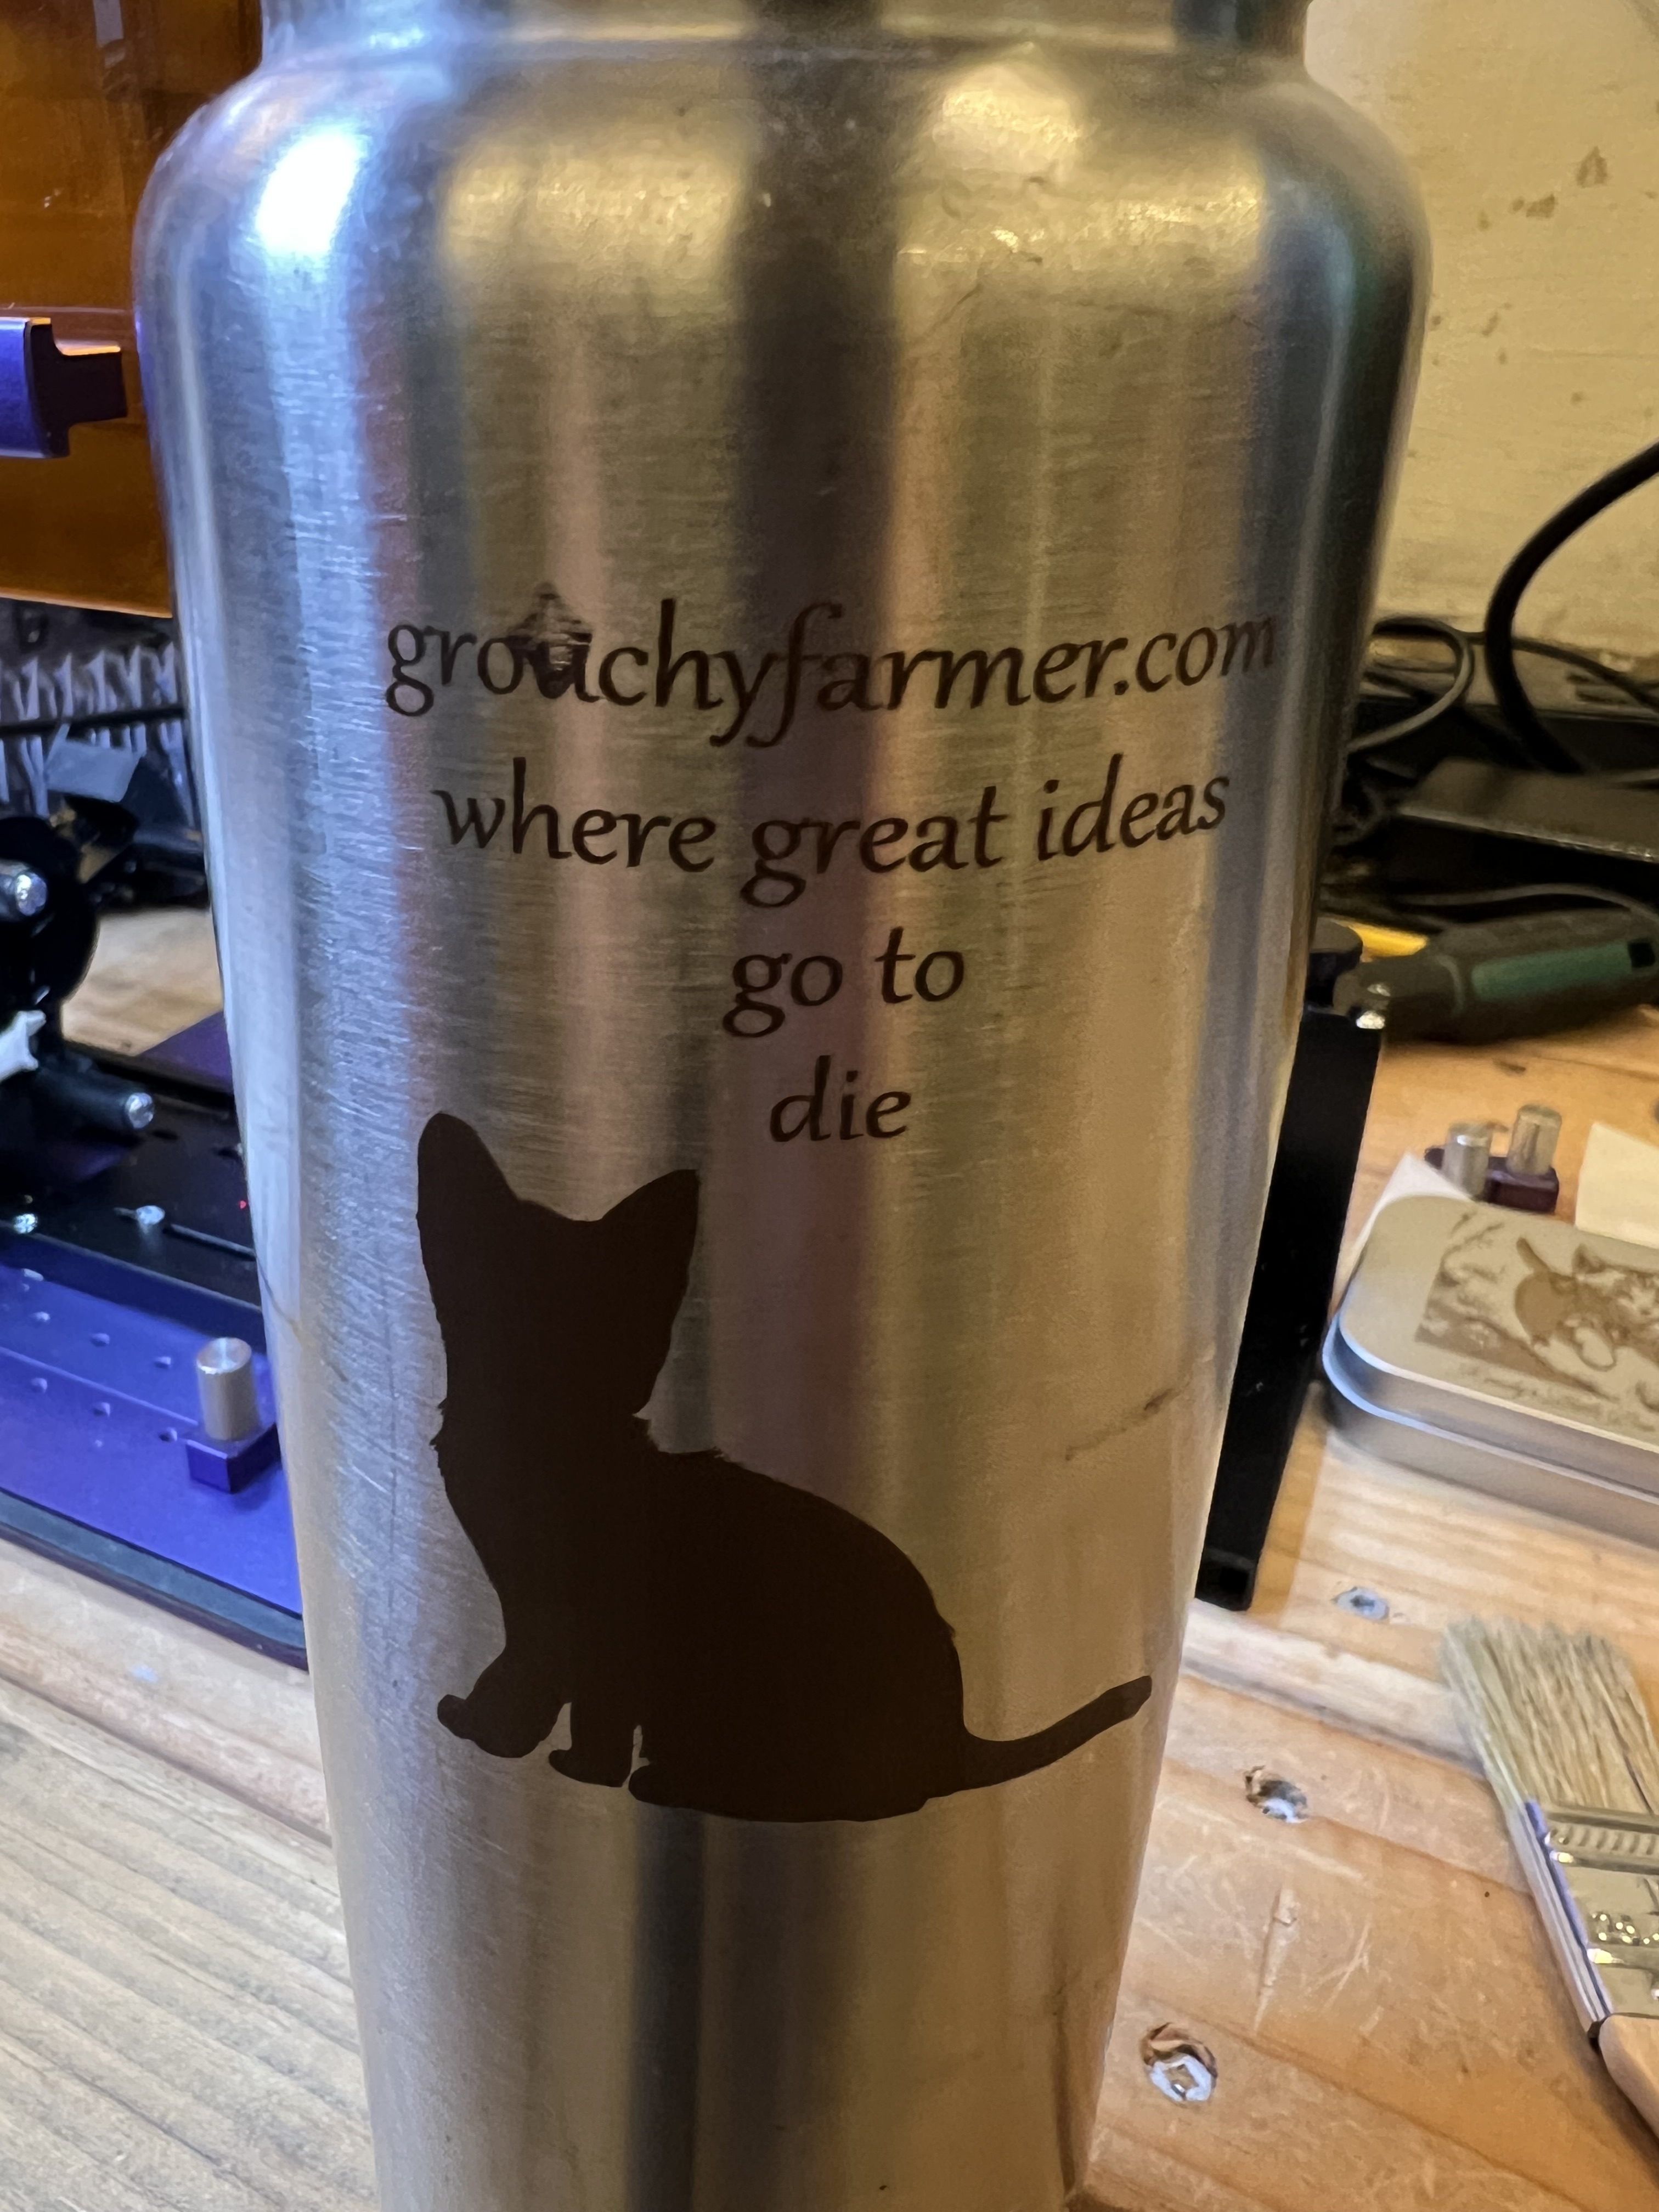
It does work well, however. I tried it just this afternoon using the old stainless steel water bottle I carry on the bike. The kit with the rotary tool includes a height adjustable rest with rollers to support the end of whatever it is you’re trying to laser which was absolutely necessary or the bottle slipped enough in the jaws of the tool to get out of position.
The blotch over the “u” in grouchy is from a defect in the surface of the bottle, not from some kind of glitch from the Lumos.
Once I had it set up it worked quite well. I had no issues with it. Basically it works just like any other rotary tool so if you’ve used one before with a different laser using this one isn’t going to be a big deal.
One thing you are supposed to be able to do is take the top off the sliding table, attach the rotary tool to it somehow, and then then clamp that whole conglomeration to the base of the Lumos and use it to making engravings up to 0ver 400mm long on lengthy round objects, with the rotary tool rotating as needed. and the sliding table moving the whole thing left to right as necessary. One of the advertising videos Wecreat has shows them engraving almost the entire length of the barrel of a baseball bat.
Now that’s a neat trick but me, being the 3rd laziest person in the state… Well I couldn’t work up enough ambition to go through all of the work of half dismantling the sliding table, attaching the rotary to it and then trying to test all of that. I’ll just take their word for it that it works and be done with it.
Overall the Lumos has been excellent. It does exactly what it’s advertised to do and it does it pretty darn well. I’m very pleased with it so far.
I want to talk specifically about metal engraving for a few minutes too. I’ve been using laser engravers for years, but I’ve only had diode lasers that couldn’t engrave metal before, so this was something entirely new to me.
Something like that metal box up there that I pictured doesn’t take very long, a few minutes at most. But if you want to do highly detailed, relatively deep engravings for an object that will have to endure a great deal of handling and wear, it is going to take a long, long time. Let me show you what I mean. Here’s a 30 second clip of it engraving a coin:
See what I mean? When I was doing those coins I’d load up 6 of them in the jig, start it going and then go do something else for an hour and a half or so. All those videos you see on Youtube of people doing deep, intricate engravings in just a few seconds? Sorry, just isn’t happening. Those videos are speeded up enormously. Until you get into lasers in the $4.000+ range you can plan on waiting a long, long time to do a deeply engraved, intricate design on something like a coin.
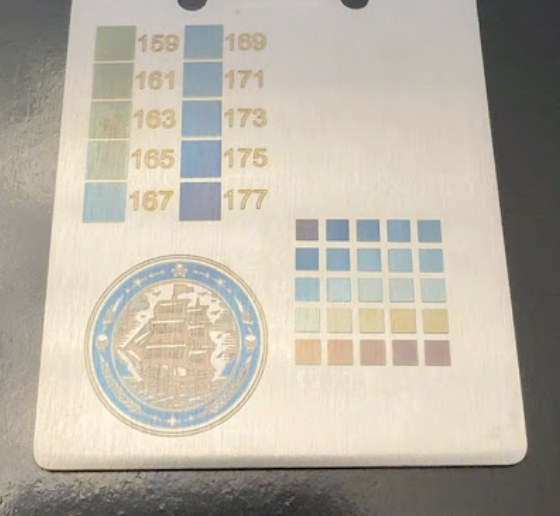
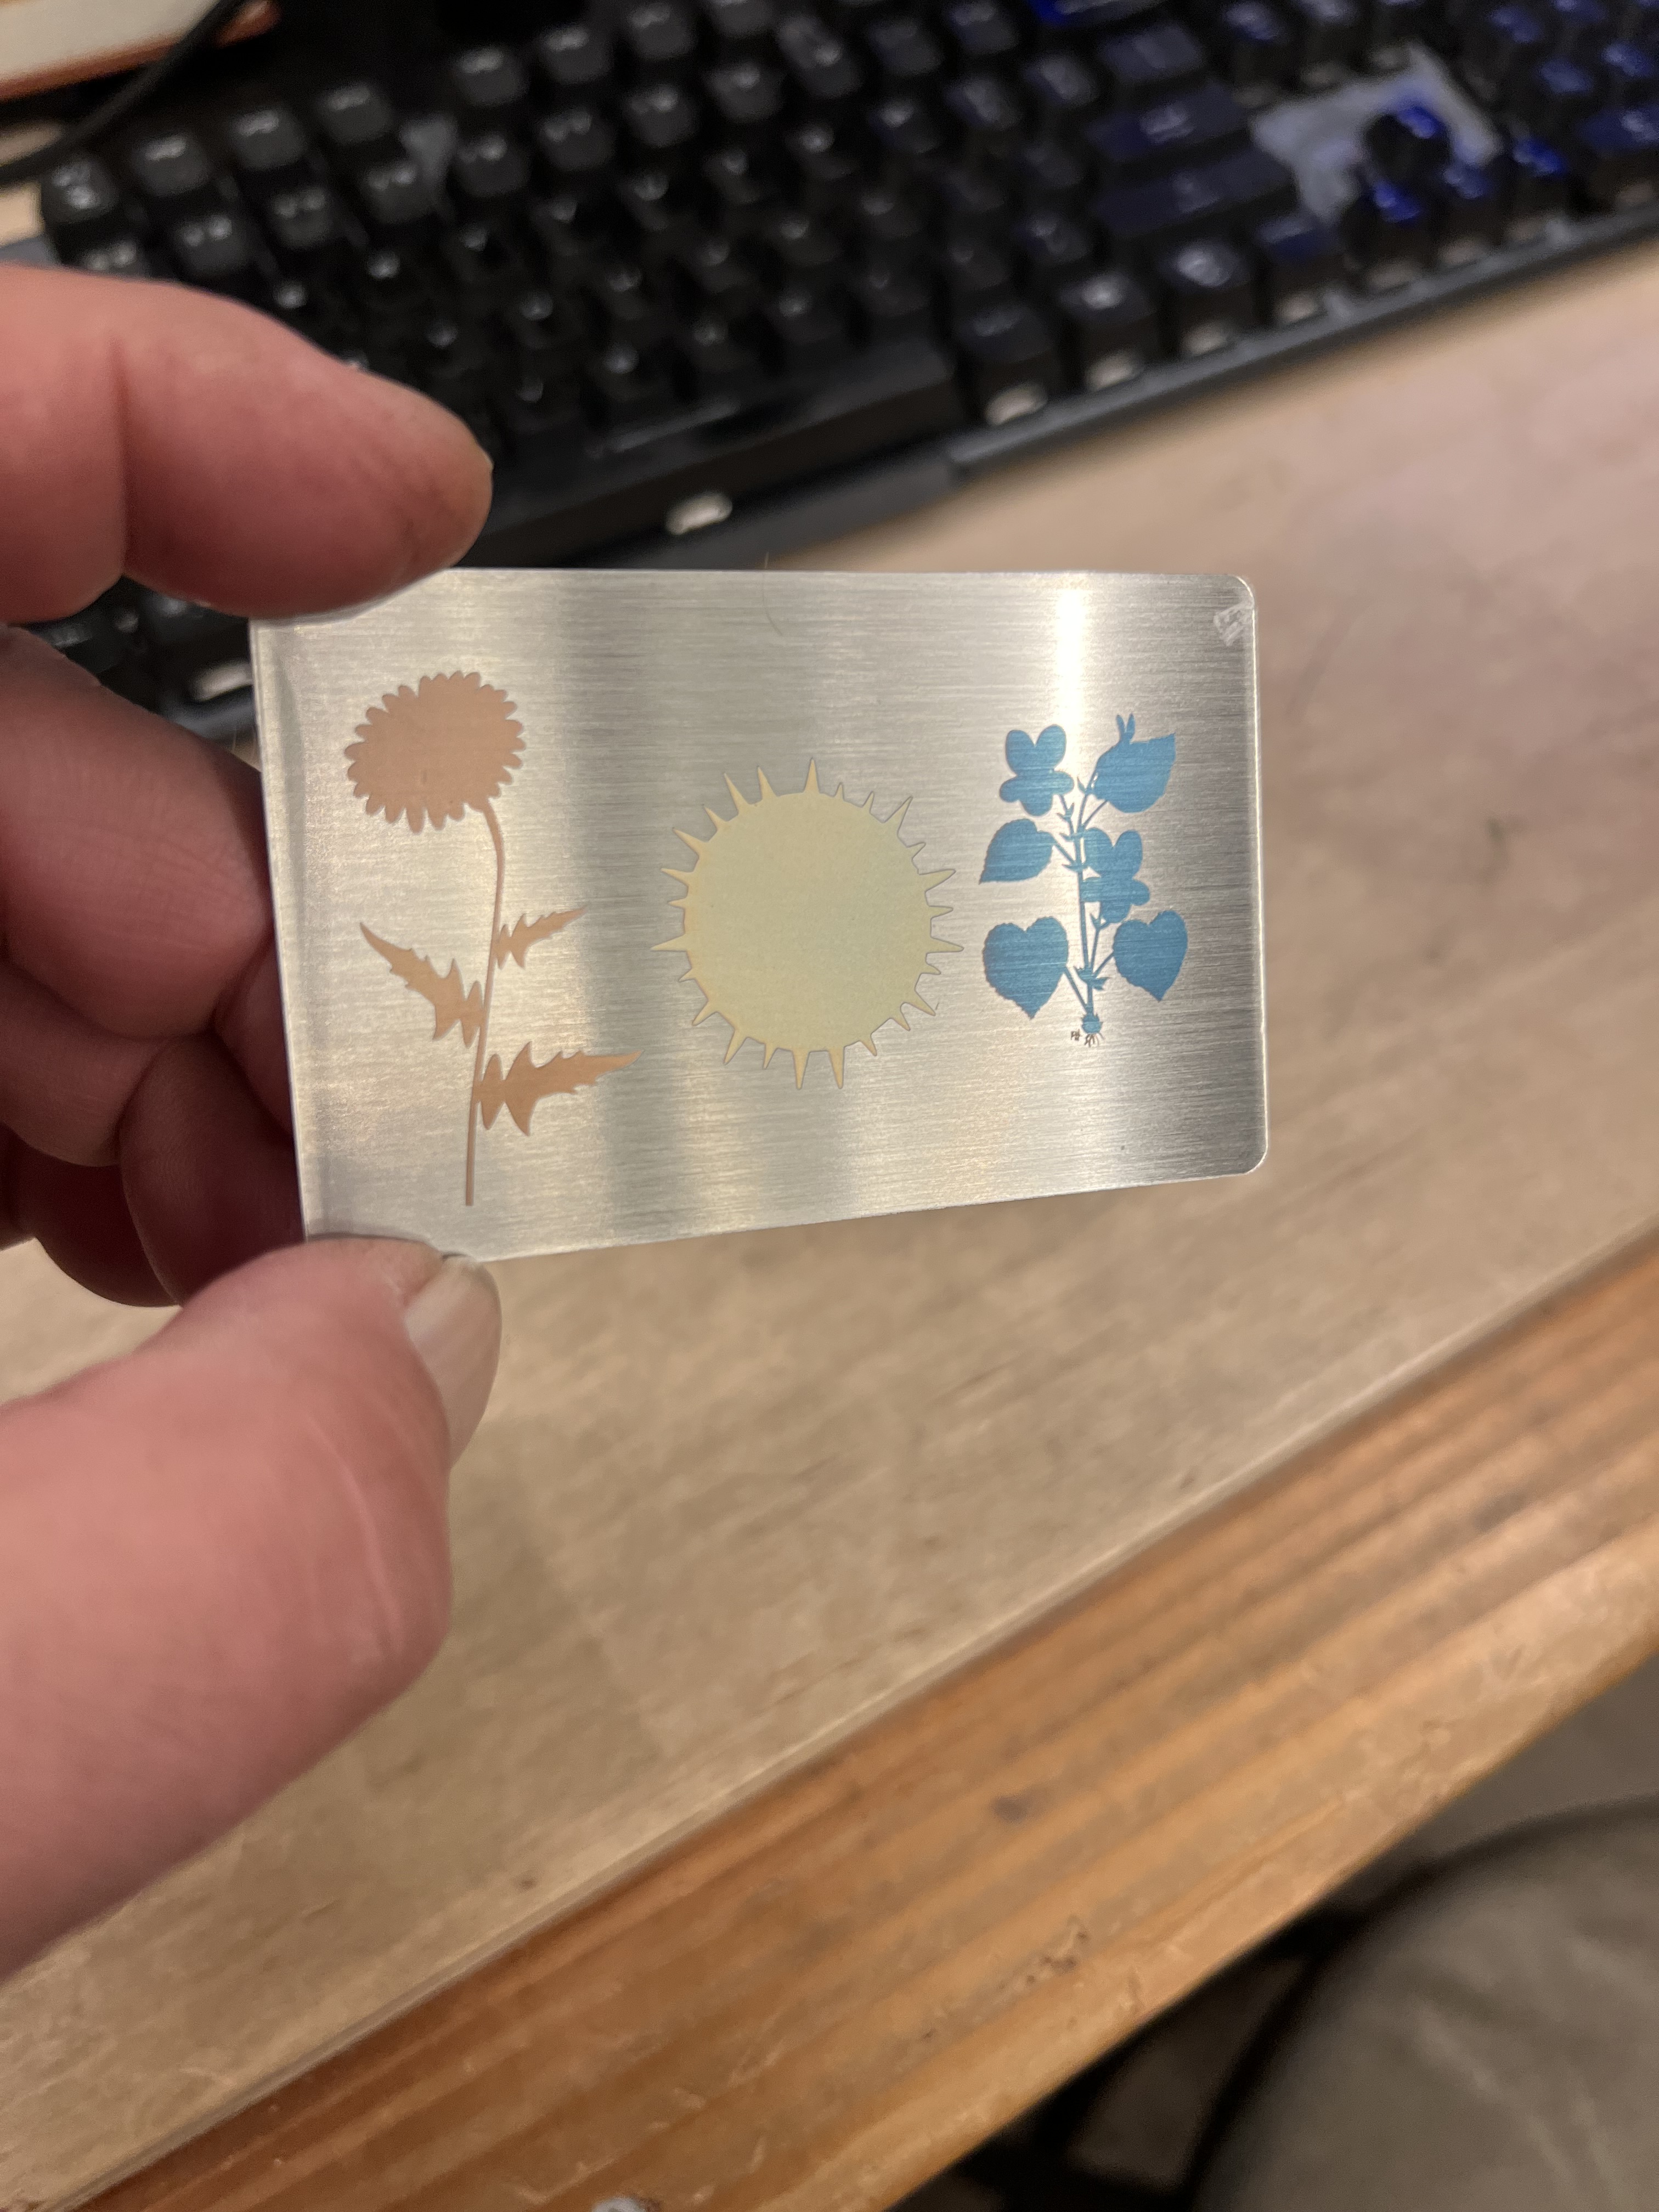
The other thing I want to talk about is that there has been a huge amount of hype with the Lumos and other IR laser engravers about being able to do color engravings on metal, usually showing you pictures like the one over there on the left. If you follow some of the “reviewers” and “creators” or whatever on Youtube, you’ve been led to believe it’s that it is wildly popular with customers, and that it is easy to do stuff like this. It isn’t. IMO it is mostly an interesting gimmick and I had a hell of a time trying to get it to work consistently.
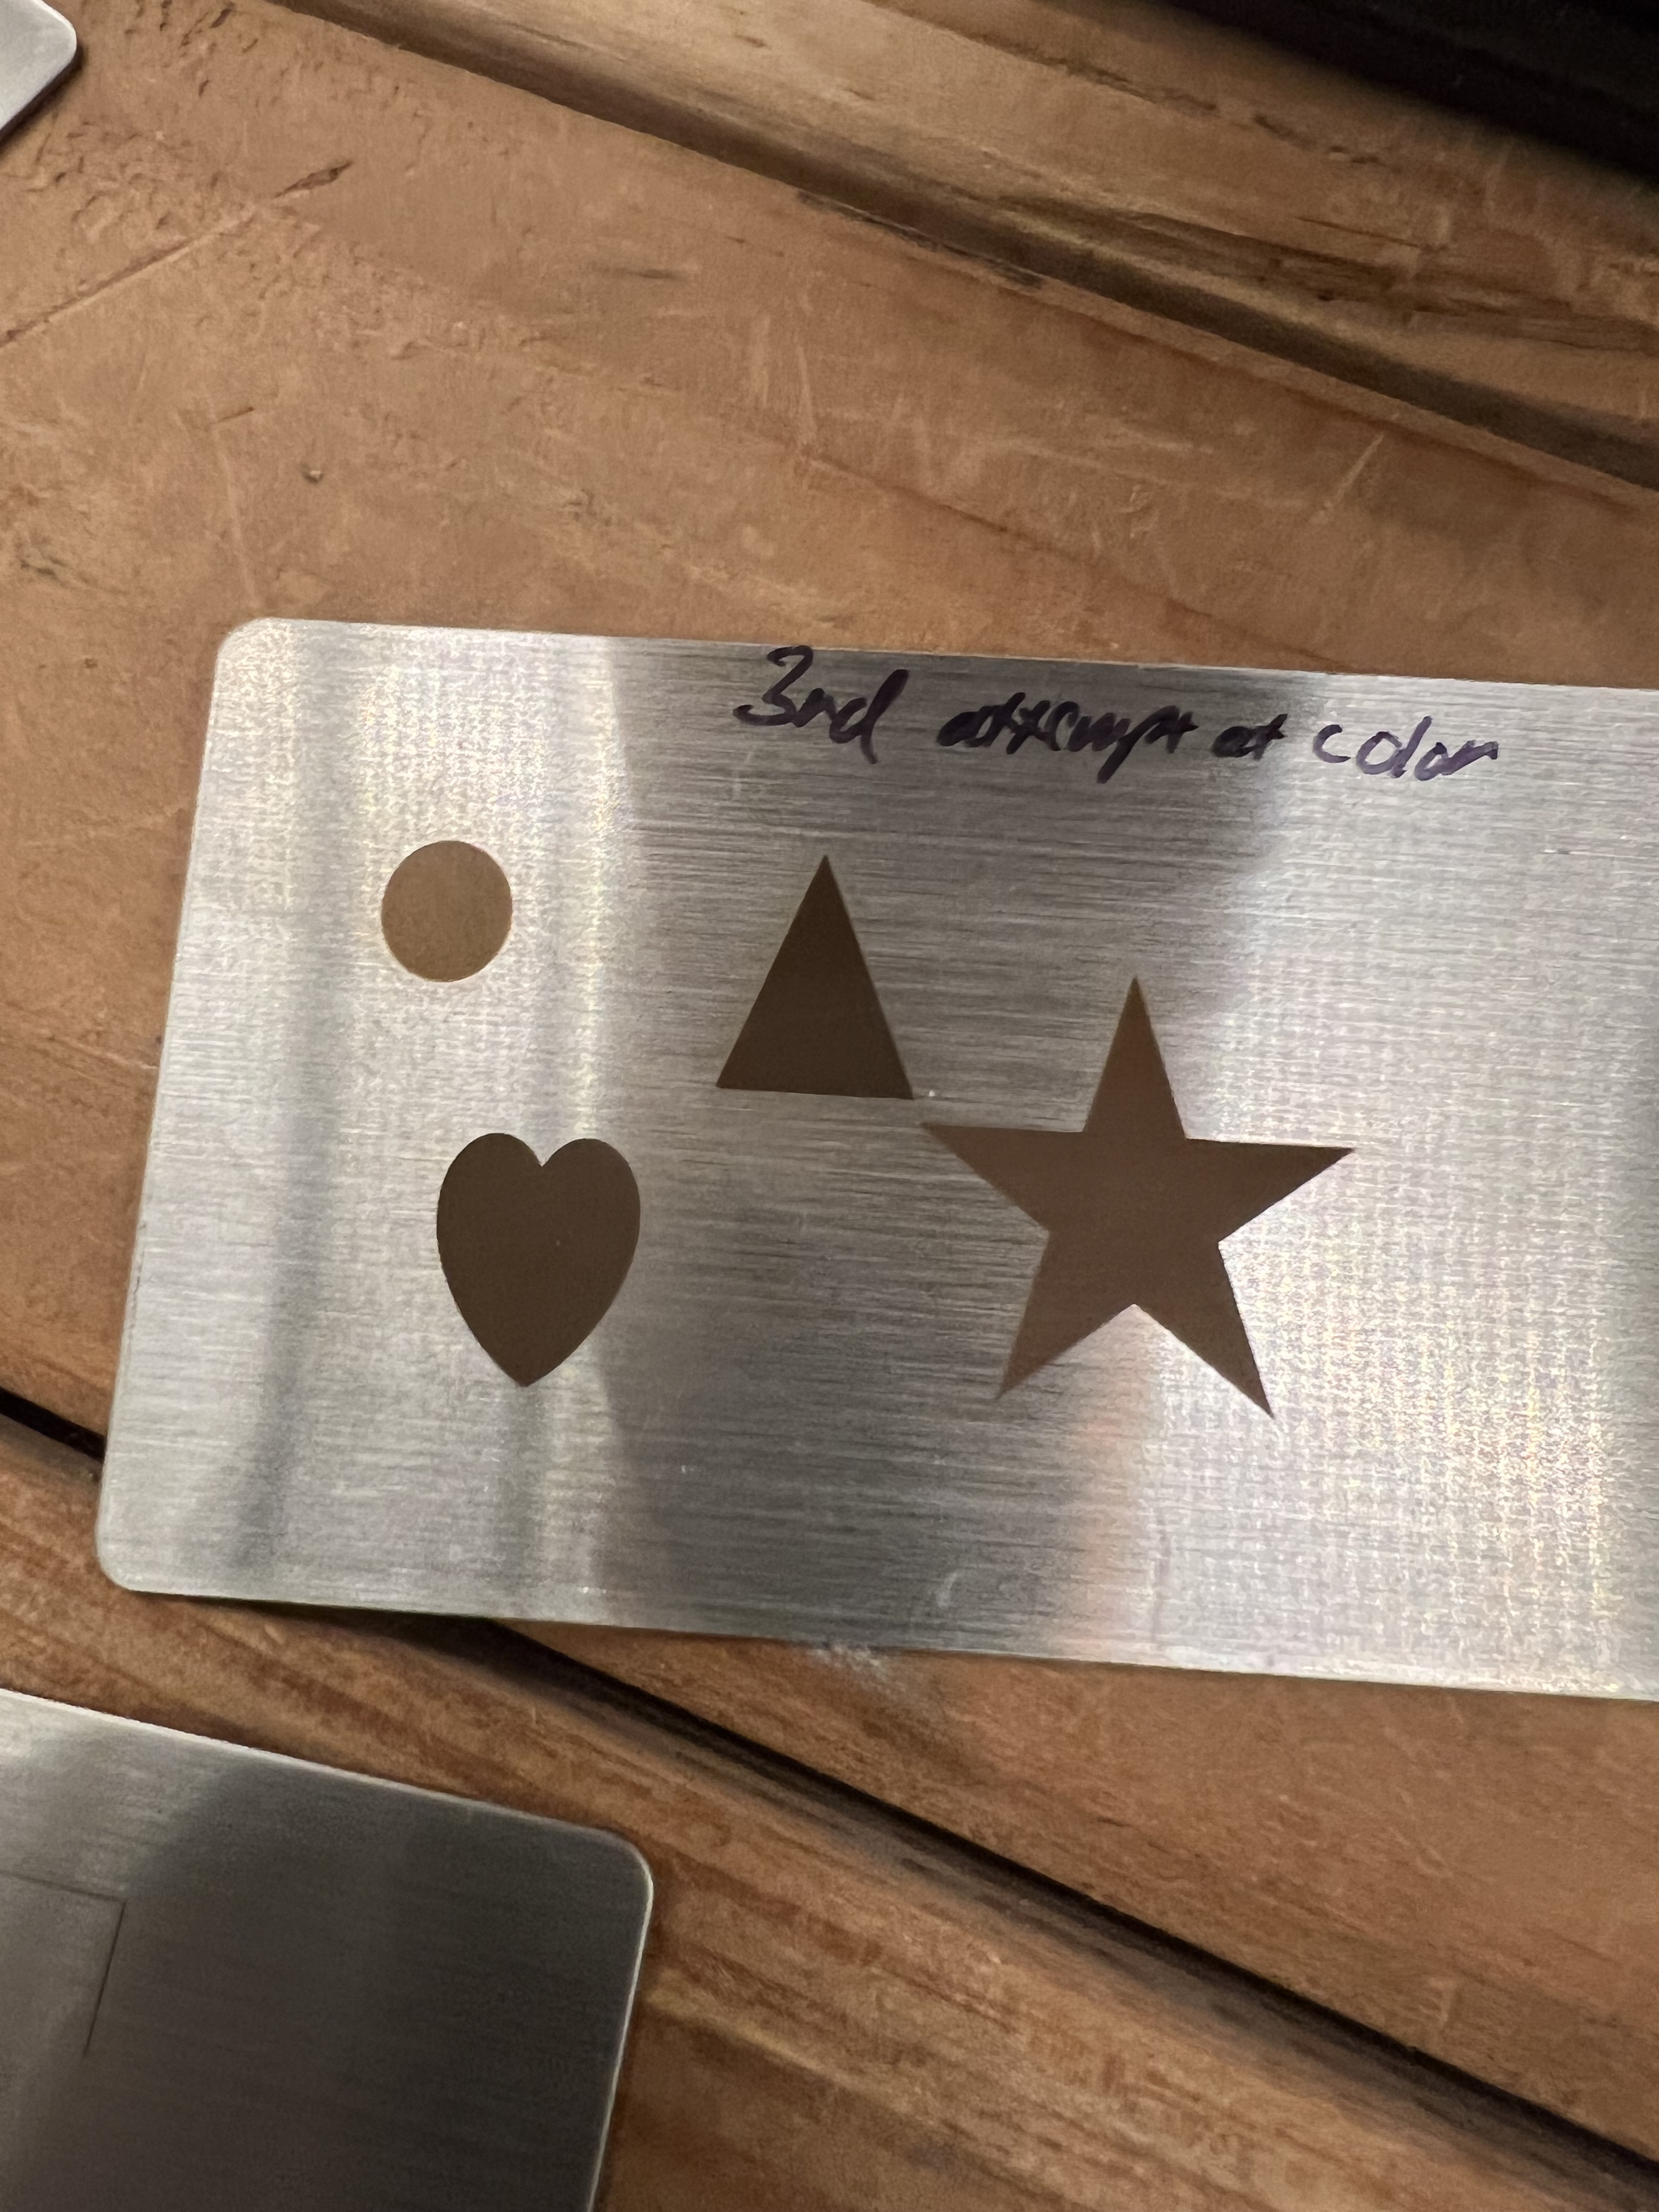
I have gotten this to work and one of my successful experiments is up above. But I burned through a dozen or more of those stainless steel cards before I got results like that. And even that simple design took something like 20 minutes to crank out. More often than not, my attempts to get color turned out looking more like the image over there on the left. Lots of dull browns and grays.
And even more interesting is that these brushed stainless steel cards and a brushed stainless steel bottle opener I had laying around from another job were the only pieces of metal I was able to do this with. Every other attempt using brass, aluminum, copper, and even other pieces of stainless steel were complete failures.
Perhaps I’m doing it wrong, perhaps I don’t really understand how it works well enough to get decent results, but my experiments with getting color have not been encouraging.
And when they have worked the results were never as brilliant as the ones I’ve seen in the ads and reviews, and the process took so long that it wasn’t worth the effort. If you’re doing this as a hobby and aren’t under any kind of time pressure, hey, it’s fun to play with. But if you’re trying to crank out products for sale? The color effects aren’t as brilliant in real life as they appear in the videos. You need to put some kind of clear coat over the top or it will start to fade and even corrode (yes, even stainless steel will corrode over time). And even worse it takes so long to do that I don’t see how this would be cost effective for commercial production.
So let me sum this up. The Lumos is a great little laser. It’s fast, compact, does a nice job. The resolution is excellent. It’s much, much faster than my Falcon. And the price isn’t bad at all. I just saw that it’s down to around $1,000 now, $200 less than mine cost me.
There are definitely disadvantages to lasers of this type, however. There is the small size of the working area, for example. There is the issue of fires to deal with if you’re going to try to cut material with it. I’ll come to that in a minute. When engraving metal it can be very slow. But otherwise I like it a lot and it gets used here constantly.
The Problems
Does it have “issues”, as they say? Definitely.
Let’s talk about fires. Yes, actual, real fire. Whenever you’re using a laser on flammable materials like wood, paper, fiberboard, etc. there is always a danger of fire. This is especially true with galvo style lasers which lack the air assist capabilities that most modern gantry style lasers have.
When trying to cut flammable materials the Lumos can and will start things on fire. It has a built in fire detection system that will shut down the laser, but that’s all it can do, shut off the laser. The burning material will continue to burn until you put it out.
This isn’t the really the fault of the Lumos, it’s just the nature of the beast, as they say. With the Falcon, because it has air assist, I can hit a piece of plywood at full power to cut through it without much risk because the air assist prevents charring and blows out any fires. But that’s not the case with the Lumos. The only way I’ve found to reduce the risk of fire is to use lower power and multiple passes. While it can cut thin wood, etc. this is not the kind of laser you want if you’re going to be cutting a lot of flammable materials.
Sidenote: Smoke and fumes are always an issue with lasers. The smoke and fumes generated from using lasers with almost any material is dangerous and can be highly toxic. Plus, of course, it will set off every smoke detector in your house. The Lumos has a very powerful extraction fan that blows into a large flexible pipe that you can either shove out a window or attach to an extraction fan, like I do. Or you can feed it into a filtration system of some sort. But you absolutely have to do something to deal with the fumes. Unlike other lasers I’ve worked with, the extraction fan on the Lumos is powerful enough that it does a reasonably good job even with the cover open.
As long as I’m on the subject of safety I need to talk about the dangers of laser light to your eyes. Exposure to laser light or radiation can and will damage your eyes. Most of these modern lasers come with some sort of enclosure that has plastics that block dangerous levels of laser radiation. But in the case of the Lumos it is necessary to operate it with the shield raised up in order to use the sliding table or the rotary tool. So you are absolutely going to need eye protection. And unlike every other laser I’ve bought, the Lumos doesn’t come with any. No glasses, no goggles, nothing.
Unless you already have safety glasses, you’re going to need to go buy some if you’re going to use the Lumos with the shield up.
Other things… As I said before I don’t like how the rotary tool attaches to the frame. It bolts not to the actual frame of the Lumos but to the small removable plate that’s inset into the base. That means the rotary tool can be tippy, which is something you absolutely do not want. It’s also very awkward to try to get those fiddly little screws attached to the base. They really need to come up with a better way of attaching it.
My biggest complaint about the Lumos isn’t the hardware, though, it’s the Wecreat software that comes with it. The software has a lot going for it, especially if you’re a “member” or whatever they call it and the AI functions become active. (I suspect that they’re going to demand I pay some kind of subscription fee once my initial membership expires to keep the AI functions working. At this point I’m not sure if that’s going to be worth the expense or not.)
The AI functions are actually quite good. It can generate complete images based on whatever you type in, and it does a reasonably good job of it. The AI can help to “process” imported photos to help get better results as well.
The software does everything it needs to do, pretty much, but it is unnecessarily awkward to work with. Different functions and settings that should all be gathered into one place are scattered all over in different pop up windows and menus for no rational reason I can come up with.
The font search for the text tool doesn’t seem to work at all. I could type in the exact name of a font exactly as listed in the list, and it couldn’t find it. I’d have to scroll through an apparently endless list of fonts to find the one I wanted.
The materials settings were even more frustrating. You can bring up a list of materials and when selected it’s supposed to change the engraving/cutting settings to the ideal settings for that material. This is a common feature with the software that comes with most of these lasers these days. Only absolutely none of the recommended settings actually worked. None of them. I found myself suspecting they just copy and pasted the settings from a different one of their engravers and never bothered to see if they actually worked.
I ended up wasting a hell of a lot of material just experimenting to try to figure out the ideal settings for the materials I was using. If I went with what the software recommended, I’d get results that were so light they were almost invisible or, even worse, that literally started the material on fire.
Copy/paste of objects between different work spaces doesn’t work at all. Select an object in your currently active work space. Create a new work space and click “paste” and… nothing.
The most irritating thing I found with the software is that it doesn’t let you save your designs in any format other than Wecreat’s own proprietary format. You can work for hours designing a nice engraving, and then you can’t save it in a format that will work with a different laser. Even the Falcon from Crealty lets me export a design in .SVG format so it could be used elsewhere.
I’m hoping that a future version of the software fixes this. But at the moment anything that I design in the Lumos software can only be used with one of Wecreat’s lasers, it seems. Be aware of that if you do your own designs. If you only work in the Lumos’ software, you’re locked in. If you get another brand of laser or Wecreat goes out of business, all of the work you put in designing those engravings is going to be lost.
This isn’t a big deal for me because I do almost all of my design work in Photoshop or Adobe Illustrator. Then I export it to a .PNG or .SVG file and import that into the Wecreat software for actual use. But a lot of people, especially hobbyists, don’t have access to those tools and depend on the software that the laser comes with. If you use the Wecreat software to design engravings, you’re locked to the company. If the company goes out of business or if you want to switch to a different brand of laser, at the moment there seems to be no way to move your work over to a different machine.
Supposedly the Lumos is compatible with Lightburn, which is more or less the software package that most professionals and serious hobbyists use these days. I don’t have Lightburn and I’ve never felt a need to get it. I’m quite comfortable using the tools I already have to do basic design work and then import it into whatever software the laser I’m using comes with. However, if you’re planning on doing laser engraving for actual production work for a business, it is something you should look into.
And that’s about it. If I come up with anything interesting in the future while I’m working with this laser I’ll keep you informed.