So we got winter now? So it seems. This is what it looks like outside this morning. Sheesh – it’s way too early for this, but, well, this is Wisconsin so we never know what we’re going to see out there when we get up in the morning.
Wood Finishes – I’ve become disillusioned with the finish I used to like, which was a mixture of beeswax, tung and cedar oil. It put a beautiful finish on the pieces, but unfortunately it didn’t stay nice. After several weeks the finish started to get dull looking, even rather nasty. I was really disappointed with that because I liked the satin finish it left.
So I’ve been using a different technique. I make my own shellac and I use that as a base coat on the wood, scuff it with 0000 steel wool to smooth things down, then put down a coat of hard carnauba wax and buff it out at high speed. It’s a bit more work because I have to sand down the wood to a higher grit than I normally would. I used to sand up to a 340 grit, but for this to work I have to go up to 600 grit because the high polish will show even tiny defects. But so far the results have been pretty nice.
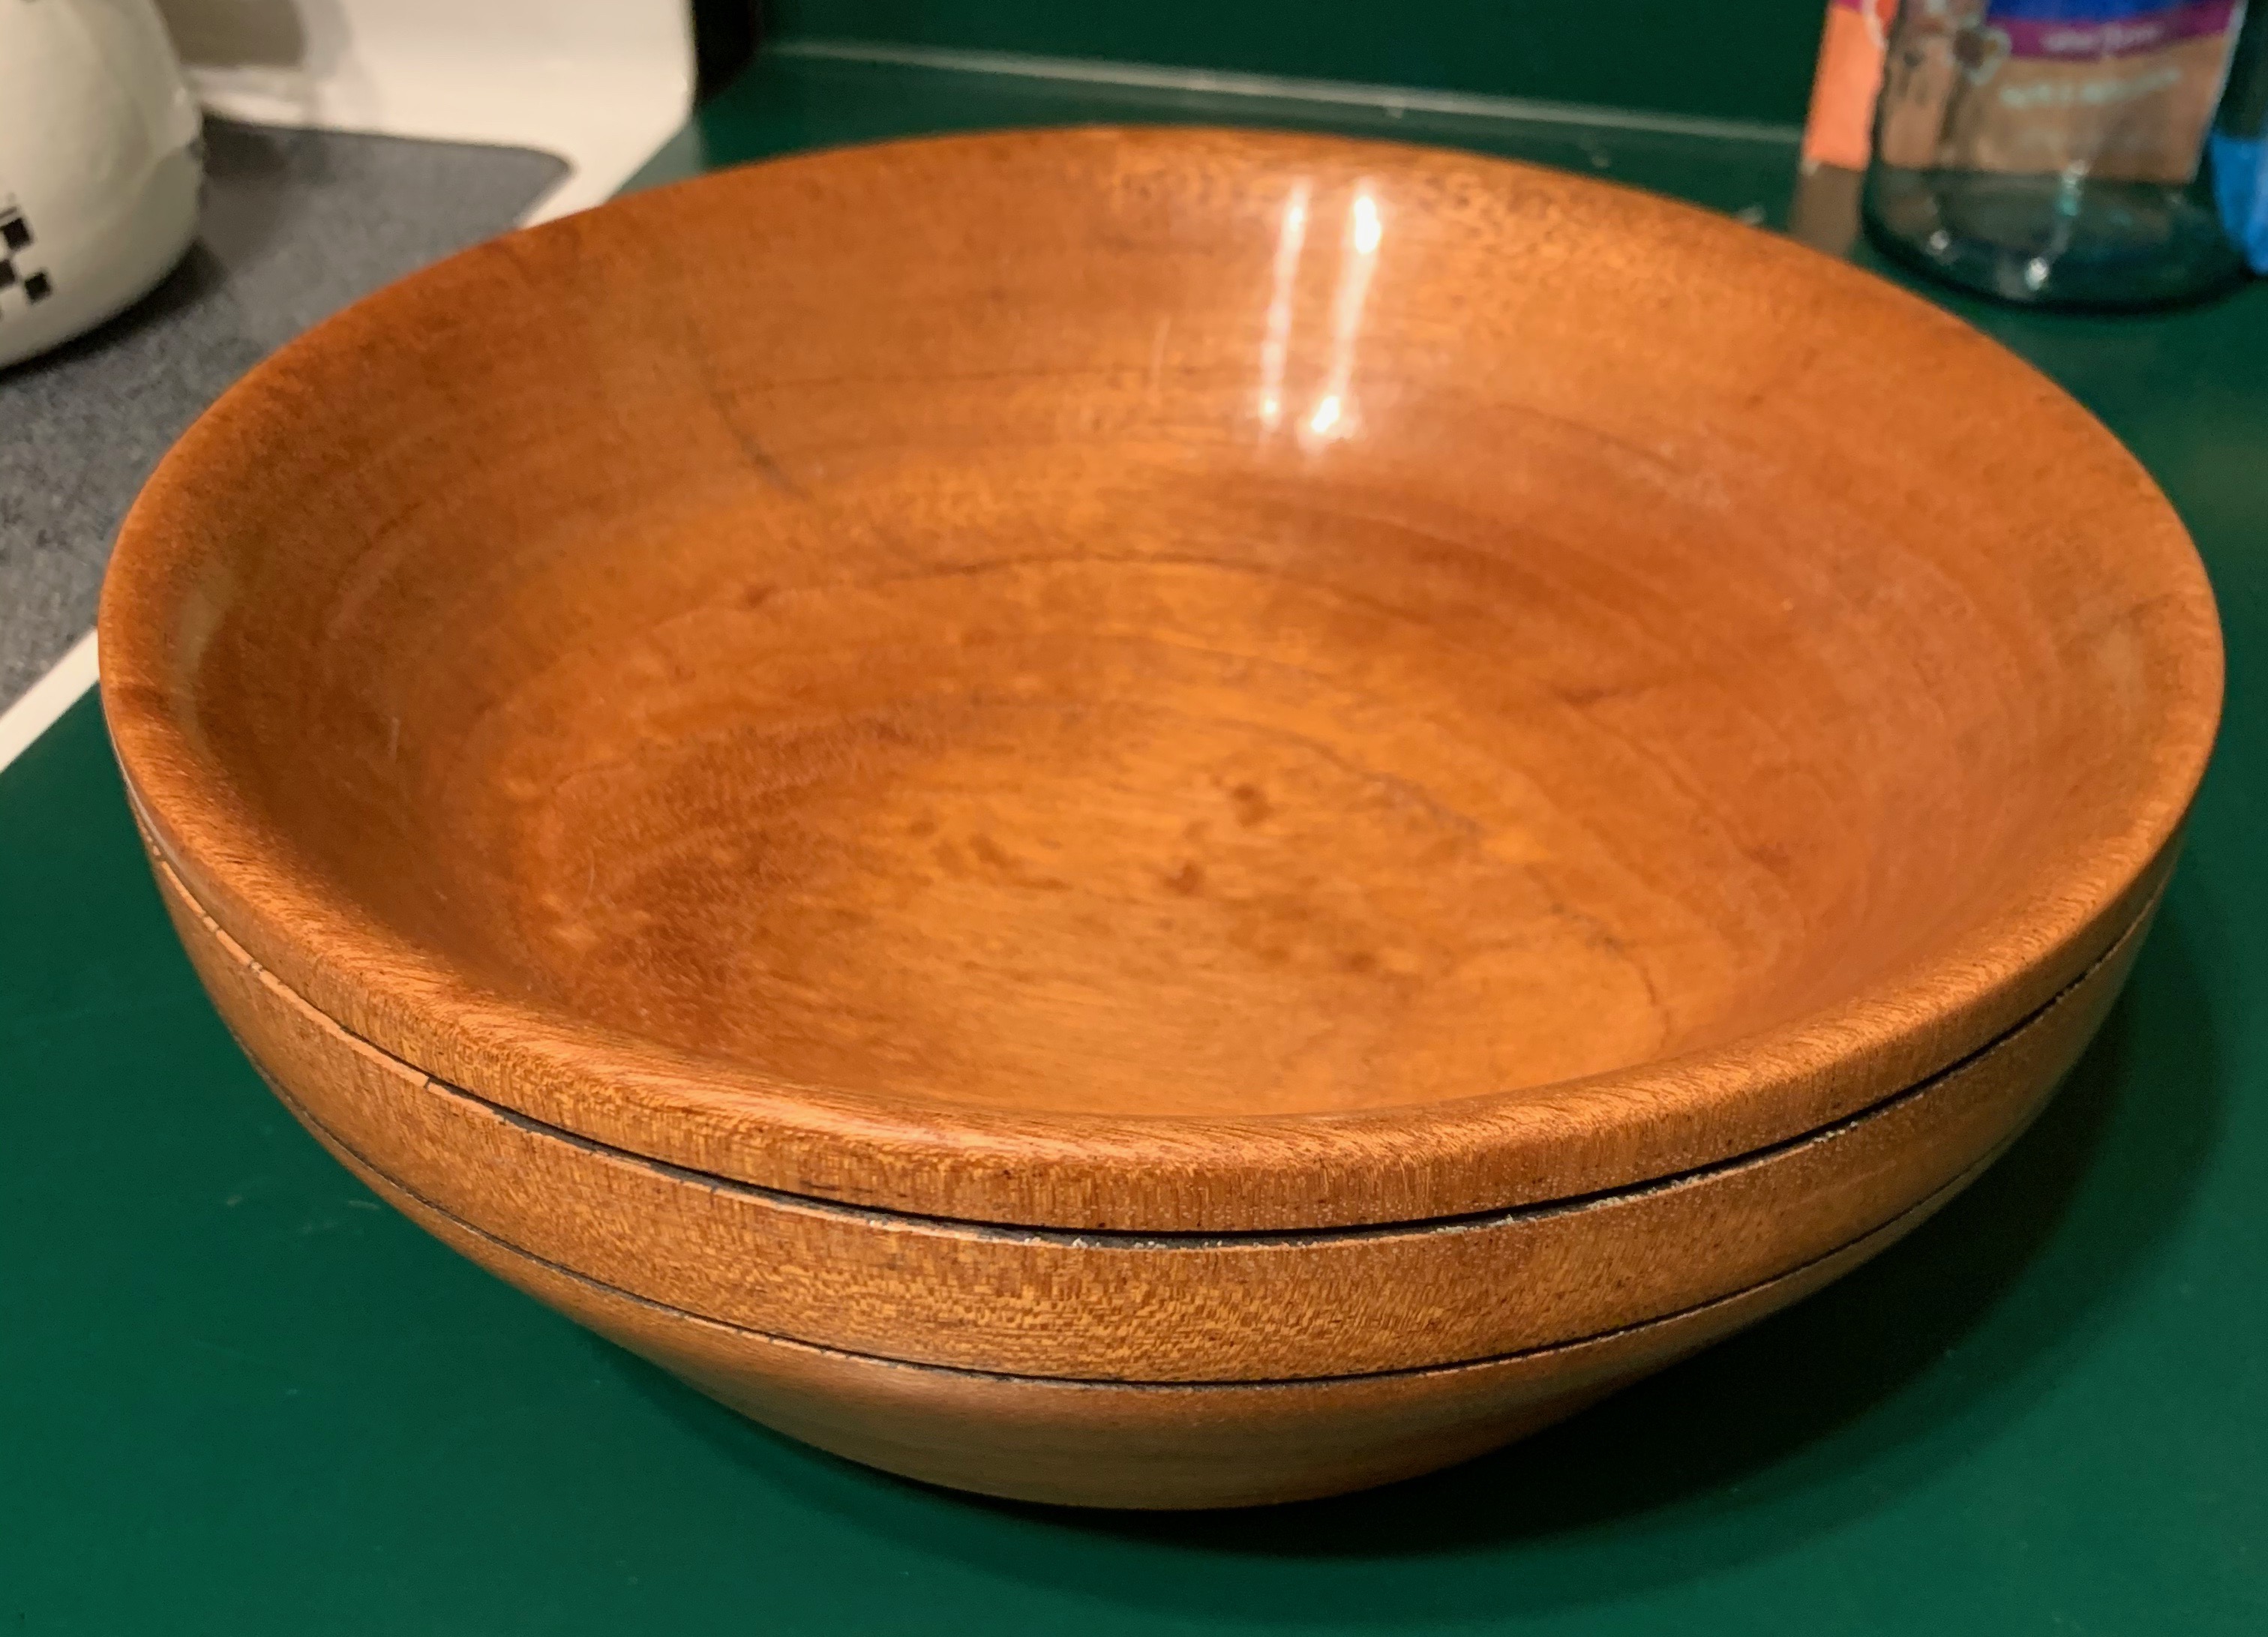
This one was originally done with the beeswax blend. I had to sand it back to bare wood and refinish it because it was looking so bad.
Early results are encouraging. And there are no nasty chemicals in any of this. The shellac is just shellac flakes dissolved in alcohol, and the wax is pure carnauba. So far it seems to be working pretty well. But time will tell. The beeswax finish I used looked good at first too.
I finally broke down and bought a band saw. I’ve wanted one for a long time but always talked myself out of it, claiming I could get along with a table saw and miter saw. But I’m working with a lot of 3-4 inch thick wood now and I just can’t cut that stuff without one. The one I really wanted cost over $2,000 and wouldn’t fit into my workshop. And I’m sure MrsGF would give me that look if I showed up with a $2K bandsaw some afternoon. (You really don’t want her to give you that look. Seriously. It’s scary.)
It’s a Rikon and it doesn’t seem bad at all. It was easy to put together and get set up, it runs smooth and seems to be pretty well made and reasonably sturdy. It will cut up to 5″ thick stock. I’d have liked to have a larger capacity than that, but wow, do prices go up fast in the larger size saws. A saw with just one inch greater capacity, 6″ instead of 5″, would be twice or even three times the cost of this one, and I can’t justify that. This one was under $500 and it seems to be pretty good quality for that price. But time will tell.
Rikon has a fairly good reputation, so it will be interesting to see how this saw works out. The only other Rikon tool I have is my low speed grinder that I use for sharpening my lathe tools.
A long time ago I said I was going to continue the tool series by talking about thickness planers and jointers. Of course I forgot all about that until just now. But I did remember. Eventually. So here goes.
Both of these tools can be really useful for anyone who fiddles around with wood, but both of these tools are expensive. A decent thickness planer is going to run you about $400 – $700, depending on the brand, features, etc. A decent jointer is going to be even more pricey. Prices on decent jointers (not the bench top models, I wouldn’t recommend those to most woodworkers) are a lot more than that. Jointers with the same features and capacity as mine look like they’re going for well over $1,000. The cheapest Jet brand (which is what I own) with the same features as mine is going for around $1,400.
That’s a heck of a lot of money, so the first question you have to ask is do you really need either of these tools to begin with? There’s no hard answer, really. It’s going to depend on your needs, of course. I know a lot of people who dabble in woodworking who get along quite well with buying the wood they need pre-cut and surfaced off the shelf at the local home improvement store. But if you’re building fine furniture, gluing up boards to make panels or table tops, doing renovations to old houses or need lumber that isn’t standard dimensions, you generally are going to need these tools.
Let’s take a look at the tools themselves.
A jointer and a thickness planer look very different, but when you look at them closely they seem to do pretty much the same kind of thing. They both have wide, rotating cutter heads that are designed to shave very thin amounts of wood off the entire width of a board. But the two machines actually perform different jobs.
The planer is used for two things. First it’s used to put a nice, smooth surface on rough surfaced, unfinished lumber you might buy direct from a sawmill. The second use is to mill lumber down to a specific thickness you need. You may, for example, only have 1/2″ thick boards laying around, but you need a board that is 3/8″ thick for a specific project. They come in really handy if you’re renovating an old house where the existing lumber used in the house doesn’t match current standards.
A jointer also does two jobs. First it’s used to prepare boards to be edge glued together to make panels by putting a smooth, perfectly square surface on the edges of a board. That’s where the name comes from, the fine art of joinery where pieces of wood are prepared to be joined together.
Second it is intended to take a board and make its surface perfectly flat by removing warps, twists and cupping. (I will warn you that I have issues with some of the things people claim about jointers. But I’ll come to that later.)
You can do all of these tasks by hand using hand planes, and for centuries that is exactly what woodworkers did. And it is a royal pain in the neck. I’ve used hand planes and sanders to smooth and flatten large hardwood table tops and panels and I can tell you from personal experience that is it is very tedious, time consuming, annoying, tiring, and requires a considerable amount of practice and skill to do it right.
But let’s get on with this and look at thickness planers first.
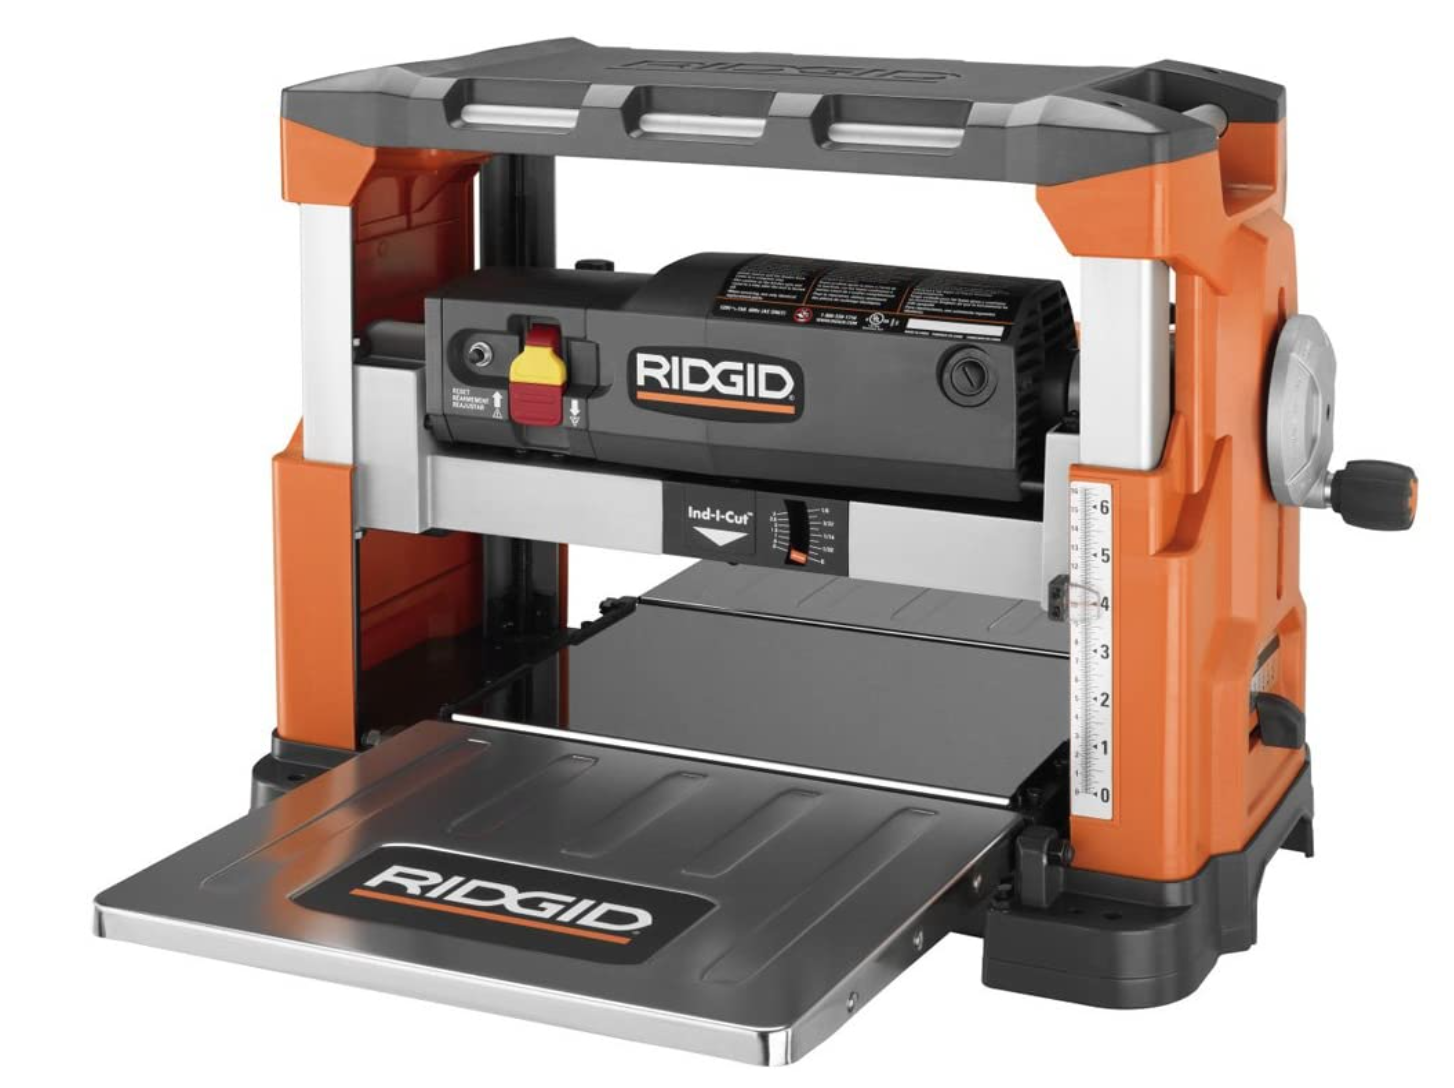
That’s my DeWalt up there. I’ve had this one for – heck, must be at least 10-15 years now.
As was the case with table saws, I’m not going to cover the big, floor mounted machines that are more suited to a professional manufacturing facility and stick with the smaller ones intended for use by the hobbyist or small furniture maker. These planers usually can handle boards up to 12 – 13 inches wide. How thick of a board they can handle varies widely. Generally you want a planer that can handle at least 4″ thick stock. You may think you’ll never need to run 4 or 5 inch thick slabs of wood through a planer, but you’d be surprised. When building furniture I’ve had to run things like table legs up to almost 4 inches thick through mine.
Planers all work pretty much the same way. Here’s a really bad drawing of the ‘guts’ of a typical planer.
There is an enclosure in which is mounted a set of feed rollers to push/pull the board through the machine. The cutter head itself is a long roller which rotates at high speed in which there are mounted two or three razor sharp steel knives that run the length of the cutter head. As the cutter head rotates, the feed rollers push the board into the machine, and the cutter head spins along at thousands of RPM, slicing off a very thin amount of wood along the entire length of the board. There is some kind of mechanism which allows the height of the cutter and rollers to be raised or lowered as needed.
Sidenote: Helical cutters. For some years now helical cutter heads like the one over there on the right have been all the rage. Instead of straight knives running the width of the cutting head, you have the setup seen in the photo over there, rows of small, individual square carbide knives set into a helical pattern around the cutter head itself. The claim is that they do a better job than traditional straight knives, are quieter, take less power, and when they get dull, you just loosen the screw holding it down and rotate it 90 degrees to get a new edge. If you get one chipped, just rotate it or replace only that one cutter. In theory they look interesting. But my personal experience is that they don’t come anywhere close to living up to the hype. I’ll talk about these later. If I remember. I probably won’t.
When you’re looking at a thickness planer there are a few things you should be looking at.
First, how robust is the mechanism which raises and lowers the cutter the rollers that feed the wood through the machine? A considerable amount of force is needed to hold that wood down, push it through the planer, hold the cutter head absolutely straight and parallel, etc. How good is the drive system that actually moves all of that stuff up and down? On the cheaper planers what holds that cutter in place and moves it up and down are nothing more than a couple of cheap, threaded steel rods driven by plastic gears, with a lot of play in the threads, and rods that flex as soon as you start pushing wood into them.
How sturdy and well built is it in general? Thickness planers have to endure a lot of stress and need to be made well enough to deal with that. They also are subjected to significant pressures and forces that can cause it to flex and bend as wood is fed through it. It has to be sturdy enough so that the cutting head is maintained absolutely parallel to the bed of the planer when a board is being pushed through.
Next thing is those knives. Those knives in there take a real pounding. They’re spinning at thousands of RPM and are being hammered down into wood that can be extremely hard and even abrasive. They get a lot of abuse. Thanks to modern metallurgy most blades are able to handle it, but eventually they’re going to get dull or even chipped. That means they’re going to need to be removed and resharpened or replaced. So take into consideration how hard it is to get at those knives, remove them, get them sharpened (if necessary) and then reinstall them properly into that planer.
The first planer I had was a major pain in the neck. It was the cheapest one I could find at the time. And it was awful in just about every way you can imagine. Just getting at the blades was a horrible job that required dismantling half the machine. And then trying to get them reinstalled after I’d had them sharpened was a nightmare. It was a hair pullingly frustrating and fiddly job to get them aligned that required the use of a couple of special jigs and considerable foul language. And even then I didn’t get them exactly right. Same with my 2nd planer. My third, well, I’d learned my lesson and got one that required no adjustments or alignments.
Cutter head on my DeWalt. The blades are disposable, and there are pins on the cutter head that fit into holes in the blades so they are perfectly aligned when they’re installed. No need for jigs, adjustments, fiddling around trying to align things. Just unscrew about 8 bolts holding the blade, remove the old one, drop the new one in, tighten it down, and it’s ready to go.
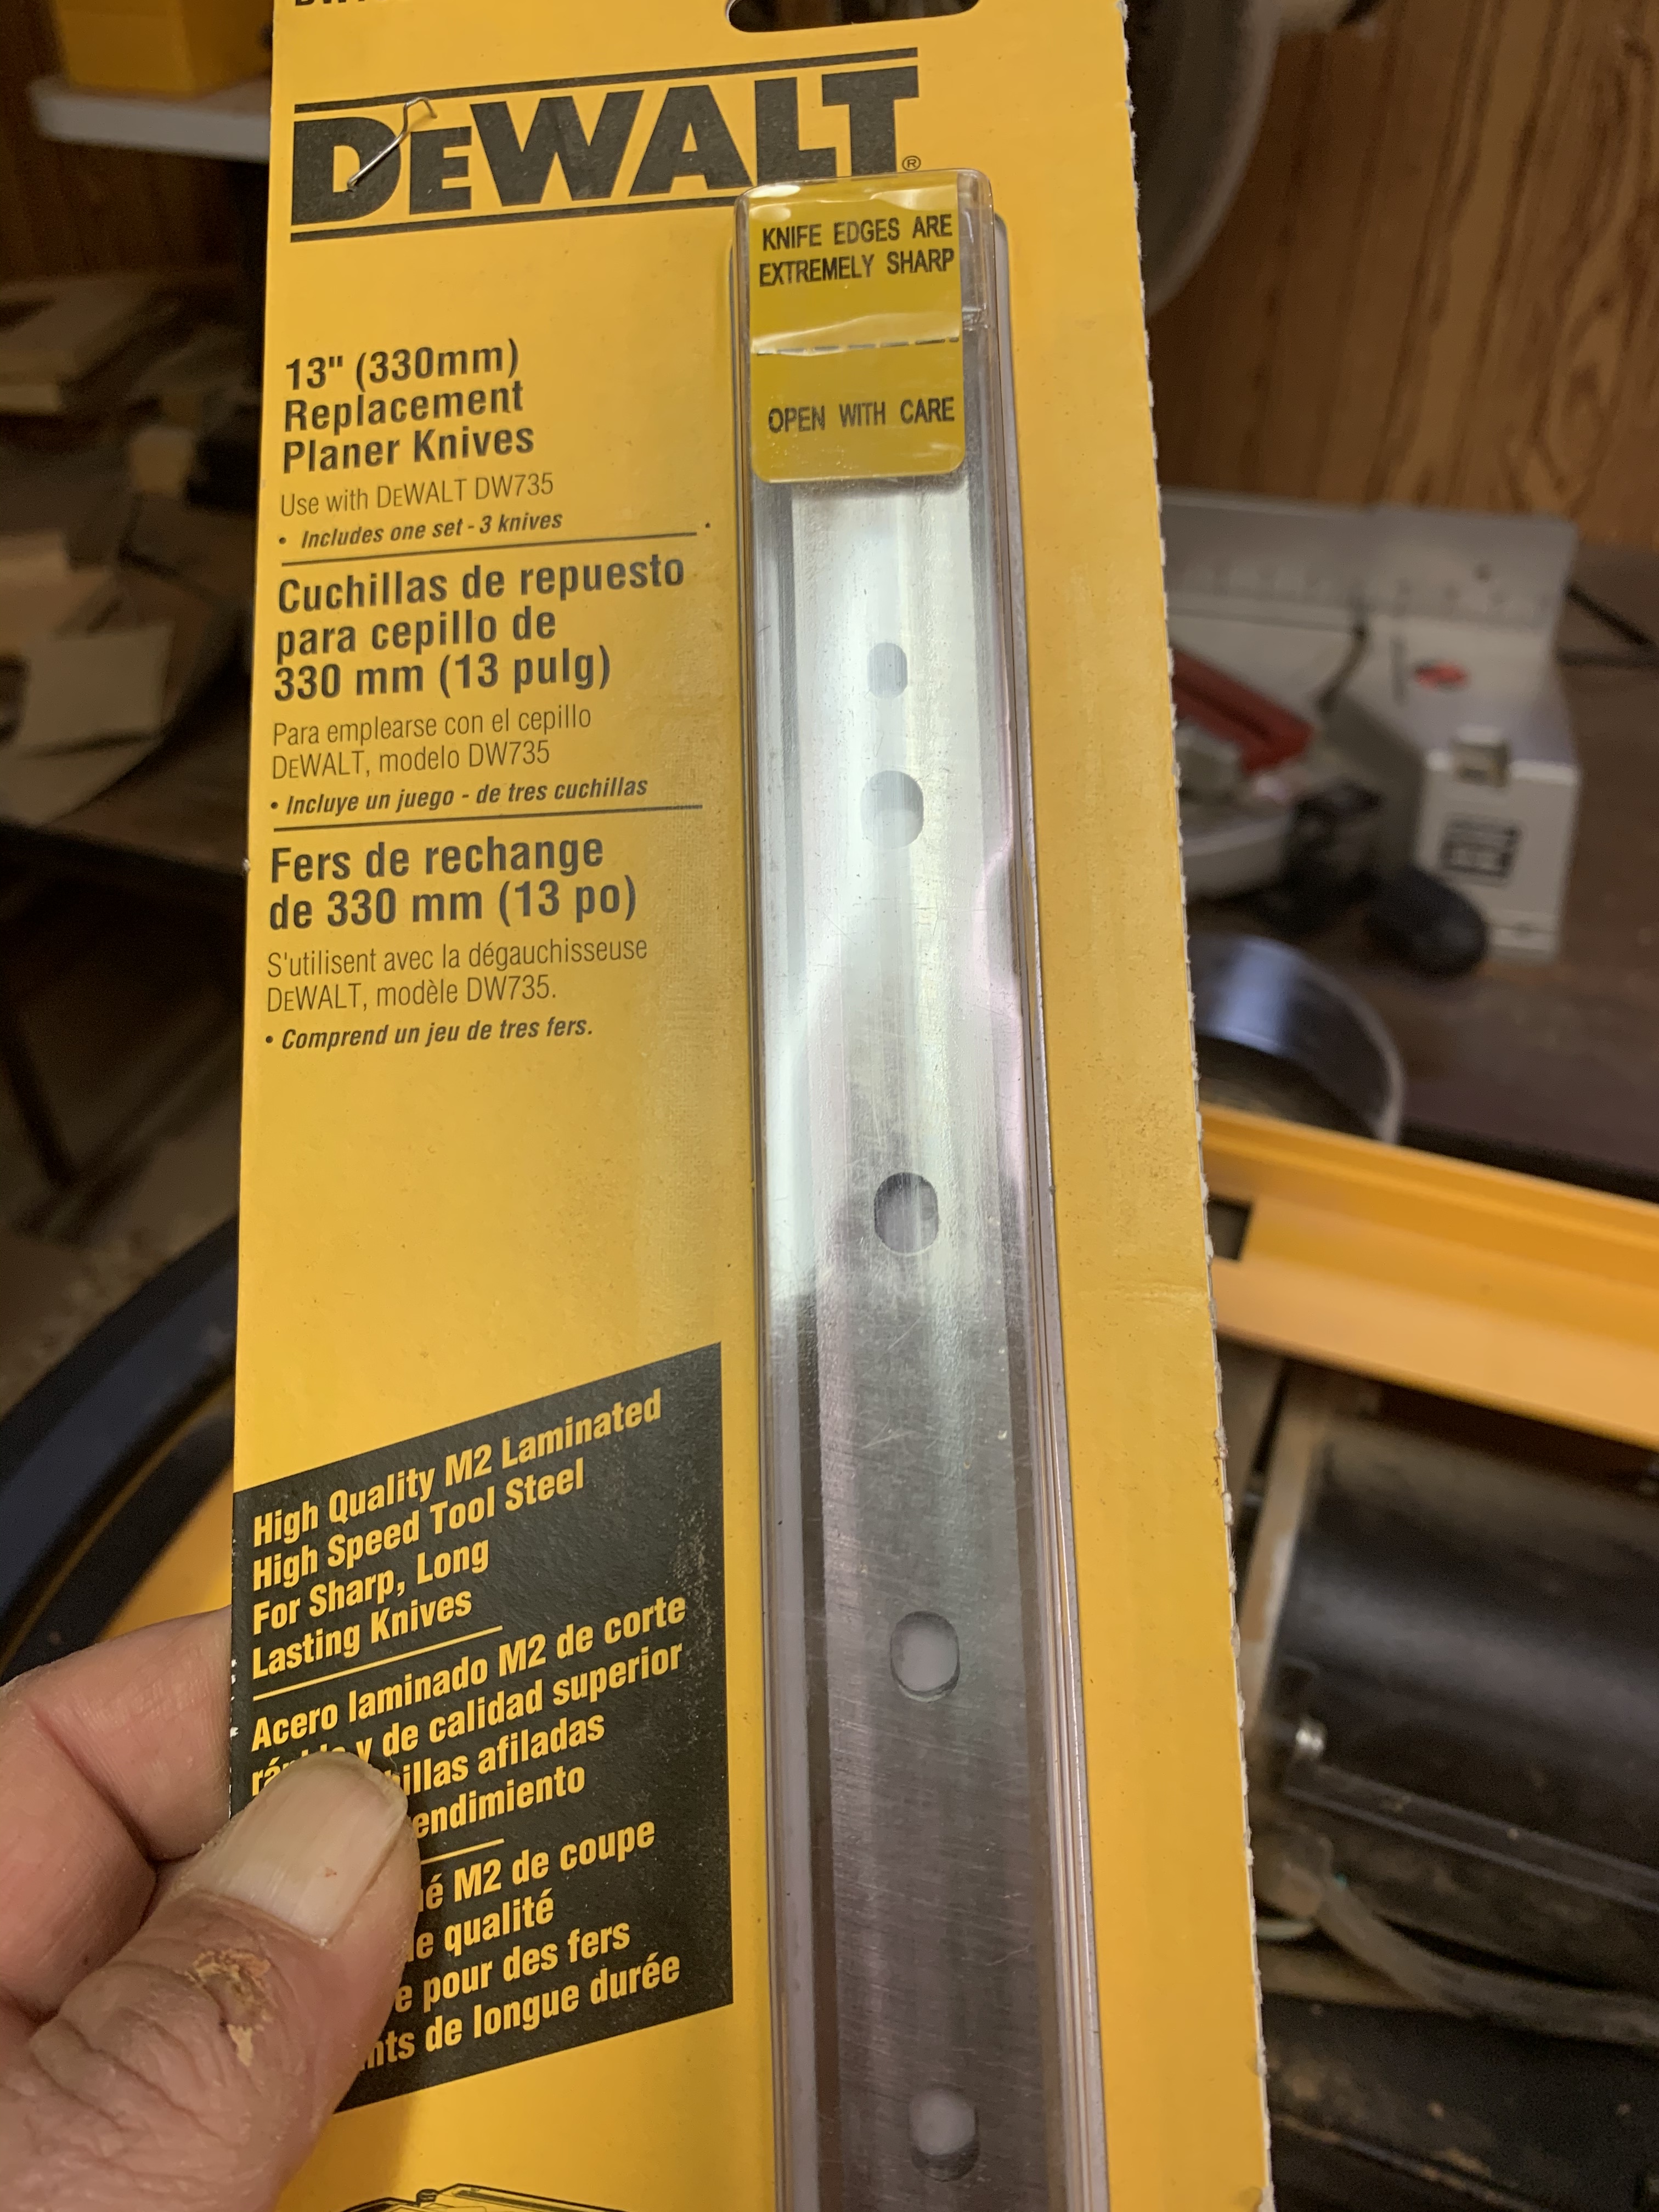
Replacement blades. Note the indexing holes to fit pins on the cutter head so the blades are always perfectly aligned.
With mine there are no adjustments. When the blades are put into place and screwed down, they are aligned. The blades are easy to get at, too. Remove 4 screws to take off the top cover of the machine, 3 screws with “T” handles on them to get off the dust shroud, and there they are. 8 screws hold down each blade. There’s even a tool stored in the planer itself that fits all of the bolts I need to remove, and has magnets built in to handle the blades so I don’t have to risk slicing a finger off on the razor sharp blades. (You do not want to handle those blades with your bare hands. Seriously. There are still blood spots inside of my planer because I got a bit careless the last time I replaced the blades.)
There are other brands that have similar systems to make blade changing as easy as possible. I’d highly recommend a planer that has some kind of system to make getting those blades aligned as easy as possible because eventually they are going to need to be replaced or sharpened.
Sidenote: Replacing the blades is more expensive than just getting them resharpened of course, but it isn’t all that much more expensive. A set of 3 for my machine costs about $80, which sounds a bit steep but those are double sided. So you’re essentially getting two sets for that price. And to give you an idea of how long they last, I bought 3 sets of blades for mine in 2012 and I still have one set unused. A set of single sided off-brand blades is going for under $30.
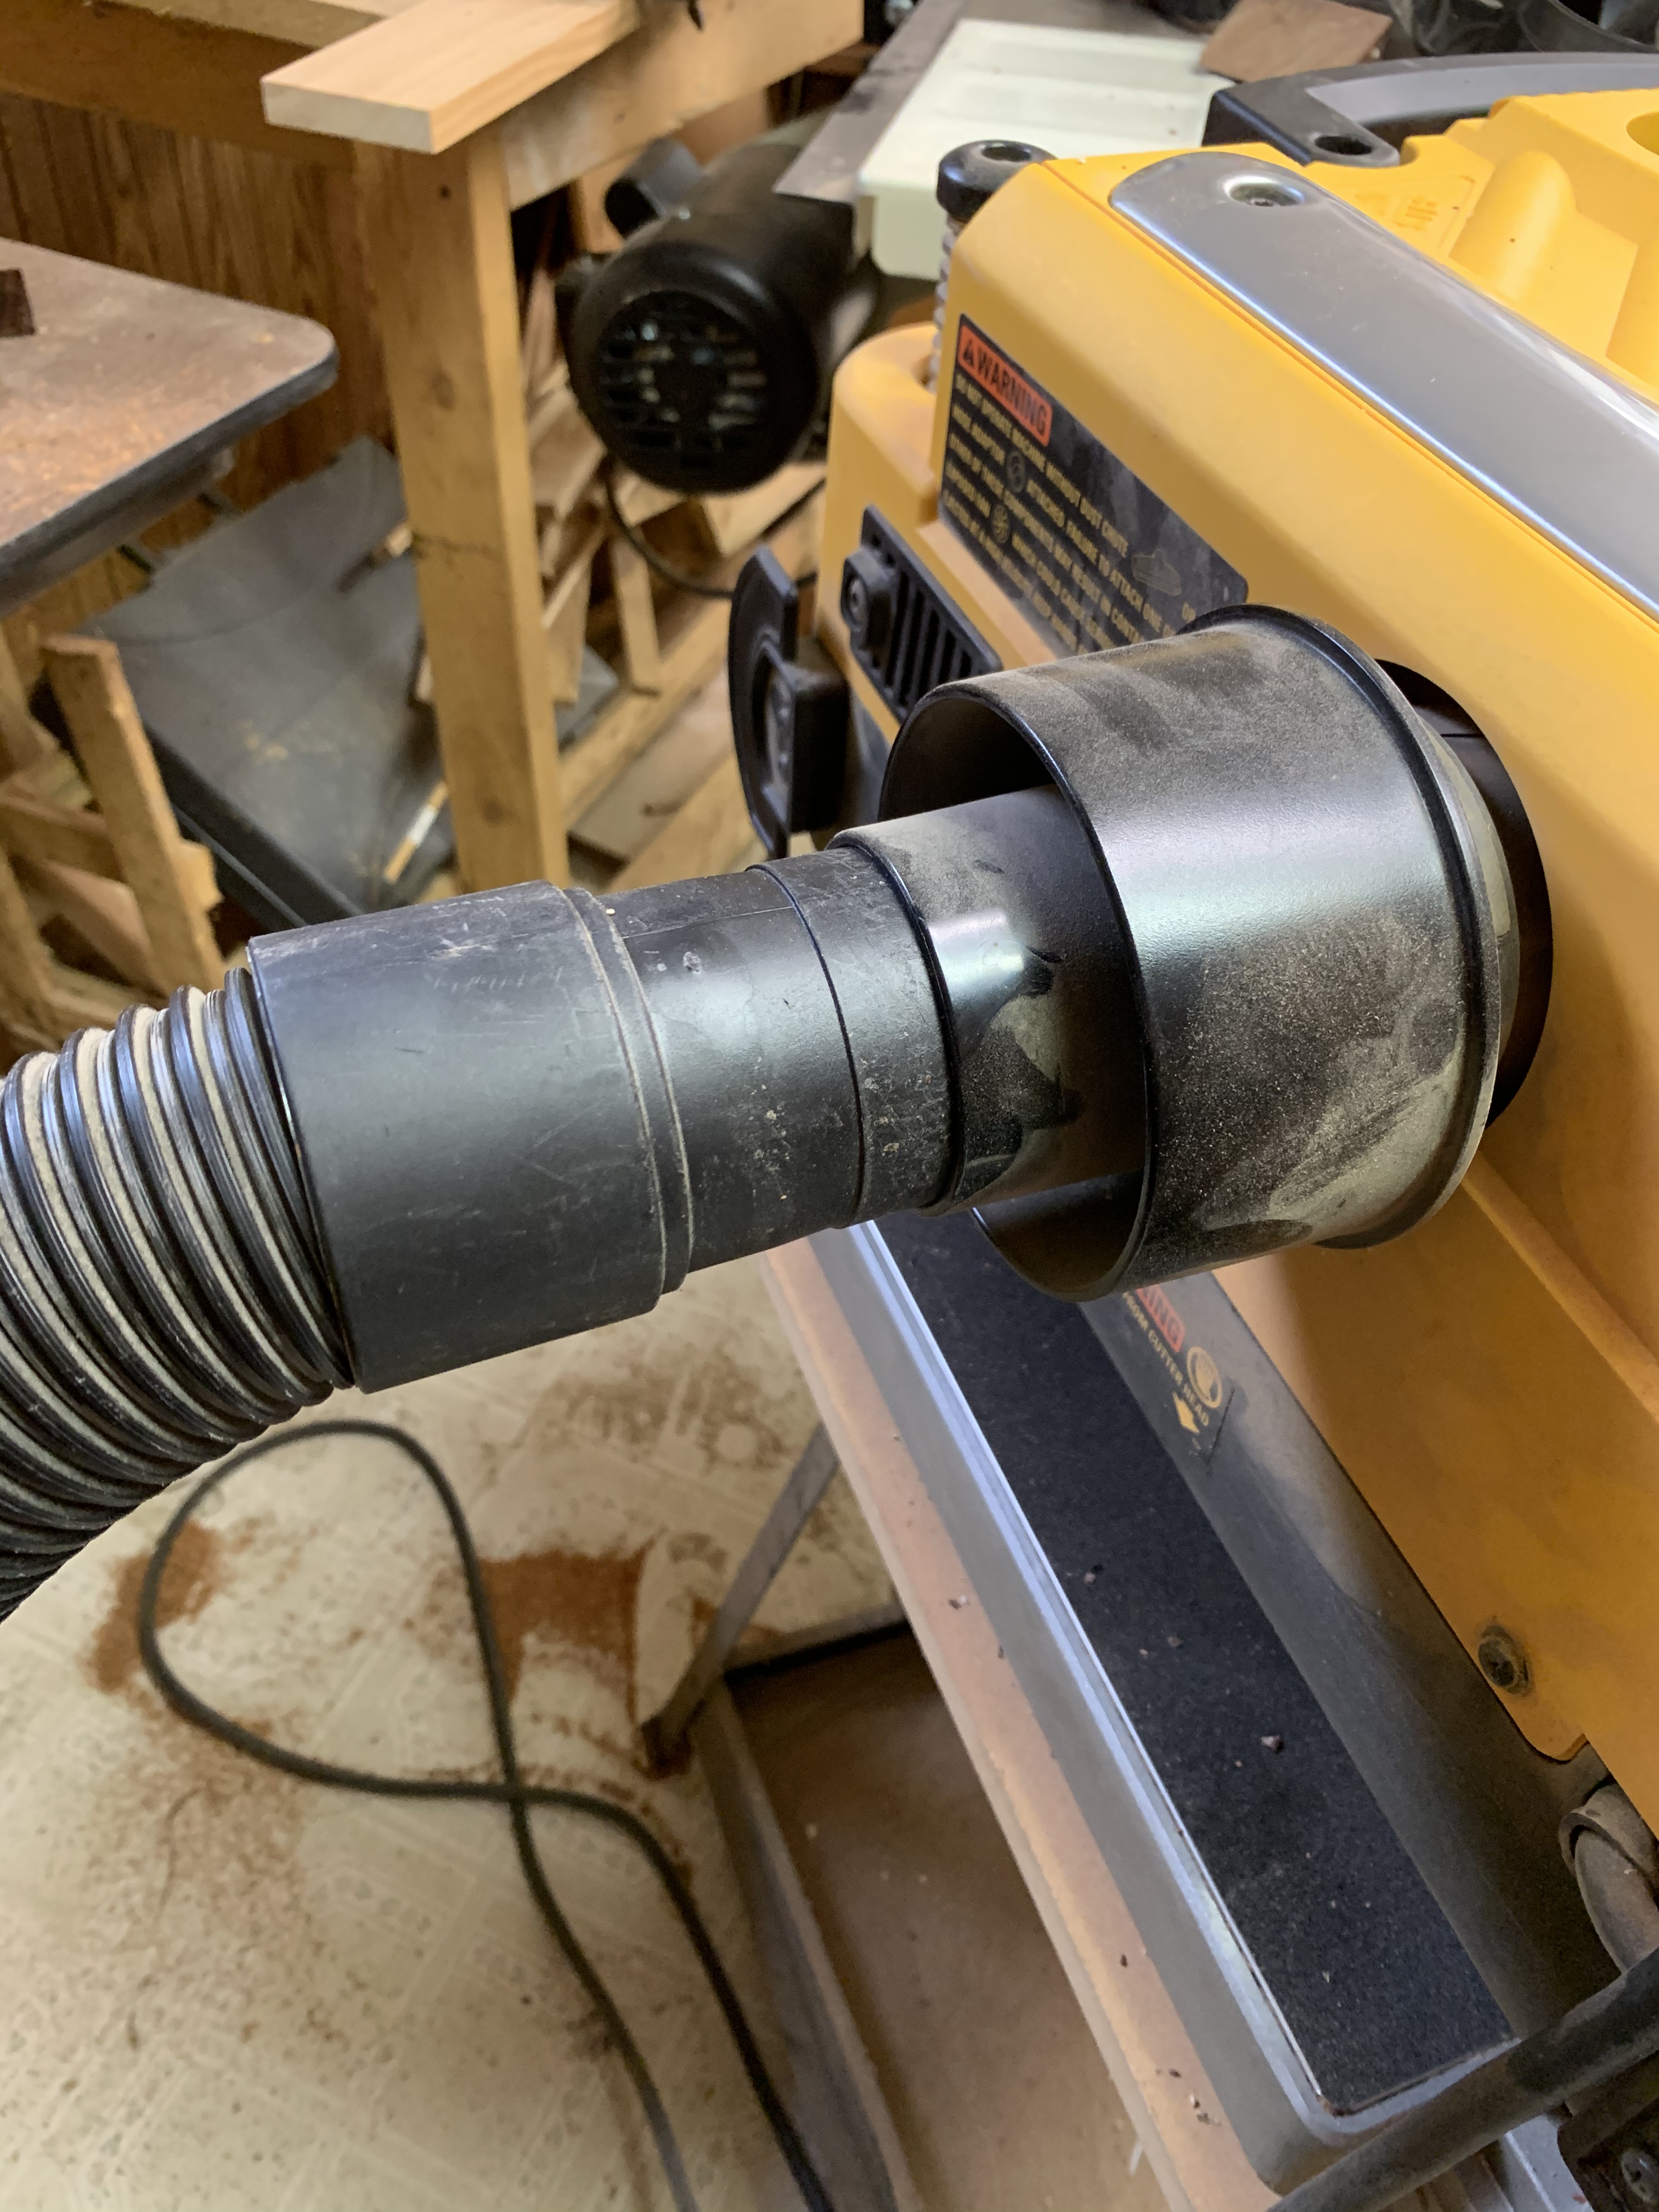
Dust collection on this one is pretty good. Just about all of the dust, chips, shavings, etc. is sucked up and blown out a port on the back of the machine. I have it connected to a hose on my “dust collection system”. Well, I call it that. It’s really a whopping great shopvac
The next thing you need to consider is how you are going to deal with mountains of chips, shavings and dust these things put out. Thickness planers put out huge amounts of the stuff. If you live in a climate that allows you to work outside and just sweep everything up and toss it into the compost pile later, good for you. But I live in Wisconsin and it gets bloody cold up here, and trying to surface a dozen or so boards out in the driveway when it’s -30 and snowing is no fun. So you need to be able to deal with waste material before it gets all over your house and into your HVAC system.
The better ones will have all of the guts of the planer enclosed in shrouds with a blower that will blow everything out of a port that you can connect to a dust collection system. Most of the better ones will have some kind of provision for hooking it up to a dust collector of some sort. But a lot, especially the cheap ones, are completely open and will be spitting shavings and dust everywhere. A real dust collection system is ideal, but you can make due with a high capacity shop vac. But be prepared to empty that thing a lot.
Capacity: Most of the planers in this class claim they can handle boards up to 12 – 13 inches wide, but I’ll let you in on a little secret, a lot of them, especially the cheaper ones, can’t. You try to chuck a 12″ wide white oak board through the average $350 thickness planer, the motor is going to bog down almost immediately and possibly even stall out completely. Or blow a circuit breaker. Or overheat the motor and burn it out if you do it too often. Oh, they’ll work fine for an 8 inch wide piece of spruce or softwood. They might be able to handle a 4 – 6 inch wide hardwood board, but that’s going to be about it.
If you look close at this pic of a wood sample I got you can see the “washboard” showing up as dark streaks running from the top of the photo to the bottom. That indicates that either the feed rate was too fast, the blades were dull, or the planer was having some other problem.
Which one should you buy? How much will it cost? It’s hard for me to make a specific recommendation because a lot is going to depend on what your budget is and what you’re going to be using it for. If you’re just going to be surfacing a few 6 inch wide boards a few times a week one of the cheaper planers will do a decent job for you. Just be aware that it is going to have “issues”, as they say. It might be difficult to get adjusted properly. For example, one side of the board might be 1/32 or more thinner than the other side. You might see a sort of washboard looking effect like in that photo up there. As long as you are aware that the planer isn’t going to be perfect and is going to have some problems that you will have to deal with, you might be able to get away with one of the ‘bargain’ machines.
But if you’re buying wood straight from a lumberyard like I do and everything going through the shop needs to be surfaced and milled to the right thickness, which is the case here, then you need to be looking at the more powerful and capable planers, not the inexpensive hobbyist models.
If you’re a pro or semi-pro woodworker, as I recommended with table saws avoid the ones with prices that seem too good to be true. I did some research before I wrote this and it seems that the “sweet spot” is in the $450 – $650 price range for thickness planers. Planers less expensive than that all seem to have various issues. The really cheap ones aren’t much good at all.
But at the other end of the spectrum I really don’t see any advantage to spending $700+ on a planer when a $600 or even $500 one will do just as good a job.
As I said, research, research, research before you pull out the credit card and buy one of these.
My personal recommendation? That DeWalt 735 up there is mine, and if mine ever blew up, I’d buy another one immediately. It’s selling for around $575 or so. I’ve had it for years, it’s handled white oak and ash boards up to 13 inches wide and everything else I’ve thrown at it. It produces a nice surface, especially at the slower feed rate, the blades are easy to change and it has a decent dust collection system.
Does the DeWalt have drawbacks? You bet. It’s loud for one thing. You’re probably going to want to wear hearing protection when you run it just to be on the safe side. Infeed and outfeed tables are an extra cost option. I don’t have them on mine, and they claim you don’t really need them, but I wish I did and keep telling myself I should get them. They’d come in handy when feeding long boards through it. It will occasionally spit wood chips back into the machine onto the table, and if I don’t clear it out before feeding another board through it can embed the chips into the underside of the board or scratch it. And the dust collection system built into it blows out so much air that it can overwhelm a wimpy, inefficient dust collection system.
Jointers
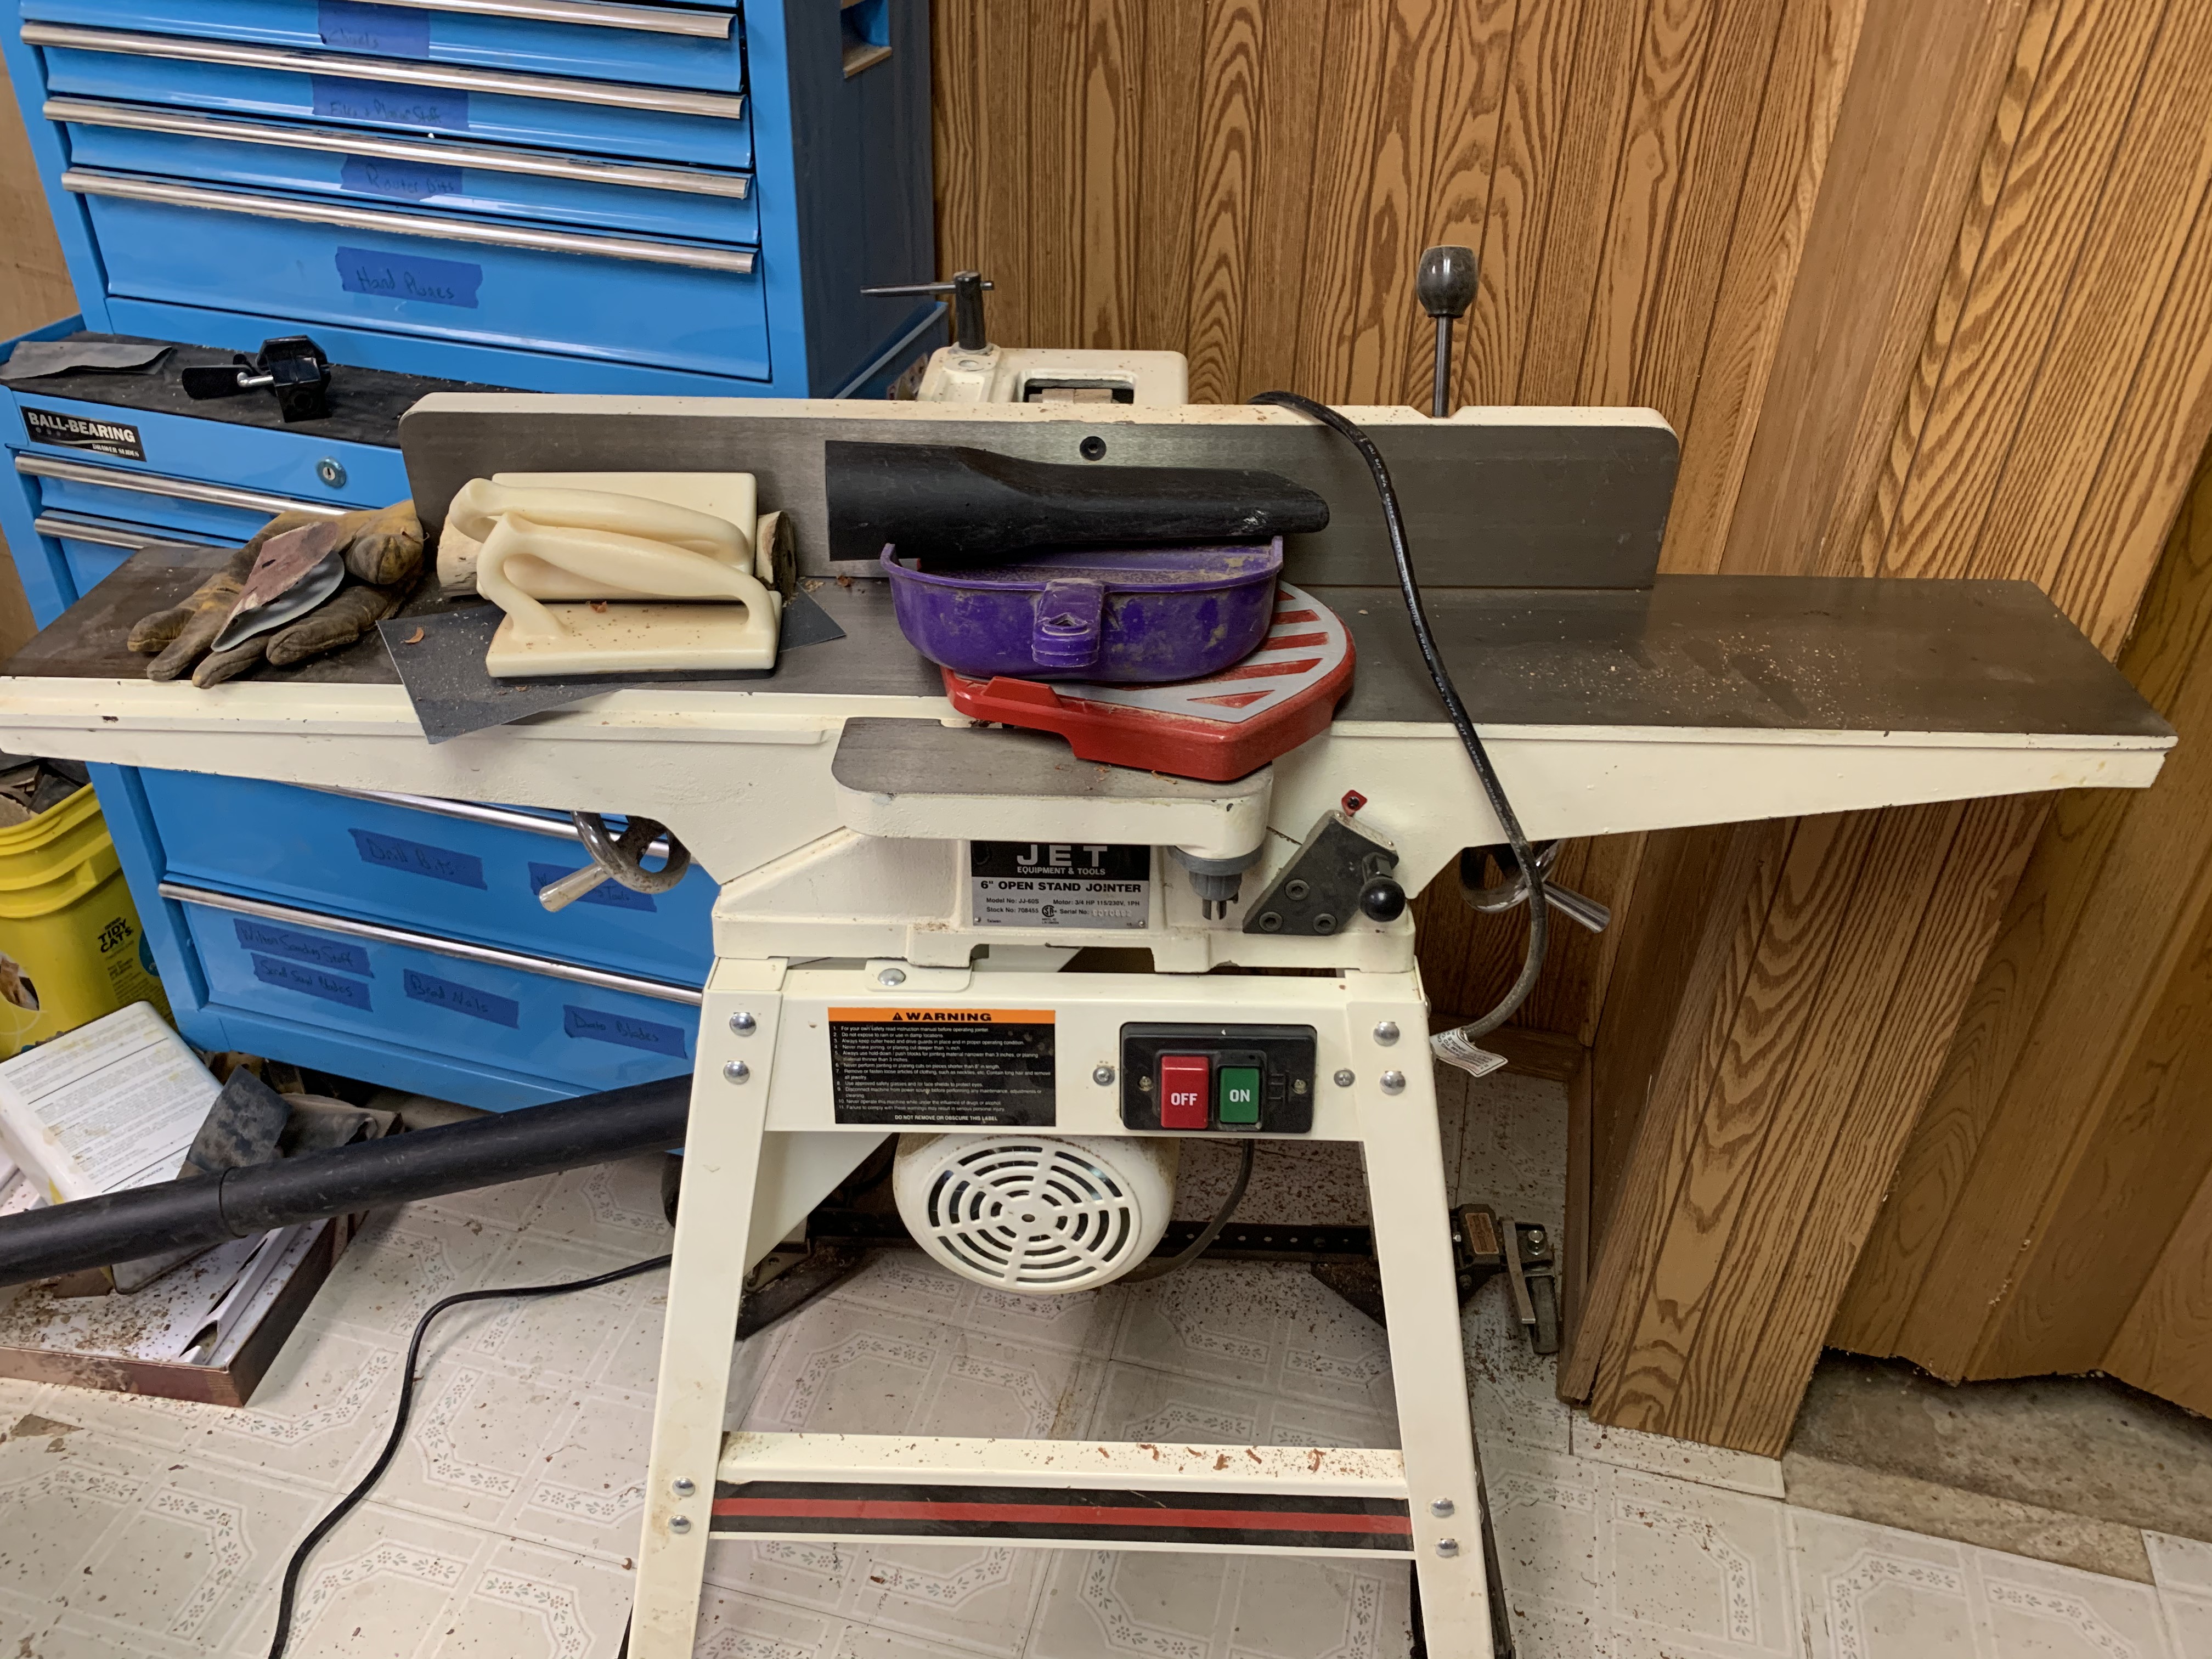
As you can see, I use my jointer all the time. Makes a handy makeshift table. Just this morning I found out it makes a good spot for clamping down the light I use with my lathe.
Now let’s move on to jointers. A lot of experts will tell you that a jointer is an absolutely essential tool for any wood shop. I don’t agree. I think the average hobbyist woodworker can get along without a jointer just fine. Can they be useful? Yes. But I think their usefulness is overrated. The only thing I use mine for is edging boards before I glue them up into panels. But let’s look at what one of these things actually does.
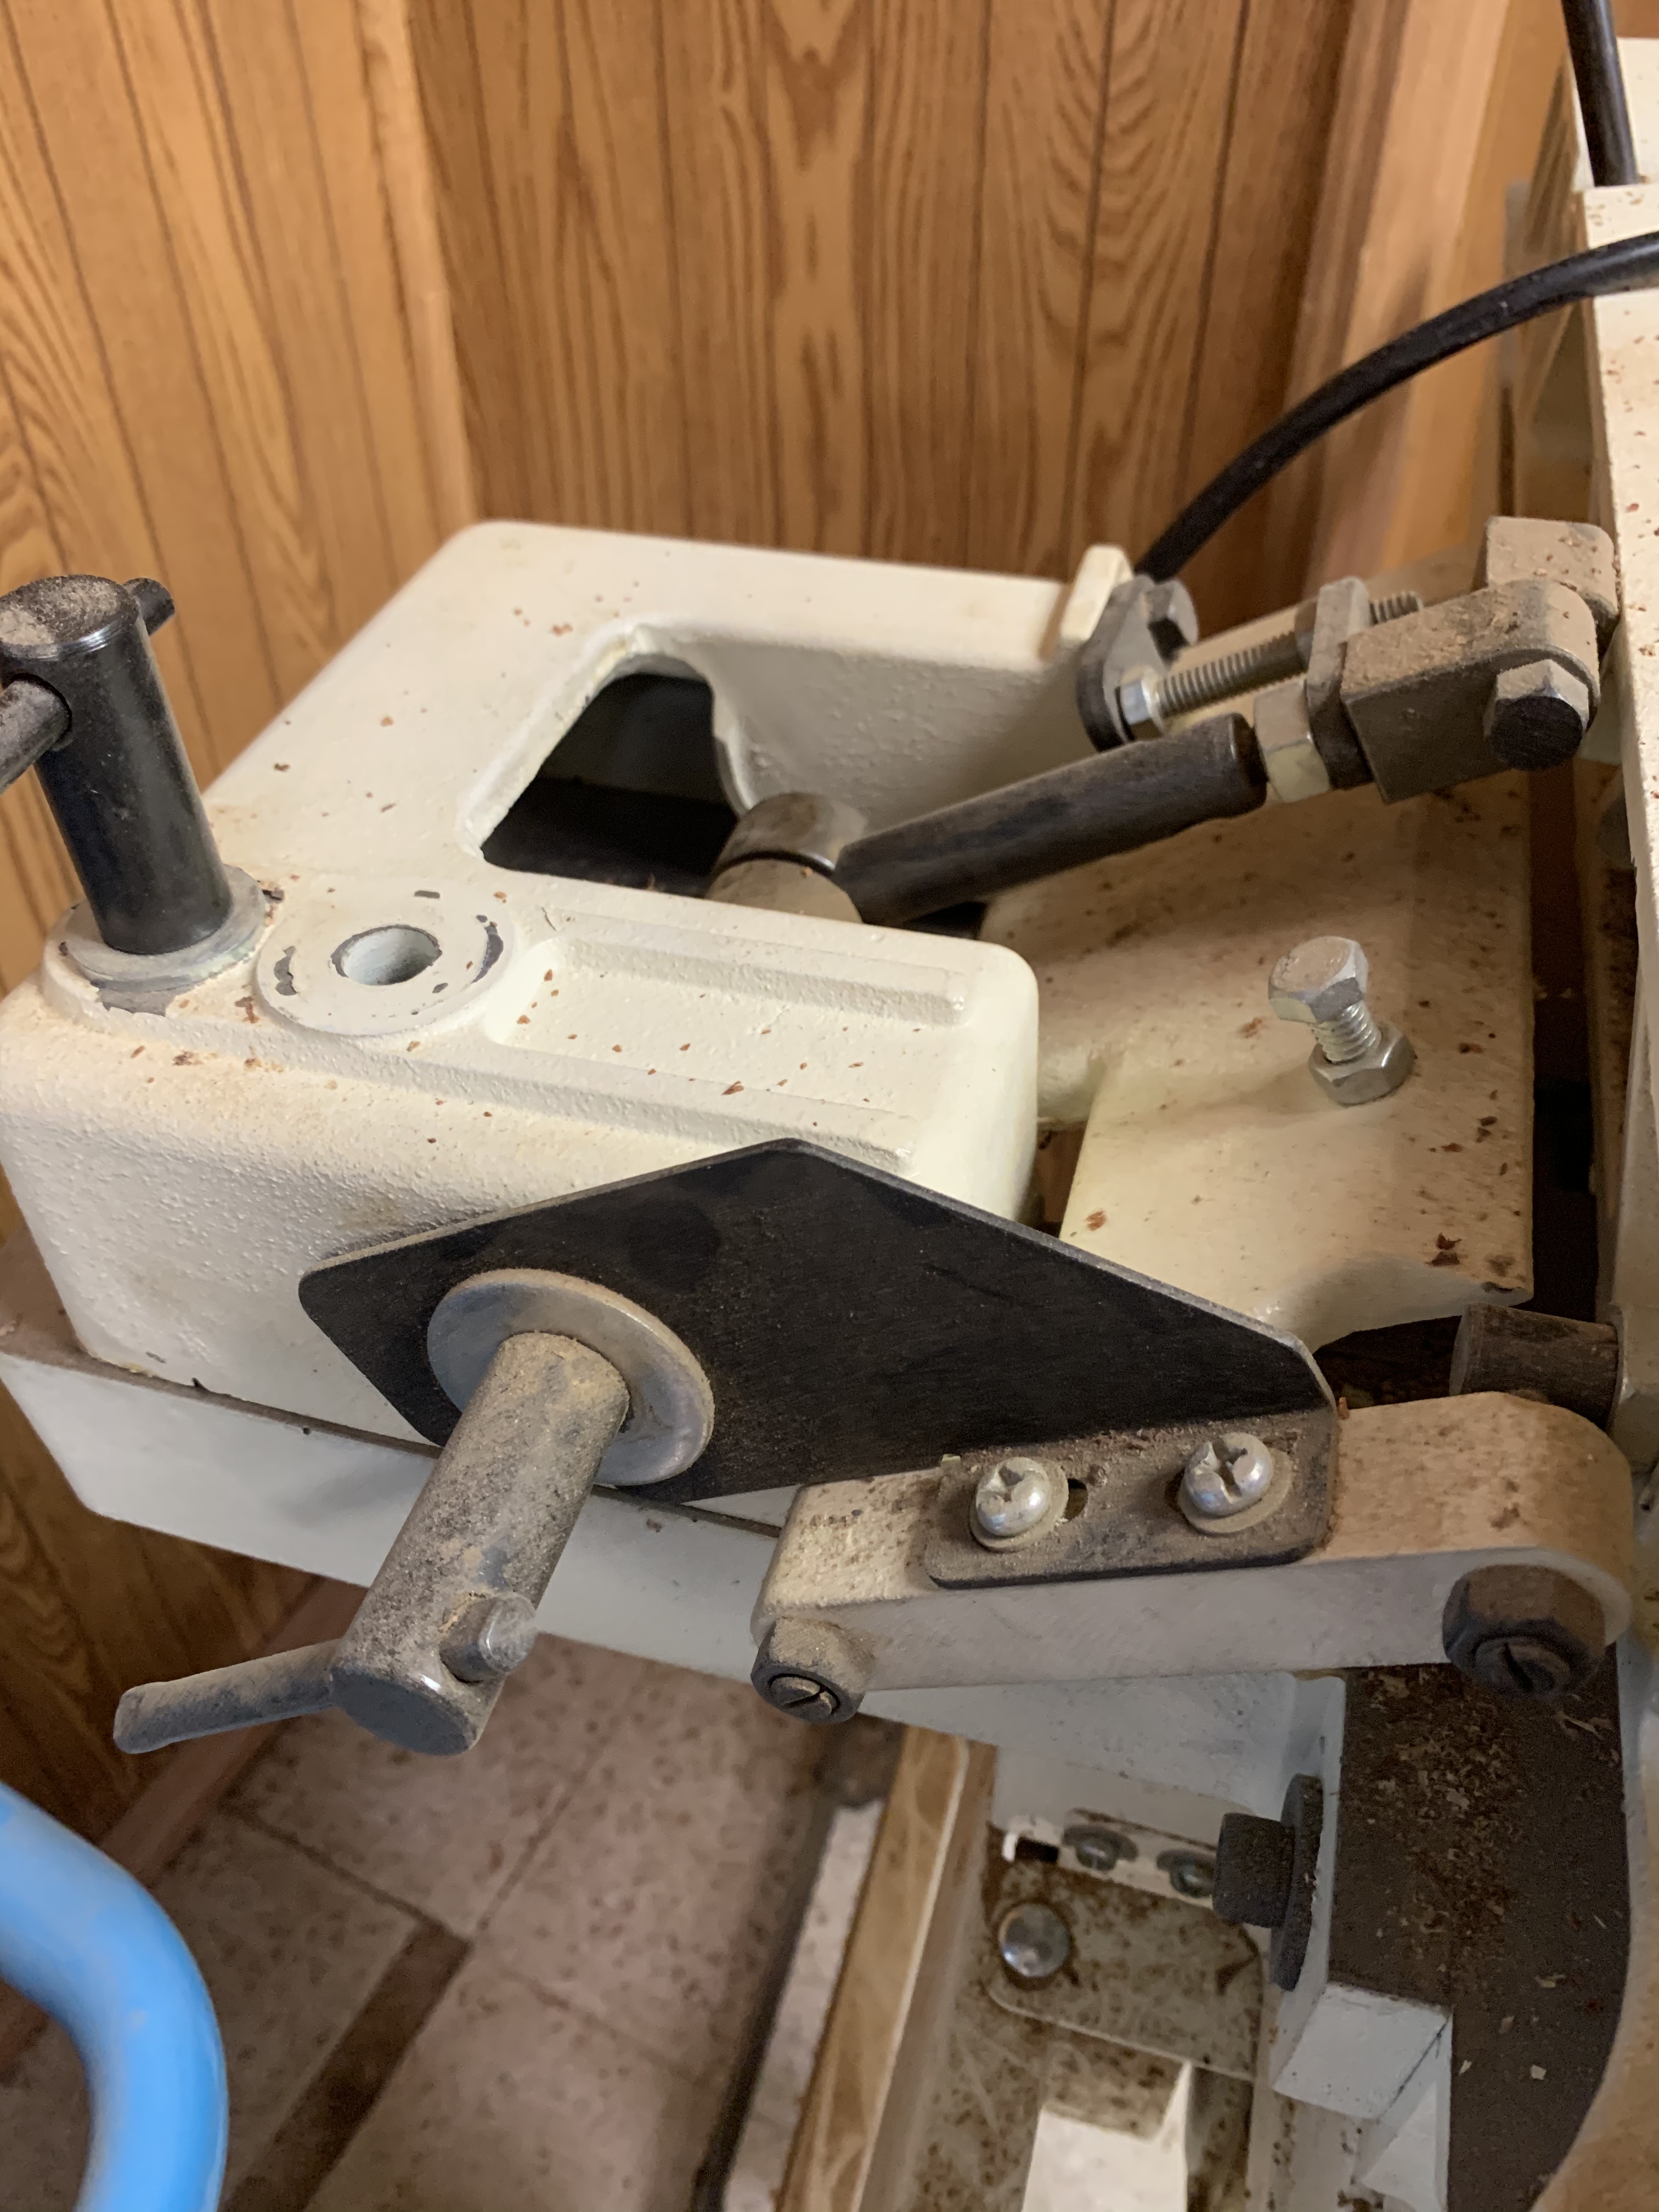
Cutter head on my Jet jointer
The fence adjustment system on mine. It looks complicated but it isn’t that difficult to set up.
At first glance a jointer looks like it works like a thickness planer. There is a rotating cutter head on which there are mounted two or more very sharp blades which slice off thin amounts of wood as a board is pushed through it. But that’s where the resemblance ends. A jointer is open topped and has no feed rollers. You push the wood through it yourself. It has separate infeed and outfeed tables made of heavy cast iron, each of which can be adjusted independently. And it has a very beefy fence hopefully made of solid cast iron which has a rather elaborate adjustment system which lets you not only adjust the width of the cut, but also the angle of the fence.
I’m not going to waste your time and mine describing how a jointer works. A lot of people who are far better at this than I am have dealt with this. Here’s a link to an article at woodcraft.com that will tell you more than you ever wanted to know about jointers. So scoot on over there and read that, then come back. I’ll wait…
Ah, back already? So, now you know everything about jointers. Excellent. And now you probably want one. You might even actually need one. Maybe. But before you max out your credit card on one of these, read on.
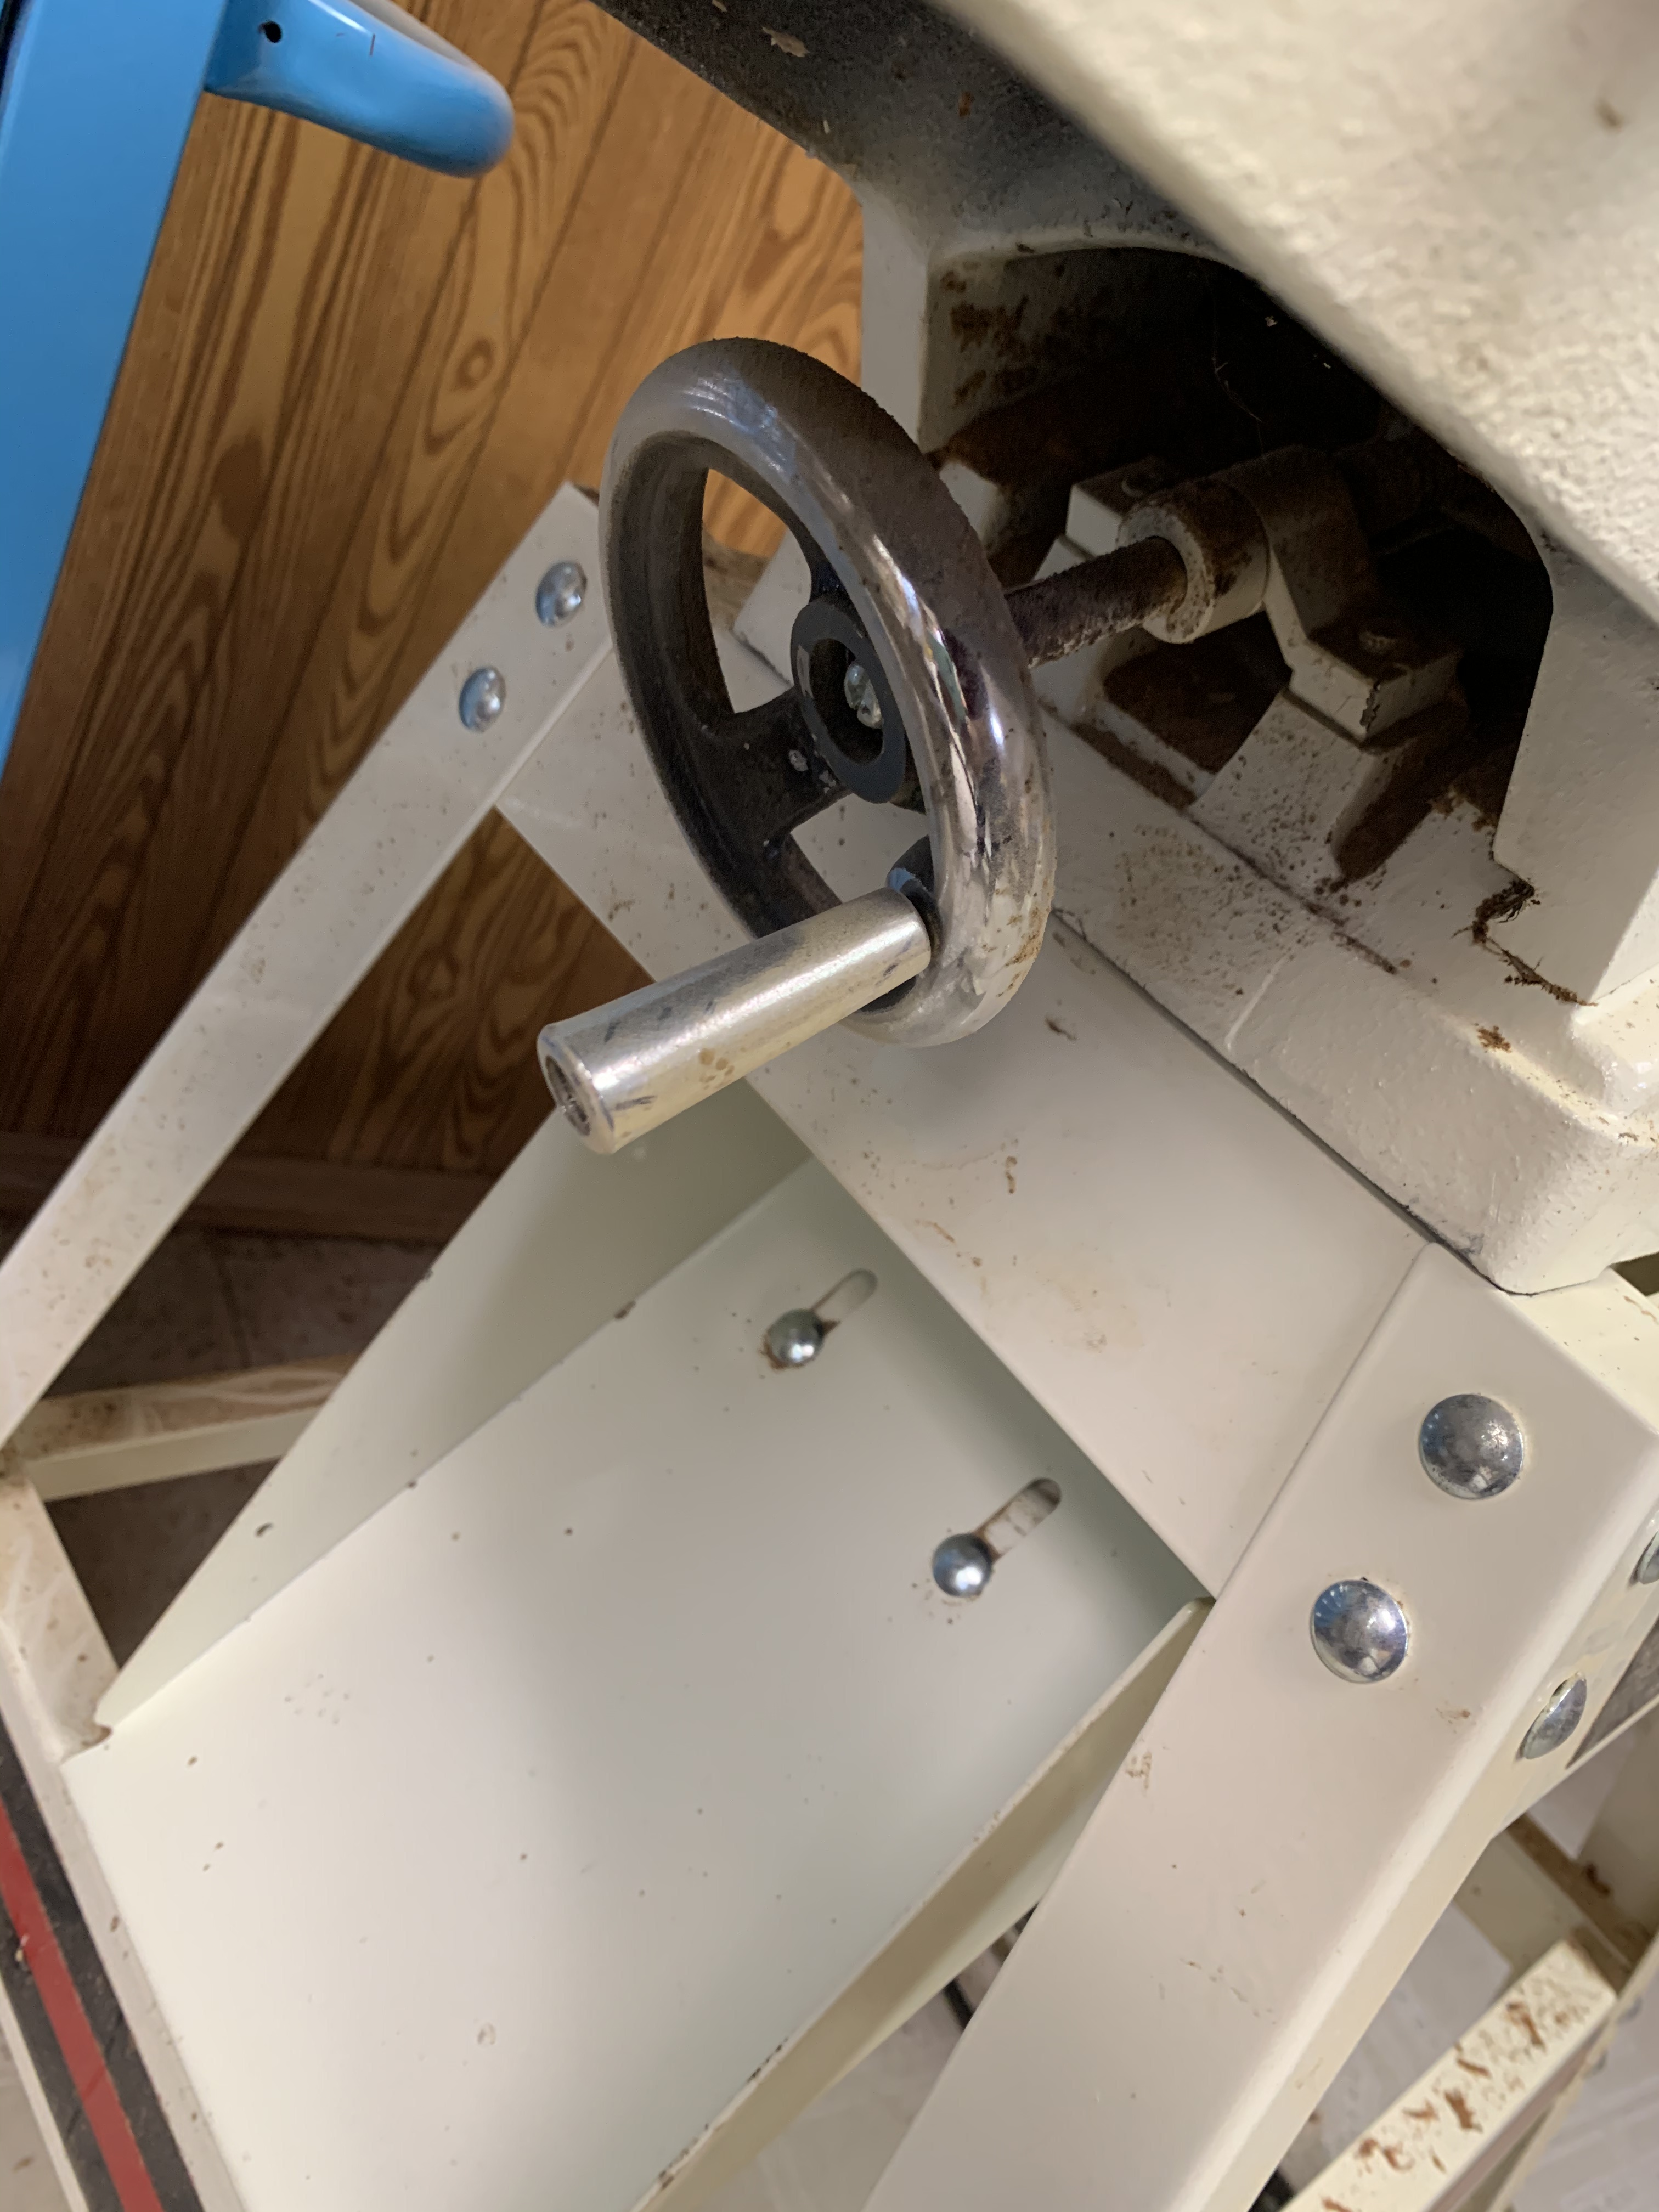
close up of the working end of the outfeed table on mine. To the right of the adjustment wheel you can see the dovetail joint that the table rides on.
They are big, heavy and expensive. Good ones are going to have infeed and outfeed tables made of heavy cast iron that is machined to extremely close tolerances, mounted on more carefully machined cast iron that has been milled into very accurate sliding dovetail mounting systems. All that carefully machined cast iron is necessary because those tables and their mounting hardware have to be absolutely accurate, absolutely flat, and cannot flex or bend. Cast iron isn’t that expensive. What you’re paying for is the machining of those parts. That’s where the costs begin to mount.
Jointers are classified according to the maximum width of the board they can accommodate. A 6 inch jointer like mine can handle boards up to 6 inches wide. An 8 inch can handle 8 inch wide boards, and so on. And as the capacity goes up, so does the size and weight of the jointer, and the price. Even a 6 inch jointer is going to be at least 4 feet long and weigh over 200 lbs or more. Mine weighs in at around 250 lbs.
There is a classification of jointers that are much smaller and cheaper, the benchtop jointer. But there are problems with these. Yes, they can handle boards up to 6 or more inches wide, but what about length? How long a board you can shove through one of these is dependant on the length of the infeed and outfeed tables. You aren’t going to push a 6 foot board through a benchtop jointer. Or a 4 foot board. Or even a 3 foot board probably. Unless you’re only going to ever work with lumber that isn’t much more than two feet long, a benchtop jointer just isn’t going to work.
As is generally the case with most of this stuff, all of the name brand models are pretty much equivalent to one another and are generally of good quality and will do a good job for you. They get expensive pretty fast. I did a quick look around and the cheapest 6 inch jointer I saw that had decent reviews and good specifications was around $800, with prices going up from there. Jet doesn’t seem to make an open base model like mine any more, but it does have one that seems to be pretty much a clone of mine but with an enclosed base going for a whopping $1,500.
So the good ones are big and very heavy. That’s something you need to keep in mind if you buy one. How are you going to get it into your shop? Will it even fit into your shop? Do you have someone who can help you put it together? You aren’t going to be able to do it yourself.
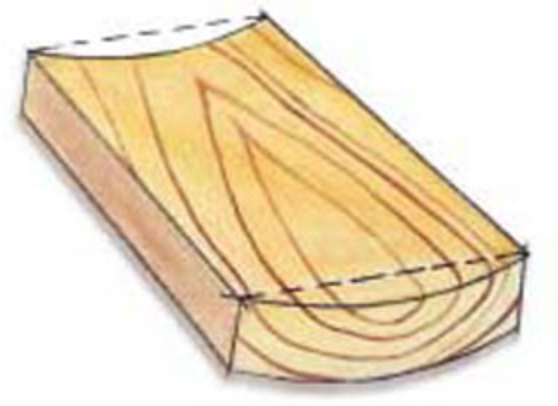
Like I said at the start of this, I have some ‘issues’ with some of the things the experts claim about jointers. Oh, they work just fine and dandy and will do the things the experts claim. Sort of. But here is my primary problem with them. Yes they will ‘fix’ problems like cupped boards, but Wood moves. It is made up of fibers that swell, shrink, lengthen, shorten, all depending on ambient temperature, moisture content and other factors. Wood is always under internal stresses and tensions. Always. When those forces are not balanced, wood warps, cups, twists and bends. And that is what a jointer is supposed to cure. But does it really? In my experience what a jointer often does is similar to someone with the flu taking NyQuil. It makes you feel better by alleviating some of the symptoms, but you still have the flu. It doesn’t cure anything.
I have a special term for boards like this: Firewood.
You can run a cupped board like the one in that drawing over there through a jointer and you’ll end up with a nice, flat surface. But did it actually fix the problem, which was an imbalance of the stresses and other forces in the wood that made it bend like that in the first place? My personal experiences tell me that sometimes it will, but often it doesn’t, and after I’ve flattened that board out and put it on the shelf, I’ll come back a couple of weeks later and find that it will once again be warped, sometimes even worse than it had been before. Not all the time, not even half the time. But often enough that I am not going to risk using a board like that one in that drawing in a piece of furniture. So keep that in mind.
Let’s see, I was going to rant about something else, wasn’t I? Ah, I remember. Helical cutters.
These things are something of a fad in woodworking, and have been for some years now. All kinds of miraculous claims are made for these things. I almost bought into the hype and seriously considered retrofitting both my jointer and planer with these things. I’ve had some experience with equipment equipped with these things since then and I’m glad I didn’t give in to that temptation.
First of all, holy cow are these things expensive! If you opt for a helical cutter in a planer or jointer, expect it to add $250 – $400 or even more to the cost of the machine. There are kits available that will retrofit one of these into the more popular planers and jointers, and even those are enough to make your credit card weep. There are kits to retrofit my DeWalt 735, but I could literally buy a brand new 735 for the cost of a helical cutter head replacement. $500 to replace the cutter head on a planer that sells for $575? Seriously? When the stock cutter head system works just fine and dandy to begin with? No thanks.
I’ve worked with a few planers equipped with these things and they just didn’t live up to the hype. It’s entirely possible that the ones I worked with weren’t set up properly or something, but none of them produced a surface on the wood that was as good as what comes off my stock 735. I tried out a 735 that was equipped with a helical cutter head retrofit kit and the surface of the wood wasn’t any better than that coming out of my stock planer. And it seemed noiser and started bogging down on wide boards. I just don’t think they’re worth the money for the average hobbyist.
So to sum up:
Thickness planers – they’re nice to have, you probably need one, and unless you’re running large amounts of hardwood through it you can probably get along with one of the under $400 models if you can deal with the potential drawbacks. If you need a really good one with better capacity and need to use it a lot, look at the DeWalt 735.
Jointers – I still don’t think the average woodworker needs one. Certainly it isn’t an “absolute must have” as the experts claim it is. The cheap (sometimes not cheap because I’ve seen some of these things going for well over $600) benchtop sized ones are just about worthless if you’re working with lumber more than three feet long. The full sized ones are heavy, large, and massively expensive. They are a ‘must have’ if you are doing a lot of edge gluing to make panels. As for surfacing a warped or cupped board, yes, they will do that but I noted my issues with that earlier.
Shameless plug: Before I get started I have to mention this before I forget. The best resource I ran across for learning about woodturning has been the YouTube videos of “Turn a wood bowl“. Kent has a lot of videos that cover just about everything from the basics to more advanced topics. He takes the time to actually explain why some things work and others won’t, what mistakes to avoid, etc. He doesn’t just cover turning, he talks about how to sharpen your tools, how to finish them, how to sand them, tips and tricks to make your life a lot easier. I learned more from him than from all the other resources I’ve found put together. Or visit his website https://turnawoodbowl.com/
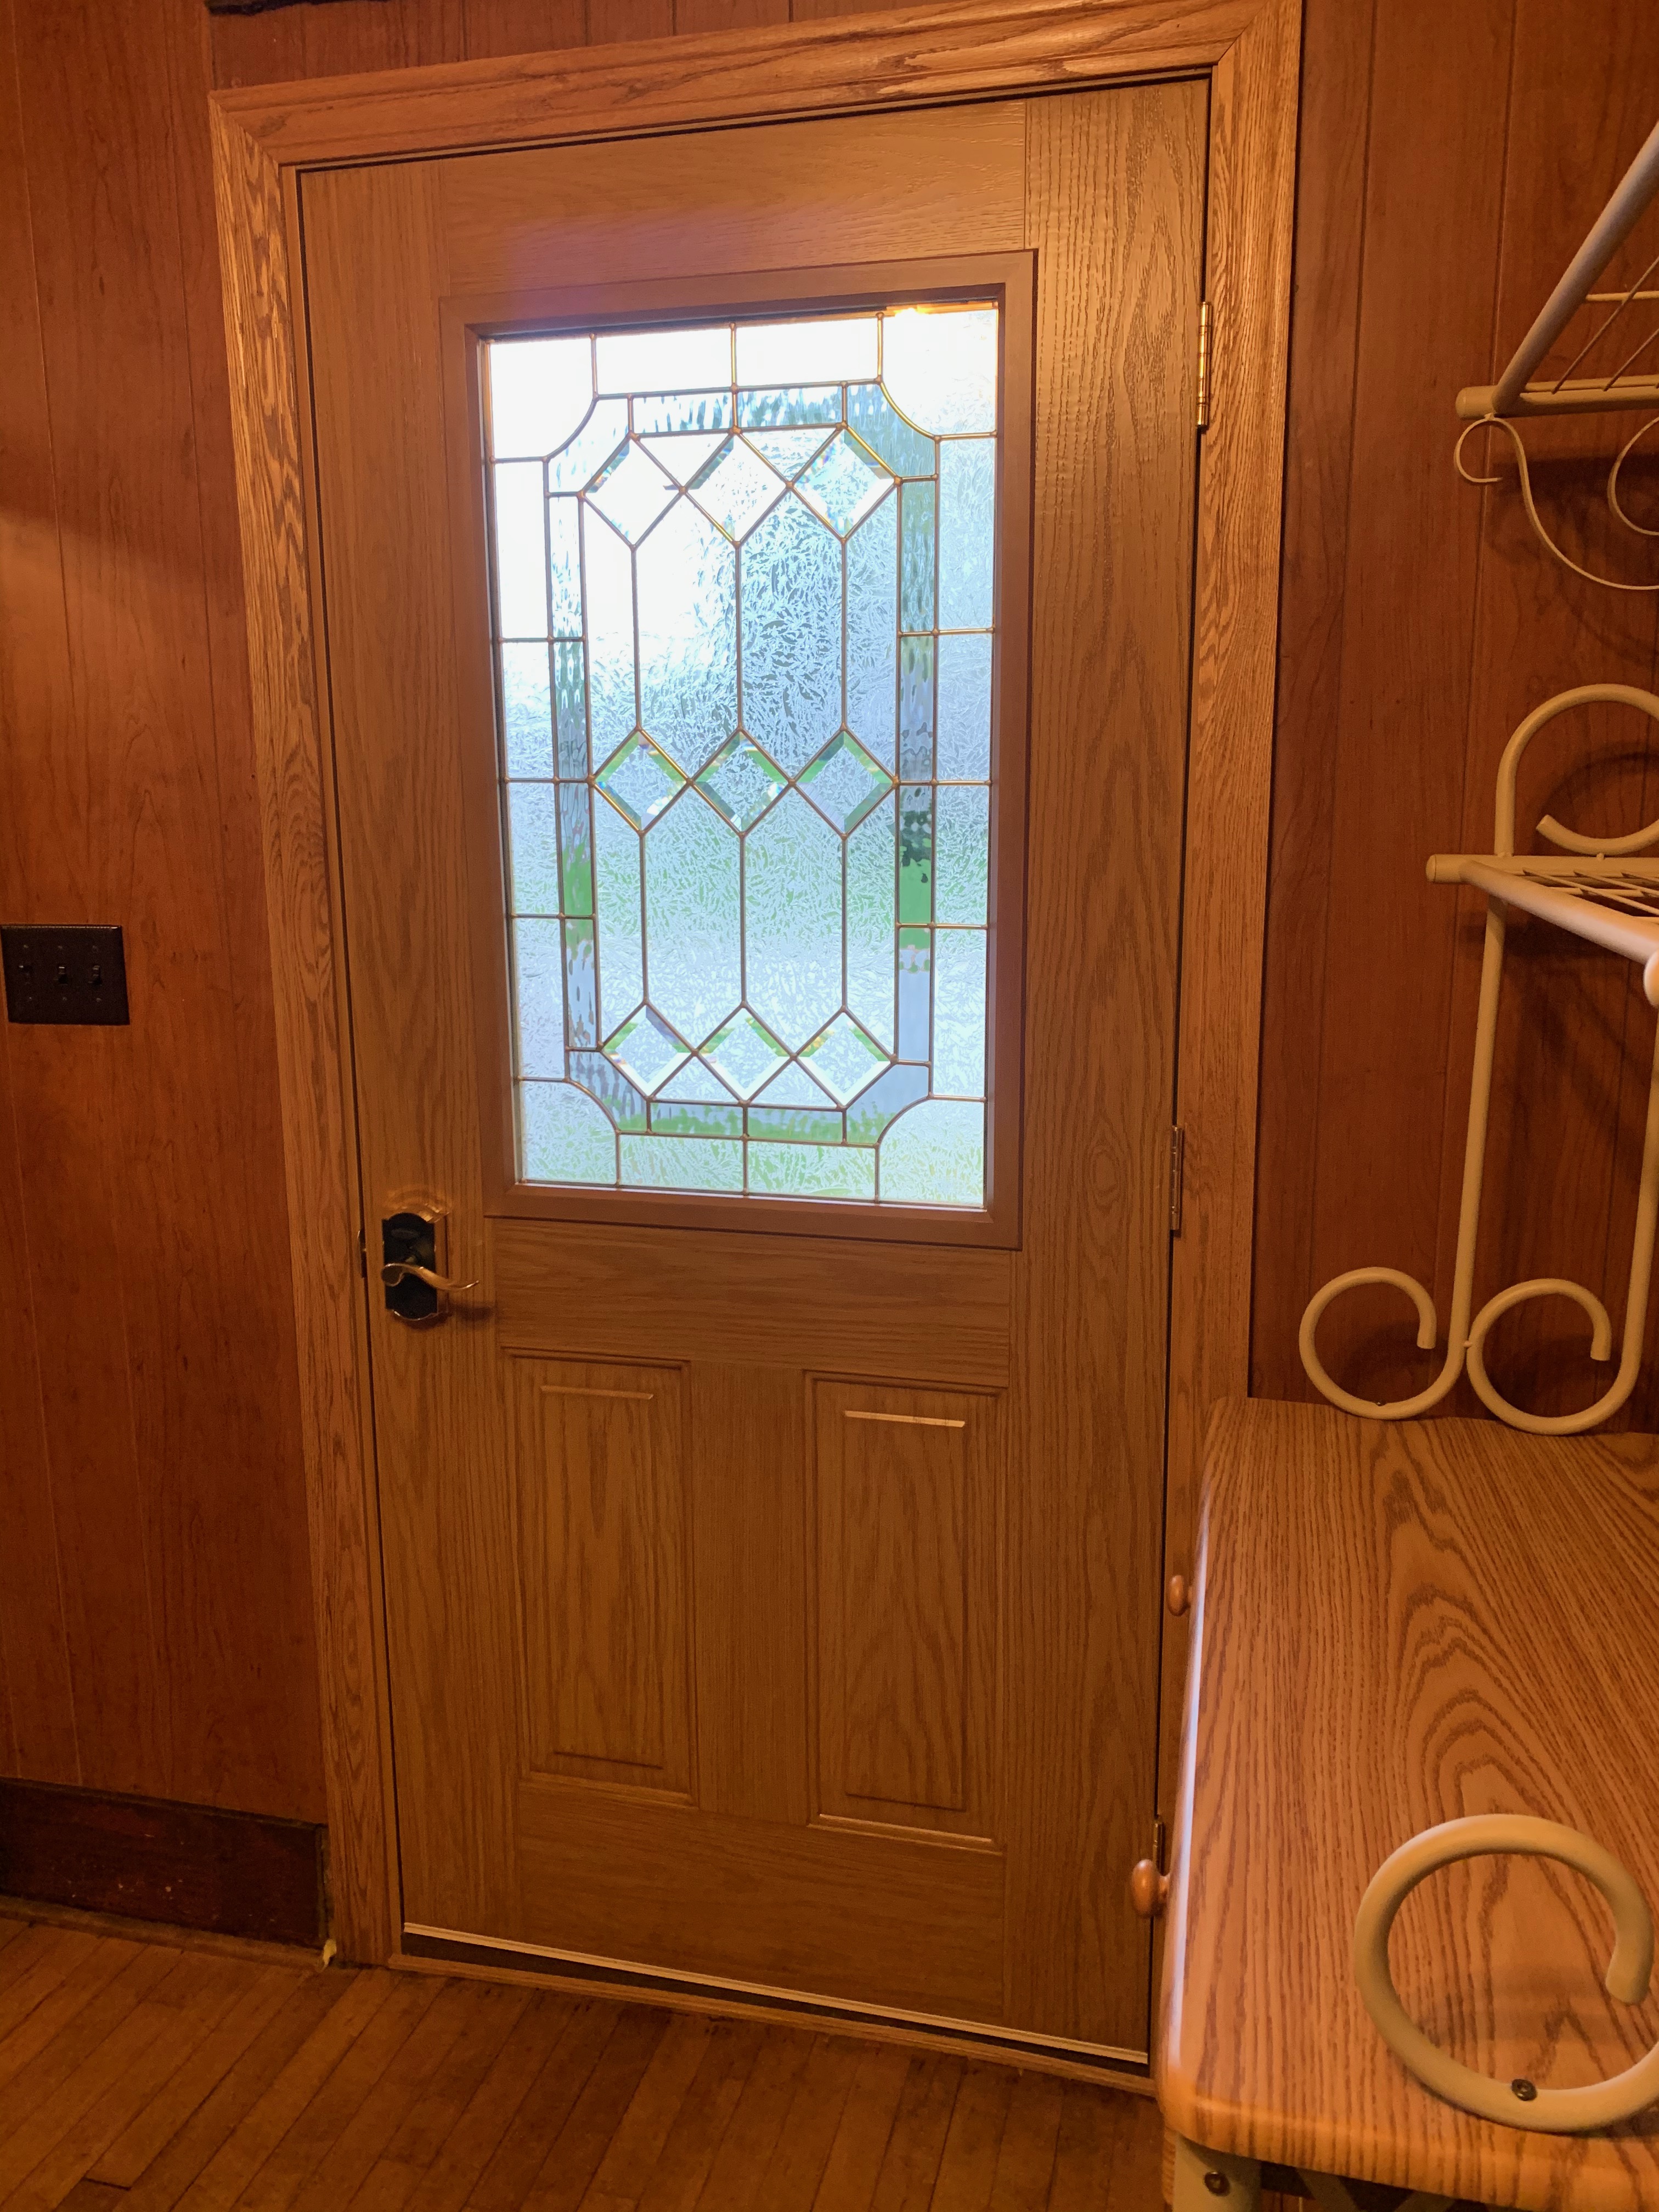
Many weeks ago we talked with the contractor/builder we’ve worked with for many years now about replacing a bunch of windows and our front door. He warned us that he was booked solid for the entire summer and it would be until mid to late fall before he could get around it. That was fine because we were in no hurry. One of the issues he was dealing with was massive delays in getting just about anything, especially anything that had to be custom made like our windows.
Ooo, it’s all shiny and stuff!
He finally got the door in the other day and came over and installed that, but we’re still waiting for the factory to finish the windows. But it isn’t just delays that he’s dealing with. There has been a massive increase in prices on even basic construction materials like 2×4 studs, OSB and plywood. It’s been a real struggle for him and his customers. His cost for basic materials has literally doubled in the last 10 months.
Anyway, he got the new door installed, which was one of the biggest issues we wanted to get taken care of before the snow flies. We’re hoping the window factory gets our order finished pretty soon here. Most of the windows we’re getting replaced would survive another winter, but one of them is in pretty bad shape. All we can do about that is keep our fingers crossed.
Finishes
I am always learning new stuff all the time. That’s one of the most enjoyable things about all of the stuff I get involved with. Getting involved in woodturning has been a very enjoyable, occasionally frustrating, and quite satisfying experience.
One of the frustrating things has been putting a finish on the bowls, vases and other stuff I’ve been making. When I make furniture I’m working with wood that is of very high quality to begin with, with beautiful grain that already looks beautiful without doing anything to it. With something like white oak or ash I just use a light stain to accent the grain and give it a slightly darker color to match the traditional arts & crafts style I like, and then top it off with a simple paste wax that protects the wood and is easy to repair and renew when necessary.
But with bowls and the other stuff I turn out on the lathe it’s a different story. First I’m often working with scraps of wood left over from other projects that aren’t exactly what you’d call high quality wood to begin with. I have to deal with large amounts of end grain which can be a problem to work with, and other issues.
My go-to finish was a product that was primarily beeswax mixed with tung oil and cedar oil to soften it. It produced a nice, semi-satin sort of glow that looked quite beautiful. But now that I’ve been doing this for a while I’ve noticed that some of the early pieces I did that were finished with that stuff looked downright nasty. The finish was turning dull in spots, no longer reflecting light, looking, oh, muddy, I suppose you could call it. Basically it was a good thing I haven’t been selling these things because whoever bought one and saw that happening would not be happy about it.
Experimental bowl. African mahogany, refinished with undercoat of home made shellac sealer with carnauba wax topcoat.
So what the heck was going on? Why was the finish deteriorating like that? I took a close look at the pieces on which the finish seemed to be failing and realized I was making a very basic mistake. The finish was being absorbed by the wood fibers, basically being sucked into the wood instead of remaining on the surface. This was most apparent on the endgrain when I took a close look at it. And it is a very basic mistake I should have realized before I tried to finish the bowls. But to be fair I never had to deal with it before, really. With furniture you almost never even see the endgrain and don’t have to deal with it. With a turned object like a bowl, the endgrain can’t be hidden and has to be dealt with.
close up interior of bowl with the shellac and carnauba wax finish. It does put a nice shine on the wood. Hopefully it will be more durable than what I was using.
So I’m experimenting with different materials and techniques to deal with the situation. I’ve started making my own shellac finish now, using a thin cut to make a sanding sealer that will seal the pores of the wood so it can’t absorb the final finish. That has the added benefit of helping to fill in small imperfections in the wood so they aren’t so obvious when the final finish is applied. And I’ve switched from the beeswax product to carnauba wax.
The results are pretty good so far. It’s a bit more work. It adds a few additional steps to the whole process, light sanding between coats of shellac, and considerable buffing with the wax. But the early experiments looked so good that I’m taking some of the pieces with the deteriorating surface, re-sanding them and refinishing them with the new technique.
The frustrating thing is that I already knew all of this about wood absorbing the finish and looking nasty. I never had to deal with it before but I still should have remembered. But I’ve learned my lesson now. The new process takes longer, requires more sanding, but so far it seems like the end result is going to be worth it.
This is also an entirely food-safe process. I’m making my own shellac. The only ingredients in that are shellac, which is food safe (and sometimes actually an ingredient in food) mixed with alcohol. The alcohol is just a carrier for the shellac and evaporates. And the wax is pure carnauba which is also a food safe wax. No weird, toxic chemicals involved at all. If this does a good job and proves to be stable, this is probably going to become the standard way I finish wood projects.
If you’ve been reading this thing for any length of time you know I love gardening and flowers. It might be mid October and we’ve had some pretty cold weather, but some of the plantings around here are still going strong like the flowers above. I still can’t believe how big those flowers get. My hand is in the photo so you can get an idea of how big they get. We still have two flower beds with these guys in full flower.
The alyssum have been hanging on too. Beautiful little flowers that are incredibly fragrant. I can usually smell them as soon as I go out the back door of the garage where they’re planted.
And these guys up there can be depended on to keep going strong well into late fall until it starts getting really cold.
Cleaning up the yard this fall has been a lot easier now that the pear tree is gone. Having that tree collapse was kind of a blessing in disguise. We miss not having the pears, but we definitely do not miss the mess the tree made. Trying to clean up all the falling pears was an incredible pain in the neck, and we’re going to have a lot fewer leaves to deal with this year too.
MrsGF and I were discussing what to do back in that area now that the tree is gone. We’re going to have a much larger area with full sun there now so that’s going to expand the planting possibilities enormously. There was a small heart shaped garden there that we put in back in 2000 that was almost entirely shaded out by the tree. Next spring we’re going to be expanding that to the west into an oval shape that will include the tree stump, about 20 feet long and 6-8 feet wide. That new bed will probably be for ornamentals.
We thought about making it a raised bed but discarded that idea. That area is very well drained to begin with so we don’t have to worry about too much water as we do at the back of the house. We’re going to have to haul a ton of compost in though because the soil there is pretty poor. Not going to do anything with that until spring, though. We’re still sketching out ideas about the exact size and shape of the bed and what we’re going to plant in it.
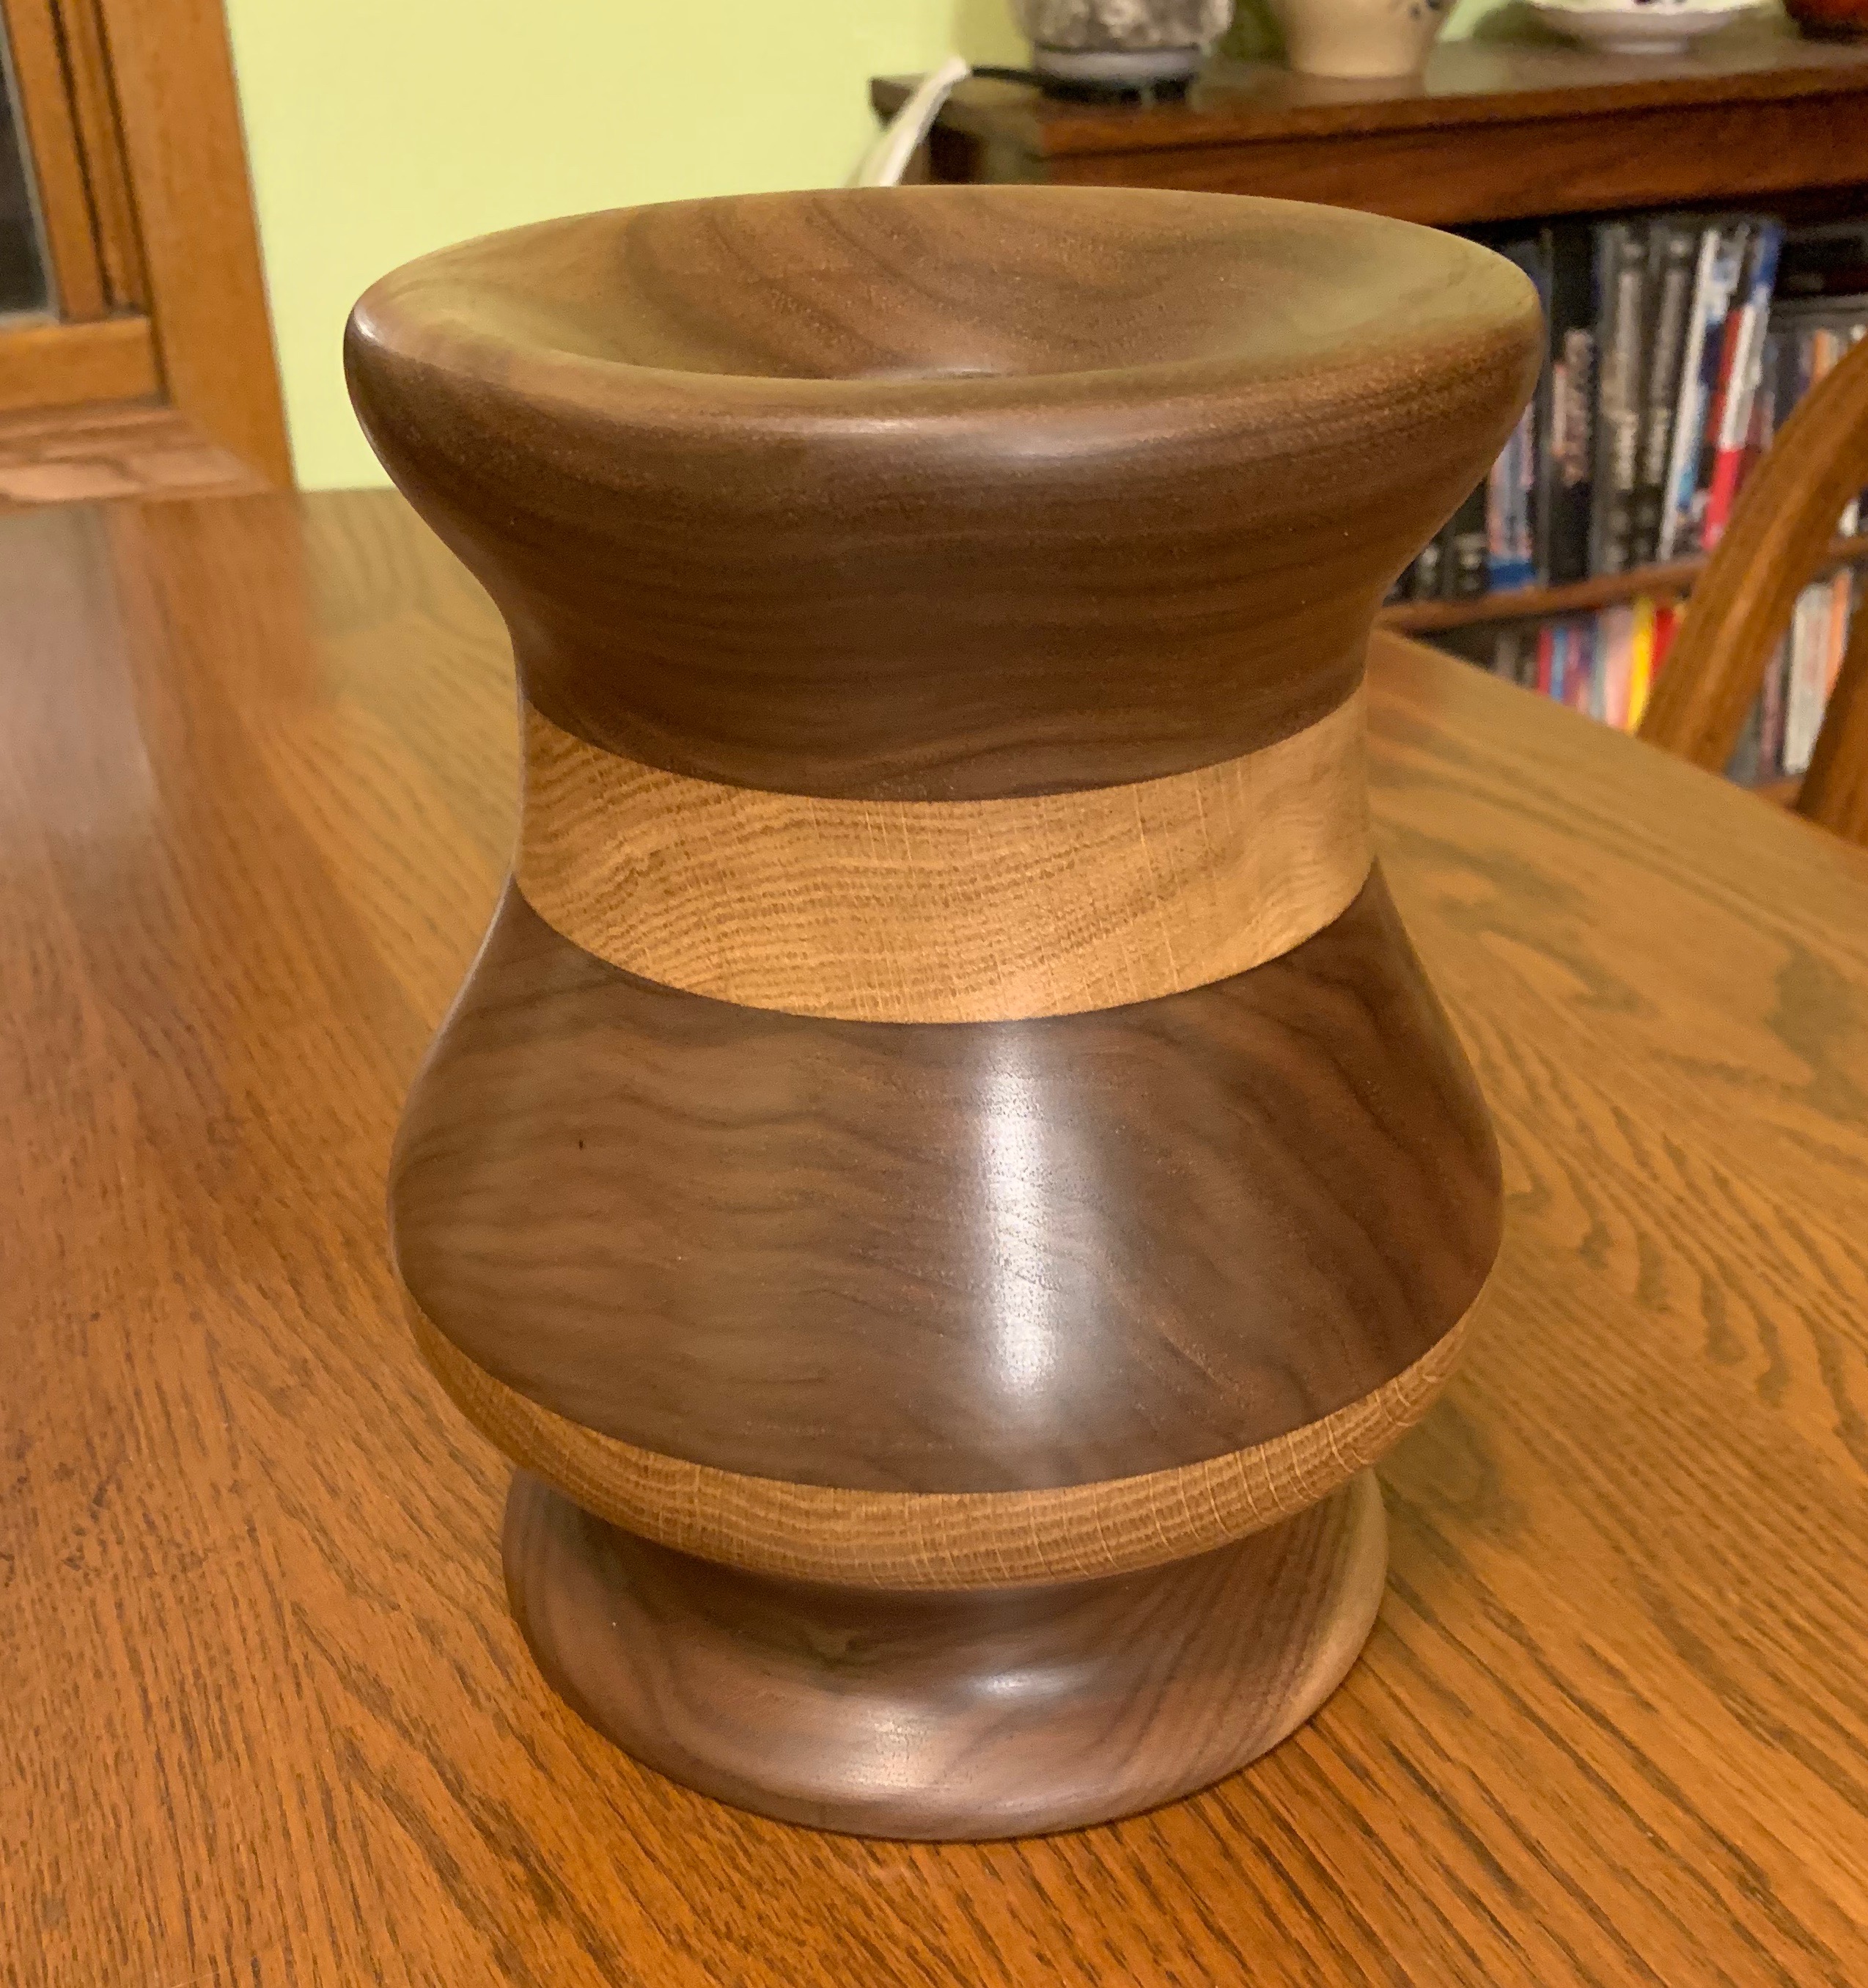
And I’m still fiddling around with wood. I finished this thing last week.
That’s a vase, not a bowl, and one of the bigger things I’ve done. It’s about 10 inches tall and 6 inches wide, made from walnut and oak. It turned out reasonably well. I really like working with walnut. It machines beautifully and I love the color and grain. A glass insert goes inside so it could be used for fresh flowers, or leave out the insert and put in dried or silk flowers.
That vase started out looking like that monstrosity over there on the right. That was a block of glued up old bits of walnut and oak I found laying on the shelf that I didn’t have any plans for. And to be honest I had no actual idea of what it was going to be when I started this. Usually when I start something like this I have at least a general idea of what I want it to be, but not in this case. I really don’t recommend people just sort of “wing it”, but in this case it worked out in the end.
That was biggest thing I’ve ever tried to spin up on the lathe. It was so wide it just barely cleared the bed of the lathe. Usually I try to round square blocks off by knocking off the corners with a saw to make it balance better, but I don’t have a saw big enough to handle a 10 inch tall, 8 inch square block, so I just had to spin it up slow, keep my fingers crossed, and start chipping way at it.
That’s it for now. Hopefully next time I’ll be continuing the tool series and talk about thickness planers and jointers. Unless something else comes up first.
Being stuck at home, not being able to travel, is getting more than a little frustrating. I’ve found myself going back through my photo archives to try to deal with the frustration of having all our travel plans shut down. Here are a few. Some of these I might have posted before
I just read yet another overly hyped article about the miracles of 5G and how it is going to “transform” my life, and well, enough is enough. I just had to throw my two cents in on the whole 5G cell network nonsense because I’ve been hearing so much hype and, frankly, pure B.S. that I can’t stand it any more.
Look, all that stuff about gigabit speeds and a revolution in data communications because of 5G? Don’t believe any of it. Pretty much none of it is true, certainly all the hype you’re hearing from the cell phone companies isn’t.
5G does indeed deliver impressive speed. Theoretically it is faster than the internet connection to your house. (Well, hell, just about anything is faster than the connection I have at my house which often drops to speeds not much faster than what I could get back in the 1990s with a 28K modem. Just one of the “joys” of the government protected internet/cable tv monopolies we have.)
But that’s the key word, isn’t it? Theoretically. In the laboratory. In testing. Out in the real world 5G almost never reaches those speeds. In fact, it doesn’t even get close. Real world testing of newly installed 5G networks is showing that they are operating at speeds that are no better and often worse than the old 4G network. Seriously. Real world test results where the new 5G network is supposedly up and running are showing that in a lot of areas 5G is slower than the existing 4G/LTE network. And that doesn’t surprise me at all
I know a bit about radio, and that is exactly what the cell phone system is, radio. I know how propagation works, how radio waves at specific frequencies behave, how they can (or more importantly can’t) penetrate things like buildings, windows, etc., I know something about transmitters, receivers, antennas and all that guff. I know all that because I play with that stuff almost every day. And system just will not, can not, deliver the bandwidth and speeds these companies are claiming it will except under ideal circumstances which almost never exist out here in the real world.
Some of their transmitters at certain frequencies have a range of a whopping 150 yards. That’s it. Some of the frequencies being used are blocked by, well, everything, even glass. In difficult areas at some frequencies the companies would have to not only install equipment every few hundred feet, they’d have to install repeaters inside of large buildings to get coverage. Trying to fully implement this network to make it capable of what the cell companies claim it will do would cost massive amounts of money, trying to get permits, locate transmitters, etc would be a nightmare. So outside of dense (and high profit) urban areas, it just ain’t gonna happen.
Sure, it has a lot of potential, especially in rural areas. The system that runs down in the 600 mHz band has a lot of potential. It won’t get anywhere near gigabit speeds, but it does promise to deliver speed in the 30 -40 mbs range, which is a hell of a lot better than what most of us out here in rural areas are getting.
But all that other stuff about pushing up to gigabit speeds with ridiculously low latency times? Don’t believe it. The only places where you’ll see those kinds of speeds are in the most densely populated areas where the companies can maximize their profits.
And then there is going to be the cost. That seems to be one thing everyone is forgetting to mention. What is this going to cost us? You can be darn sure that the cell/data monopolies are going to try to suck every penny they can out of you. There are going to be data caps, speed throttling, and eye watering overage charges. They’re going to milk this for every penny they can get. And if you think they won’t, I should remind you that one of the big cell companies drastically throttled back the speeds and capabilities of some of California’s emergency services, including the fire departments a year or so ago. In the middle of a state wide fire emergency while whole towns were burning. Even though they paid extra for “unlimited” service. So yeah, they’re going to charge you through the nose for it.
5G has huge potential. The problem is that for most of us out in the real world we’re never going to see that potential fulfilled because of a lack of infrastructure, poor implementation by the carriers, and sheer greed on the part of the companies.
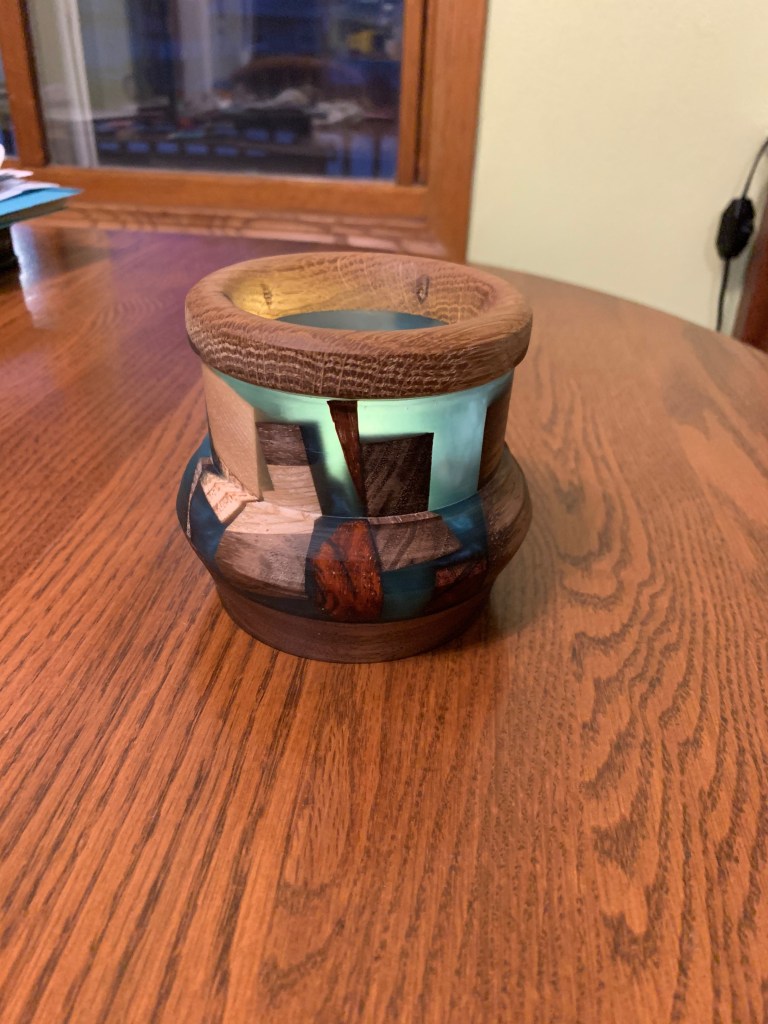
Just thought I’d keep you up to date about the resin experiments. I started this about a week or so ago and, of course, I entirely forgot to take photos. Sigh… But I can show you the end result and tell you that it worked out reasonably well for something I just threw together.
I stuck a battery powered tea light in the thing. Turned out much better than I thought it would.
I did all of this just to see how the whole system worked and to discover any quirks or issues I might not have been aware of. It all worked surprisingly well.
The resin I’m using here is from Naked Fusion, their “Deep Pour” formula, and it was really easy to work with. I had no problems at all with mixing it or coloring it. You might remember this was the stuff that got damaged in shipping and started leaking on my front deck. The hardener bottle got punctured. The resin bottle was fine, and I managed to salvage about two thirds of the hardener, putting it into sealed glass jars. Anyway, I do like this stuff a lot now that I’ve had a chance to try it. It has no VOCs and virtually no odor at all. Some of this stuff is so nasty you have to wear a respirator just to work with it. I had no such problems with this. It mixes easily, was easy to use with coloring agents, and worked just fine.
I took a bunch of small wood scraps and shoved them into a plastic container, mixed up about 30 oz of the resin with some coloring in it, poured it over the top of the wood, then chucked the whole thing into the pressure tank. I pumped it up to 65 PSI and let it sit for 24 hours. After that I released the pressure on the tank and checked, and it was still a bit, well, squishy. But I expected that. Naked Fusion says it can take up to 72 hours or even longer to fully cure, depending on the temperature, quantity of material being used and some other factors.
So I put it back in the tank and pulled it out after another 24 hours hours and was able to peel the mold off it. The epoxy still felt tacky to the touch so I waited another 12 hours, by which time it seemed fully cured. That’s pretty much spot on according to the instructions.
The tank seemed to do its job of eliminating bubbles. I didn’t see any noticeable bubbles in the epoxy when I looked at it under a strong light.
I stuck it in the lathe and flattened one end, used a 2″ Forstner bit chucked into the lathe to drill a mortise into one end to fit my 4 jaw chuck, and got to work because I what I really wanted to see was how well this stuff could be shaped with my equipment and tools.
Wear a respirator if you work with this stuff. Seriously. Do I really need to tell you that you do not want to be breathing epoxy dust? Or wood dust, for that matter.
It machines pretty darn well, but dear lord it’s messy! I should have taken some photos or a video of it because holy cow it was a mess! I had long, thin strings of epoxy flying off everywhere and getting into everything. I looked like I was covered in tinsel after a few minutes, and so did everything else within three feet of the lathe. I had to vacuum my hair afterwards, for heaven’s sake. And change all my clothes, including my socks. I can see I’m going to need to rig up some kind of frame to hold the nozzle from the shopvac close to lathe to try to suck this stuff up before it gets all over everything the next time I do this.
I’ve heard people claim you can only work this stuff with carbide tools. I’ve heard other people claim you can’t use carbide tools and have to use HSS tools. So I tried both and it doesn’t matter. My traditional steel roughing gouge and bowl gouges worked just as well with this stuff as my carbide tipped tools. The only issue I noticed is that the epoxy can chip if I started to try to make too deep of a cut. Using a traditional bowl gouge works a wee bit better, but only because the “U” shape of the tool guides the material away from work. With the carbide tools waste material tended to build up right at the cutter head and I’d have to stop more often to clean things off so I could see what I was doing
Sanding this stuff is a major hassle. Sanding worked ok up to about 120 grit, but finer grit sandpaper clogs up almost immediately. I can see that if I want to get a good, glass smooth finish on this stuff I’m going to have to resort to wet sanding. I didn’t want to go through all the the mess involved with that for this experiment so I only sanded up to 120 grit and then quit.
Normally I use a beeswax/tung oil blend to finish off my wood pieces because I like it. I personally don’t like wood with mirror like finishes on it because I think it looks ridiculously artificial. I like wood to look like wood, and the beeswax gives it a nice finish without ending up with something that looks like it was dipped in plastic. The finish on this is also an experiment, using a carnauba wax product. That worked out pretty well too. I don’t think it’s any better than the beeswax/tung oil finish I’ve used before, but it isn’t bad at all. And for some reason it smells like blueberries? Seriously?
All things considered I think this experiment was pretty successful and I’m confident enough now to want to try more serious things with this system.
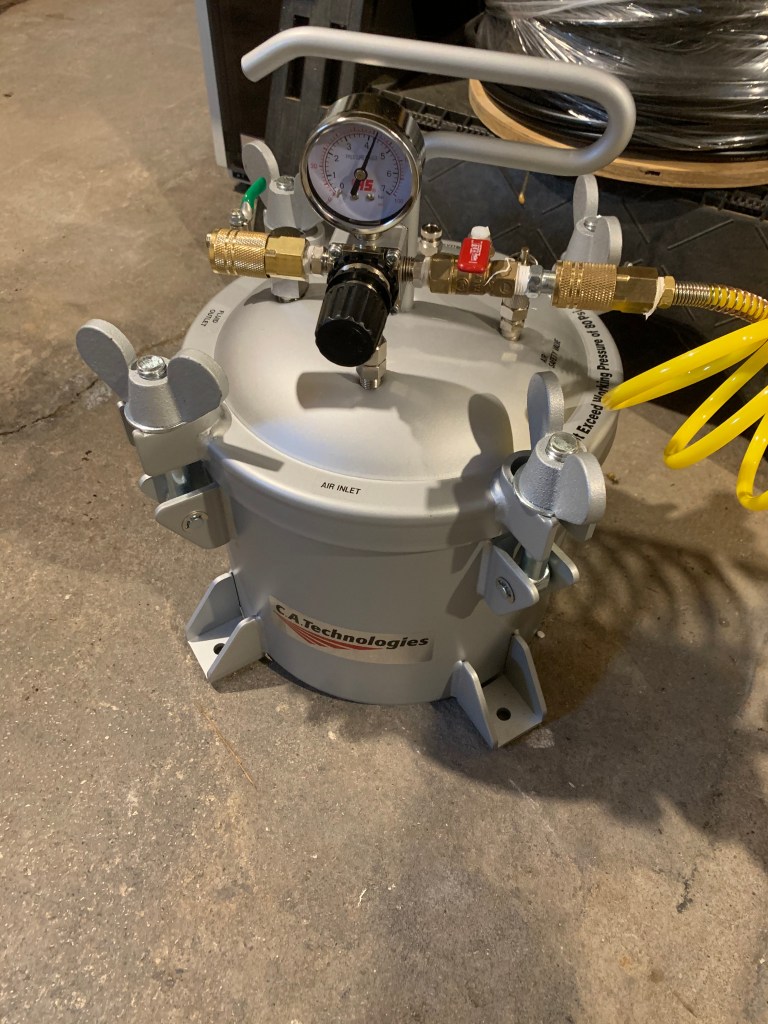
Are there drawbacks? You bet. Some serious, like the cost. If this looks like something you want to try yourself, I’ll warn you right now it ain’t cheap. That one and a half gallon resin kit up there will set you back about $170. If you want to color the resin you need to buy dyes, powders, etc. and that’s more money. That pressure tank used to reduce bubbles in the resin will set you back about $400. There are cheaper tanks on the market but I wouldn’t trust them. You can get a pressure pot from a certain well known ultra-cheap tool vendor that I won’t name that costs less than half what my CA Technologies tank cost and, well, I personally don’t know anyone who has had a cheap pressure tank explode on them, but stories about these things failing and actual photos of failed tanks pop up all the time. Plug the phrase “resin casting pressure pot failure” into Google search and you’ll quickly find out which brand I’m talking about. If you need a pressure tank for resin casting you very, very much want to avoid the cheap brands and the home made ones you see out there.
Then you need molds, of course. You can try to make your own. There are silicon molds in various shapes and sizes that you can buy. Since I was going to be machining this stuff anyway I wasn’t worried about the mold shape. I just ordered a bunch of cheap, disposable plastic mixing cups off Amazon in various sizes and those work quite well.
Let’s talk about the resin for a minute. There are a bewildering variety of brands and types out there. Every different type has its advantages and disadvantages. If you want to do stuff like this, do your research before you start buying anything. I can’t emphasize that enough. Most of the “art” rosins are only good for very thin pours, 1/2 inch or less, often only 1/4″ thick. If you want to do stuff like that tea light up there, you need a “deep pour” resin that can be poured at least 2″ thick. Some resins cure so fast I don’t know how people can actually work with them. Others, like this one from Naked Fusion, can take days to fully cure. Some put out nasty fumes. Some produce considerable heat during the curing process. You get the idea. Research, research, research!
And I suppose before I wrap this up I should add the usual disclaimer. I do not get free material from manufacturers, I do not accept advertising, I am not paid by the makers or dealers of any of the products or tools I talk about here. All of the stuff you see here was purchased by myself. If I recommend a specific product it is because I personally have used it and liked it.